-
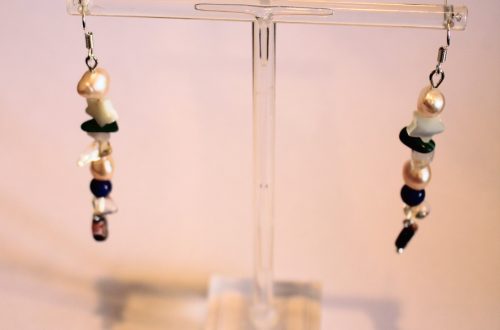
Jewels for those little ear lobes. Make these gemstone cluster earrings!

Add these stunning gemstone cluster earrings to your jewelry box. These babies are sweet, elegant and easy to make, perfect for work and play.
You will need the following tools and materials to make these earrings:
1: Pliers. You will need your flat nose pliers and round nose pliers to make these earrings.


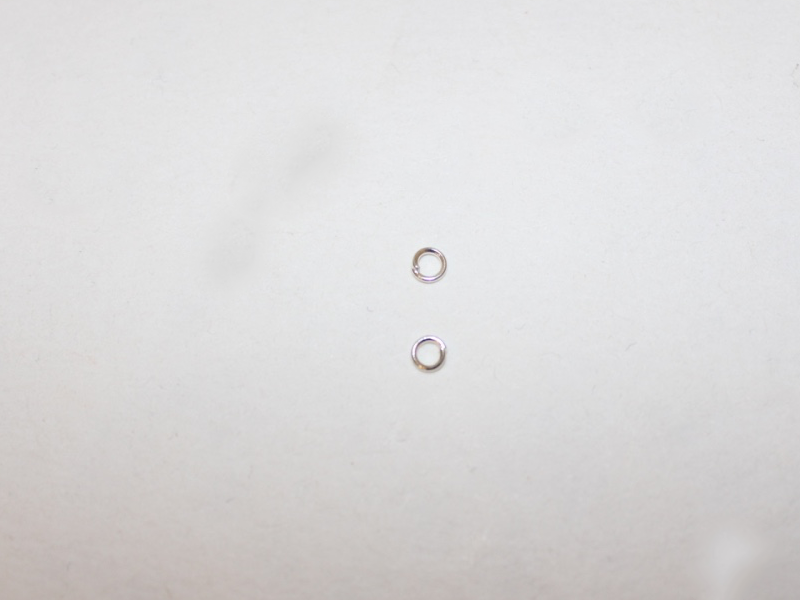
2: Two large jump rings.

3: Eight small head pins (If you use smaller beads you can add more to your clusters).

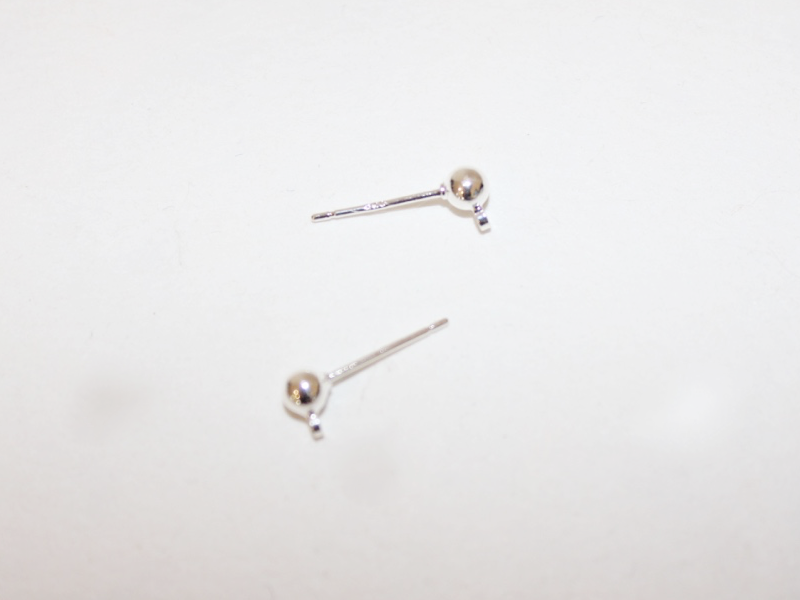
4: Two charm connector stud earrings.

5: Eight gemstone beads. I used these coral beads in two different sizes.
https://flic.kr/p/QeAPCP
Follow these instructions to make these amazing gemstone cluster earrings:
1: Add the beads to the head pins.

2: Curl the pins into a loop around the barrel of the round nose pliers to secure the beads in place.


3: Add 4 bead charms onto each jump ring.

4: Add an earring to each of the jump rings and then close the rings to secure them in place.

Once your stud posts are added your earrings are finished! How perfect are these earrings for taking you from day to night?!

-
These are just the cutest! Make your own Ladybug Studs.

These ladybug studs aren’t just cute, they are really easy to make! I love these adorable little wooden bug charms. Perfect for adding some fun to your looks.
You will need the following tools and materials to make these ladybug earrings:
1: Two painted wooden ladybugs.

2: Two flat bed stud post earrings.

3: a skewer.

4: A scrap piece of paper.

5: Araldite glue.

Follow these steps to make your own cute ladybug studs:
1: Squeeze the Araldite out onto the scrap piece of paper and mix the two parts using the skewer.


2: Add some glue to one of the stud earrings and to the back side of the ladybug in the spot you would like to place your earring post.


3: Press the earring and wooden ladybug together.

4: Repeat steps 2 and 3 for the other earring, hold them both for a little while to allow the glue to cure and ensure that your earring remains in the right place.

Once your earrings are dry they are finished. These little ladybugs are sure to brighten your day every time you wear them!


This tutorial contains affiliate links.
-
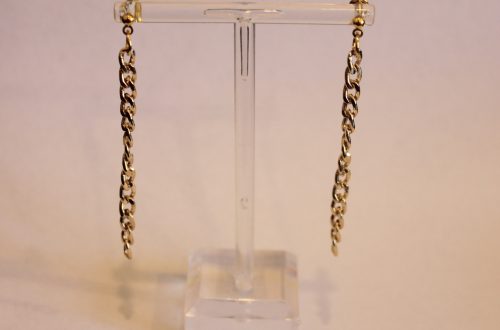
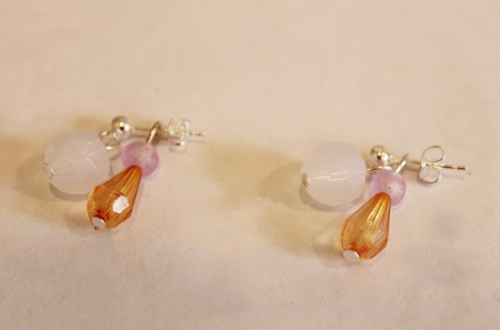
Here’s How to Make Some Simple Stud Drop Earrings.
Do you crave simple elegance? The this DIY is for you. These earrings are made using stud charm connector earring findings and are very quick to make.
You will need the following tools and materials to make these earrings:
1: Pliers. You will need your cutting pliers and round nose pliers to make these earrings.

2: Two stud connector earrings.
3: Two long head pins.

4: Beads of your choice. I used some citrine gemstone beads, moonstone beads and these long glass tube beads.


Follow these steps to make your earrings:
1: Add the beads to each of the head pins.

2: Using the round nose pliers, bend each pin at a right angle to the beaded section.


3: Trim each pin so that the bent section is approximately 1cm long (o.4 inches) using the cutting pliers.


4: Curl the top of each pin into a loop using the round nose pliers.


5: Add each of the bead charms to the stud connector earrings. Close the loop to secure each charm in place.


Once you’ve got your charms connected your earrings are finished and ready to wear!


-
Want to Add Another Cool Choker To Your Collection? Make This Velvet Number!
Here’s how to make your own dual color velvet choker. Use your favorite colors to make a cool velvet choker that is all your own. This tutorial is a variation on our bi-color velvet bracelet, it looks amazing and couldn’t be easier to make.
You will need the following tools and materials to make this choker:
1: Pliers. You will need your flat nose pliers and round nose pliers to make this velvet choker.
2: Scissors. You will need scissors to trim your velvet ribbon to the right length.

3: Two 2cm wide flat crimp ends.
https://flic.kr/p/PvJLq4
https://amzn.to/3R3P96y4: Two pieces of velvet ribbon that are 1cm wide.

5: Two jump rings.
6: A lobster clasp.

Follow these steps to make your own dual color velvet choker:
1: Place the ends of both ribbons into one of the flat crimp ends.

2: Use the flat nose pliers to squeeze the crimp closed around the ribbons. Squeeze down hard to secure the ribbons in place.


3: Use the scissors to cut the ribbon to your desired length.

4: Repeat steps 1 and 4 for the other end of the ribbon using the remaining crimp end.

5: Add a jump ring to one side of the choker.

6: Add another jump ring to the other side and attach a lobster clasp before closing the jump ring.


Once your clasp is in place your choker is finished and ready to wear! Where will you wear yours?


-
Show your fun side with these cute pompom stud earrings!

Want to add some real fun to your ear lobes? These studs will be a fun addition to your jewelry box, and perfect for a fun start to the new year. Fun new year, fun new you!
You will need the following tools and materials to make these pompom stud earrings:
1: Two small pompoms.

2: Two flat bed stud earrings.
3: A skewer.
4: Scrap paper.
5: Araldite glue.
Follow these steps to make your own pompom stud earrings:
1: Squeeze some glue out onto the scrap paper and mix it using the skewer.
2: Add glue to both sides of the flat part of the earring, this will allow it to be embedded into the pompom.

3: Flatten out part of the pompom and place the earring with glue on it inside. Then squeeze the pom pom around the earring flat bed and hold it for a few seconds to allow the glue to cure.


5: Repeat steps 2 and 3 for the second earring.

Once your earrings are dry they are ready to wear! Will you be wearing pompoms to ring in 2017?