How to Make Hair Accessories
-
Here’s a cute idea… make a beaded hair elastic!
I’m really into quick DIY’s at the moment, so here’s another one you can make quickly with no tools! This hair elastic has some fun timber beads on it so you can add some extra spice to your hairstyles. You can also wear it on your wrist as a bracelet when it isn’t tying back your hair.
You’ll need these tools and materials to make your beaded hair elastic:
1: A piece of elastic.

2: Beads. I used these painted timber beads.

Follow these steps to make your super cute beaded hair elastic:
1: Add the beads to the elastic.

2: Tie the ends of the elastic into a knot.
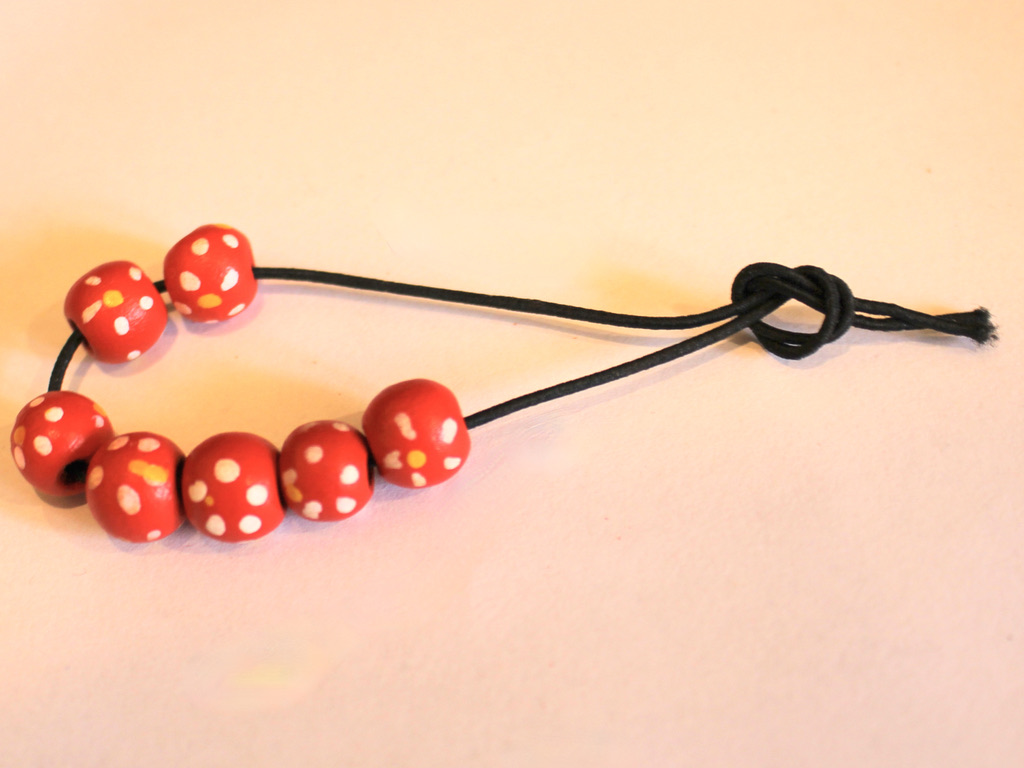

Now you’re done! It’s literally a two step process and it looks so cute!

Here’s how it looks as a bracelet

Here are some other hair accessories tutorials you can follow at home:
- A cool barrette with a chain feature.
- This rhinestone embellished hair comb.
- A shell covered hair clip.
- Floral embellished bobby pins.
- How to cover hair clips with ribbons.
- Sparkly rhinestone hair clips.
- How to add rhinestones to a headband.
- A knot feature headband.
- A beaded bobby pin.
- Add feature rhinestones to your old headband.
- Glue a charm to an old hair clip for a quick revamp.
-
Do your barrettes need something more? Make this cute hair clip with a beaded chain feature.
I think that this hairclip design is so cute! It features sparkly charms and an awesome dangling chain that will loop elegantly across your hair.
You will need the following tools and materials to make your beaded chain hairclip:
1: Pliers. You’ll need your flat nose and round nose pliers.


2: A hairclip finding with holes in either side.

3: Two large jump rings.

4: Eye pins, I didn’t use as many as are pictured here.

5: A selection of beads. I used these mixed glass beads.

6: A selection of glue on charms. I used this mix of resin charms and rhinestones. I didn’t use all of these either.

7: Two part epoxy glue. I used Araldite glue.

8: A scrap piece of paper for mixing the glue.

9: A skewer.

Follow these steps to make your sparkling chain hair clip:
1: Add beads to the eye pins and attach them together by forming loops using the round nose pliers.


2: Once your chain is at your preferred length attach it to the hairclip using the two large jump rings.


3: Squeeze out the glue in equal parts and mix it using the skewer.
4: Add the glue to the hairclip using the skewer.

5: Add the charms to the hairclip. Here’s a tip, I used some blue tack to keep the hairclip and charms in place while the glue was drying.


Once your hairclip is dry it is ready to wear! So cute and trendy.

Here is another one I made using shells and some rose quartz beads.

-
Are you sick of the hair accessory trend yet? If not, why not make a rhinestone hair comb?

This rhinestone hair comb is super easy to make and is the perfect way to add some sparkle to your hair! I love this cute piece so much, I wear it at the back of my head to add some style to my messy bun, just tuck it into your hair! So comfortable and cute.
Please note that this tutorial contains affiliate links for which we may receive a commission.
You will need the following tools and materials to make this rhinestone hair comb:
1: A metal hair comb.

You can get hair combs here:
2: Rhinestones. I used three of these silver backed rhinestones.

You can get something similar here:
3: Two-part epoxy glue, I used Araldite.
You can get glue here:
4: A skewer.
You can get skewers here:
5: Scrap paper.
Follow these steps to make your rhinestone comb:
1: Squeeze out the glue in equal parts onto the scrap paper.


2: Mix the glue using the skewer.

3: Add glue to the top of the comb where you want to place your rhinestones.

4: Add glue to the back of the rhinestones and place them on the comb.


5: Set the comb aside to dry.
Once the glue is dry your rhinestone embellished hair comb is ready to use!
Here’s another one that I made using resin charms.

Here are some other rhinestone hair accessory tutorials:
- Rhinestone embellished hair clips
- A headband with a rhinestone crown
- Upgrade an old headband with statement rhinestones
This tutorial contains affiliate links
-
Two trends in one! Shells and Hair clips

Are you keen on the hair clip trend and the shell trend? Why not make a shell embellished hair clip? Contains affiliate links.
You will need the following tools and materials to make your shell hair clip:
1: A hair clip finding

2: Araldite glue
3: Skewer
4: Scrap paper
5: Shells

Follow these steps to make your shell hair clip:
1: Squeeze out the glue in equal parts and mix it using the skewer.
2: Add the glue to the clip.

3: Add glue to the underside of each shell and place them on the clip.


4: Set the clip aside to dry. You might need to add a prop to each end to stop the shells from sliding off while the glue is still wet.
Now your shell hair clip is finished and ready to wear!
Here are some other DIY tutorials that use beautiful shells:
-
Add some custom bobby pins to your clip collection
Clips, barrettes, hair slides… hair accessories are having a moment! Add your favorite decorations to some bobby pins do add a custom edge to your hair accessory collection. Please note that this tutorial contains affiliate links.

You will need the following tools and materials to make your custom bobby pins:
1: A pair of bobby pins with a flat bed for attaching charms.

2: Two charms to glue on to the bobby pins. I used these flower charms.

3: Araldite glue.
4: A scrap piece of paper for mixing the glue on.
5: A skewer for mixing and applying glue.
Follow these steps to make your custom bobby pins:
1: Squeeze out some glue in equal parts and mix it with the skewer.
2: Apply the glue to the flat parts of one of the bobby pins and one of the charms.


3: Glue the pieces together and set them aside to dry.

4: Repeat steps 1 to 3 for the second bobby pin.
Once your bobby pins are dry they are ready to pop in your hair and wear away!
-
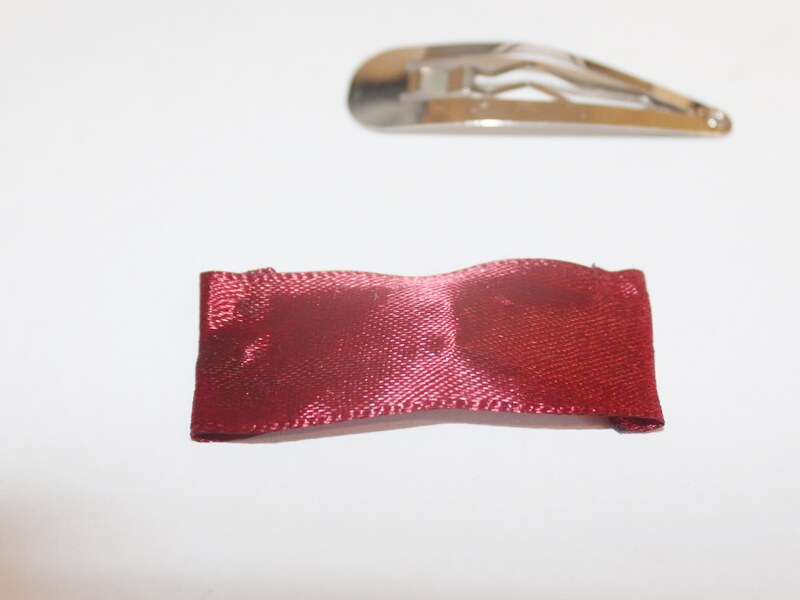
Hair clips are back. Here’s how to turn those useful clips into something more elegant.

Covering your clips with luxurious ribbon adds an element of elegance to those practical accessories. I love to add a ribbon covered hair clip to my everyday hairstyle. Contains affiliate links.
You will need the following tools and materials to make your ribbon covered hair clips:
1: Two metal hair clips. I used this pair that I had lying around.

2: Two pieces of ribbon long enough to wrap around the ends of the clips. I used this red satin ribbon.

3: Super glue. You might want to use Araldite for a stronger hold.

Follow these steps to make your hair clips:
1: Add glue to the back of one clip.

2: Add the ribbon and hold it in place until it is secured. Be careful not to glue your fingers.

3: Open the clip and Fold the ribbon around it.

4: Add glue to the underside of the open top.

5: Secure the other end of the ribbon. Make sure there is enough slack to allow your clip to close properly.

6: Add extra glue if needed to secure the ribbon in place.
7: Repeat steps 1 to 6 for the second clip.
Once your clips are dry you can pop them in your hair and go on your way!
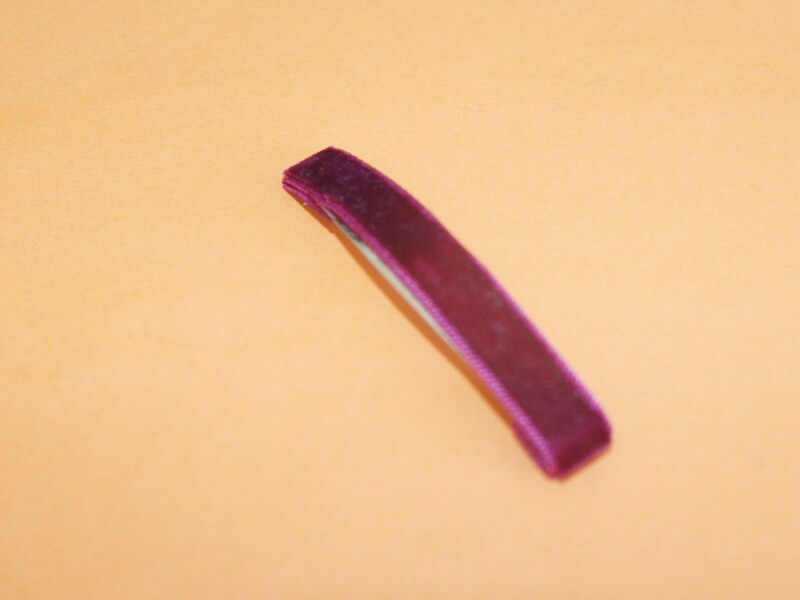
Here’s another clip I covered with velvet ribbon.
-
I am seeing fancy hair clips everywhere, here’s how to make a pair of rhinestone embellished clips.

Continuing the rhinestone trend on DIY Jewelry Hub with these rhinestone embellished clips!
You will need the following tools and materials to make these hair clips:
1: Two hair clips. I used these alligator clips that I had at home and wasn’t using. I added a lick of color using some old nail polish.

2: Two short rhinestone strands. Cut them to the length of the clip you intend to glue them too.

3: Glue. I used superglue but you will probably get a better result using Araldite glue.
or
Follow these steps to make your rhinestone clips:
1: Add a dab of your chosen glue to the top of the clip and stick one end of a rhinestone strand in place, with the long side draping towards the body of the clip.


2: Continue adding glue down the clip and put the rest of the rhinestone strand in place.

3: Set the first clip aside to dry and repeat steps 1 and 2 for the second clip.
Once they’re dry those sparkly hair clips are ready to wear!

Here’s another pair that I made using some resin charms.

here are some more DIYs for rhinestone crystal embellished hair accessories:
- A rhinestone and chain embellished barrette
- This rhinestone crystal hair comb
- Rhinestone crystal headband
- Statement rhinestone headband
This tutorial contains affiliate links
-
I am loving rhinestone right now! Here’s how to DIY a rhinestone headband

I love this headband! Such a cool hair accessory, simple and sparkly… what more could you ask for?
You’ll need the following tools and materials to make this headband:
1: A headband. I used this one covered in a red ribbon.
2: A strand of rhinestones long enough to cover the headband.

3: Superglue.
Follow these steps to make your rhinestone headband:
1: Add some glue to the end of the headband.

2: Place the end of the rhinestone strand on the glued part to secure it in place. Be careful not to glue your fingers!

3: Add some more dabs of glue along the headband securing the rhinestones down as you go.

4: Secure the other end of the rhinestone strand down at the other end of the headband to finish it off!


Now it’s ready to wear!
-
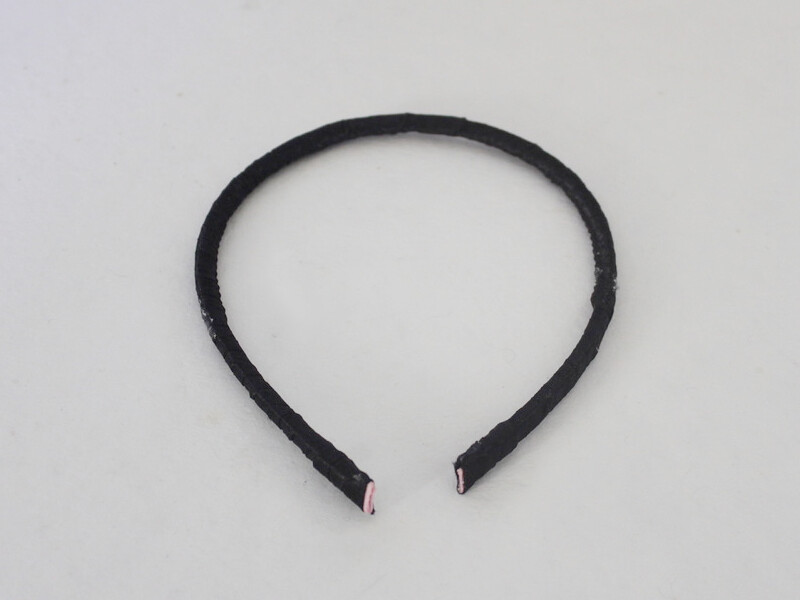
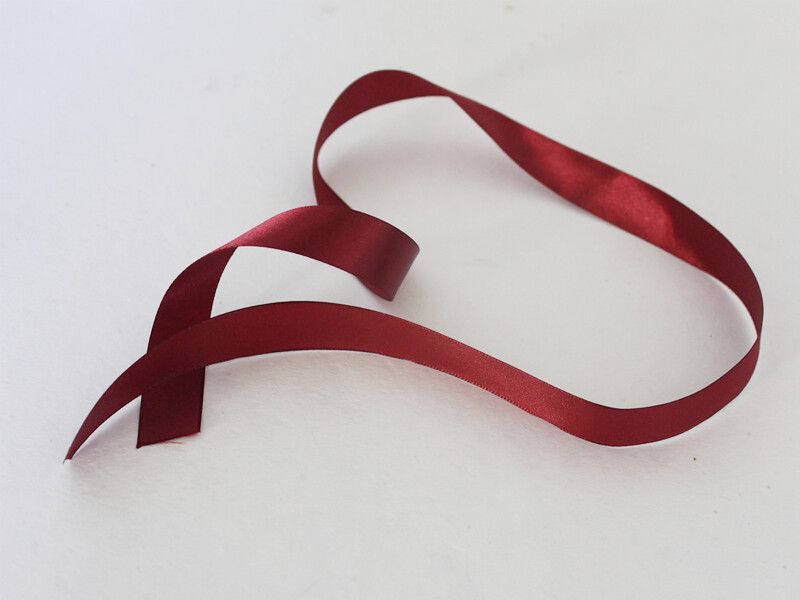
Want something fun to wear on your head? Make this knotted headband!
For some reason I have a lot of old headbands lying around. I decided to give one a makeover using some ribbon and some hot glue. This DIY is super easy, you can do it yourself in around 10 minutes.
You will need the following tools and materials to make your headband:
1: A headband. I used this old one I had lying around that I had previously wrapped in black ribbon.
2: Scissors, for trimming the ribbon.

3: A hot glue gun and hot glue.

4: Some ribbon. I used some deep red ribbon.
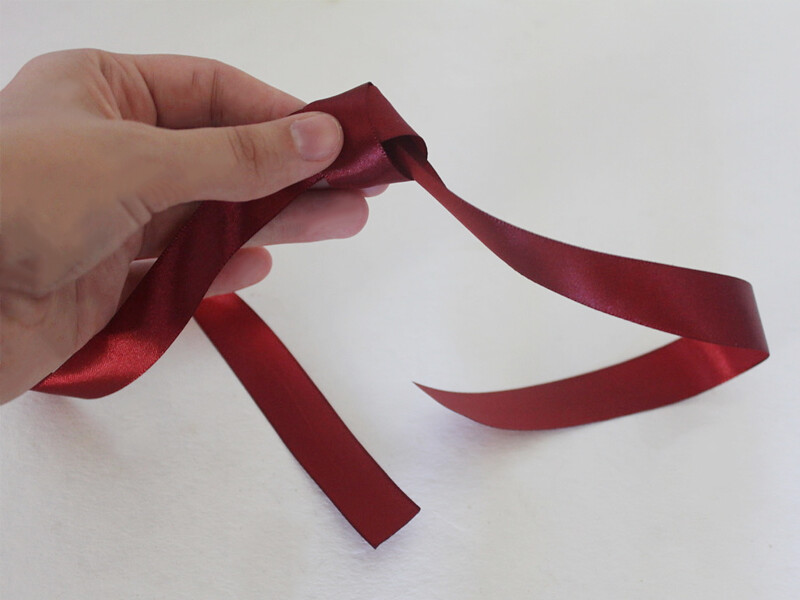
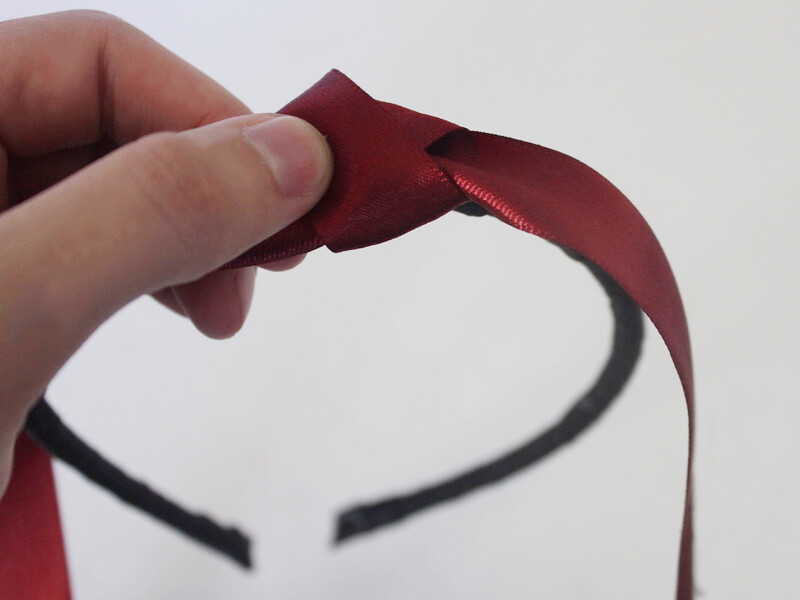
Follow these steps to make your headband:
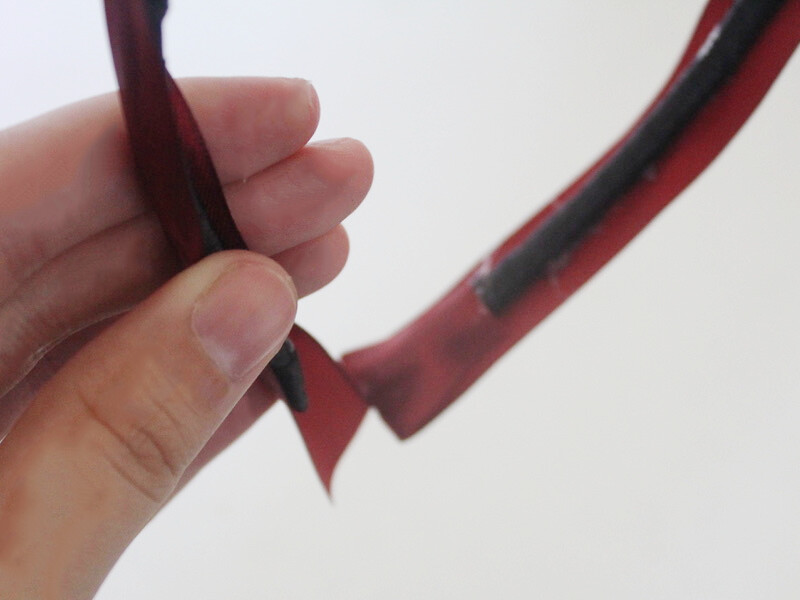
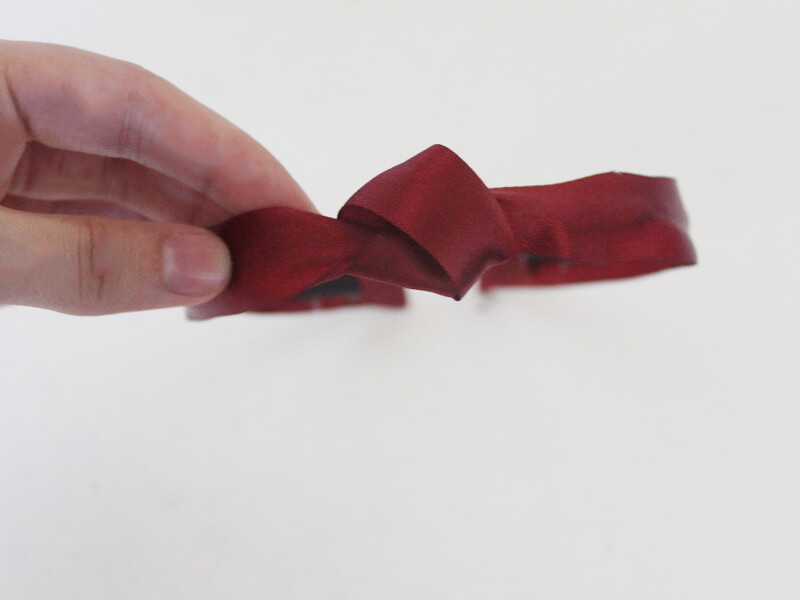
1: Loosely knot the ribbon in the middle. Don’t pull the knot tight or it will lose it’s shape and bounciness!
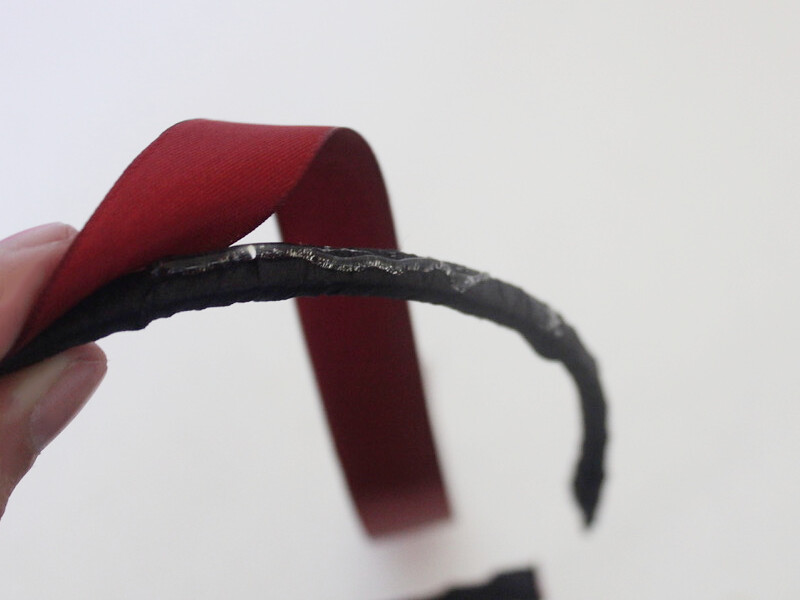
2: Add some glue to the middle of the headband and glue the knotted part of the ribbon to the center.
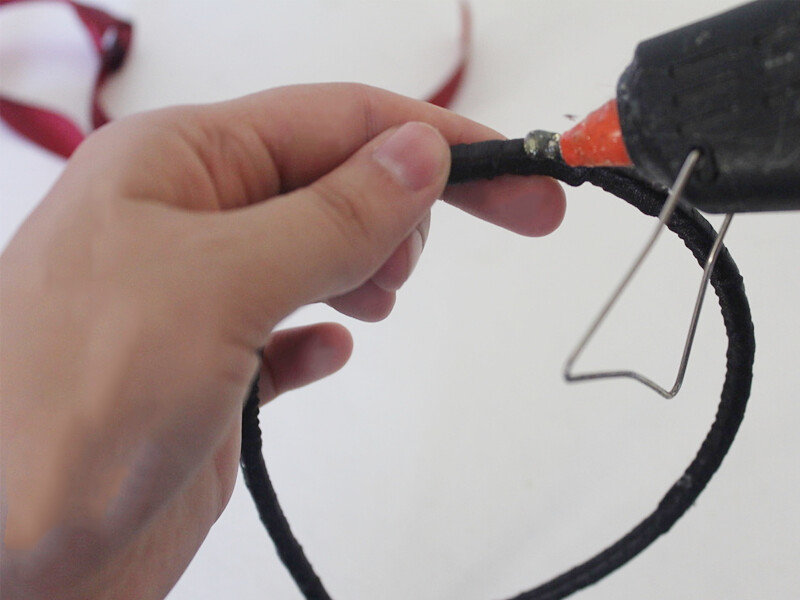
3: Add some more glue down the sides of the headband and secure the ribbon to the band.
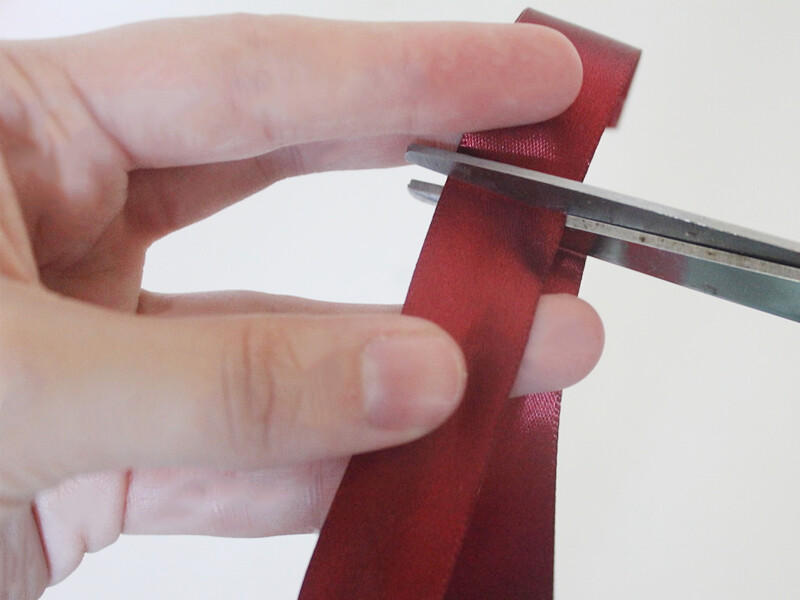
4: Trim the excess ribbon off the ends. Leave enough ribbon to fold around the ends of the headband.

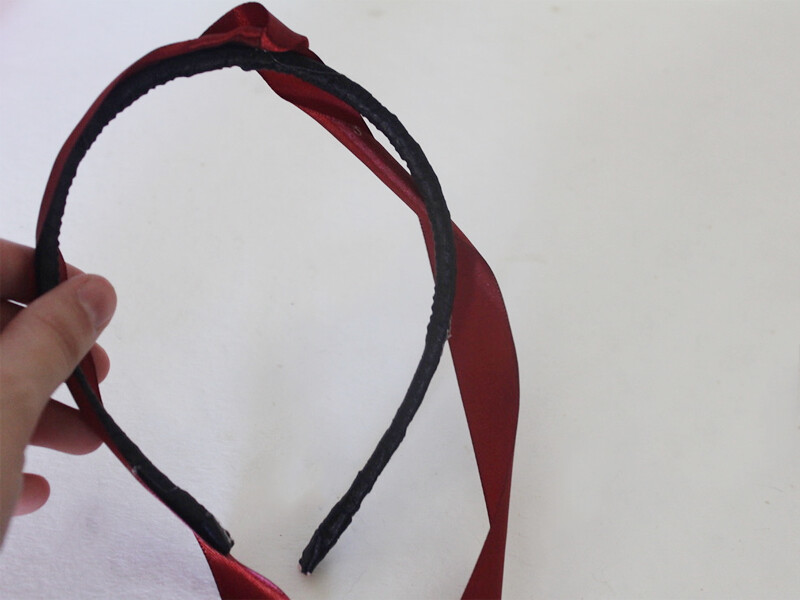
5: Add glue to the inside ends of the headband and secure the ends of the ribbon around the end of the headband.

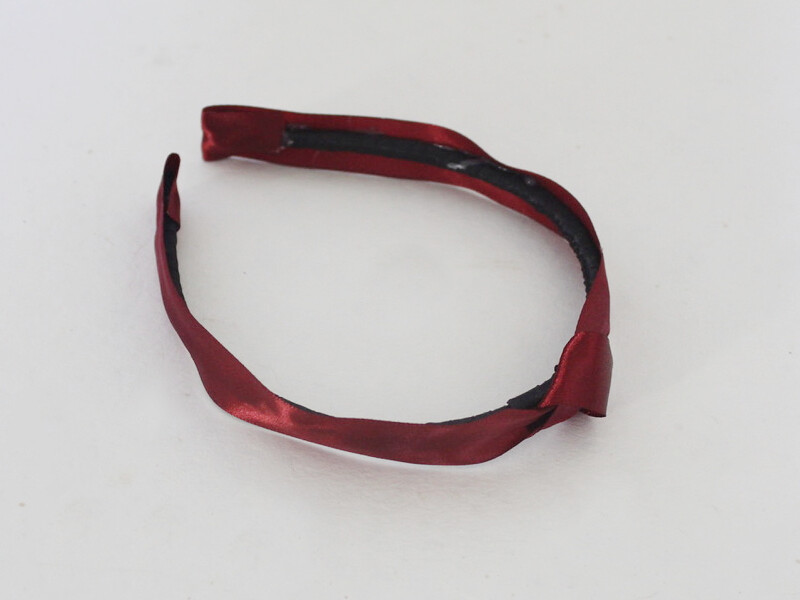
Once the ends are glued in place and the glue has cooled and dried your headband is ready to wear!
-
Make your next hairstyle special with a customized Bobby Pin
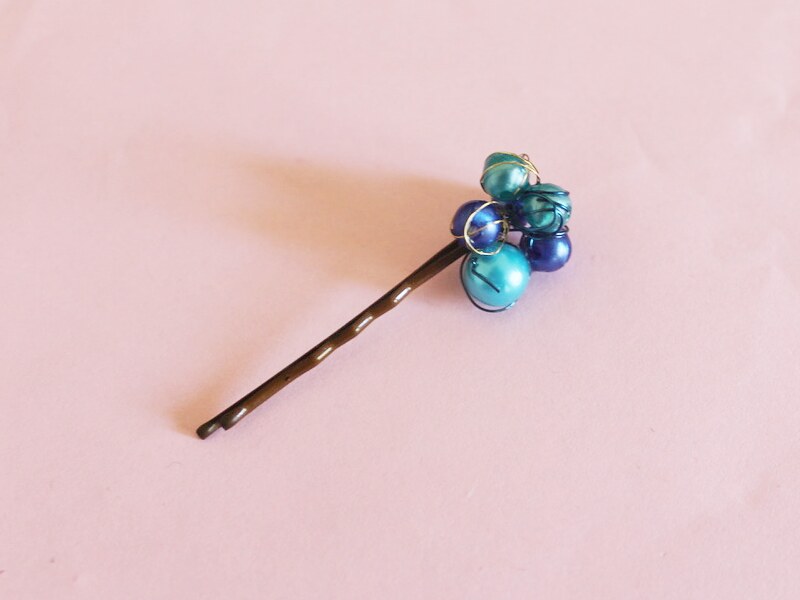
Do your up dos need something special? Why not make this beaded bobby pin to add something amazing to your hair styling.
You will need the following tools and materials to decorate your bobby pin:
1: Cutting pliers for cutting the wire.

2: Pieces of thin wire cut to approximately 15cm long. You can cut as many as you like.
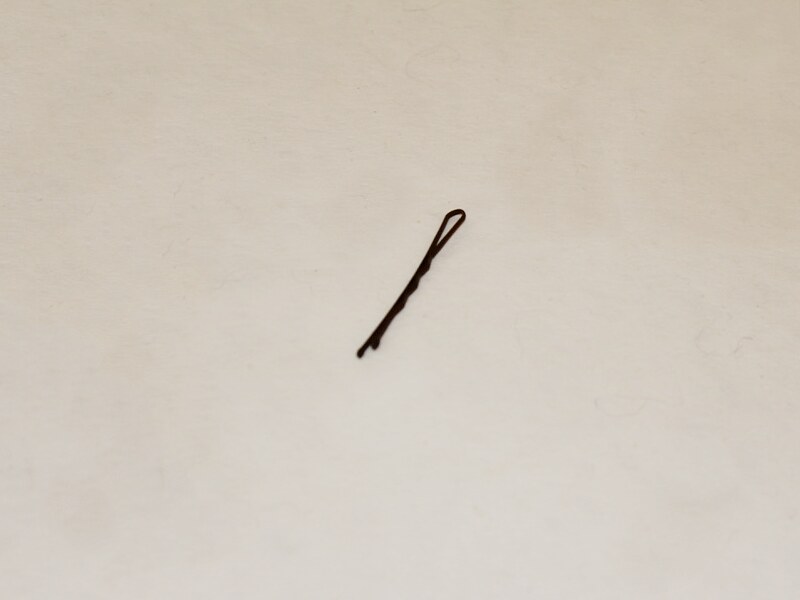
3: A Bobby Pin.
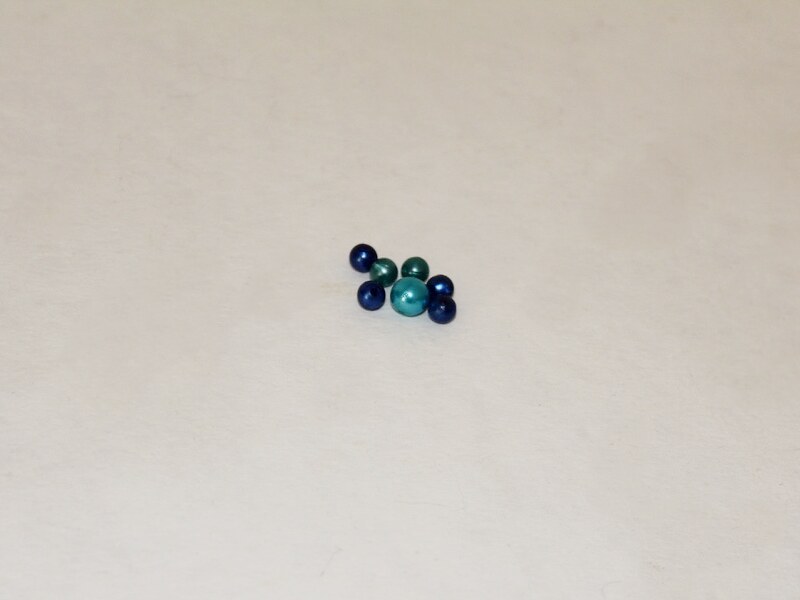
4: Beads of your choice. I used these plastic beads.
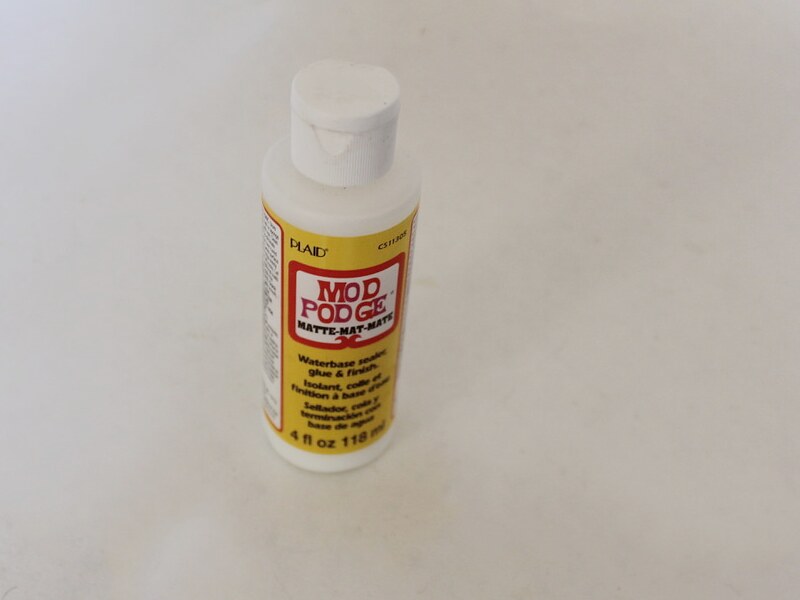
5: Water based glue. I used Mod Podge.
6: A Skewer.
Follow these steps to decorate your bobby pin:
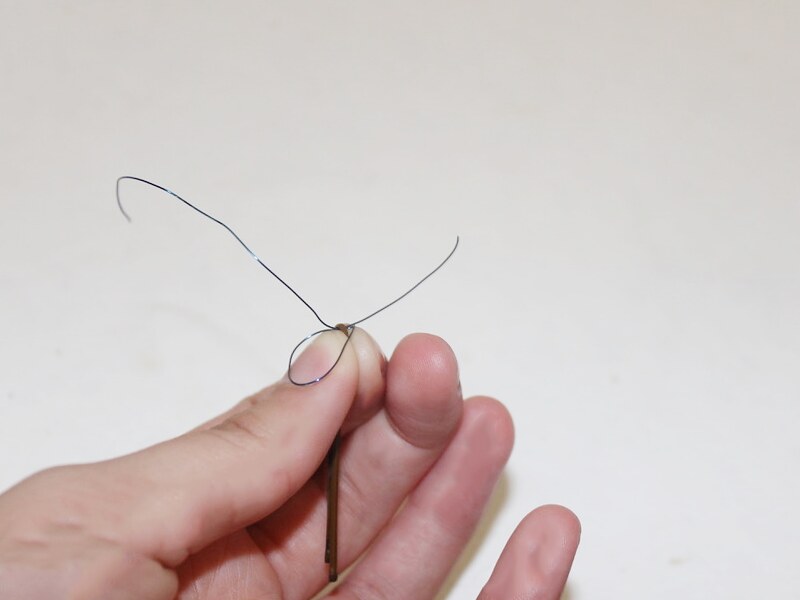
1: Put a piece of wire between both sides of the bobby pin, up near the bent part of the pin.

2: Wrap the piece of wire around the top of the pin where it bends over.

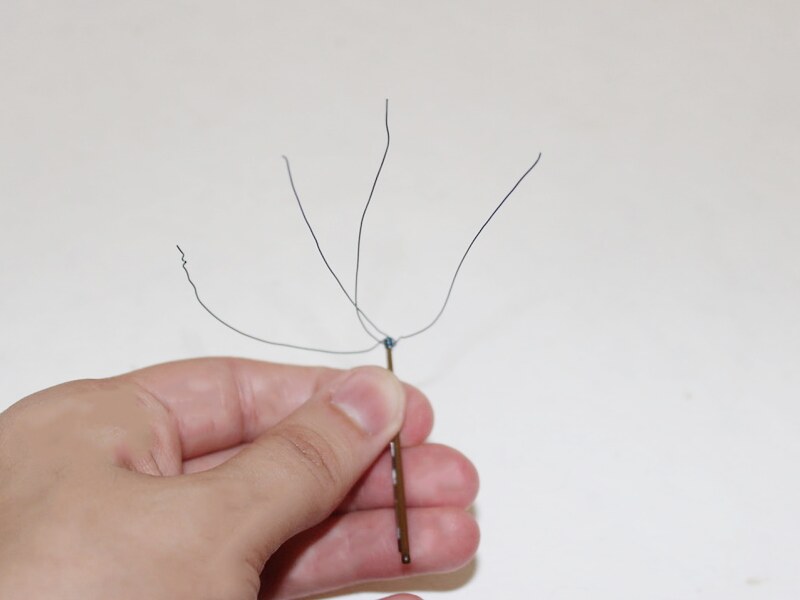
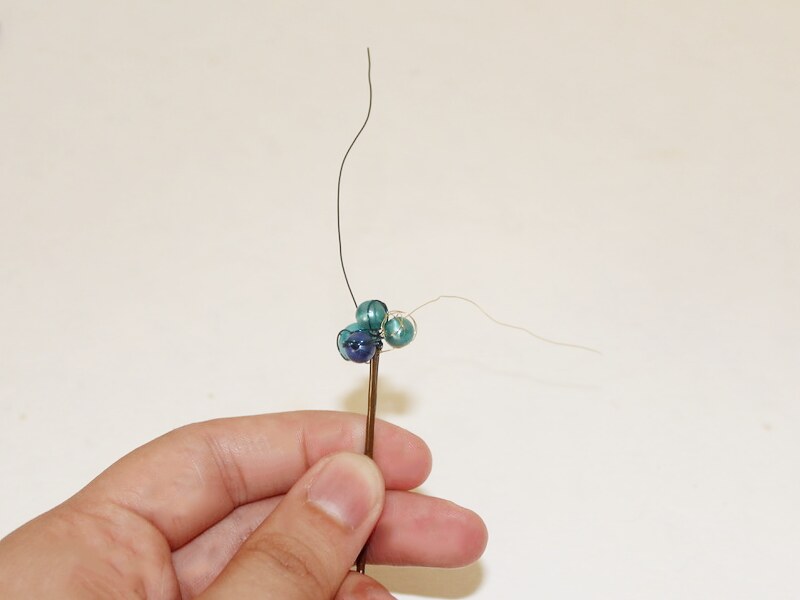
3: Add more pieces of wire in the same way. Add as many as you like depending on how many beads you want clustered on your bobby pin.
4: Add a bead to one of the ends of the wire.
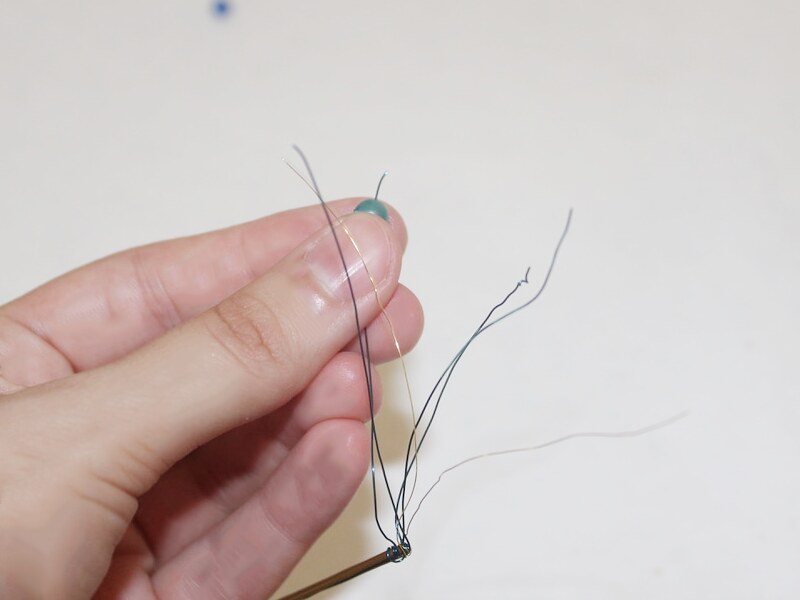
5: Wrap the wire around the bead so that it sits close to the pin.
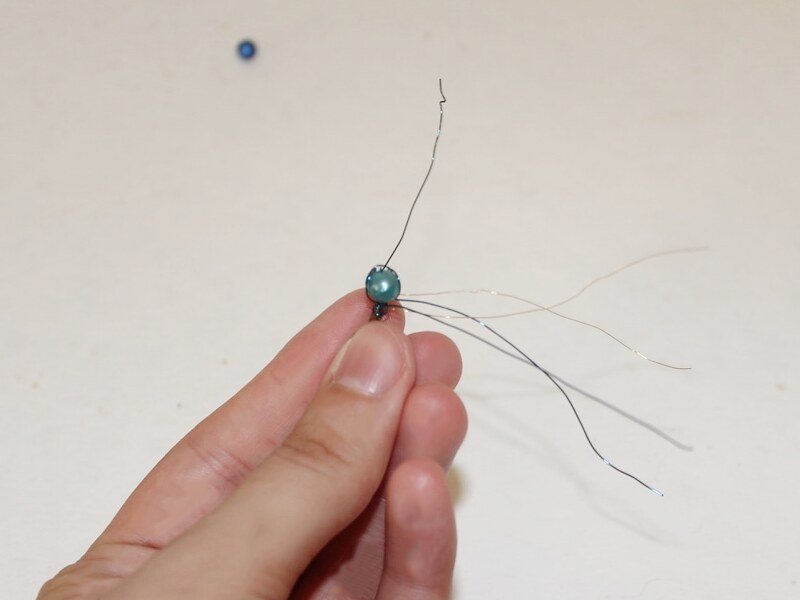
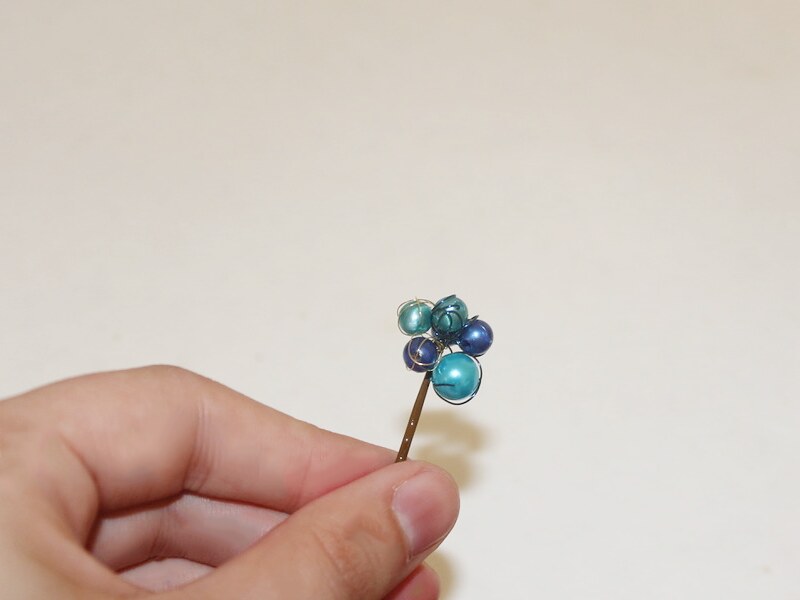
6: Repeat steps 4 and 5 until all the pieces of wire have been beaded and you have formed a cluster of beads on the bobby pin.
7: Add some PVA glue to the ends of the wire to secure the beads in place.
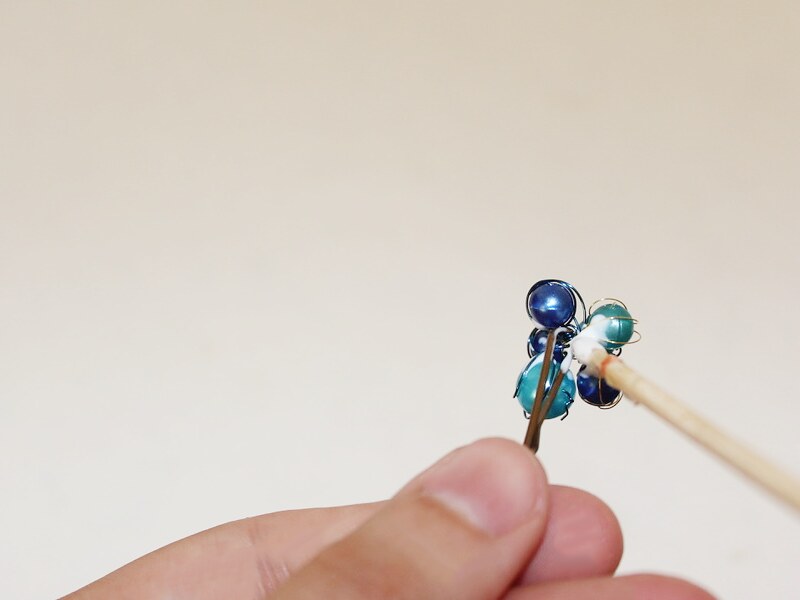
Once the glue is dry your bobby pin is finished and ready to wear!