-
Got a scarf and a ring? Here’s how you can combine them to make a cute new new necktie!
I love scarves, but sometimes just wrapping one around my neck doesn’t feel like it brings enough panache to my outfit, so it can be fun to use a simple ring to add some flair. This tutorial couldn’t be easier, all you need is a scarf and a ring to give you lots of different style options. So cute!
Please note that this tutorial contains affiliate links for which we may receive a commission.
No tools required for this one, but you’ll need the following materials:
1: A small square scarf.

You can get similarly sized silk scarves here:
2: A ring. I used a silver ring with no gemstones or embellishments.

You can get a similar ring here:
Follow these steps to make your scarf-ring necktie:
1: Fold the scarf in half diagonally.
2: Poke a corner of the scarf into the middle of the ring.

3: Tie a knot to secure the ring in place.

4: Loop the scarf around your neck and slide the other end through the ring to secure it around your neck.


How simple is that? Such a cute way to accessorise.
Here’s the same scarf necktie with a shell ring instead. If you’ve got a few rings, you have so many styling options! Love it!

If you like the shell look, you can get a shell ring here:
You May Also Like

Here’s how to turn a chain into a lariat that holds your wireless ear buds
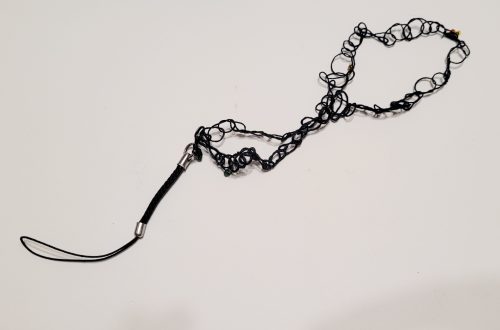
Get Hands-Free and Stylish with a DIY Crochet Phone Wrist Strap: Follow our Step-by-Step Tutorial Now!

Need a sparkly accessory to cheer up the 2020 silly season? Make this waist chain in time for Christmas this year!
-
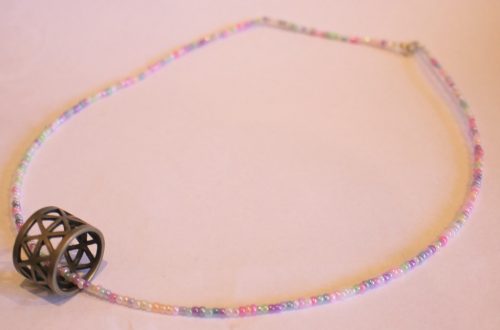
Got a ring that doesn’t fit anymore? Turn it into a fun pendant!
I popped this ring on the other day… and it got stuck on my finger! After panicking a little I managed to get it off and decided it needed a new life as a pendant rather than a ring. Here’s how to transform your too small ring into a cool necklace pendant…
This tutorial contains affiliate links.
You’ll need the following tools and materials:
1: A ring that doesn’t fit you anymore. I used this steel ring.

Here’s something similar:
2: Pliers. I used my cutting pliers, round nose pliers and flat nose pliers.

3: Some tiger tail wire, long enough to make a necklace.

4: Four crimp beads.

5: Two small jump rings.

6: A lobster clasp.

7: Beads. I used this mix of pastel glass seed beads. I also used six larger beads to fit over the folded tiger tail wire.


Follow these steps to make your ring pendant necklace:
1: Add two of the crimp beads and a jump ring to one end of the tiger tail wire.


2: Loop the end of the wire around the jump ring and back through the crimp beads, pull the wire tight.

3: Squash the crimp beads using the flat nose pliers.


4: Bead the wire in any pattern you wish. I beaded mine randomly with no particular pattern.


5: Once you have your necklace at the length you want it, add the remaining crimp beads and jump ring.

6: Loop the end of the wire around the second jump ring and back through the crimp beads and the last few glass beads, pull it tight.

7: Squash the crimps using the flat nose pliers and then trim the excess tiger tail wire using the cutting pliers.


8: Add the ring to the strand.

9: Attach a lobster clasp to one of the end jump rings to finish it off.

Now your ring pendant necklace is finished and ready to wear!


Here’s another idea, pop your rings onto a chain. Here’s one I made with two brass rings on a silver-tone chain.

Here are some other ways to use rings in your jewellery:
- How to turn a ring into the central feature of a choker necklace
- Here’s how to turn a costume ring into a different kind of pendant
This tutorial contains affiliate links.
-
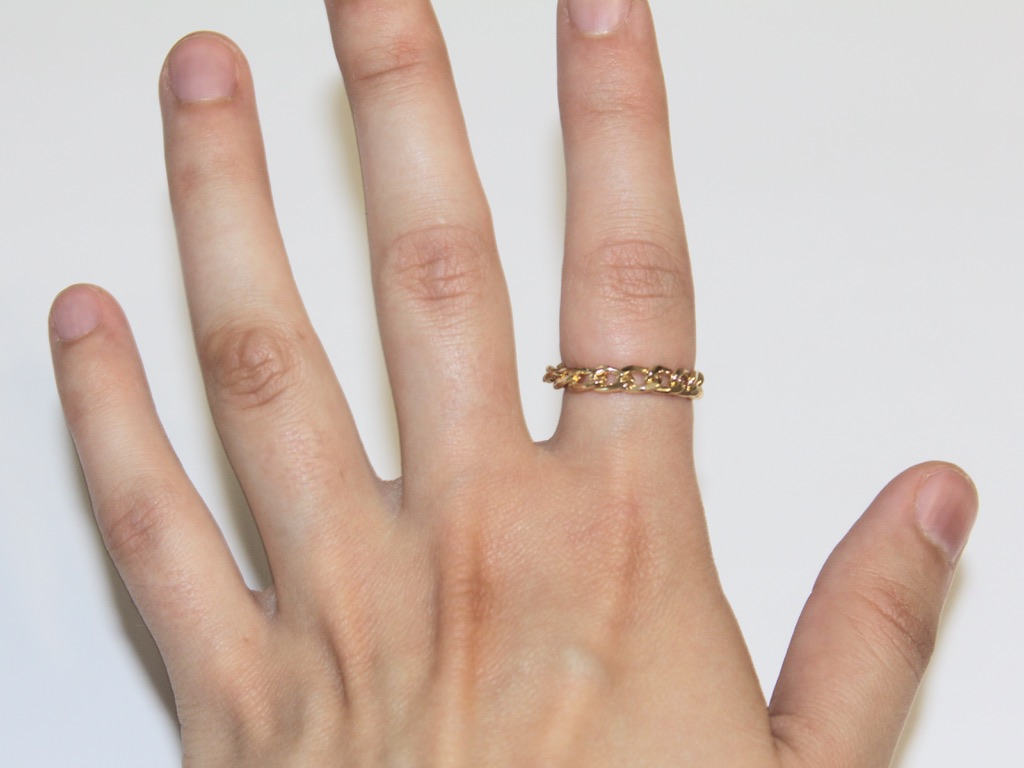
Want a cute new ring? Here’s a super easy way to make one out of chunky chain.
Are you ready for a super simple DIY? Make this chunky chain ring! I keep reading over and over that chunky chains are trendy right now. This ring tutorial is a fun way to dip your toe into this fun new jewelry trend.
You’ll need just a few tools and materials to make this cool chain ring:Pliers. I used my round nose and flat nose pliers.
1: Pliers. I used my round nose and flat nose pliers.


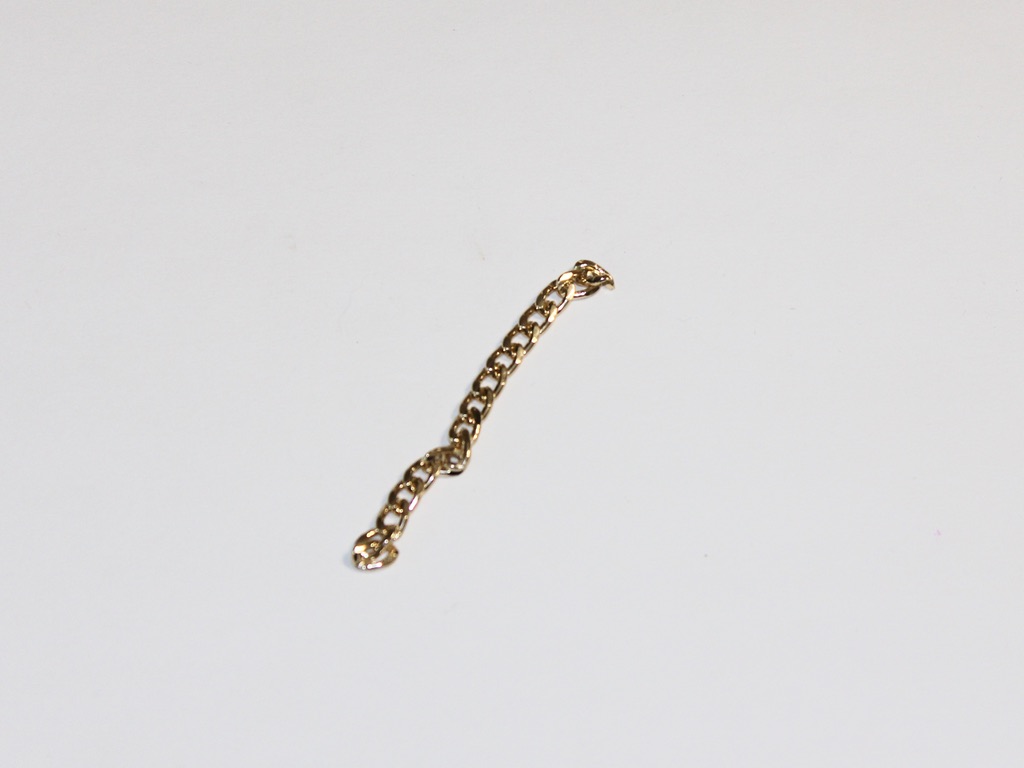
2: Some chunky chain
Now you can make your ring:
1: Wrap the chain around your finger to get the right size.
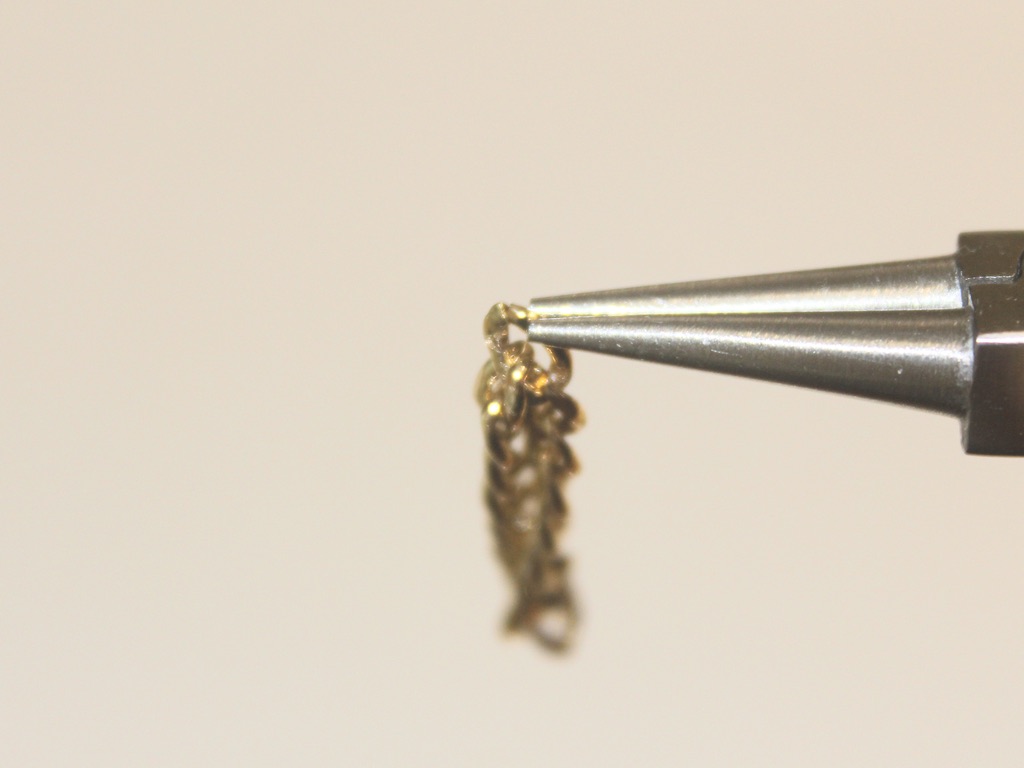
2: Open a link and detatch the short amount of chain that you measured out.
3: Form a loop and put the end link into the open one.
4: Close the link to form a circle.
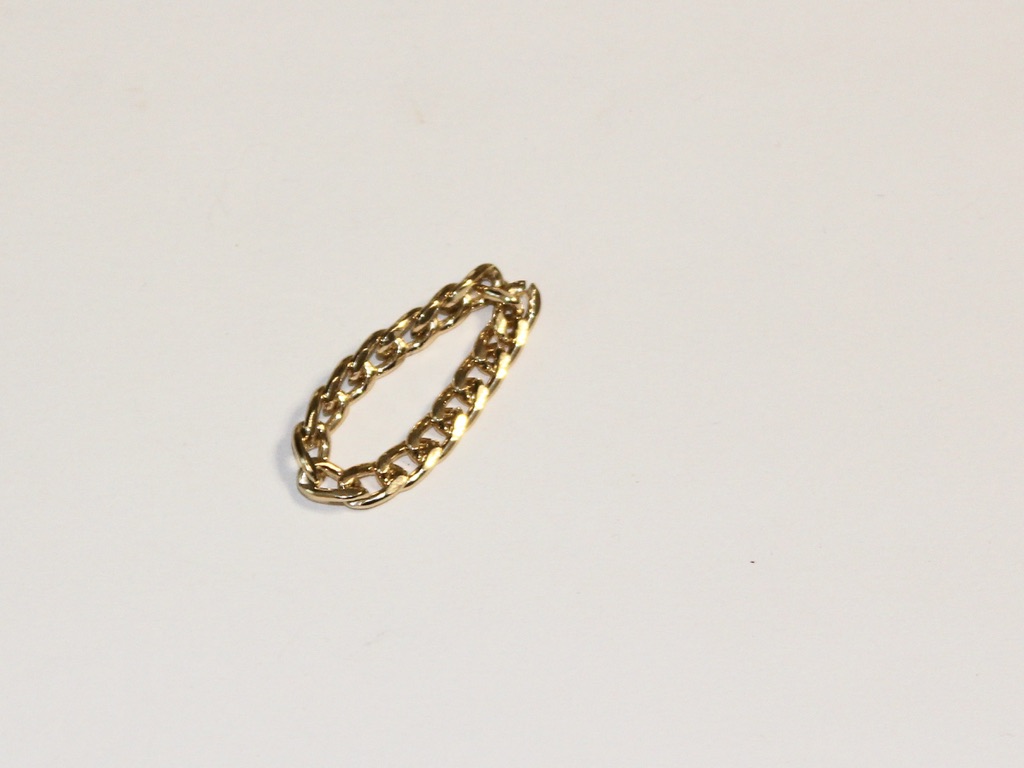
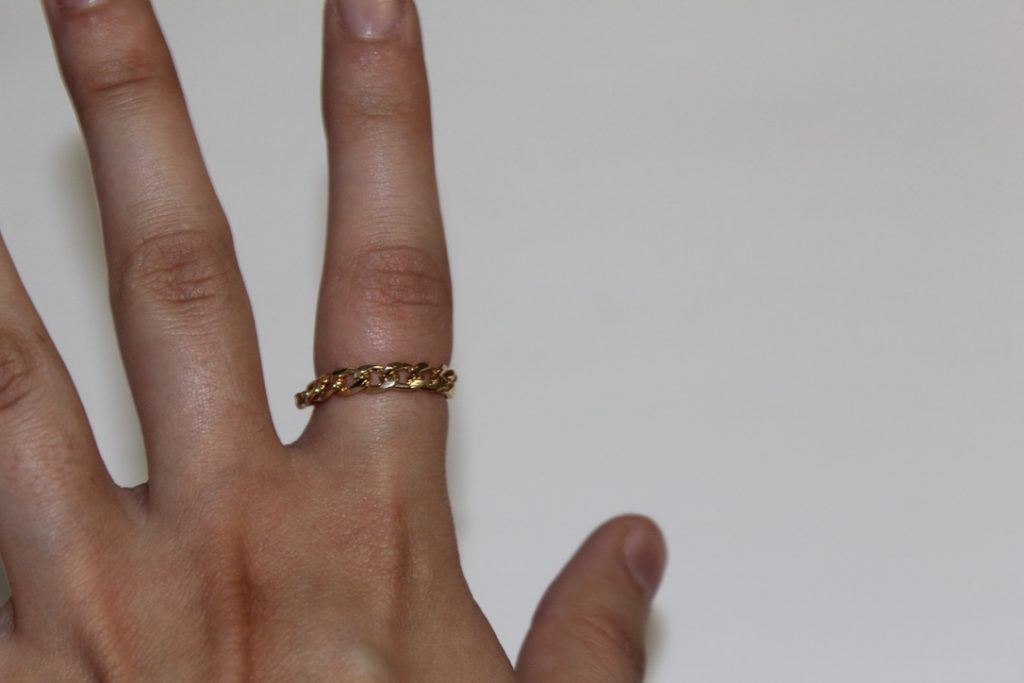
Now your ring is finished! How easy was that?
This tutorial contains affiliate links.
-
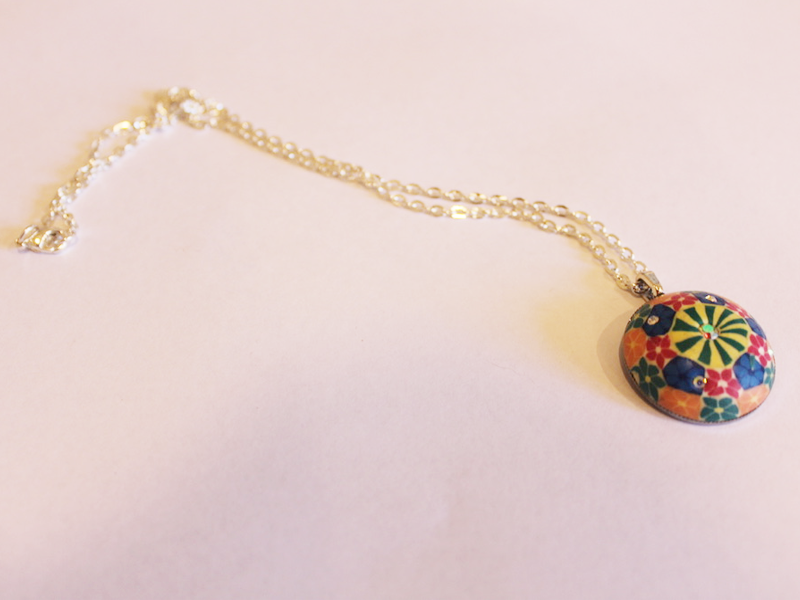
How to transform an old ring into a pendant.

If you are like me you might have some old costume jewelry lying around that isn’t really your style any more. Instead of throwing it away here’s a way that you can transform an old ring into a wearable pendant.
You will need the following tools and materials to make your pendant:
1: An old ring. I used this ring with a soldered on ring shank.

2: Flat nose pliers for pulling the ring apart.
3: A glue on bail.

4: Araldite glue.

5: A skewer.

6: Scrap paper.

8: A necklace chain.

Follow these steps to transform your old ring into a necklace pendant:
1: Remove the ring shank from the top of the ring, gently pulling it off with your flat nose pliers.


2: If there is excess metal use a file to remove it. I didn’t have to do this for this project.
3: Squeeze out the Araldite glue in equal parts onto the scrap paper.


2: Mix the glue using the skewer.

3: Add the glue to the bail and the back of the ring.


4: Place the bail onto the glued part of the ring and set aside to dry.

5: Add the dry pendant to the necklace to finish it off!
Now your new pendant is ready to wear! Such an easy way to upcycle old jewelry.
-
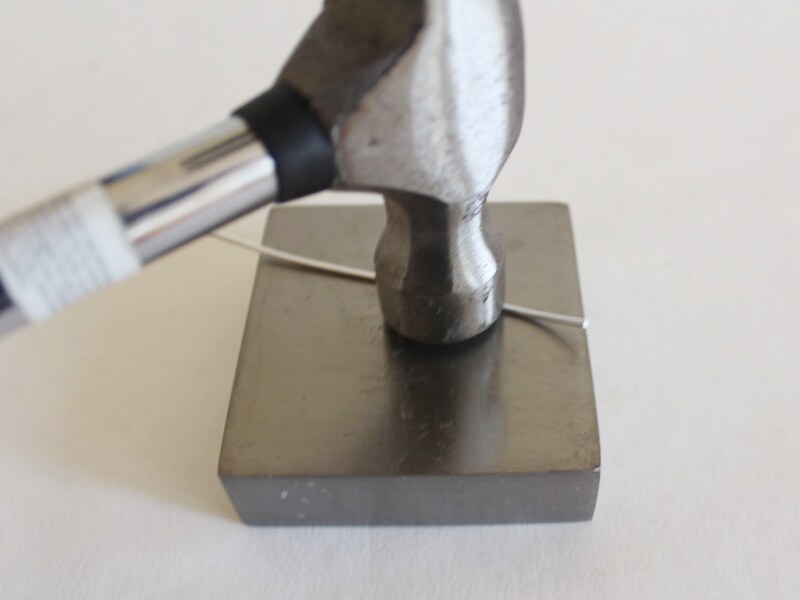
Here’s how to make a bent wire ring. You’ll need a hammer for this one!

Do you need some new finger decoration? Here’s how to turn some soft wire into a cool adjustable ring. Note: affiliate links
You will need the following tools and materials to make your ring:
1: Pliers. You will need your cutting pliers and round nose pliers to make this ring.

2: A ring mandrel.

3: A steel block.

4: A hammer.

5: A file.

6: Some soft wire. I used this thick gauge wire in a silver color.

Follow these steps to make your ring:
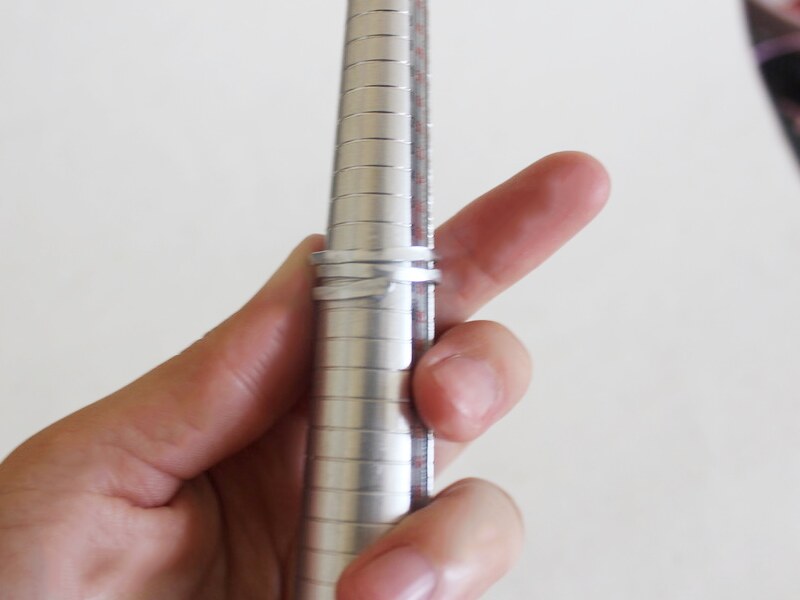
1: Cut a length of wire. I cut mine to approximately 12cm long (4.7 inches).

2: Flatten the wire on the steel block using the hammer.

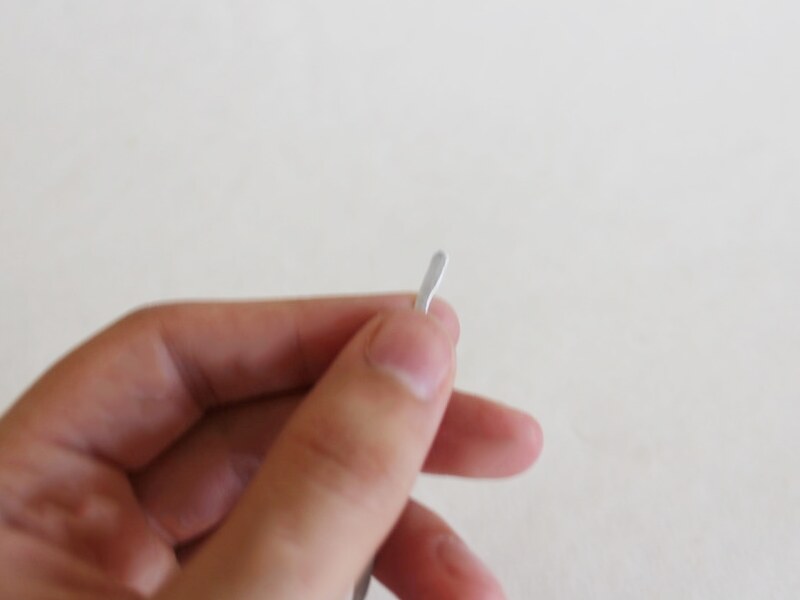
3: File the ends of the wire so that they are not sharp.
4: Bend the wire around the mandrel at the size you want it.

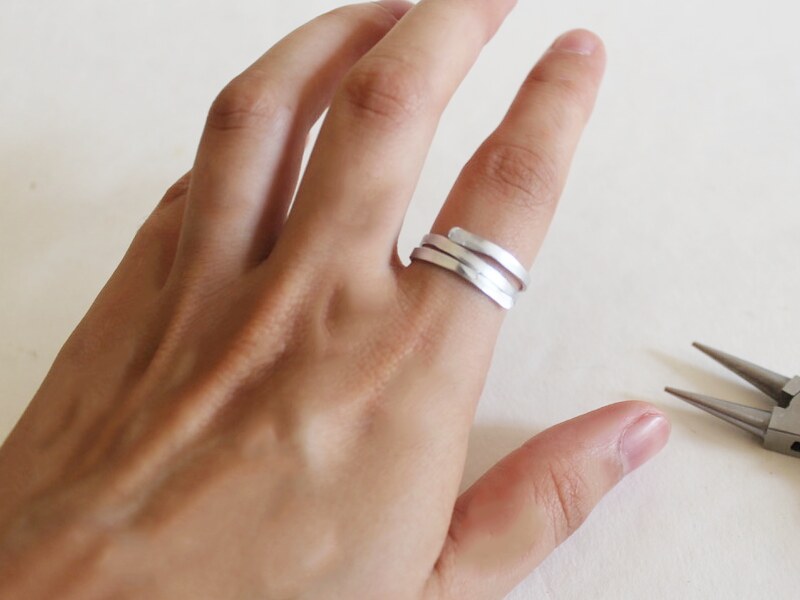
5: Wrap the rest of the wire around to give your ring a layered effect.
6: You can leave your ring as it is here. Or you can follow the next steps to add a coil decoration to it.
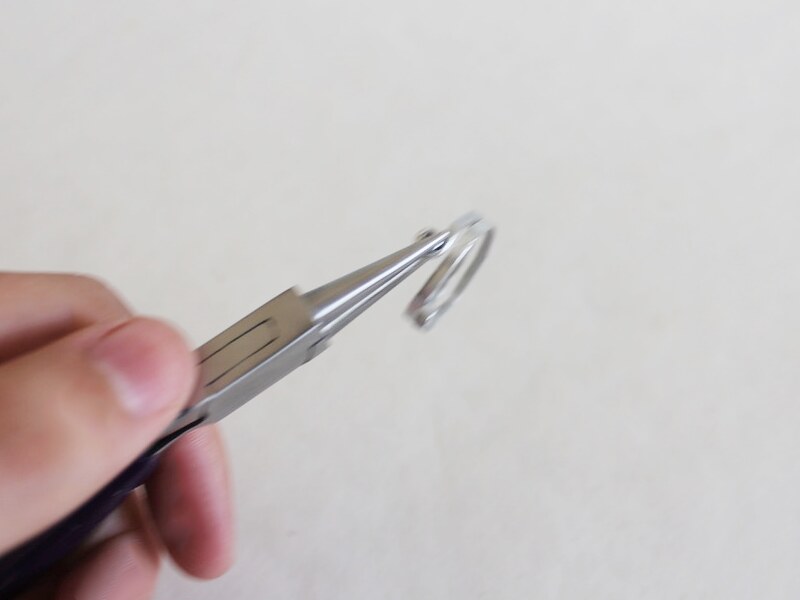
7: Using the round nose pliers, create a coil on one end of the wire.

8: Repeat for the other end of the wire.

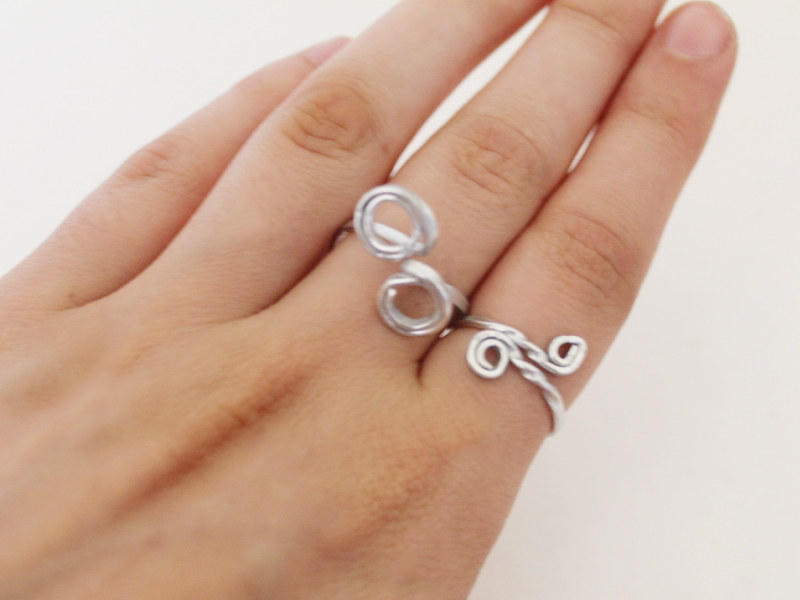
9: Twist each coil out to the side so they align with the center of the ring.
10: Once both coils have been twisted outwards your ring is finished!

Here are some other hammered wire ring designs:

-
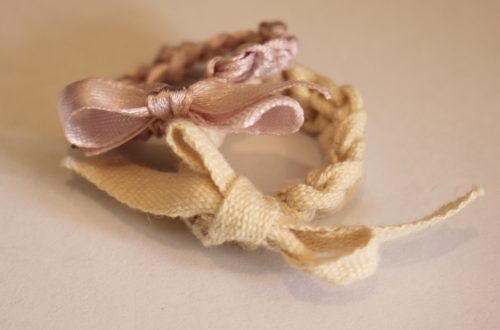
Here’s Some Cute Finger Bling, Make Yourself A Button Ring!

Do you have any random plastic decorations lying around? Why not use them to make some cute rings? All you need are your fave buttons, a ring finding and some trusty araldite! This tutorial contains affiliate links.
You will need the following tools and materials to make your button ring:
1: A button or plastic cabochon of your choice. I used this pink rose-shaped button, I recommend using something that already has a flat back so you don’t need to go through the hassle of cutting the button loop off.

2: A ring finding.

4: Araldite glue.
5: A piece of scrap paper.
6: A Skewer.
Follow these steps to make your ring:
1: Squeeze out the glue and mix it using the skewer.
2: Add the glue to the ring using the skewer.

3: Place the ring on the back of the button and let it dry. You might need to check it to make sure that the ring doesn’t slide out of place.

Once your ring is dry it is ready to wear! Cute!!

-
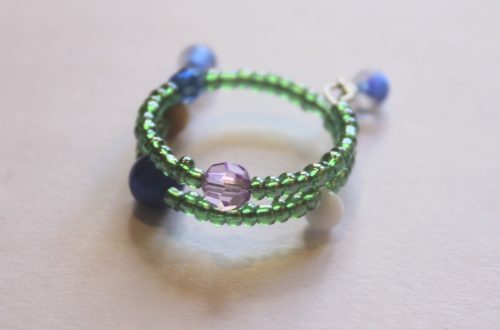
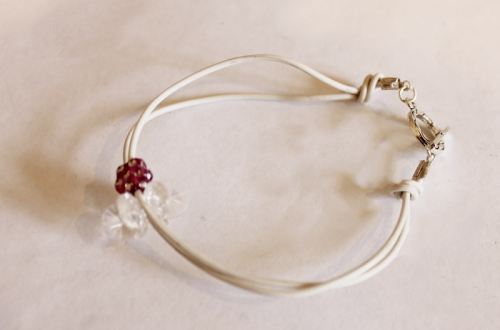
Make this thin wire ring and give your fingers some delicate bling!

This ring makes use of firm memory wire to create a delicate cocktail ring that is simple to make and a delight to wear.
Follow these steps to make your own delicate thin wire ring:
1: Pliers. You will need your cutting pliers to make this ring.
2: Ring sized memory wire.

3: Araldite glue. I suggest wearing gloves and working in a well ventilated space when gluing.
4: Skewer.
5: A piece of scrap paper.
6: A bead of your choice. I used this handmade polymer clay cube bead.

Follow these steps to make your own elegant thin wire ring:
1: Cut one loop of memory wire using the cutting pliers.

2: Squeeze out some glue and mix it using the skewer on the scrap paper.
3: Add the glue to one side of the opening on the memory wire.

4: Place the glue end into one side of the bead.

5: Add glue to the other side of the ring and place the end into the other side of the bead.
6: Once the wire has been secured in place you may need to add some extra glue to the bead opening to ensure that the ring is secured.

7: Wait for the glue to dry before you wear your ring.

Once the ring is dry it is ready to wear… Looking good!

Here is another ring made with a grey polymer clay bead.


-
Bling Up Your Look With This Epic Statement Ring
This DIY jewelry tutorial is a little different, instead of relying on beads, pins and wire to create a ring, this design uses a flat bed ring finding and an assortment of bright and shiny materials to make a statement. All you need to construct a ring like this are your materials and some strong glue.
To make this design you will need to use the following tools and materials:
1: Glue. When I am working with translucent materials I prefer to use Araldite glue. Using super glue or hot glue from a glue gun can affect the appearance of your materials and the finish of your overall design.
2: A skewer or stick for mixing and applying the glue.
3: A piece of paper or plastic to mix your glue on.
4: A flat bed ring finding.
5: A base piece to build your decoration on. In this design I used a piece of green laser cut acrylic.

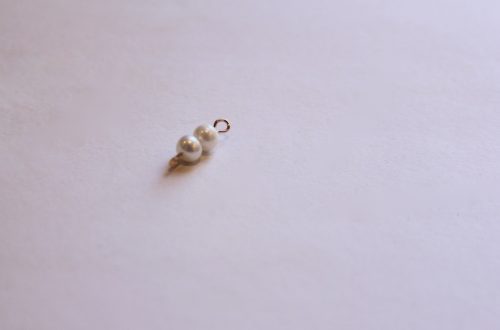
6: Decorations. For this design I used two faux pearls and a large pink rhinestone.


The Steps:
1: Squeeze some glue out of the tube, Araldite is a two part glue that requires mixing to make it set. You might need to mix a few batches as the glue can harden while you are waiting for your components to dry. I recommend using this glue in a well ventilated area.
2: Mix the glue carefully using the skewer.
3: Add some glue to the end of the skewer and carefully apply it to the pink rhinestone centerpiece.

4: Carefully place the rhinestone onto the green backing piece. Once the piece is in place, begin adding glue in the same manner to the pearl decorations, placing them either side of the pink rhinestone centerpiece.

5: Once all your decorations are in place, let the piece sit for a few minutes to dry. Try to keep the piece flat to prevent the decorations from sliding around on the base piece.

6: Once the ring decoration is dry, turn it over to prepare for the attachment of the ring finding.

7: Add some glue to the flat part of the ring finding. You might have to mix up some more glue at this stage as your initial batch may have hardened.

8: Carefully place the ring finding onto the backside of the base piece so that it sits directly behind the pink rhinestone centerpiece.


9: You might need to hold the piece still until it begins to dry. Alternatively, you can prop it up, being careful to keep the piece straight so that the ring finding doesn’t move and set in the wrong spot.
Once all the components are dry and set in place your stunning statement ring is ready to wear!


-
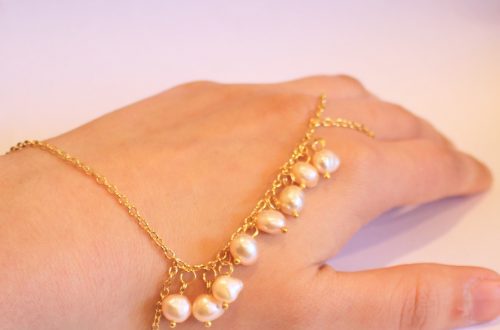
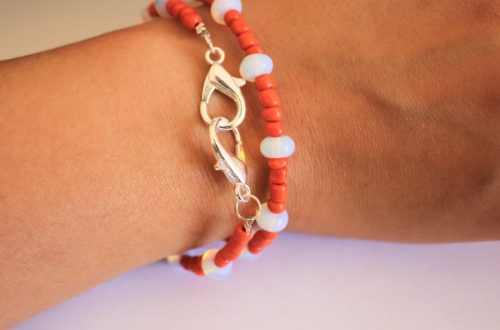
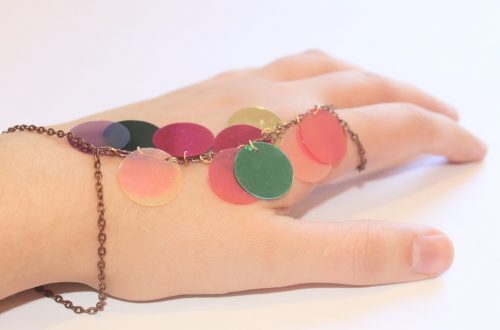
When A Ring and A Bracelet Unite What Do you Get? A Ring Bracelet
Ring bracelets are such cool accessories. They adorn the whole hand and seem to add a certain special flair to your jewelry repertoire. You don’t need any special materials to make this ring bracelet design, just some chain, an eye pin and some beads. I used some stunning peridot beads for my design. What will you use to make your own, unique ring bracelet?
You will need the following tools and materials to make this ring bracelet:
1: Pliers
For this design you will need to use the round nose and flat nose pliers. I didn’t use my cutting pliers this time but keep them on hand just in case!
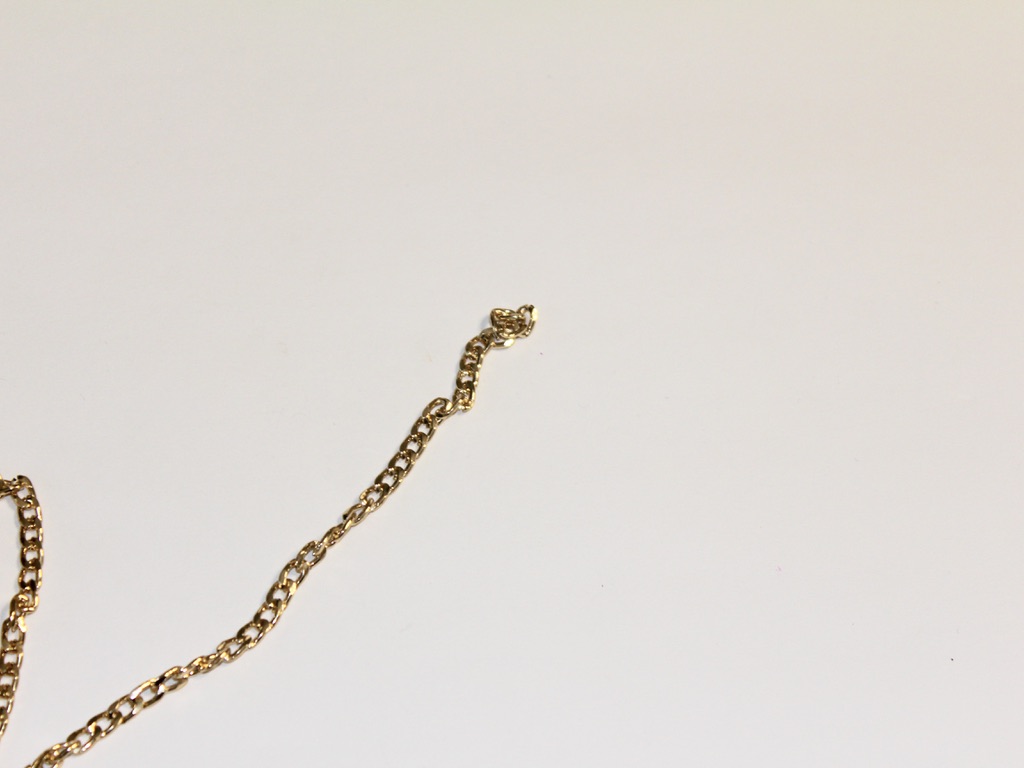
2: Chain

3: One eye pin

4: One lobster clasp

5: One jump ring
4: Beads
In this design I used some Peridot chip beads.

The Steps:
1: Add your beads to the eye pin.

2: Using the round nose pliers, bend the top of the pin at a right angle to the beaded section.

3: Now use the round nose pliers again to create a loop at the end of the pin to secure the beads.

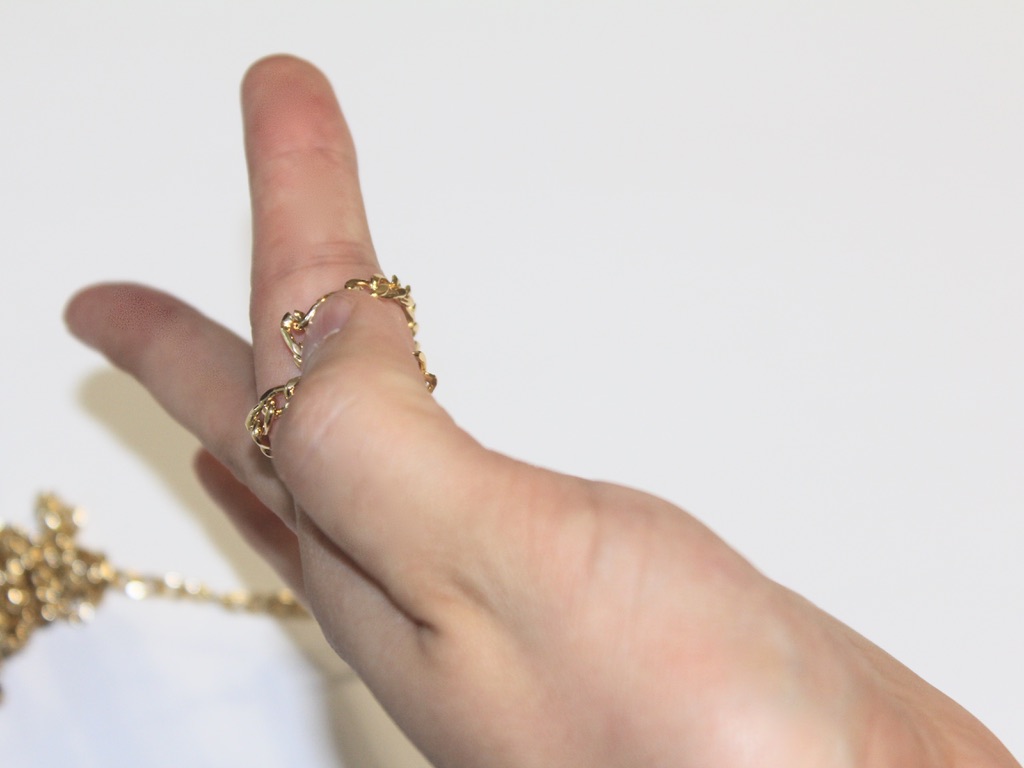
4: Take the chain and create a small loop that is large enough to slip over your finger. Try not to make it too tight. Secure this small loop by opening a link using the pliers closing it again so that it is attached to the point you would like your loop to end.

5: Once the small ring loop has been formed, trim the chain so that the piece reaches the bottom of your middle knuckle, you can do this by carefully opening a chain link using the pliers and sliding the other link out.

6: Now it is time to attach the bead charm you made earlier. Slide one of the looped ends into the chain link you opened in step 5. Once the charm is in place you can use your pliers to close the chain link again.


7: Add the remaining chain to the other end of the charm in the same manner.

8: Your chain might be a little long at this stage. To form the bracelet you will need to let the chain fall to the base of your hand and then wrap it loosely around your wrist. Once you’ve got this measurement, open the link as you did earlier to trim the chain.
9: Attach the end of the chain to the point where the chain meets the base of your hand. At this point the bracelet section will be an unbroken loop.

10: Open the bracelet loop at the halfway point. You can do this by carefully opening a link using your pliers. Once the bracelet has been split, you can start attaching the clasp.
11: On one side of the bracelet, carefully open a chain link (if not already open) and slide on the lobster clasp. Close the link again to secure the clasp in place.


12: Take the jump ring, opening it using your pliers, and attach it to the other side of the bracelet by sliding on the chain link loop. Close the jump ring again using your pliers.

13: Now your ring bracelet is complete! Wear it anytime you want to add a little ‘something special’ to your outfit.

-
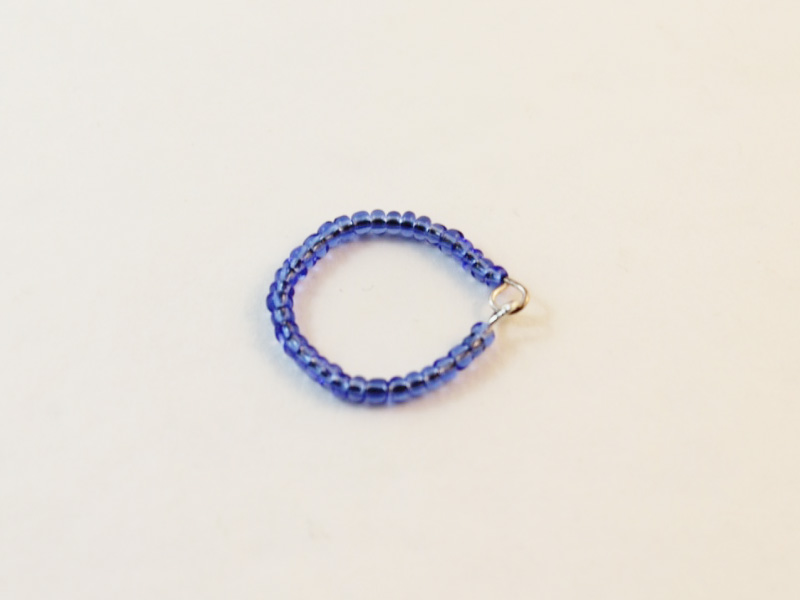
You can never have enough rings, so here’s How to Make cute a Wire Ring
This ring design is just a scaled down version of my super simple beaded bangle design. With a handful of beads and some 18 gauge wire, you’ll be stacking these cute little rings on all your fingers in no time! These wire rings would also make great charms for necklaces and earrings. Get creative and see how you can use them in your own DIY jewelry designs.
You will need the following tools and materials to make this ring:
1: Pliers.
To make this ring you will need to use your round nose pliers and cutting pliers.
2: A piece of 18 gauge wire.
I cut my piece a little longer than I needed to. You can check the length of wire you will need by wrapping a piece of paper around your finger. Mark the point where the paper overlaps for a comfortable fit. You can then use this measurement to cut your wire to size.

3: Beads
I used these bright blue seed beads to make my ring.

The Steps:
1: Take your piece of wire and form a loop at one end using the round nose pliers.

2: Once the loop has been formed, begin adding beads to the wire.


3: Continue beading until there is approximately 1cm (0.4 inches) of wire remaining.

4: Use the round nose pliers to bend the end of the wire at a right angle to the beads. If your wire is a little long, you might also want to trim it at this point.

5: Now you can create a loop at the other end of the wire, leaving a small opening. Do this using the round nose pliers.


6: Gently bend the wire into a ring shape.

7: Once you have your ring shape formed, slide the open loop into the other end of the wire. Then use the round nose pliers to secure the loop closed.


8: Now your ring is finished! I’d love to see how you decide to use your ring, will you stack them on your fingers or dangle them from your ear lobes? Share your wire ring designs with me on instagram by tagging @diyjewelryhub.