-
Can’t get enough of ankets? Here’s another cool anklet to DIY.

Anklets are a fun summer accessory you can adorn your legs with. Why not make this simple one to stack with other fun ankle accessories? This article contains affiliate links.
You will need the following tools and materials to make your anklet:
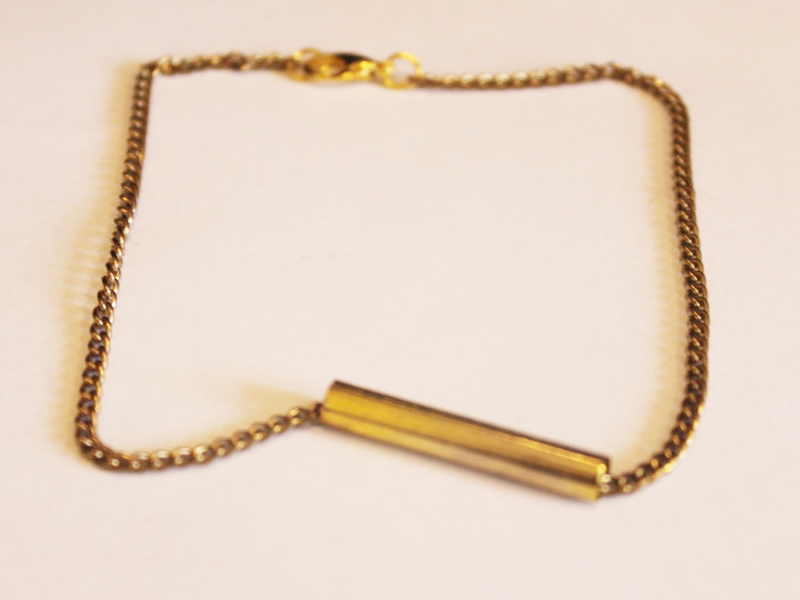
1: One piece of ankle length chain. I used this gold-tone chain.

2: Two jump rings.

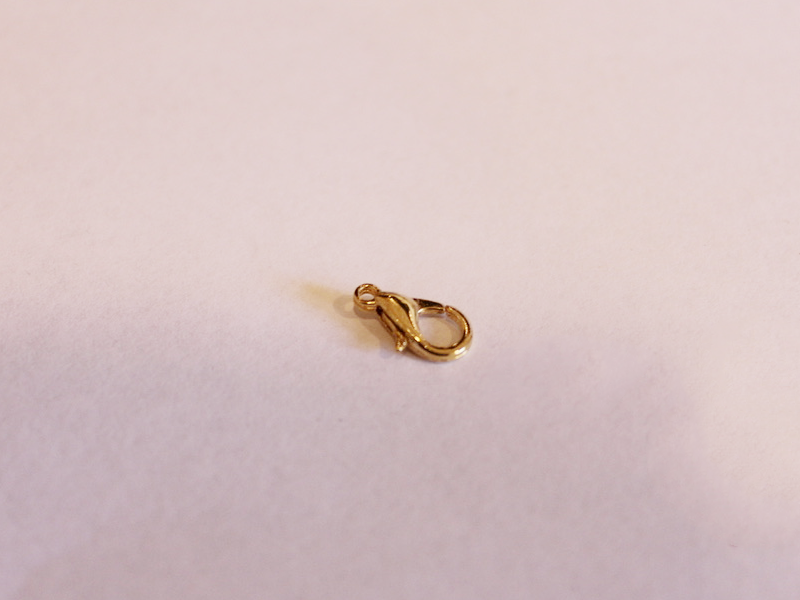
3: A lobster clasp.
4: A tube bead. I used this gold-tone tube bead.

5: Pliers. I used my round nose and flat nose pliers.


Follow these steps to make your new anklet:
1: Add the tube bead to the chain.

2: Attach one of the jump rings to one end of the chain. Do this by sliding the open jump ring through the end link of chain.

3: Add the lobster clasp to the open jump ring.

4: Close the jump ring to secure the clasp in place.

5: Add the other jump ring to the other side of the anklet and close it to finish it off.

Now your anklet is finished and ready to wear!
Here’s another one I made using a curved silver bead.
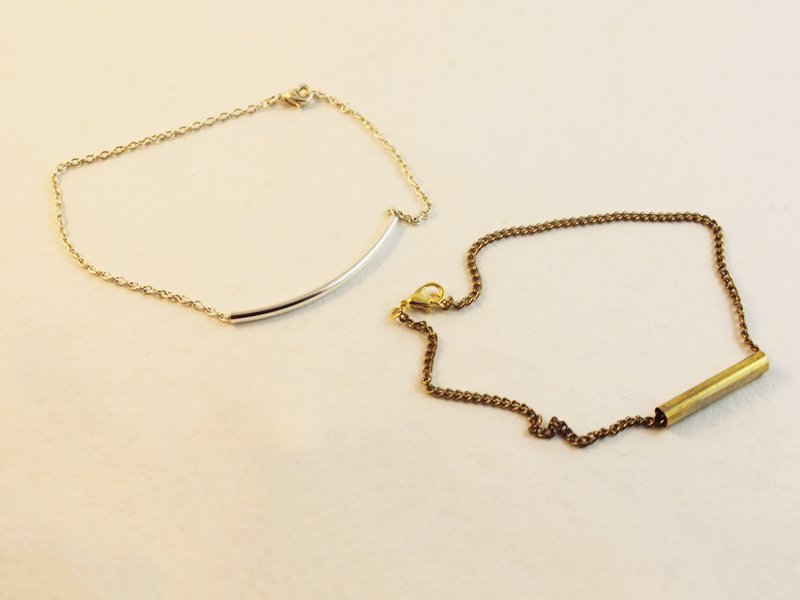
Here is a link so you can buy some curved silver beads if you like that look more!
Note: This article contains affiliate links
-
Here’s how to incorporate recycled materials into a glasses chain DIY

Are you interested in incorporating recycled materials in to your DIY jewelry designs? Here’s an idea for you… a glasses chain made with a recycled headphone cord.
You will need the following tools and materials to make your glasses chain:
1: Pliers. You will need your round nose pliers, flat nose pliers and cutting pliers.

2: A piece of cord from an old broken pair of headphones. I used this cord leftover from another project.

3: Beads with holes big enough to fit your cord. I used 10 of these painted wooden beads.

4: Two crimp ends.

5: Two jump rings.

6: Two rubber glasses holders.

Follow these steps to make your glasses chain:
1: Trim excess material from your cord using the cutting pliers.


2: Add the beads to the cord.


3: Fold one of the crimp ends around one end of the cord using the flat nose pliers.


4: Add the second crimp end to the other end of the cord.

5: Attach the glasses holders to each end of the cord using the jump rings.


Now your glasses chain is finished and ready to use. Perfect for windy spring days or for when you’re getting active outside!

Here’s another version I made using some broken apple headphones and some plastic heart shaped beads.

-
Chunky chains are taking over. Here’s a DIY to get you in on the trend.

Apparently chunky chains are taking over from dainty delicate jewelry. Getting in on this cool new trend is super easy… here’s how to make your own chunky chain necklace.
You will need the following tools and materials to make your chunky chain necklace:
1: Pliers. You’ll need your round nose and flat nose pliers.
2: A chunky chain long in a length of your choice. I used this lightweight silver chain and made it choker length (fitting closely around the neck).

3: Two jump rings.

4: A lobster clasp.

Follow these steps to make your chunky chain necklace:
1: Add one of the jump rings to one end of the chain. Close it to secure it in place.


2: Add the other jump ring to the other end of the necklace.

3: Add the lobster clasp to the open jump ring.

4: Close the jump ring to secure the clasp in place and finish your necklace.

IT IS THAT SIMPLE! Now your chunky chain necklace is ready to wear!

-
Anklets are set to be HOT in the summer months. Here’s one to add to your accessories collection.

According to this article, anklets are set to be the jewelry item that defines summer in 2019. This anklet is sparkly and summery, perfect for evening drinks or beach holidays!
You will need the following tools and materials to make your beaded anklet:
1: Pliers. You’ll need flat nose pliers and round nose pliers.
2: Eye pins.

3: Two jump rings.

4: A lobster clasp.

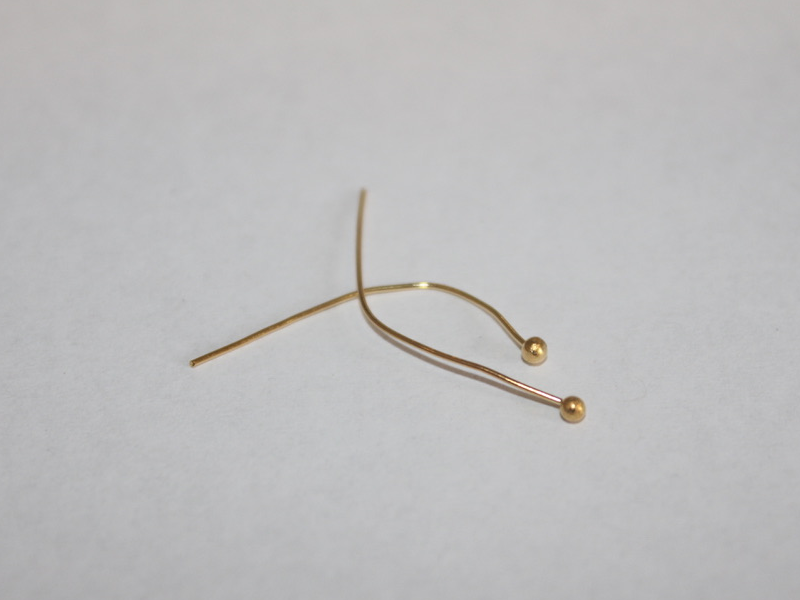
5: Two head pins.
6: Beads. I used some blue faceted plastic beads recycled from an old necklace, some glass seed beads and some other blue glass feature beads.


Follow these steps to make your beaded anklet:
1: Add beads to the pins and loop the tops. Attach each charm using the end loops to form a chain.


3: Continue making these charms and attaching them in a pattern until your chain is long enough to fit comfortably around your ankle.

4: Add a jump ring to one end of the chain and add the lobster clasp.

5: Add the remaining jump ring to the other side of the chain.

6: At this stage your anklet is ready to wear, but you can perform these extra steps to add some extra charms.
7: Add beads to the two head pins.

8: Curl the tops of the pins using the round nose pliers.


10: Add the charms to the jump ring that attaches the clasp to the anklet. Close the jump ring to secure the charms in place.


Now your anklet is finished with some cute little charms! How adorable is this design? Why not make a whole bunch and have a #ankleparty 😉

-
I am seeing fancy hair clips everywhere, here’s how to make a pair of rhinestone embellished clips.

Continuing the rhinestone trend on DIY Jewelry Hub with these rhinestone embellished clips!
You will need the following tools and materials to make these hair clips:
1: Two hair clips. I used these alligator clips that I had at home and wasn’t using. I added a lick of color using some old nail polish.

2: Two short rhinestone strands. Cut them to the length of the clip you intend to glue them too.

3: Glue. I used superglue but you will probably get a better result using Araldite glue.

or

Follow these steps to make your rhinestone clips:
1: Add a dab of your chosen glue to the top of the clip and stick one end of a rhinestone strand in place, with the long side draping towards the body of the clip.


2: Continue adding glue down the clip and put the rest of the rhinestone strand in place.

3: Set the first clip aside to dry and repeat steps 1 and 2 for the second clip.
Once they’re dry those sparkly hair clips are ready to wear!

Here’s another pair that I made using some resin charms.

here are some more DIYs for rhinestone crystal embellished hair accessories:
- A rhinestone and chain embellished barrette
- This rhinestone crystal hair comb
- Rhinestone crystal headband
- Statement rhinestone headband
This tutorial contains affiliate links
-
I am loving rhinestone right now! Here’s how to DIY a rhinestone headband

I love this headband! Such a cool hair accessory, simple and sparkly… what more could you ask for?
You’ll need the following tools and materials to make this headband:
1: A headband. I used this one covered in a red ribbon.
2: A strand of rhinestones long enough to cover the headband.

3: Superglue.
Follow these steps to make your rhinestone headband:
1: Add some glue to the end of the headband.

2: Place the end of the rhinestone strand on the glued part to secure it in place. Be careful not to glue your fingers!

3: Add some more dabs of glue along the headband securing the rhinestones down as you go.

4: Secure the other end of the rhinestone strand down at the other end of the headband to finish it off!


Now it’s ready to wear!
-
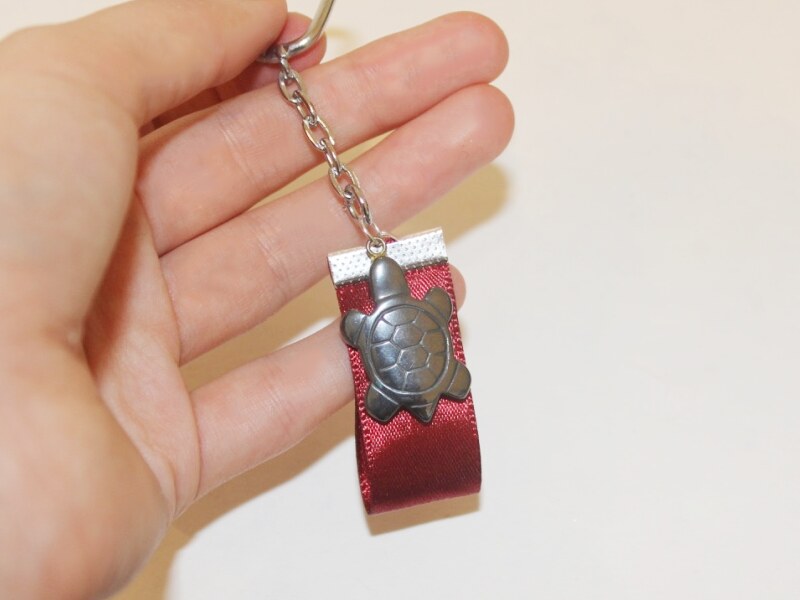
Need a new decoration for your handbag or keys? Here’s how to make a custom key chain!
This custom key chain is super easy to make and will make a great addition to your handbag! If you’ve got a favorite charm or trinket this is a great way to use it.
You will need the following tools and materials to make your key chain:
1: Pliers. You will need your flat nose pliers and round nose pliers.
2: Scissors. To cut your ribbon.

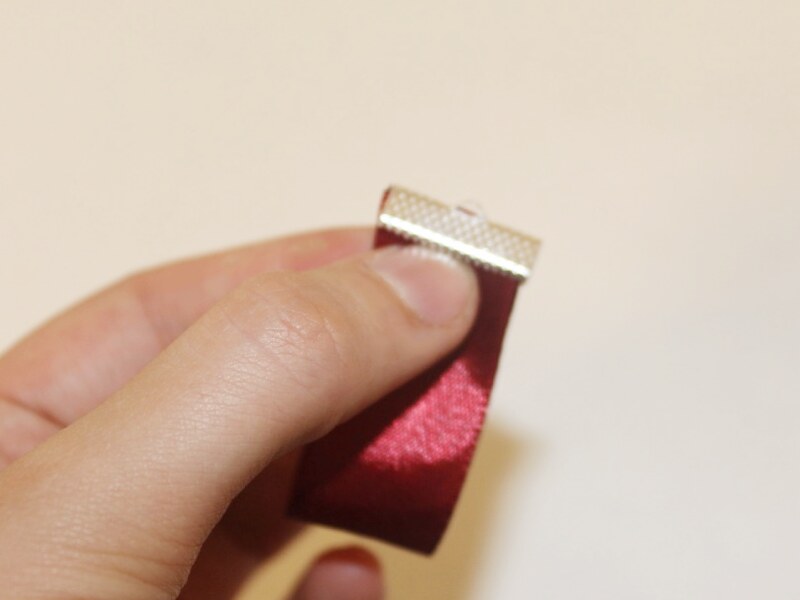
3: A piece of ribbon, approximately 10cm (approx 3.9 inches) long.

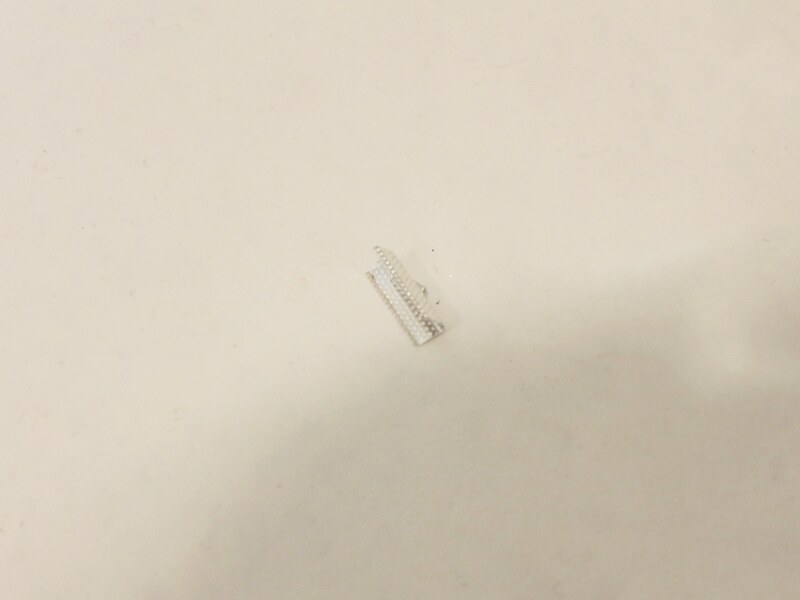
4: A flat ribbon crimp end.
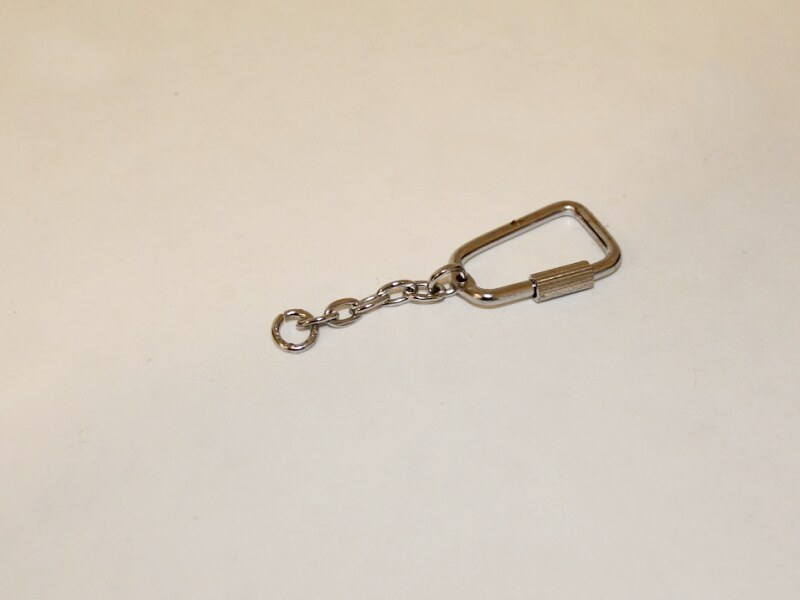
5: A large jump ring.

6: A key chain.
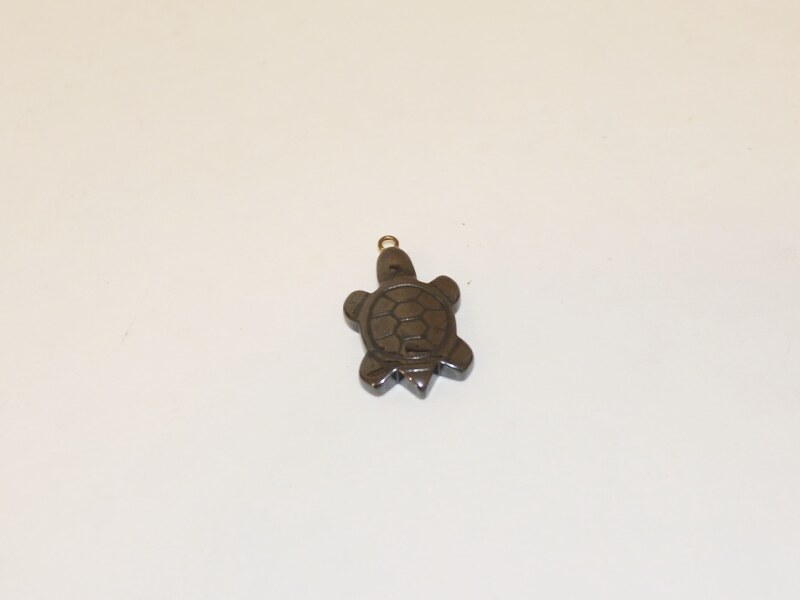
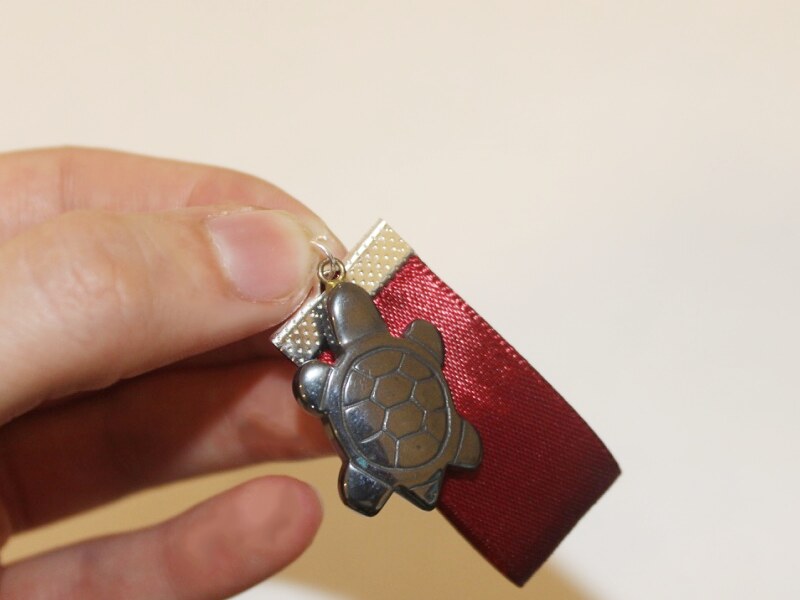
7: A charm of your choice. I used this hematite turtle charm.
Follow these steps to make your key chain:
1: After cutting your ribbon, fold it in half and use the flat nose pliers to squash the crimp end around the ends of the ribbon.
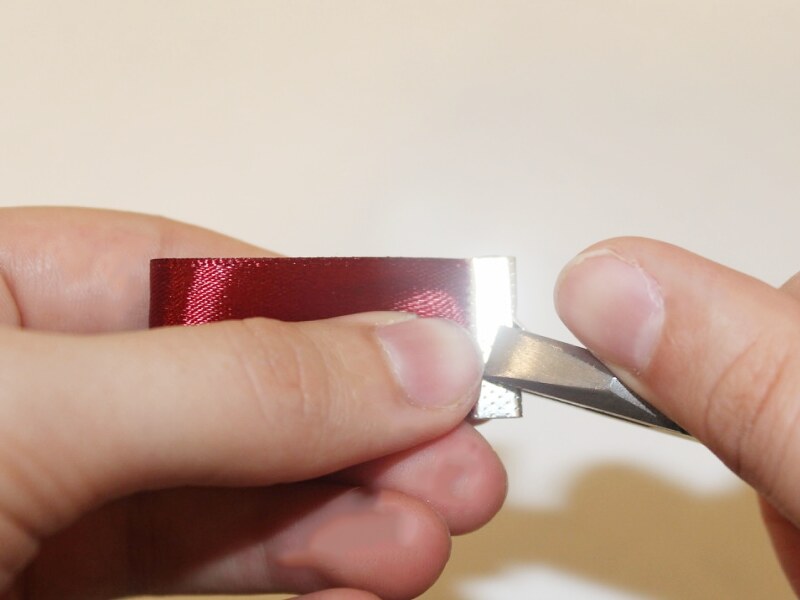
2: Add a jump ring to the top of the ribbon charm and add the charm to the open jump ring.
3: Attach the key chain to the jump ring.
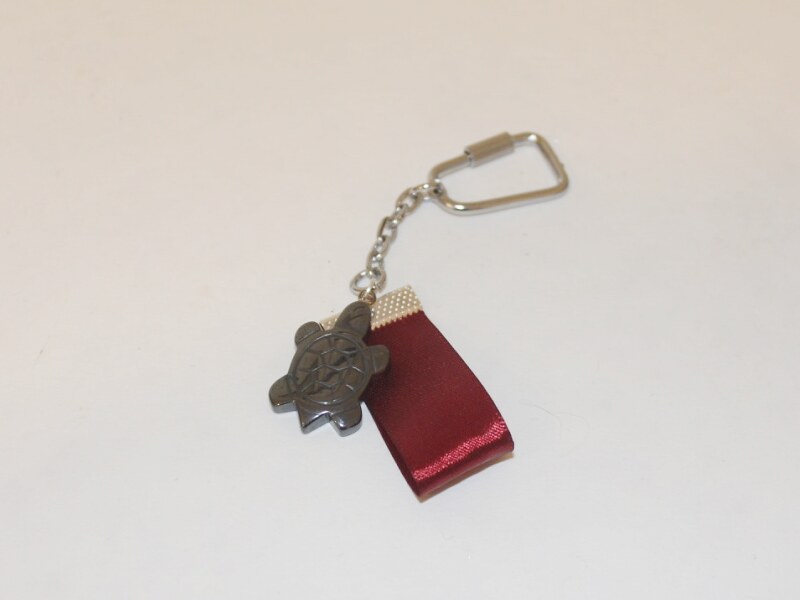
4: Now your key chain is finished and ready to use! Where will you attach it?!
You May Also Like

How to make a clip on beaded bag charm! This is such a fun project