-
Here’s how to add eclectic charms to a chain to make a unique necklace.
I love the look of eclectic charms on a necklace, so I decided to make a tutorial to show you how easy it is to make your own custom charm necklace design. Gather up some gorgeous vintage and new charms and pop them onto a lovely chunky chain.
Please note that this tutorial contains affiliate links for which we may receive a commission.
You’ll need these tools and materials to make your charm necklace:
1: A sterling silver chain with large links for you to attach your charms to.

You can get something similar here:
2: A selection of charms. I used some vintage charms in different materials that I have collected over the years. I also made sure I had matching jump rings made from sterling silver. I used 5 charms but you can add as many as you like.

Here’s something similar to the bird charm:
Shell charm:
Here’s an option, or…
Dolphin Charm:
Here’s a sterling silver version
Bead charm:
Quartz charm:
3: Flat nose and parallel pliers to open and close the jump rings.

You can get a pair here:

Get some parallel pliers here:
Now here are all the steps you need to follow to make your charm necklace:
1: Find the centre of the necklace and place your first charm in the middle. Attach it using your pliers to open the jump ring and then close it around the chain link.


2: Place the second charm a few centimetres (or around an inch) away from the first charm and attach it the same way you did the first charm.

3: Repeat step 2, adding the next charm to the other side of the first charm.

4: Do this again until all your charms have been added in the order you like.


Now your necklace is finished and ready to wear! So cute! I love this design so much.


Here’s what it looks like on!

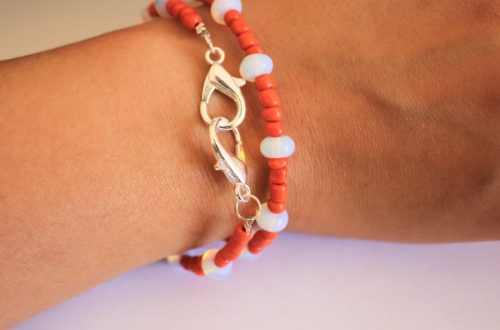
If you love this, here’s a charm bracelet tutorial you can follow to make something that matches!
-
Do you need more colorful jewelry in your life? Why not make this rainbow beaded choker with a feature pendant?

This choker necklace is super cool! Made with a rainbow of glass beads and a simple charm, it is sure to make an impact!
You will need the following tools and materials to make this choker necklace:
1: Pliers. You’ll need your flat nose pliers, round nose pliers and cutting pliers for this necklace.

2: Some tiger tail wire long enough to make a choker. Measure the length by wrapping the wire loosely around your neck. Make sure you leave enough length to allow space for securing the ends.

3: Four crimp beads.

4: Two small jump rings.

5: One bigger jump ring.

6: A lobster clasp.

7: Beads. I used these mixed glass beads in different colours.

8: A pendant. I used this pendant I made a while ago from a ring. Check out this tutorial to do this yourself.

Follow these steps to make your own colorful choker necklace:
1: Add two of the crimp beads to the end of the wire.
2: Fold the end of the wire around a jump ring and thread it back through the crimp beads.

3: Squash the crimp beads using the flat nose pliers.

4: Begin adding the beads to the wire. I added mine in random order.

5: Add the pendant. Depending on the size of your beads and the pendant bail you might need to add your pendant at half way so that it sits in the middle of your necklace when you wear it.

6: Add the remaining crimp beads and small jump ring to the end of the wire.
7: Fold the wire around the jump ring and thread it through the crimps and end beads.

8: Squash the crimp beads.

9: Trim the excess wire.


10: Add the lobster clasp to one end of the necklace, attaching it using one of the jump rings.
11: Add the larger jump ring to the other side of the necklace to finish it off.

Now your joyful beaded choker is ready to wear!


-
If you had a secret diary this lock and key tutorial is perfect for you!
For some reason I had a lock and key from my childhood diary lying around, so I decided to turn it into something nostalgic and wearable! This tutorial contains affiliate links.

You will need the following tools and materials to make your lock and key jewelry set:
1: Pliers. You will need your flat nose pliers and round nose pliers.

2: Two small pieces of chain.

3: One long piece of chain long enough to form a necklace.

4: Six jump rings.

5: A lobster clasp.

6: Two charm connector earrings.

7: Two keys and a lock. I used these ones from an old lockable diary.


Follow these steps to make your lock and key jewelry set:
1: Add a key to the end of each small piece of chain, securing them using two of the jump rings.


2: Add an earring finding to the top of the small pieces of chain using another two jump rings.


3: Now your earrings are finished, set them aside and start on the necklace!
4: Add the lock to the long piece of chain.

5: Add a jump ring to one side of the chain.
6: Add the lobster clasp to the open jump ring and close the ring to secure the clasp in place.

7: Add the other jump ring to the other side of the necklace chain to finish the necklace.
Now your lock and key set is finished and ready to wear! So cute!
-
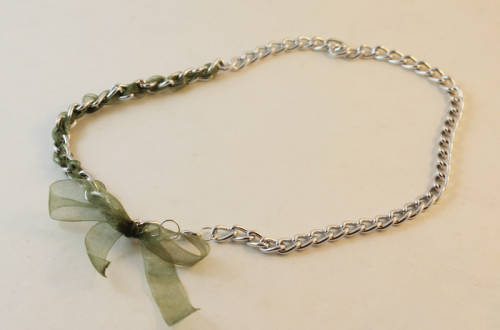
Sick of those delicate chains? Try making this cute cord necklace!
Sometimes you don’t feel like adorning yourself with delicate chains and dainty necklaces. Instead, sometimes you found yourself in the mood for a bolder choice. This cord necklace is simple to make but to great effect! Using some recycled cord and a couple of crimp ends you can make this great (and comfortable) necklace.
You will need the following tools and materials to make this cord necklace:
1: Pliers. You will need your flat nose and round nose pliers to make this necklace.

2: A piece of cord. I used this white cord recycled from a paper shopping bag.

3: Two flat crimp ends.

4: One large jump ring.

5: Two small jump rings.

6: Two small head pins.

7: One lobster clasp.

8: Beads of your choice. I used these glass beads (you’ll see that I had to swap my beads around because the first one I chose was too large)

Like the orange? Grab some orange beads here:
9: A charm of your choice. I used this blue shell star charm recycled from an old pair of earrings.

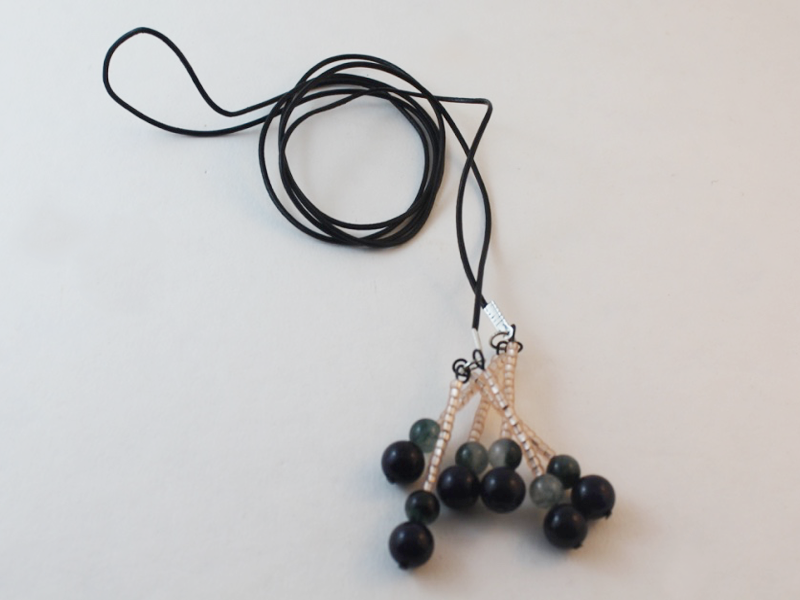
Follow these instructions to make your stunning cord necklace:
1: Add your chosen beads to each of the head pins.

2: Bend each pin at a right angle to the beaded section using the round nose pliers.

3: Once each pin has been bent, use the round nose pliers to form a loop at the top of each pin.

4: Open the jump ring at the top of your chosen charm. Add each of the bead charms and close the jump ring to secure in place (You’ll see here that I ended up swapping my beads around here).


5: Add all the charms to the large jump ring and close it to secure it in place.

6: Slide the large jump ring with the charms onto the piece of cord.

7: Once the charm is in place, take one of the flat crimp ends and place it carefully on one of the cord ends.

8: Use the flat nose pliers to secure the first flat crimp in place.


9: Repeat steps 7 and 8 for the second crimp at the other end of the cord.

10: Add a jump ring to both ends of the necklace on each of the crimps.
11: Keeping on of the jump rings open, slide on the lobster clasp and close the ring again to secure it in place.

12: Once the clasp is in place your necklace is finished! How easy was that?


Here are some other examples of necklaces made using cords and ribbons secured with flat crimp ends.


-
How to Make a Bar Charm Necklace… You know you want to try it!
I’ve seen a lot bar charm necklaces around on Instagram, so I thought I would show you how to make one. The steps for to make this necklace are very similar to the bar charm bracelet tutorial, the only difference here is that the pieces of chains are longer! Making this necklace is really easy, add your own personal touch by using some funky beads or semi precious gemstones to jazz up your charm.
You will need the following tools and materials to make this necklace:
1: Pliers.
To make this necklace you will need to use the round nose pliers and flat nose pliers.
2: One eye pin.

3: Two pieces of chain.
I reused some chain from a previous project so my chain already had the jump rings attached. These pieces were approximately 21cm long (8.5 inches).

4: Two jump rings.

5: One clasp.

6: Beads of your choice.
For this design I used these peridot chip beads.

The Steps:
1: Add the beads to the eye pin. Keep adding beads until the there is approximately 1cm (0.4 inches) of the pin left uncovered.


2: Once you have finished beading, use the round nose pliers to bend the pin at a right angle to the beaded section.

3: Now use the round nose pliers again to create an open loop. Leaving the loop slightly open allows you room to slide on the chain.

4. Slide on the chain and close the loop again using the round nose pliers.

5. Now you should have one side of the charm attached to one chain.

6. Repeat Step 4 for the other side of the charm. Opening the loop slightly using round nose pliers, attaching the chain and then closing the loop again.

7. If you don’t have your jump rings already attached to the ends of the chain, use the pliers to open them and slide them onto the last chain loop. If they are already attached like mine are, open one jump ring using your pliers and slide the clasp on.


8. Close the jump ring again using the round nose pliers.

9. Once the clasp has been attached your necklace is complete!