Add some edge to your look with this leather wrap necklace

Are you interested in the current choker trend but don’t want to look like everyone else? Why not try making this edgy leather wrap necklace? This necklace is super simple to put together but it sure does make a statement. Add a bead tassel to each end and you’ll be onto a winner. (I will say, be careful wearing this piece, it could tighten and start to become uncomfortable around your neck depending on how you wear it).
You will need the following tools and materials to make this leather wrap necklace:
1: Pliers. You will need your round nose pliers, flat nose pliers and cutting pliers.

2: Leather cord. The cord should be long enough to wrap comfortably around your neck and hang down your front.

3: Two leather crimp ends.

4: Two jump rings.

5: Six head pins. I used these black painted head pins but you can use any color you like.

6: Beads of your choice. I used some blue goldstone beads, some green gemstone beads and pink glass seed beads.


Here are the instructions to make this cool leather wrap necklace:
1: Start adding beads to each of the head pins.


2: Once all of the beads have been added to each head pin, use the round nose pliers to bend the top of each pin at a right angle to the beaded section.


3: Create a loop at the top of each head pin using the round nose pliers to secure the beads in place.


4: Once all your pin charms have been completed you can trim the leather cord if you need to.
5: Take one of the leather crimp ends and squash one side around one end of the leather cord using the flat nose pliers.


6: Squash the other side using the flat nose pliers and secure the leather crimp end in place.


7: Repeat steps 5 and 6 for the other end of the leather cord using the remaining leather crimp end.

8: Add a jump ring to one of the leather crimp ends.

9: Add three beaded charms to the jump ring and close them to secure them in place.


10: Repeat steps 8 and 9 for the other side of the necklace.

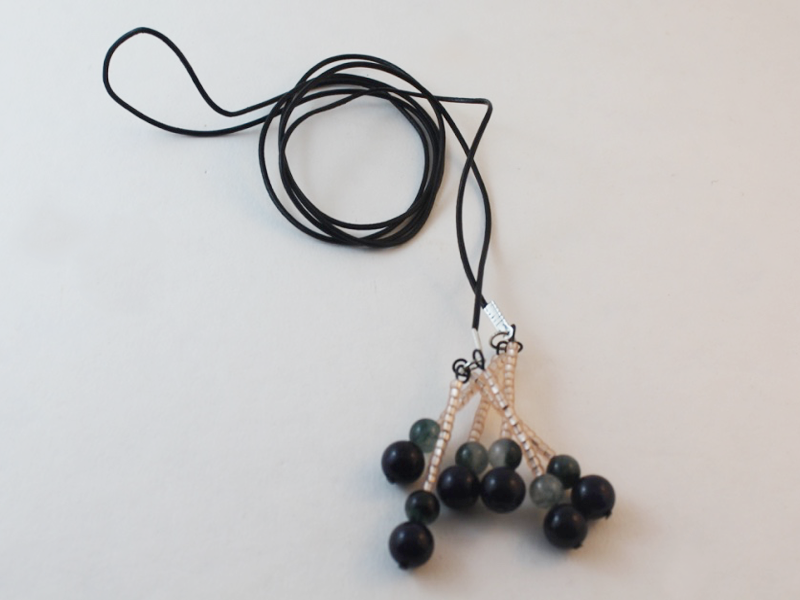
11: Once all the beaded head pins have been secured in place your necklace is done. Have fun and make sure that you don’t let your necklace get too tight around your neck!
DIY Jewelry Hub
Welcome to DIY Jewelry Hub. If you’ve ever wanted to learn how to make your own jewelry this is the place to start! Jewelry is a great way to show off your individuality and style. You’ll be surprised at how easy it is to create your own unique pieces! DIY Jewelry Hub will equip you with all the knowledge and inspiration you need to make your own jewelry.


You May Also Like

How to make a double-strand knot necklace.

DIY Beaded Necklace Tutorial: Creating a Stunning Strand for Silver Pendants
