-
Do you love a waist chain? Here’s how to make one with an extra loop feature.
This design is really cool! I think chain belts or waist chains are a really fun way to add some 80s glam to your favorite dresses or skirts. Please note that this tutorial contains affiliate links.
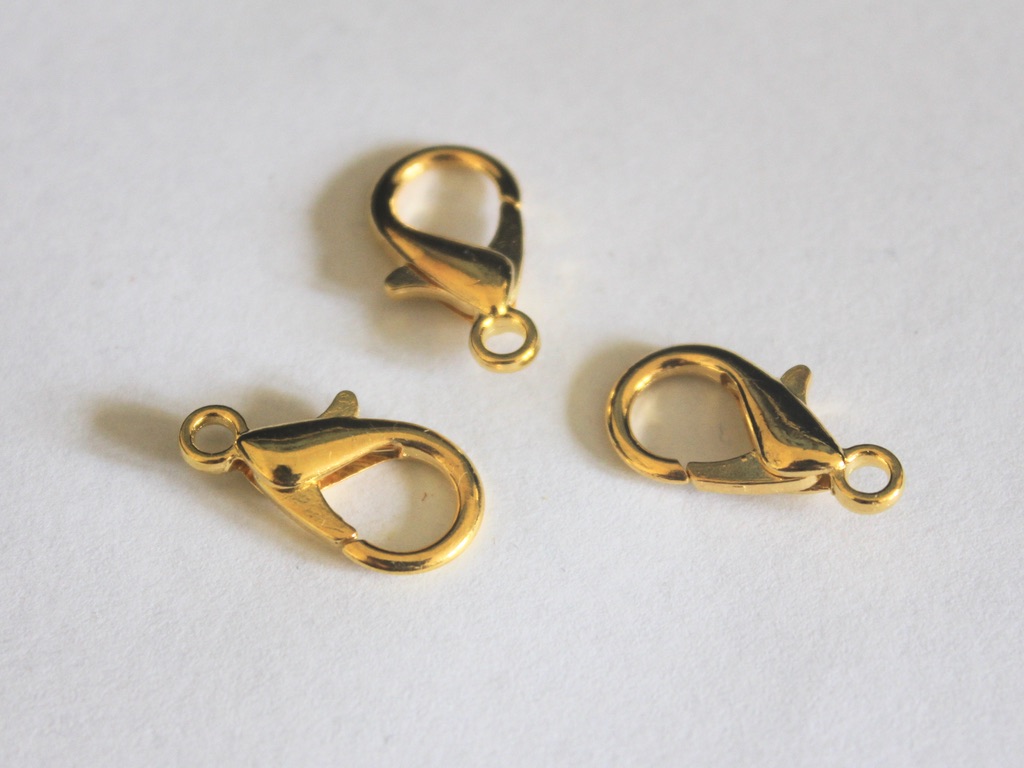
You’ll need the following tools and materials to make your looped chain:
1: A length of chain long enough to fit around your waist with a little extra (approximately 20cm) to spare.

2: Three large jump rings.

3: A large lobster clasp.

4: Pliers. I used my round nose and flat nose pliers to make my chain belt.


Follow these steps to make your chunky waist chain:
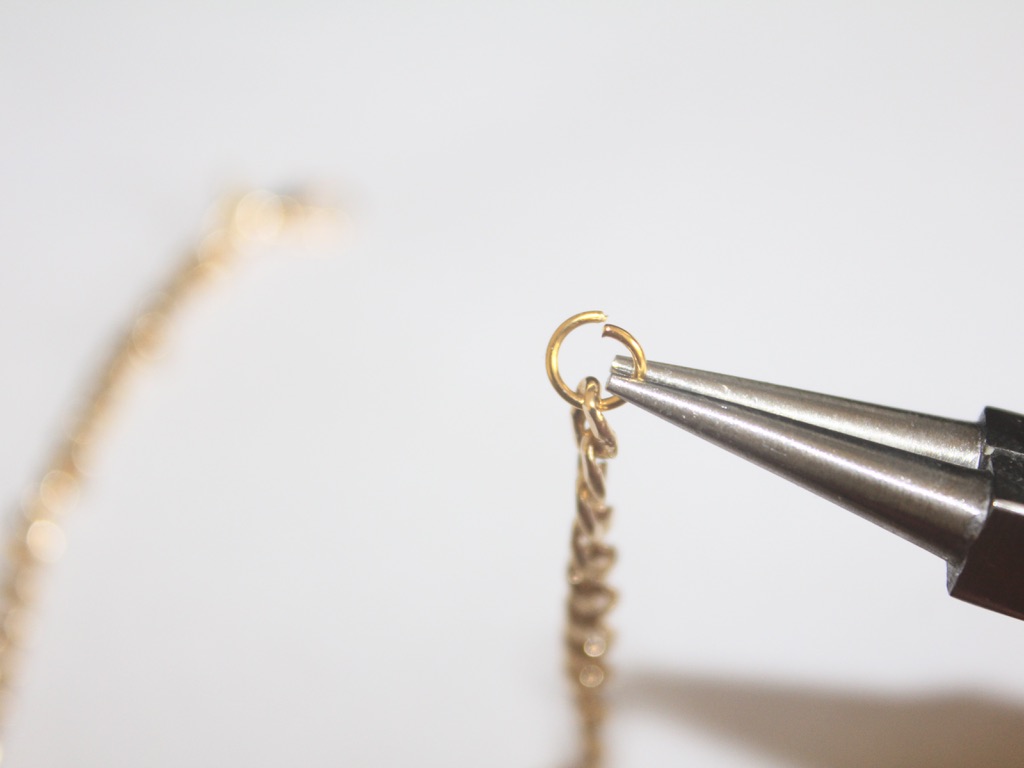
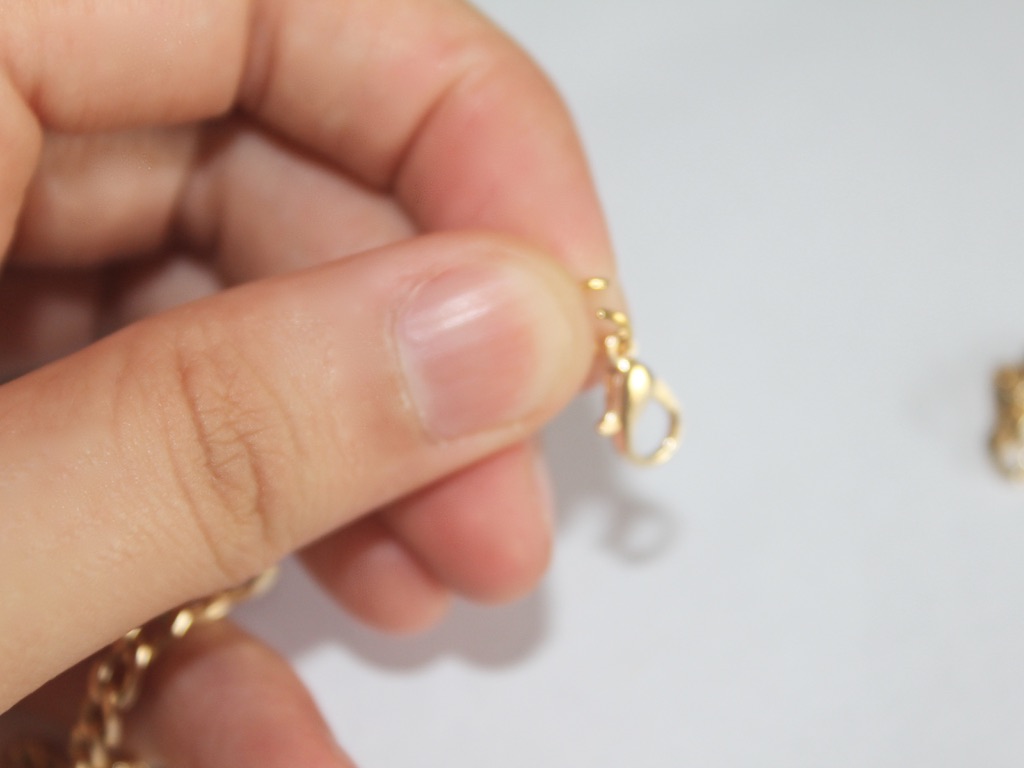
1: Add a large jump ring and lobster clasp to one end of the chain.


2: Wrap the chain around your waist and find the point where it fits.

3: Add another jump ring to the point where the chain fits your waist, you should have some extra chain that dangles beyond this point.


4: Take the extra bit of chain and fold it back towards the long waist part of the chain.
5: Take the last jump ring and use it to attach the end of the chain to the main waist part of the chain to form a loop. Once this extra part of the chain is secured your looped waist chain is ready to wear! So so cute!


Here are some of our other body chain tutorials:
-
How to make a double-strand knot necklace.
This one didn’t really turn out how I had anticipated, but I thought I would share it with you anyway. I had more success making two beaded strands to knot together compared to this design that knots together a beaded strand with a chunky chain. If you don’t want the chain just make one bead strand and knot it loosely in the middle for a cool knot necklace look! This tutorial contains affiliate links.
You’ll need the following tools and materials to make your double-strand knot necklace:
1: Tiger tail wire. Make it a little longer than the chain you are using.

2: Four crimp beads.

3: Pliers. I used cutting, flat-nose and round-nose pliers.

4: A length of chunky chain.

5: Two jump rings.

6: A lobster clasp.

7: Beads. I used some blue plastic beads and some green glass beads.


Follow these steps to make your two-strand knot necklace.
1: Add the crimps to one end of the tiger tail wire.

2: Add the jump ring and loop the end of the wire around it and back through the crimp beads.

3: Squash the crimp beads using the flat nose pliers.

4: Begin adding the beads in your chosen pattern.


5: Bead until it is at your desired length.

6: Add the second pair of crimp beads to the wire and repeat steps 2 and 3 to secure the beads onto the strand.


7: Trim the excess wire using the cutting pliers.


8: Add the chain to the bead strand by opening the jump rings at either end of the necklace and adding the ends of the chain.


9: Add a lobster clasp to the necklace.


10: Tie the strands into a loose knot that sits at the centre of the necklace opposite the lobster clasp closure.

Now your necklace is finished and ready to wear! Like I said, the chain looks a bit weird on this one, so you can leave it out if you like. You could also make the double strand necklace and skip the knot!

You can make this necklace with materials you already have, but if you need some new supplies this tutorial contains affiliate links.
-
Ankle wear is cool! Here’s how to make a wrap anklet with clip on charms.
This anklet is so cool! It is made from chunky chain that wraps twice around your ankle and has three cute clip on charms. This is sure to keep you busy for a little while, make tonnes of charms so that your ankle feels fancy!
You’ll need the following tools and materials to make your wrap anklet with charms:
1: A length of chain long enough to wrap twice around your ankle.

2: Two medium sized jump rings.

3: A small lobster clasp.

4: Three head pins

5: Three large jump rings.

6: Three large lobster clasps.
7: Beads. I used these resin beads with some green glass beads.

8: Pliers. I used cutting pliers, round nose pliers and flat nose pliers.
Here are the steps to make your wrap anklet with clip on charms:
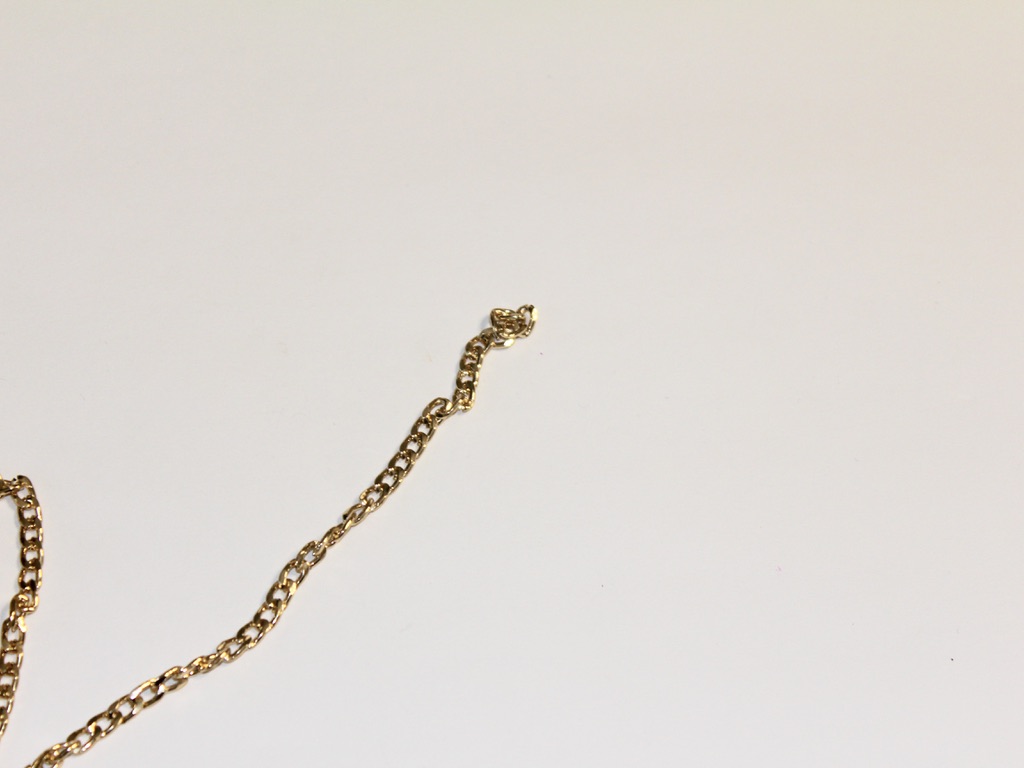
1: Add jump rings to either side of the length of chain.
2: Before closing one of the jump rings add the small lobster clasp. You can set the chain aside for a moment at this stage.

3: Add the beads to each of the head pins.


4: Bend the pins at a right angle and trim them so that there is only approximately 1cm exposed.


5: Loop the tops of each pin using the round nose pliers to secure the beads on the pins.


7: Add a jump ring to each charm.
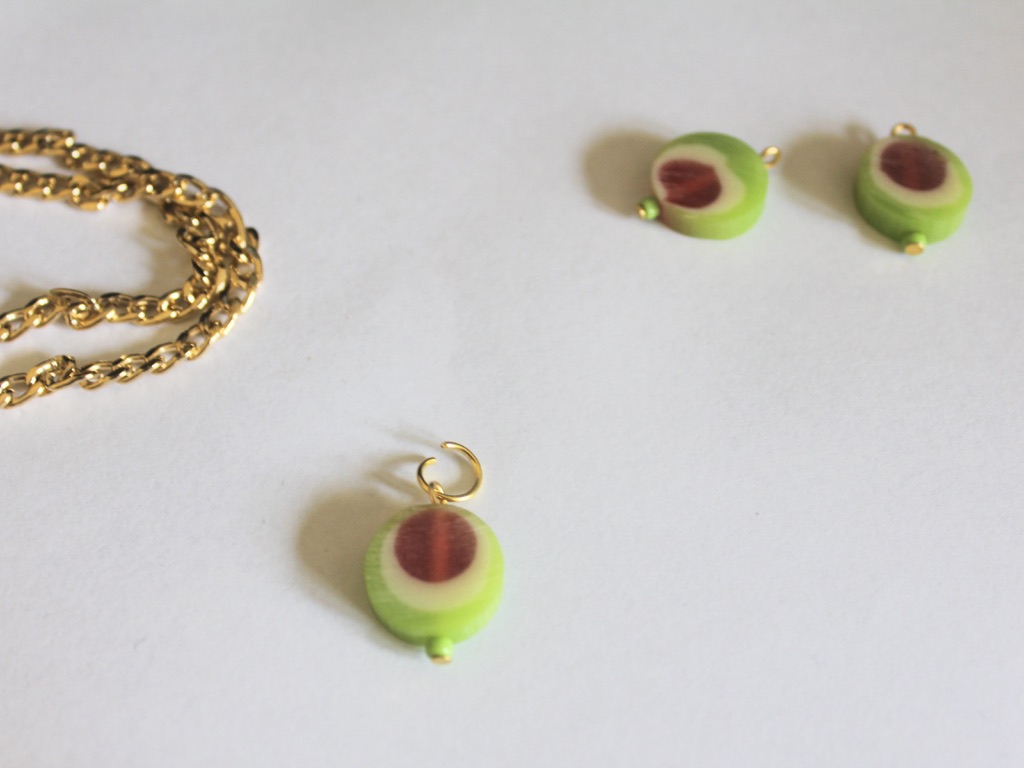
8: Attach each of the charms to each of the large lobster clasps and secure them by closing the jump ring.

9: Attach the charms to the chain wherever you choose. Now your anklet is finished!

Here’s what the finished product looks like on.

This tutorial contains affiliate links.
We have lots of other anklet DIYs you can follow if you want to shine up your ankle game:
- This fully beaded charm anklet
- Simple chain anklets that feature cool tube beads
- Chain anklets with cute charms
- A Gemstone embellished chain anklet
- Why not make a leather and bead charm anklet?
- Braid up this string and bead anklet
- Double chains for this anklet
- Recycle broken headphones to make this anklet
- Here’s how to add shell charms to a chain anklet
- Love charm connectors? Add one to a delicate anklet
- Construct a beaded chain anklet
- Add some fun to your ankle with this pearl beaded anklet
- Finger knit this bohemian shell anklet
- Use recycled shopping bag cords to make this anklet
-
Want a cute new ring? Here’s a super easy way to make one out of chunky chain.
Are you ready for a super simple DIY? Make this chunky chain ring! I keep reading over and over that chunky chains are trendy right now. This ring tutorial is a fun way to dip your toe into this fun new jewelry trend.
You’ll need just a few tools and materials to make this cool chain ring:Pliers. I used my round nose and flat nose pliers.
1: Pliers. I used my round nose and flat nose pliers.
2: Some chunky chain
Now you can make your ring:
1: Wrap the chain around your finger to get the right size.
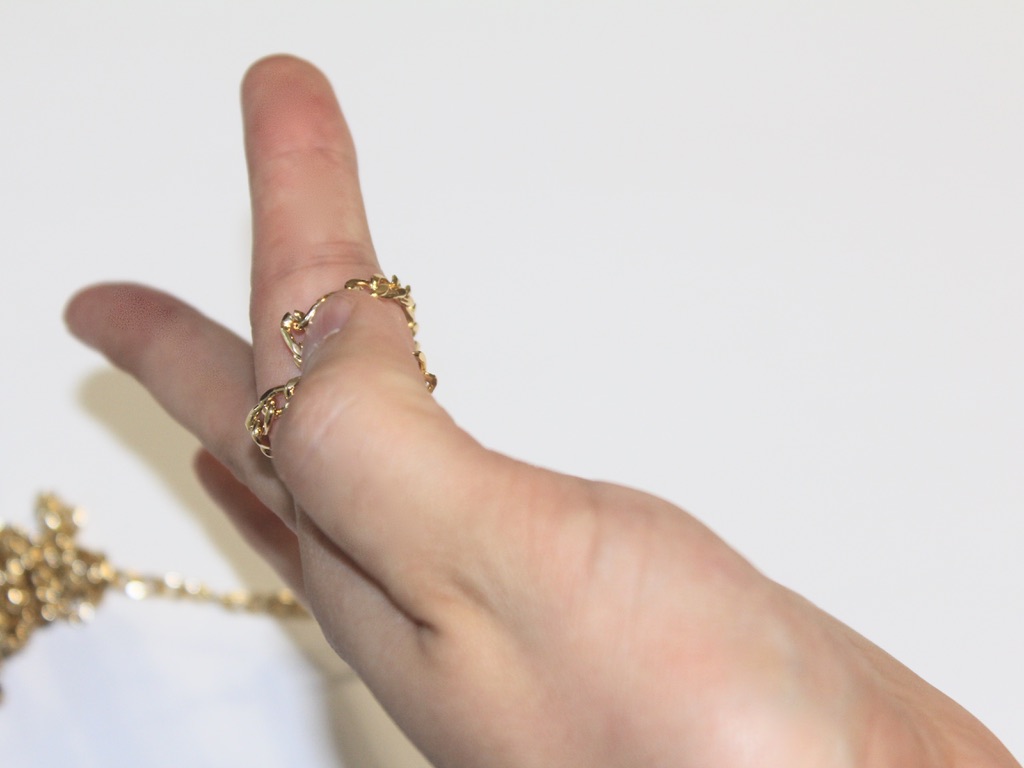
2: Open a link and detatch the short amount of chain that you measured out.
3: Form a loop and put the end link into the open one.
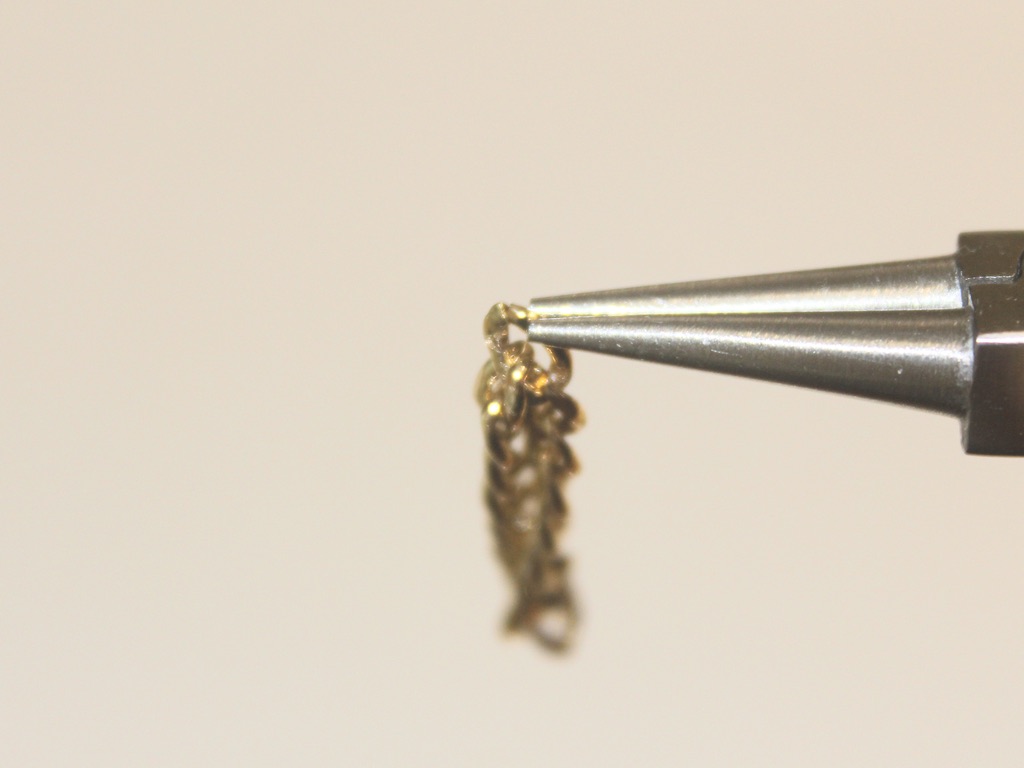
4: Close the link to form a circle.
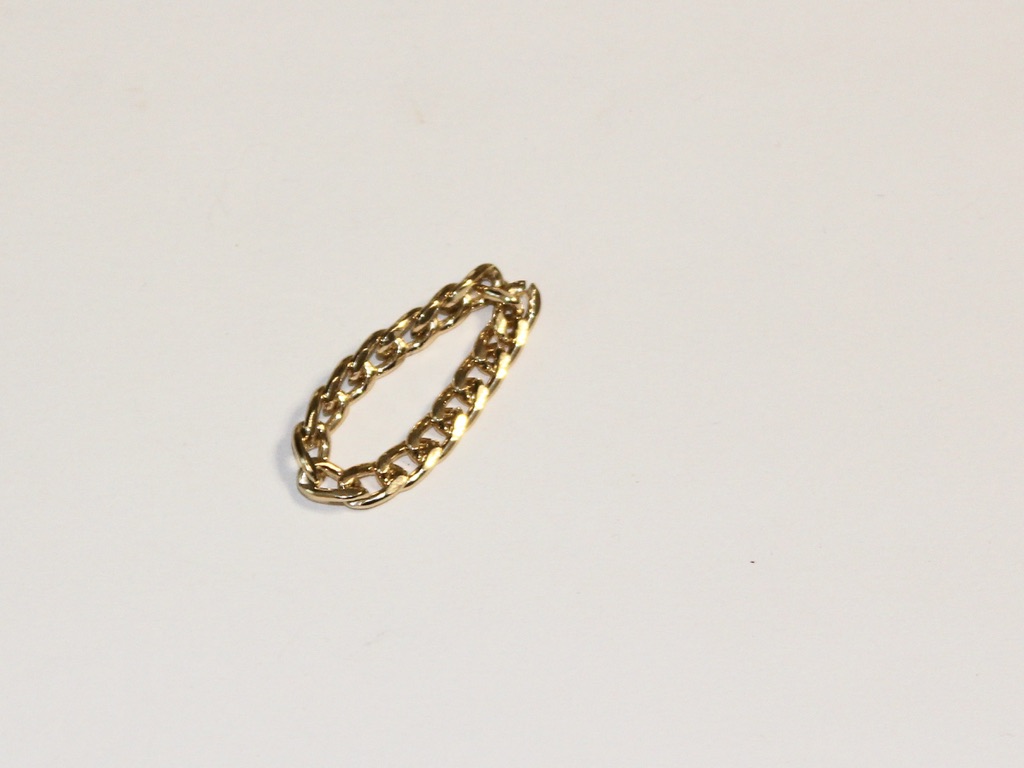
Now your ring is finished! How easy was that?
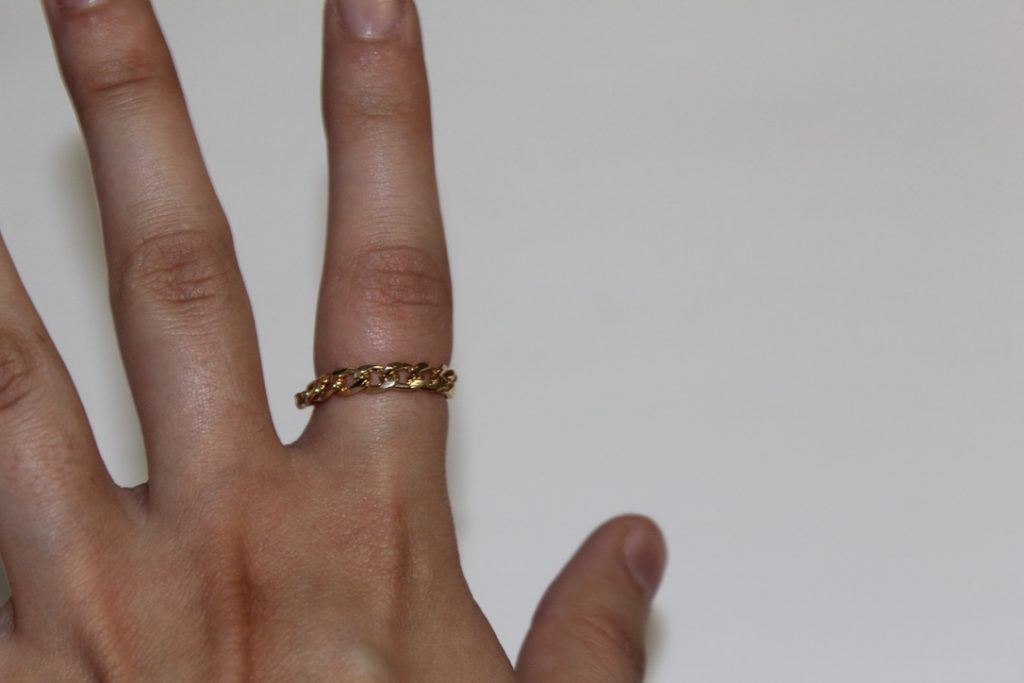
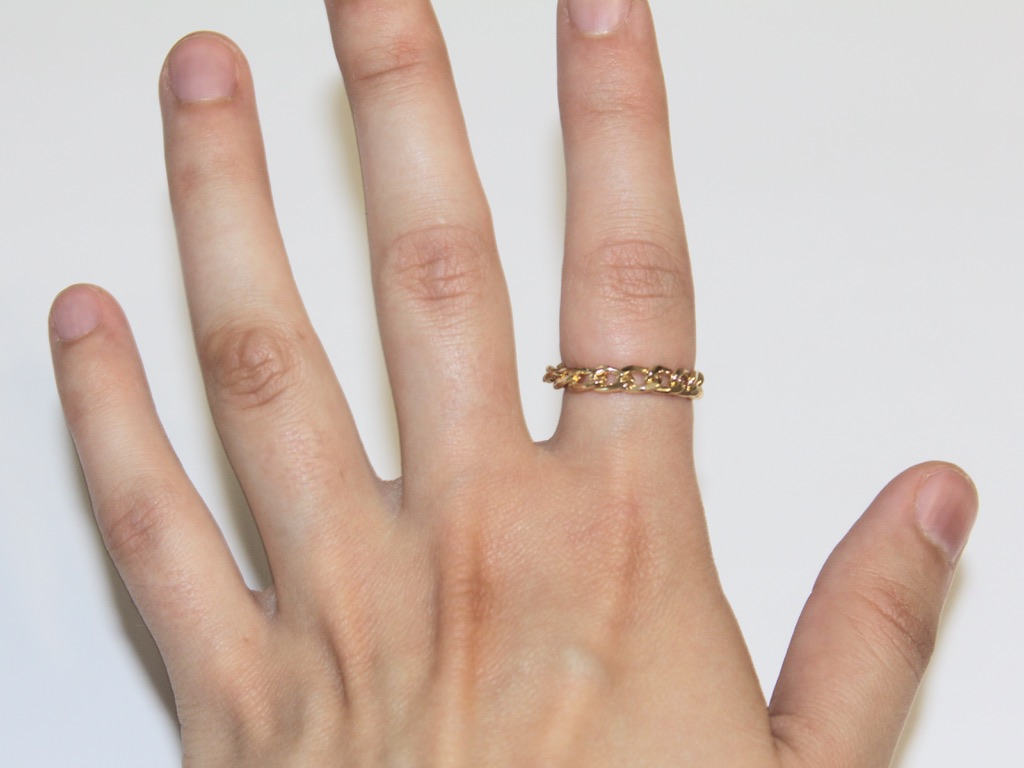
This tutorial contains affiliate links.
-
Do you want a quick DIY? Here’s how to make a simple and fast knot chain bracelet.

This DIY is super duper quick and easy, all you need to do is tie a knot in some chunky chain and add a clasp! So simple and cool. I think this bracelet would make a great gift for the minimalist jewelry lover in your life.
You’ll need to use these tools and materials to make your knot chain bracelet:
1: Pliers. Round nose pliers and flat nose pliers will be useful for this DIY bracelet.
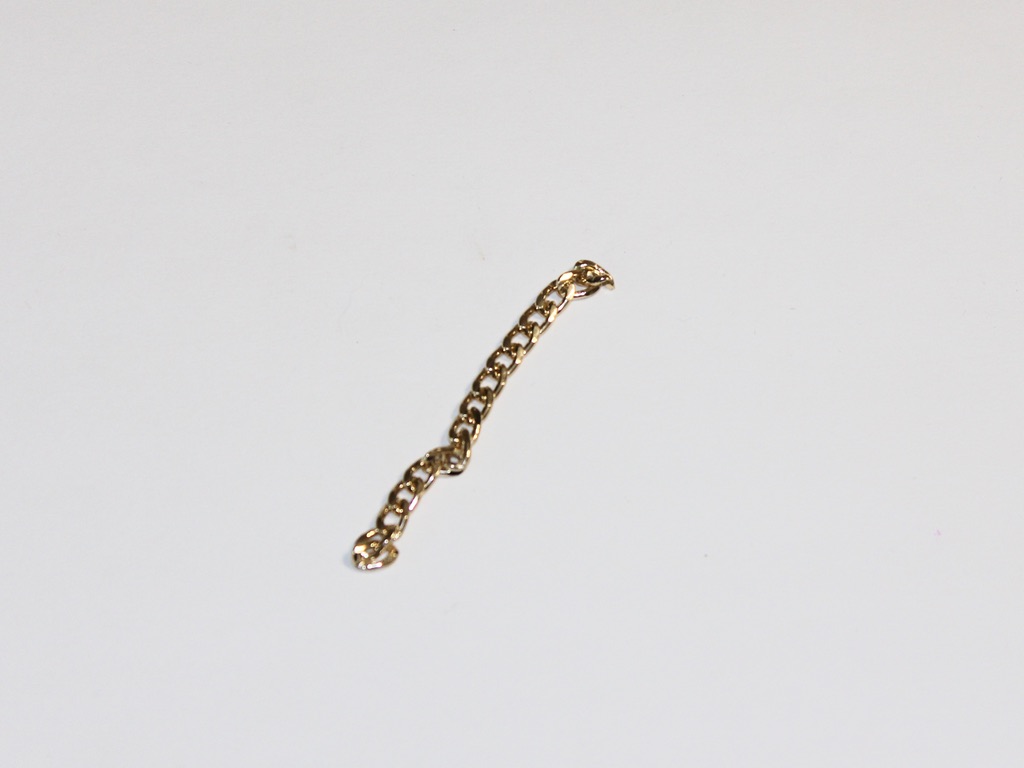
2: A piece of chain slightly longer than you would need to fit your wrist. I used this chunky gold chain.

3: Two jump rings. I used gold to match the chain.

4: A toggle clasp. I used a gold clasp to match the rest of my materials.

Now here are the steps to follow to make your knot chain bracelet.
1: Form a basic knot in the chain.
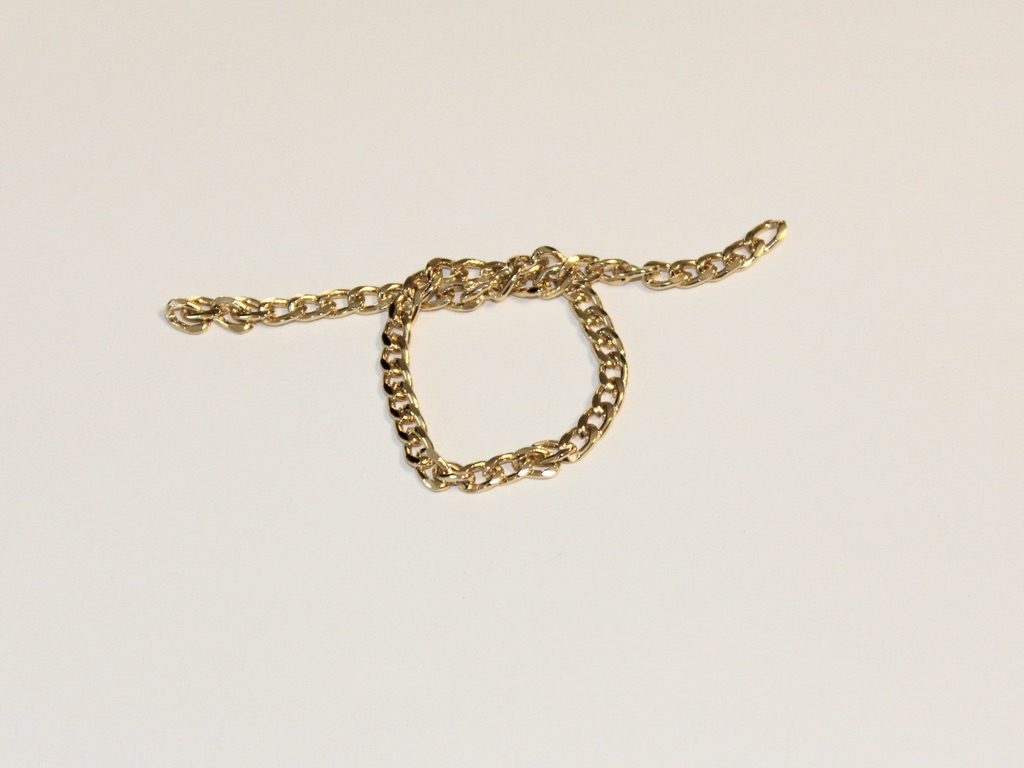
2: Pull the ends of the chain to tighten the knot. You might need to shift it slightly to make sure that the knot is in the middle.

3: Add one of the jump rings to one side of the knotted chain.
4: Add one side of the toggle clasp to the open jump ring. Close the jump ring using your pliers to secure the toggle component to the chain.
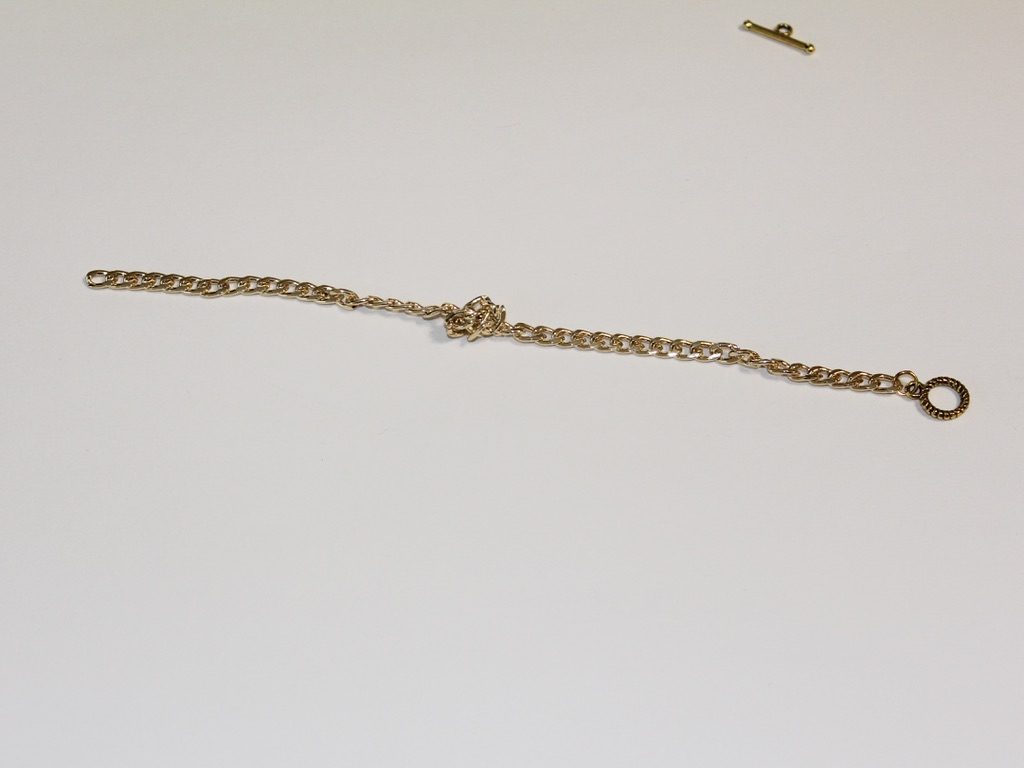
5: Add the other jump ring to the other side of the chain and attach the remaining toggle clasp component.
6: Close the second jump ring to secure the second part of the toggle clasp. Now that the clasp is in place your knot chain bracelet is ready to wear!

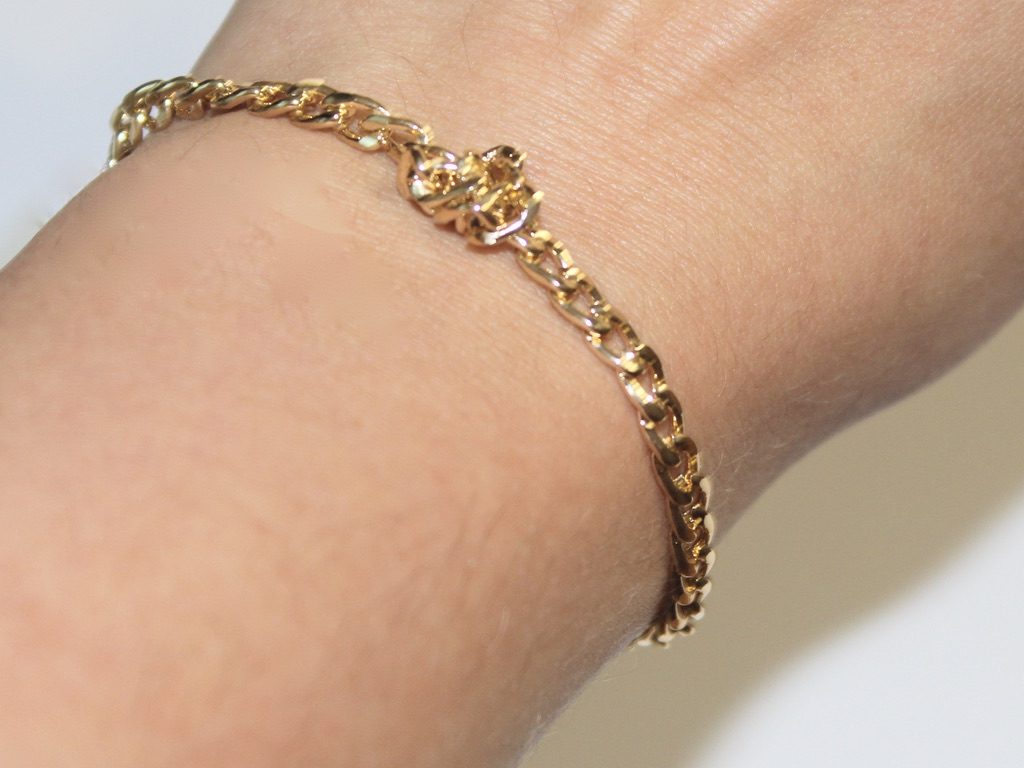
So cute!!!!! How perfect is this DIY for when you need a new accessory ASAP?!

Here are some other chain bracelet tutorials:
- A beaded chain bracelet
- Double chain bracelet
- Bead and chain bracelet
- Bar charm chain bracelet
- Velvet and chain bracelet
- Chain charm bracelet
This tutorial contains affiliate links.


