-
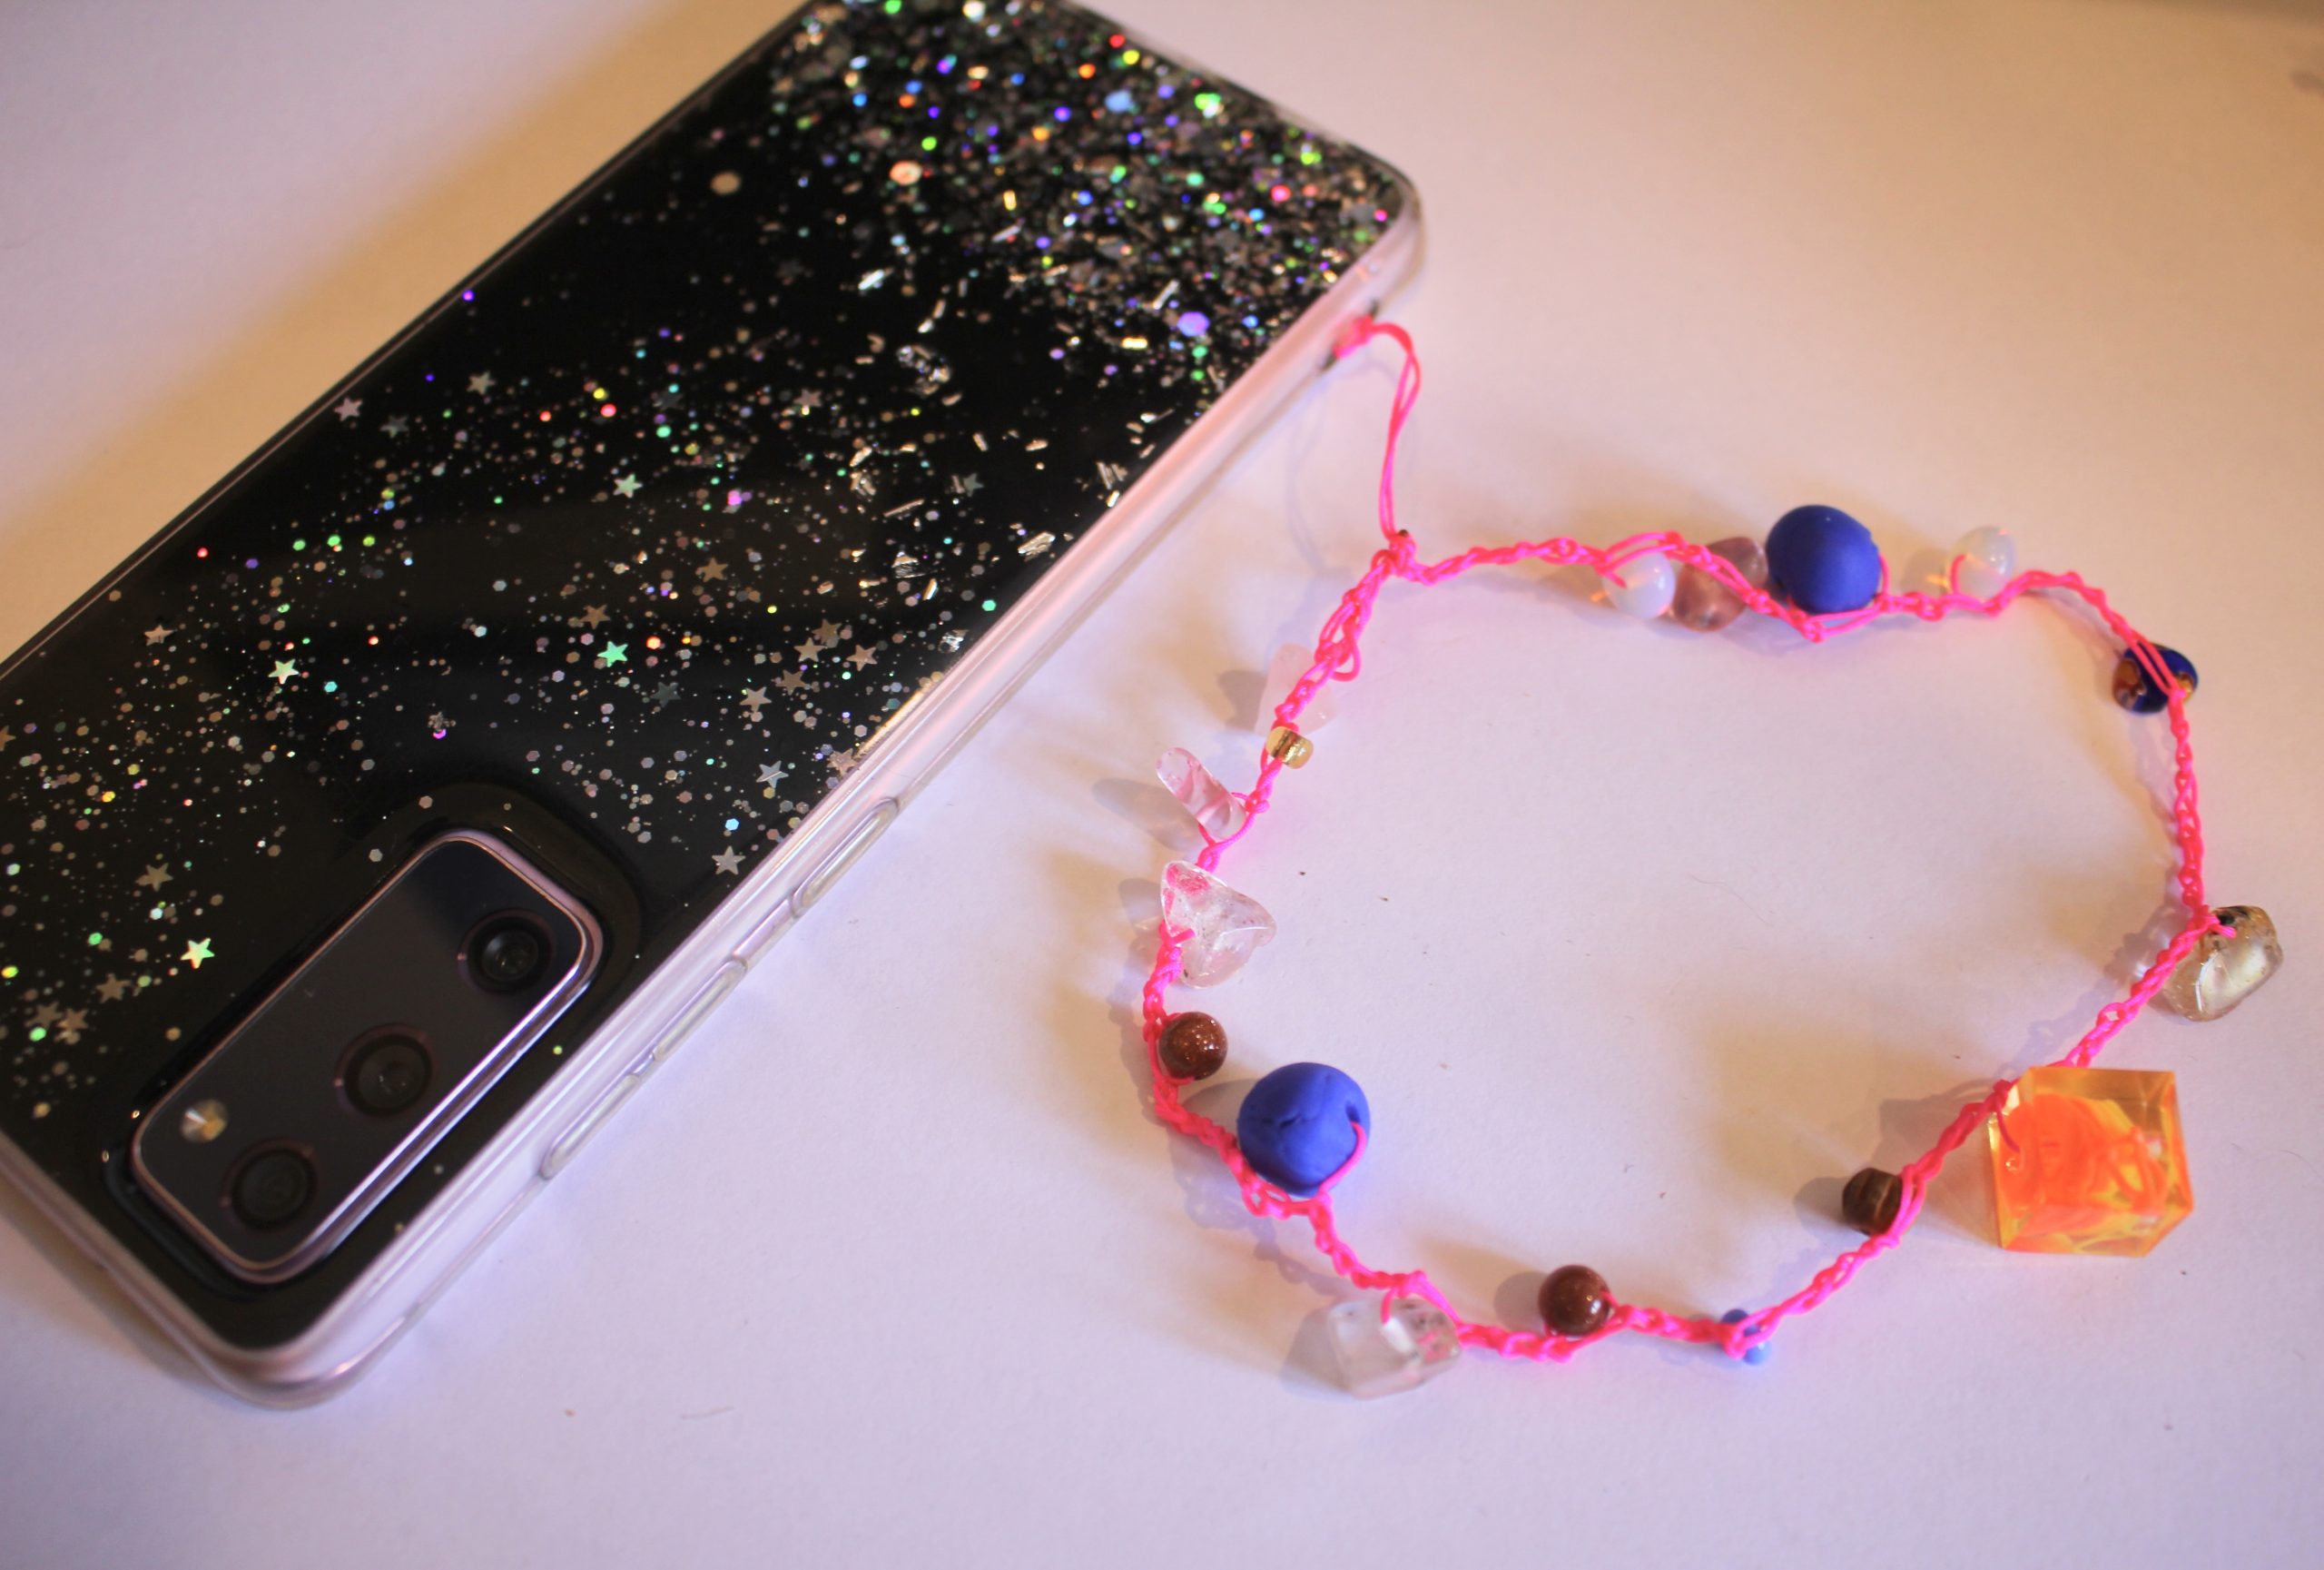
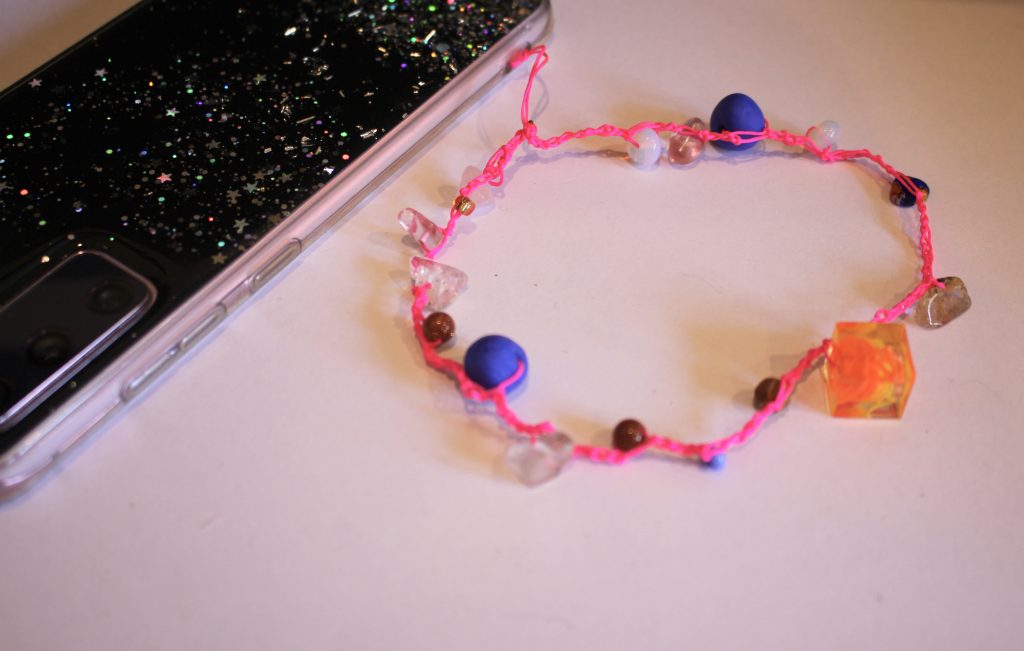
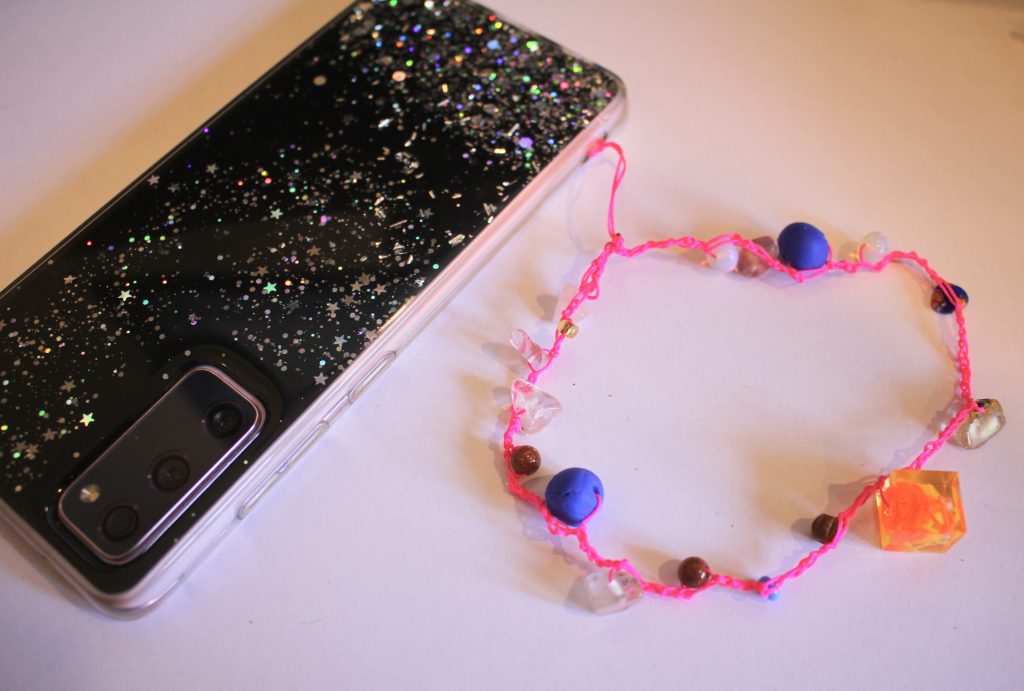
This one is fun! Here’s how to make a crochet phone strap with beads.
I made myself one of these before a recent trip and found it so handy! No dropping your phone when you’ve got one of these on. This phone strap features a range of colourful beads threaded onto some vibrant thread. Perfect for showing your personal style. What colours will you make yours in?
Please note that this tutorial contains affiliate links.
You will need the following tools and materials to make your phone strap:
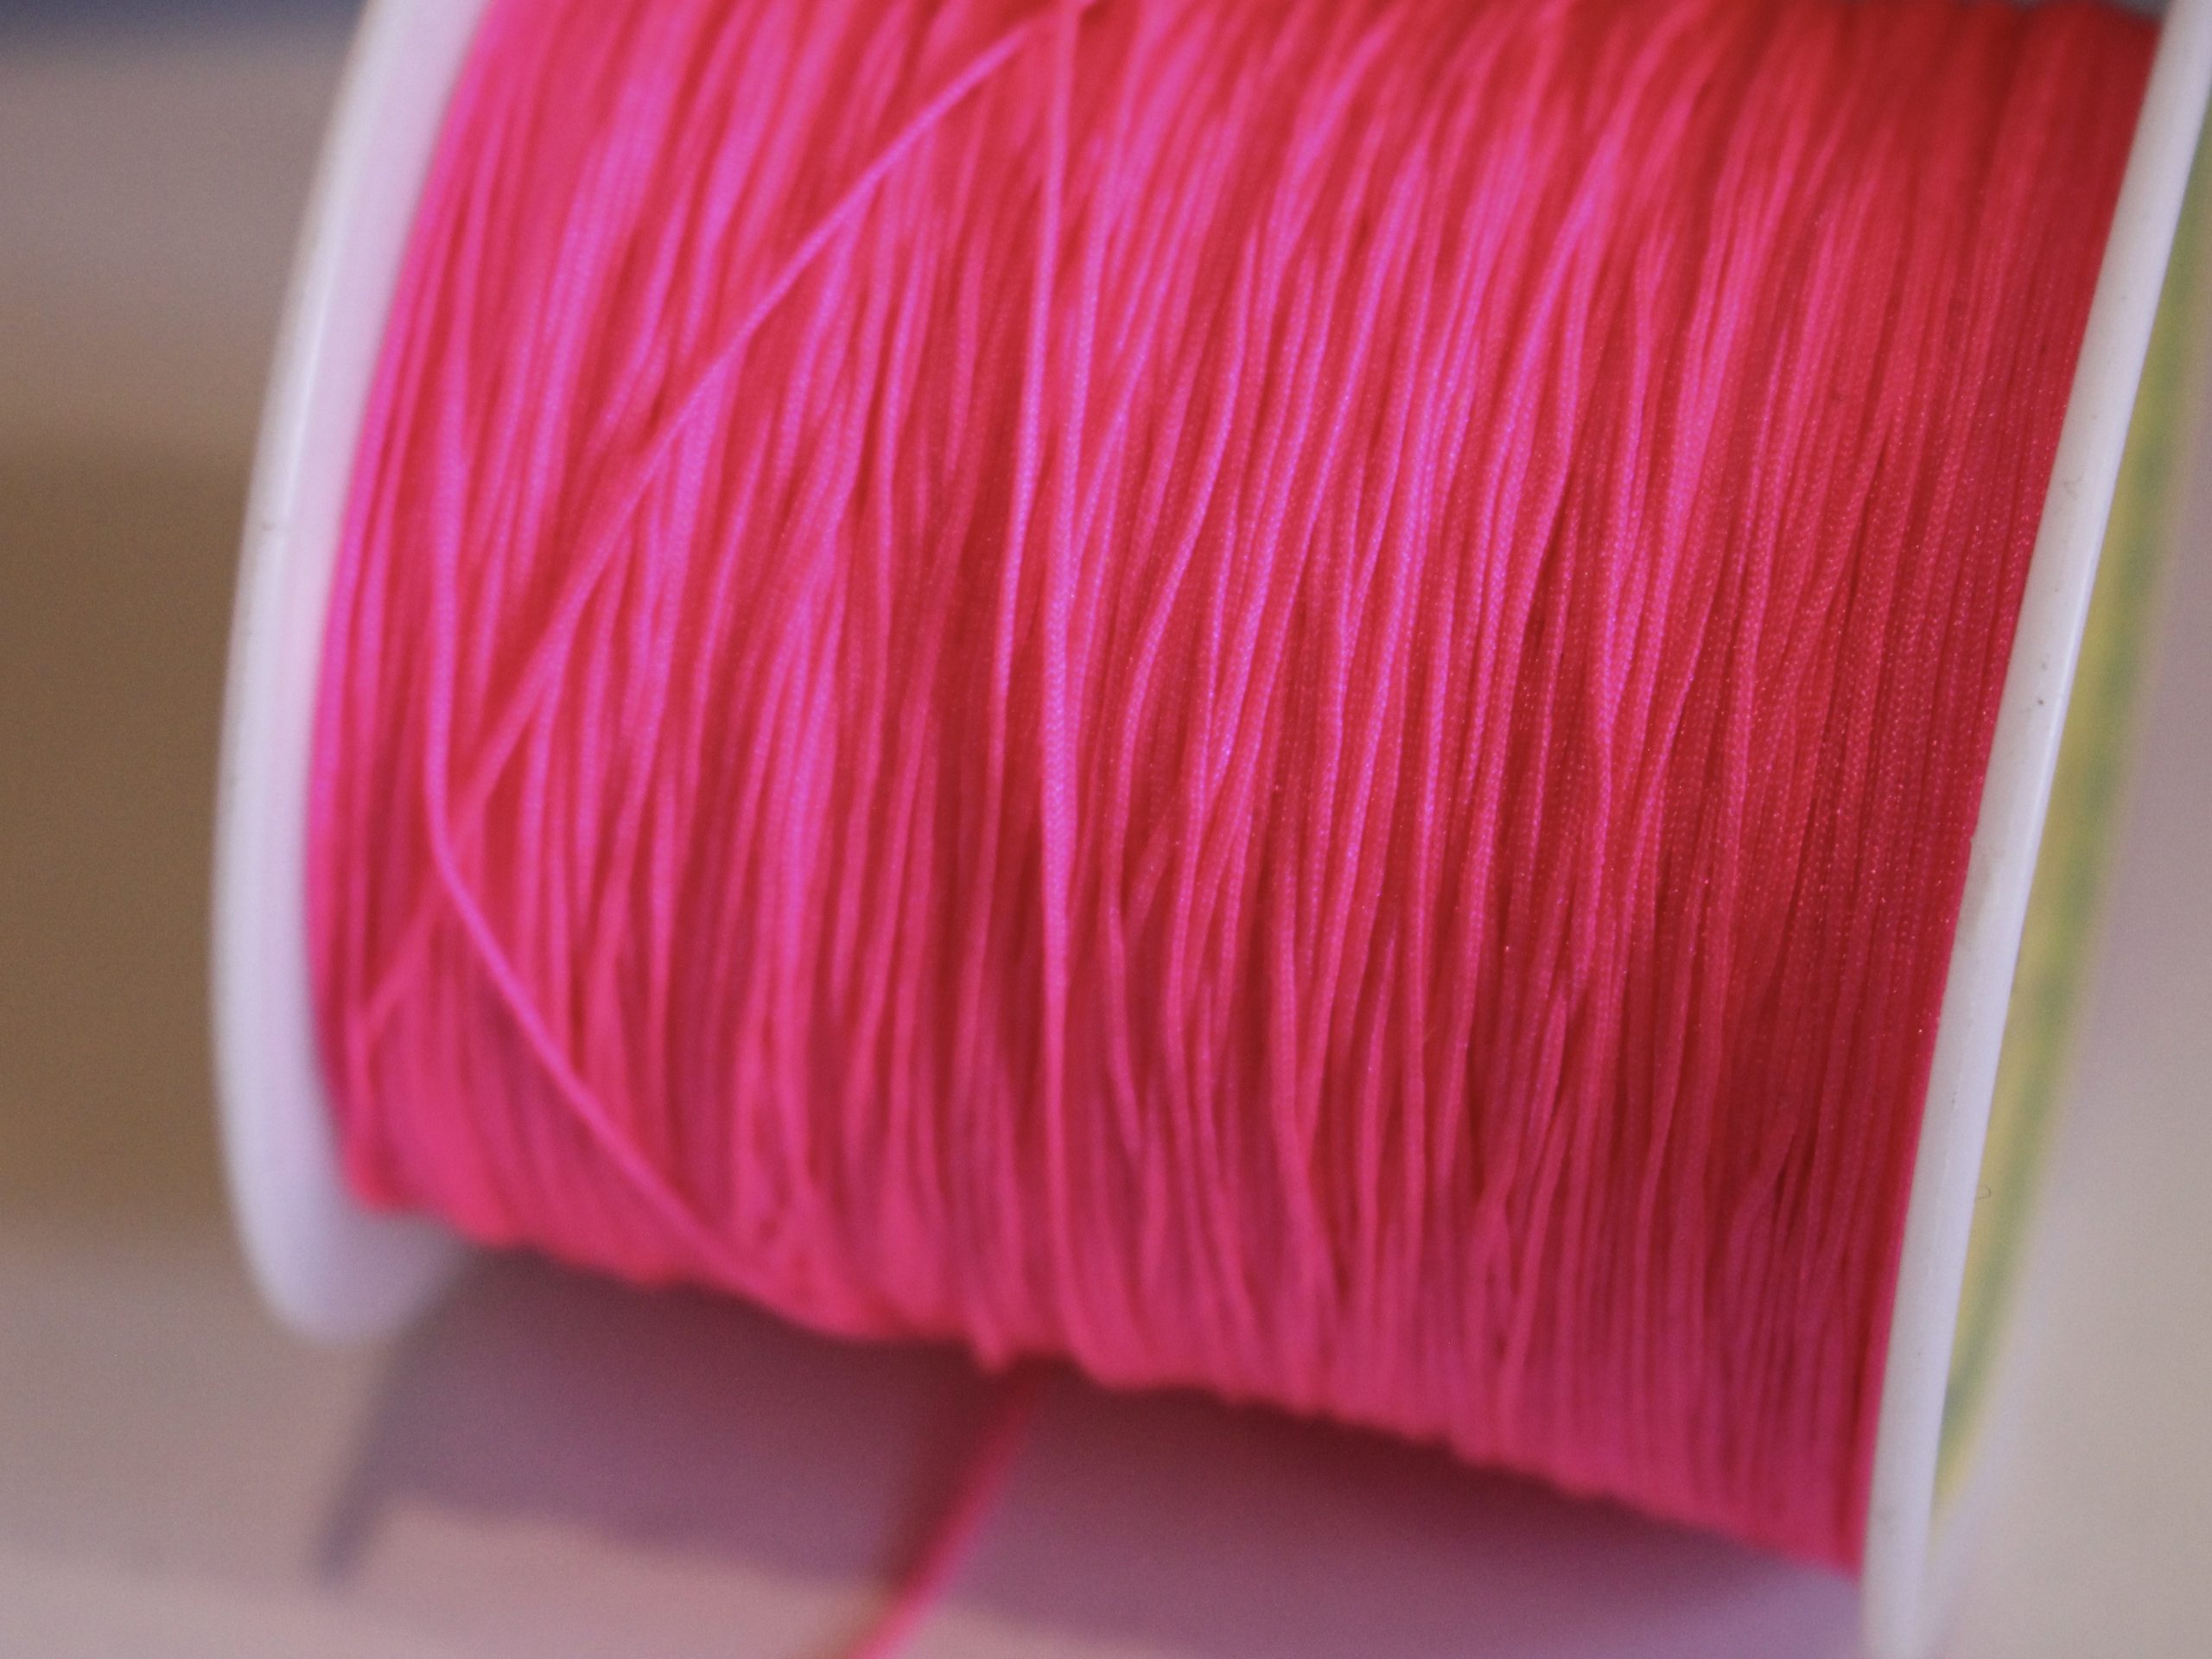
1: Thread. I used this pink nylon thread. Make sure it is thin enough to fit your beads but not too thin.

2: A pair of scissors.

Get some here:
3: Beads. I used a random selection of beads from my collection in a mixture of materials including glass, plastic and timber.
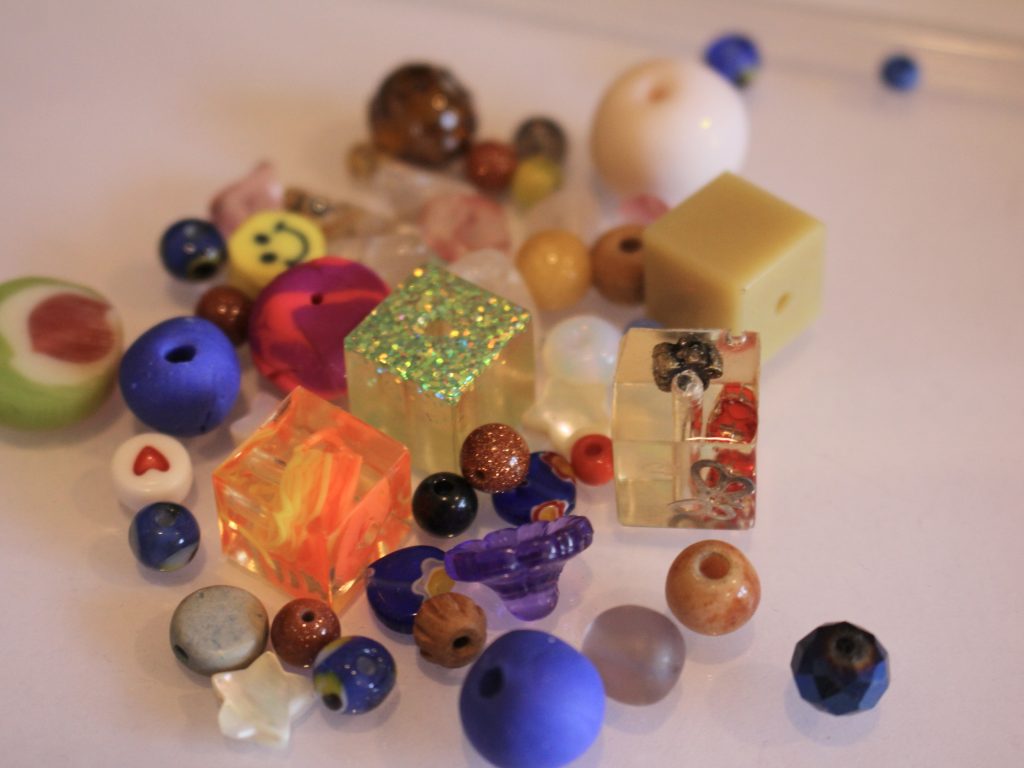
You can get pre-mixed beads here:
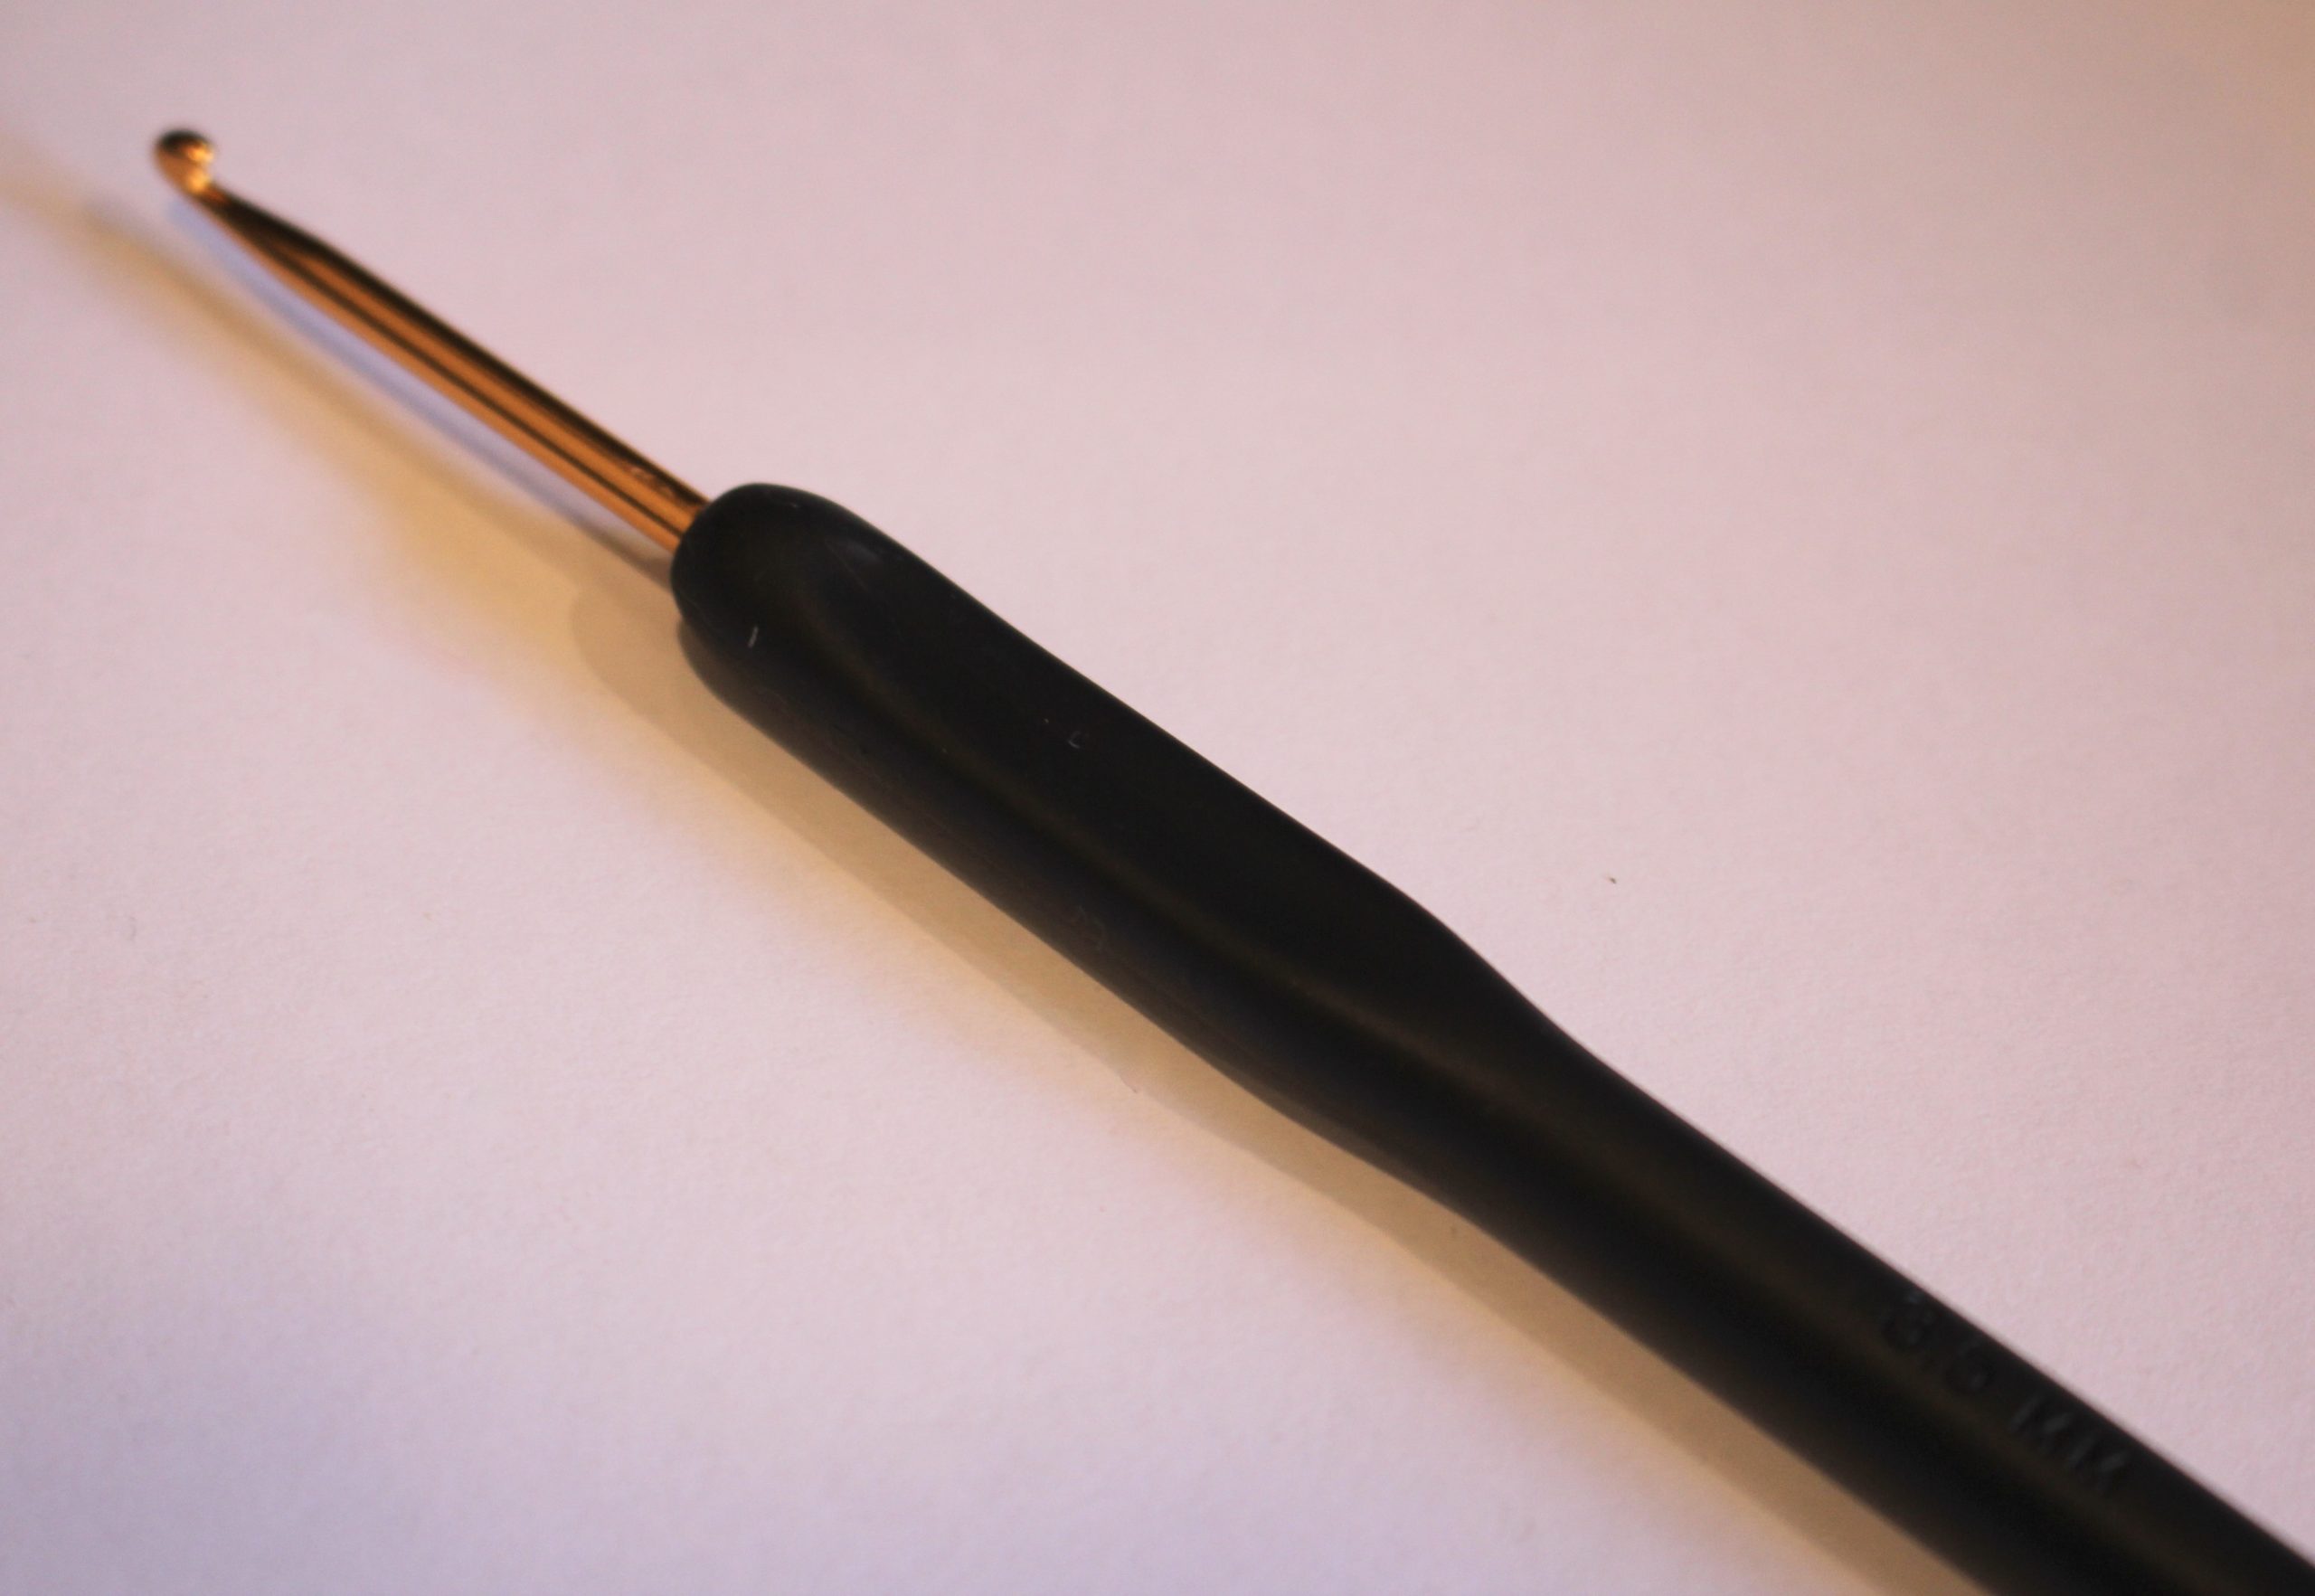
4: A crochet hook. I used a 3.5mm crochet hook.

You can get a crochet hook here:
5: Some superglue to secure the knots.

You will need the following tools and materials to make your phone strap:
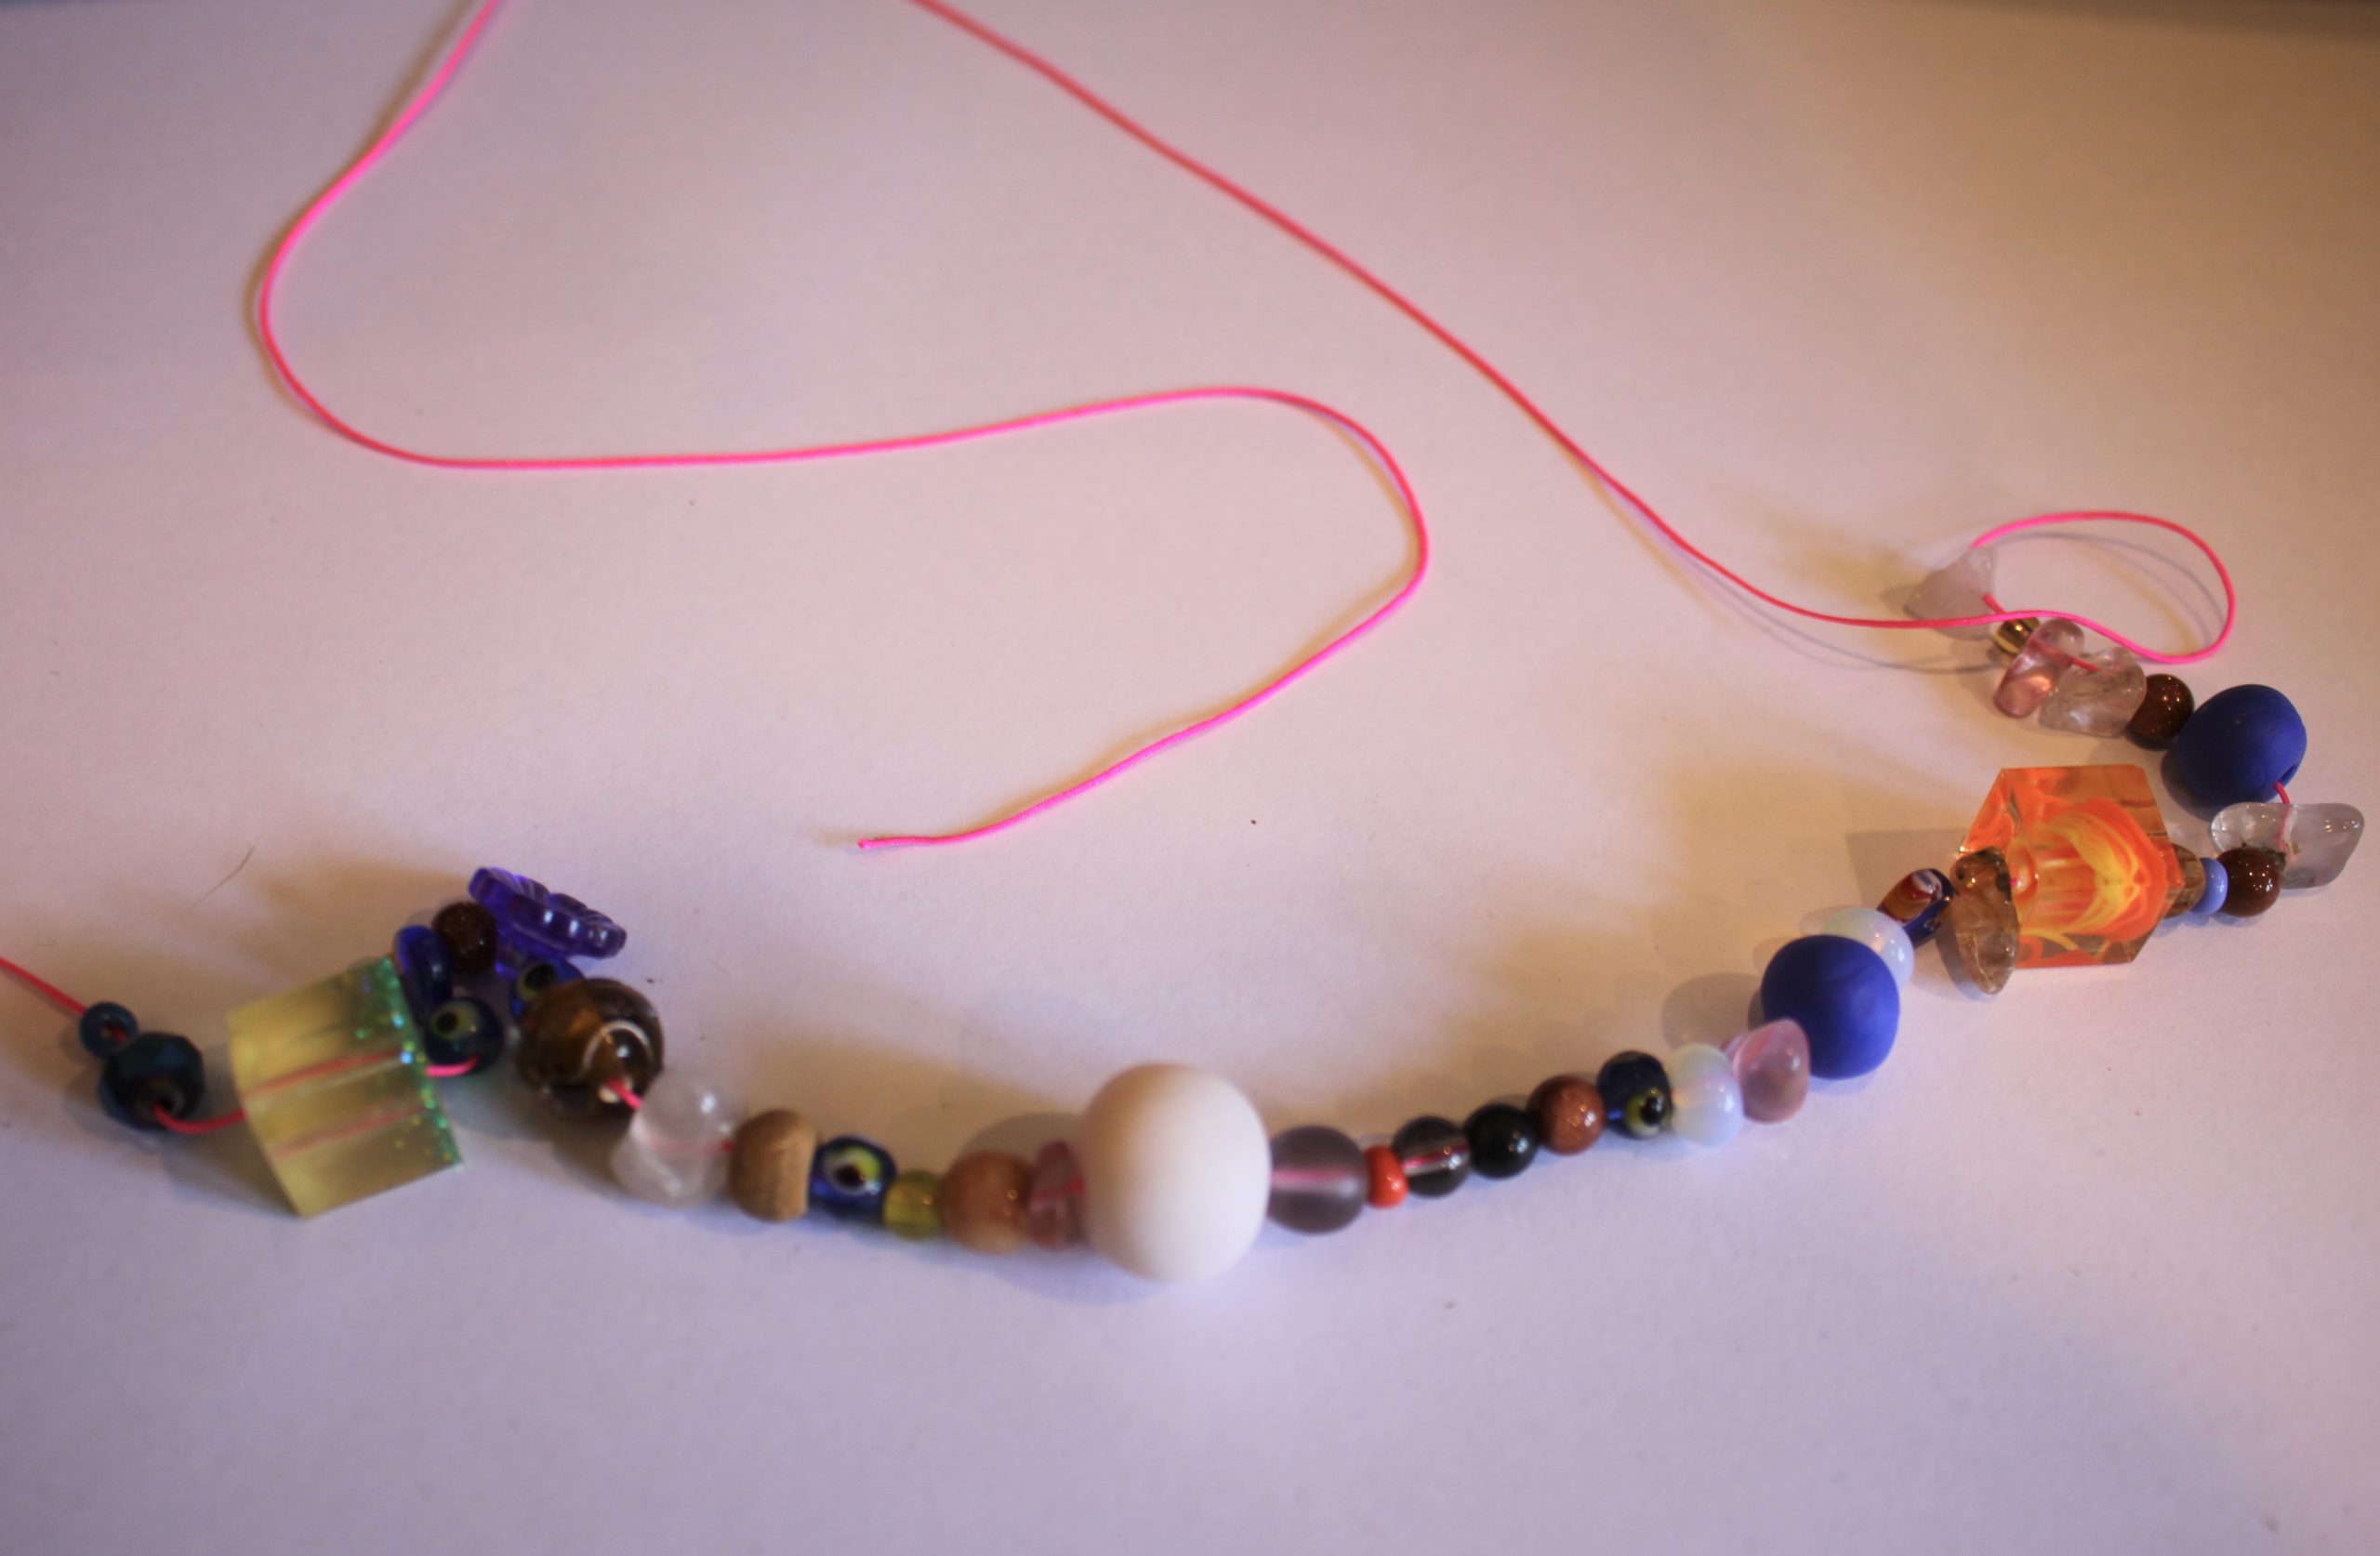
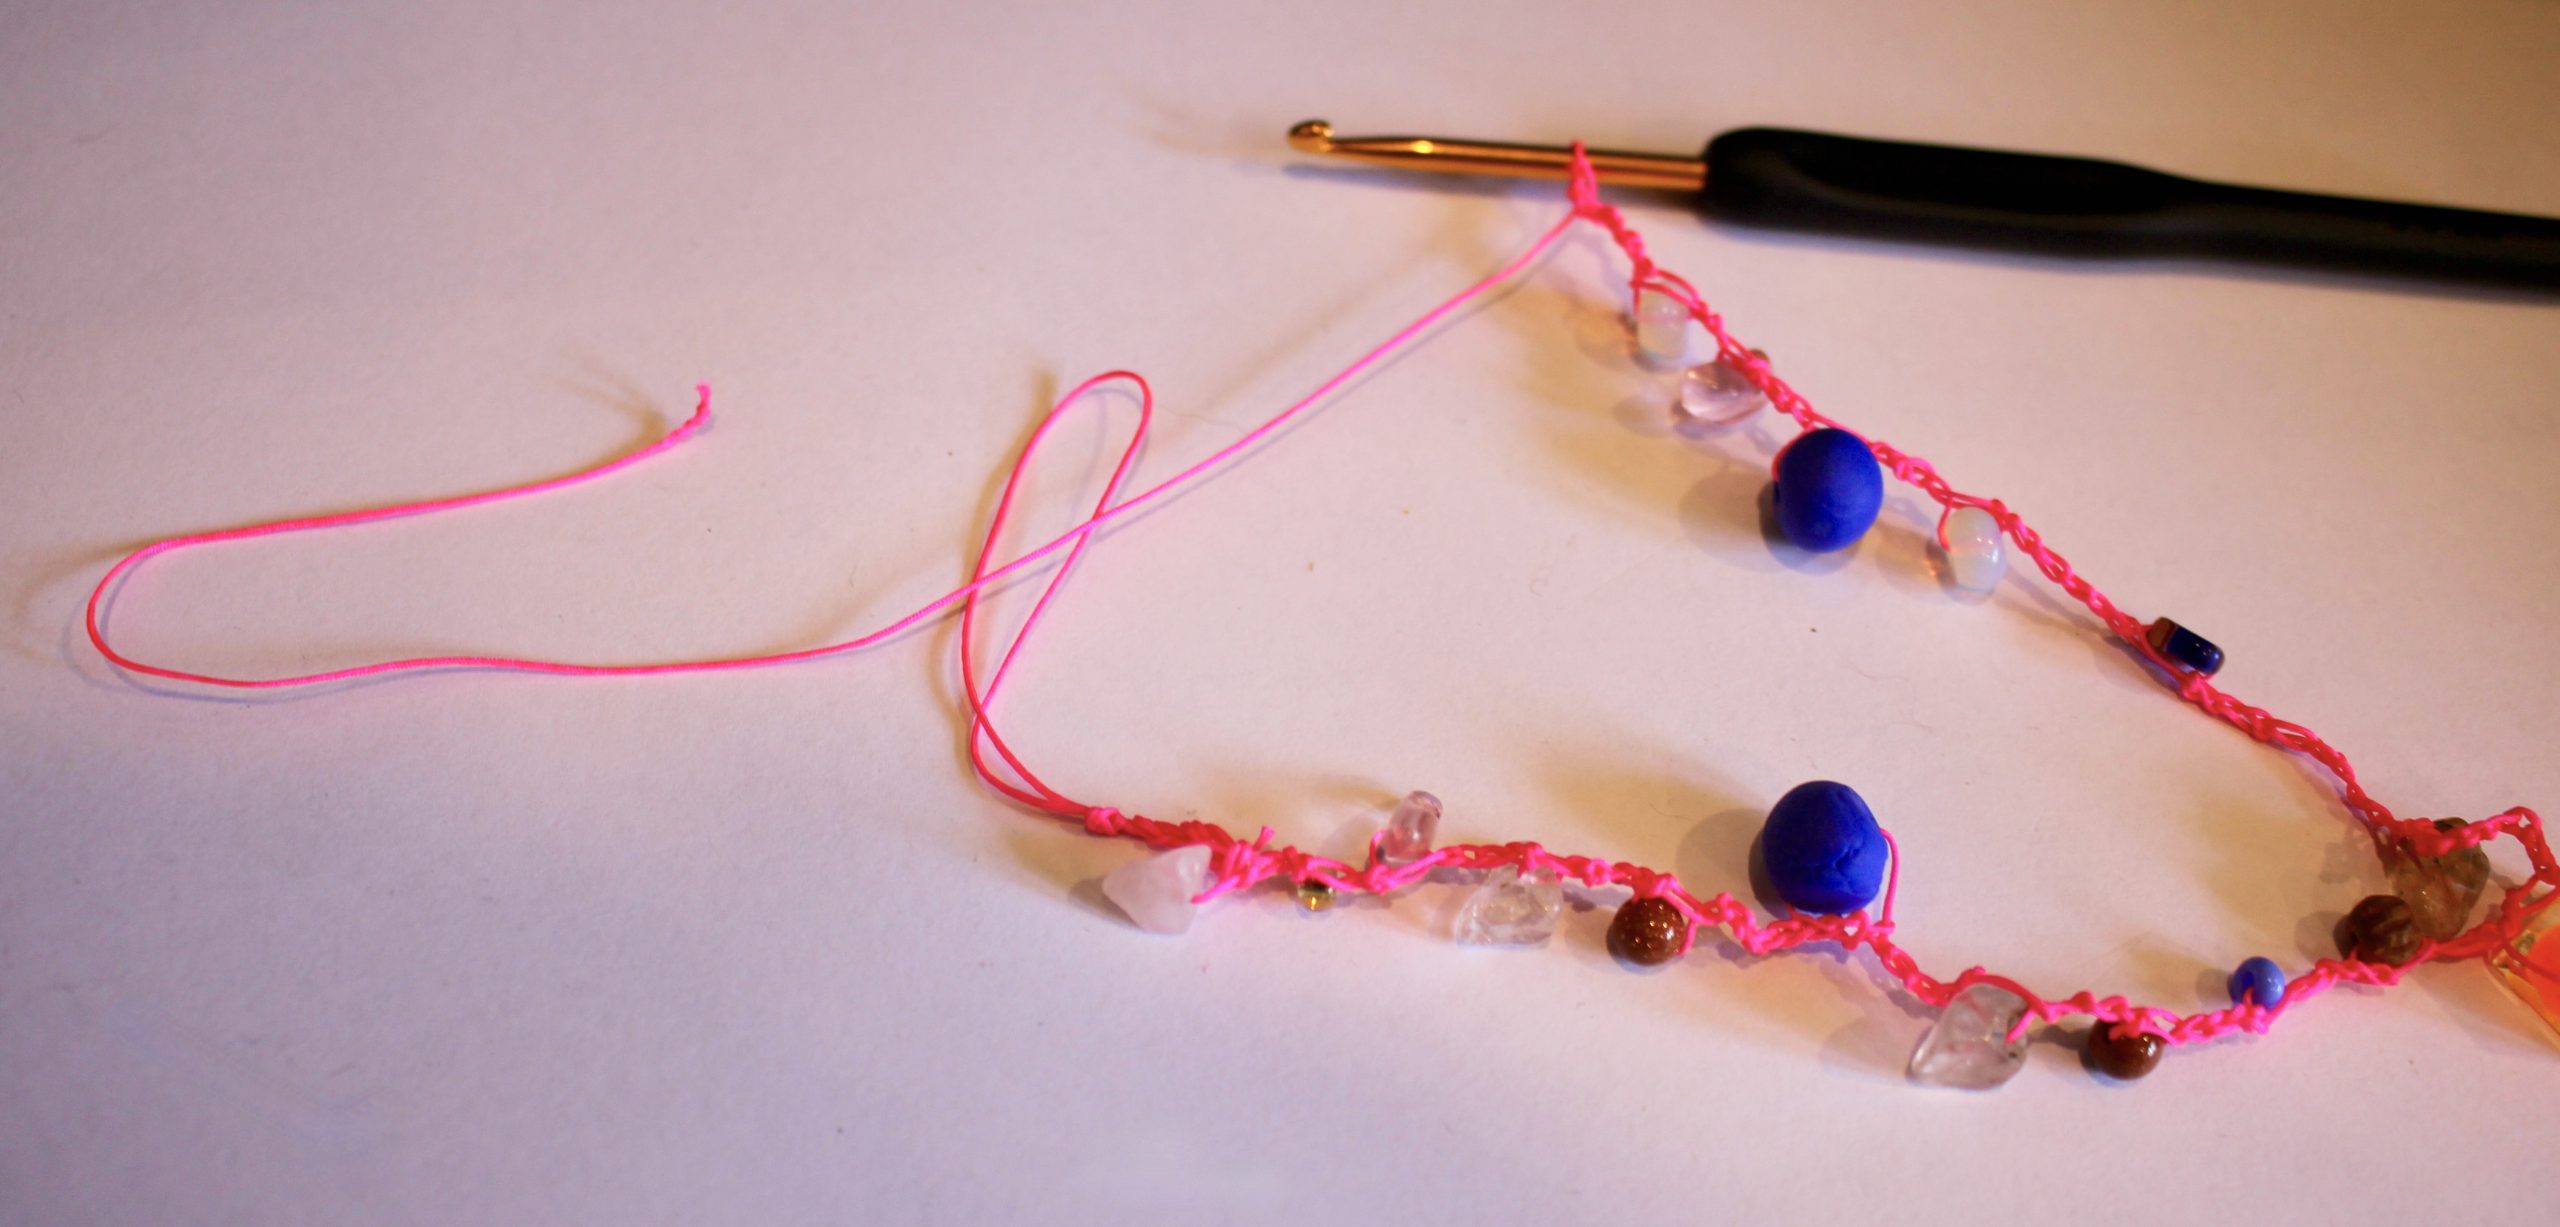
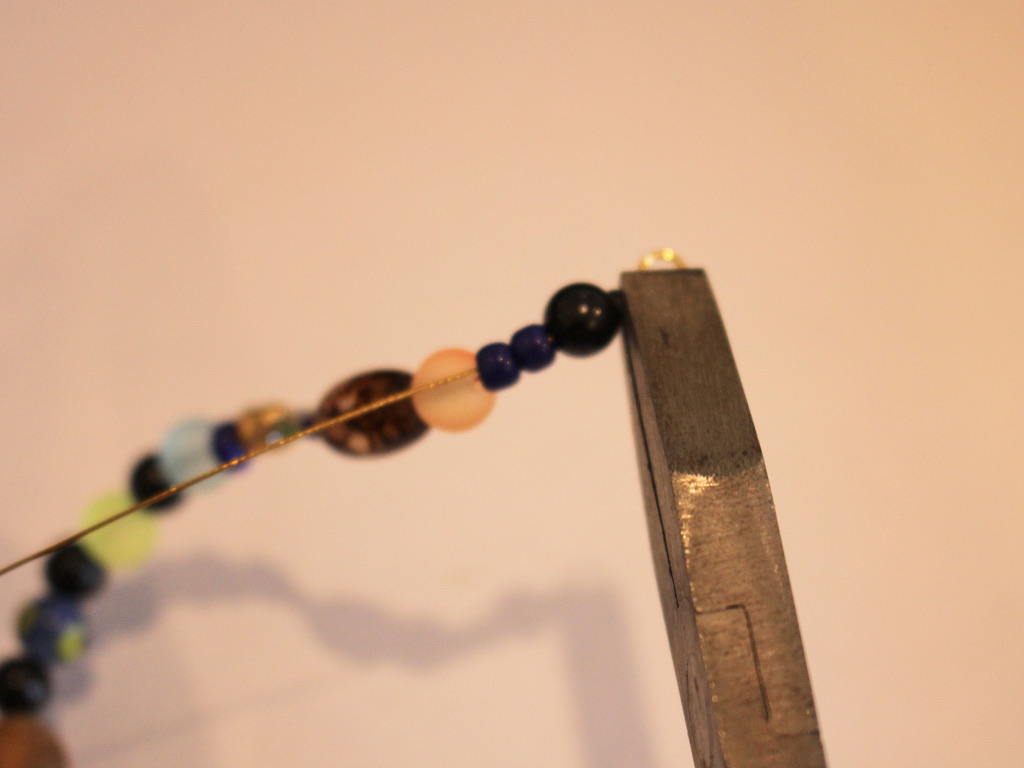
1: Add the beads to the thread.

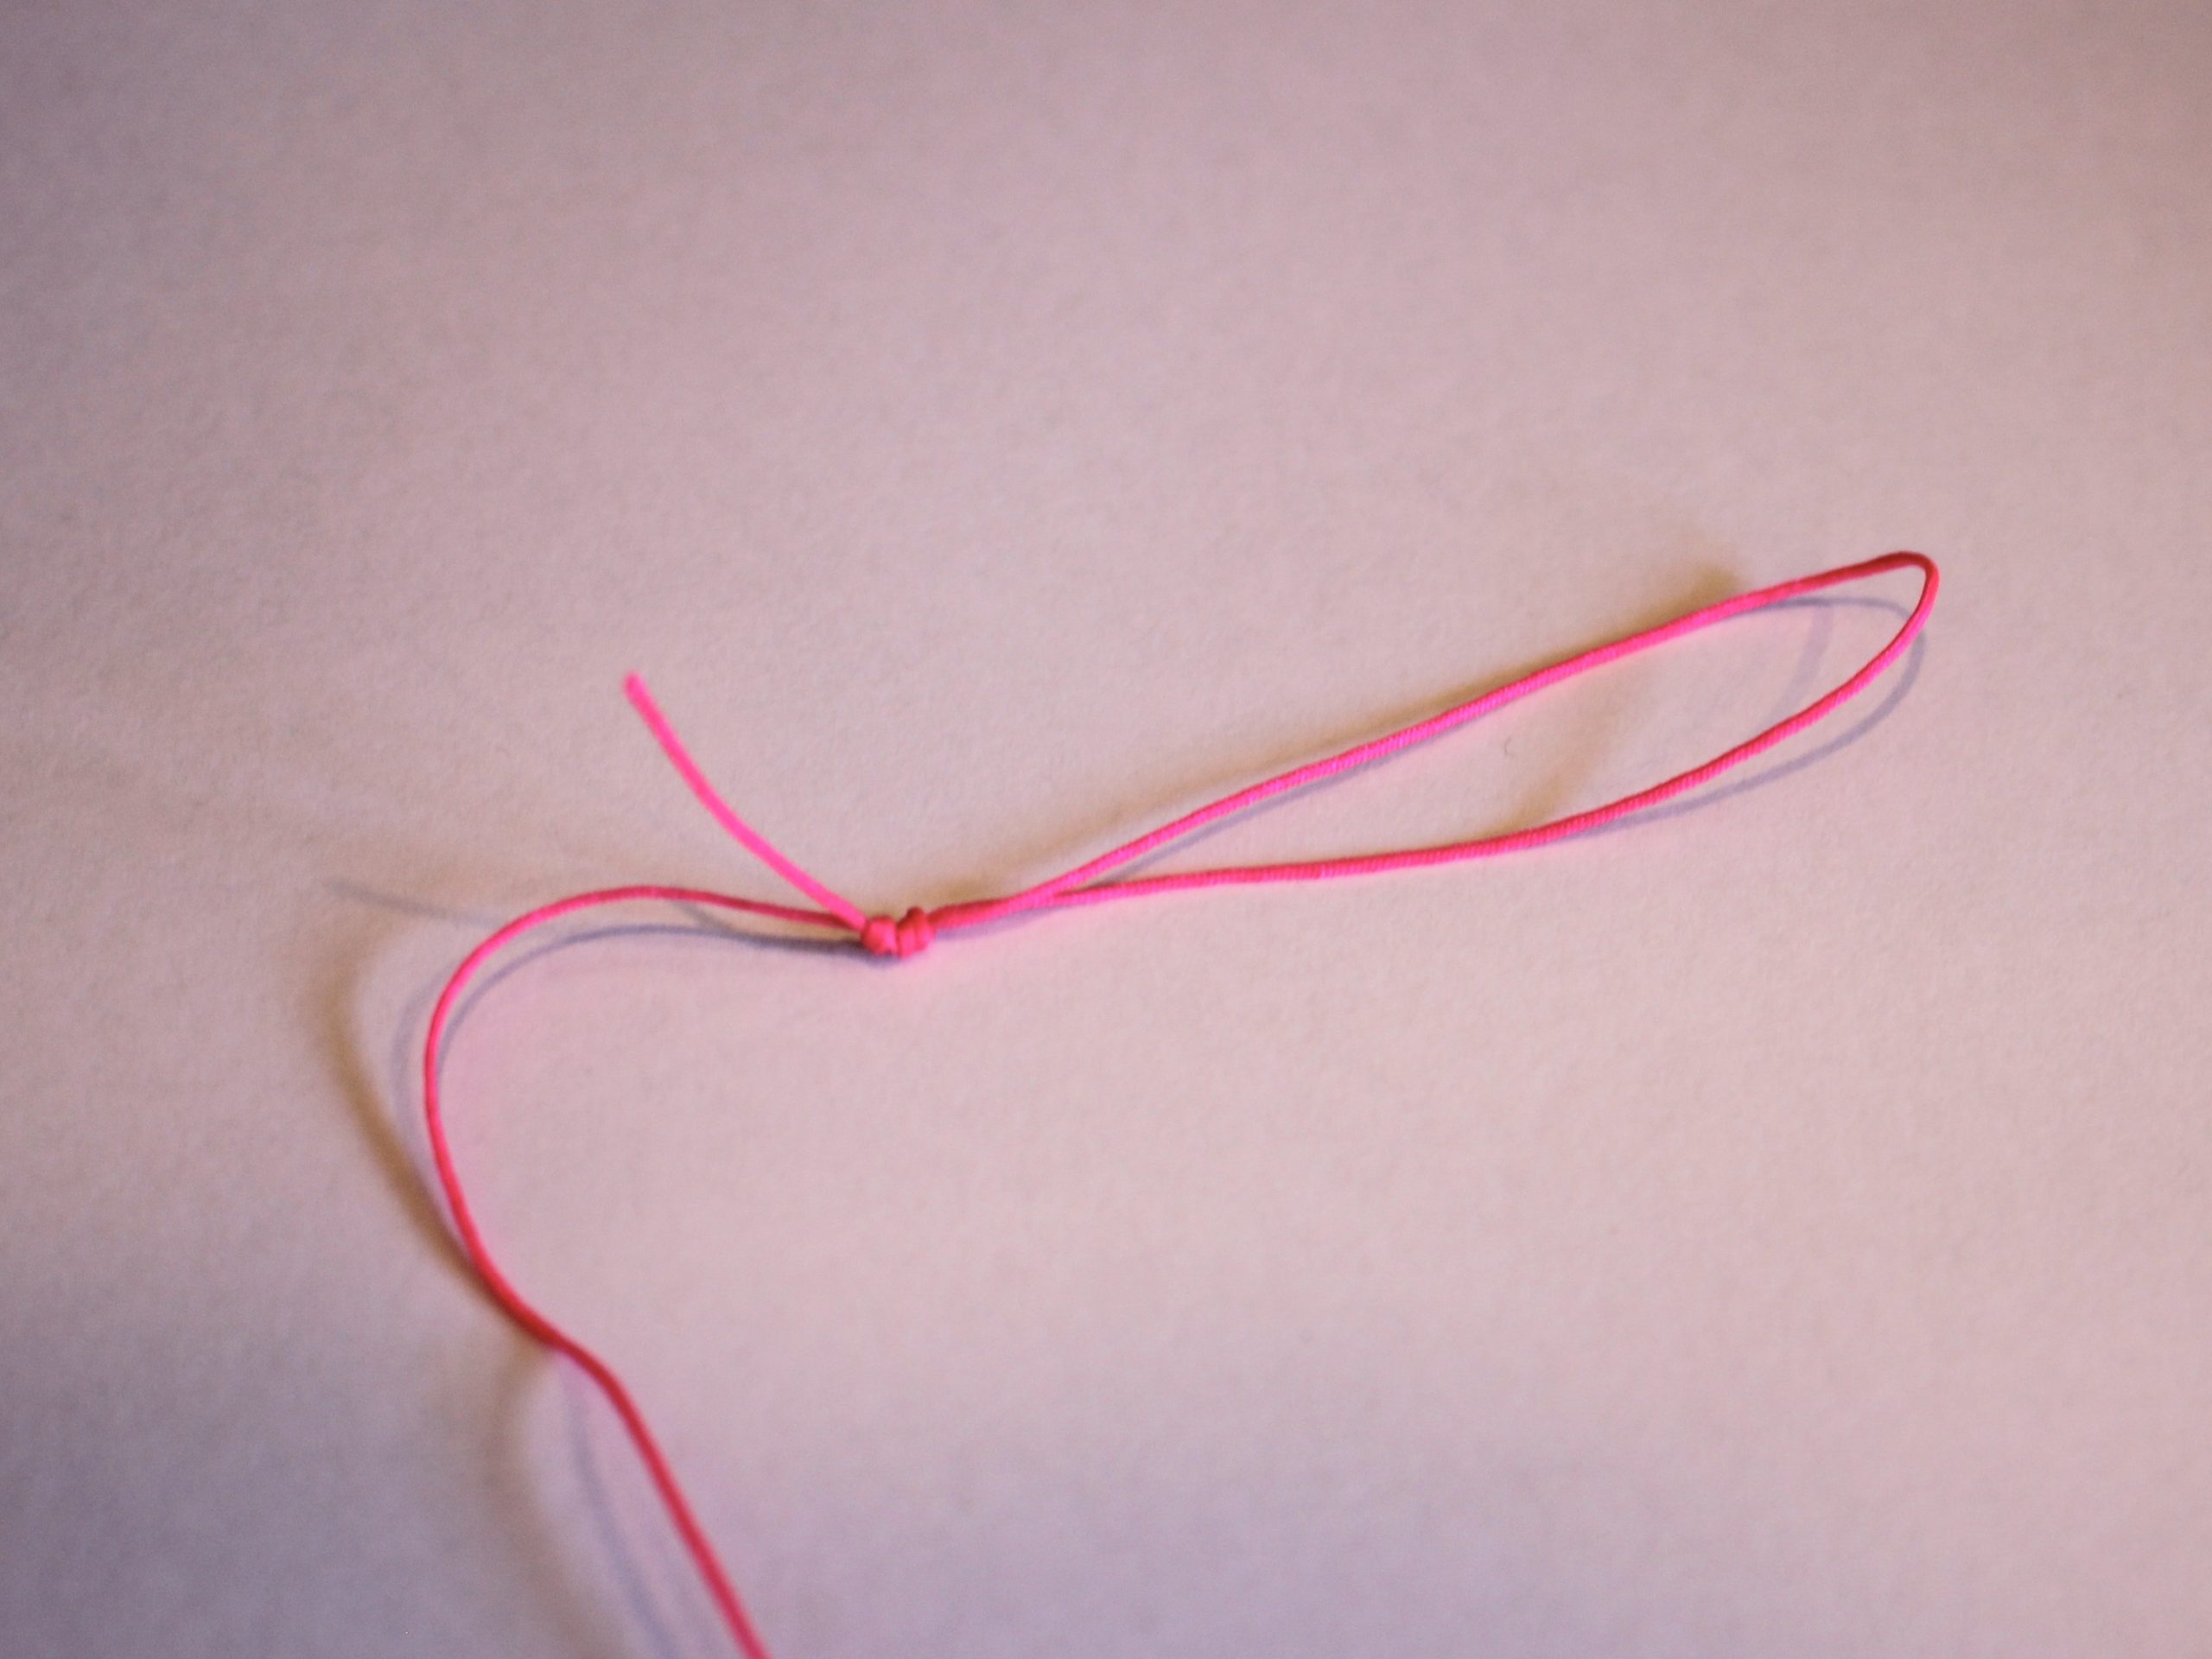
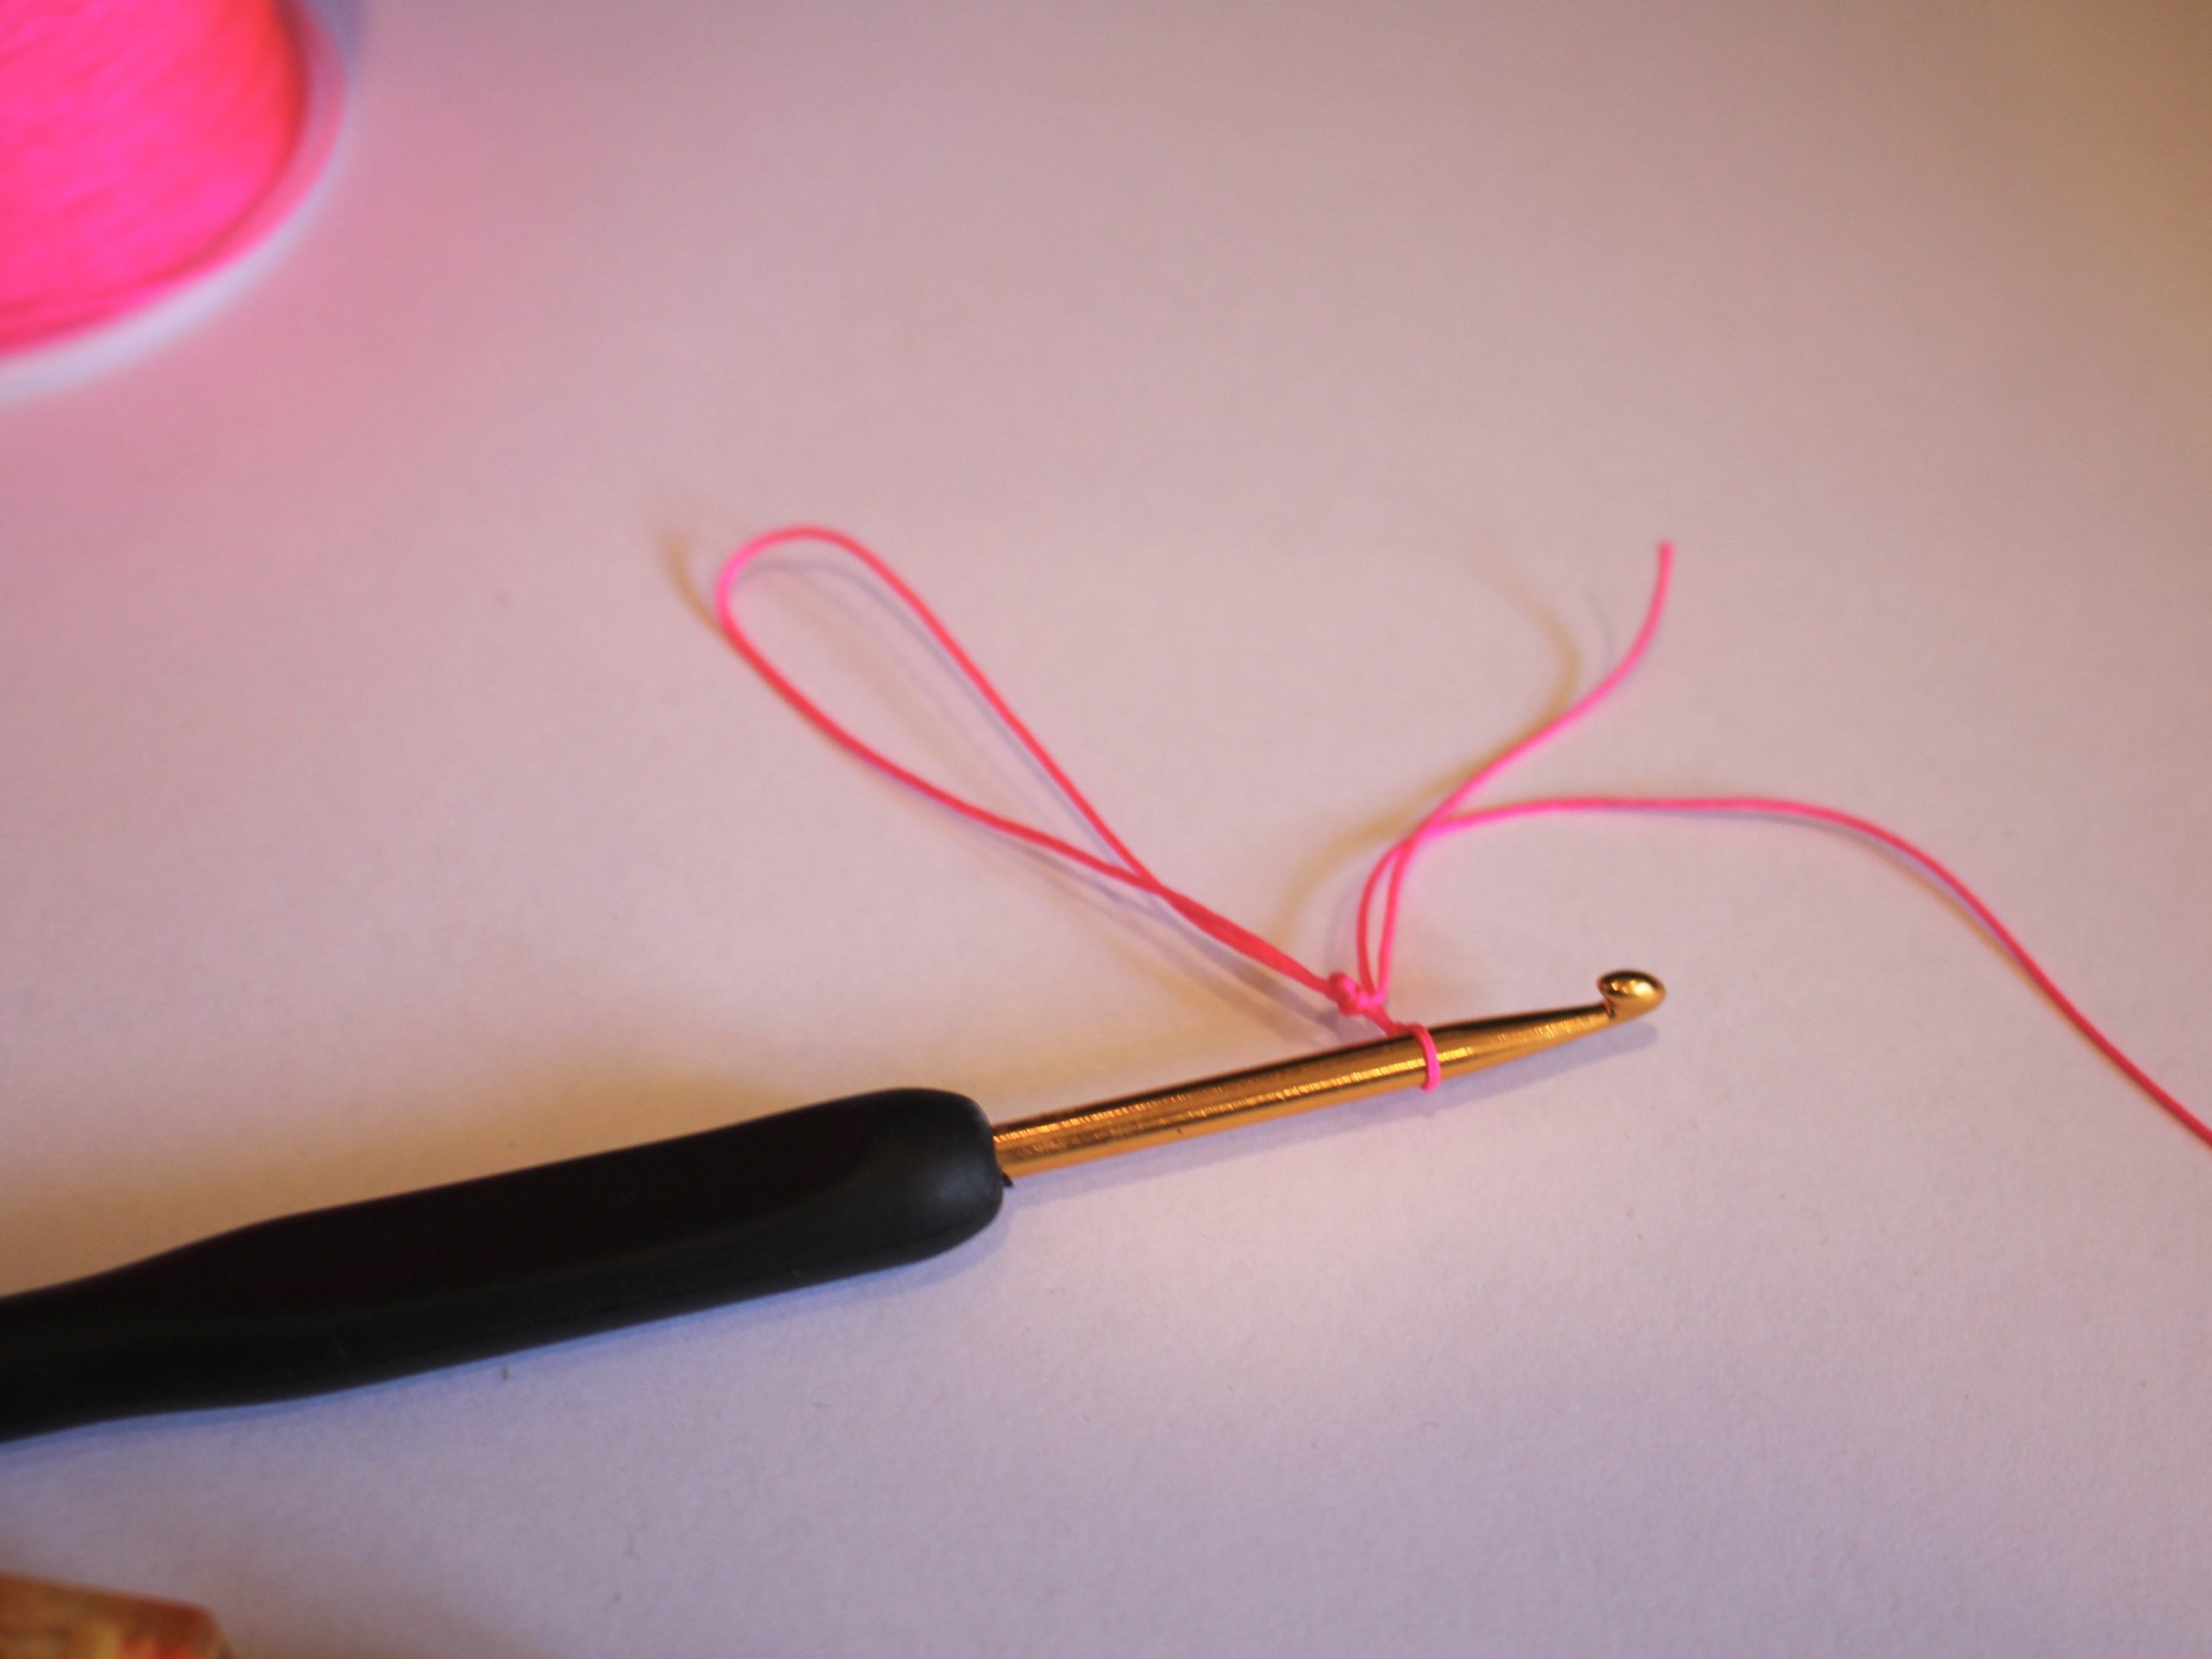
2: Create a loop and tie it in a knot, this will be the loop you use to add the strap to your phone case.

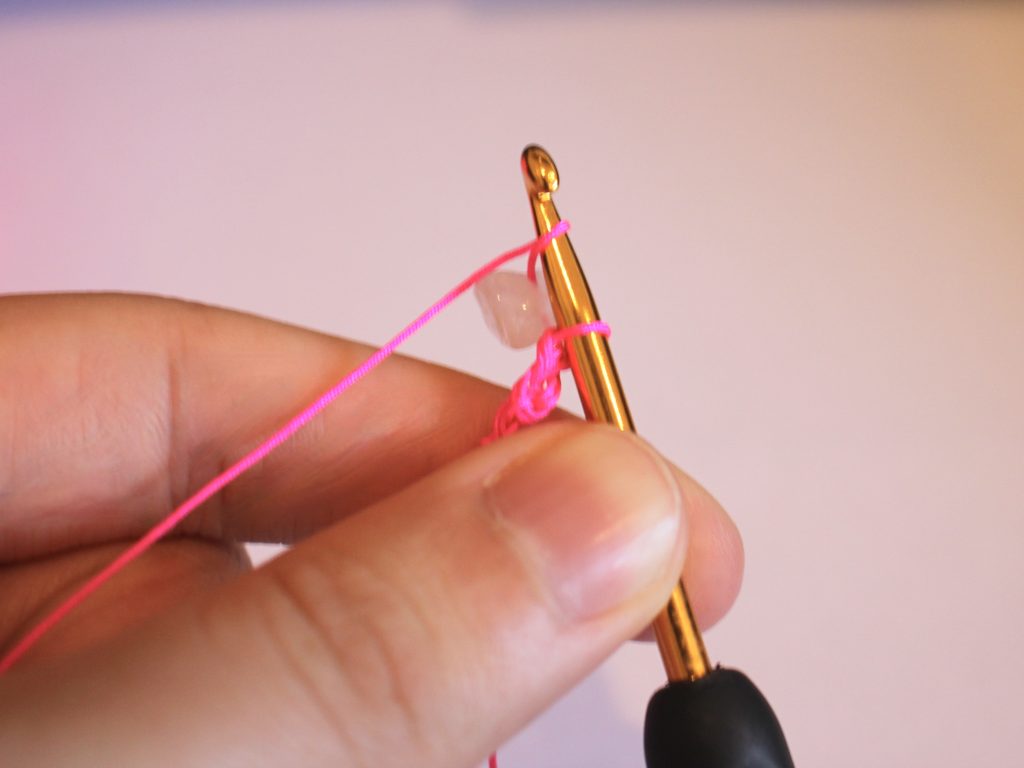
3: Now create a slip knot close to the loop you just made and slip it over the crochet hook.

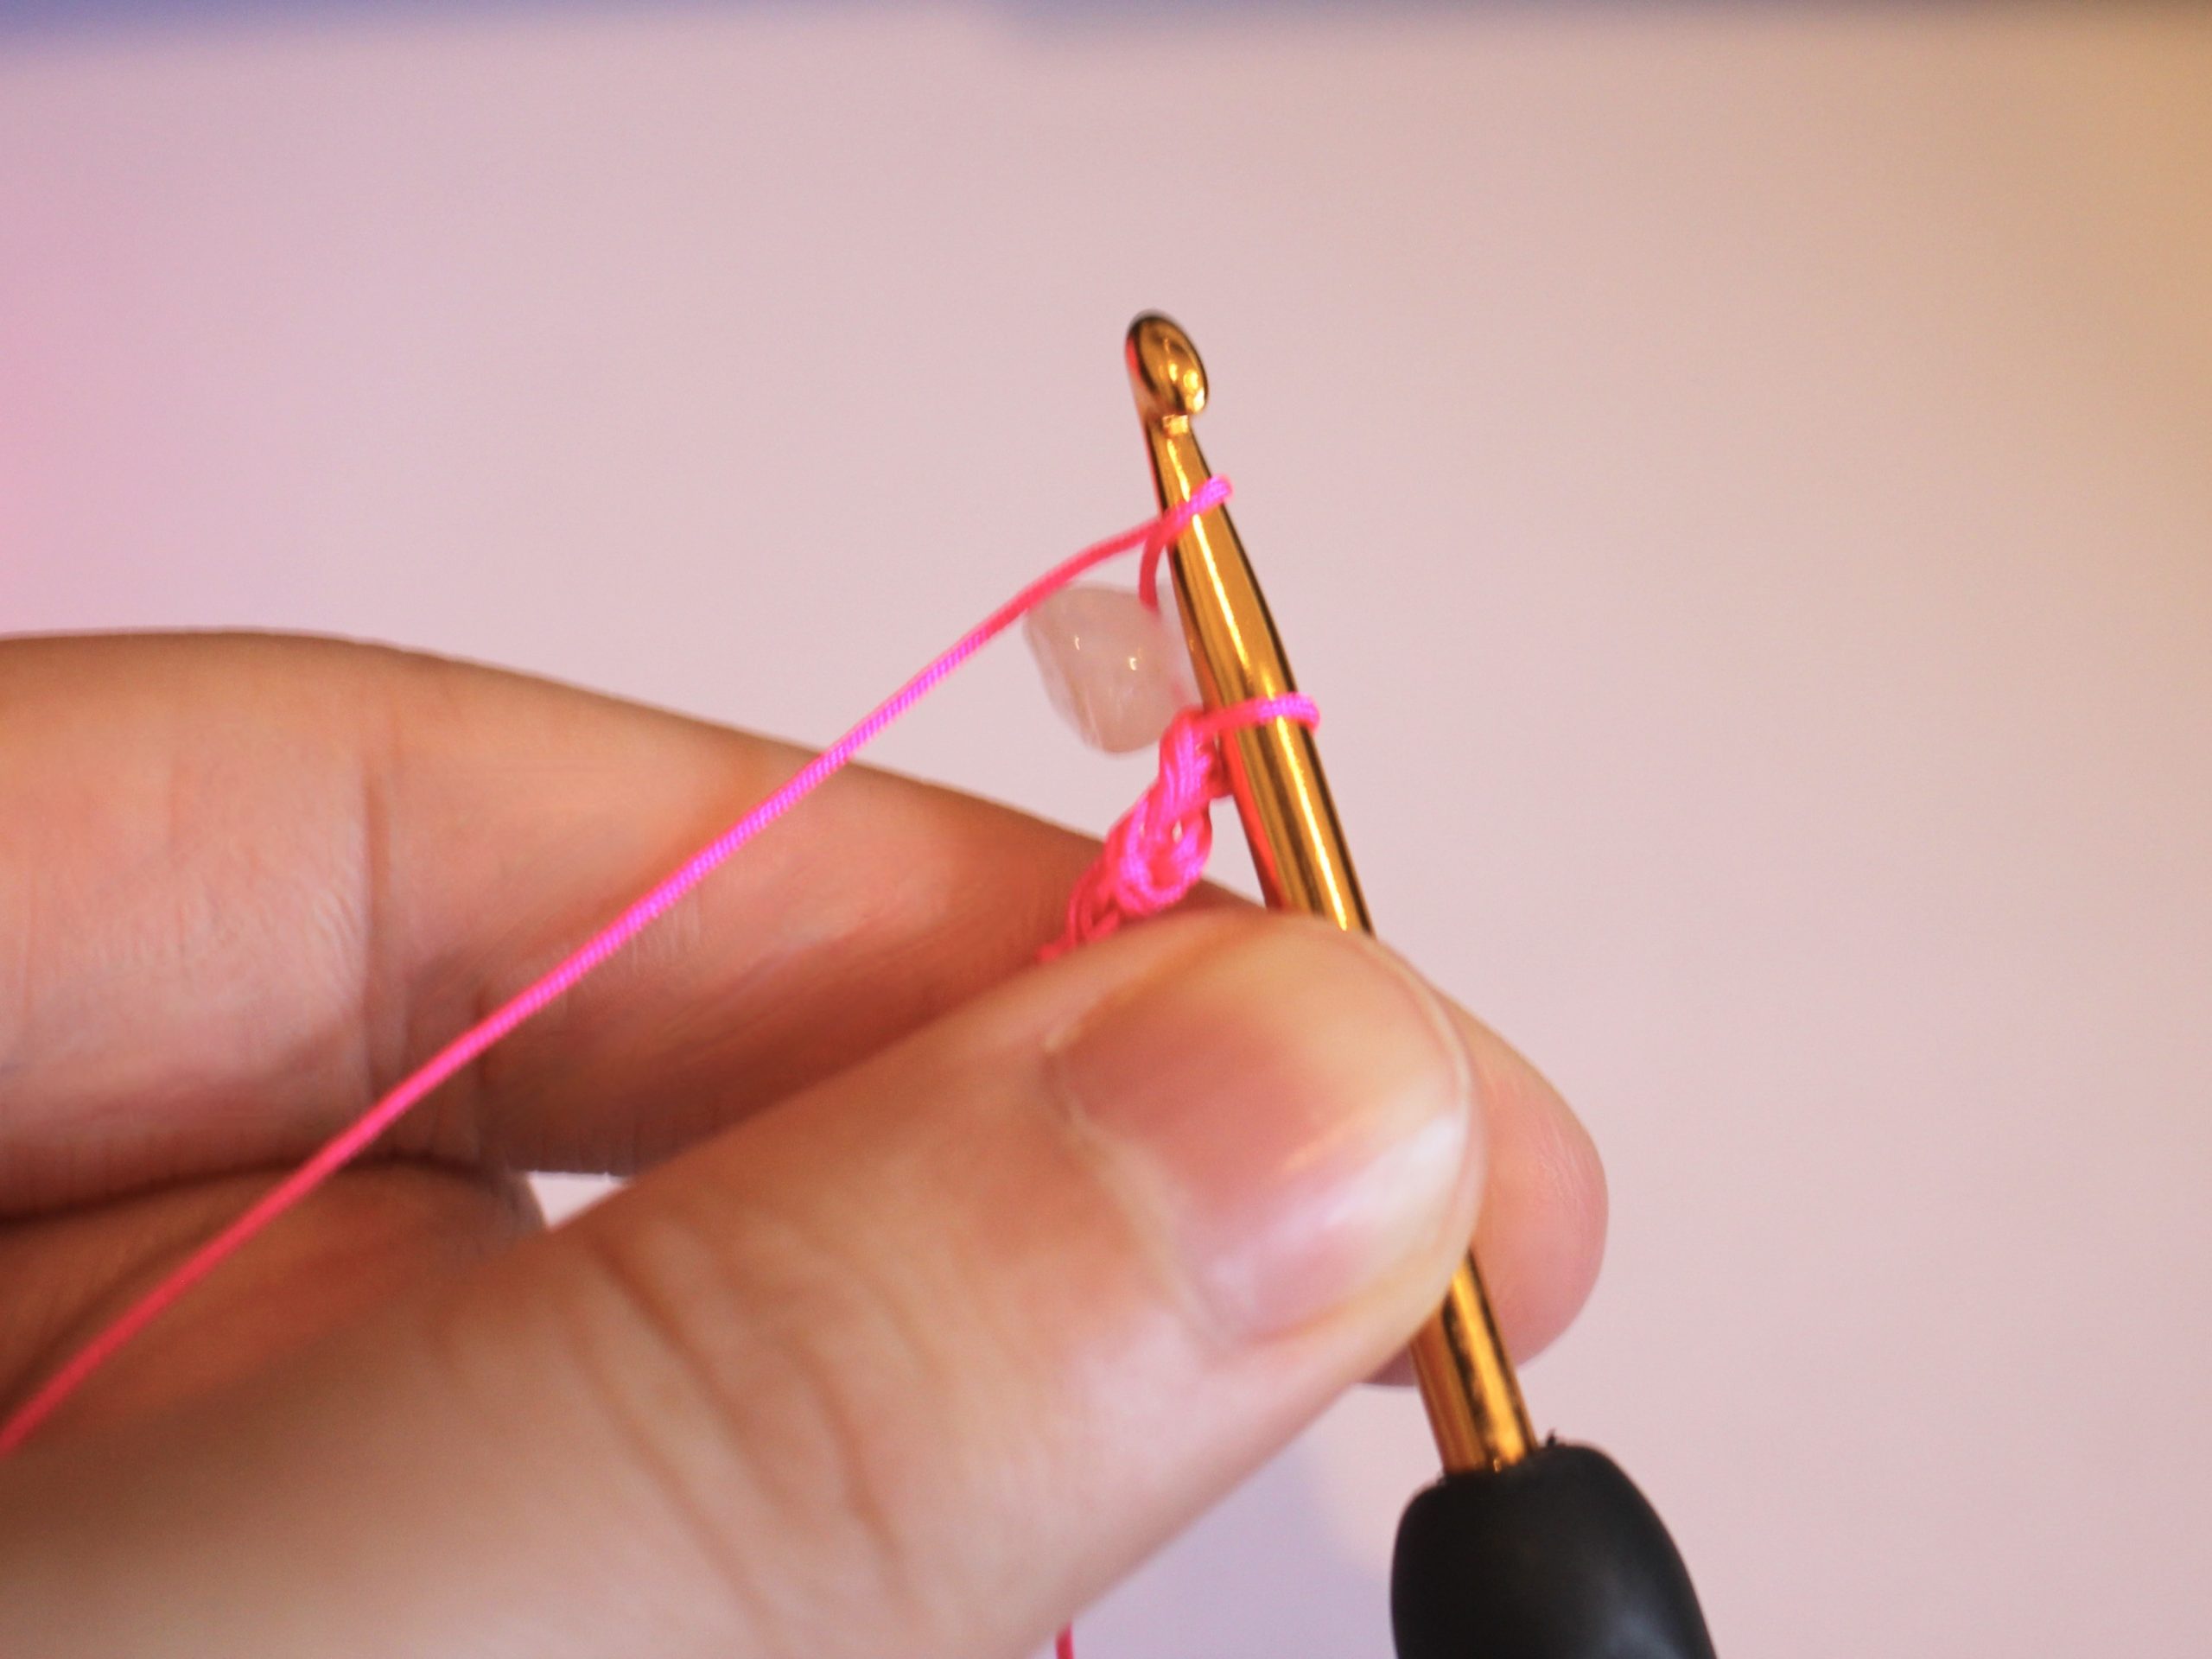
4: Tighten the loop around the hook.
5: Take the longer part of the string and loop it over the crochet hook in front of the first loop.
6: Take the first loop and pull it over the second one and off the crochet hook.
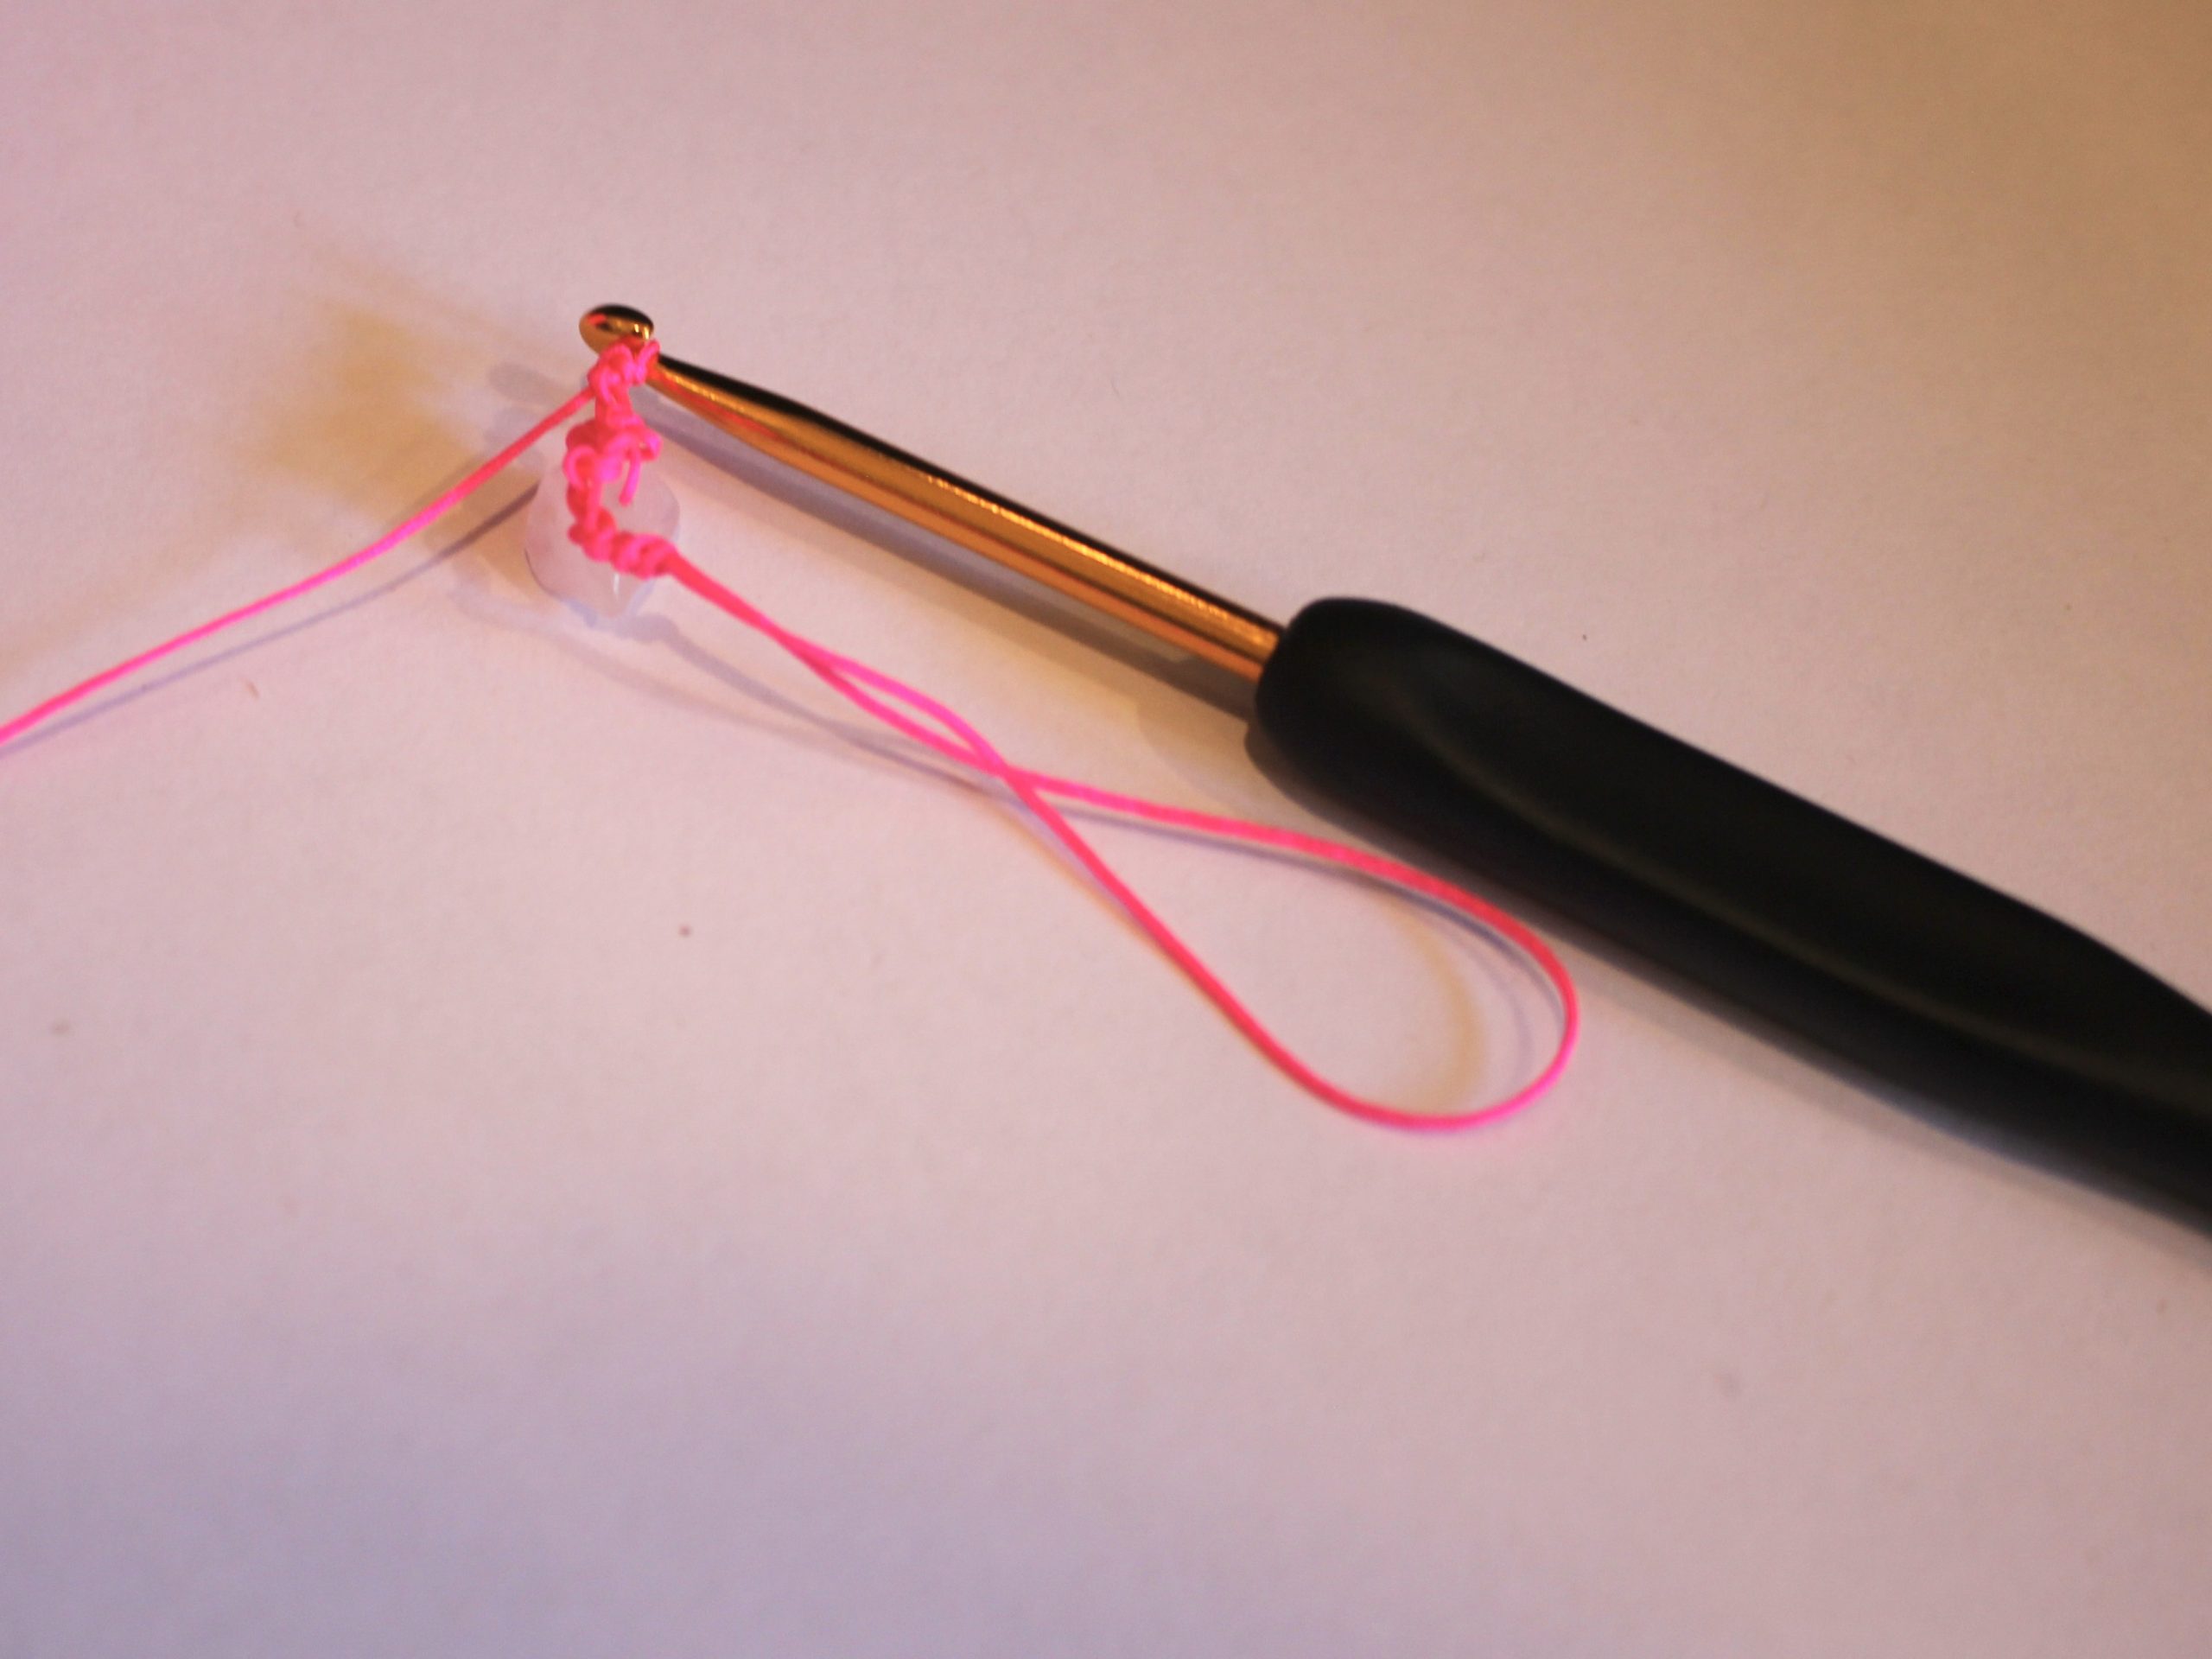
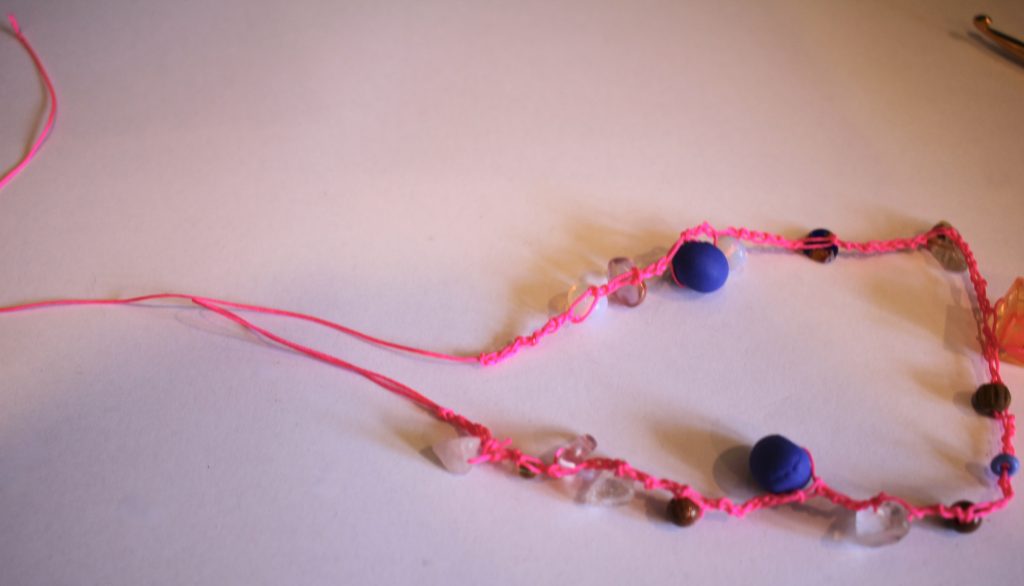
7: Repeat steps 5 and 6 a couple more times before sliding one of the beads up to the hook.
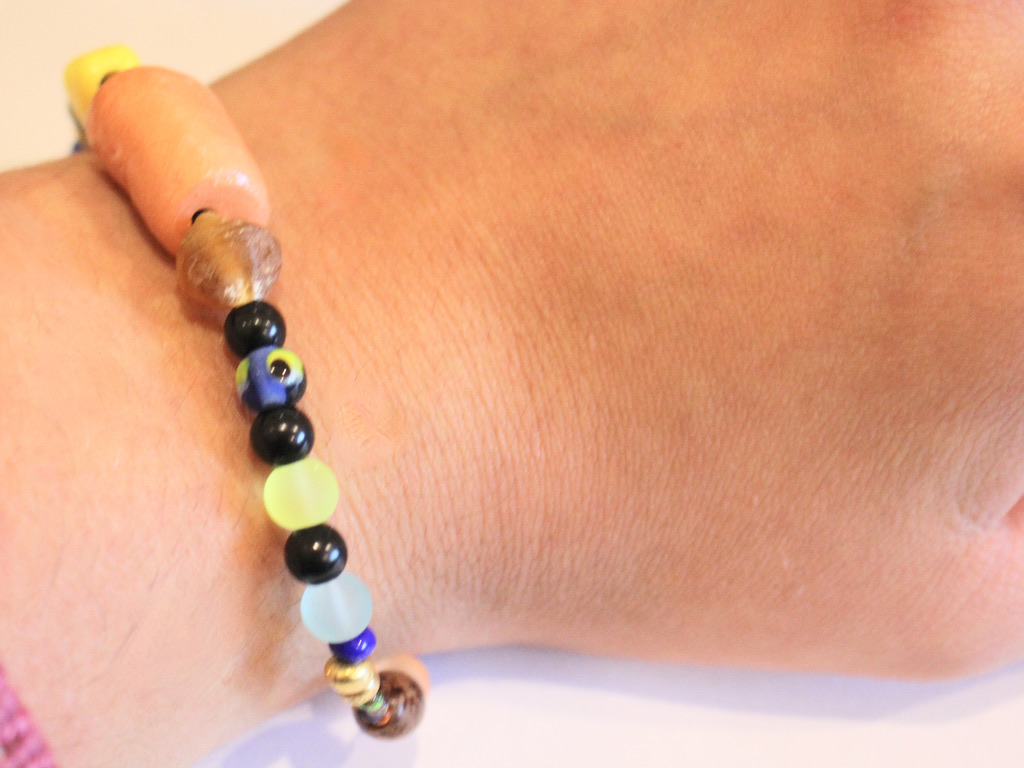
8: With the bead next to the hook, loop the thread around the hook again to create another link to the crochet chain. When you pull the loop over, it will secure the bead in place. Continue in this fashion, adding beads as you see fit until you have a strap long enough to fit around your wrist loosely.


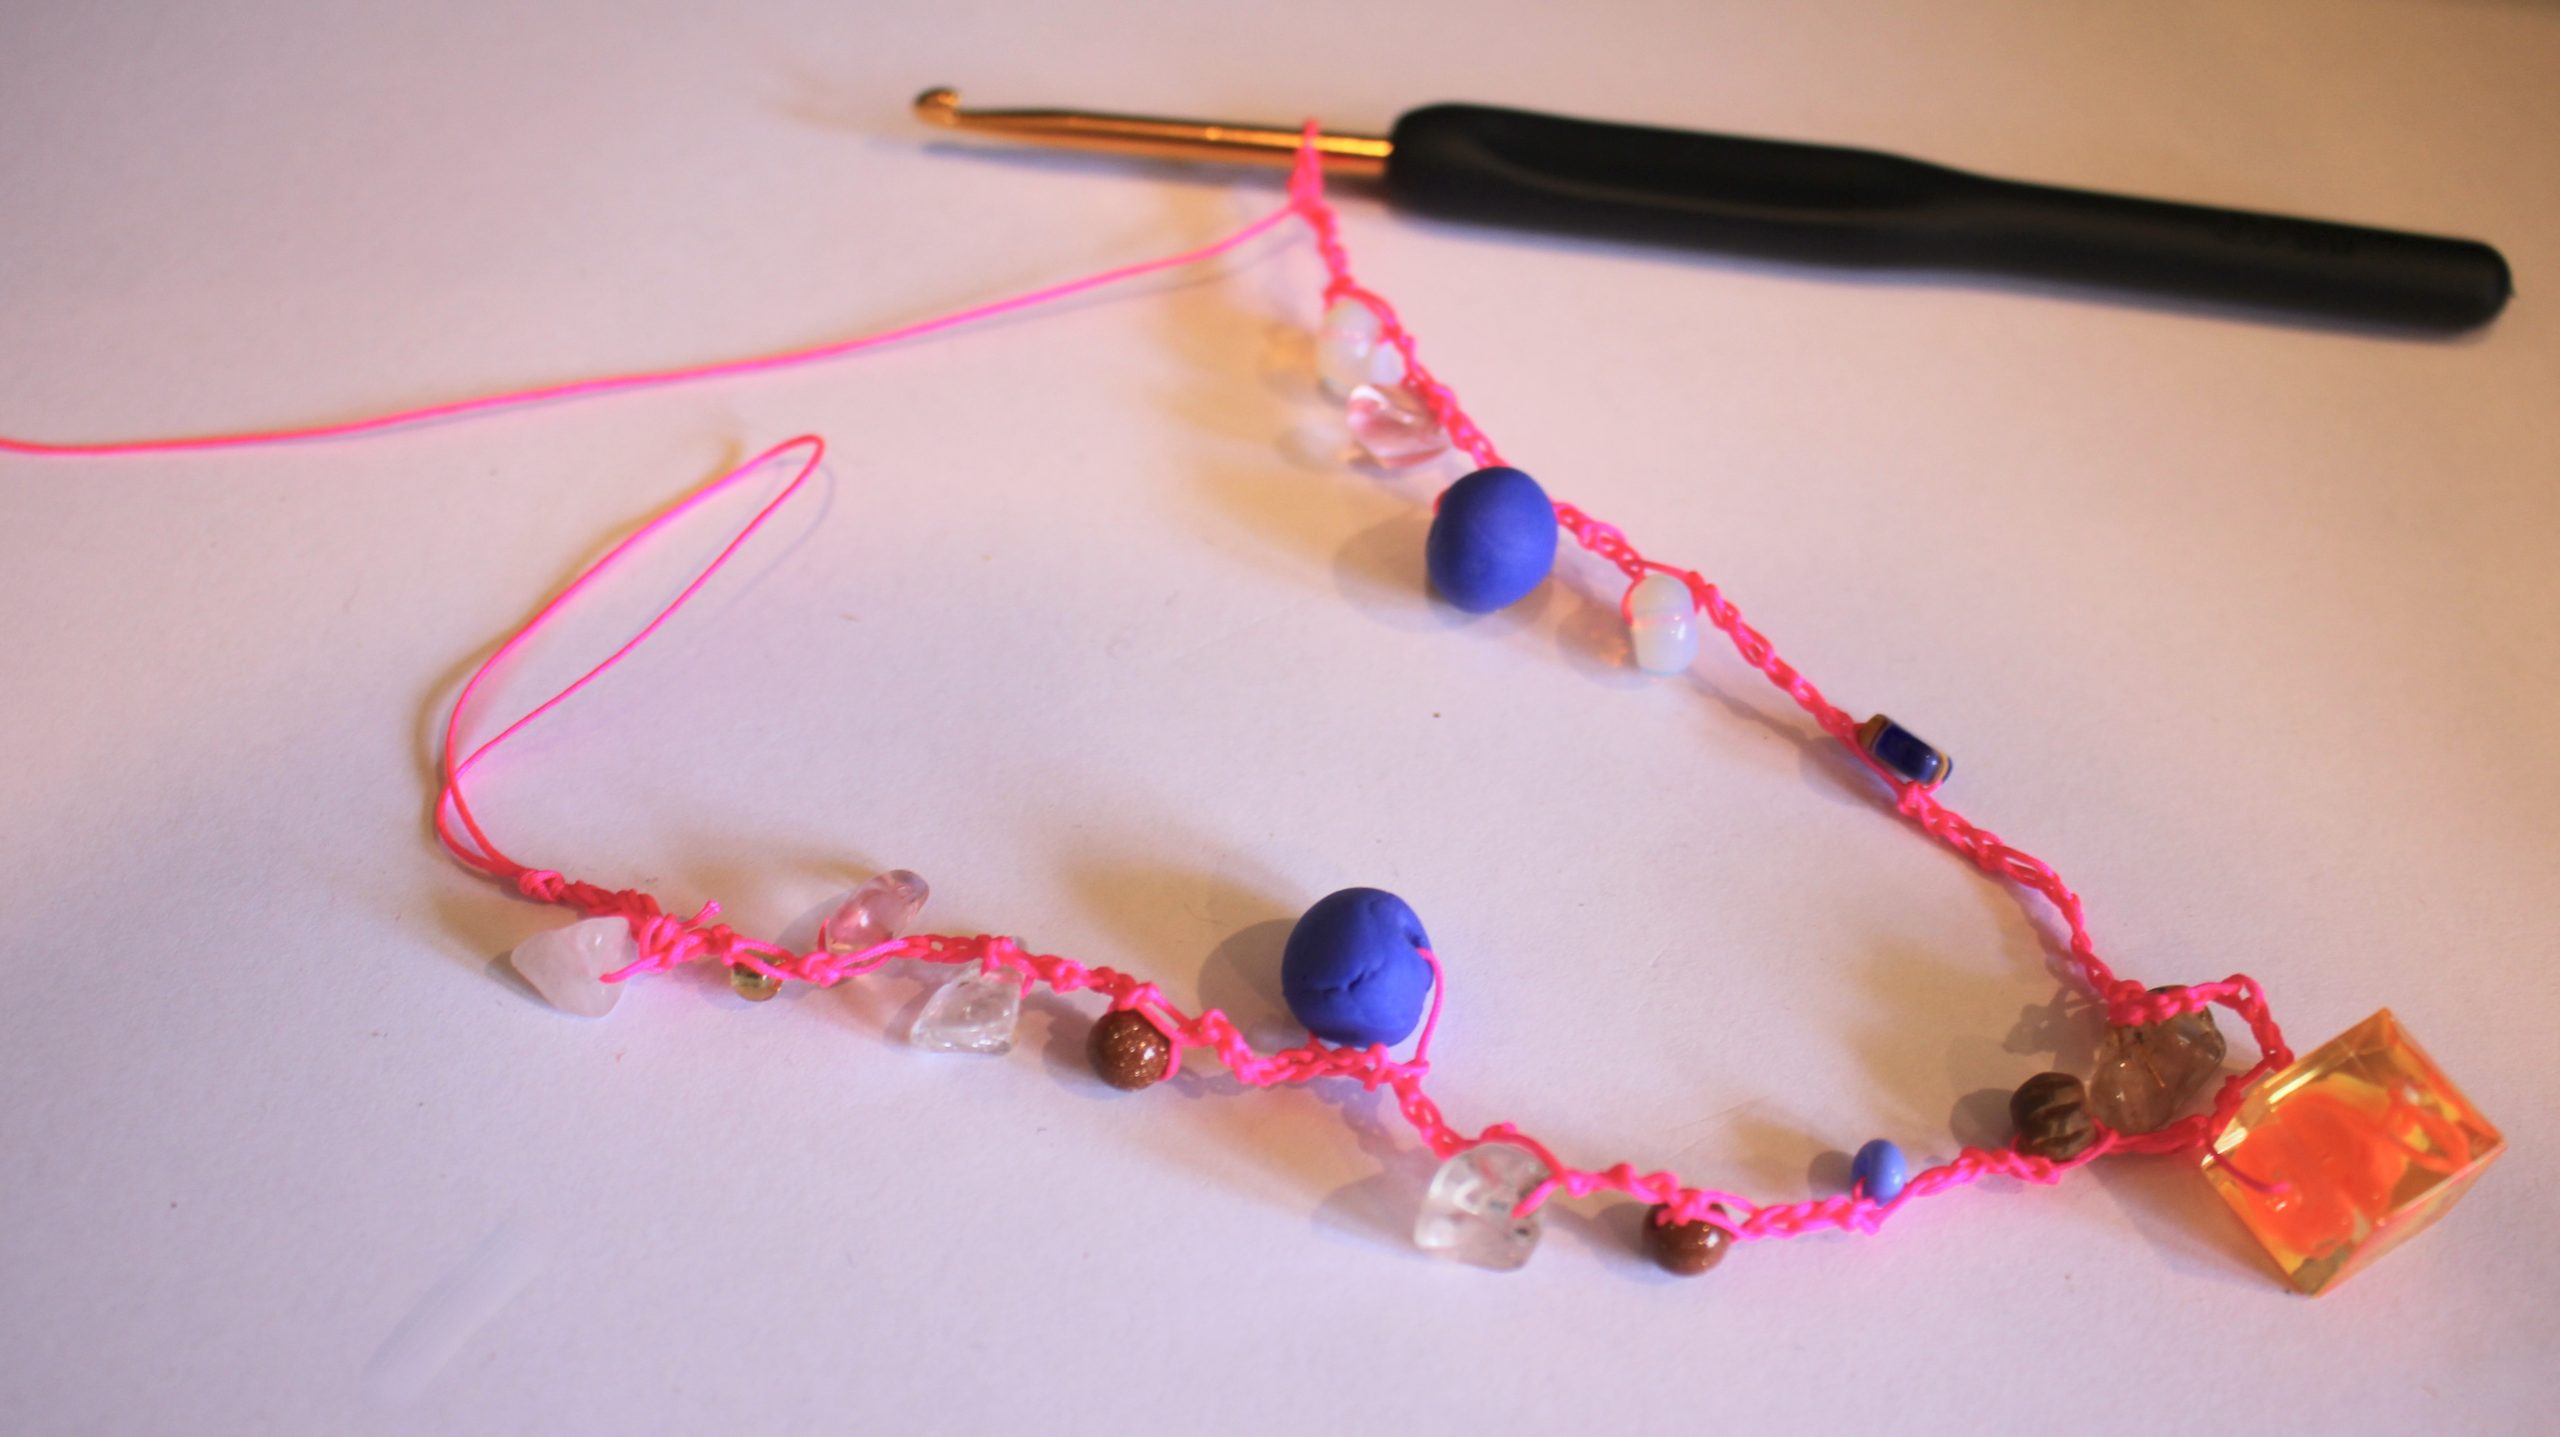
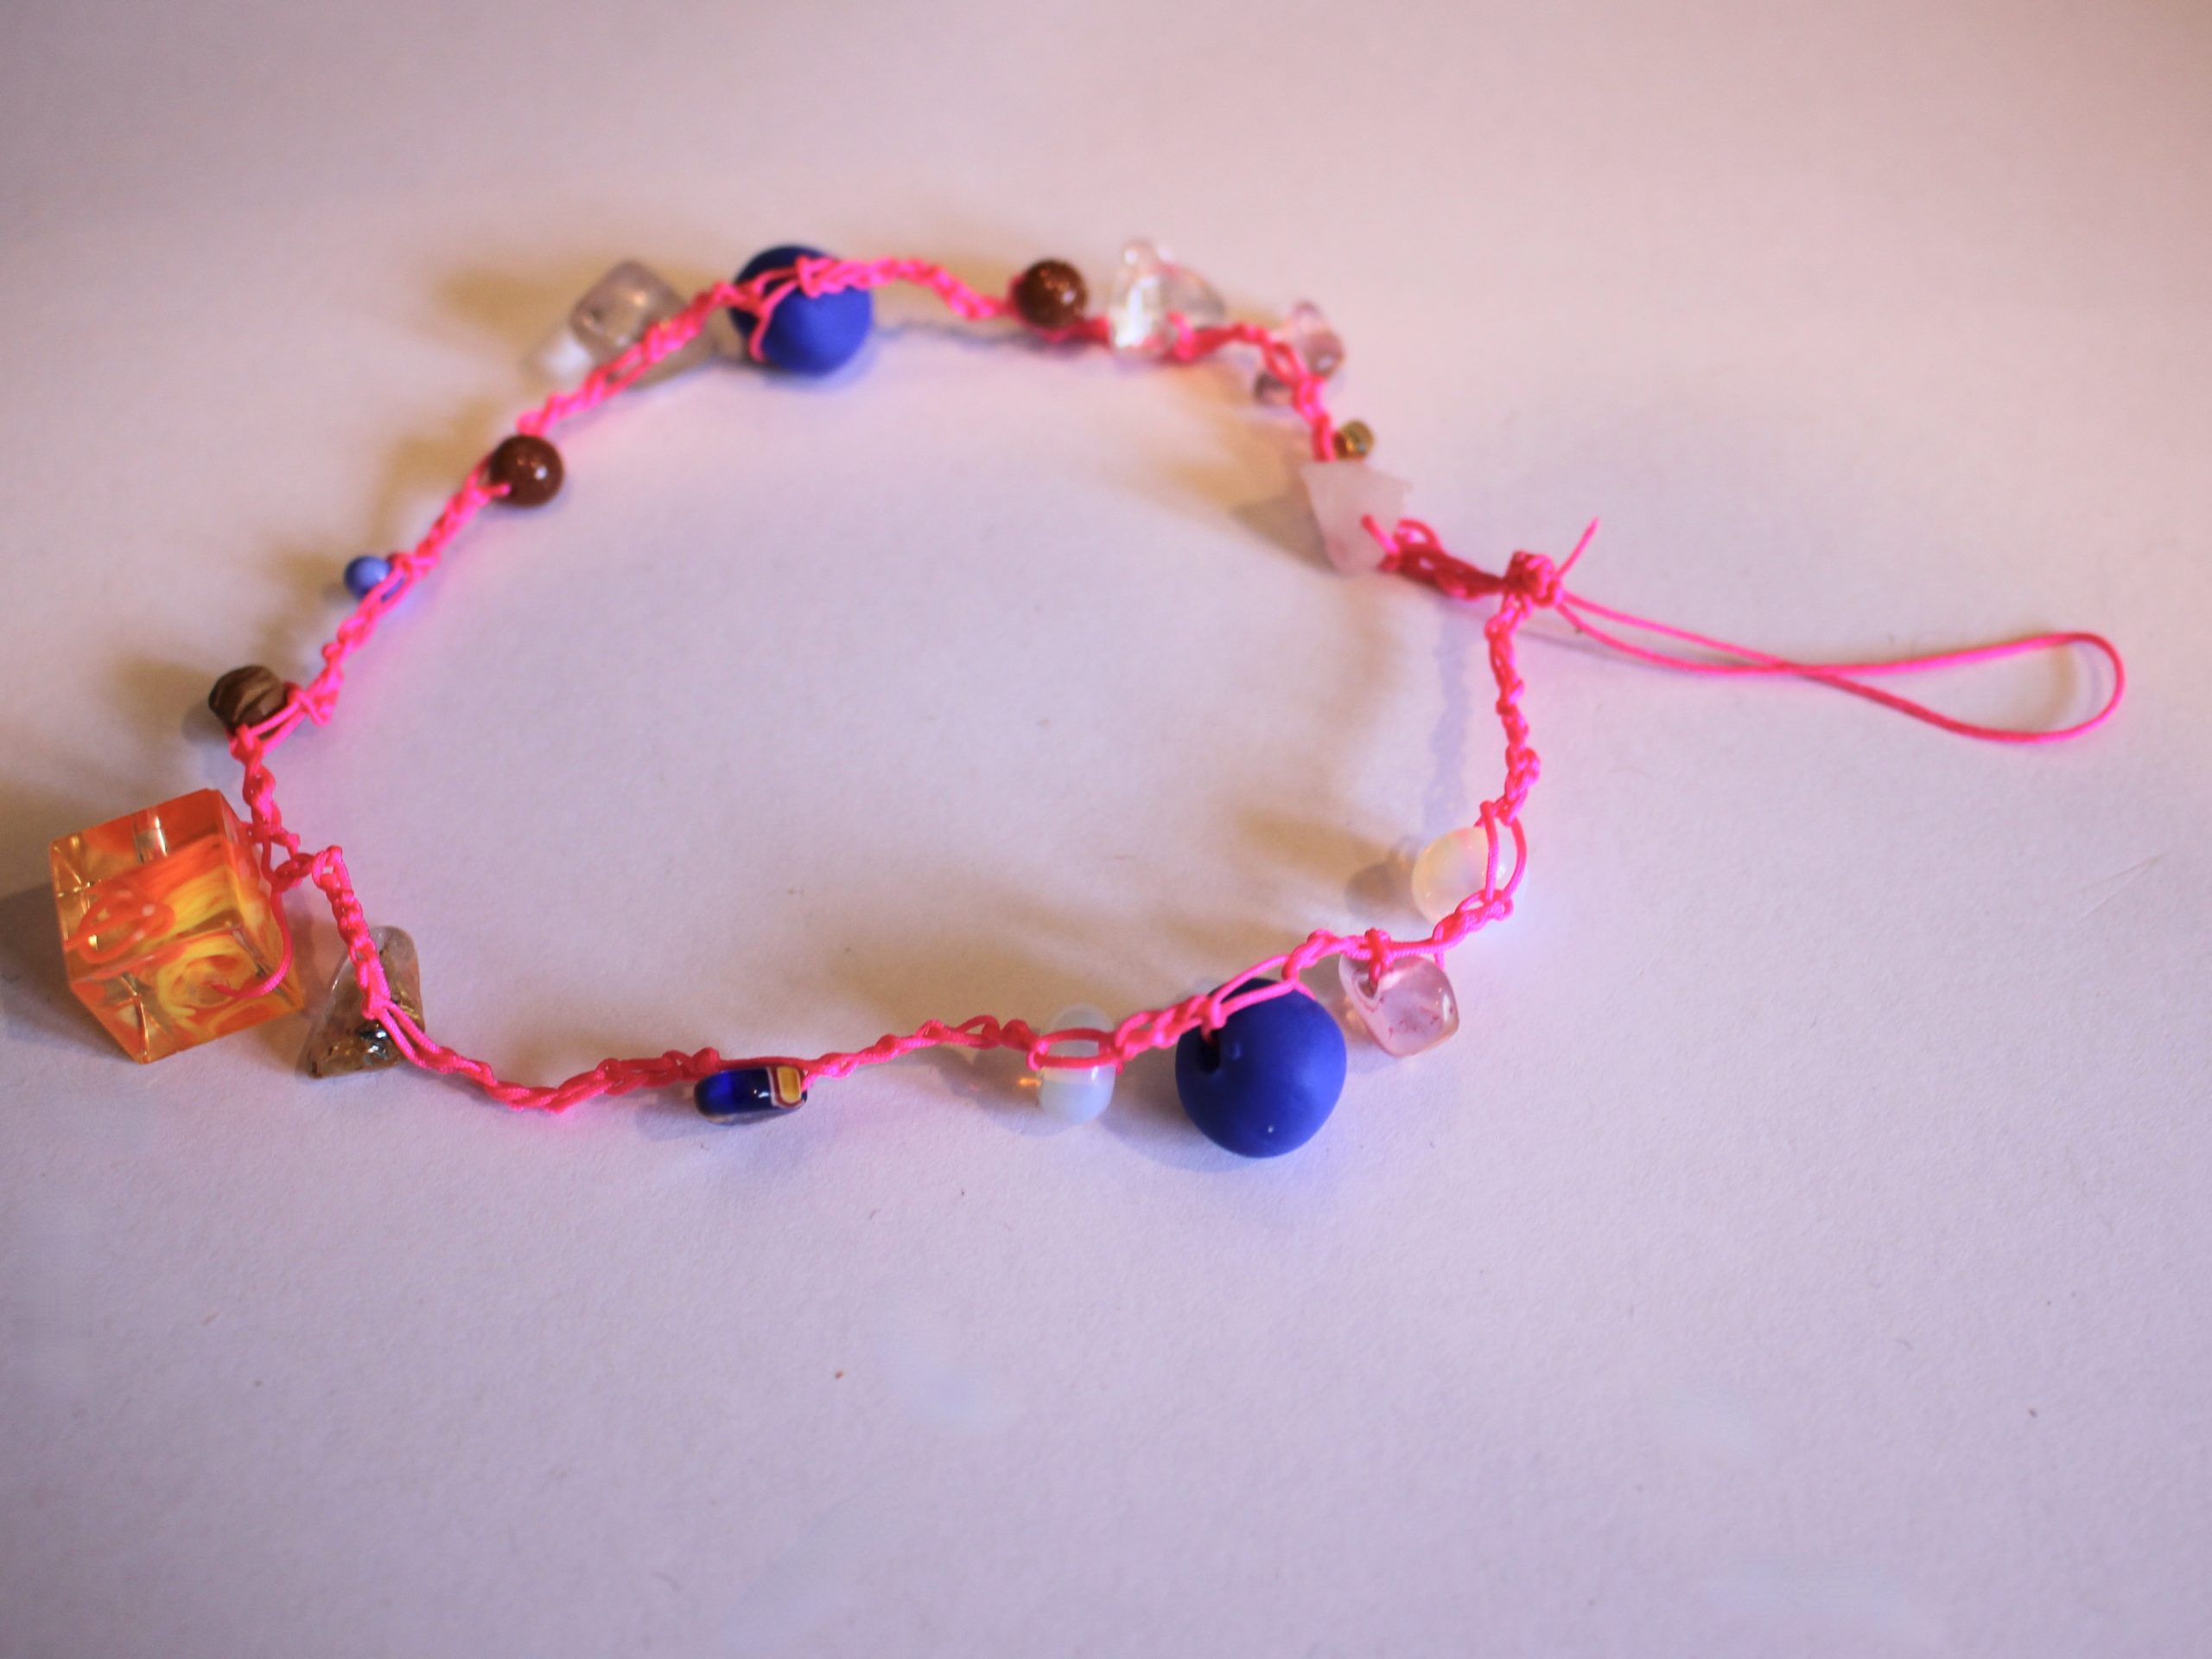
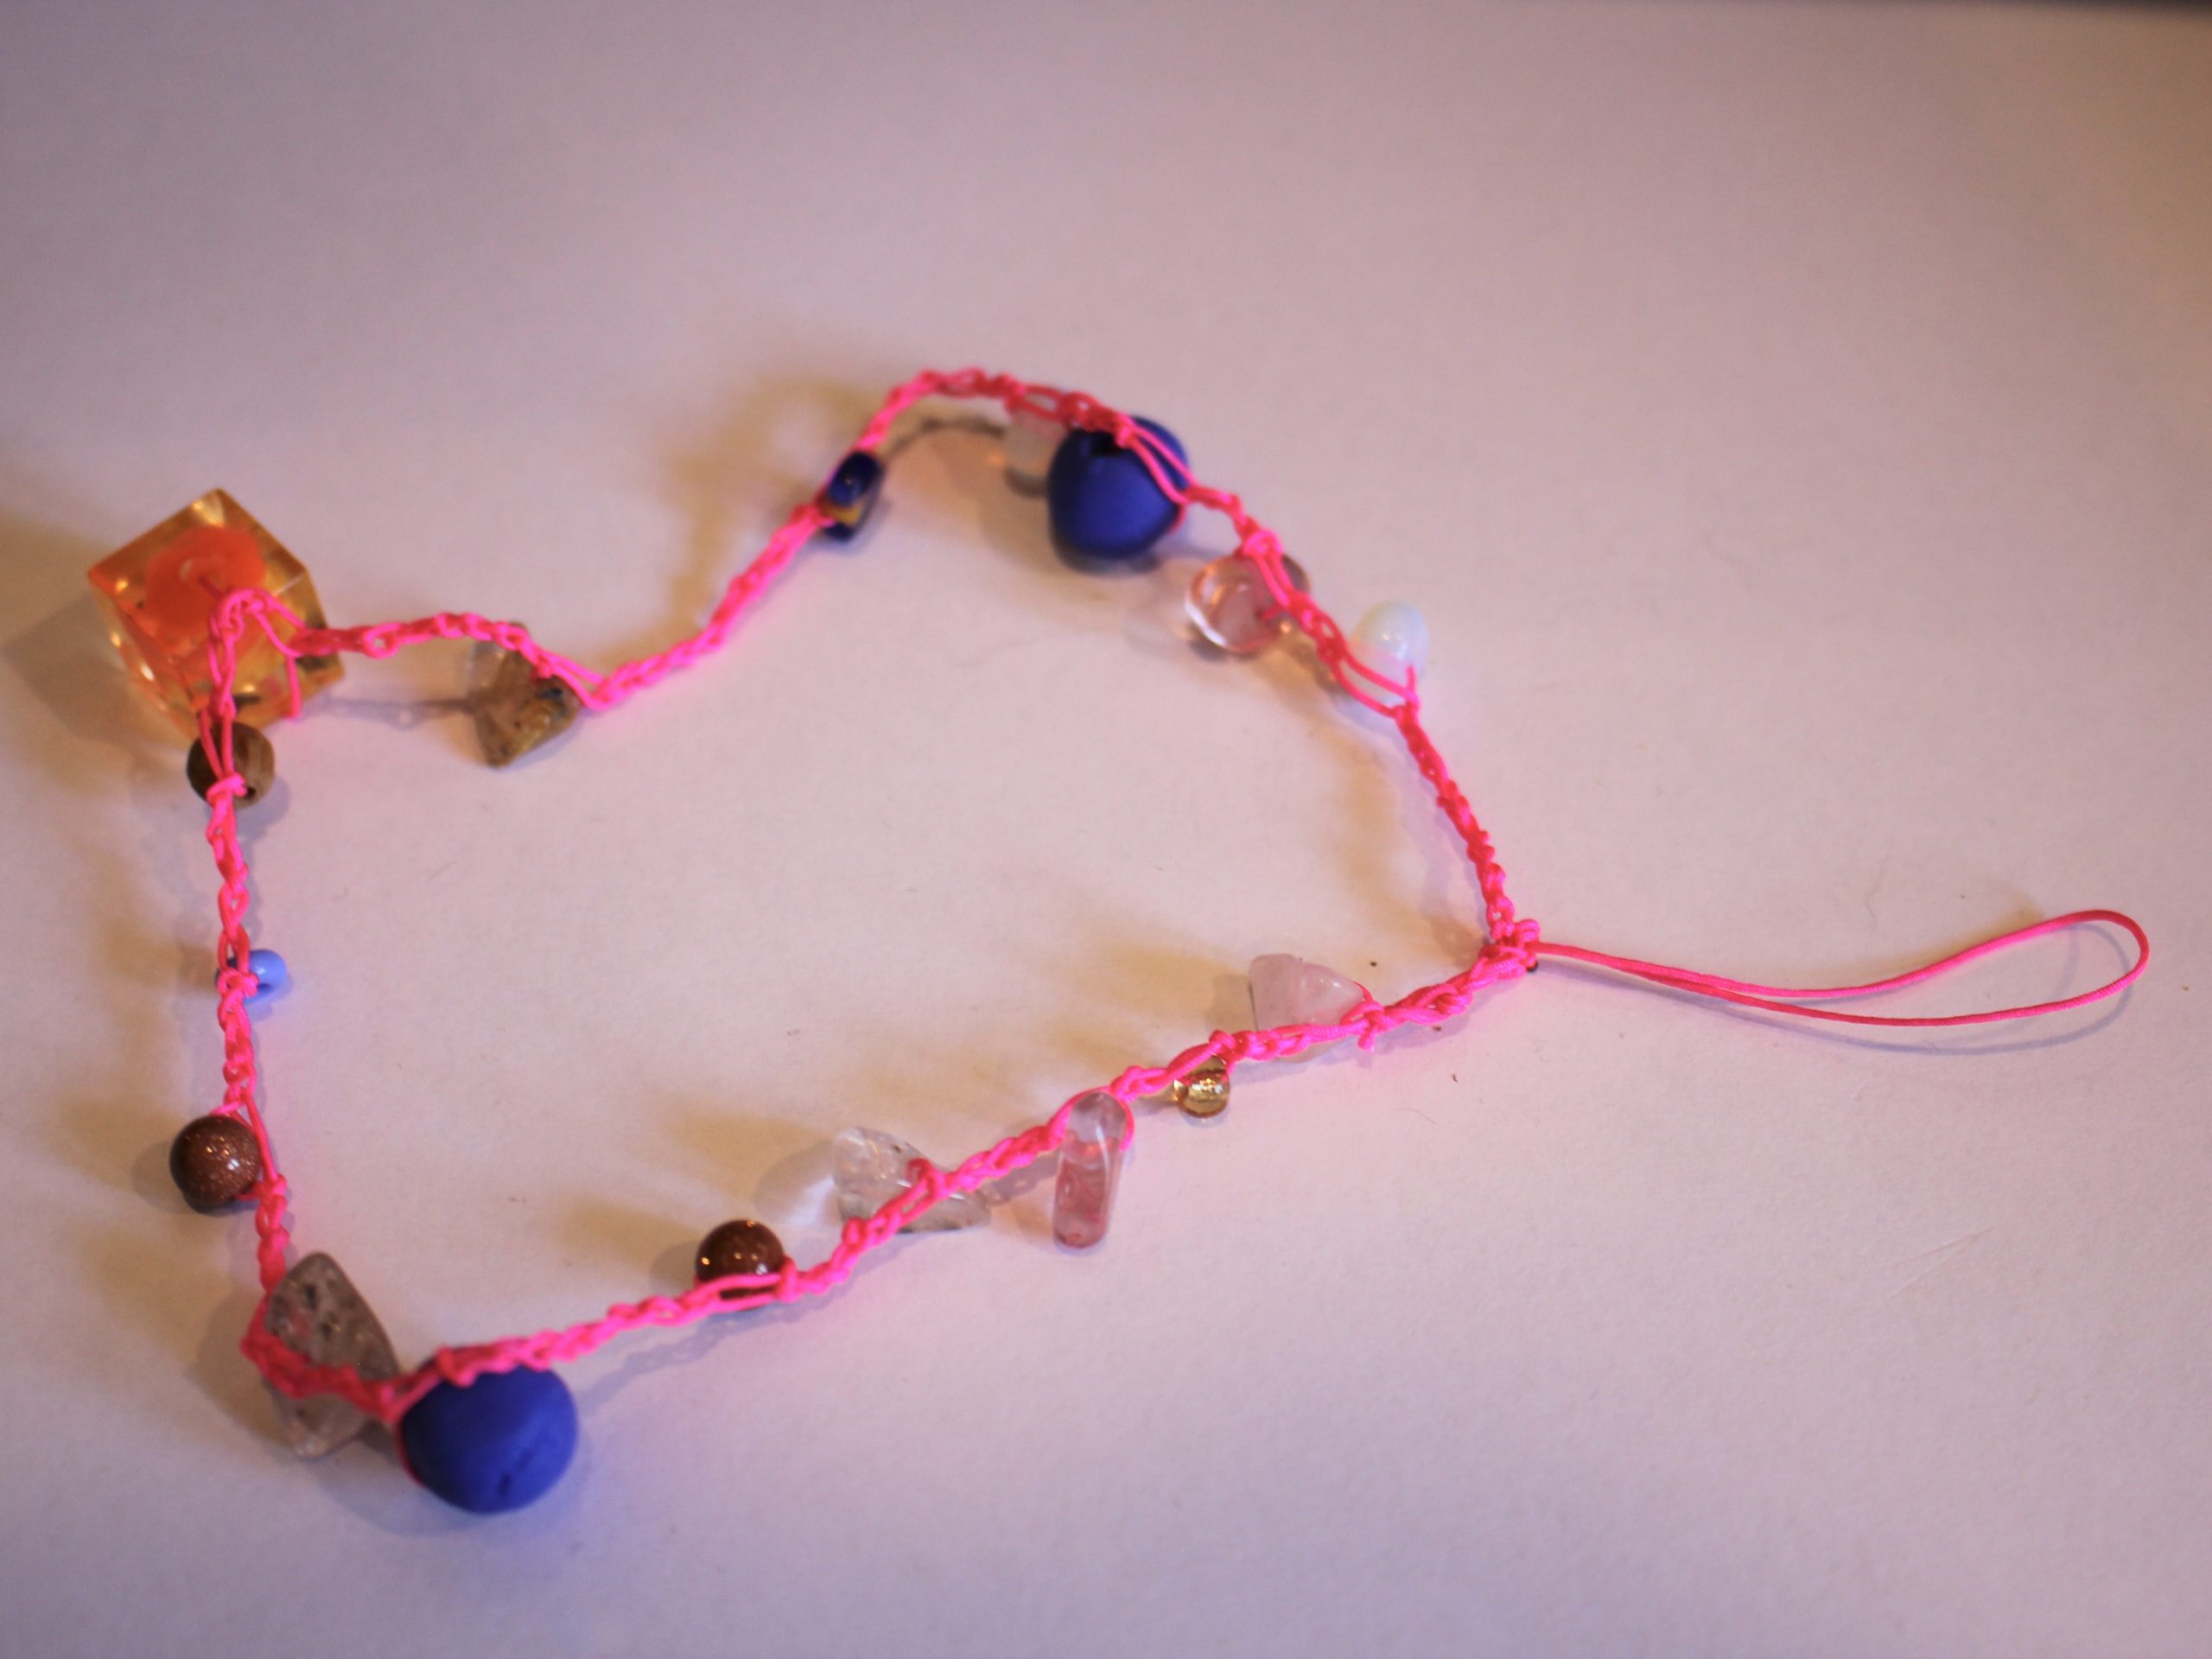
9: Once your crochet chain is long enough, cut the thread and secure the end loop by threading the end through the last loop of the chain.

10: Tie the ends of the strap together, securing the knot a few times.
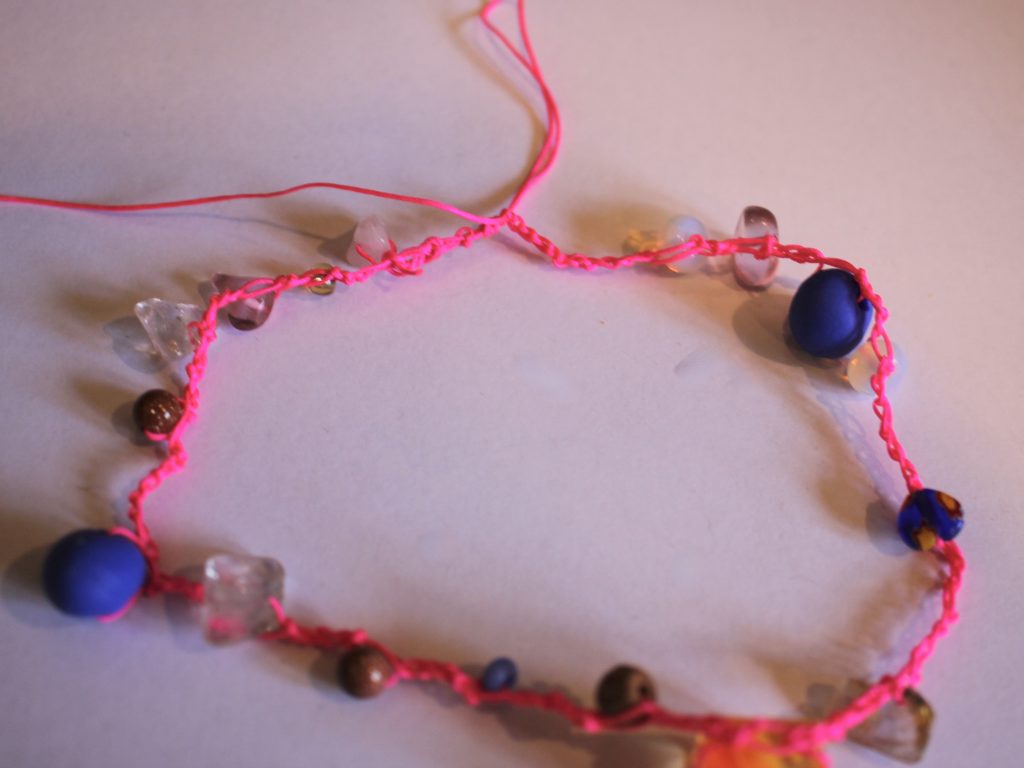
11: Trim the excess thread.

12: Add a dab of glue to the knot to secure it in place.

Now your beaded crochet phone strap is finished and ready to use! What will yours look like?
-
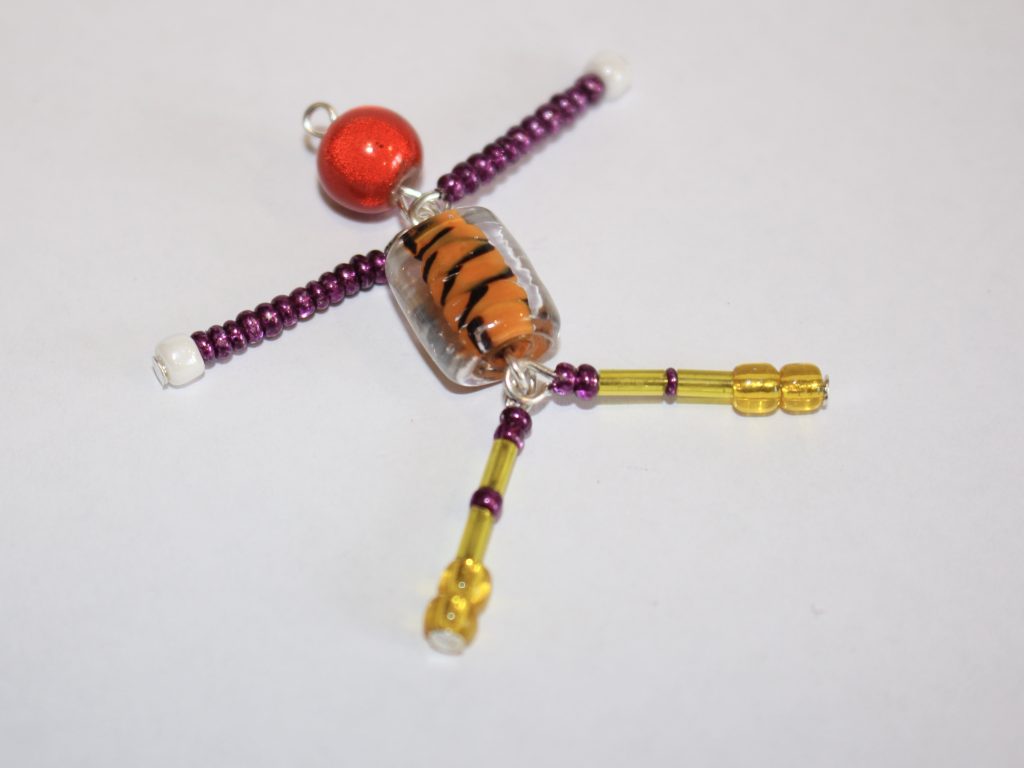
Here’s how to make a necklace strand for your cute beaded person charm…
Remember this charm? Here’s how to make a crazy mixed bead necklace to hang it on and wear about! This tutorial makes use of those random mixed beads you aren’t sure what to do with! Please note, this tutorial contains affiliate links.
You’ll need these tools and materials to make your beaded necklace:
1: A person charm, you can follow the tutorial here.
2: A piece of tigertail wire, long enough for your desired necklace length, plus a few extra centimetres.

3: Four crimp beads.

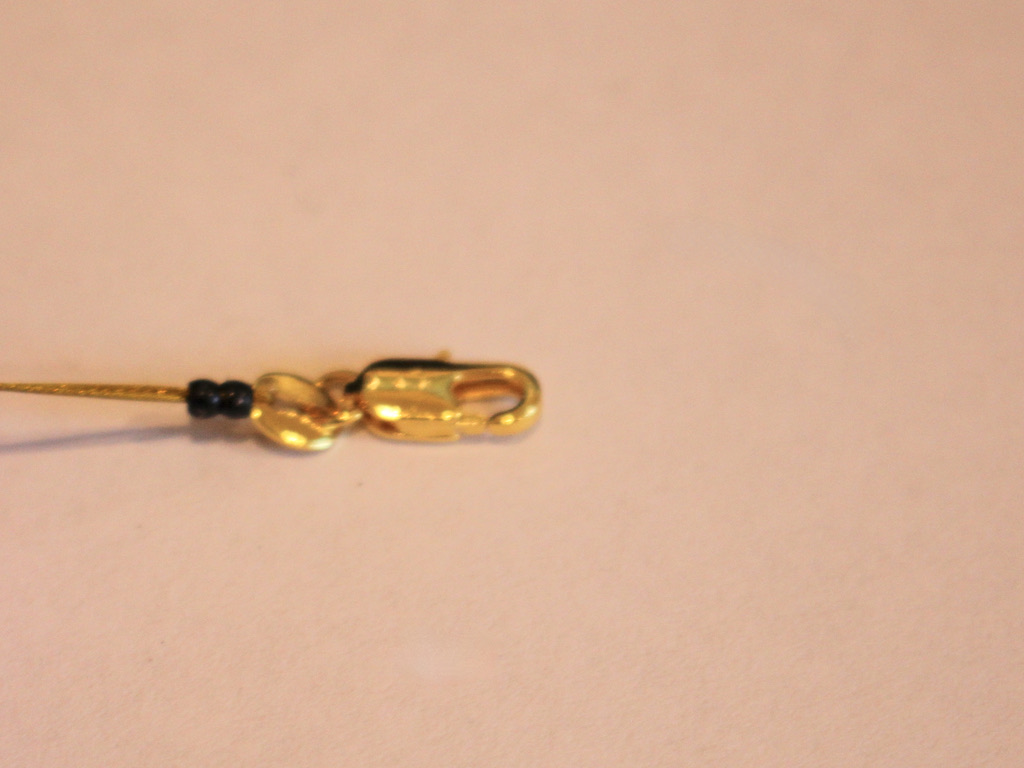
4: A toggle clasp.

5: Two jump rings.

6: Pliers.

7: A selection of beads.

Follow these steps to make your necklace for your cute person charm:
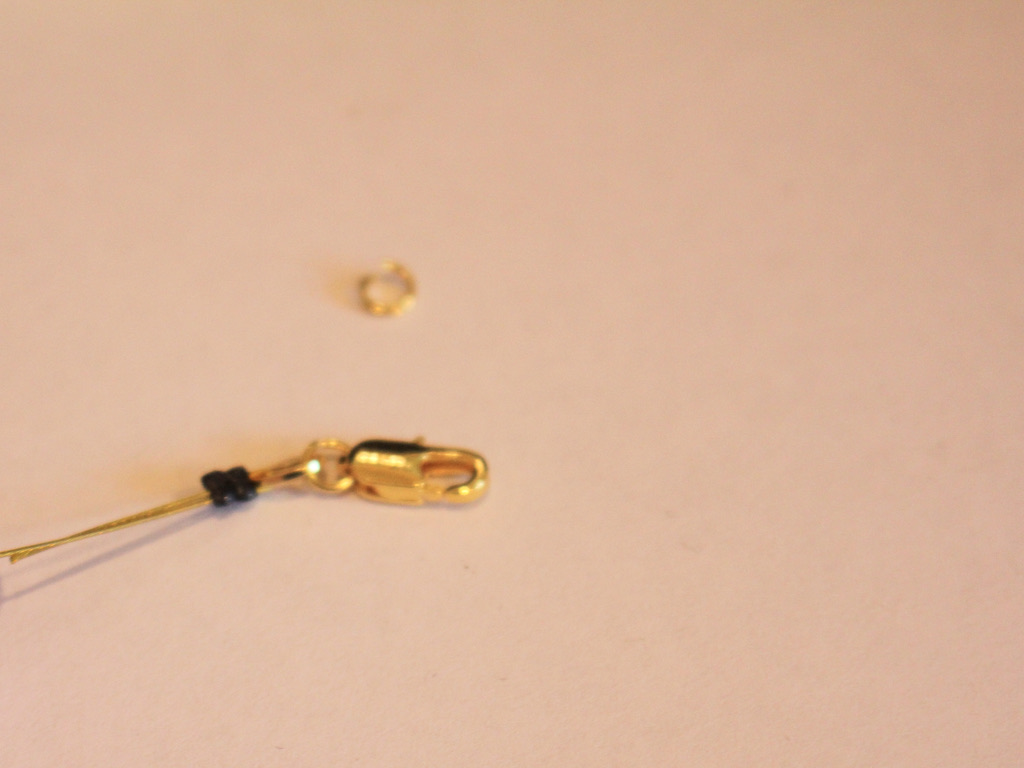
1: Take the tigertail wire an add two crimps to one end.

2: Add a jump ring to the end of the wire.

3: Fold the end of the wire around the jump ring and through the crimp beads.

4: Squash the crimp beads using the flat nose pliers.


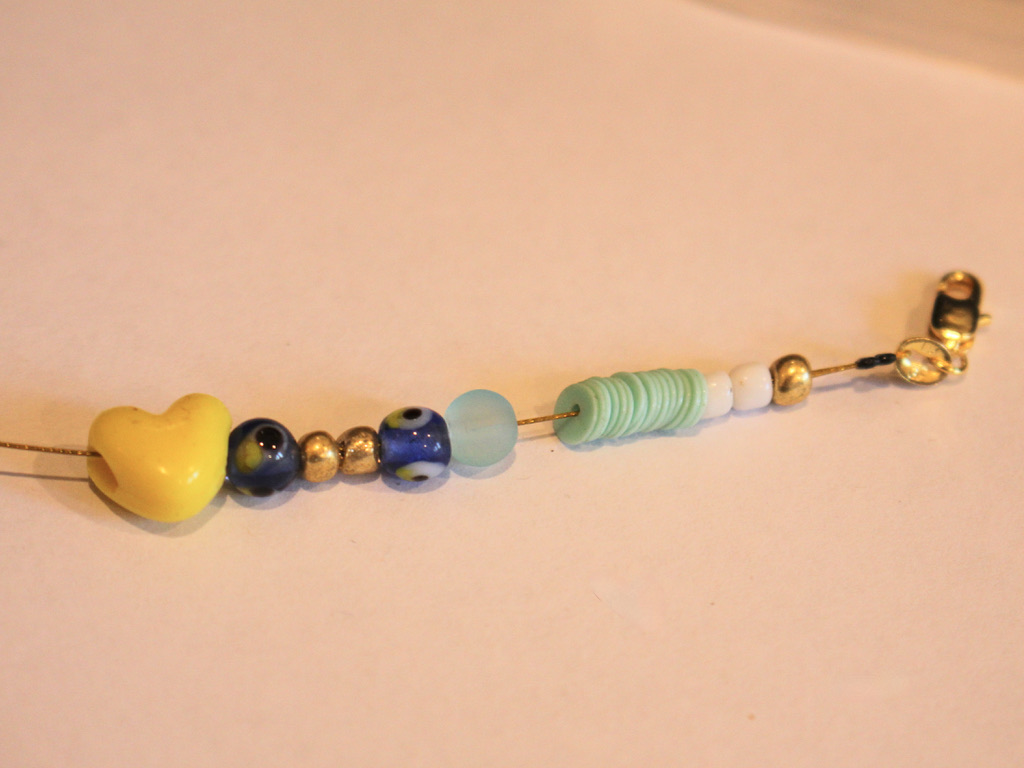
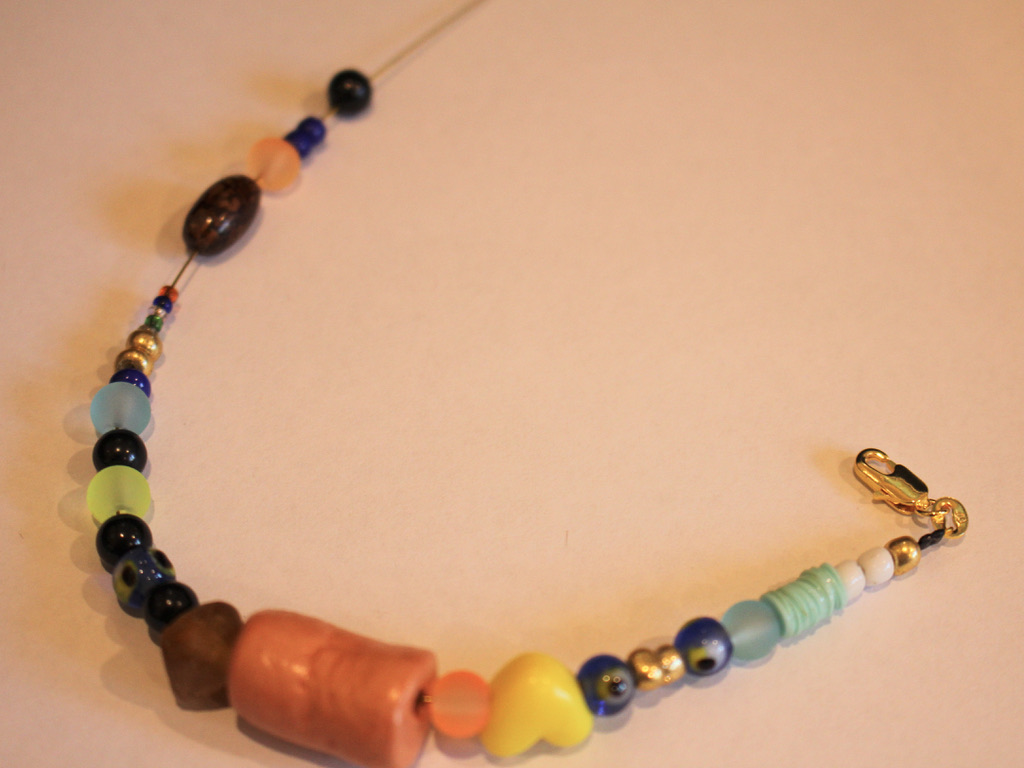
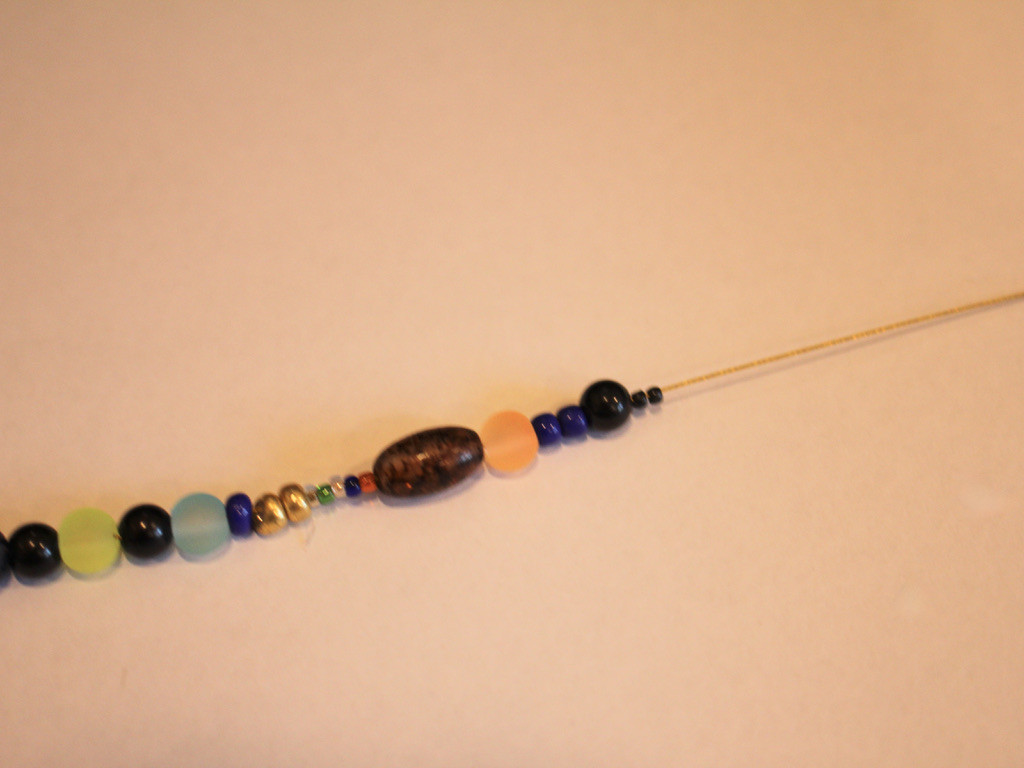
5: Begin adding beads.

6: Continue adding beads until you have a length you like.

7: Add the second set of jump rings to the other end of the necklace.

8: Add the second jump ring.

9: Loop the end of the wire around the jump ring and back through the crimp beads and the last couple of beads on the strand. Pull the wire tight.

10: Squash the crimp beads to secure the jump ring in place at the end of the necklace.

11: Trim the excess wire.

12: Open one of the jump rings using pliers and add the person charm.

13: Add the circle side of the toggle clasp and close the jump ring to secure the components together.


14: Add the other side of the toggle clasp and close the jump ring to finish the necklace off.


Now your adorable person charm necklace is finished and ready to wear! How cute!!


-
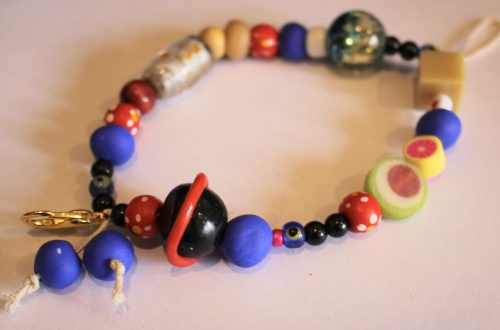
Here’s how you can make a fun mixed bead bracelet to show off your personality!
I love the trend towards the craft-core bead explosion designs in jewellery! I’ve shared a few other similar tutorials in the form of mixed bead anklets and necklaces, but this one is a bracelet! This bracelet features a mixture of handmade, recycled and new beads for a unique look! What beads will you use in yours? Please note that this tutorial contains affiliate links.
You’ll need these tools and materials to make your own mixed bead bracelet:
1: Some tiger tail wire cut to a length that will fit your wrist plus a few extra cm.

2: A selection of beads. I used a mix of plastic, clay and glass beads from different sources, recycled, new and handmade.

3: A clasp. I used this gold-tone parrot claw clasp.

4: A jump ring.

5: Four crimp beads.

6: Pliers. I used cutting pliers to cut the wire, flat nose pliers and round nose pliers.
Cutting pliers, round nose pliers, flat nose pliers. Follow these steps to make your crazy mixed bead bracelet:
1: Take the tiger tail wire and add two of the crimp beads.

3: Add the clasp to the wire and loop the end of the wire back through the crimp beads.

4: Squash the crimp beads using the flat nose pliers.

5: Begin adding beads to the wire in random order.
6: Continue adding beads until you get it to the length that feels comfortable around your wrist.
7: Add the second set of crimp beads to the wire.
8: Add the jump ring to the wire.
9: Loop the wire around the jump ring and back through the crimp beads and the first few beads at the end of the bracelet.

10: Pull the wire tight.
11: Squash the crimp beads using the flat nose pliers.
12: Trim the excess wire using the cutting pliers.


13: Now your bracelet is finished and ready to wear!


Here are some other mixed bead, craft-core tutorials for you to follow:
- A crazy mixed bead necklace
- A mixed bead necklace with letter beads
- This special mixed bead shoe chain that can also be worn as an anklet
- A simple mixed bead anklet
If you love the clay bead featured on this bracelet, here’s a tutorial that you can follow to make your own.
-
How to make a beaded phone strap using a piece of string!
Beaded phone straps are a bit of a trend right now, and here’s a down and dirty way to make one! Really all you need is some string and some beads. I added a large lobster clasp as well, you can use it to attach the strap to your phone or to add some keys or other important charms to your design! Please note that this tutorial contains affiliate links.
You will need these tools and materials to make your own beaded phone strap:
1: A piece of string. I cut mine to be about 40cm long but I suggest going longer, maybe 50-60cm.

2: A selection of beads. Make sure they have holes big enough to fit over the string. I used a mix of handmade polymer clay beads, glass beads, resin beads, timber beads and plastic beads.

3: A large lobster clasp.

4: A pair of scissors for cutting and trimming your string.
Follow these steps to make your phone strap:
1: Fold the string in half.

2: Take the folded end and create a knot, I made mine a little small, I suggest creating the knot about 8-10cm down the string. After you pull the knot tight you will have a loop and two separate strings.


3: Begin adding beads to one of the strings until you have most of the string beaded.


4: Add beads to the other side, beading the second string to the same length as the first.

5: Tie the ends of each string together, adding the lobster clasp before securing the knot.


6: Add an accent bead to one of the tails of the loop and knot the end to secure the bead in place.


7: Repeat step 6 for the second tail of the beaded phone strap.

Now your phone strap is finished! This is a bit of a down and dirty DIY but the results are pretty cute and you can personalise it to your liking!


-
Here’s how you can make a y2k inspired anklet with a mix of random beads!
These craft-core y2k inspired designs are so popular right now. A mix of beads including glass, polymer clay, semi-precious gemstones and pearls come together to create a chaotic but stylish look! This is perfect for using those random beads in your stash that you aren’t sure how to use! Please note that this tutorial contains affiliate links.
You’ll need these tools and materials to make this cute y2k nostalgia anklet:
1: Some tiger tail wire, cut it about 5cm longer than the length you need to fit loosely around your wrist.

2: Pliers. I used my round nose pliers (middle), flat nose pliers (right) and cutting pliers (left).
3: A selection of beads. I used some glass beads, some polymer clay beads, plastic beads, pearls, gemstone chip beads and timber beads.

4: A charm. I used this gold strawberry charm.

5: Four crimp beads.

6: Two small jump rings.

7: One larger jump ring.

8: A lobster clasp.

Follow these steps to make your y2k inspired anklet:
1: Add two of the crimp beads to the piece of tiger tail wire.

2: Add a jump ring.

3: Fold the end of the wire around the jump ring and through the crimps.

4: Squash the crimps using the flat nose pliers.


5: Add beads until you have the length you like to fit around your ankle.


6: Add the second set of crimp beads to the wire.

7: Add the second small jump ring.
8: Loop the wire around the jump ring and back through the crimps and the end bead. Pull the wire tight.

9: Squash the crimp beads using the flat nose pliers again.

10: Trim the excess wire.

11: Add the lobster clasp to one end of the anklet. Attach it by opening the jump ring and sliding the clasp on.

12: Close the jump ring.

13: Attach the charm to the bracelet using the larger jump ring.


Now your y2k inspired anklet is finished and ready to wear! How cute?!


-
Here’s how to make a bead chain lariat
Bead chains are pretty cool, and a fun way to use any random beads you have lying around. I recently made this kitschy hodgepodge lariat necklace using the bead chain technique. This tutorial features affiliate links.
Here are the tools and materials you need to make your bead chain lariat:
1: Pliers. I used by round nose and flat nose pliers for this design.


2: An assortment of beads. I used a random assortment of plastic, timber and glass beads.

3: A bunch of eye pins.

4: Two head pins.

5: A lobster clasp.

6: Two medium jump rings.

7: Two smaller jump rings.

Follow these steps to make your bead chain lariat:
1: Add some feature beads to one of the head pins. I used this silver plastic heart bead and some glass seed beads.

2: Bend the pin at a right angle and use the round nose pliers to form the top into a loop.


3: Set this pin aside.
4: Begin adding beads to the eye pins.

5: Once each pin is beaded, bend the top to form a loop using round nose pliers. This will secure the beads in place.

6: Repeat this step for the other pins, attaching the pins together by opening one of the loops and sliding it through another to form the chain.


7: Once you have a chain long enough to fit your neck, attach the two ends together using one of the larger jump rings.


8: Create a few extra links and attach them to the middle of the necklace, finishing with the first head pin you beaded.


9: Split the top of the chain opposite the lariat chain you just attached.

10: Attach the clasp to the chain using one of the smaller jump rings and add another jump ring to the other side.


11: Bead the other head pin, looping it at the top as you did the others. Attach this pin to the chain behind the clasp using the other larger jump ring.


Now your necklace is finished! So fun!


This tutorial contains affiliate links.