-
How to make a super cute letter bead necklace! Add your word to a chain for a cute twist on the y2k jewelry trend!
This is a super cute necklace design that you can personalise to suit your preference. I’m stuck in lockdown right now so I decided to make sure everyone knows that I am ‘BORED’ haha. This super cute design is simple to construct and looks great worn on its own or layered with your other pieces. Maybe you can make a high-low statement by wearing this with your fine jewelry! Please note that this tutorial contains affiliate links.
You will need these tools and materials to make your letter bead necklace:
1: You’ll need two pieces of chain that make up your preferred necklace length. Please note that adding the letter bead chain will make it a little longer.

2: Enough eye pins for the length of your word. I used seven.

3: Enough small jump rings for the length of your word plus one extra. I used eight.

4: Two larger jump rings.

5: A lobster clasp.

6: Letter beads. I used seven beads, five to spell out the word BORED and a couple of white letter beads with hearts on them.

7: Pliers. I used my round nose and flat nose pliers to open and close jump rings and eye pins to complete this necklace.


Follow these steps to make your own letter bead necklace:
1: Add one of the letter beads to one of the eye pins.

2: Bend the pin using the round nose pliers to form a loop. This will secure the bead onto the pin.


3: Repeat this steps for the remaining letter beads until they are all secured onto eye pins.

4: Attach the beads together in order using the small jump rings, you should have two left over for each end of the letter bead chain to attach the necklace chains.


5: Add one of the remaining small jump rings to one end of the letter bead chain.

6: Attach one of the long necklace chains and secure it by closing the jump ring.

7: Repeat steps 5 and 6 for the second side of the necklace.

8: Add one of the larger jump rings to one end of the necklace and slide on the clasp. Close the jump ring to secure the clasp in place.


9: Add the second large jump ring to the other side of the necklace to finish it off!

Now your necklace is complete and ready to wear! What message will you send with yours? Hopefully it is more positive than mine!! 😉


Here are some other letter bead pieces you can make if you loved this one!
-
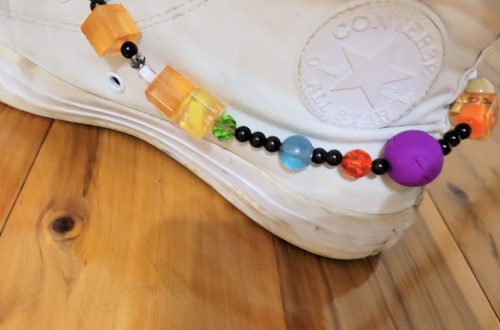
Here’s how you can make a y2k inspired anklet with a mix of random beads!
These craft-core y2k inspired designs are so popular right now. A mix of beads including glass, polymer clay, semi-precious gemstones and pearls come together to create a chaotic but stylish look! This is perfect for using those random beads in your stash that you aren’t sure how to use! Please note that this tutorial contains affiliate links.
You’ll need these tools and materials to make this cute y2k nostalgia anklet:
1: Some tiger tail wire, cut it about 5cm longer than the length you need to fit loosely around your wrist.

2: Pliers. I used my round nose pliers (middle), flat nose pliers (right) and cutting pliers (left).
3: A selection of beads. I used some glass beads, some polymer clay beads, plastic beads, pearls, gemstone chip beads and timber beads.

4: A charm. I used this gold strawberry charm.

5: Four crimp beads.

6: Two small jump rings.

7: One larger jump ring.

8: A lobster clasp.
Follow these steps to make your y2k inspired anklet:
1: Add two of the crimp beads to the piece of tiger tail wire.

2: Add a jump ring.

3: Fold the end of the wire around the jump ring and through the crimps.

4: Squash the crimps using the flat nose pliers.


5: Add beads until you have the length you like to fit around your ankle.


6: Add the second set of crimp beads to the wire.

7: Add the second small jump ring.
8: Loop the wire around the jump ring and back through the crimps and the end bead. Pull the wire tight.

9: Squash the crimp beads using the flat nose pliers again.

10: Trim the excess wire.

11: Add the lobster clasp to one end of the anklet. Attach it by opening the jump ring and sliding the clasp on.

12: Close the jump ring.

13: Attach the charm to the bracelet using the larger jump ring.


Now your y2k inspired anklet is finished and ready to wear! How cute?!