-
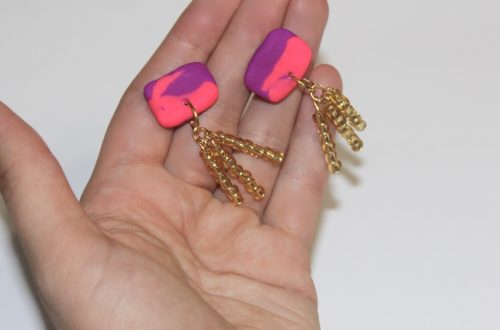
If you are sick of matching earrings this is the tutorial for you… How to make asymmetrical earrings.
I am seeing loads of cool asymmetrical earrings around lately, here’s how to make a pair of your own.

You will need the following tools and materials to make your asymmetrical earrings:
1: Pliers. I used my round nose pliers, cutting pliers and flat nose pliers.

2: Eye pins of different lengths. I used two eye pins.

3: Three small head pins.

4: One larger head pin.
5: A pair of stud earring findings.

6: Beads of your choice. I used some vintage yellow tube beads, some blue plastic beads and some yellow and blue glass beads.

Follow these steps to make your asymmetrical earrings:
1: Add one of the glass beads and tube beads to the larger head pin.

2: Bend the top of the pin to form a right angle.

3: Trim the pin so that it is only 1cm long from the top of the bead.

4: Curl the top of the pin using the round nose pliers to secure the bead on the pin.

5: Add the longer bead to the longer eye pin and repeat steps 2-4 to secure the bead in place.


5: Attach the two pins together.


6: Attach the top of the charm to the loop of the earring finding.

7: Add the plastic blue beads to each of the small head pins.

8: Curl the tops of the pins to secure the beads in place.


9: Place the remaining glass beads on the shorter eye pin.

10: Repeat steps 2-4 to secure the glass beads on the eye pin. (Skip the wire trimming if your pin is the right length!)


11: Put the small blue charms onto the bottom of the beaded pin.


12: Add an earring finding to the top of the pin to finish the second earring.

Now your asymmetrical beaded earrings are finished and ready to wear!


Here’s another pair of mismatched beaded earrings made using a hammered wire ring.

Note: This article contains affiliate links
-
How to upcycle your old broken headphones into a bracelet!

I have a load of broken headphones, if you’re like me and don’t want to chuck them in the bin, here’s a way to upcycle them… turn them into a beaded finger-knit bracelet. Contains affiliate links.
You will need the following tools and materials to make your headphone bracelet:
1: Pliers. You’ll need cutting pliers, round nose pliers and flat nose pliers.
2: A pair of broken headphones. I used these broken apple headphones.

3: Some beads with large holes. I used these yellow plastic heart beads.

4: Two crimp ends.

5: Two jump rings.

6: A toggle clasp.

Follow these steps to make your headphone bracelet:
1: Clip the headphones so that you have one long thread.

2: Create a slip knot at one end of the headphone cord.

3: Put the knot around your finger and loop it again right next to the first loop. If you need a refresher on how to finger knit check out this video tutorial.

4: Pull the first loop over the second one and off your finger.
5: Add a bead to the next loop and repeat steps 3 and 4.

6: Continue this until your finger knitting is long enough to fit your wrist.
7: Knot the end of the finger knitting to secure it.

8: Add a crimp end to both ends of the headphone cord.


9: Attach the toggle clasp using the jump rings.


Now your upcycled headphone bracelet is ready to wear!

https://flic.kr/p/RqQsqF
-
One hoop not enough? Here’s how to make double hoop earrings!
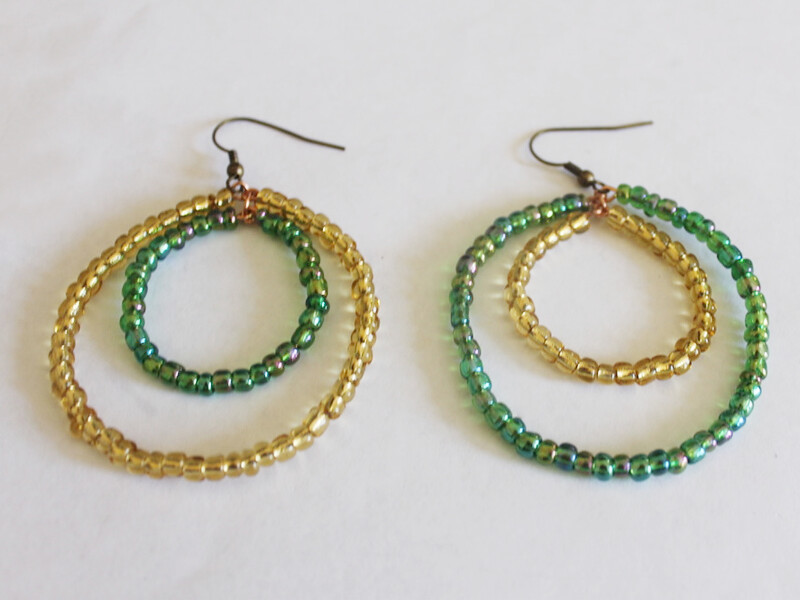
These hoops are special, they’re double hoops! This tutorial contains affiliate links.
You’ll need the following tools and materials to make your own double hoop earrings:
1: Pliers. You’ll need round nose pliers, flat nose pliers and cutting pliers.
2: Two pieces of wire.

3: Two shorter pieces of wire.

4: Two jump rings.
5: Two earring hooks.

6: Beads of your choice. I used these green and yellow glass e-beads.


Follow these steps to make your double hoop earrings:
1: Create a loop at one end of one of the shorter wires using the round nose pliers.

2: Add yellow beads to the wire until there is approximately 1cm left unbeaded.

3: Create another loop at the other end of the wire to secure the beads in place.

4: Repeat steps 1-3 for the second short wire using the green beads.

5: Follow the previous steps for the two longer pieces of wire. Make one in yellow and one in green.


6: Form each of the wires into circles joining them at the end loops.


7: Attach the small green hoop to the inside of the large yellow hoop using one of the jump rings.

8: Repeat step 7 for the other pair of hoops.

9: Add an earring hook to the top of each hoop to finish the double hoop earrings. Now they’re ready to wear!

-
Do you like geometric jewelry? Here’s how to make a pair of square beaded earrings

These earrings are so easy to make! They’re a cool variation on the triangle earrings tutorial.
You will need the following tools and materials to make your square beaded earrings:
1: Pliers. You will need your round nose pliers to make these earrings.

2: Eight eye pins.

3: Two earring hooks.


Follow these steps to make your square earrings:
1: Add beads to 6 of the eye pins leaving approximately 1cm exposed.


2: Bend the tops of each pin to form right angles.
3: Create loops at the top of each pin using the round nose pliers to secure the beads in place.


4: Add beads to the two remaining pins. When you reach the approximate halfway point add an earring hook. Place the remaining beads on the other side of the hook leaving approximately 1cm of the pin unbeaded.

5: Repeat steps 2 and 3 on the last two eye pins.

6: Attach three pins to the earring pin to form a chain.

7: Bring the end of the last pin around and attach it to the other side of the earring pin to form a square.


8: Repeat this for the second earring to finish off the pair.

Here’s another pair I made using longer eye pins and some green glass beads.