-
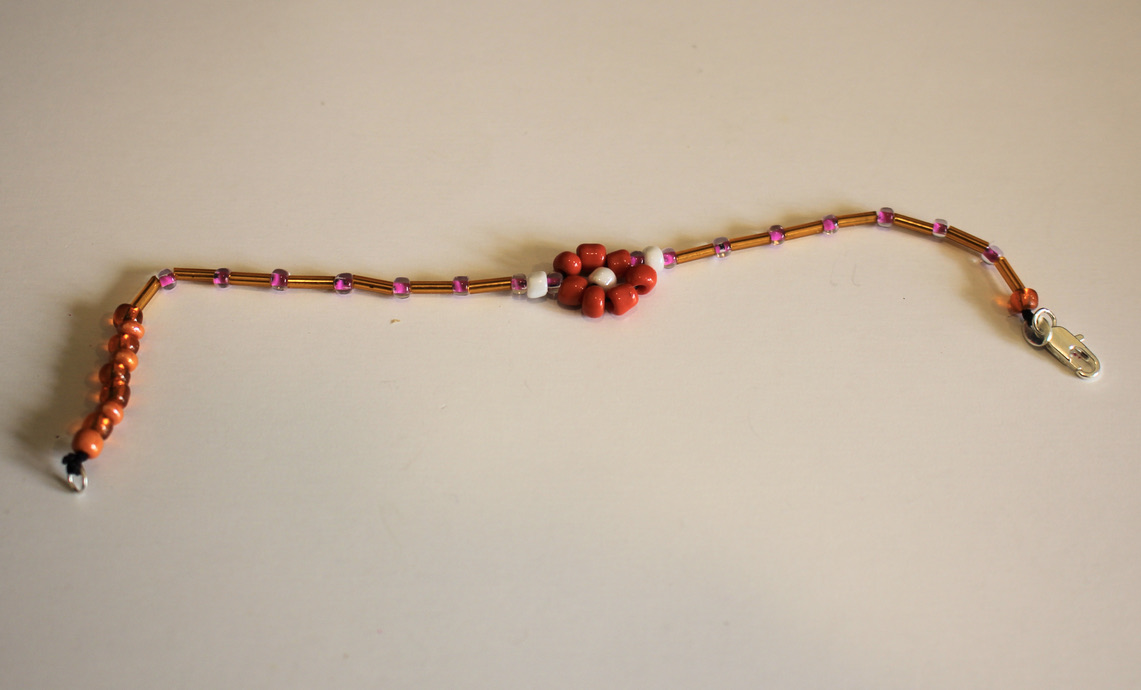
Flower beading is so fun! Here’s how to put together a flower beaded bracelet.
Flower beading was one of the first beading techniques I learned when I was a crafty kid! I still love beading and it is so fun to see this nostalgic style coming back! This bracelet makes a feature of a beaded flower, surrounded by a variety of glass beads. Please note that this tutorial contains affiliate links.
You’ll need these tools and materials to make your flower beaded bracelet:
1: Scissors.

2: Beading thread.

3: A selection of beads. I used some larger glass beads for the flower and some smaller ones for the base of the bracelet.

4: A parrot clasp and jump ring for the ends of the bracelet.


5: Some superglue.

6: A beading needle with a thin loop of thread tied to it.

Here are the steps to follow to make your flower beaded bracelet:
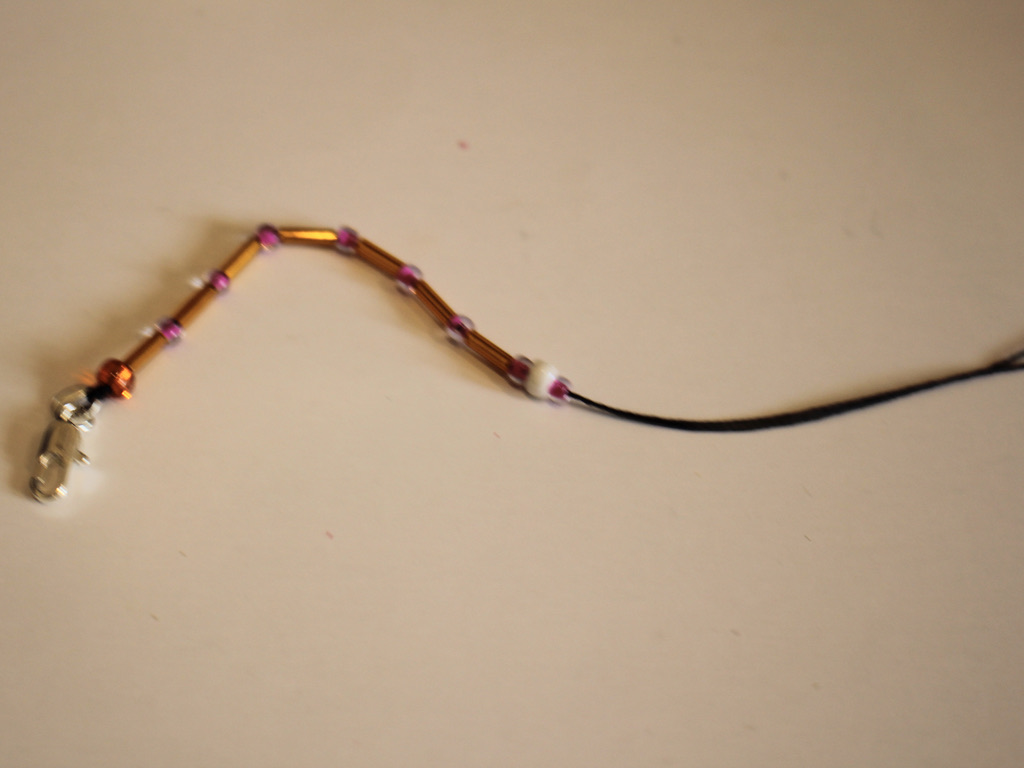
1: Cut a length of thread, about 50cm and fold it in half.

2: Slip the loop around the clasp end and pull the length of the thread back through that loop. Pull it tight to secure it to the clasp.

3: Tie a knot at the base of the clasp and put the thread back through the clasp end, tying one final knot for extra security.


4: Add the looped needle to the beading thread.
5: Begin adding beads, bead to about half of the preferred length of your bracelet. You can check this roughly by laying the bracelet across your wrist and measuring by eye how far it reaches around the wrist.

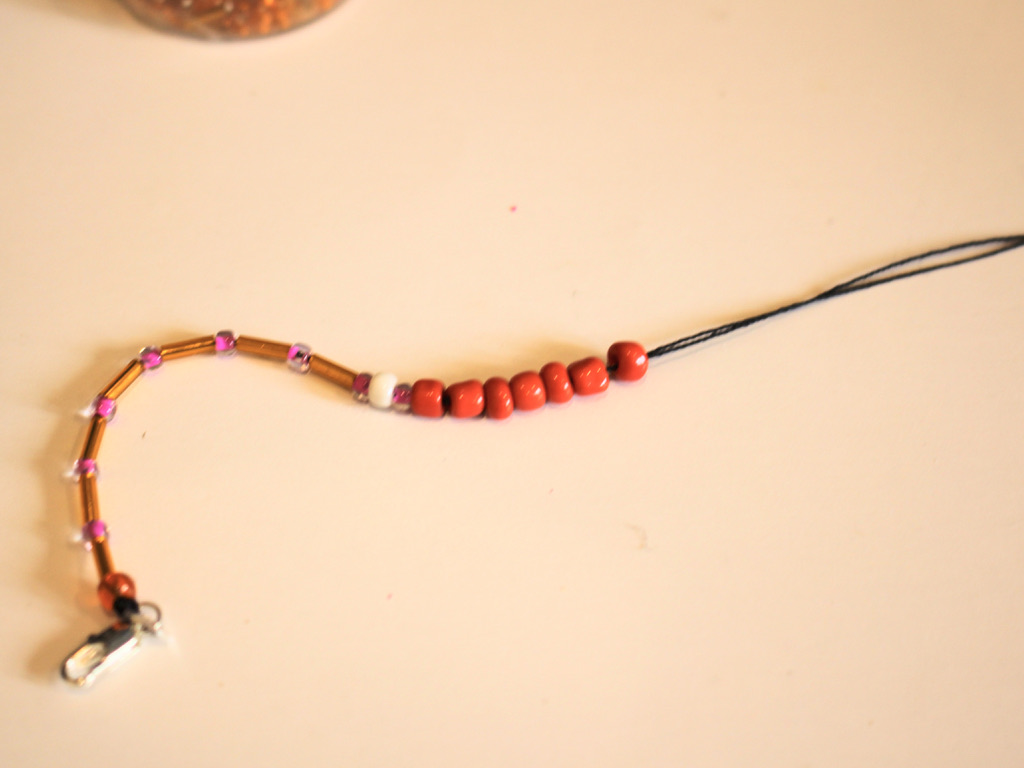
6: Once you have the length you like, add the seven beads for making the flower.
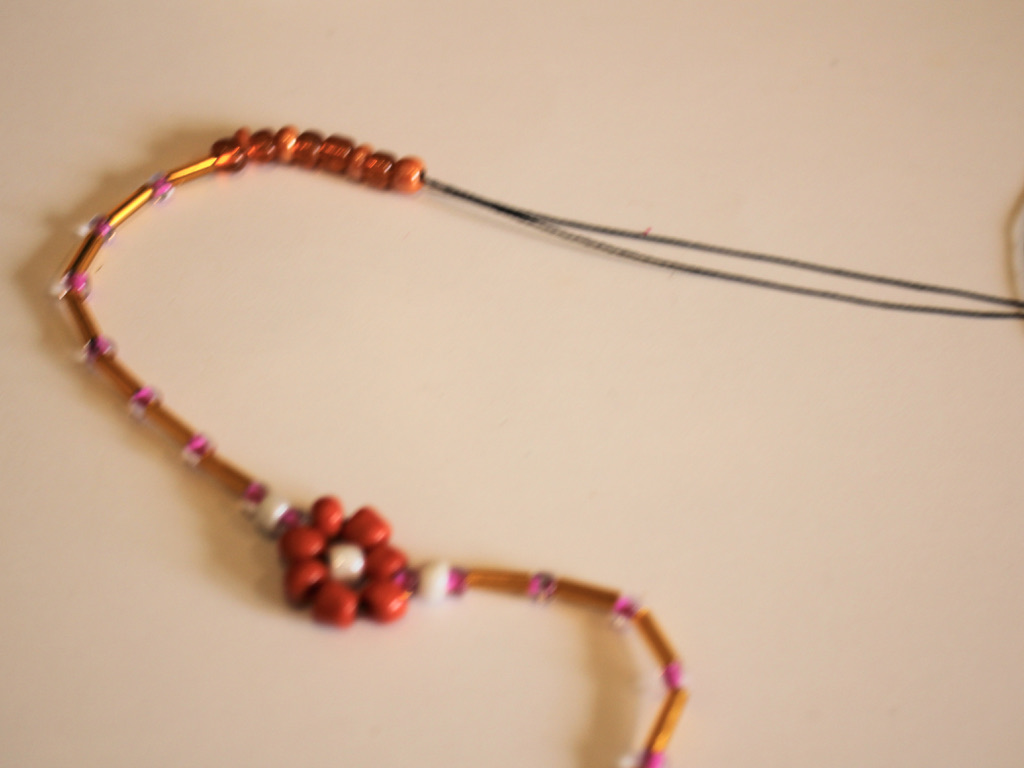
7: Take the needle and put it through the hole of the first of the flower beads. When you pull it tight you will have a circle shape.

8: Add another bead to the thread, this will be the centre of the flower.

9: Place the centre bead into the middle of the circle and then thread the needle through one of the beads opposite the one you used to form the circle.

10: Pull the thread tight, you will now have a flower with a centre.
11: Continue beading until you have the length you like. I didn’t quite make the first part of my bracelet long enough so I decided to add some extra feature beads at the end to make it long enough.


12: Once you have your desired bracelet length, tie a knot at the end of the beads to secure them.
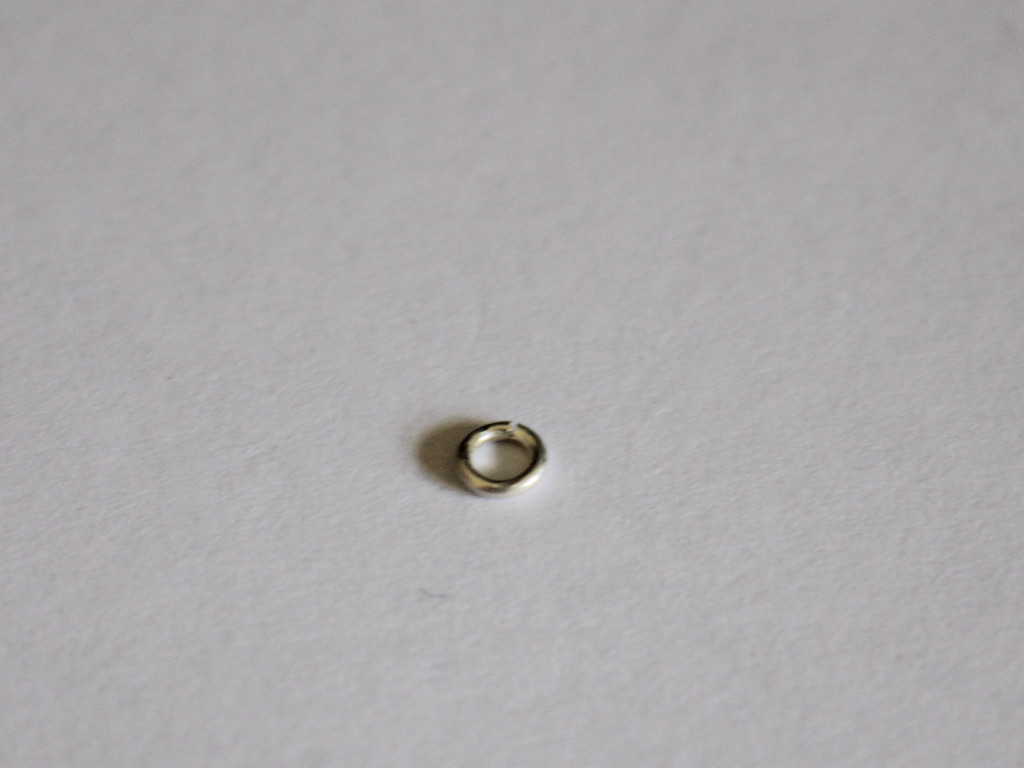
13: Loop the thread around the jump ring and tie a knot. Repeat this to secure the jump ring well.


14: Trim the excess thread from the end of the bracelet, cutting closely. Then add a dab of superglue to the knots on both ends of the bracelet for extra security. Set the bracelet aside and wait for the glue to dry.


Once the glue is dry, your sweet and cheerful floral bracelet is finished and ready to wear!


Here are some more floral bead tutorials you can follow:
-
Here’s how to make a bracelet using beading thread and a needle!
I’m loving using nylon beading thread at the moment, so I thought I’d make a tutorial showing how to use it to make a cute beaded bracelet! Here are all the instructions plus some affiliate links so you can buy the materials to make your own.
You’ll need these tools and materials to make this beaded bracelet:
1: Some nylon beading thread. I used some thread that was cut to about 1m long.

2: A clasp. I used this sterling silver parrot clasp.

3: A jump ring. I used a sterling silver jump ring.
4: Beads. I used these handmade polymer clay beads and some red glass seed beads.

5: Scissors to cut the thread.
6: Super glue.
7: A beading needle with a thin loop of thread tied around the bottom.
Follow these steps to make your beaded bracelet:
1: Fold the piece of thread in half, loop and knot it around the jump ring.

2: Slide the thread through the needle loop and begin adding beads.


3: Add beads in your desired pattern.


4: Once you have your bracelet at a length you like, tie a knot to the end so the beads won’t slide off.
5: Tie the end of the string to the jump ring on the parrot clasp, be sure to do a few knots and loops around the clasp for a strong tie.


6: Trim the excess thread.

7: Add a dab of superglue to each knot and set the bracelet aside to dry.

8: Once the superglue is dry, your bracelet is finished! How sweet is it to learn how to use new beading materials?


If you like using beading thread, here’s a tutorial that shows you how to use it to make a beaded necklace.
-
Choosing bead stringing materials for your project…
Some people have strong preferences for the bead stringing materials they prefer to use when making their jewelry. I recommend playing around with different materials to find what you like using, but I thought I would share my thoughts on my preferred bead stringing threads. Please note that this blog post contains affiliate links.
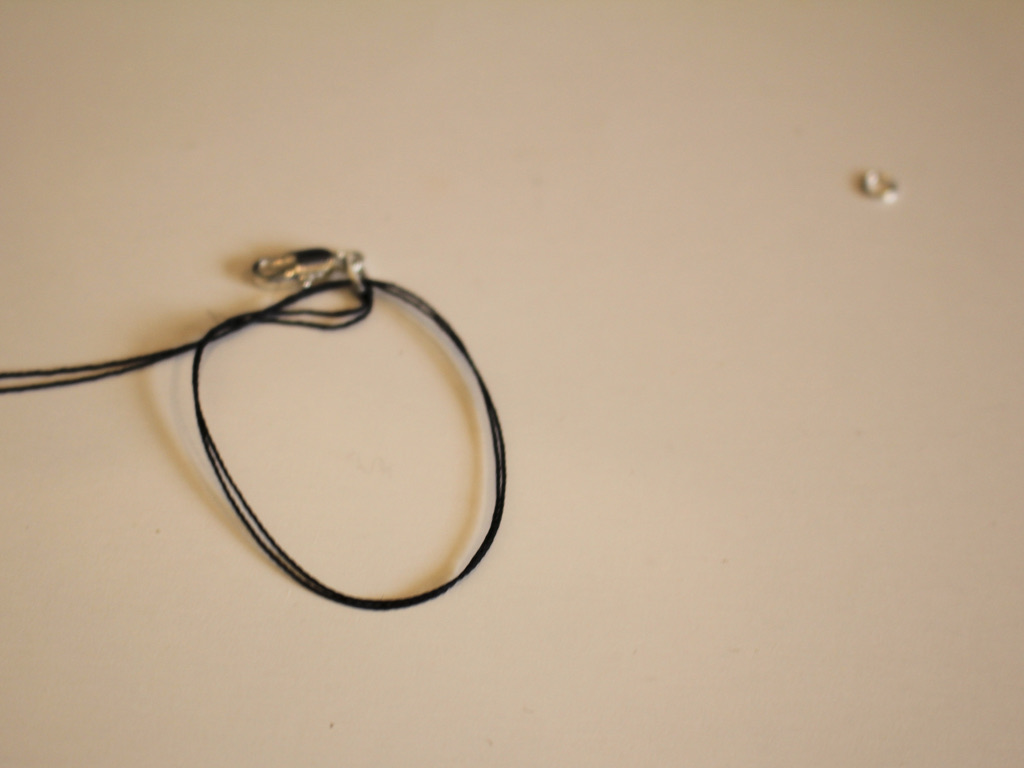
I was inspired to write this post after finding this broken bracelet…

This bracelet was made from elastic thread tied to a jump ring at each end. When I found it, the elastic had broken or come undone at one end and there were beads spread all over the ground. I picked a few up to see if I could reuse them.
1: Beading elastic
Here’s where I introduce the first stringing material that I’ll be discussing here, clear beading elastic. There are a few pros and cons to using elastic, one pro is that it is easy to secure the ends closed and that elastic beaded bracelets are easy to put on, they stretch over your hand so you don’t have to fiddle with any clasps. A downside (a big one in my opinion) is that elastic isn’t very hardwearing or sturdy. Elastic stretches out and loses its elasticity over time, it can also snap or untie easily, so you end up with the situation pictured above.
If you want to try out beading on elastic, you can follow our tutorial for making a beaded elastic bracelet here. If that doesn’t tickle your fancy, I’ve got some more bead stringing information for you below…
2: Tiger Tail wire
Another material that I often use for stringing beads is tiger tail wire. Tiger tail is a metal wire coated with nylon. It is flexible and can be bent into shapes. I find tiger tail wire a much stronger and sturdy material for beading compared to elastic. There are also a couple of cons to using tiger tail, you need a few more materials and tools to use it, and if you crease it, it is hard to get it back to its previous shape.
I have LOTS of tiger tail tutorials, so here’s one of my favorites that you can try out.
3: Nylon thread
A third bead stringing option is using nylon beading thread. This method is probably the most traditional and is useful when you are using delicate bead materials like pearls. Thread allows you to create knots between beads so that they don’t rub together on each other, knotting also means that if your piece does break, the beads won’t fall off and fly everywhere!
The downside of bead stringing onto nylon thread is that it can be a bit fiddly to work with and you need to use a needle to add beads to the string. Here’s a tutorial that shows you how to create a simple beaded necklace using nylon string.
Which bead stringing material do you like best?