

Flower beading is so fun! Here’s how to put together a flower beaded bracelet.
Flower beading was one of the first beading techniques I learned when I was a crafty kid! I still love beading and it is so fun to see this nostalgic style coming back! This bracelet makes a feature of a beaded flower, surrounded by a variety of glass beads. Please note that this tutorial contains affiliate links.
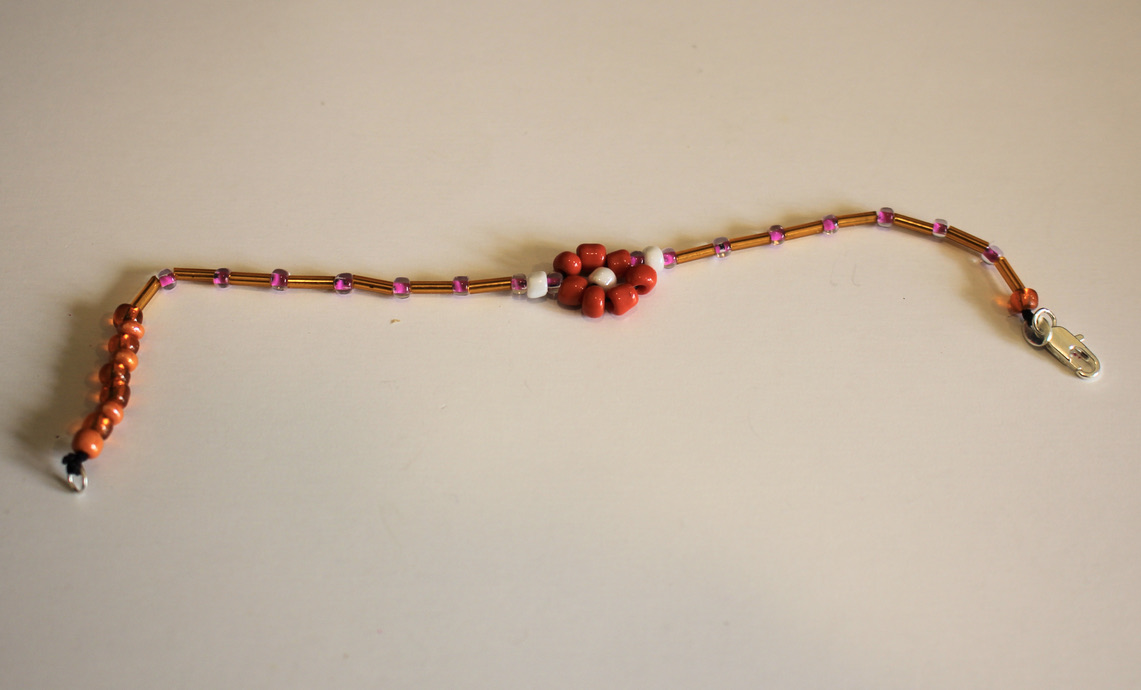
You’ll need these tools and materials to make your flower beaded bracelet:
1: Scissors.

2: Beading thread.

3: A selection of beads. I used some larger glass beads for the flower and some smaller ones for the base of the bracelet.

4: A parrot clasp and jump ring for the ends of the bracelet.


5: Some superglue.

6: A beading needle with a thin loop of thread tied to it.

Here are the steps to follow to make your flower beaded bracelet:
1: Cut a length of thread, about 50cm and fold it in half.

2: Slip the loop around the clasp end and pull the length of the thread back through that loop. Pull it tight to secure it to the clasp.

3: Tie a knot at the base of the clasp and put the thread back through the clasp end, tying one final knot for extra security.


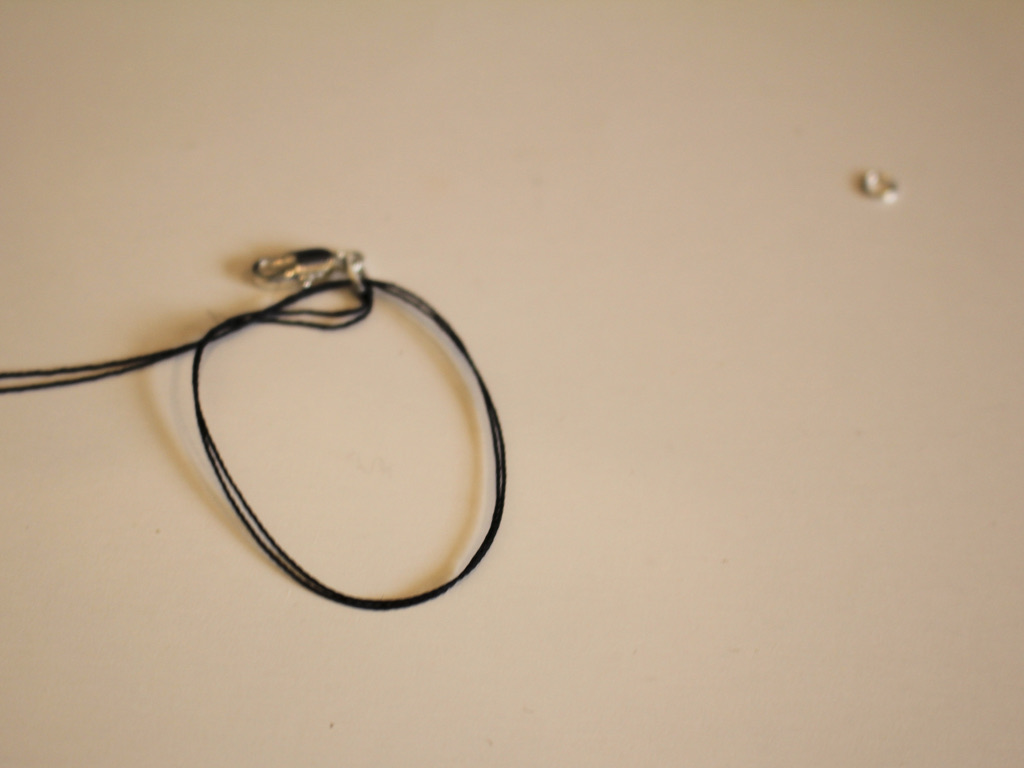

4: Add the looped needle to the beading thread.
5: Begin adding beads, bead to about half of the preferred length of your bracelet. You can check this roughly by laying the bracelet across your wrist and measuring by eye how far it reaches around the wrist.

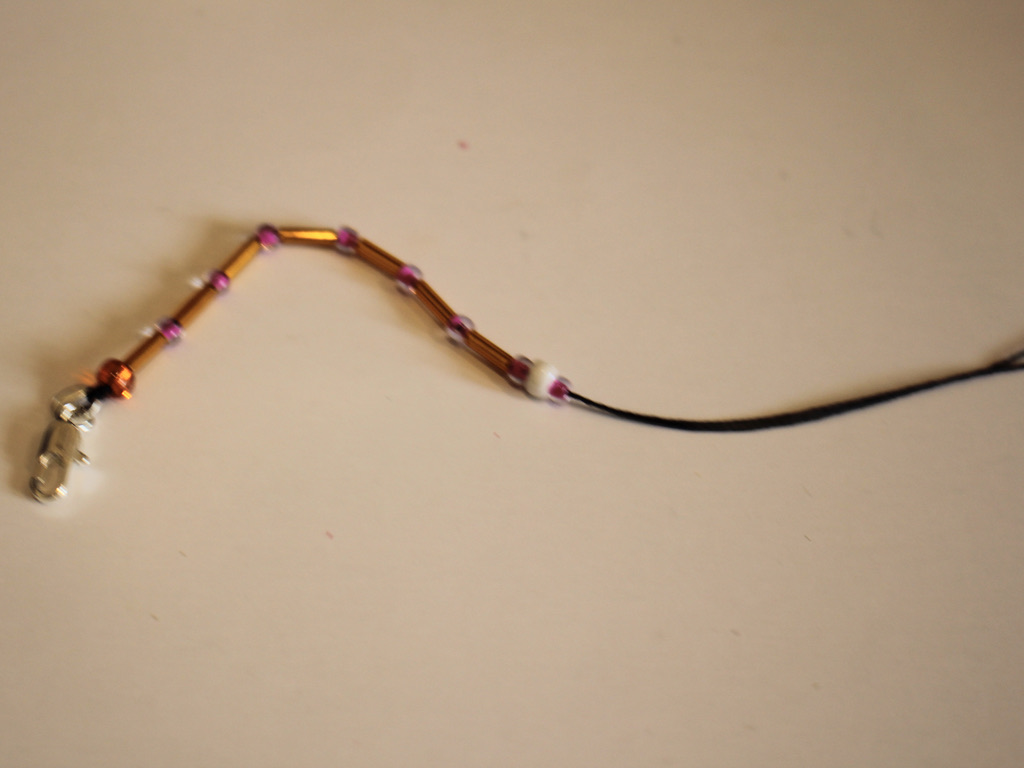
6: Once you have the length you like, add the seven beads for making the flower.
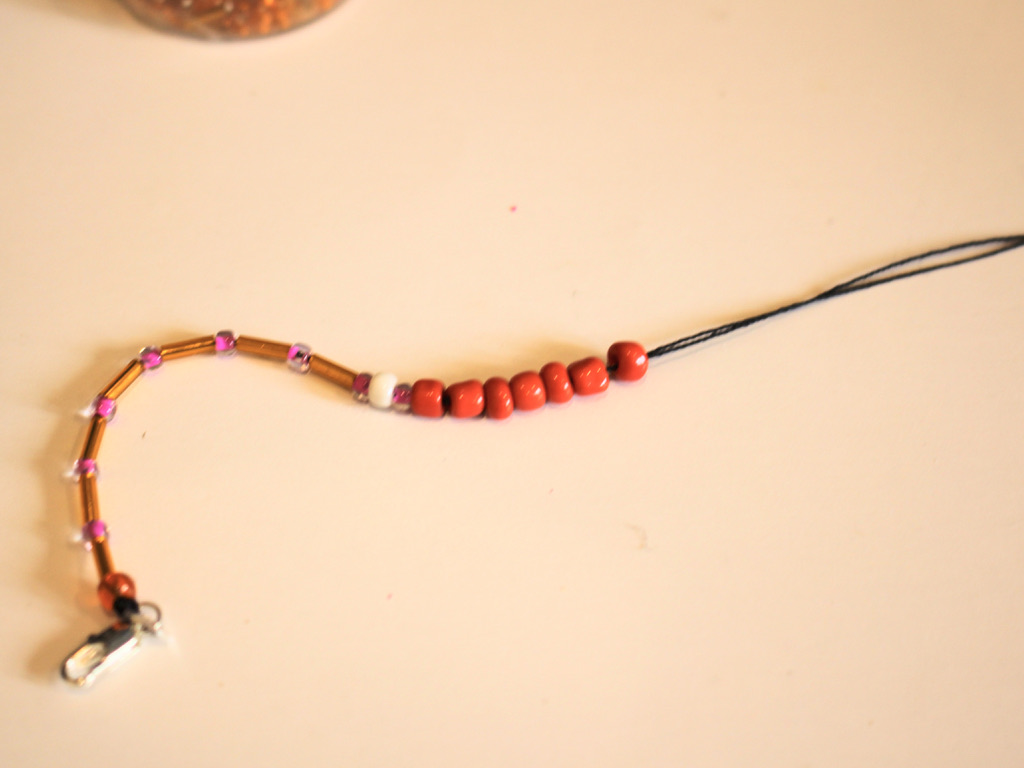
7: Take the needle and put it through the hole of the first of the flower beads. When you pull it tight you will have a circle shape.

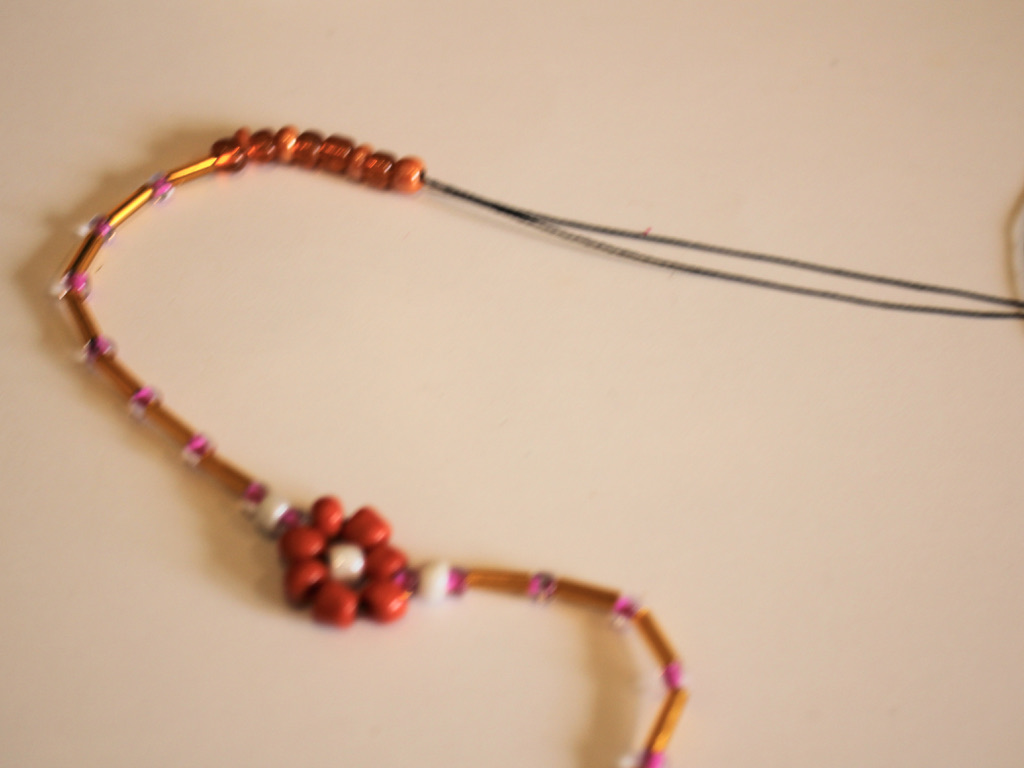
8: Add another bead to the thread, this will be the centre of the flower.

9: Place the centre bead into the middle of the circle and then thread the needle through one of the beads opposite the one you used to form the circle.

10: Pull the thread tight, you will now have a flower with a centre.
11: Continue beading until you have the length you like. I didn’t quite make the first part of my bracelet long enough so I decided to add some extra feature beads at the end to make it long enough.


12: Once you have your desired bracelet length, tie a knot at the end of the beads to secure them.
13: Loop the thread around the jump ring and tie a knot. Repeat this to secure the jump ring well.


14: Trim the excess thread from the end of the bracelet, cutting closely. Then add a dab of superglue to the knots on both ends of the bracelet for extra security. Set the bracelet aside and wait for the glue to dry.


Once the glue is dry, your sweet and cheerful floral bracelet is finished and ready to wear!


Here are some more floral bead tutorials you can follow:
DIY Jewelry Hub
Welcome to DIY Jewelry Hub. If you’ve ever wanted to learn how to make your own jewelry this is the place to start! Jewelry is a great way to show off your individuality and style. You’ll be surprised at how easy it is to create your own unique pieces! DIY Jewelry Hub will equip you with all the knowledge and inspiration you need to make your own jewelry.


You May Also Like

Velvet and chains, could it get more luxe? This bracelet is Amazing!

When A Ring and A Bracelet Unite What Do you Get? A Ring Bracelet
