-
Love layering your necklaces but hate when they tangle? Here’s a trick to fix that!
I love layering my necklaces, but I can’t stand it when they tangle and twist together, so here’s how to use two clasps and a couple of jump rings to make a handy necklace stacker clasp that allows you to layer your necklaces with ease. This is a super simple tutorial that will transform your jewelry styling!
Please note that this tutorial contains affiliate links for which we may receive a commission.
You’ll need the following tools and materials to make your necklace stacker clasp:
1: Two sterling silver lobster clasps with jump rings attached.

You can get some here:
2: Two large jump rings.

You can get some here:
3: A pair of flat nose pliers for opening and closing the jump rings.

You can get a pair here:
4: Any necklaces you want to wear stacked. I used this selection of beaded and chain necklaces of different lengths.

Follow these steps to make your game-changing necklace stacker clasp:
1: Take one of the jump rings and attach it to one of the clasp ends. Close it carefully using the flat nose pliers, making sure to get the ends close together.


2: Add the second large jump ring to the end of the second clasp and close it with the pliers.

3: Clip the second clasp to the large jump ring that you attached to the first clasp.

4: Now the clasp is complete and you are ready to start stacking necklaces. The clasp of each necklace is attached to the jump ring end of the clasp, while the other end is attached to the lobster clasp end.
5: Add the first necklace by clipping it onto the jump ring.

6: Then add the other end to the clasp end by opening the clasp and sliding the ring onto it before closing it again.

7: Repeat steps 6 and 7 for the other necklaces, being careful to attach them in the same order on either side.


Once you’ve attached all your necklaces, your new stacked piece is ready to wear. You can use bigger or smaller jump rings depending on how many necklaces you wish to stack. How handy?!
Here’s the finished clasp again.

And here it is with all the necklaces attached.


Here’s how it looks when it is being used.

-
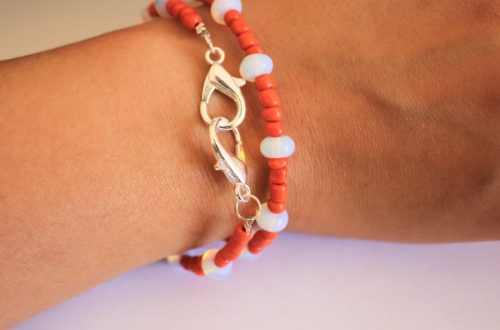
Here’s how to turn two necklaces into one unique statement piece.
I’ve made a few tutorials that show you how to reuse your existing jewellery to make something new, and this tutorial is another technique to add to your set of jewelry styling skills. This tutorial requires two different necklaces, I used a beaded one and a chain one, that are looped together to make something new. Please note that this tutorial contains affiliate links for which the website may receive a commission.
You will need the following tools and materials to make your looped mixed material necklace:
1: A chain necklace. I used this gold tone chain.

You can get something similar here:
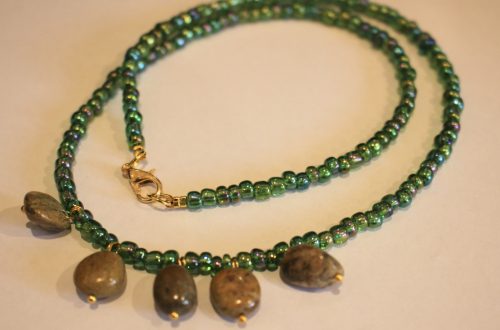
2: A beaded necklace of a similar length. I used this rainbow beaded one I made earlier.

You can make your own by following these instructions (just skip the pearl), or you can buy a similar one here:
Follow these steps to make your new necklace:
1: Undo each of the necklaces and loop them together.

2: Clip the ends of each necklace closed to make two loops.
3: Open one of the clasps and attach it to the other side (without letting go of the loop you just made) to secure it around your neck.


The different materials of these necklaces allows you to create a more sculptural piece that shows off your unique style. I think it looks elegant and edgy at the same time. So cool. Here’s what it looks like on.


If you like this tutorial, here are some similar ones you can follow:
-
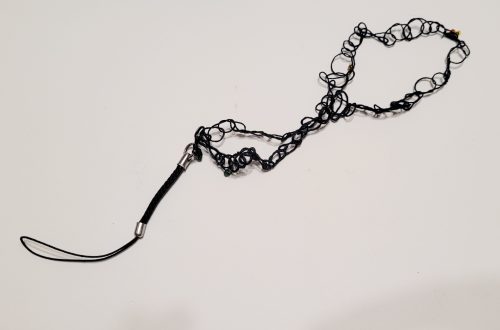
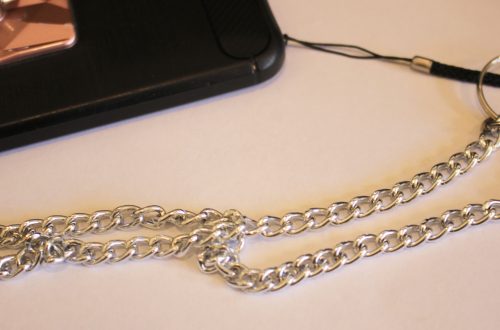
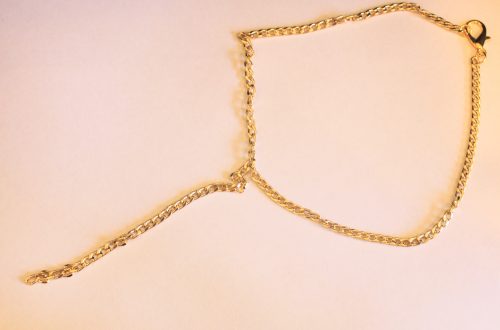
Here’s how to turn a chain into a lariat that holds your wireless ear buds
Wireless headphones allow you to roam freely, but they can also get lost easily, so here’s a tutorial that shows you how to make a chain that holds your headphones, can can also be worn as a lariat necklace when you’re not using it. How handy? Please note that this tutorial contains affiliate links for which this website may receive a commission.
You’ll need the following tools and materials to make this lariat.
1: A chain. I used this silver tone snake chain that is quite long. Make sure you have some jump rings to add to either end or that the chain necklace already has them in place.

You can get a similar chain here:
You can purchase jump rings here:
2: Two hair elastics.

You can get some here:
3: Wireless earbuds. Hopefully you already have these 😉

Follow these steps to make your headphone holder lariat:
1: Take one of the hair elastics and slide it through the jump ring at one end of the chain.

2: Loop one end of the elastic through the other and pull it tight around the end of the chain. Add a knot above it to secure the elastic in place.


3: Add a knot in the middle of the elastic, make it sit closer to one end so that it is small enough to sit tightly around your ear bud.

4: Repeat steps 1-3 for the other end of the chain.


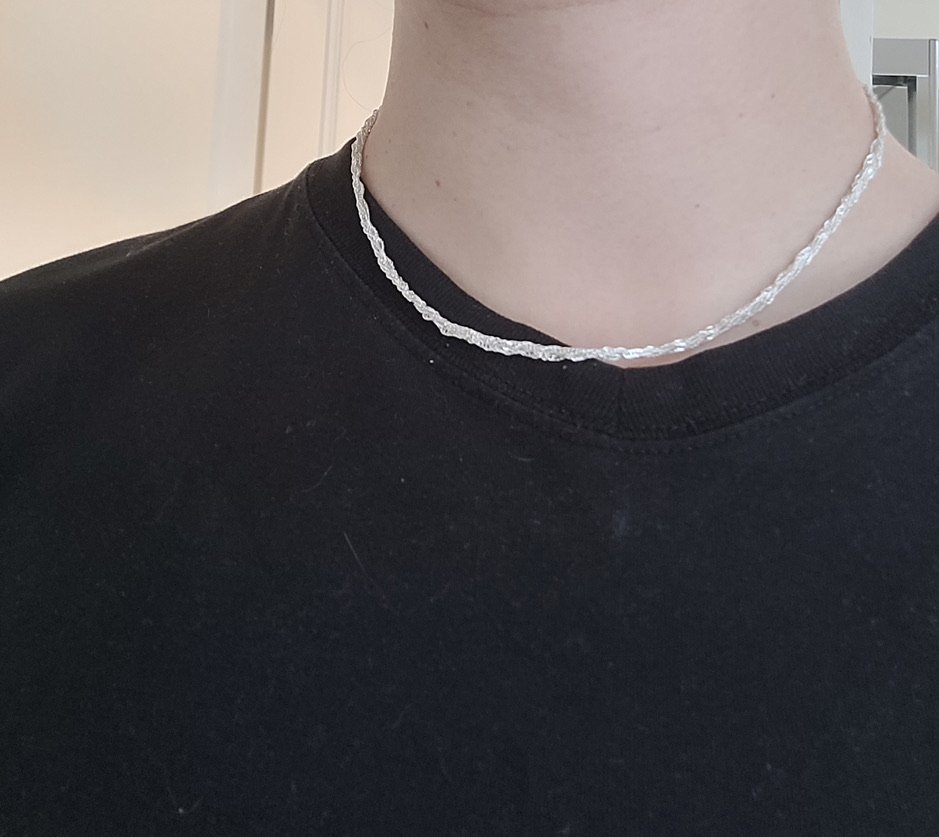
Once you have both elastics in place, your ear bud holder lariat is ready to use. Slide the elastic around each of your ear buds and pop them in your ears. When The ear buds are in use, the chain will hang around your shoulders like a glasses chain, when you are finished, you can pull the ear buds out of your ears and loop the chain around your neck like this. So handy!


If you want some other ideas for how to keep track of your headphones you can check out these tutorials.
-
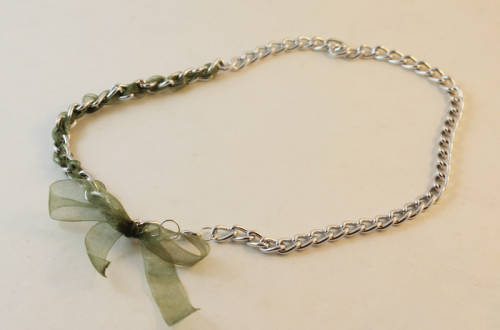
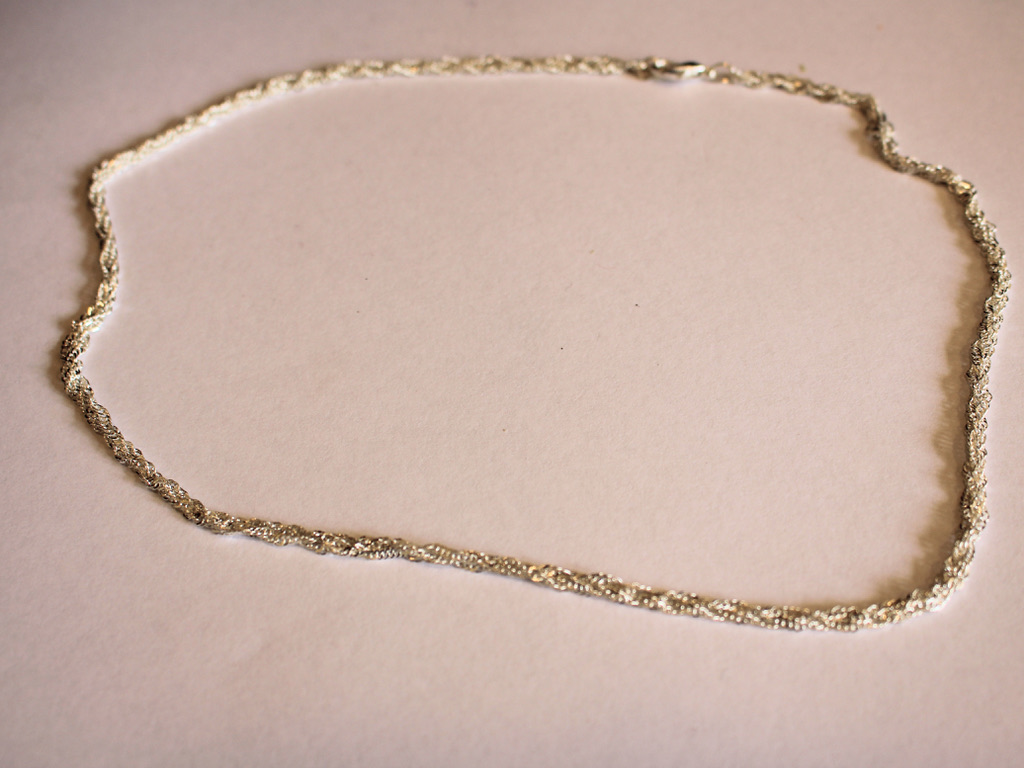
Here’s how to braid three of the same type of chain together to make a cool necklace for layering!
I’ve already shown you how to braid three different types of chain together to make a choker length necklace, but here’s another tutorial that shows you the results of braiding three of the same chain together. This gives you the effect of a thicker chain and slightly shortens the length of the original chain. I think the end result is minimalist cool that can be worn on its own or the perfect necklace to layer with different lengths of chain. Please note that this tutorial contains affiliate links.
You’ll need these tools and materials to make this cute braided chain necklace:
1: Three of the same style of chain all of the same length.

2: Pliers. I used my flat nose and round nose pliers for this piece.


3: A paperclip.

4: A bulldog clip.

Follow these steps to make your cute braided chain necklace:
1: Remove the clasps and jump rings from both ends of each chain except for one. Leave the clasp attached to this chain.


2: Open the jump ring that attaches the clasp to the chain and add the other two chains. Close the ring to secure the chains together.


3: Attach the paperclip to a table edge or other sturdy surface using the bulldog clip.

4: Add the chains to the paperclip by clipping the lobster clasp to it. This will allow you to pull your braiding tight and manage the tension better.

5: Braid the chains.

6: When you get close to the end of the chains, attach the ends together using one of the jump rings you removed from the necklaces earlier. Try to avoid letting the chains unravel.


Now your braided chain necklace is finished! How cute?!


-
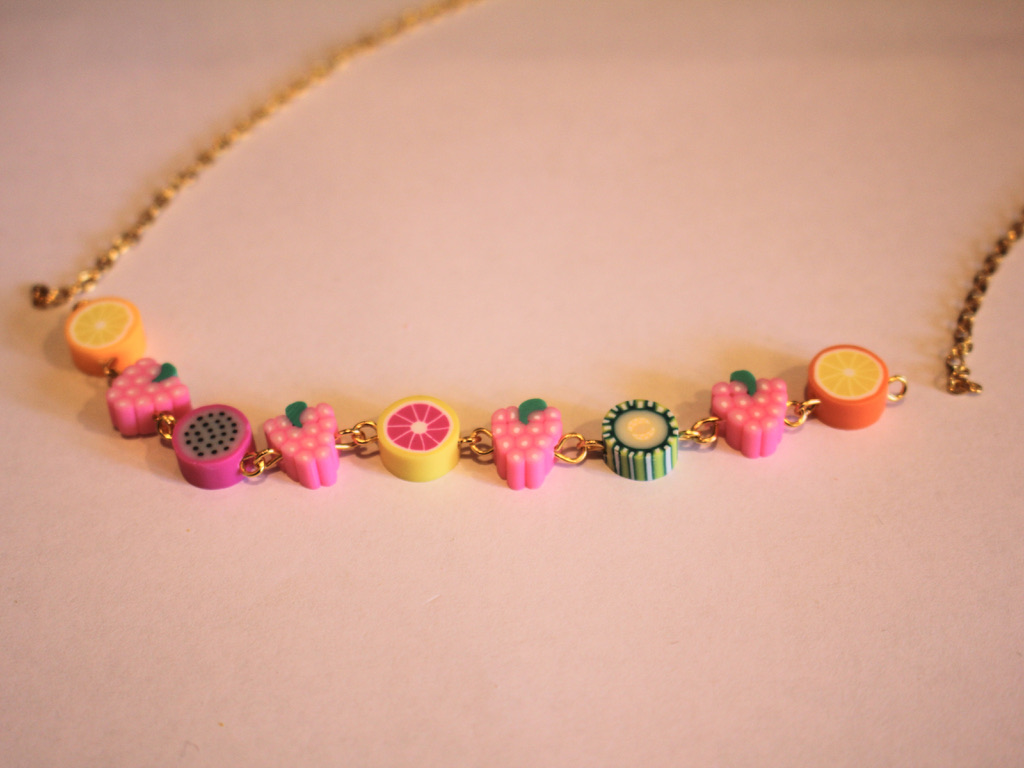
How to make a sweet fruity necklace with beads and some chain!
This necklace is super duper cute! Add some fruity polymer clay beads to eye pins and chain to create a fun beaded chain necklace perfect for adding some color and summer vibes to your wardrobe. Please note that this tutorial contains affiliate links.
You’ll need these tools and materials to make your fruity necklace:
1: A selection of polymer clay fruit beads.

2: The same number of eye pins.

3: Two pieces of chain slightly shorter than the necklace you want to make (The bead elements will make the necklace longer).

4: Two jump rings.

5: A lobster clasp.

6: Some pliers. I used my round nose and flat nose pliers for this piece.
Follow these steps to make your fruit necklace:
1: Add one of the beads to one of the eye pins.

2: Bend the pin to form an angle with the bead.
3: Loop the end of the pin using the round nose pliers. This will secure the bead onto the pin.


4: Repeat steps 1-3 for the rest of the fruit beads.

5: Attach all the fruit beads on their pins together to form a chain. Do this by slightly opening the loops with your pliers and then closing them again after sliding a charm onto the open loop.

6: Add one side of the chain to one end of the fruit chain you have just made attaching it as you did the fruit links in step 5.


7: Add the other side of the chain to the other side of the fruit section as you did in step 6.

8: Add a jump ring to one end of the chain and add the lobster clasp before closing it.

9: Add the other jump ring to the other side of the jump ring to finish it off.

Now your necklace is finished! How perfect and cheerful is this fruity design?!


Here are some other fruity jewelry tutorials you can make if you loved this one:
- A fruit themed waist chain
- Beaded hoops with glass fruit charms
- This perfectly simple apple bracelet
- This cute peachy anklet
- Strawberry dangle charm earrings
- Hot hot hot, a single chilli and pearl earring
- Orange threader earrings
- This yummy bell pepper necklace
- Fruit also features on this mixed bead necklace
- And on this simple strawberry necklace
- This letter bead bracelet has a happy banana on it
-
How to make a smiley good vibes necklace!
This necklace has been designed to give you some good vibes, it features a yellow polymer clay smiley bead and a black tourmaline for good feelings! Black tourmaline is believed to be a gemstone that protects people against negative energies. So by that logic, this necklace will save you from negative vibes and send a smile to people around you! Please note that this tutorial contains affiliate links.
You’ll need these tools and materials to make your good vibes necklace:
1: A chain necklace thin enough to fit the bead.

2: Pliers to remove and replace the end of the chain.
3: A smiley face polymer clay bead.

4: A black tourmaline bead.

5: A large jump ring.

Here’s how to put your necklace for positivity together:
1: Remove the jump ring or tag at the end of the necklace using your pliers.

2: Slide the bead onto the chain.

3: Add the tourmaline bead onto the jump ring.

4: Close the jump ring using your pliers.

5: Add the tourmaline charm to the necklace.

6: Replace the jump ring or tag to the end of the chain to finish the necklace off.


Now your super cute smiley good vibes necklace is finished and ready to wear!


-
Here’s how to make a stunning crystal choker necklace!
This choker length necklace is really special! It’s simple look is a really powerful way to show off your special crystal beads. I used a small green crystal bead for my design. Please note that this tutorial contains affiliate links.
Grab these tools and materials to make your special crystal choker:
1: A pretty crystal bead. I used this green bead.

2: A short eye pin.

3: Four small jump rings.

4: Two pieces of chain that are long enough in total to fit closely around your neck.

5: A lobster clasp.

6: Some pliers. I used my round nose and flat nose pliers to make this necklace.
Follow these steps to make your pretty crystal choker necklace:
1: Add the crystal bead to the eye pin.

2: Bend the pin to form an angle.

3: Secure the bead onto the pin using the round nose pliers to make a loop.

4: Attach one side of the chain to one side of the charm using one of the small jump rings.


5: Repeat step 4 for the other side of the necklace attaching the other side of the chain to the other side of the crystal charm.

6: Attach the lobster clasp to the end of one of the chains using another of the small jump rings.

7: Attach the remaining jump ring to the other side of the necklace to finish it off.

Now your lovely crystal chain choker is finished and ready to wear! Let it stand out on its own or layer with some longer pieces. Perfect for hot girl summer!


Here are some other crystal designs you can make at home:
-
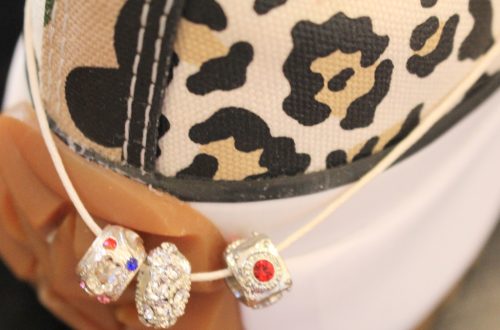
Here’s a letter bead necklace so you can tell everyone how you feel.
This letter bead necklace is a simple design with a big personality. Use letter beads to show something about your mood or personality around your neck. Layer this design with some other pieces to really show off your style. I love this simple necklace DIY! Please note that this tutorial contains affiliate links.
Here are the tools and materials you’ll need to make your letter bead necklace:
1: Pliers. I used my cutting pliers (to cut my chain to length), round nose pliers and flat nose pliers.

2: A piece of chain long enough to fit around your neck. You can make it longer or shorter depending on how long you like your necklaces.

3: Two small jump rings.

4: A lobster clasp.

5: Letter beads. I used two to spell out ‘OK’.

Follow these steps to make your letter bead necklace:
1: Add your beads to the chain to form your chosen word.


2: Add one of the jump rings to one end of the chain by threading it through the last chain link. This can be tricky when your chain links are small like on this chain. I suggest using your smallest size jump ring.

3: Close the jump ring to secure it in place.

4: Add another jump ring to the other side of the chain.

5: Add a lobster clasp to the open jump ring and close it to finish the necklace off.


Now your minimalist but very cool letter bead necklace is ready to wear. Will you wear yours on its own for a big statement, or layer it with other pieces for a more curated look?


-
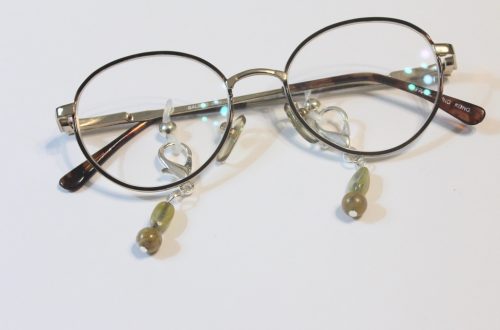
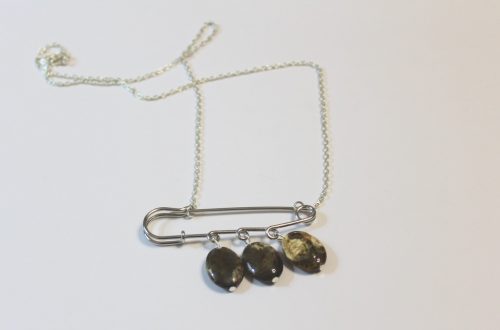
How to make a stunning beaded heart pendant with a tassel detail <3
This necklace is so so cute. Transform beads into a pretty heart pendant with beaded tassels. Layer this with some beaded necklaces or wear it on its own. Please note that this tutorial contains affiliate links.
Here are the tools and materials you’ll need to make your beaded heart charm necklace:
1: Pliers. I used my round nose pliers and flat nose pliers.
2: Beads. I used a glass heart shaped bead (approximately 2cm long), three opalite disk beads and some vintage red beads.


3: Three head pins.

4: One eye pin long enough to fit your bead on.

5: A jump ring.

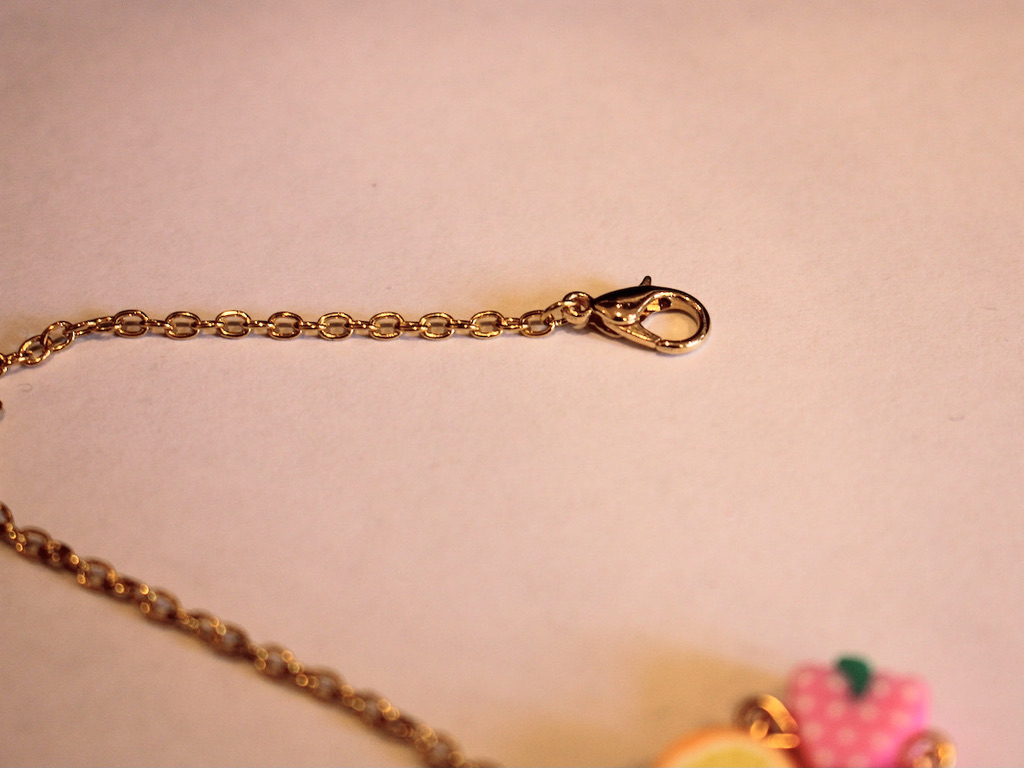
6: A necklace chain.

Follow these steps to make your cute little heart charm:
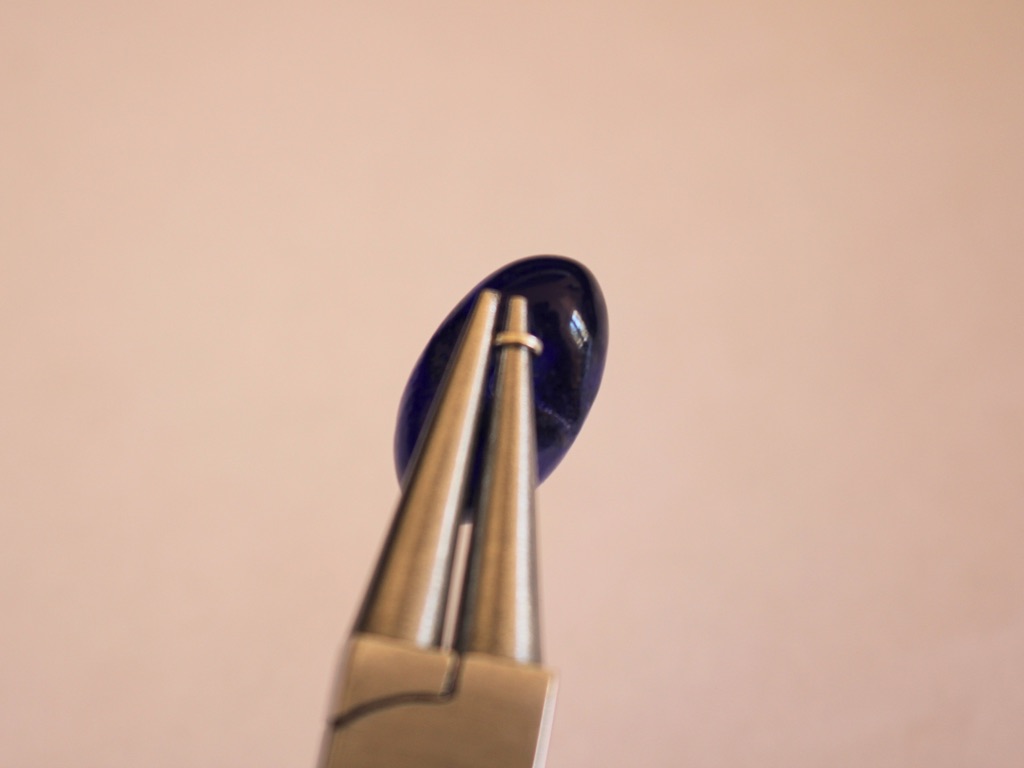
1: Add the heart bead to the eye pin.

2: Bend the top of the eye pin to form a right angle.

3: Curl the top of the pin to form a loop and secure the bead onto the pin and set the heart aside.

4: Place an opalite bead on each of the head pins.

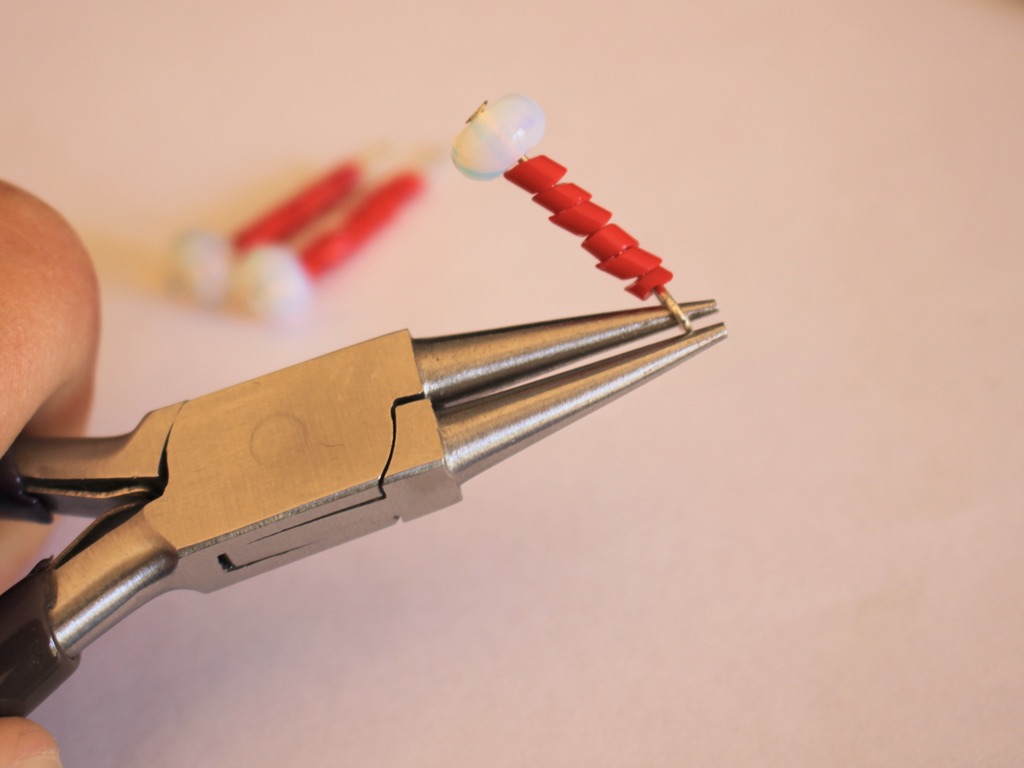
5: Add the smaller beads to each of the pins until each has approximately 1cm left bare.
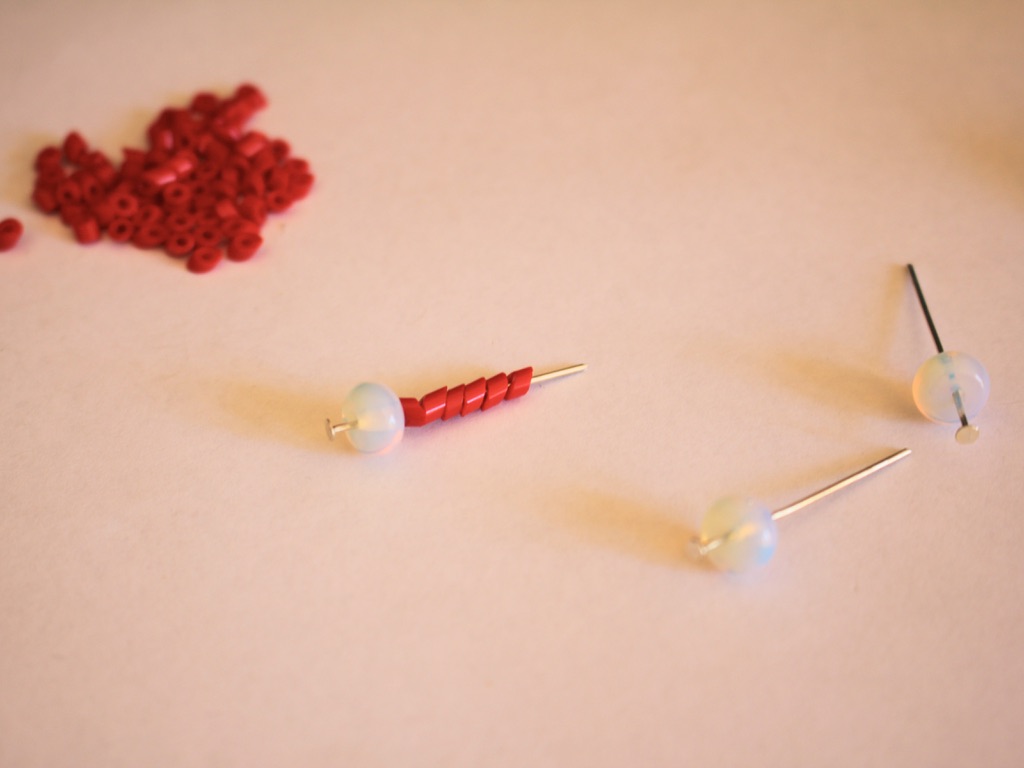

6: Loop the top of each head pin using the round nose pliers to secure the beads in place.


7: Add each of the opalite pins to the jump ring, followed by the heart bead.


8: Close the jump ring to secure the pins together.

9: Add the finished charm to the chain to finish it off.

Now your amazing heart pendant necklace is finished and ready to wear. Super beautiful and sentimental… make one for someone special in your life (maybe that someone special is you!)


If you like this design, here are some other beaded tassel tutorials:
-
Need a new necklace? Look no further than this tutorial!
Here’s a new necklace you can make and customise to your liking. It uses memory wire and chain to make a layered effect for extra visual interest.
Here’s what you need to make this necklace:
1: Pliers. I used my cutting pliers, round nose pliers and flat nose pliers.
2: Two half circle pieces of necklace length memory wire.

3: Two pieces of chain that, when measured together, are long enough to fit around your neck.

4: Six jump rings.

5: A lobster clasp.

6: Beads. I used yellow glass beads.

Follow these steps to make your necklace:
1: Curl one end of one of the pieces of memory wire using the round nose pliers to form a loop.


2: Add beads to the wire until there is approximately 1cm left unbeaded.


3: Curl the other end of the wire using the round nose pliers again to secure the beads in place.

4: Repeat steps 1 to 3 for the second piece of memory wire.

5: Attach the two pieces of memory wire together using two of the jump rings.


6: Attach one of the pieces of chain to one side of the memory wire arches using another of the jump rings.

7: Repeat step six for the other side of the necklace attaching the second piece of chain.

8: Attach the lobster clasp to one side of the necklace using one of the remaining two jump rings.

9: Attach the last jump ring to the other side of the necklace to finish it off.

Now your new necklace is ready to wear!