-
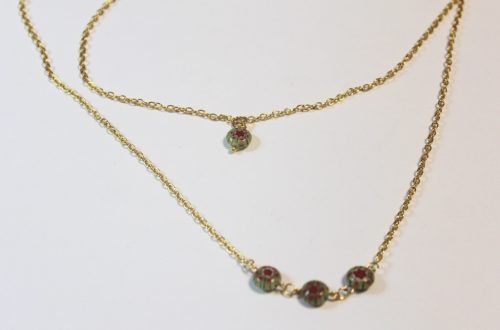
Here’s how to make a super cute lariat!
This tutorial shows you how to put beads on a chain necklace! This bead and chain lariat is really pretty and surprisingly simple to DIY at home. This design is perfect if you are looking for an at home craft activity or want something new to spice up your zoom outfit!
Please note that this tutorial contains affiliate links.
You will need the following tools and materials to make your beaded lariat:
1: Pliers. I used my cutting pliers, my round nose pliers and my flat pliers.

2: You’ll also need some chain. I used two pieces of gold-tone rolo chain, one long enough to fit around my neck and another that was a bit shorter, approximately 12cm long.


3: A selection of beads. I didn’t use all these beads but it’s good to have a range to choose from!

4: Some eye pins. You’ll use these to add beads to your chain necklace.

5: One head pin.

6: A couple of jump rings.

7: A lobster clasp.

Follow these steps to make your own chain beaded lariat. Have fun with this one ;):
1: First separate your long chain into two halves. Depending on what kind of chain you have you’ll need to cut it or open up one of the links with your flat nose pliers.


2: Add a jump ring to one end of each of the chain halves.


3: Add a lobster clasp to one of the chains and set them aside.

4: Add one of the beads to one of the eye pins.

5: Bend the eye pin to form an angle.

6: Trim the length of the pin using the cutting pliers so that it is approximately 1cm long past the bead.


7: Create a loop at the end of the pin by bending it around the barrel of the round nose pliers.


8: Repeat steps 4 to 7 for the other beads, I put 7 beads on eye pins, 6 round beads and one long bead which I used as a feature bead.

9: Add a couple of beads to the head pin and loop the top as you did with the other bead charms.


10: Add the long bead to one end of the short chain and the head pin charm to the other end.


11: Link three of the round beads together to form a mini chain.


12: Repeat this for the second set of beads so you have two chains made up of three beads each.

13: Attach the bead chains to the loop at the top of the long bead.


14: Attach each of the necklace chains to each of the short beaded chains to finish the lariat off.


Now your bead and chain lariat necklace is finished and ready to wear!


Here are some other lariat tutorials you can make at home:
- An adorable lariat with a cute love heart bead detail
- A handmade beaded chain lariat made with mixed vintage beads
- This pretty lariat with a double hole bead detail
- A beaded strand with a chain detail lariat
- This chunky gold curb chain lariat
- This fun lariat with round beaded charms
- A triangle detail lariat necklace
- This special charm that you can attach to any necklace to turn it into a lariat
-
Here’s how to make a fruity waist chain!
This waist chain can be adjustable and is embellished with fun polymer clay fruit beads to make you feel like a tropical human fruit salad! This tutorial shows you a way to put beads on a chain for a fun effect! Please note that this tutorial contains affiliate links.
You’ll need the following tools and materials to make your fruit salad waist chain:
1: Pliers. I used my round nose and flat nose pliers.


2: Chunky chain long enough to fit your waist. Make it a little longer to make your belt adjustable.

3: Two large lobster clasps.

4: Two large jump rings.

5: Some head pins.

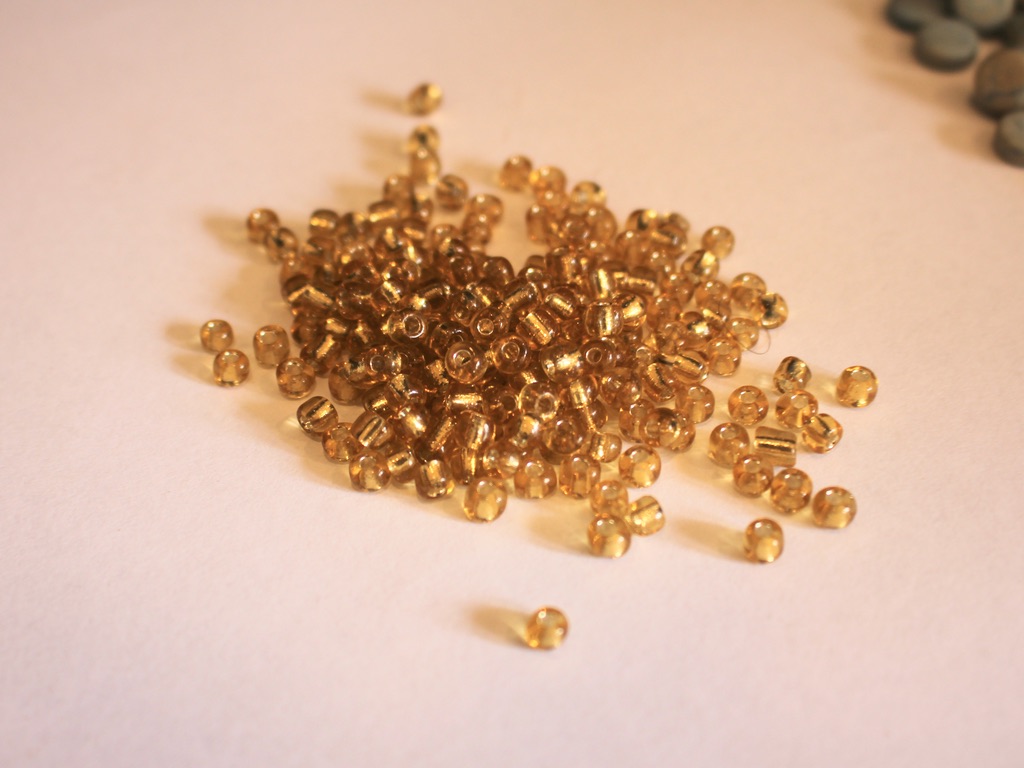
6: Beads. I used polymer clay beads in the shape of different fruits and some yellow glass beads.

Follow these steps to make your fruity waist chain:
1: Attach a clasp to either end of your chain using each of the jump rings. Open the jump ring and slide it through the end of the chain and the clasp. Close the ring to secure the clasp to the chain.


2: Set the chain aside.
3: Add beads to a head pin. I used a few glass beads and a fruit bead on mine.

4: Bend the top of the pin to form a right angle.

5: Create a loop at the top of the pin using the round nose pliers. This will secure the beads on the pin.


6: Open the loop slightly and attach it to one of the chain loops. Close the loop to secure the charm to the chain.


7: Make another charm that features only glass beads and place it on the chain next to the first charm.


8: Continue making fruit and bead charms and attach them to the chain in your chosen pattern until you have a fully beaded chain.

Now your waist chain is finished and ready to wear! You can also wear this design as a necklace.


Here are some other waist chain designs you can make:
-
Need a sparkly accessory to cheer up the 2020 silly season? Make this waist chain in time for Christmas this year!
2020 has been wild and hard for lots of people. Some sparkly accessories might not fix anything, but they might help cheer you up a little bit! Please note that this tutorial contains affiliate links.
Here are all the things you need to make this waist chain:
1: Some rhinestone chain long enough to fit comfortably around your waist.

2: Pliers. I used my cutting pliers to cut my chain to length. I also used my flat nose and round nose pliers.
3: A couple of jump rings.

4: Two crimp ends.

5: A large lobster clasp.

Follow these steps to DIY your own fun sparkly waist chain:
1: Add one of the crimp ends to one end of your chain, holding it in place around the chain.

2: Squash one side of the crimp around the rhinestone chain using the flat nose pliers. Be careful with this step to ensure that the chain doesn’t pop out of the crimp.

3: Squash the other side of the crimp to secure it onto the strand.

4: Repeat steps 2 and 3 using the other crimp on the other side of the rhinestone strand.

5: Add a jump ring to one end of the strand and attach the lobster clasp. Secure the clasp in place by closing the jump ring.


6: Add the remaining jump ring to the other side of the waist chain to finish it off. Now your rhinestone waist chain is finished and ready to wear! I hope it brings some necessary sparkle into your life!


-
Combine gold wire and pearls with these amazing statement earrings
These earrings use different materials to create a loop of gold wire and rainbow beads with a sweet dangly pearl in the centre. This tutorial contains affiliate links.
You’ll need the following tools and materials to make your earrings:
1: Pliers. I used my cutting pliers (left), flat nose pliers (right) and round nose pliers (middle).
2: Two pieces of 0.8mm wire approximately 7-10cm long. I used gold fill wire.

3: Two pieces of tiger tail wire, around 10-15cm long.

4: Four small jump rings.

5: Two head pins.

6: Two larger jump rings.

7: Post earrings with charm loops.

8: Beads. I used mixed glass beads.

9: Two pearl beads.

10: Eight crimp beads.

11: Something round to form your wires around. I used a bead container.
Follow these steps to make your earrings:
1: Take one of the pieces of tiger tail wire and add two crimp beads and a small jump ring to the end.

2: Loop the end of the wire around the jump ring and through the crimp beads. Pull it tight.

3: Squash the crimps using flat nose pliers.

4: Add beads to the tiger tail wire until you have a length you like.

5: Once fully beaded add another two crimp beads and another small jump ring to the end of the wire.
6: Pull the end of the wire around the jump ring and back through the crimps and last few beads.

7: Squash the crimp beads at the end and trim the excess wire.

8: Repeat steps 1 to 8 for the second bead strand.

9: Add each of the pearl beads to the head pins and use round nose pliers to curl the tops, this secures the beads on to the pins.


10: Add the pearls to each beaded strand.

11: Bend the wires around your round thing to form an arch shape.


12: Add a loop to either end of the wire using the round nose pliers.


13: Attach a bead strand to each of the wires using the jump rings.


14: Add an earring post to each earring, attaching it using the remaining two larger jump rings.


Now your earrings are finished and ready to put on! Perfect for adding some color to neutral outfits!


-
Here’s how to make a pair of cute beaded chain earrings!
These earrings are made using soft wire and beads to make a chunky chain that dangles from each ear. These really cute earrings are fun to make and look so fun.
You’ll need these tools and materials to make these earrings:
1: Pliers. I used my cutting pliers (left), flat nose pliers (right) and round nose pliers (middle) to make these earrings.
2: Some thin soft wire. I used six pieces (approx 7cm long) of wire that I recycled from an old project.

3: Some beads. I used green and gold glass e-beads.

Gold beads: https://amzn.to/3S3zwfi
Green beads: https://amzn.to/3QTdMlj
4: Two small jump rings.

5: Two earring hooks.

Follow these steps to make your chunky bead chain hoops:
1: Take a piece of wire and curl one end around the round nose pliers.
2: Add beads to the wire until there is 1cm left without beads.


3: Put the end of the wire back through the first loop you made.

4: Curl the other end of the wire so that the beaded circle is closed.

5: Make another beaded circle, thread it through the first circle you made before you secure it closed.


6: Make a third beaded circle and attached it to the first two so that you have a chain of three.


7: Repeat steps 1 to 6 for the second earring.

8: Attach the earring hooks to the top of each chain using the small jump rings.


Now your chain earrings are finished and ready to wear!!!

Here is a four link version I made as well


This tutorial contains affiliate links.