-
How to make a letter bead chain bracelet!
Sometimes you need to be a bit subtle about how you communicate your feelings. So instead of saying it out loud, or showing it in your body language, why not show how you feel with your jewelry? Here are all the steps you can follow to make a cute letter bead bracelet that says a word on it. Mine says ‘grumpy’ because that’s how I feel a lot of the time ;). Please note that this tutorial contains affiliate links.
You’ll need these tools and materials to make your letter bead chain bracelet:
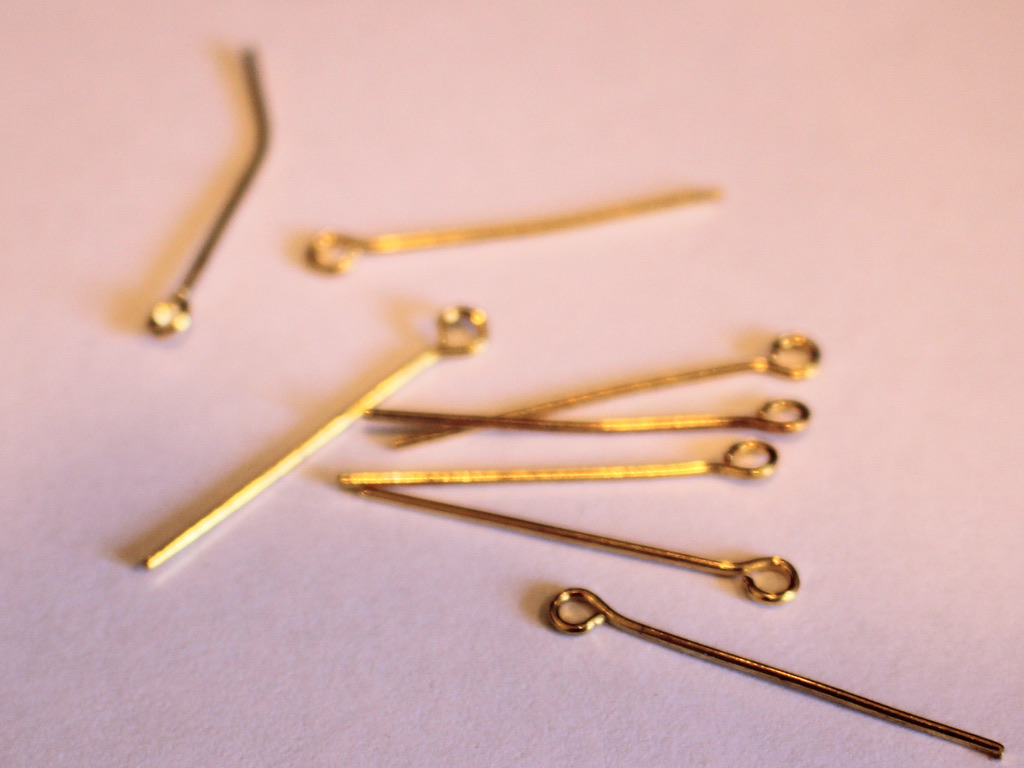
1: A bunch of eye pins. The number you need depends on the length of your bracelet.

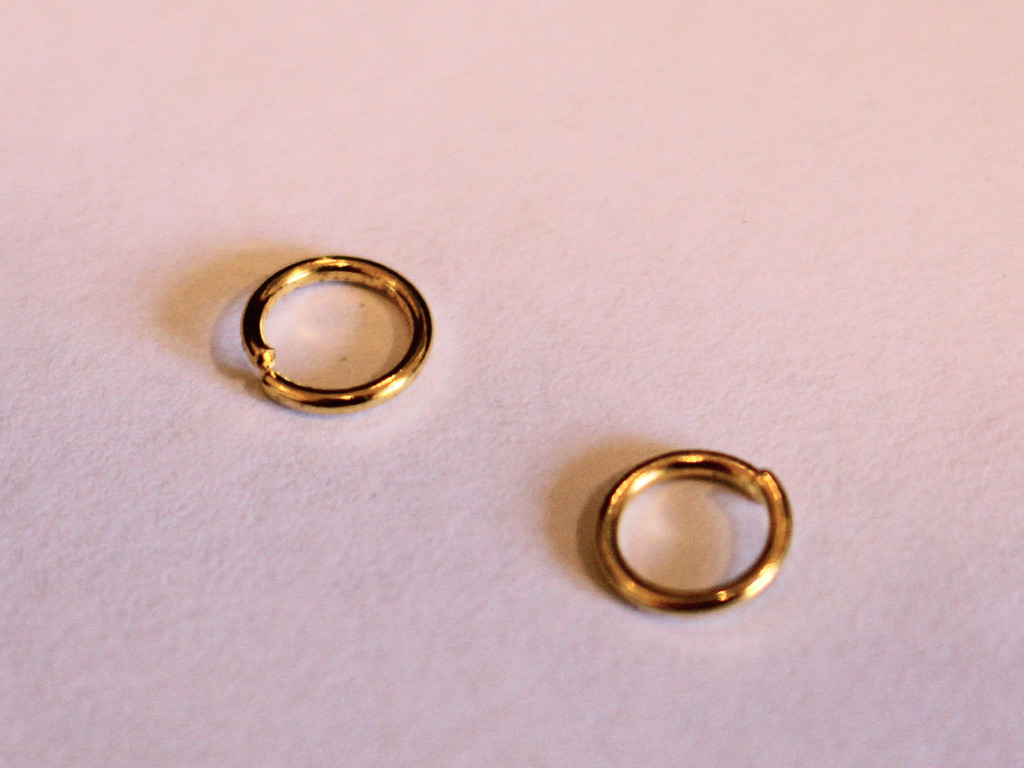
2: Two jump rings.

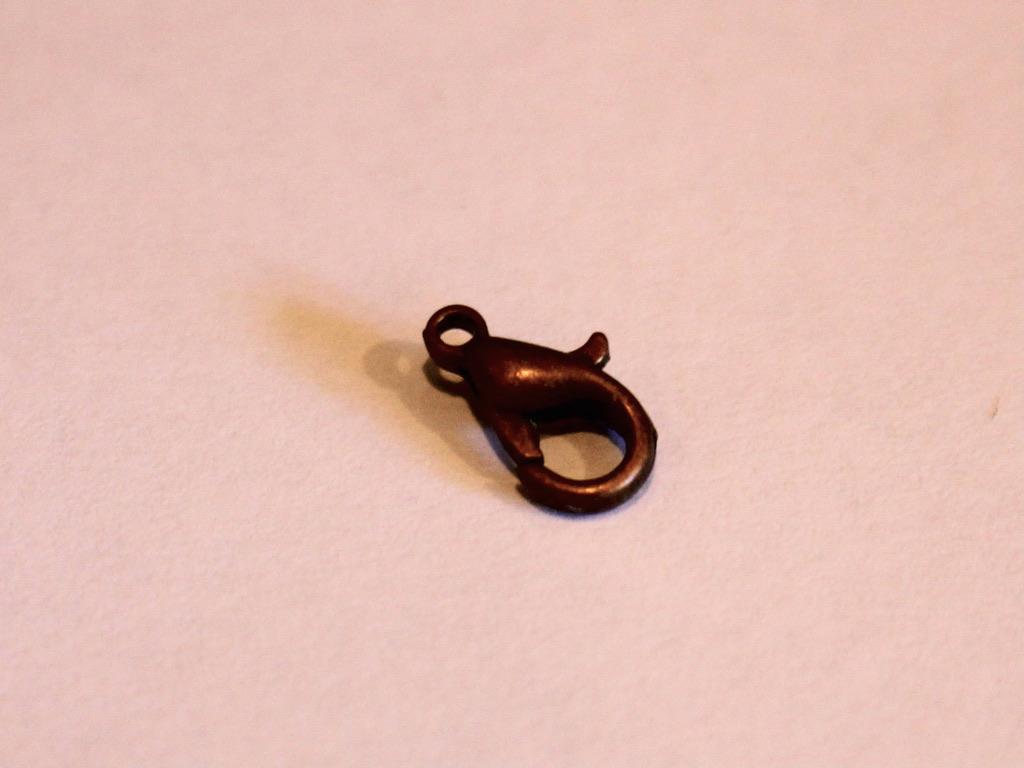
3: A lobster clasp.

4: Letter beads that make up the word you want to spell. Mine spells G-R-U-M-P-Y.

5: Other beads. I used some black plastic beads recycled from an old necklace. The number of extra beads you need will depend on the length of your word.

6: A small jump ring.

7: A charm. I used this plastic banana charm and drew a little smile on it with permanent marker.

Follow these steps to make your own letter chain bracelet:
1: Add a letter bead to one of the eye pins.

2: Bend the eye pin to form an angle.

3: Bend the top of the pin over to form a loop that secures the bead onto the pin. Use your round nose pliers to do this.

4: Repeat steps 1 to 3 for the other letter beads until your whole word is on pins.

5: Attach each of the letter bead pins together to form a chain.


6: Set the letter chain aside and start making the side chains.
7: Add your other beads to the pins the same way you did for the letter beads. Make two chains so that the whole piece is long enough to wrap around your wrist. Make each chain an even length so that your word sits in the middle.


8: Add a lobster clasp to one end of the bracelet using one of the jump rings.


9: Add the other jump ring to the other side of the bracelet.

10: To finish the bracelet off, attach your charm using the small jump ring.


Now your bracelet is finished and ready to wear! So cute!


Here are some other letter bead tutorials you can follow:
-
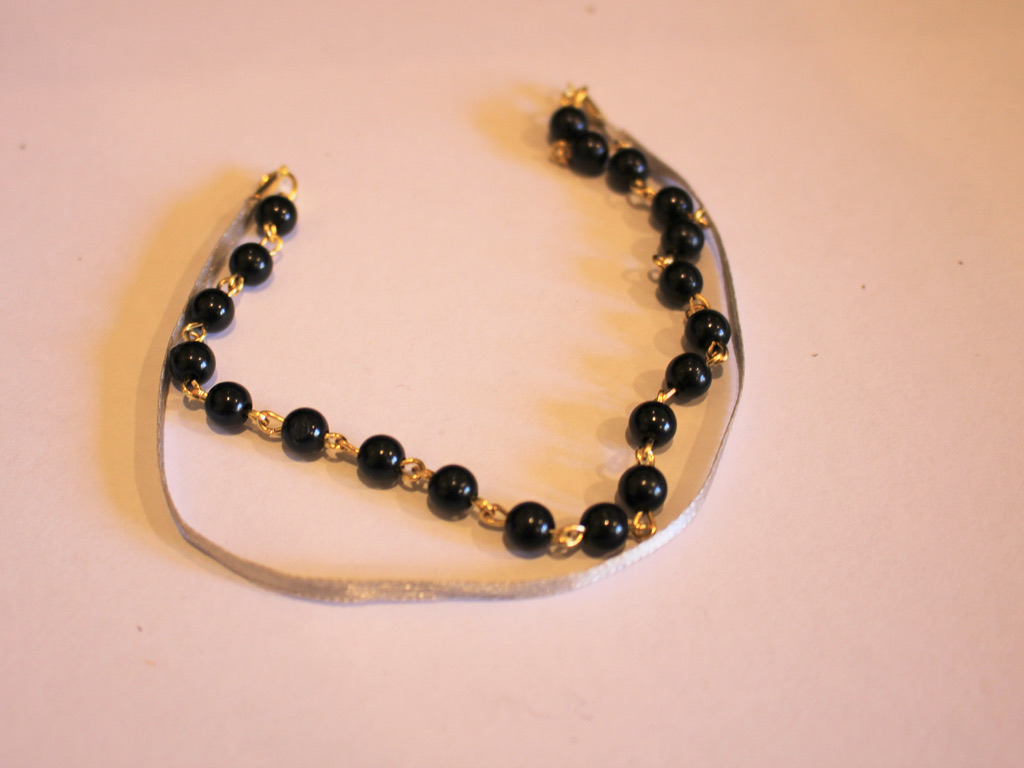
How to make a double strand bracelet with ribbon and beads!
This bracelet is another way that you can make a multi-strand bracelet. This bracelet makes use of ribbons and a beaded chain for an alternative look. I used some recycled materials in this design, it is a great way to reuse ribbons and cords from old packaging or gifts. Please note that this tutorial contains affiliate links.
You’ll need these tools and materials to make this double strand bracelet:
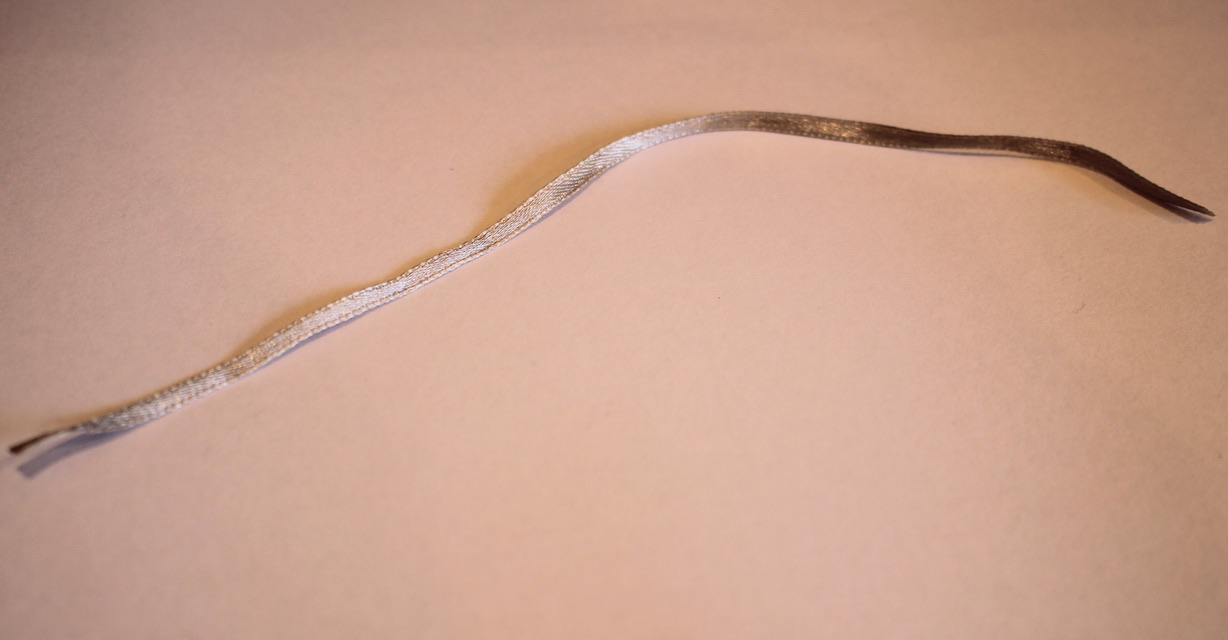
1: A piece of ribbon. I used this thin ribbon that I had recycled from a piece of clothing.

2: Scissors. I used my scissors to cut the ribbon to length.

3: Pliers. I used my flat nose and round nose pliers for this design.


4: Some sticky tape.
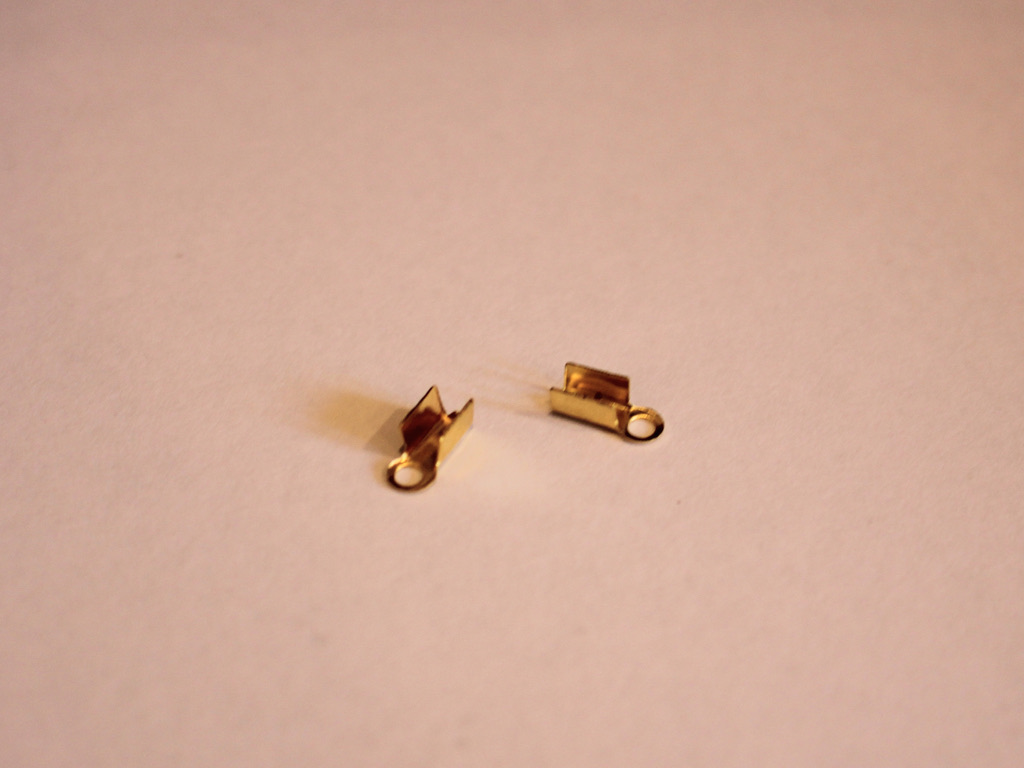
5: Two crimp ends.
6: A bunch of eye pins. The number you will need depends on the length of your bracelet so it’s good to have a few extra on hand.
7: Beads. I used these black plastic beads that I recycled from an old piece of jewelry.
8: Two jump rings.

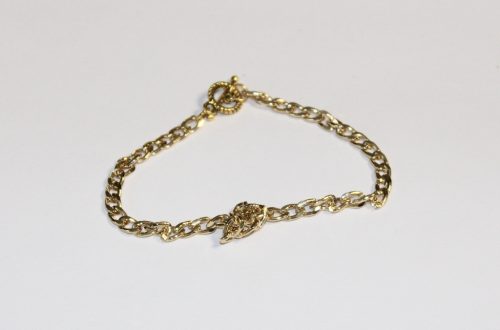
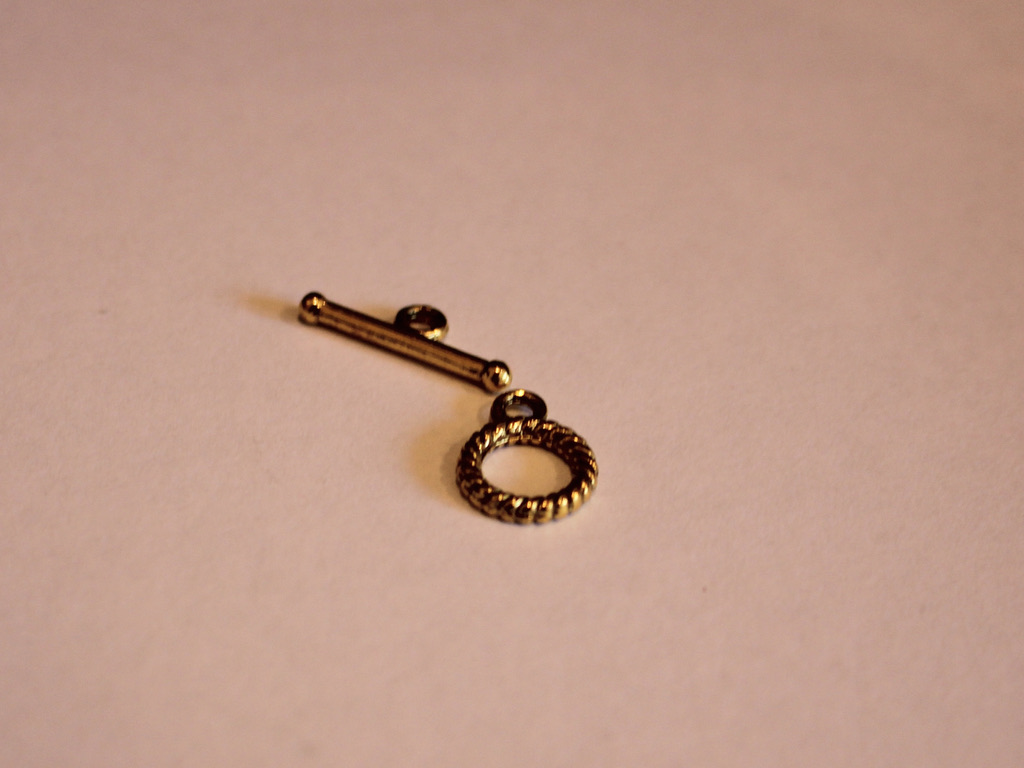
9: A toggle clasp.
Follow these steps to make your own double strand bracelet made with mixed materials:
1: Take the ribbon, cut it to a length that fits around your wrist.
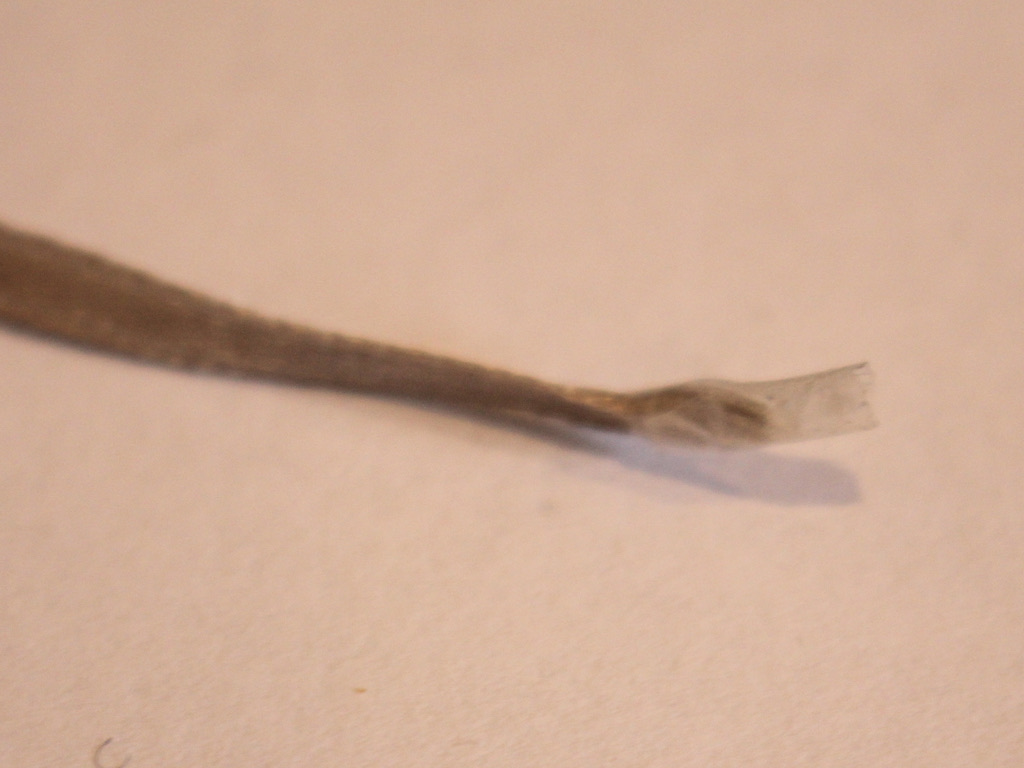
2: Add some sticky tape to either end of the ribbon. This will give the crimps a bit more material to grip on to. You can skip this step if you have a thicker piece of ribbon.
3: Place the crimp around the end of the ribbon.

4: Squash one side of the crimp around the ribbon using the flat nose pliers.

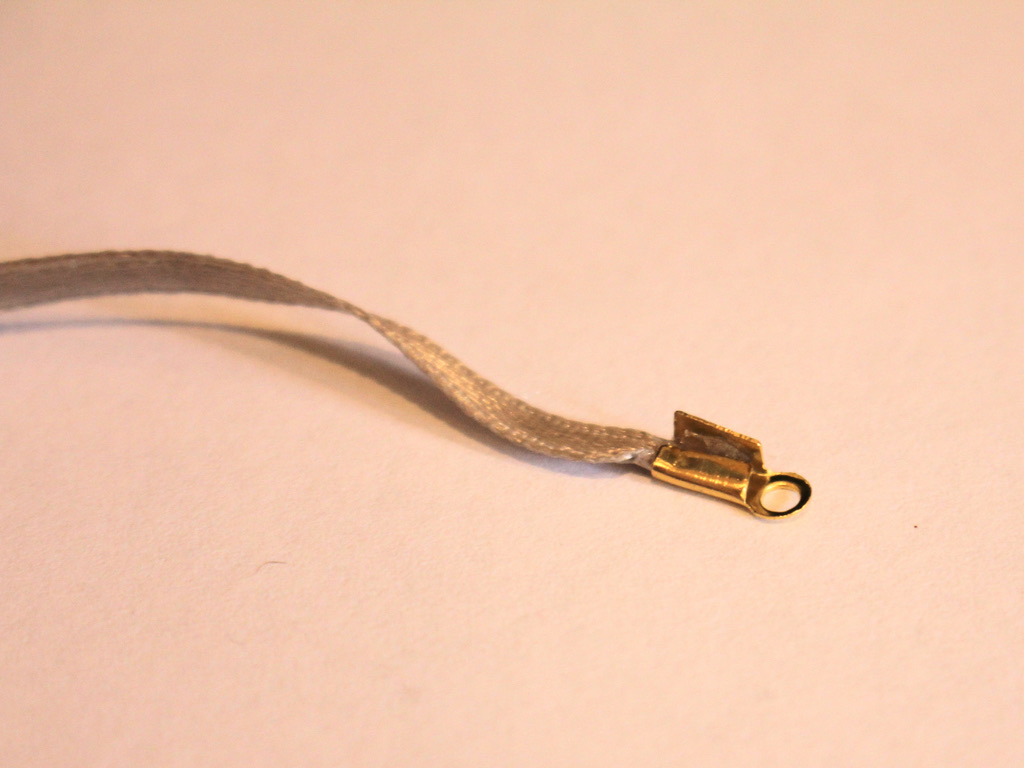
5: Squash the other side of the crimp around the ribbon using the flat nose pliers.

6: Repeat steps 3 to 5 for the other end of the ribbon, squashing the other crimp in place.

7: Set the ribbon aside.
8: Take one of the eye pins and place a bead on it.

9: Bend the pin to form an angle with the bead.
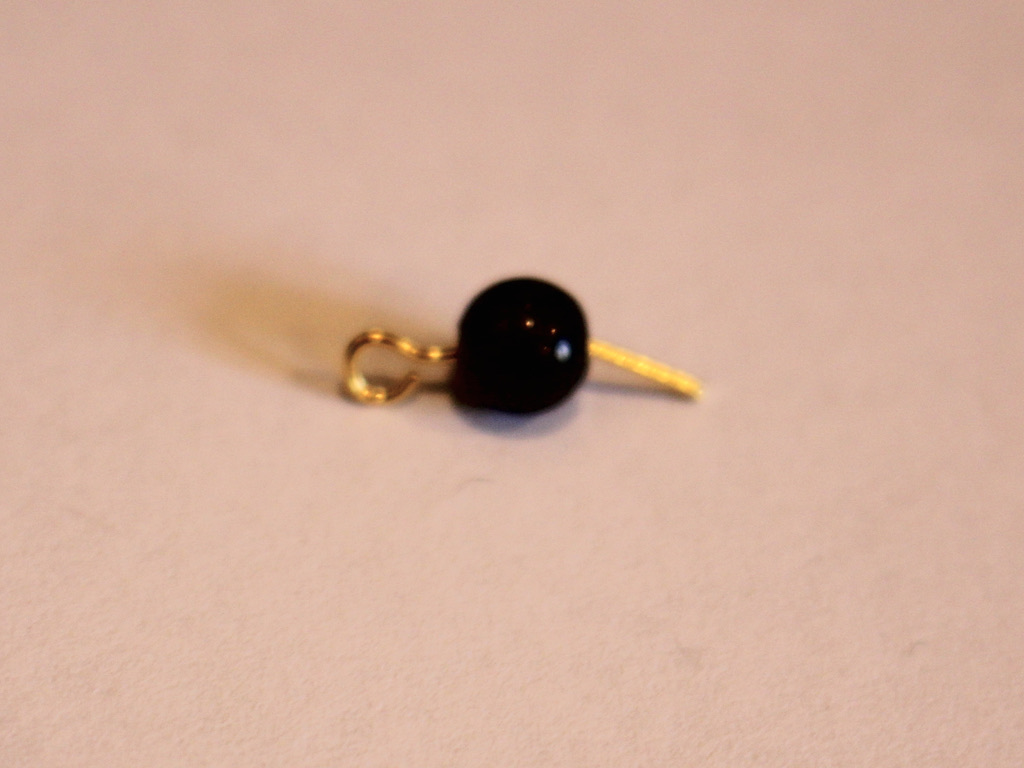
10: Loop the end of the pin around the round nose pliers to form a loop.


11: Repeat steps 8-10 for another pin and bead, now you will have two beaded pins that you can now attach together. Do this by slightly opening one of the loops and sliding the other charm on. Close the loop to secure the pieces together.

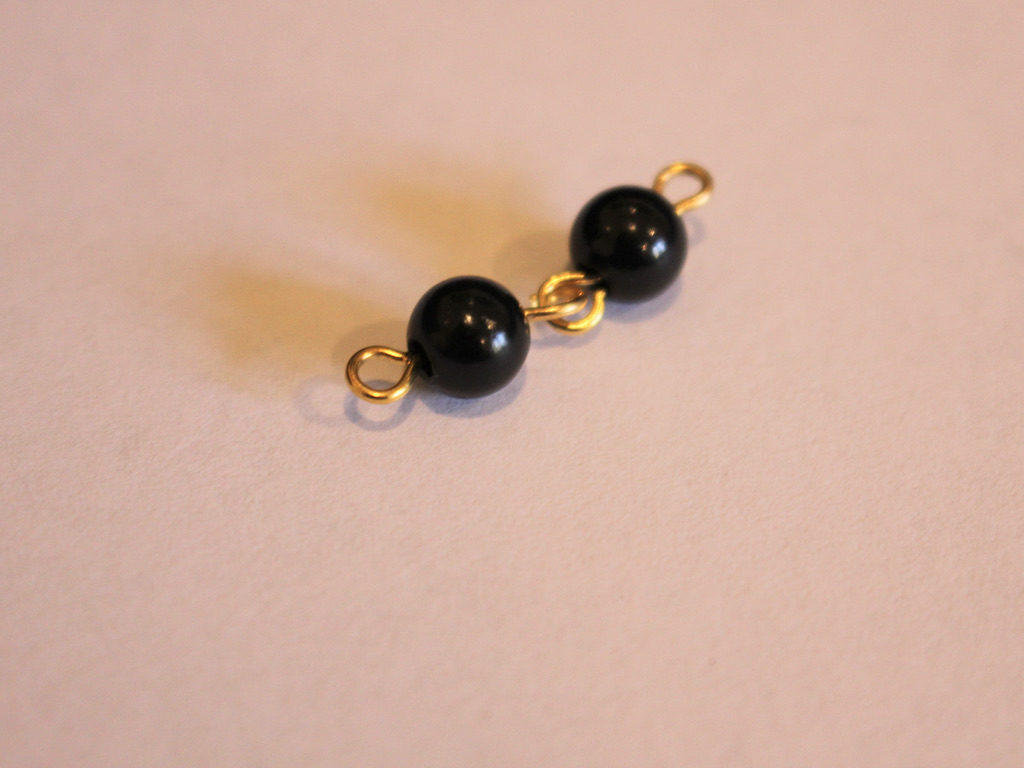
12: Repeat steps 1-11 until you have a chain that is the same length as the ribbon. It doesn’t matter if it is a tiny bit longer or shorter.


13: Take a jump ring and slide it through one end of each strand. Close the jump ring to secure the strands together.
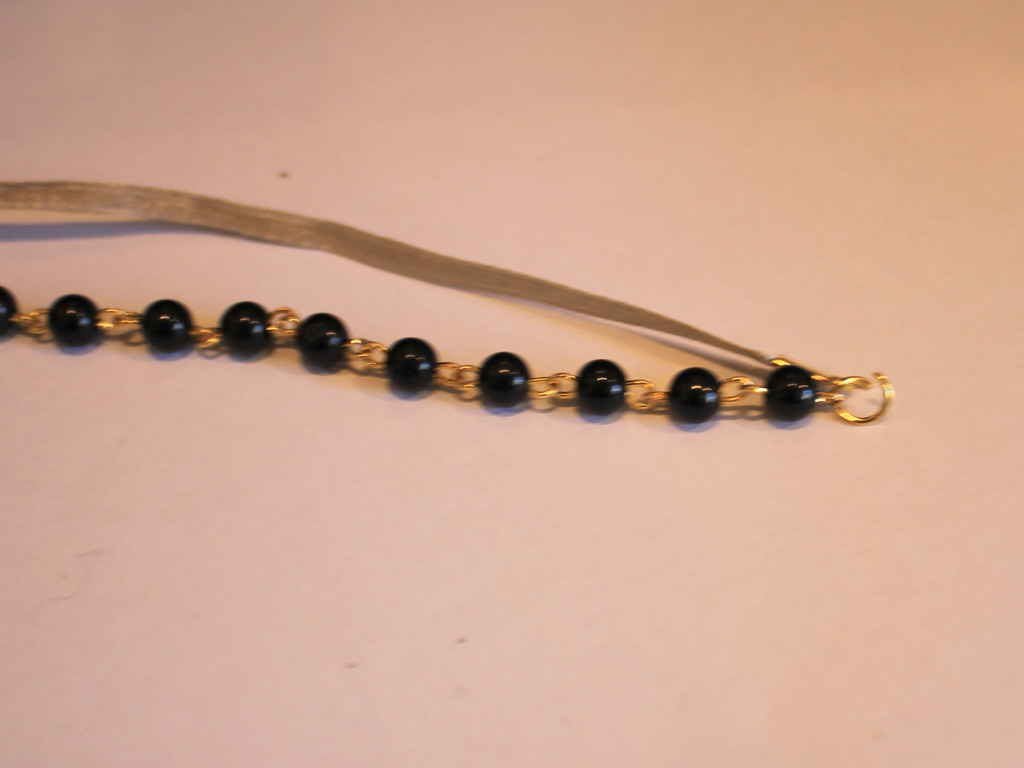

14: Repeat step 13 for the other end of the bracelet.
15: Attach one side of the toggle clasp to one side of the bracelet by slightly opening the jump ring, sliding the clasp on, then closing the jump ring again.

16: Repeat step 15 for the second part of the clasp.

Now your bracelet is finished and ready to wear! So cute.

-
Here’s how to add beaded sections to your boho body chain!
Nothing screams warm weather like a bohemian body chain! This waist chain design is embellished with gemstones for a luxe bohemian look. As an added bonus, it can also be worn as a necklace during the colder months. Please note that this tutorial contains affiliate links.
You’ll need the following tools and materials to make your beaded body chain:
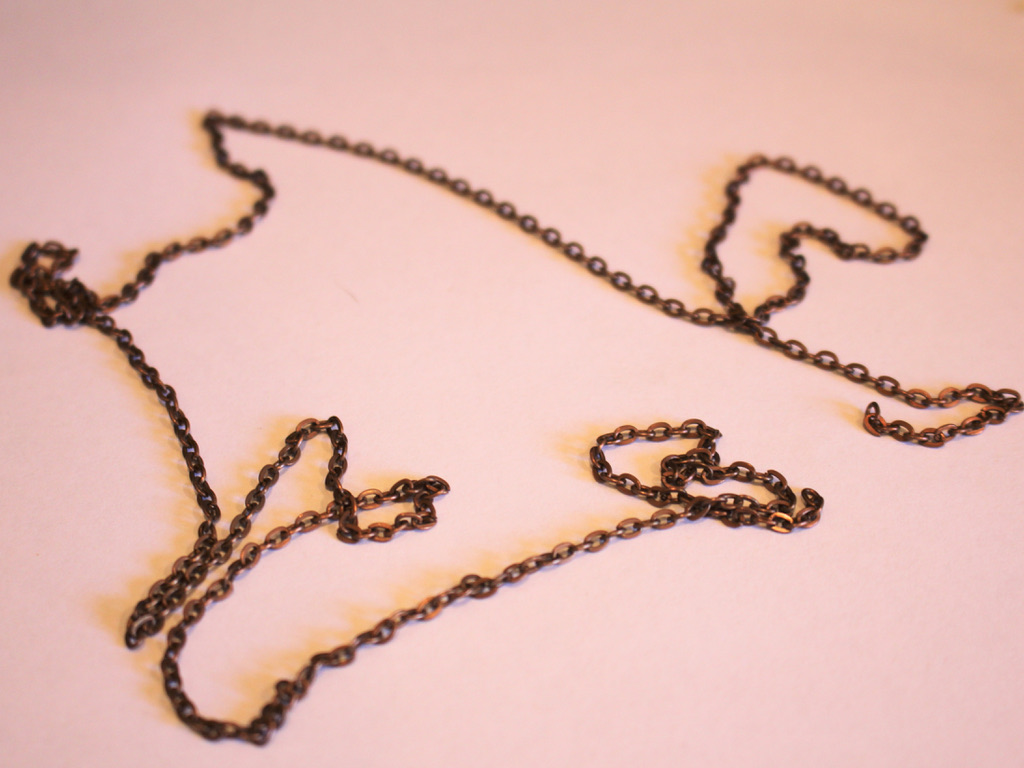
1: A piece of chain that fits closely around your waist (It will get longer when you add the beads).
2: Pliers. I used my flat nose and round nose pliers.
3: Some eye pins. I used 8.
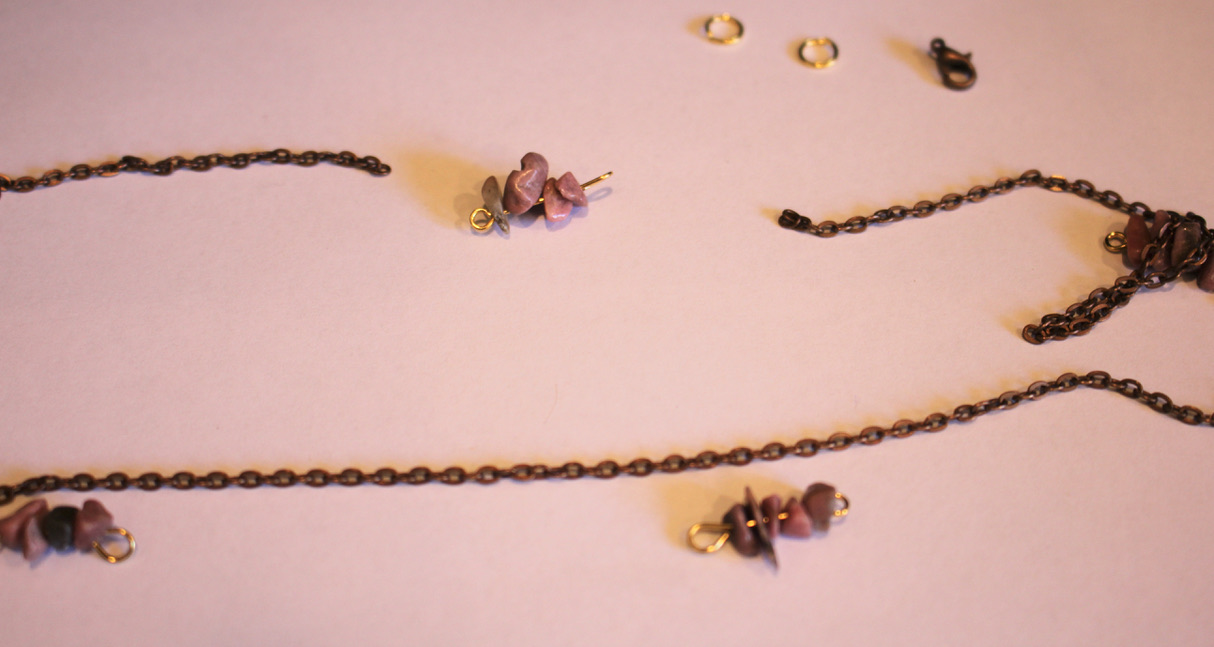
4: Two jump rings.
5: A lobster clasp.
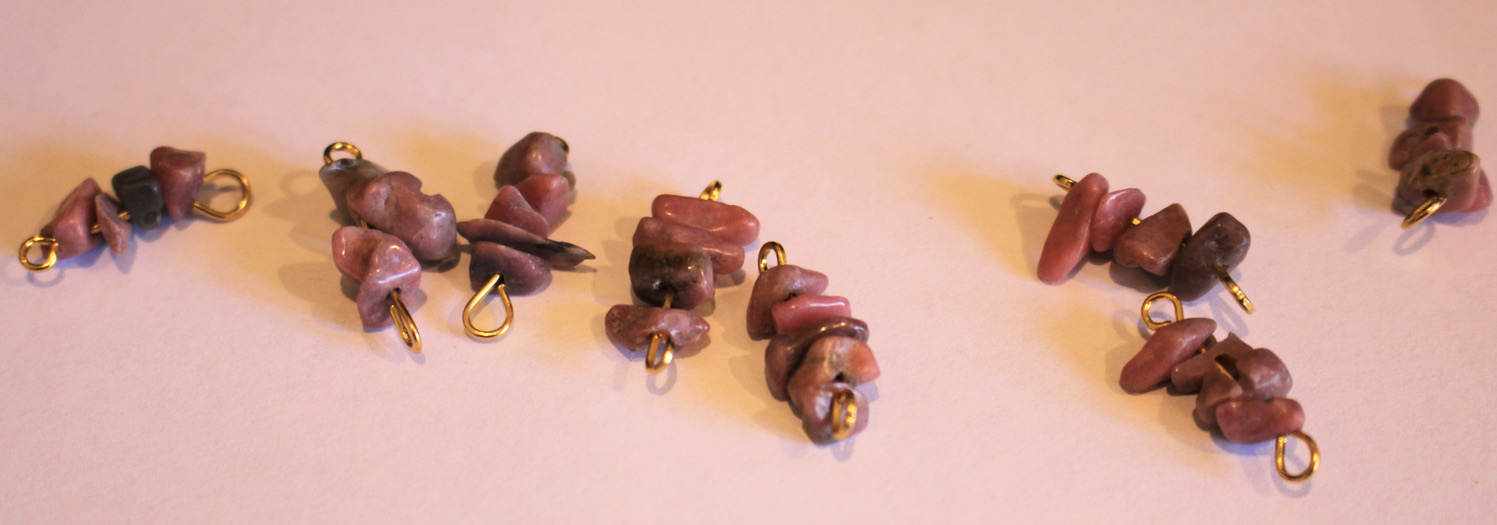
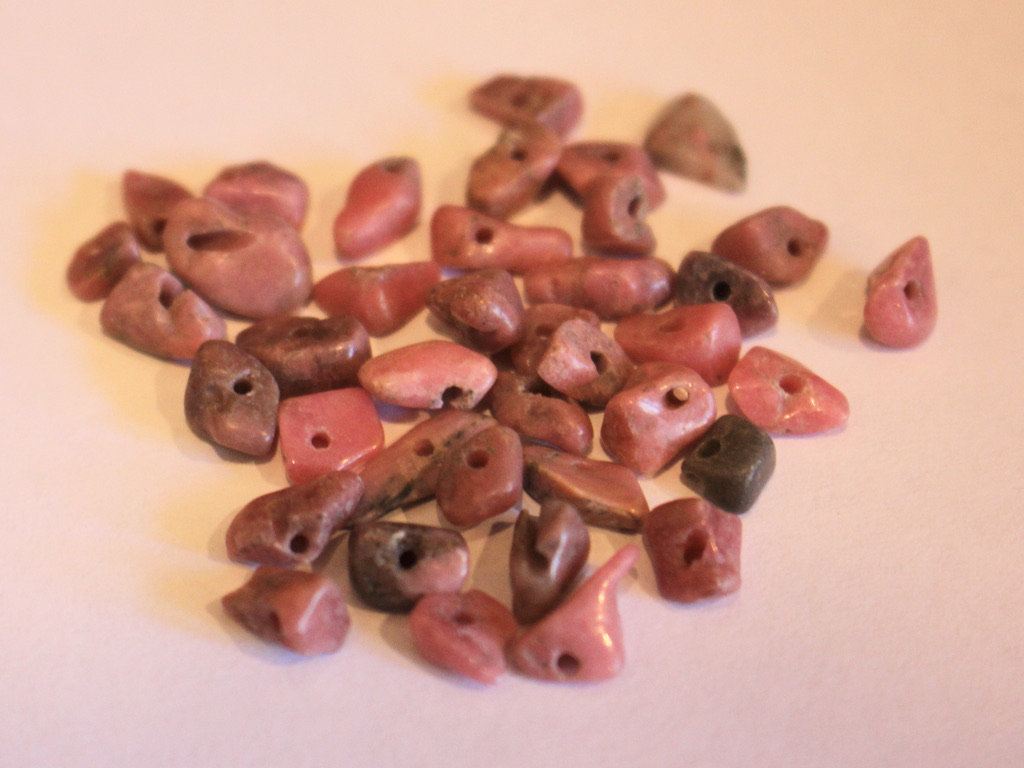
6: Some beads. I used these pink gemstone chip beads.
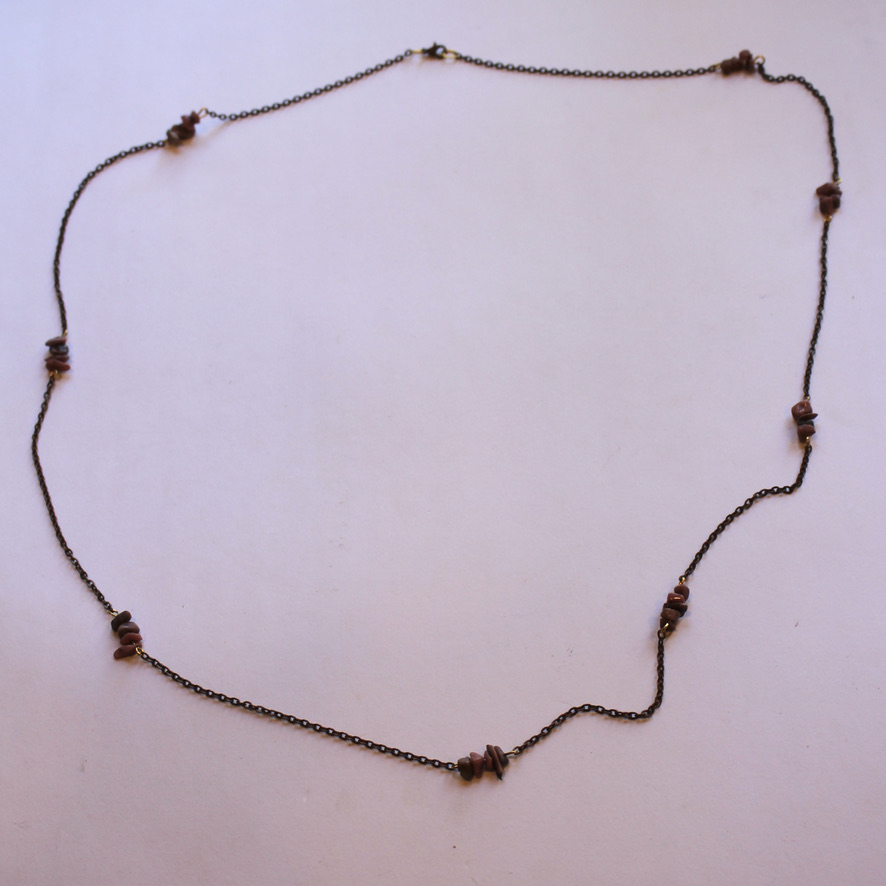
Follow these steps to make your cute boho waist chain:
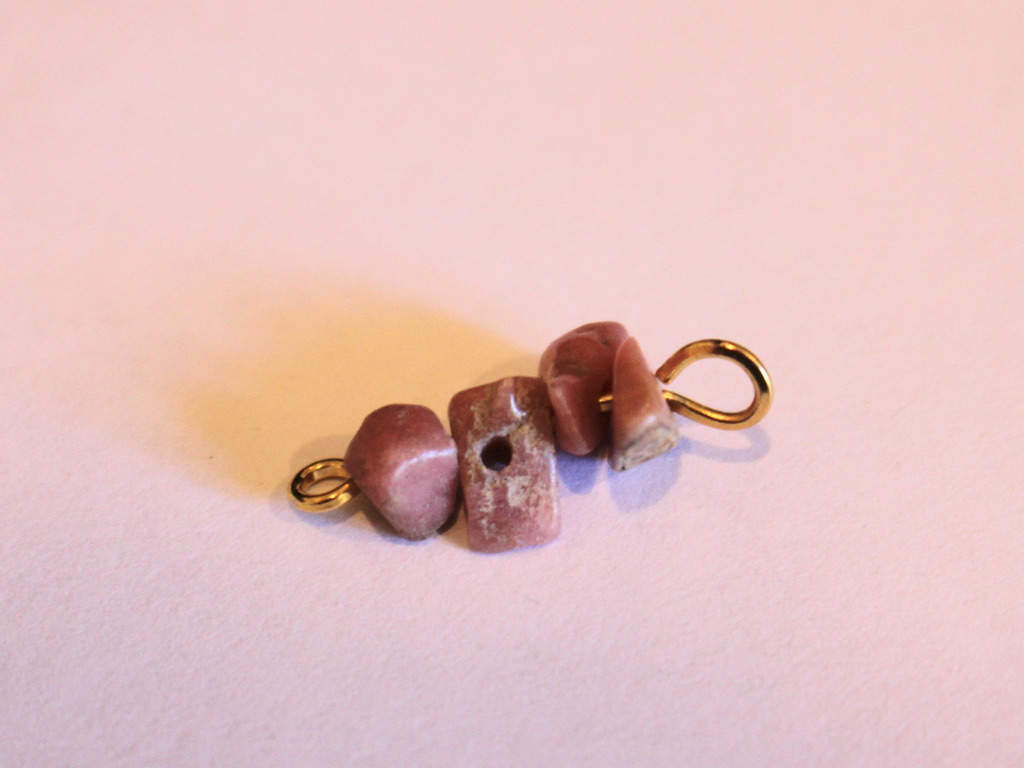
1: Add beads to a pin. I added four to each pin.

2: Bend the pin to form an angle with the beaded section.
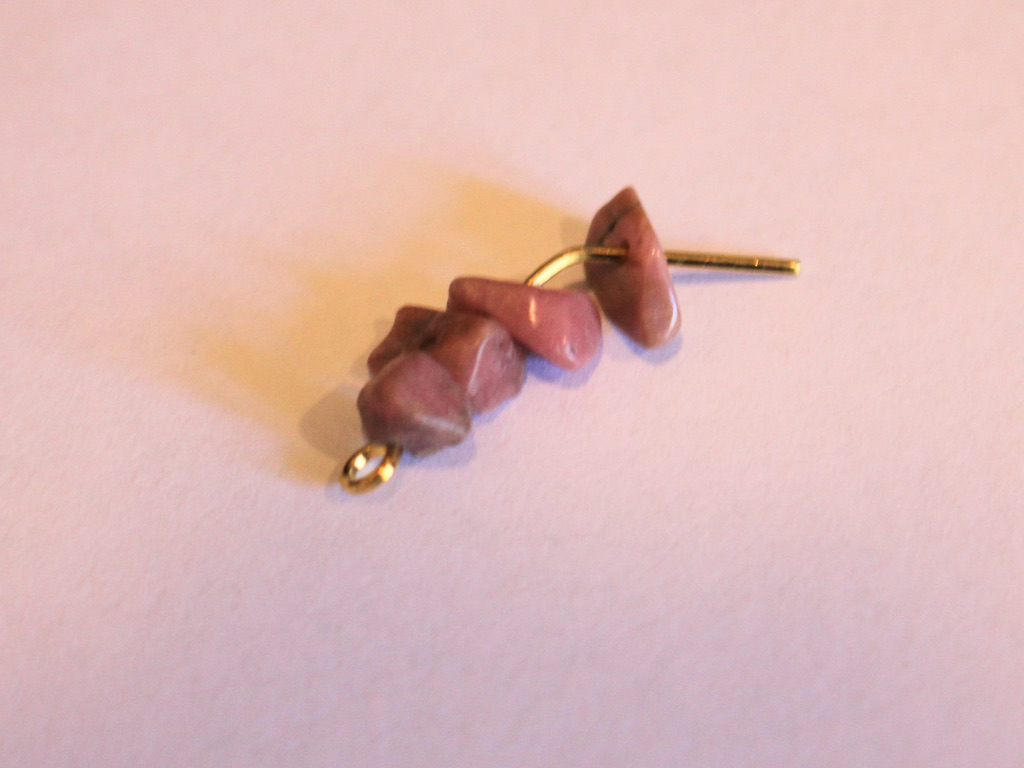
3: Wrap the end of the pin around the round nose pliers to form a loop that secures the beads onto the pin.
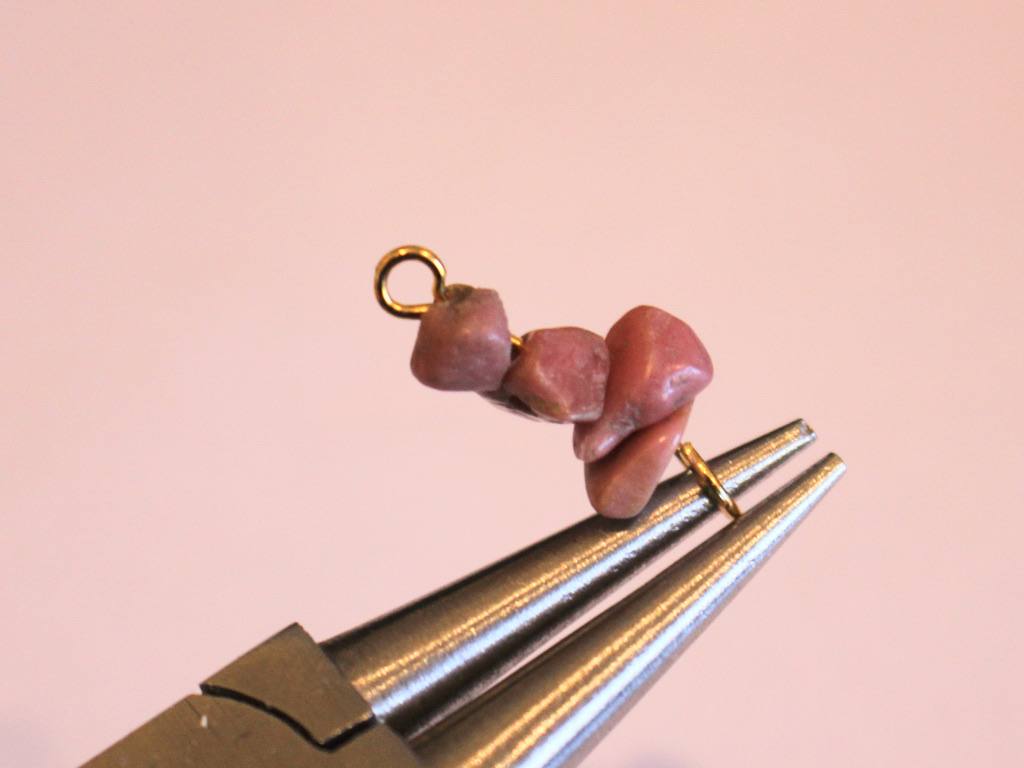
4: Repeat steps 1 – 3 for the rest of the pins.
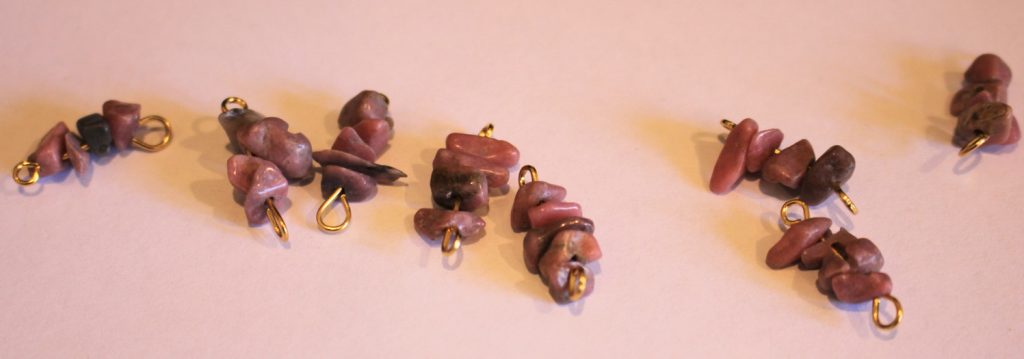
5: Line up the beaded pins along the chain so you can place them in a roughly even pattern.
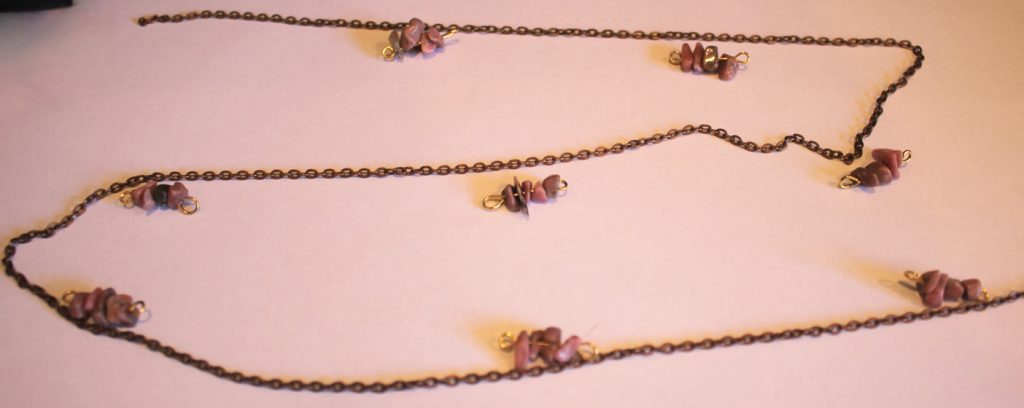
6: Split the chain for the first beaded pin.
7: Attach one side of the pin to the first piece of chain, secure the pieces together by closing the loop on the beaded pin.
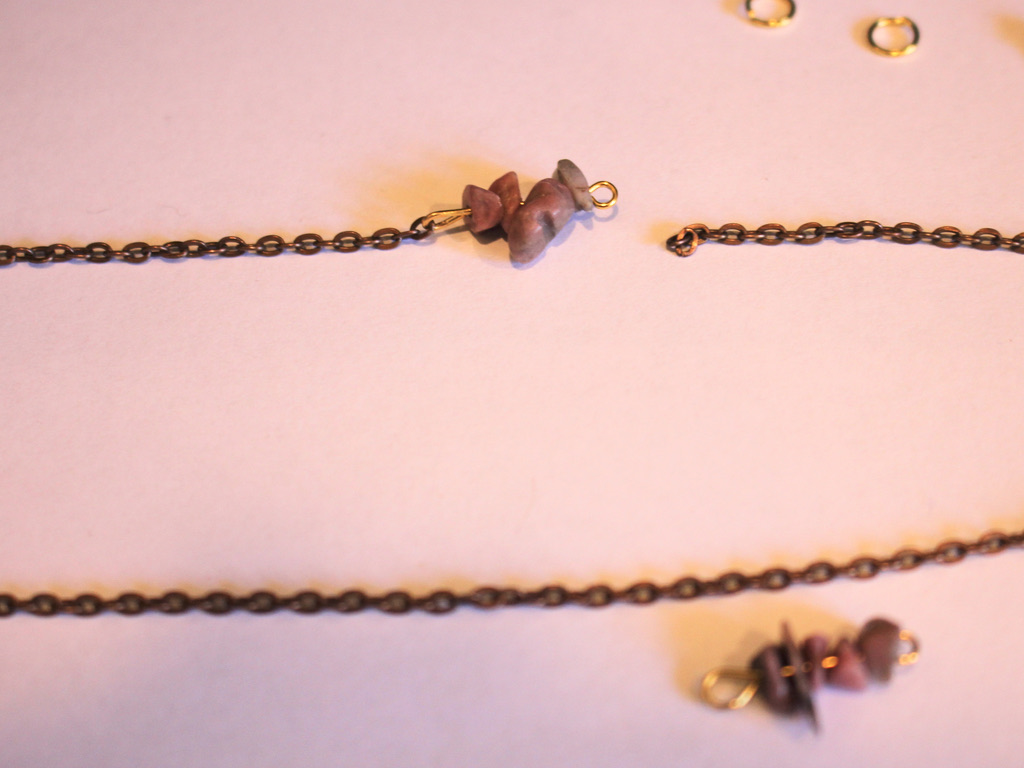
8: Attach the other side of the pin to the other piece of chain. Now you have a chain with one charm attached.
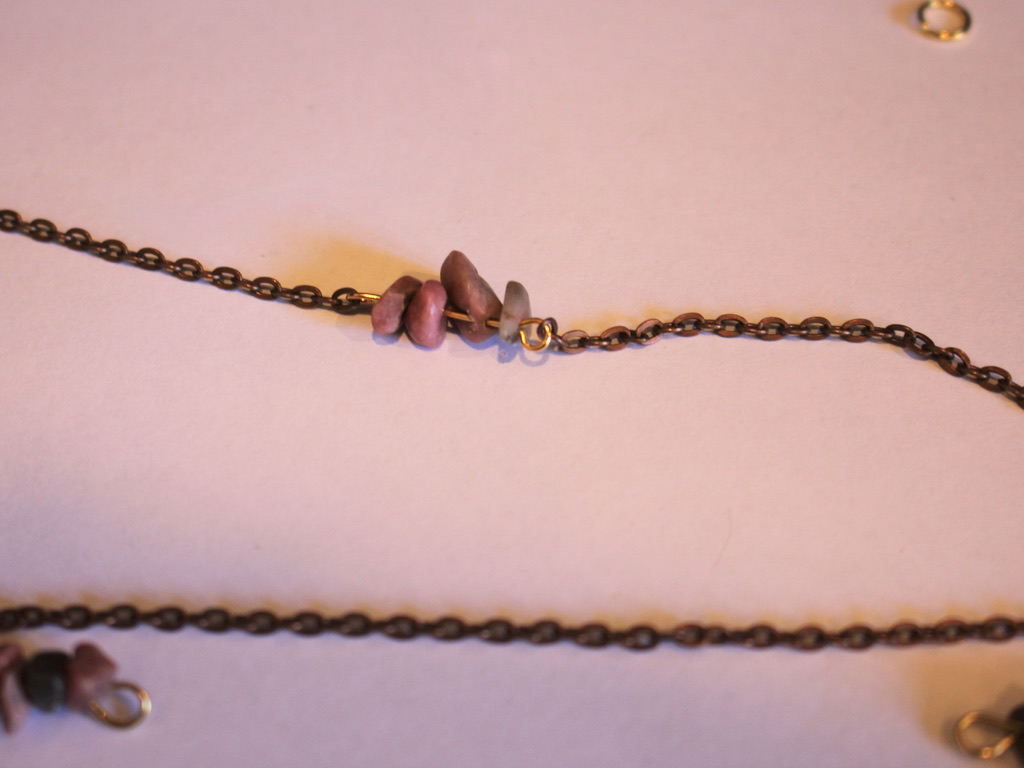
9: Repeat steps 6 to 8 for the rest of the beaded pins until they are all attached.
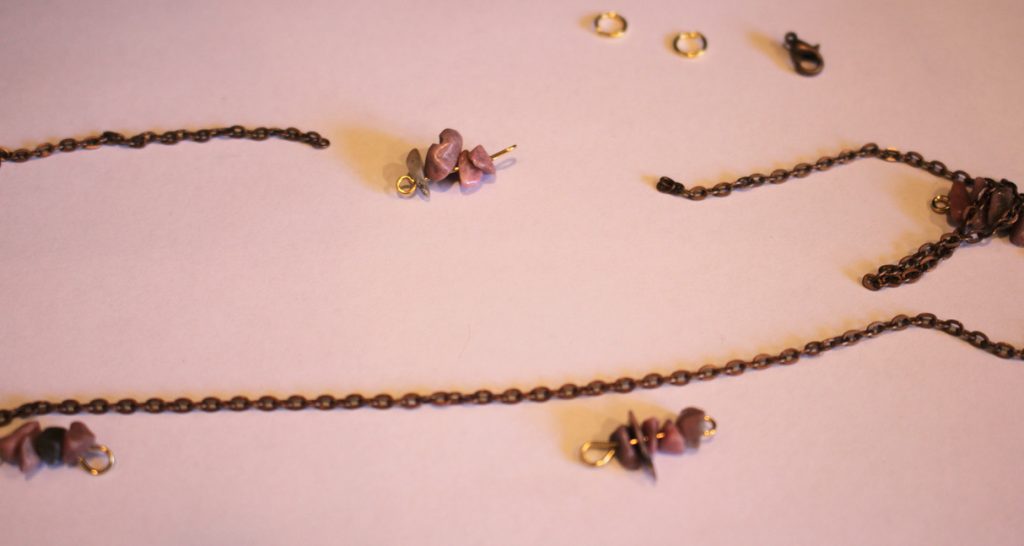
10: Add a jump ring to one end of the chain and slide on the clasp before closing it.
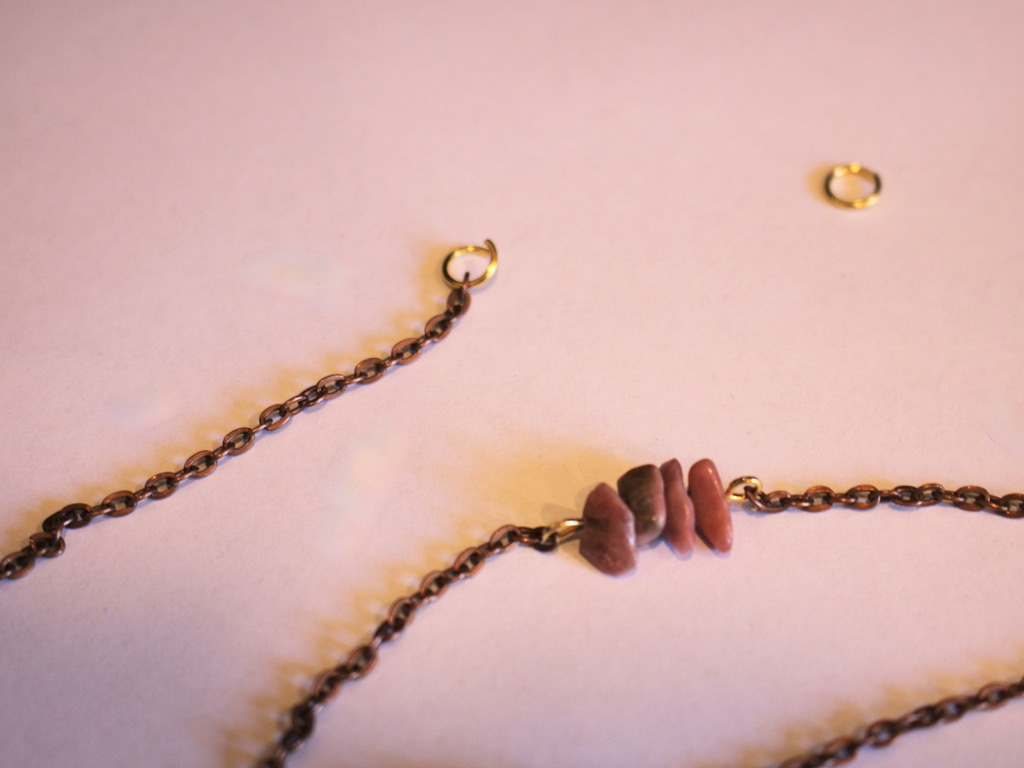
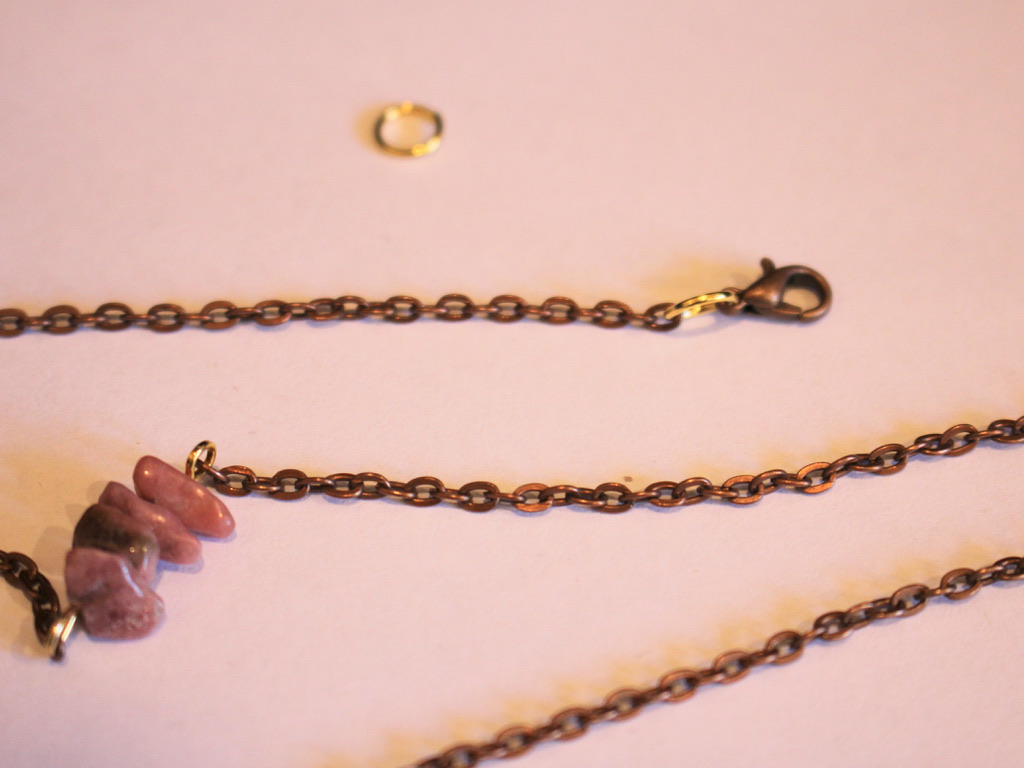
11: Add the other jump ring to the other end of the chain to finish it off.
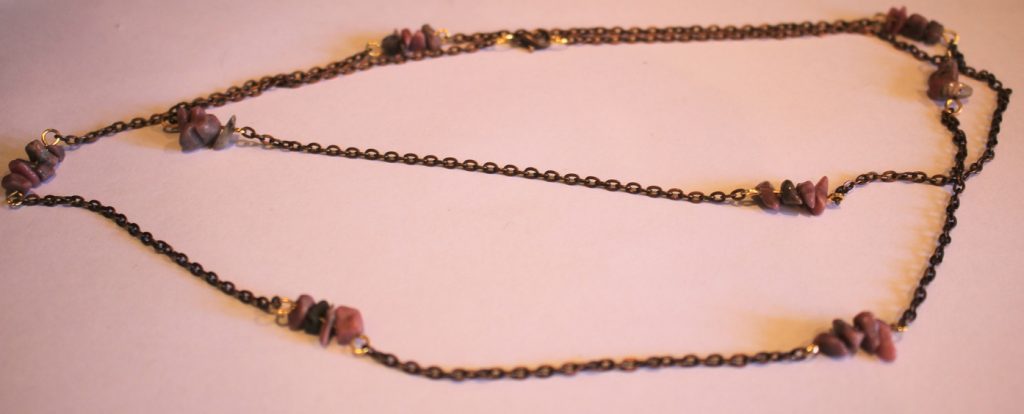
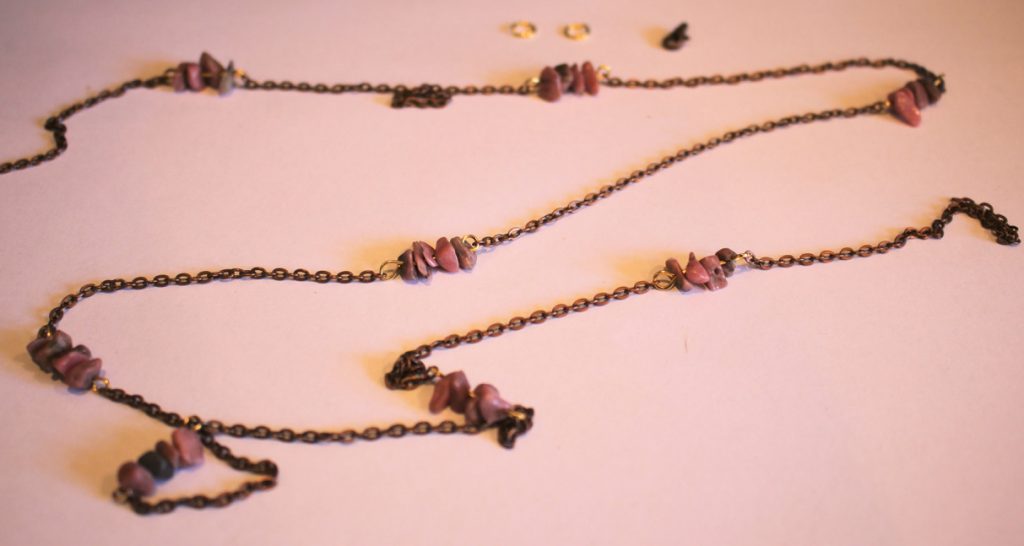
Now your beaded waist chain is finished and ready to wear! What gemstones will you use on your cute body chain design?
Find some more waist and body chain tutorials here
-
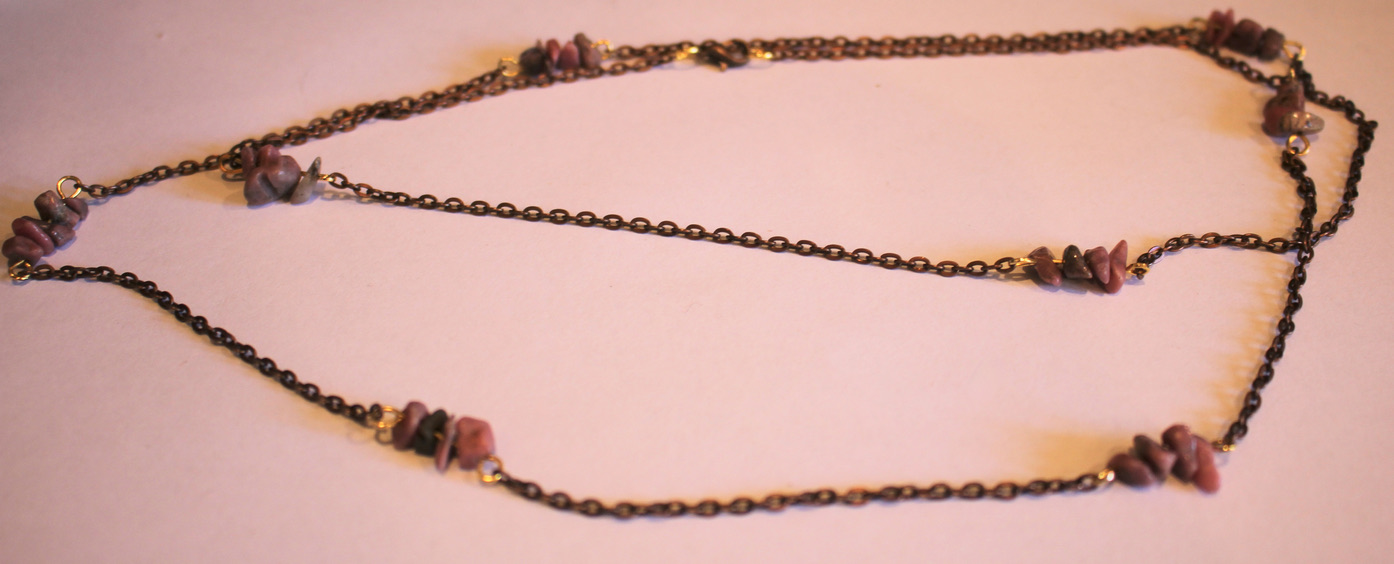
Here’s how to make a super cute lariat!
This tutorial shows you how to put beads on a chain necklace! This bead and chain lariat is really pretty and surprisingly simple to DIY at home. This design is perfect if you are looking for an at home craft activity or want something new to spice up your zoom outfit!
Please note that this tutorial contains affiliate links.
You will need the following tools and materials to make your beaded lariat:
1: Pliers. I used my cutting pliers, my round nose pliers and my flat pliers.

2: You’ll also need some chain. I used two pieces of gold-tone rolo chain, one long enough to fit around my neck and another that was a bit shorter, approximately 12cm long.


3: A selection of beads. I didn’t use all these beads but it’s good to have a range to choose from!

4: Some eye pins. You’ll use these to add beads to your chain necklace.

5: One head pin.

6: A couple of jump rings.

7: A lobster clasp.

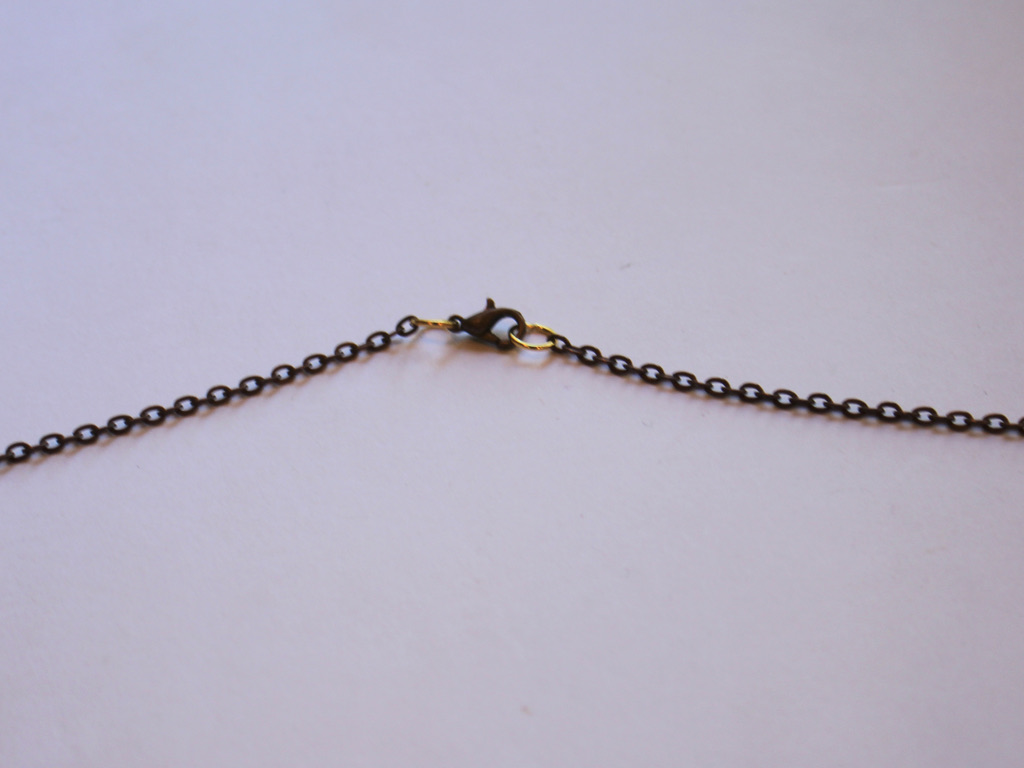
Follow these steps to make your own chain beaded lariat. Have fun with this one ;):
1: First separate your long chain into two halves. Depending on what kind of chain you have you’ll need to cut it or open up one of the links with your flat nose pliers.


2: Add a jump ring to one end of each of the chain halves.


3: Add a lobster clasp to one of the chains and set them aside.

4: Add one of the beads to one of the eye pins.

5: Bend the eye pin to form an angle.

6: Trim the length of the pin using the cutting pliers so that it is approximately 1cm long past the bead.


7: Create a loop at the end of the pin by bending it around the barrel of the round nose pliers.


8: Repeat steps 4 to 7 for the other beads, I put 7 beads on eye pins, 6 round beads and one long bead which I used as a feature bead.

9: Add a couple of beads to the head pin and loop the top as you did with the other bead charms.


10: Add the long bead to one end of the short chain and the head pin charm to the other end.


11: Link three of the round beads together to form a mini chain.


12: Repeat this for the second set of beads so you have two chains made up of three beads each.

13: Attach the bead chains to the loop at the top of the long bead.


14: Attach each of the necklace chains to each of the short beaded chains to finish the lariat off.


Now your bead and chain lariat necklace is finished and ready to wear!


Here are some other lariat tutorials you can make at home:
- An adorable lariat with a cute love heart bead detail
- A handmade beaded chain lariat made with mixed vintage beads
- This pretty lariat with a double hole bead detail
- A beaded strand with a chain detail lariat
- This chunky gold curb chain lariat
- This fun lariat with round beaded charms
- A triangle detail lariat necklace
- This special charm that you can attach to any necklace to turn it into a lariat