-
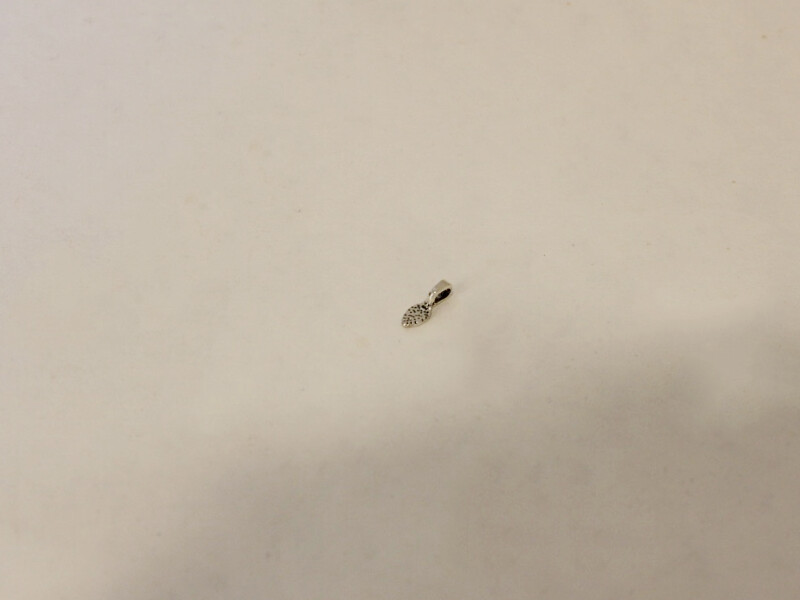
Bail Findings

These glue on bail findings are great for transforming special objects and trinkets into pendants. All you need is one of these bad boys and some glue!
Here are some ways you can use glue on bail findings:
-
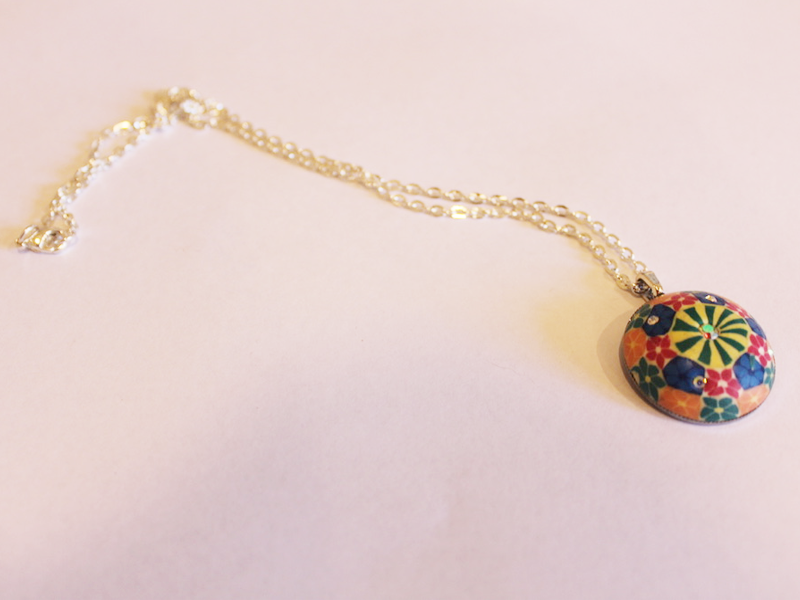
How to transform an old ring into a pendant.

If you are like me you might have some old costume jewelry lying around that isn’t really your style any more. Instead of throwing it away here’s a way that you can transform an old ring into a wearable pendant.
You will need the following tools and materials to make your pendant:
1: An old ring. I used this ring with a soldered on ring shank.

2: Flat nose pliers for pulling the ring apart.

3: A glue on bail.

4: Araldite glue.

5: A skewer.

6: Scrap paper.

8: A necklace chain.

Follow these steps to transform your old ring into a necklace pendant:
1: Remove the ring shank from the top of the ring, gently pulling it off with your flat nose pliers.


2: If there is excess metal use a file to remove it. I didn’t have to do this for this project.
3: Squeeze out the Araldite glue in equal parts onto the scrap paper.


2: Mix the glue using the skewer.

3: Add the glue to the bail and the back of the ring.


4: Place the bail onto the glued part of the ring and set aside to dry.

5: Add the dry pendant to the necklace to finish it off!
Now your new pendant is ready to wear! Such an easy way to upcycle old jewelry.
-
Stuck for Mother’s Day gift ideas? Here’s our DIY jewelry gift guide!
If you need some ideas for Mother’s Day, here are some tutorials that might inspire you to make the mother figure in your life something special and sentimental.
Gift idea one: A necklace made out of an upcycled brooch.
Find all the steps to make a brooch necklace here.
Gift idea two: A lock and key jewelry set.

This is such a cute idea, turn your childhood diary lock and key into a sweet jewellery set! Find the steps here.
Gift idea three: Some delicate wire threader earrings.

These are for the Mother who loves the simple things. The full threader earring tutorial can be found right here.
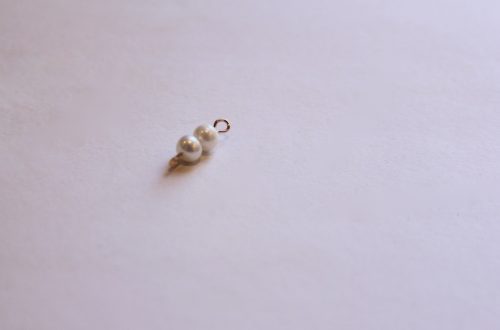
Gift idea four: An elegant floating pearl necklace.

This necklace is so cool! Find the tutorial here.
Gift idea five: A custom made charm.

Use a special bead or a handmade one and transform it into a one of a kind charm. All the steps to create this special charm are right here.
Gift idea six: A beachy pendant.

Fill this pendant with reminders of the beach or the bush. All the steps to make this sentimental pendant right here.
-
How to make a beaded teardrop pendant

Here’s how to make a cute beaded teardrop pendant using memory wire. If you’re sick of making chokers with your memory wire coil this is another way to use it!
You will need the following tools and materials to make your teardrop pendant:
1: Pliers. You’ll need your cutting pliers, flat nose pliers and round nose pliers.

2: A piece of memory wire, half of a necklace loop.

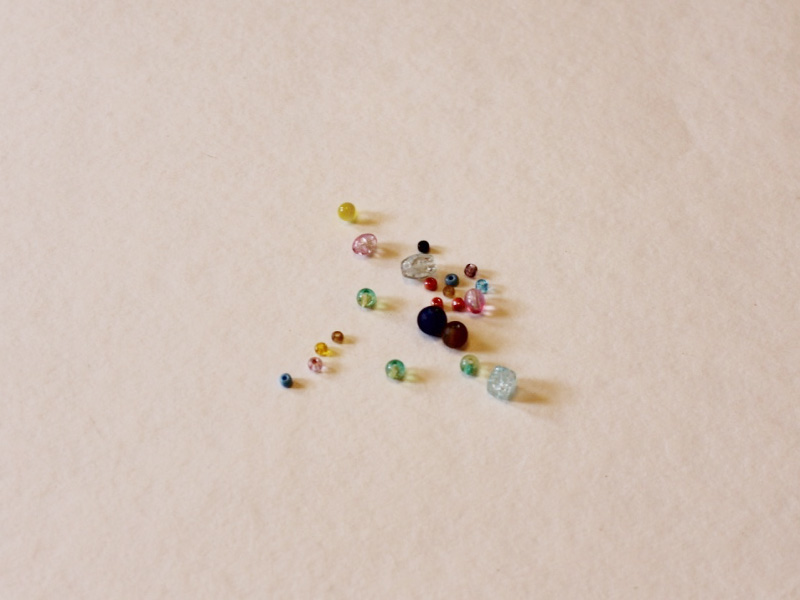
3: Beads. I used these mixed glass seed beads.

Follow these steps to make your teardrop pendant:
1: Create a loop at the end of one side of the piece of memory wire.


2: Add the beads to the wire until there is only 1cm left unbeaded.


3: Create a loop at the other end of the wire securing the beads in place.

4: Link the loops together to form the teardrop shape.


Now your pendant is finished you can attach it to a chain or beaded strand of your choice!

Here’s a pair of earrings I made using the same technique. Just add an earring hook to the top of each teardrop instead of a chain!

-
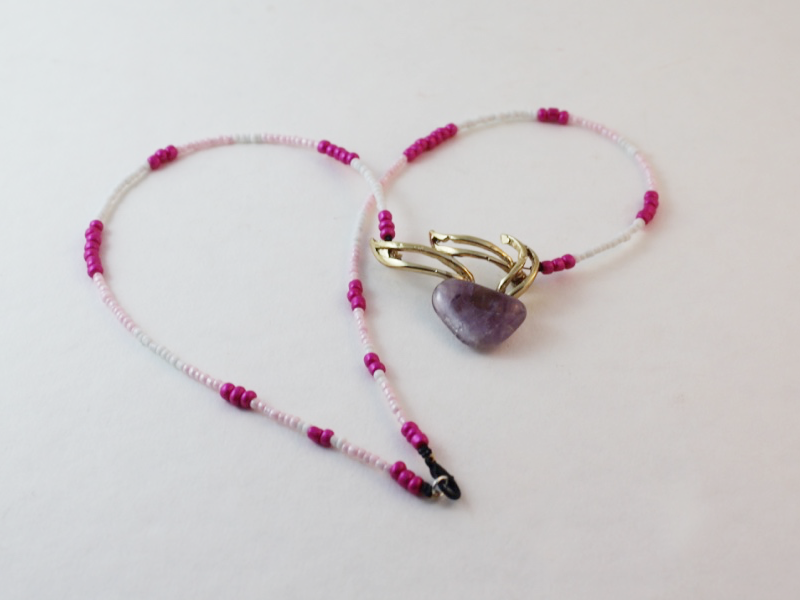
Use Special Charms and Some Awesome beads to make this stunning necklace.

This pendant necklace is so cute! Use a pre-made pendant, or make your own, and surround it with some pretty accent beads to make a lovely little necklace!
You will need the following tools and materials to make this necklace:
1: Pliers. You will need your cutting pliers, round nose pliers and flat nose pliers to make this necklace.
2: A piece of chain long enough to fit around your neck. You can make your chain longer or shorter depending on where you want your necklace to sit.

3: Two eye pins.

4: Two smaller jump rings.

5: One medium sized jump ring.

6: A lobster clasp.

7: A pendant or charm. I used this bent wire charm that used to be an earring.

8: Extra beads. I used two silver colored metal beads. You can use any beads that you think will complement your chosen pendant or charm.

Follow these steps to make your necklace:
1: Split the piece of chain in half, you will have two equal length pieces of chain.

2: Add each of the accent beads to each of the eye pins.

3: Bend each eye pin at a right angle to the beaded section using the round nose pliers.


4: Trim each pin if required, the angled part of the pin should be approximately 1cm in length.


5: Create a loop at the top of the pin using the round nose pliers to secure the beads onto the pins.


6: Add the beaded pins to one end of each chain.


7: Attach the other ends of each beaded pin to the larger jump ring and slide the charm on in the middle of the two chains.

8: Close the jump ring to secure the chains and charm together.

9: Add a smaller jump ring to the other end of one of the chains and add the lobster clasp to the same jump ring. close the jump ring to secure the clasp in place.


10: Add the other jump ring to the other side of the necklace, close it to secure it in place.

Now your necklace is finished! How simple but beautiful is this design?


Here’s another accent bead necklace made using a resin charm.

-
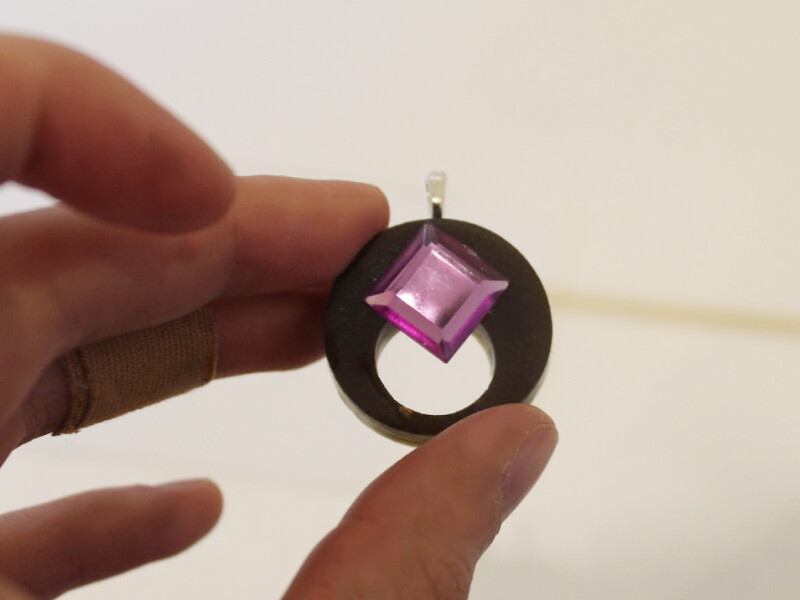
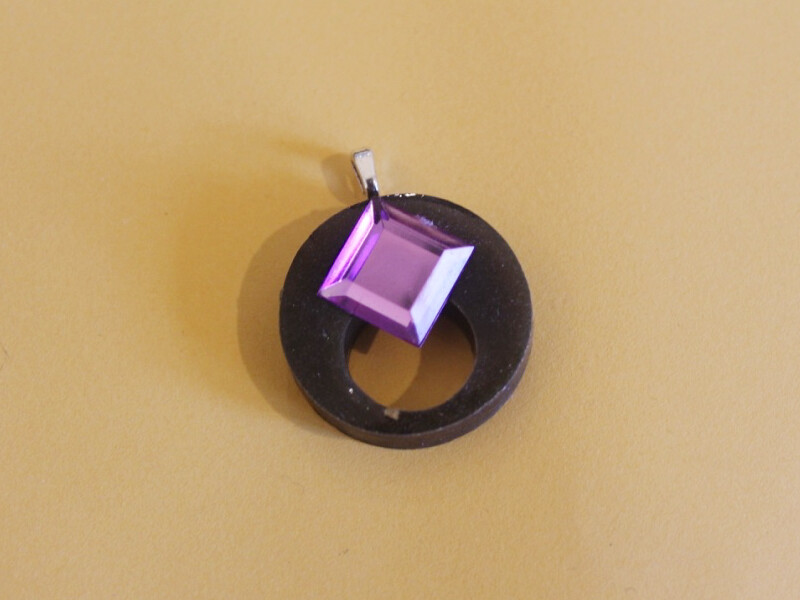
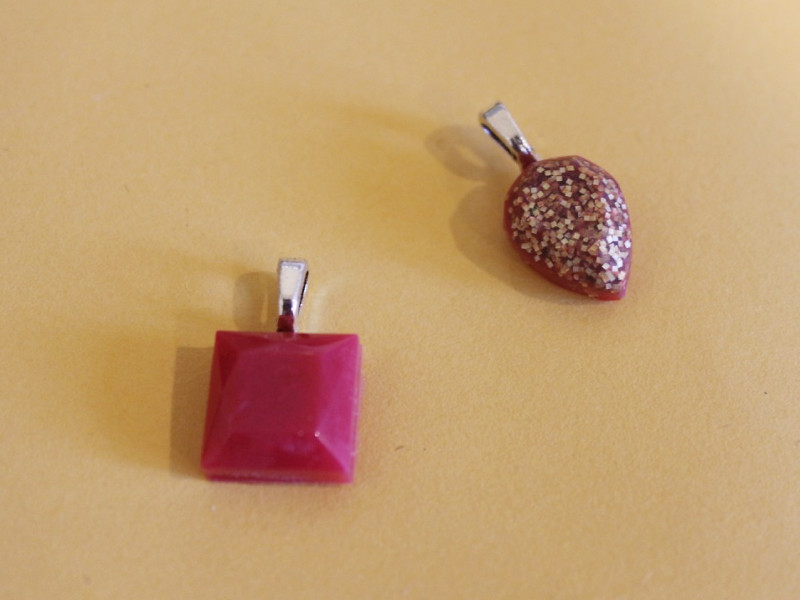
Do You Have Any Special Pieces You Wish You Could Wear as a Pendant? Here’s How You Can…

With a glue on bail you can turn almost anything into a pendant. Here’s how to use one!
You will need the following tools and materials to make this pendant:
1: A glue on bail.
2: Araldite glue.
3: A skewer.
4: A scrap piece of paper.

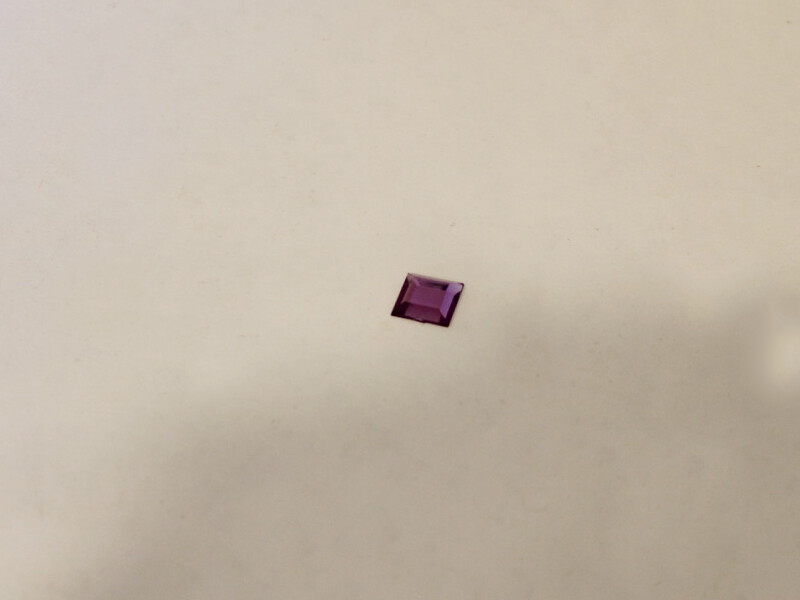
5: A plastic charm/decoration. I used this circular resin piece and a plastic gemstone.
Follow these steps to make your pendant:
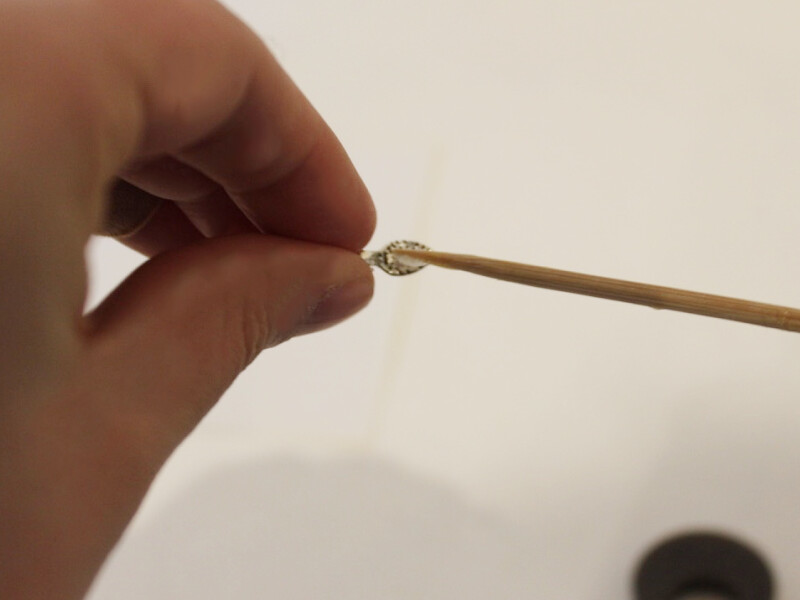
1: Squeeze the glue in equal parts onto the piece of scrap paper.
2: Mix the glue using the skewer.
3: Add the glue to the bail and to the back of the charm where you want your bail to sit.
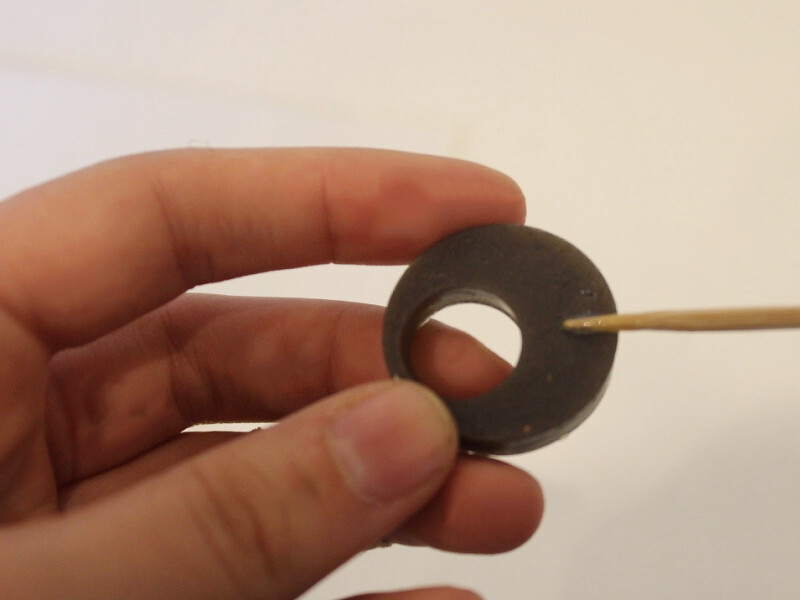
4: Place the bail onto the charm and wait for it to dry.

5: Depending on how long it takes for the bail to dry you might need to mix up some more glue.
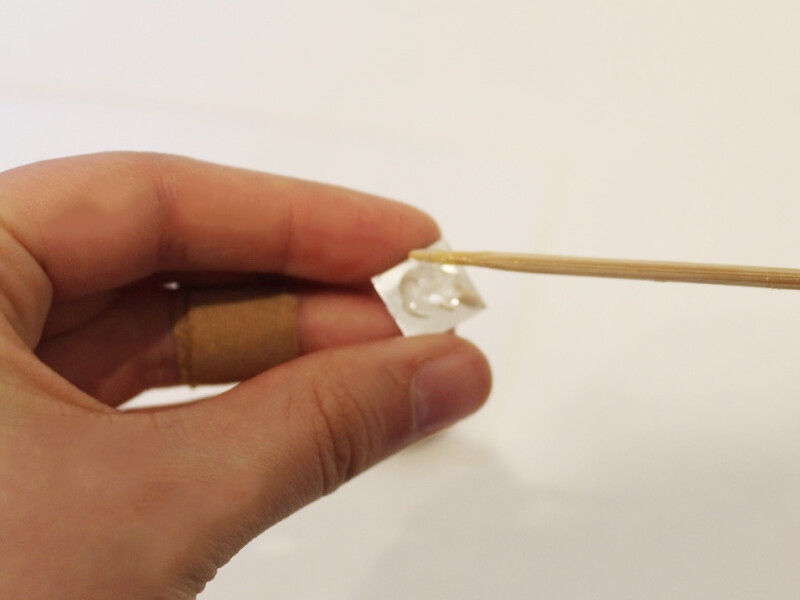
6: Add more glue to the back of the plastic gemstone and place it on the front of the other charm.
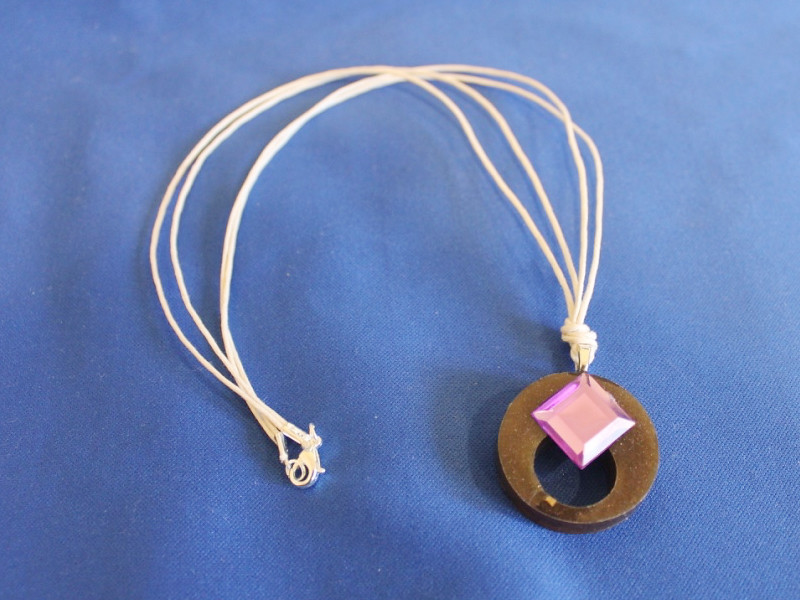
Once the charm is completely dry it is finished and ready to attach to a chain and wear!
I attached my pendant to some string to wear as a necklace.

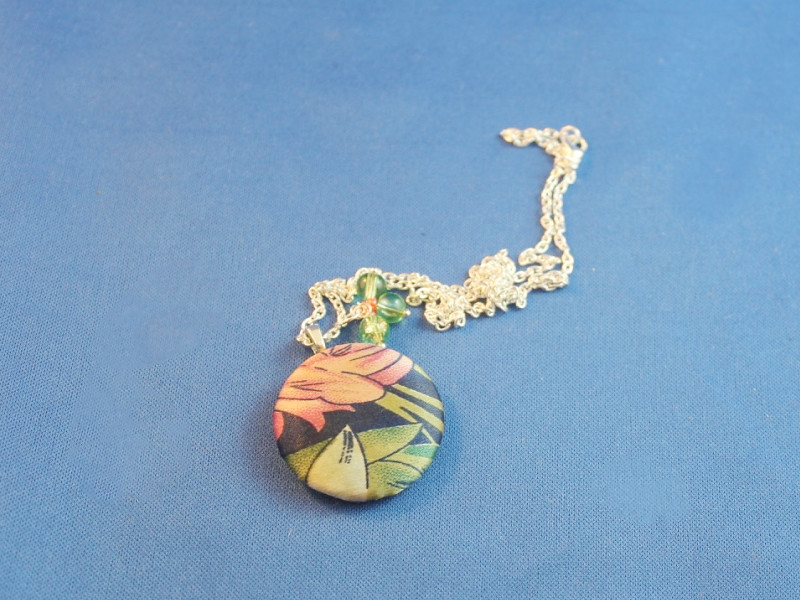
Here is another pendant made from a broken button.
And a couple of small pendants made from resin cabochons
-
This is a pendant with a twist… literally! Making one way too fun.
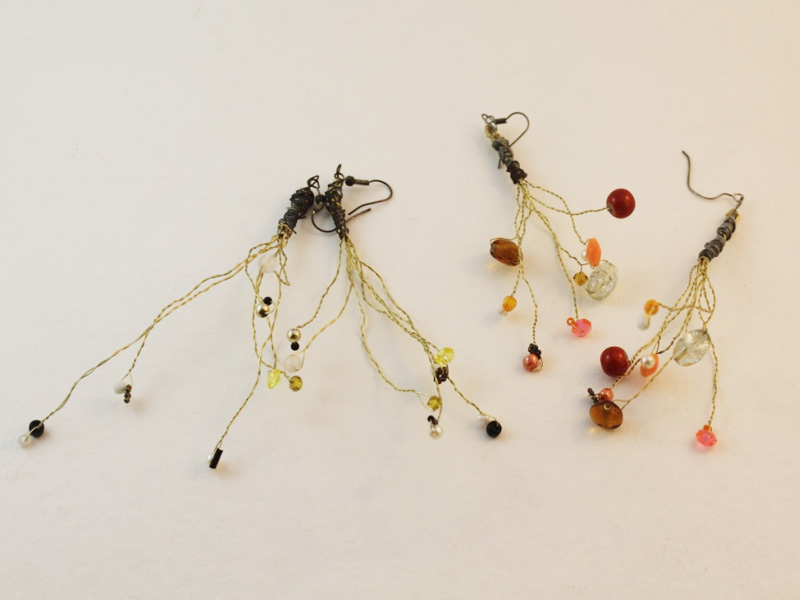
I recently rediscovered the earrings pictured above that I made way back when I was in high school (a fair few years ago now) and they inspired me to make this simple necklace pendant tutorial. Making this pendant requires minimal use of tools and extra findings. This pendant is made using 32 gauge wire which is fine enough to manipulate using your fingers! All you need are your cutting pliers to cut your wire to size. So grab a handful of beads and some cool colored wires and go make your own crazy, cute wire pendant.
You will need the following tools and materials to make this wire pendant:
1: Cutting pliers.

2: 32 gauge wire. I used this blue colored wire.
3: A selection of beads. I used this assortment of glass beads.
The Steps:
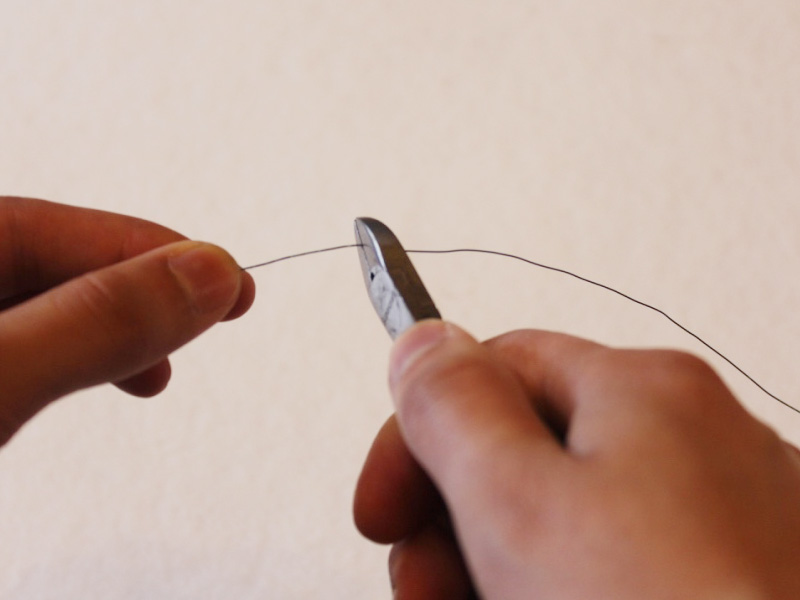
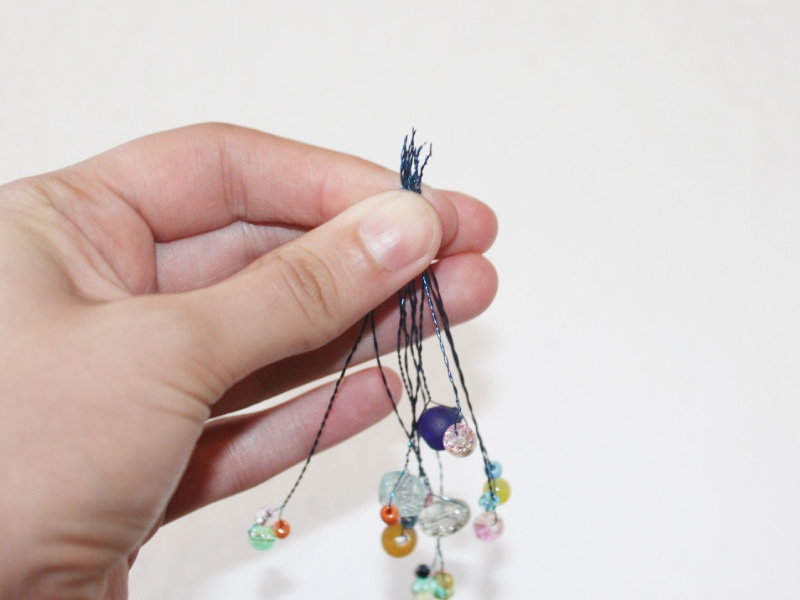
1: Cut the wire into different lengths using the cutting pliers. You can cut as many as you like. I cut eleven pieces of wire (one for finishing the top of the pendant).
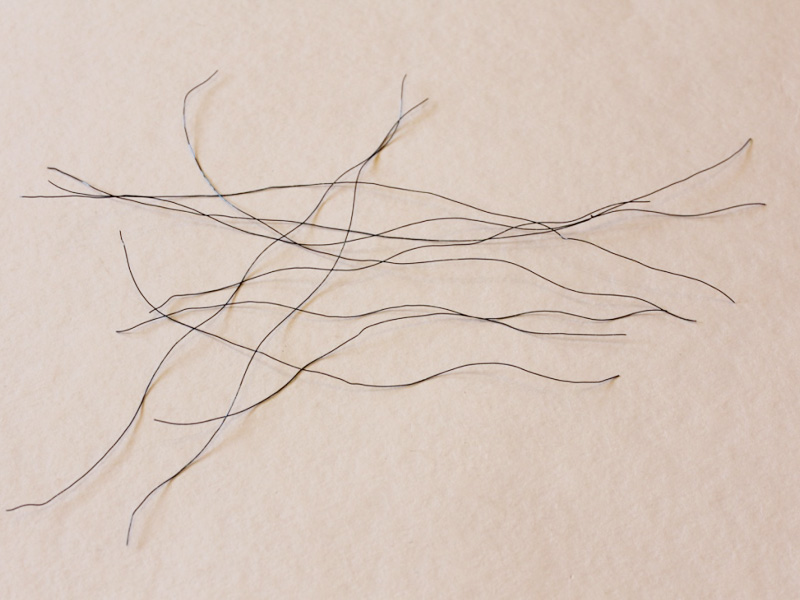
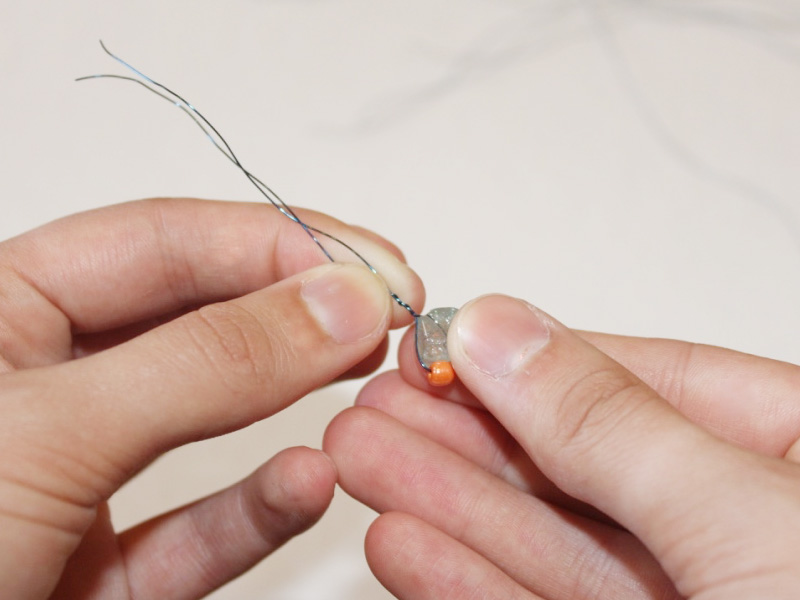
2: Take a bead or two and add them to the center of a piece of wire.
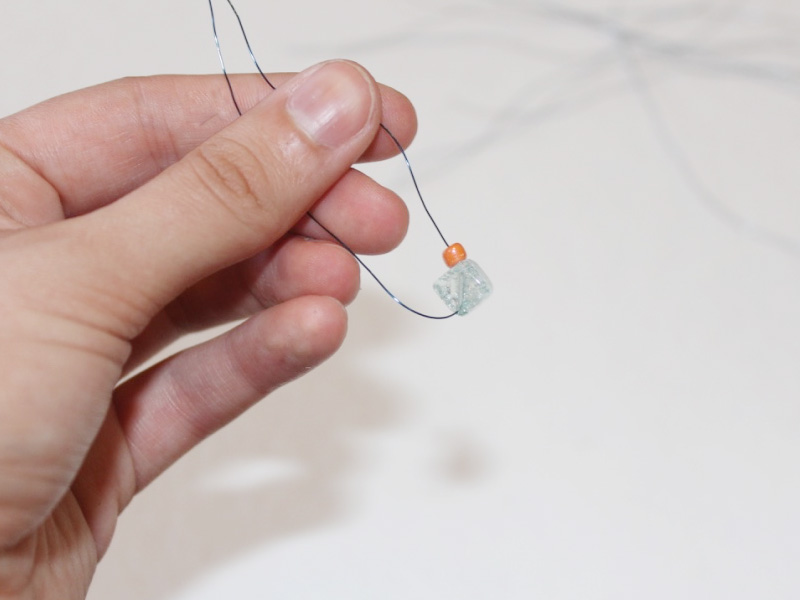
3: Twist the ends of the piece of wire together to hold the beads in place.
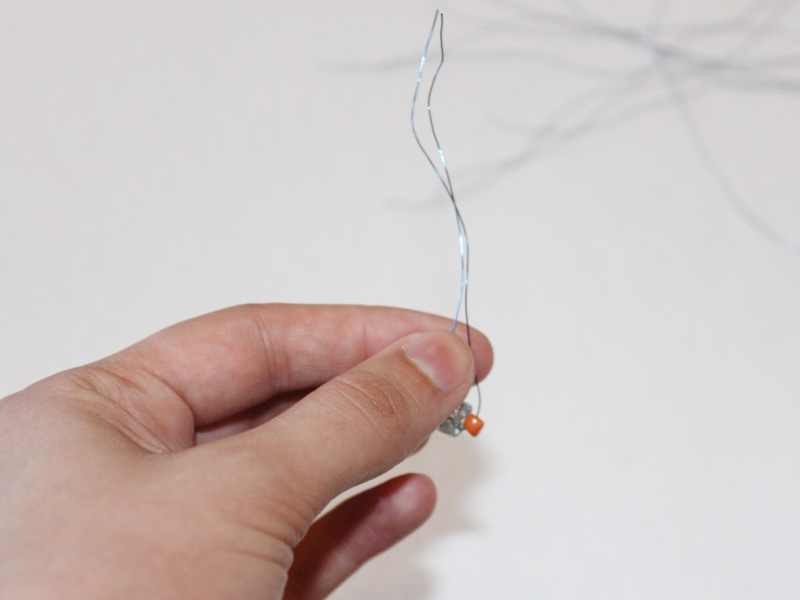
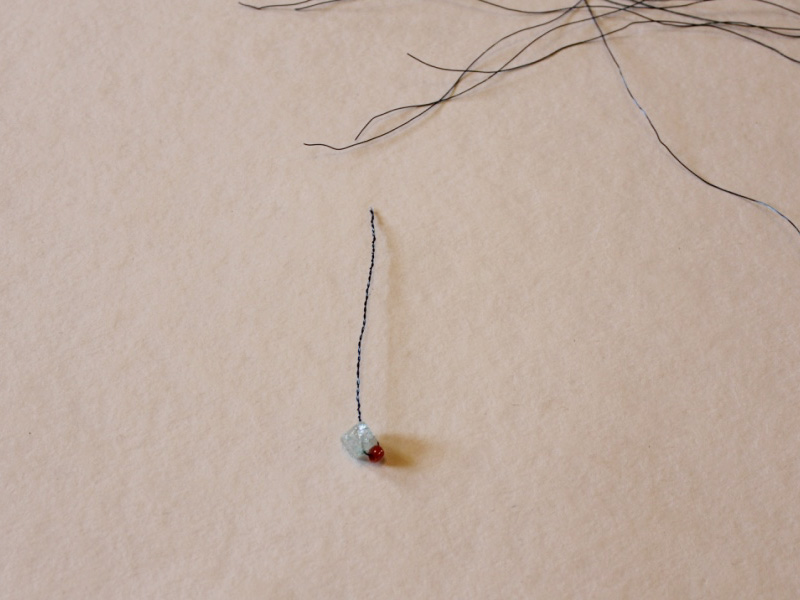
4: Repeat steps 2 and three until only one piece of wire remains.

5: Gather all the wire pieces together and twist them together at the top.
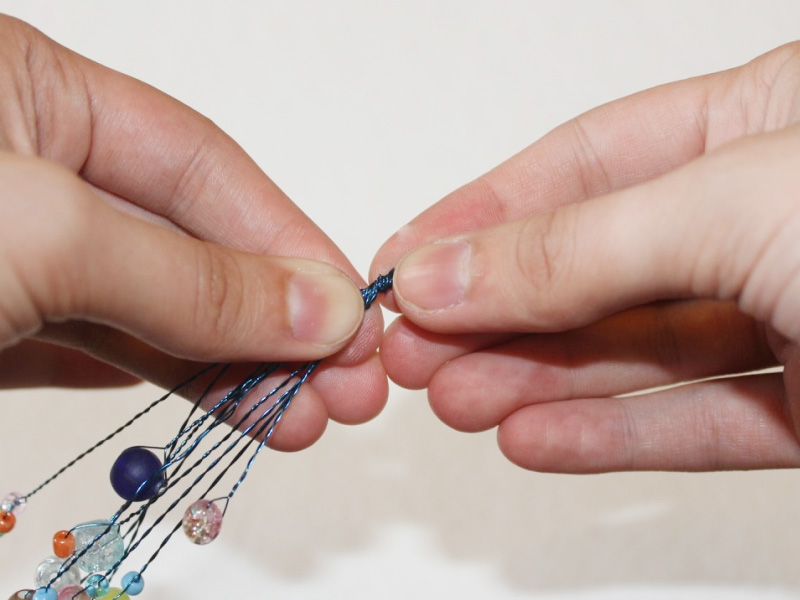
6: Trim the top of the bunch using the cutting pliers.
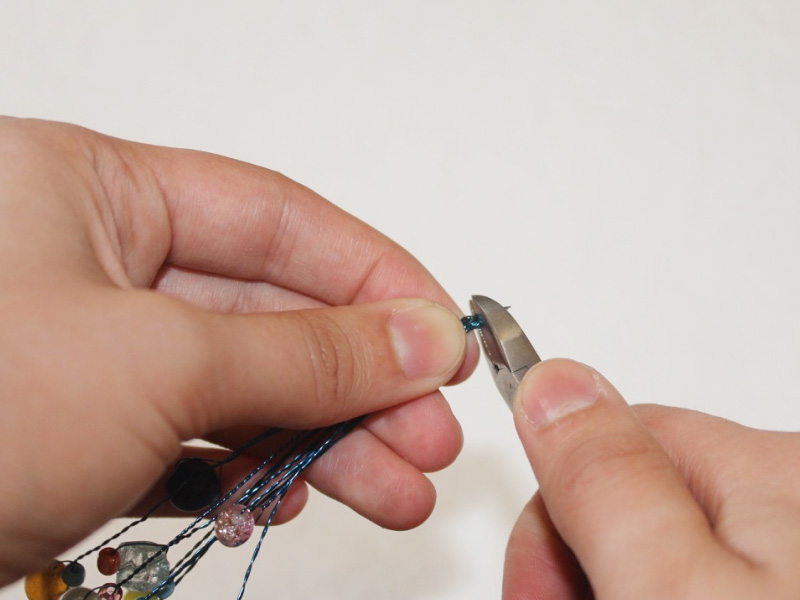
7: Take the remaining piece of wire and fold it in half.
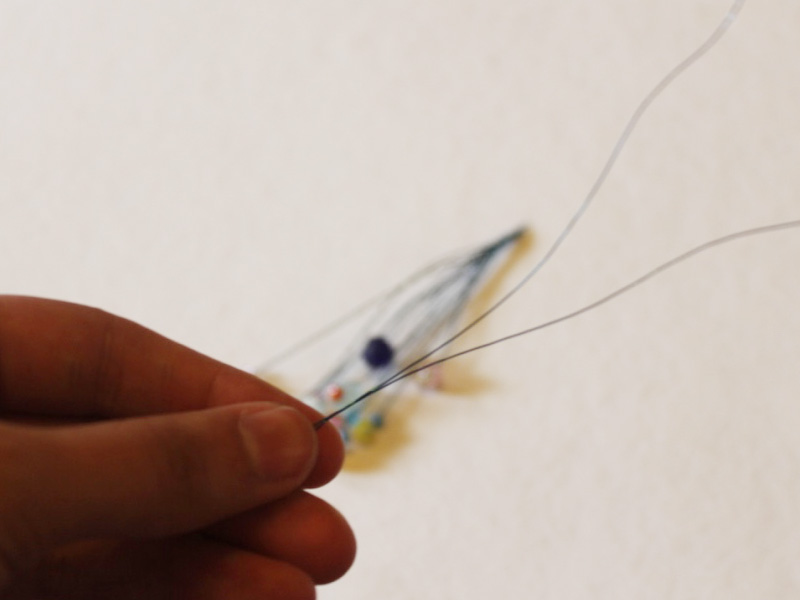
8: Place the loop at the top of the pendant and wrap the rest of the wire around the top to secure the bead bunch in place.
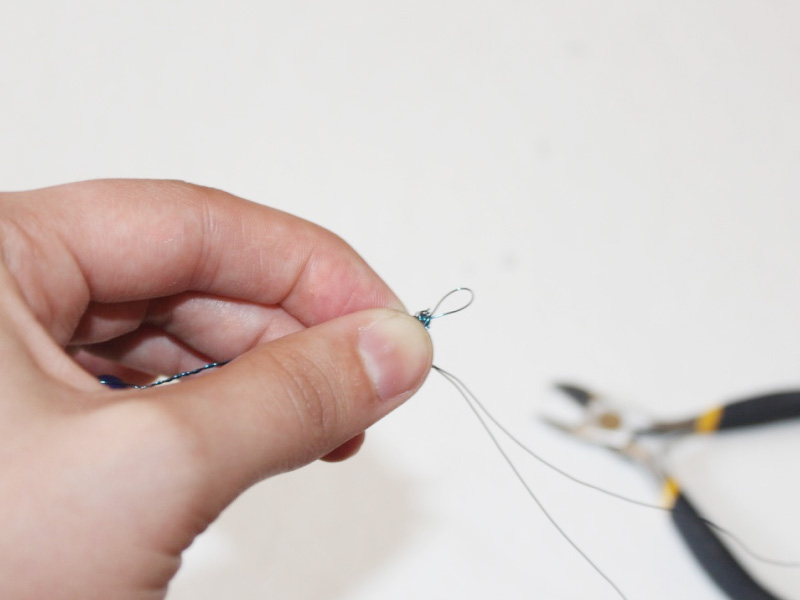
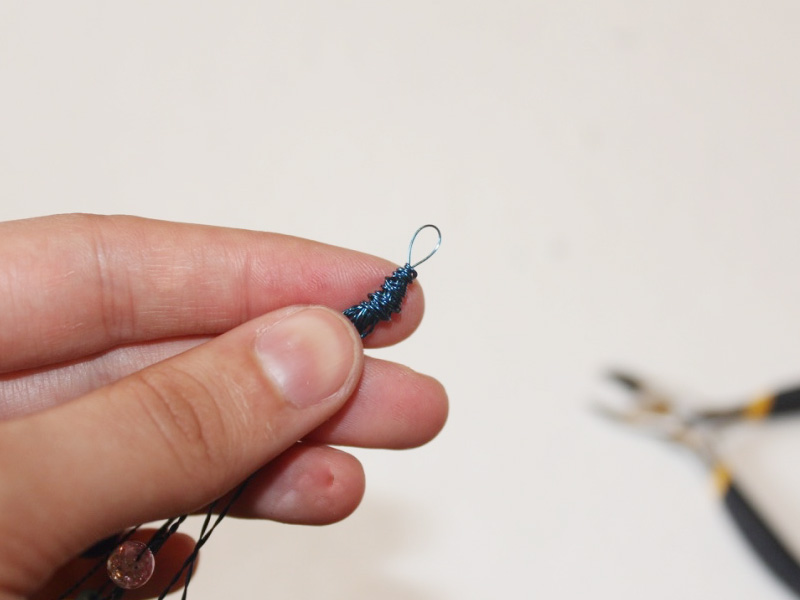
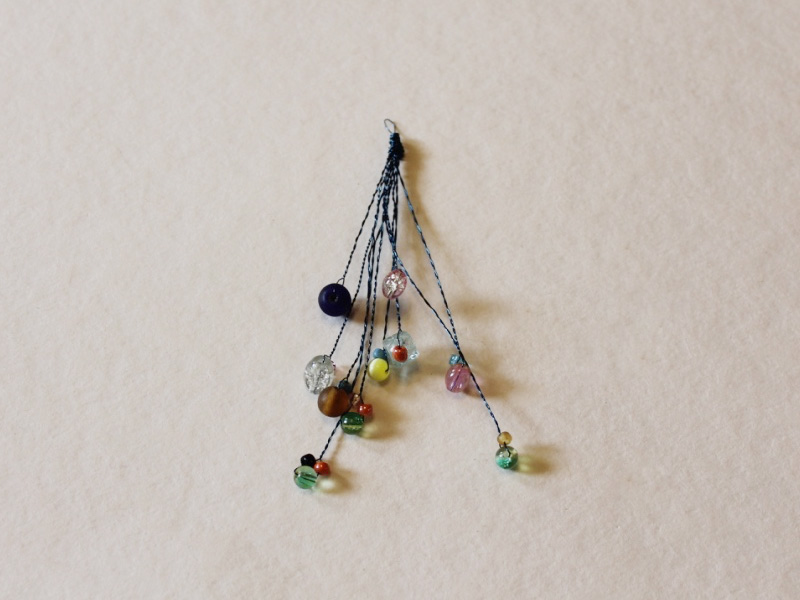
9: Once the pieces are secured at the top, gently pull and shape the bead wires into your preferred position to complete the pendant.
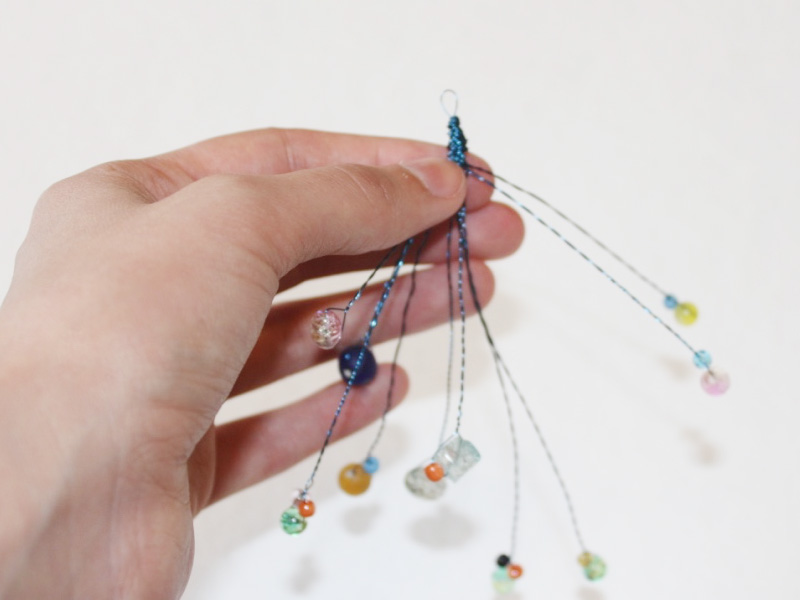
10: Once you have customized your pendant to your liking you can add it to a chain or cord and wear away!