-
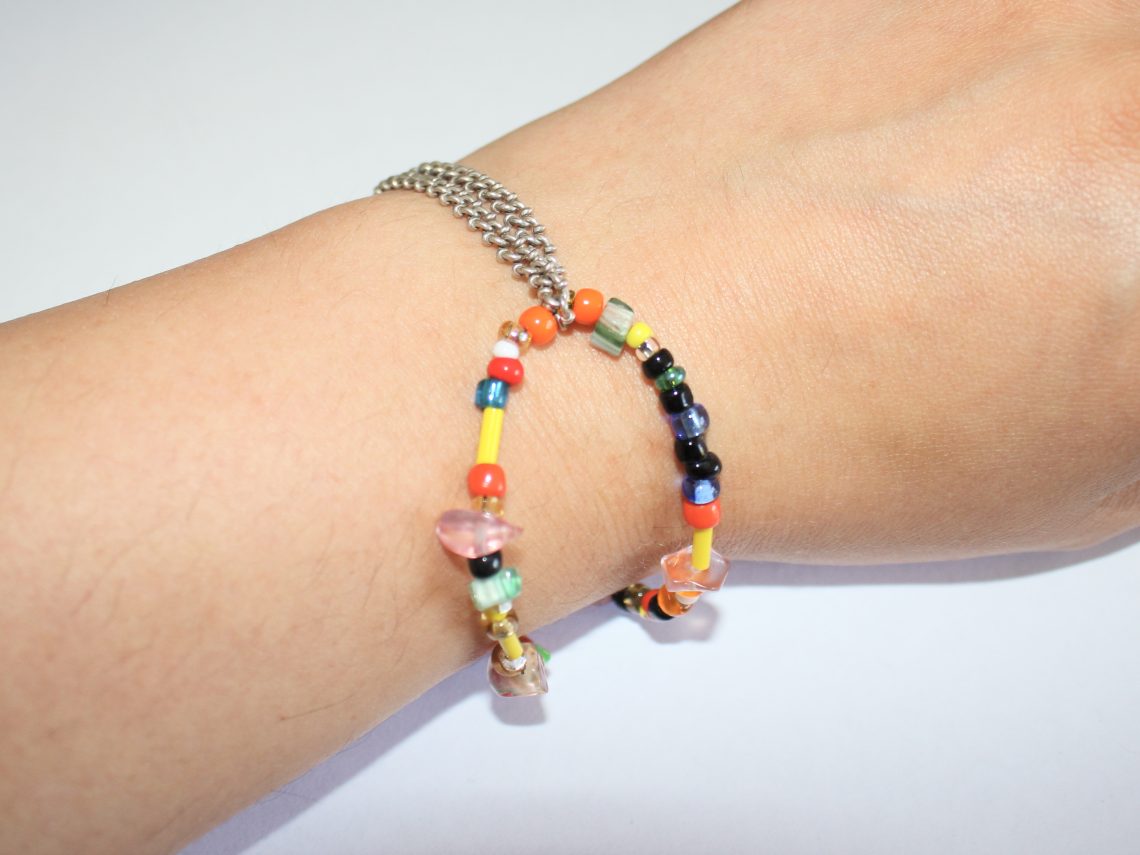
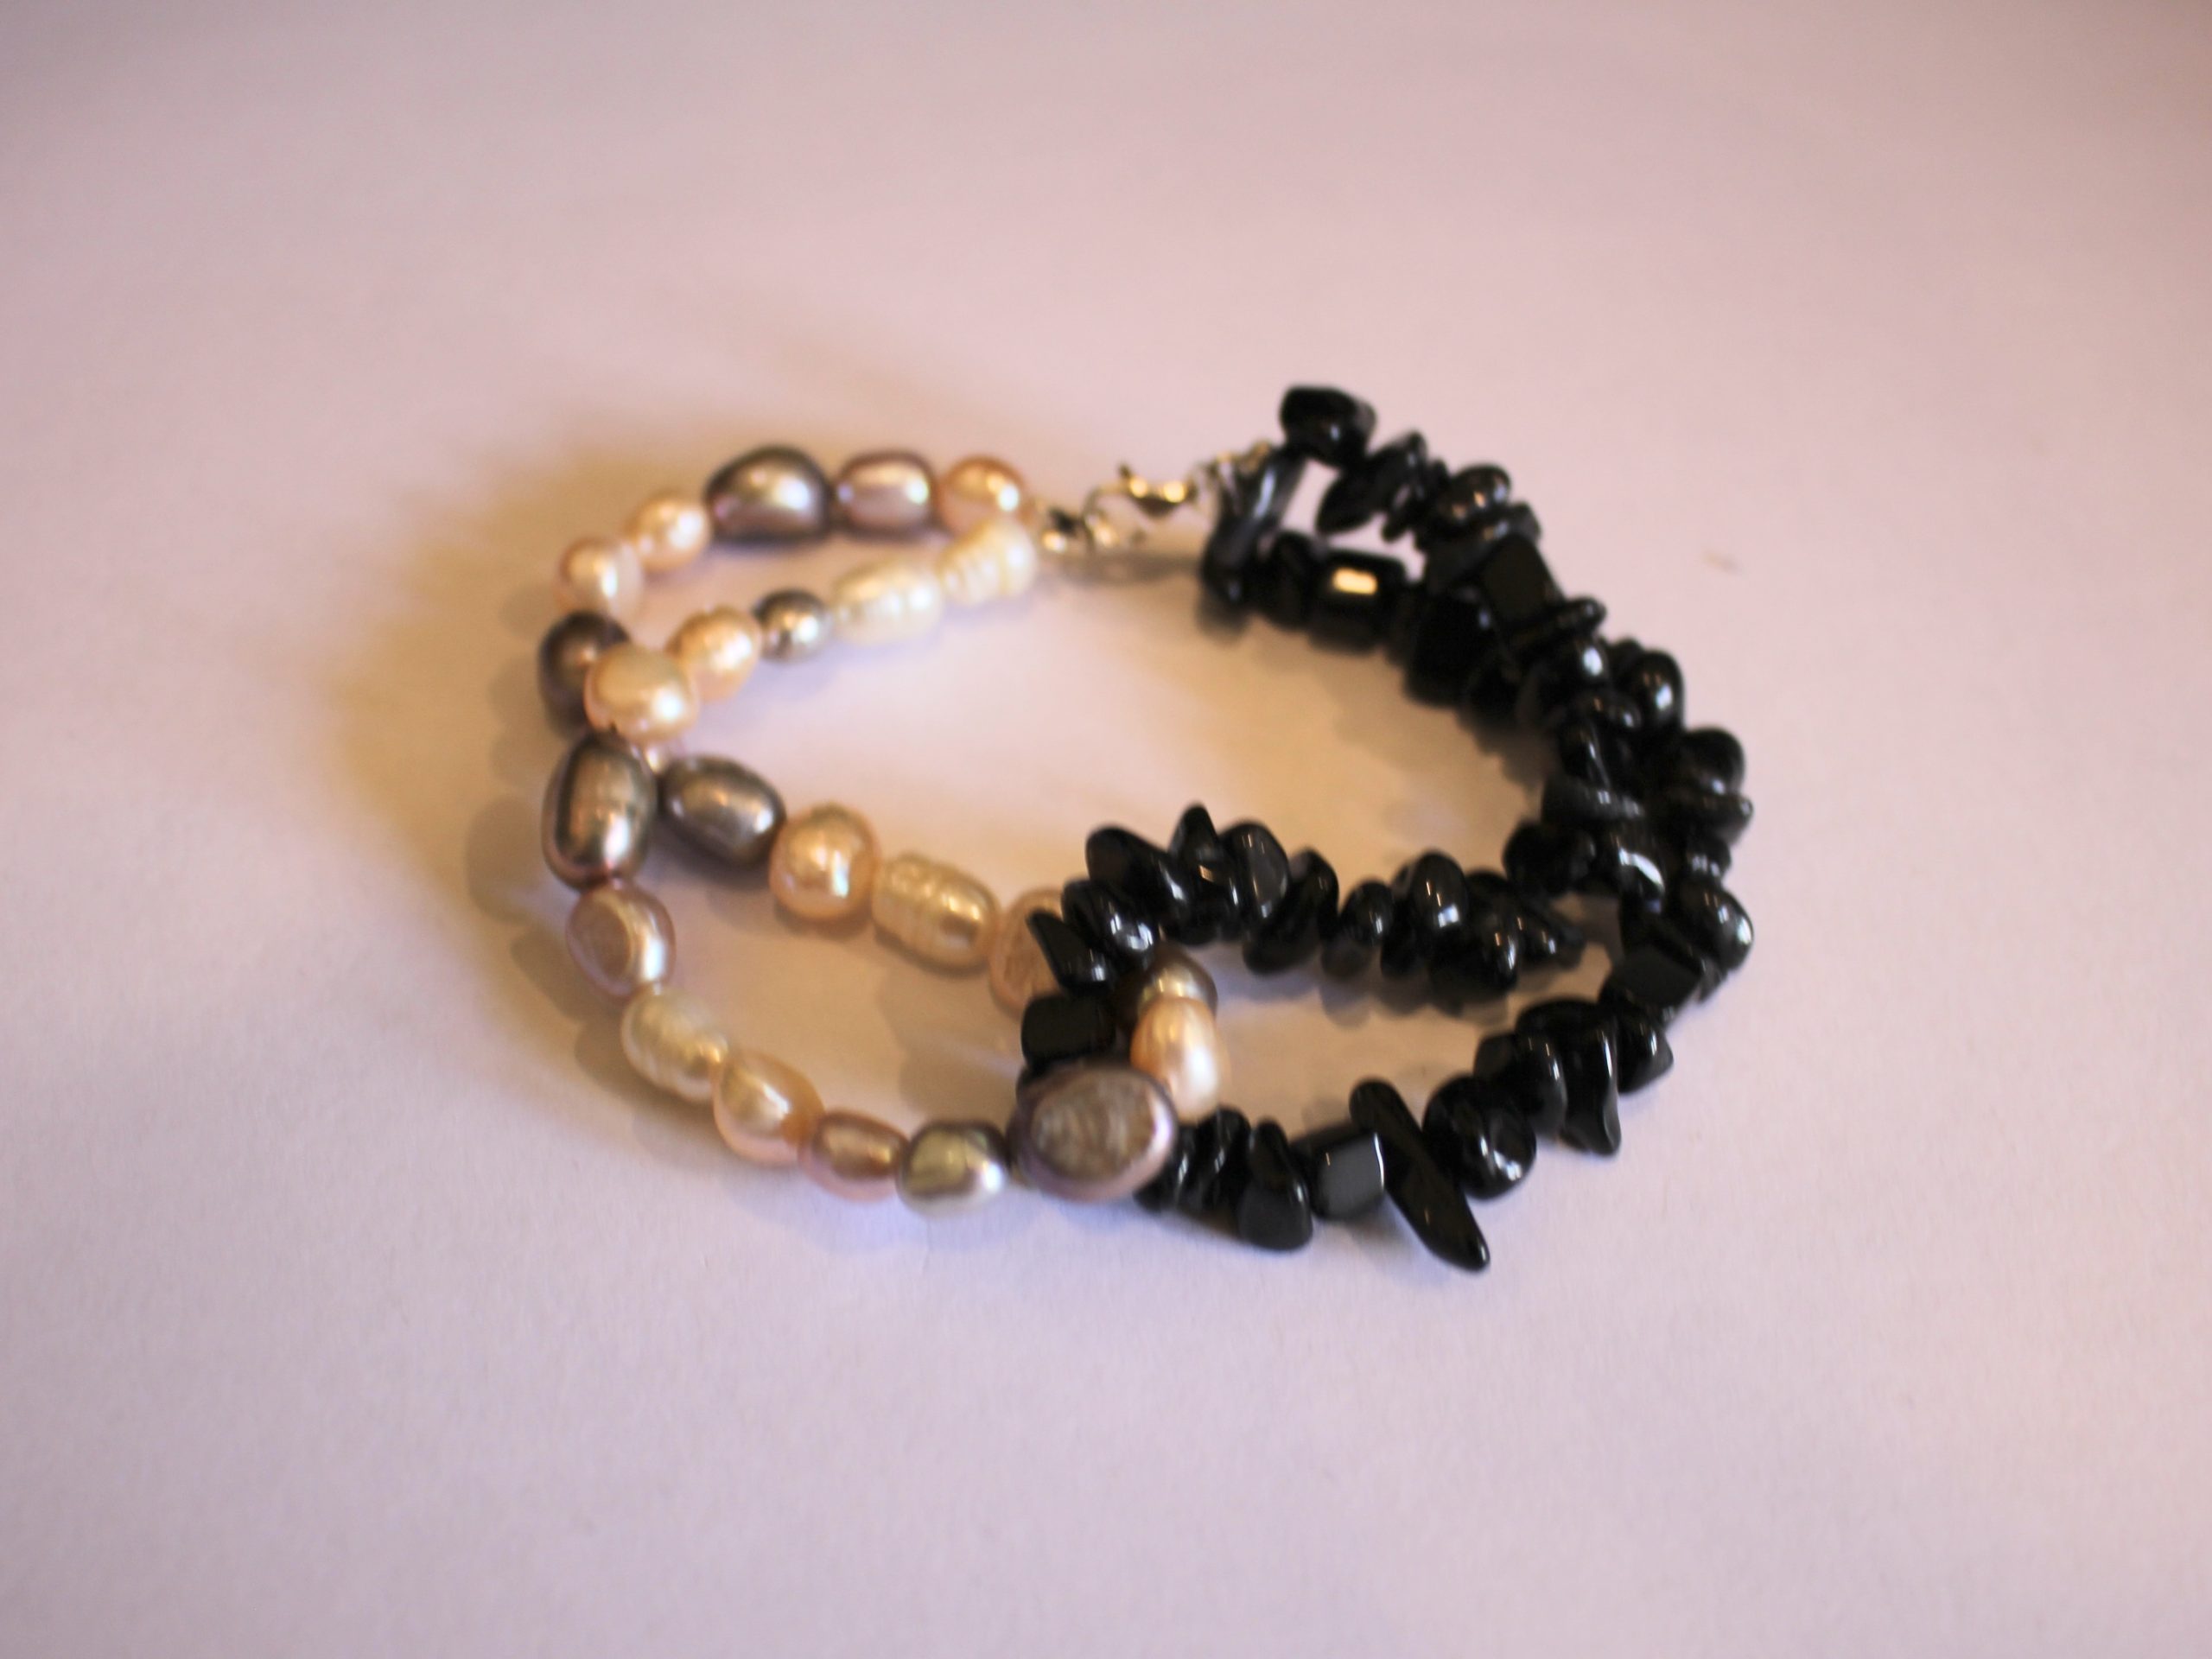
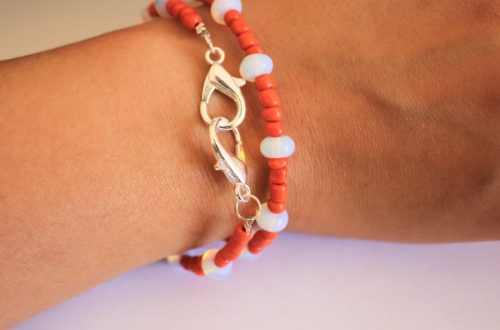
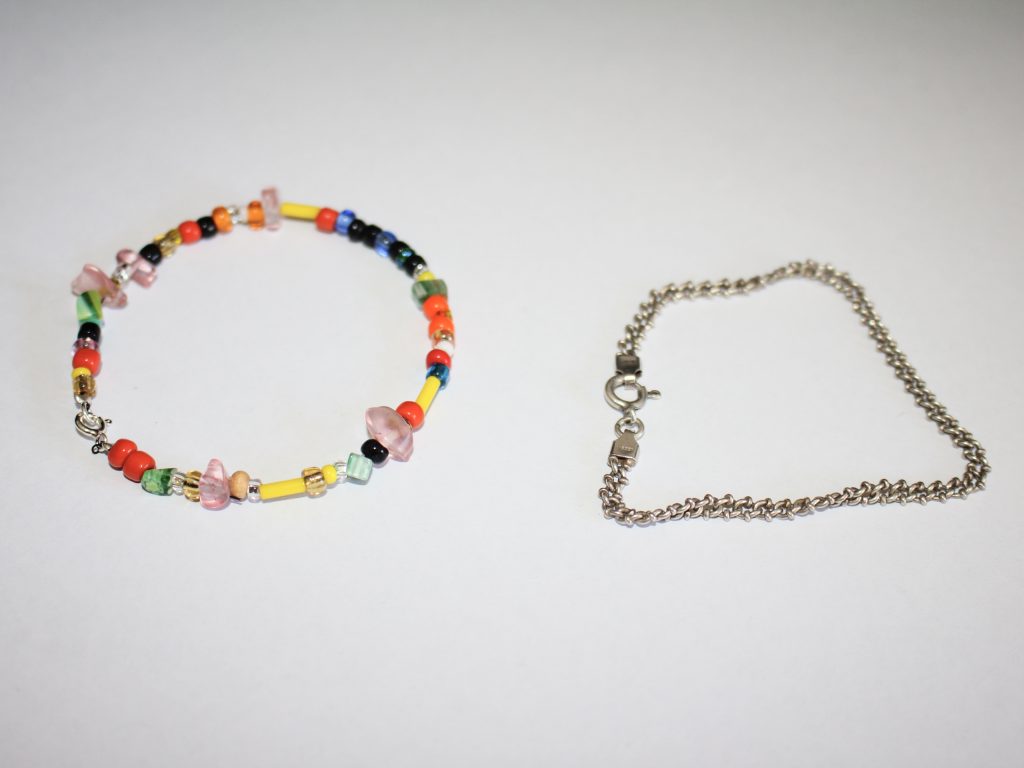
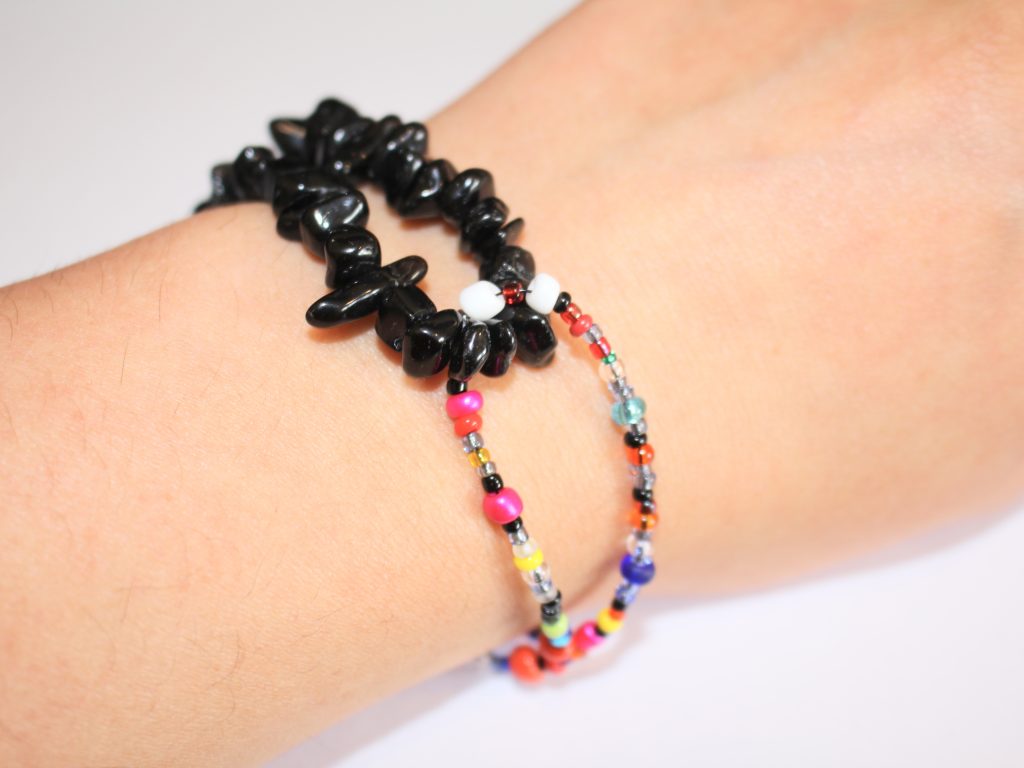
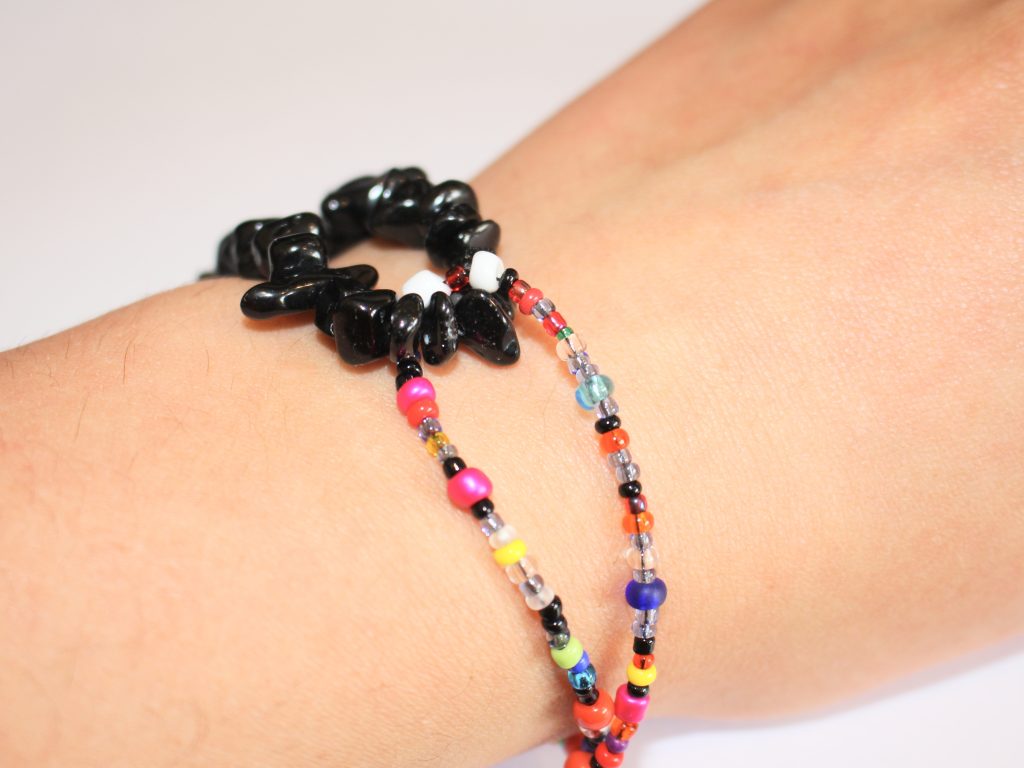
This tutorial shows you how to turn two bracelets into one interlocked statement bracelet!
Do you like it when you’re jewellery shows off different textures and colours? Me too! Sometimes it can be fun to hack you’re existing jewellery collection to make something look cute and new. This tutorial shows you how you can turn two of your favourite bracelets into a new statement bracelet! This tutorial is extra great because you don’t need any tools to make it! Please note that this tutorial contains affiliate links for which this website might receive a commission.
You’ll need the following tools and materials to make your interlocked bracelets:
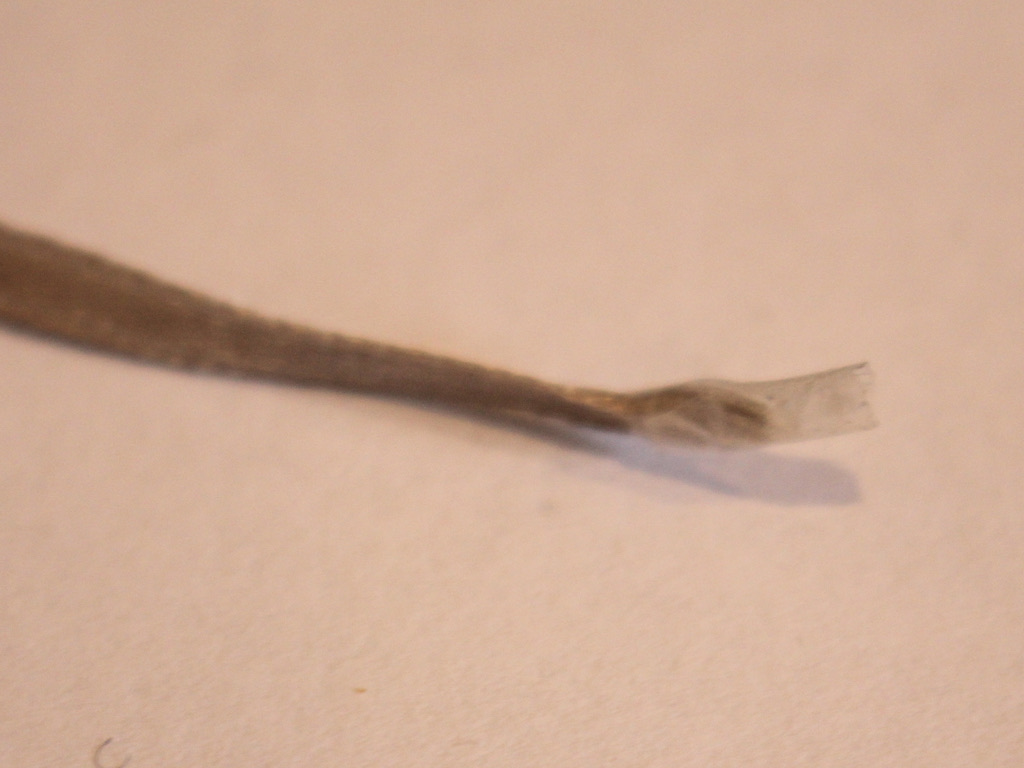
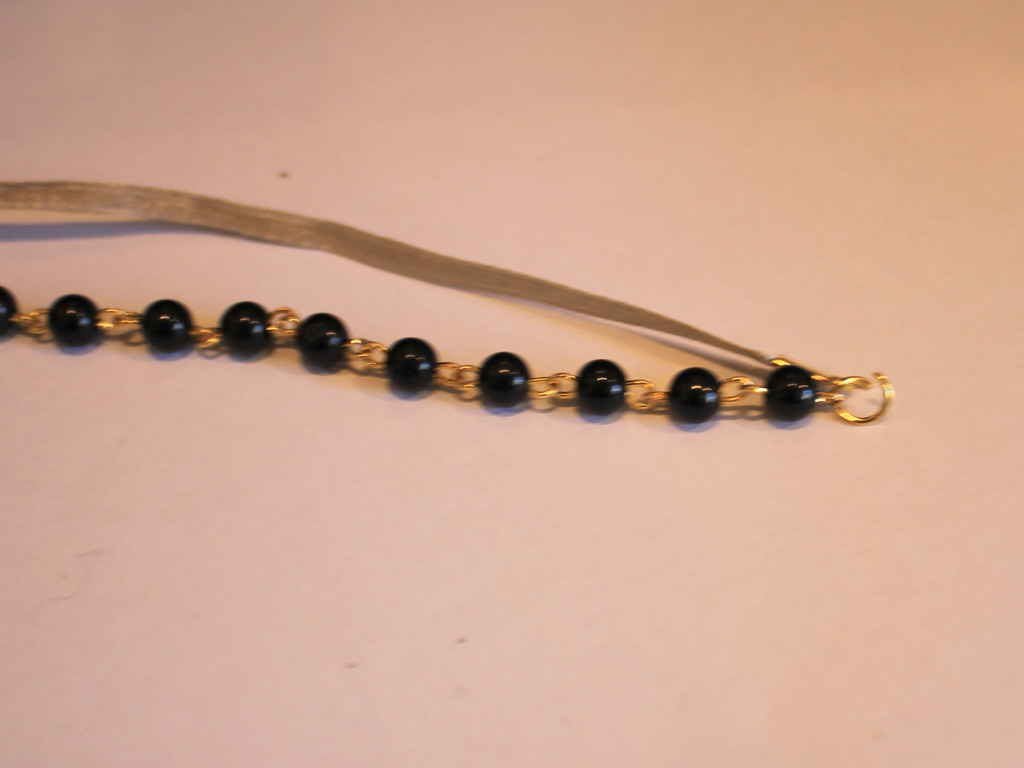
1: All you need for this tutorial is two bracelets. I used a sterling silver chain bracelet and a rainbow beaded bracelet. It is ideal if they are about the same length and each fit your wrist comfortably.
I made this rainbow beaded bracelet but here are some places you can get something similar:
Here are some sterling silver chain bracelets you can purchase:
Follow these steps to make your interlocked statement bracelet:
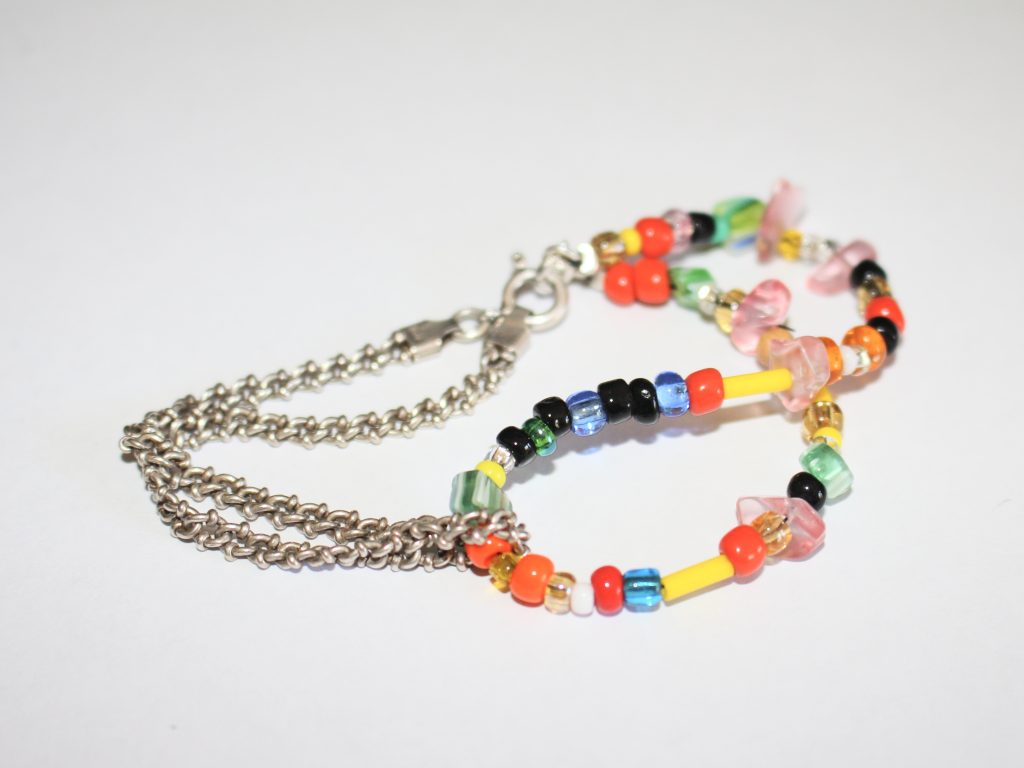
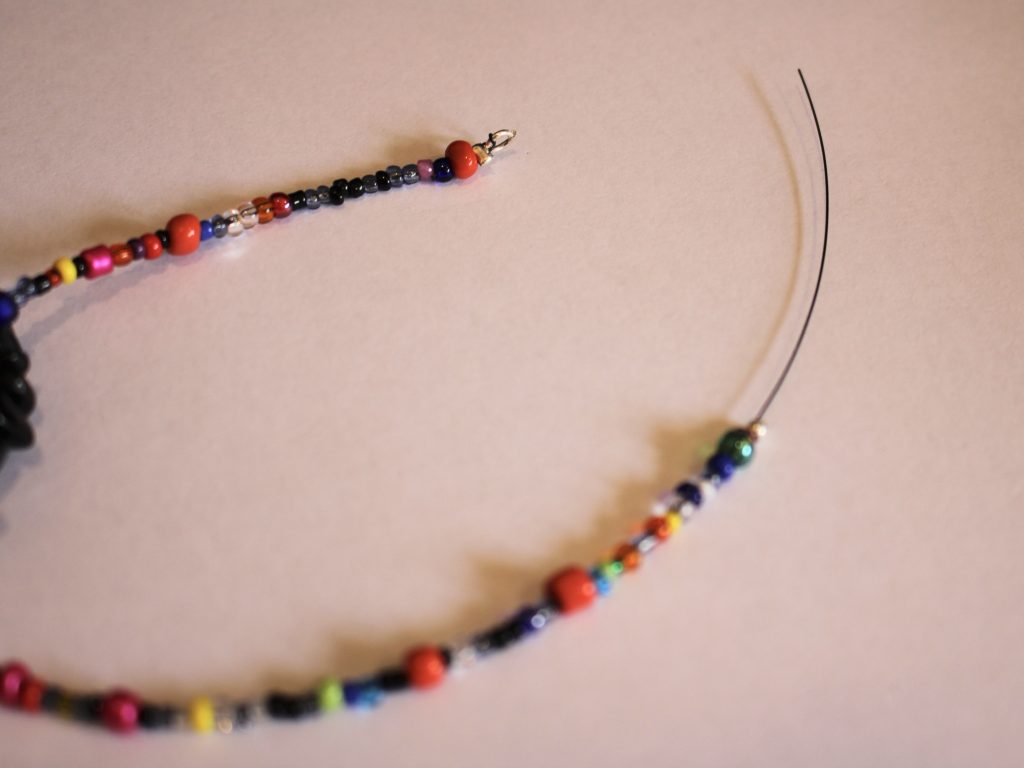
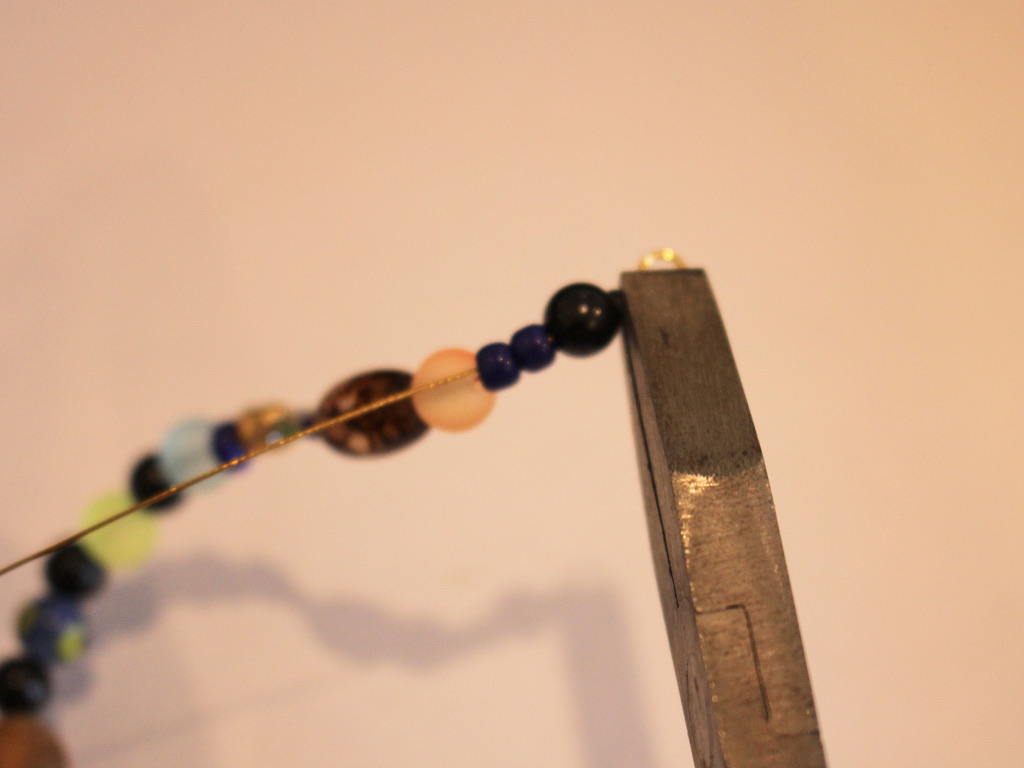
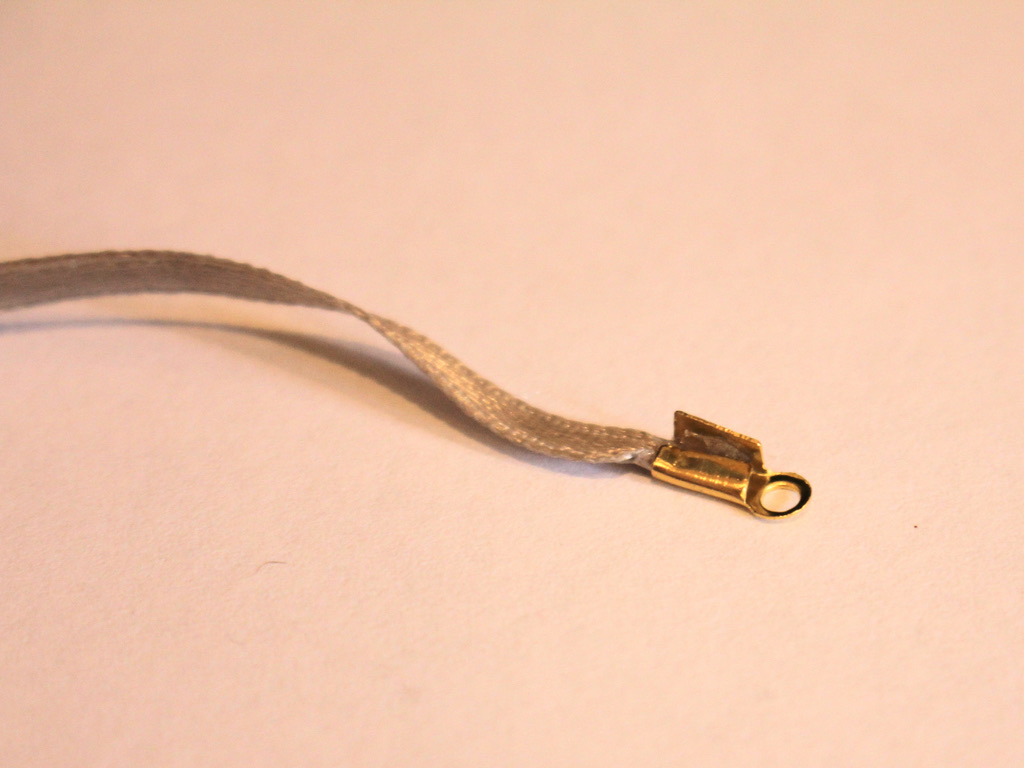
1: Undo the clasps on each bracelet.

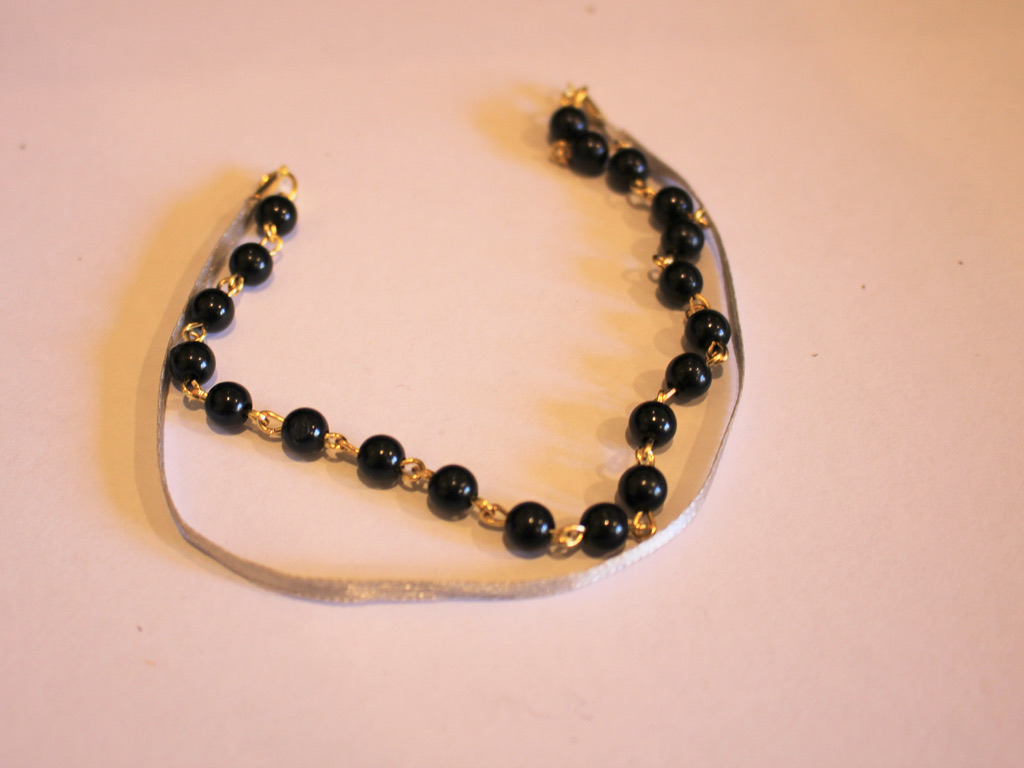
2: Loop the bracelets around each other, folding them in the middle and clasping them together so they are attached.


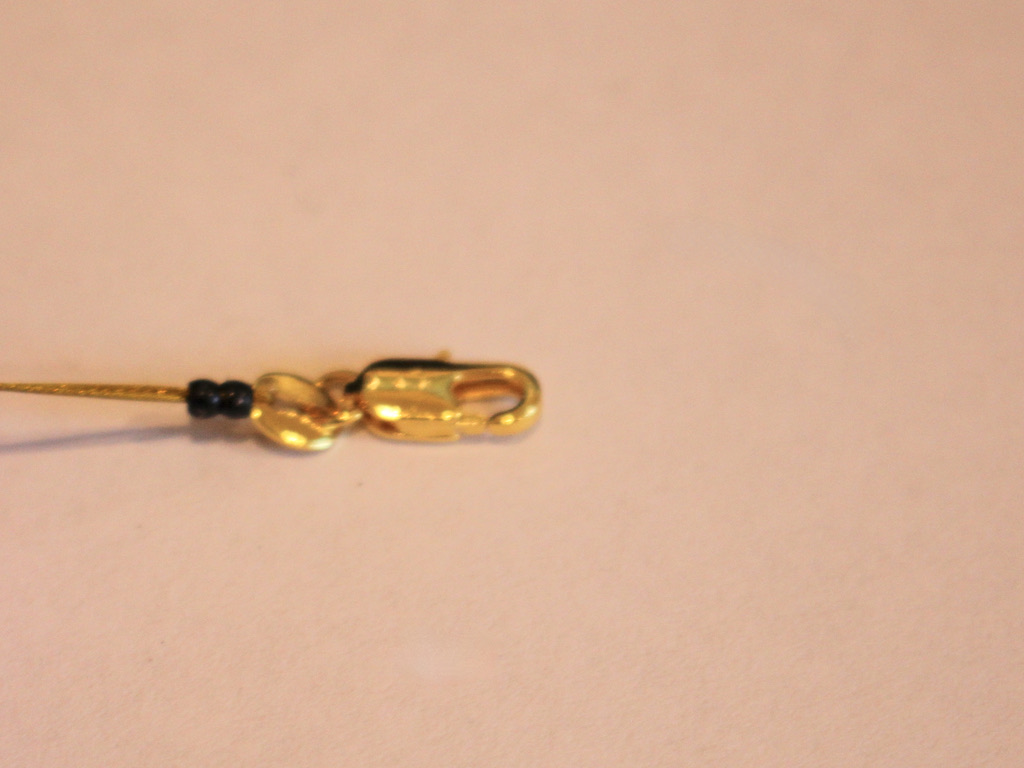
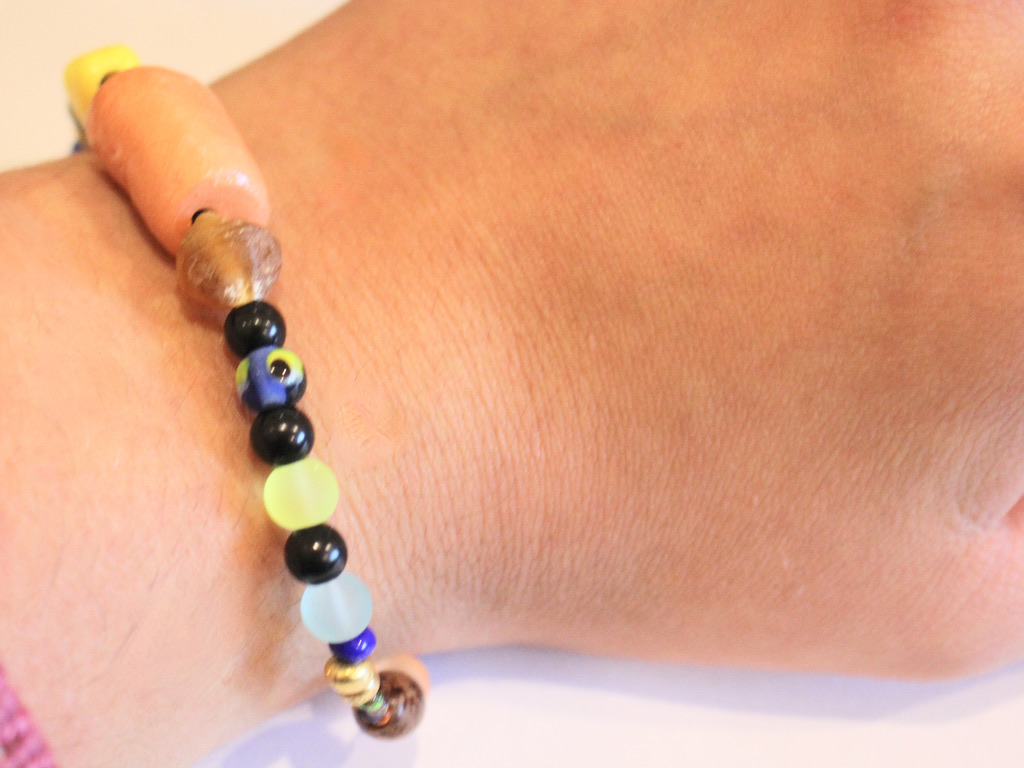
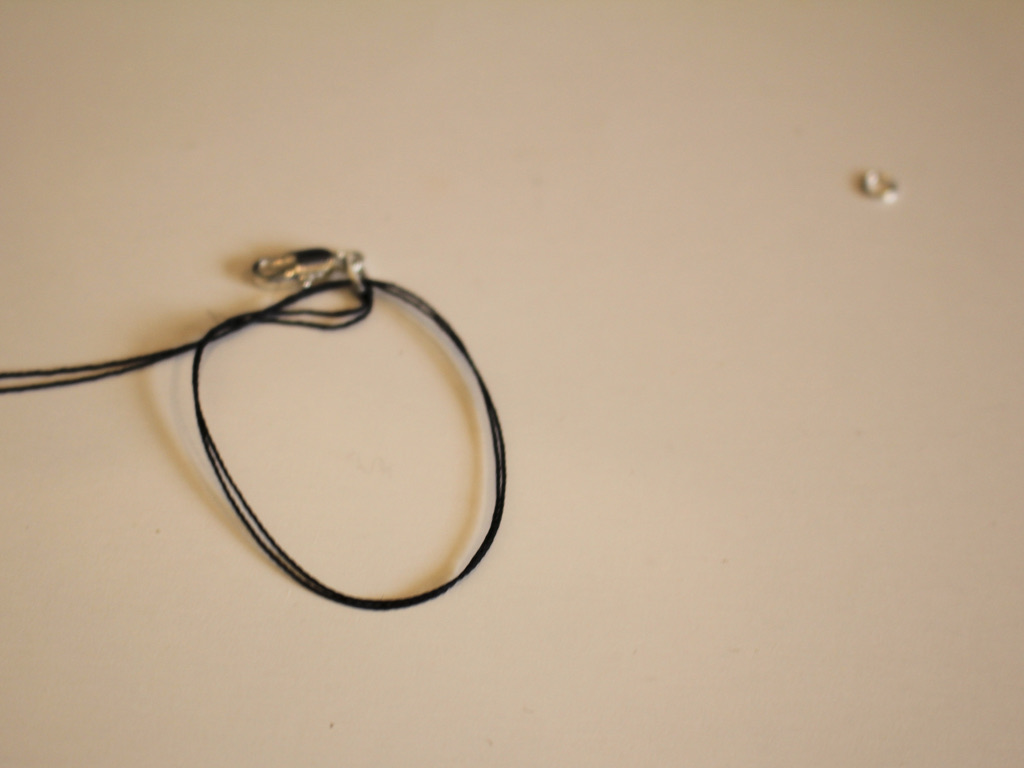
3: Put it on your wrist, opening one of the clasps and closing it around its closure and the closure on the other bracelet. It can help to add an extender chain to one of the bracelets to make it easier to put on. You can get one here:

And that’s it! This tutorial is great for adding some spice to your existing jewellery collection. What bracelets will you use to make your own interlocked statement piece?
If you want this look but don’t want to use bracelets you already own, you can follow this tutorial that shows you how to make one from scratch: https://www.diyjewelryhub.com/how-to-make-a-beaded-double-loop-bracelet/
-
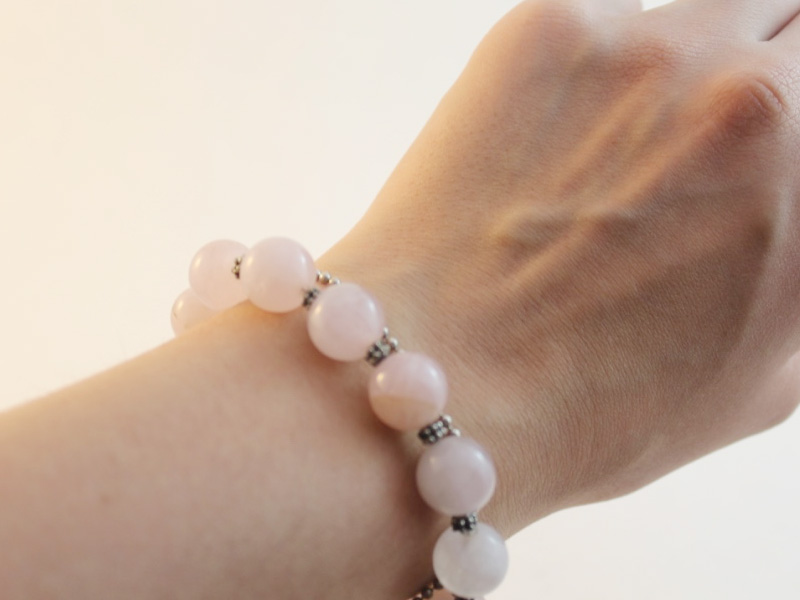
DIY Double Loop Bracelet Tutorial: Create Your Own Stylish bracelet stack
This bracelet gives the illusion that it is two bracelets looped together, but it’s actually an intentional look formed by one bracelet! Use some contrasting beads to create a unique bracelet style that makes a strong statement. Please note that this tutorial contains affiliate links.
You’ll need the following tools and materials to make your double loop bracelet:
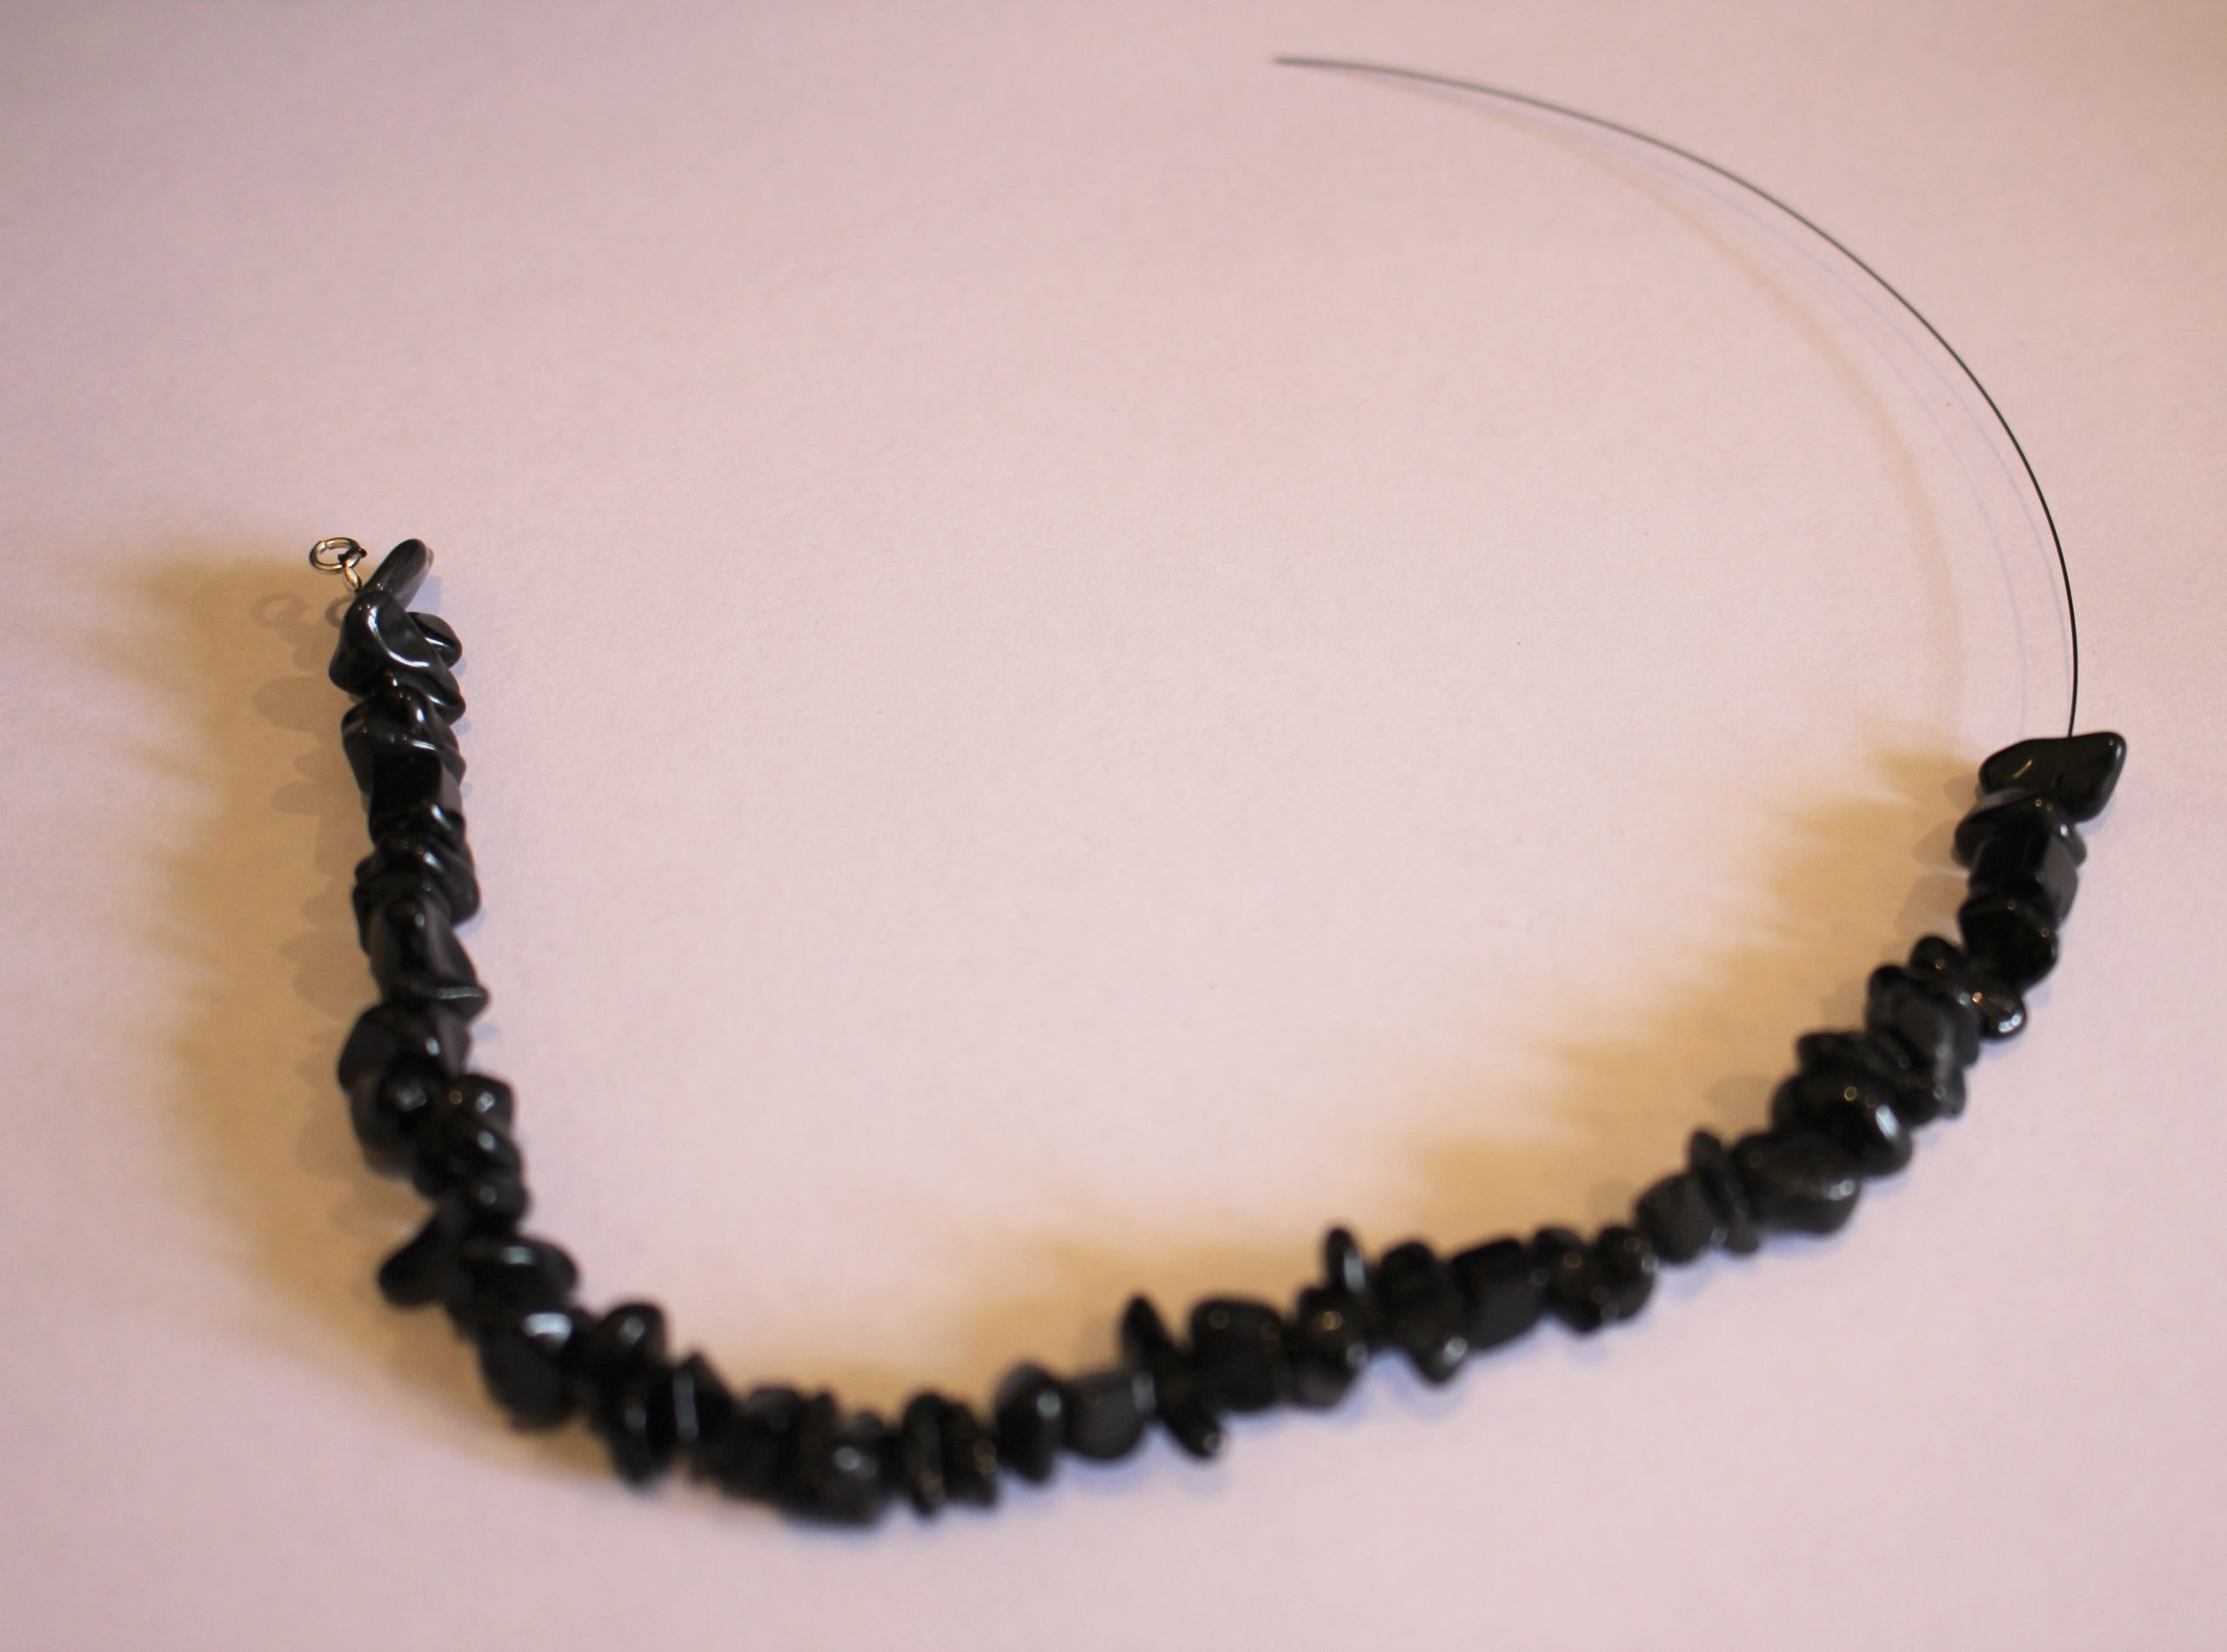
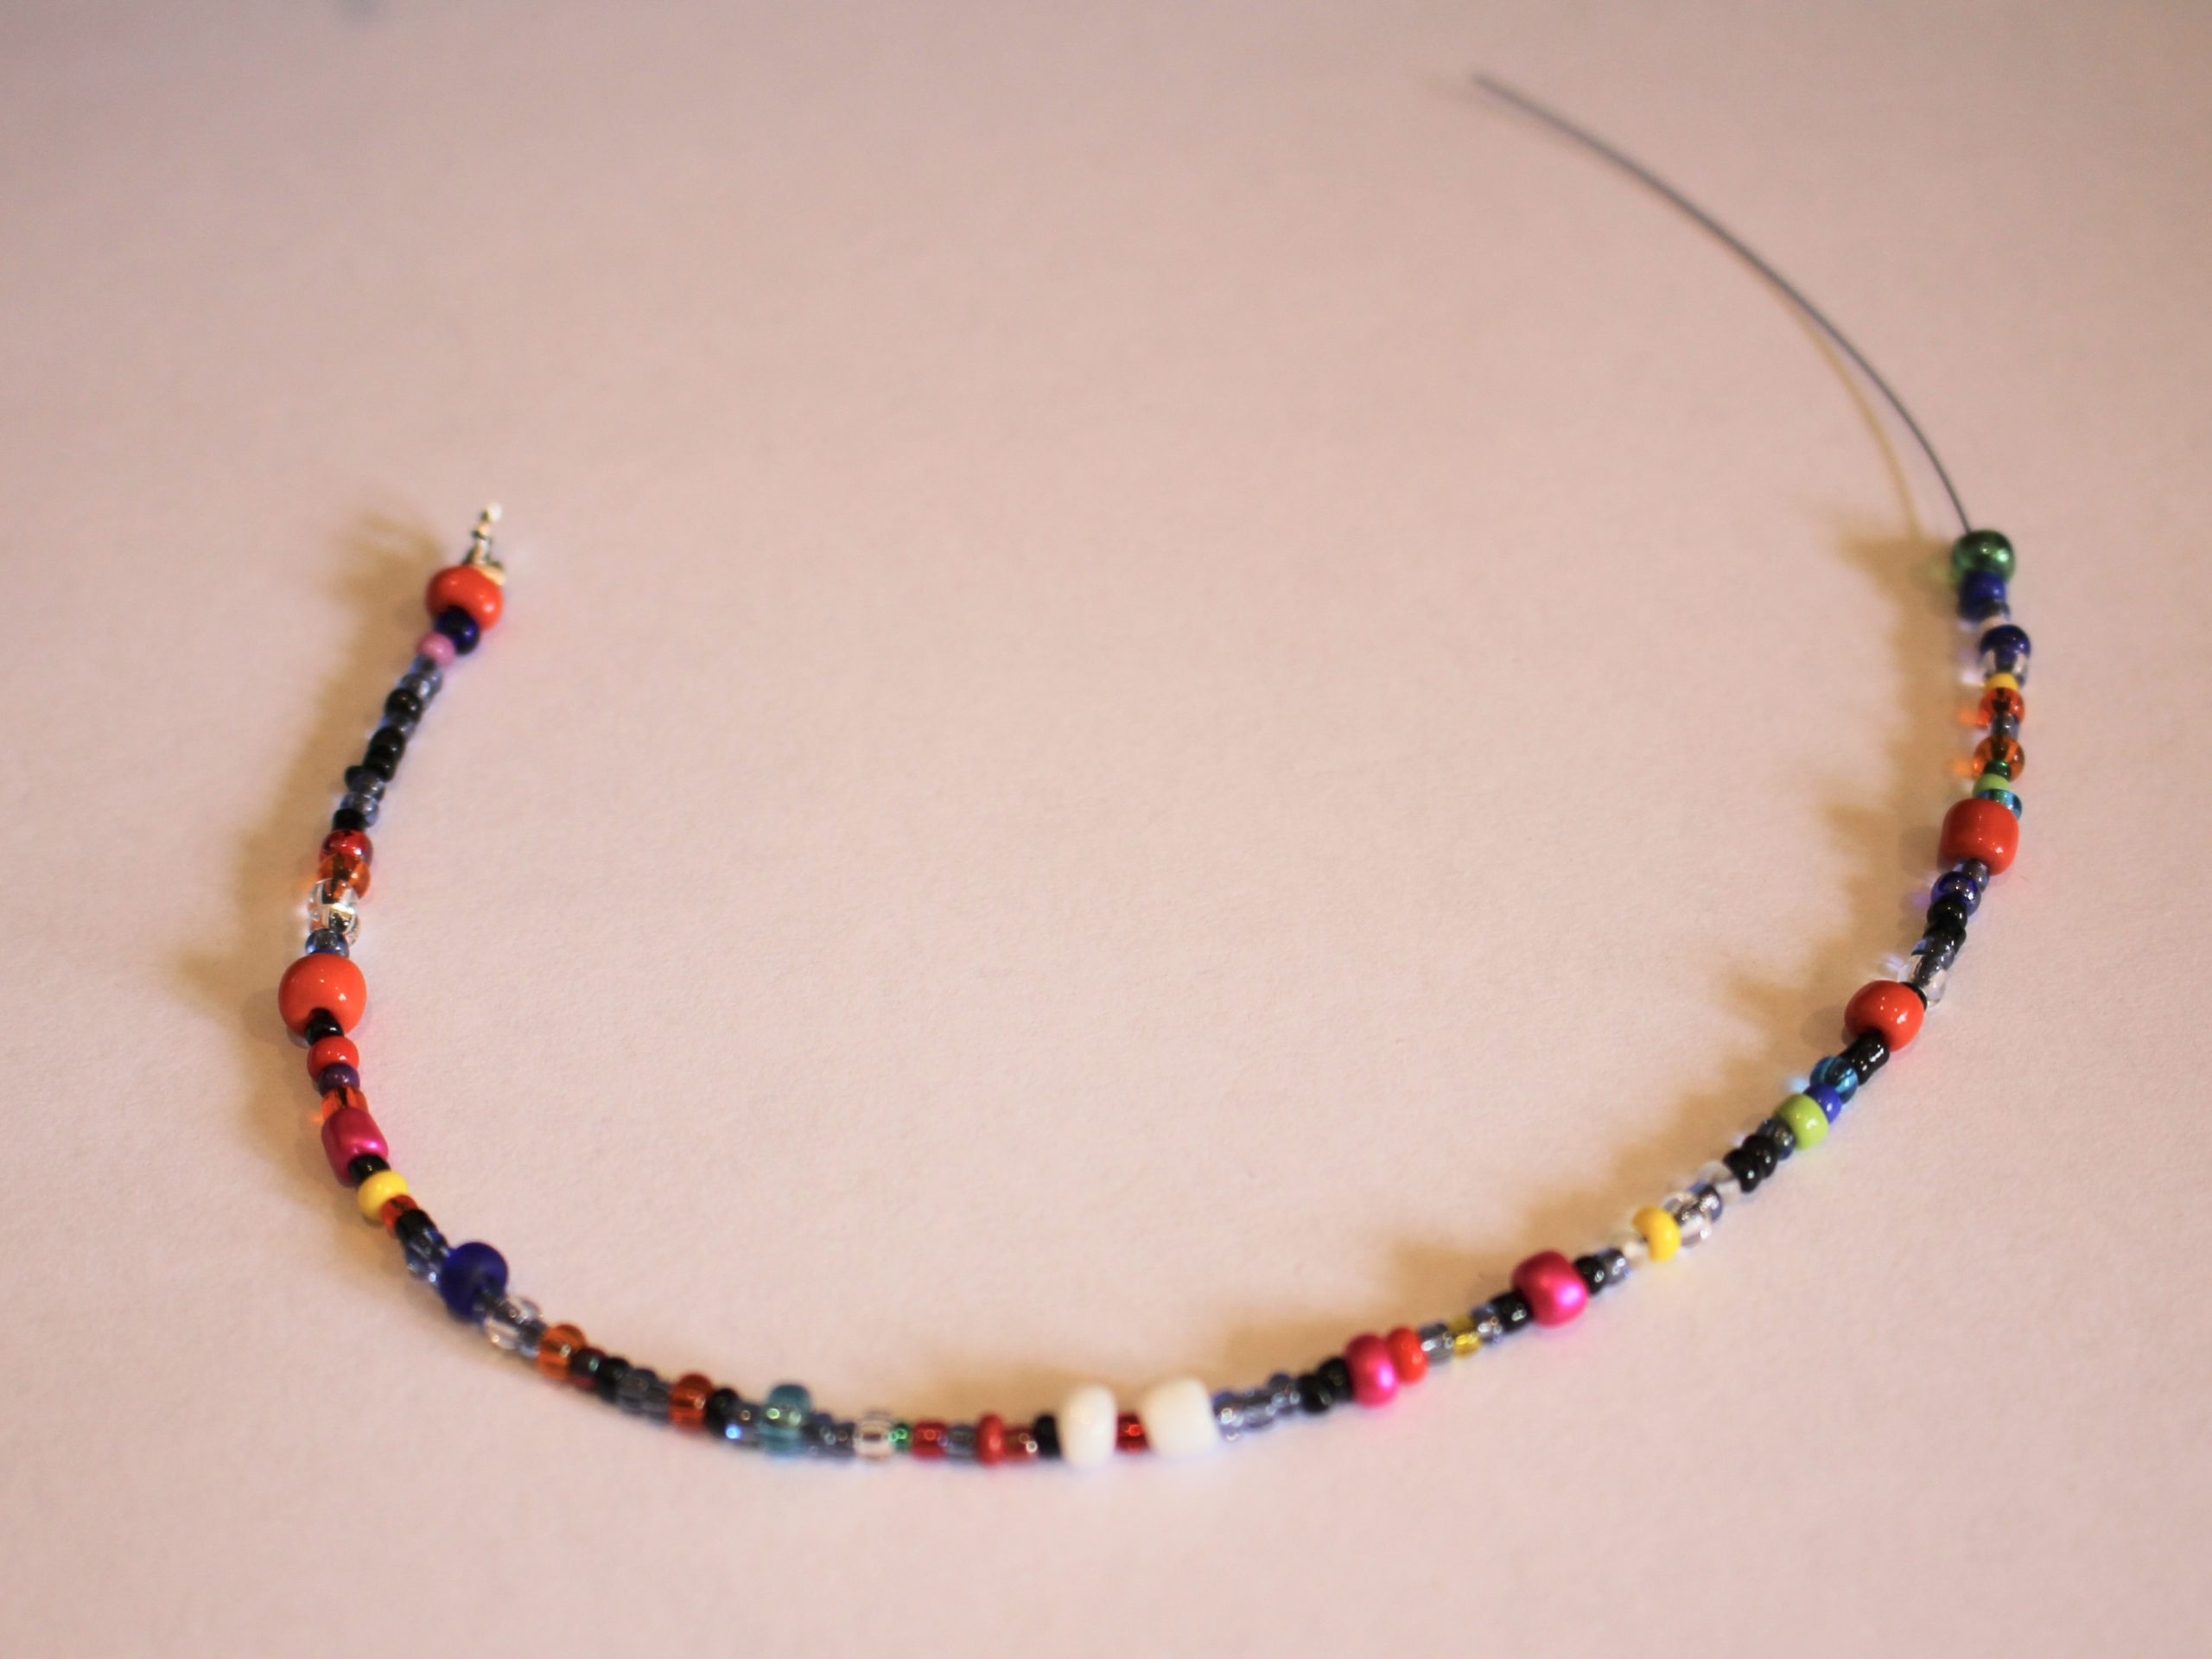
1: Some beads. I used some tourmaline chip beads for one side of the bracelet and a mix of glass beads for the other side.

You can get some here:

You can purchased some mixed seed beads here:
2: Two pieces of tiger tail wire long enough to fit your wrist plus about 8cm extra.

You can purchase some here if you don’t already have some:
3: Two jump rings.

You can get some sterling silver jump rings here:
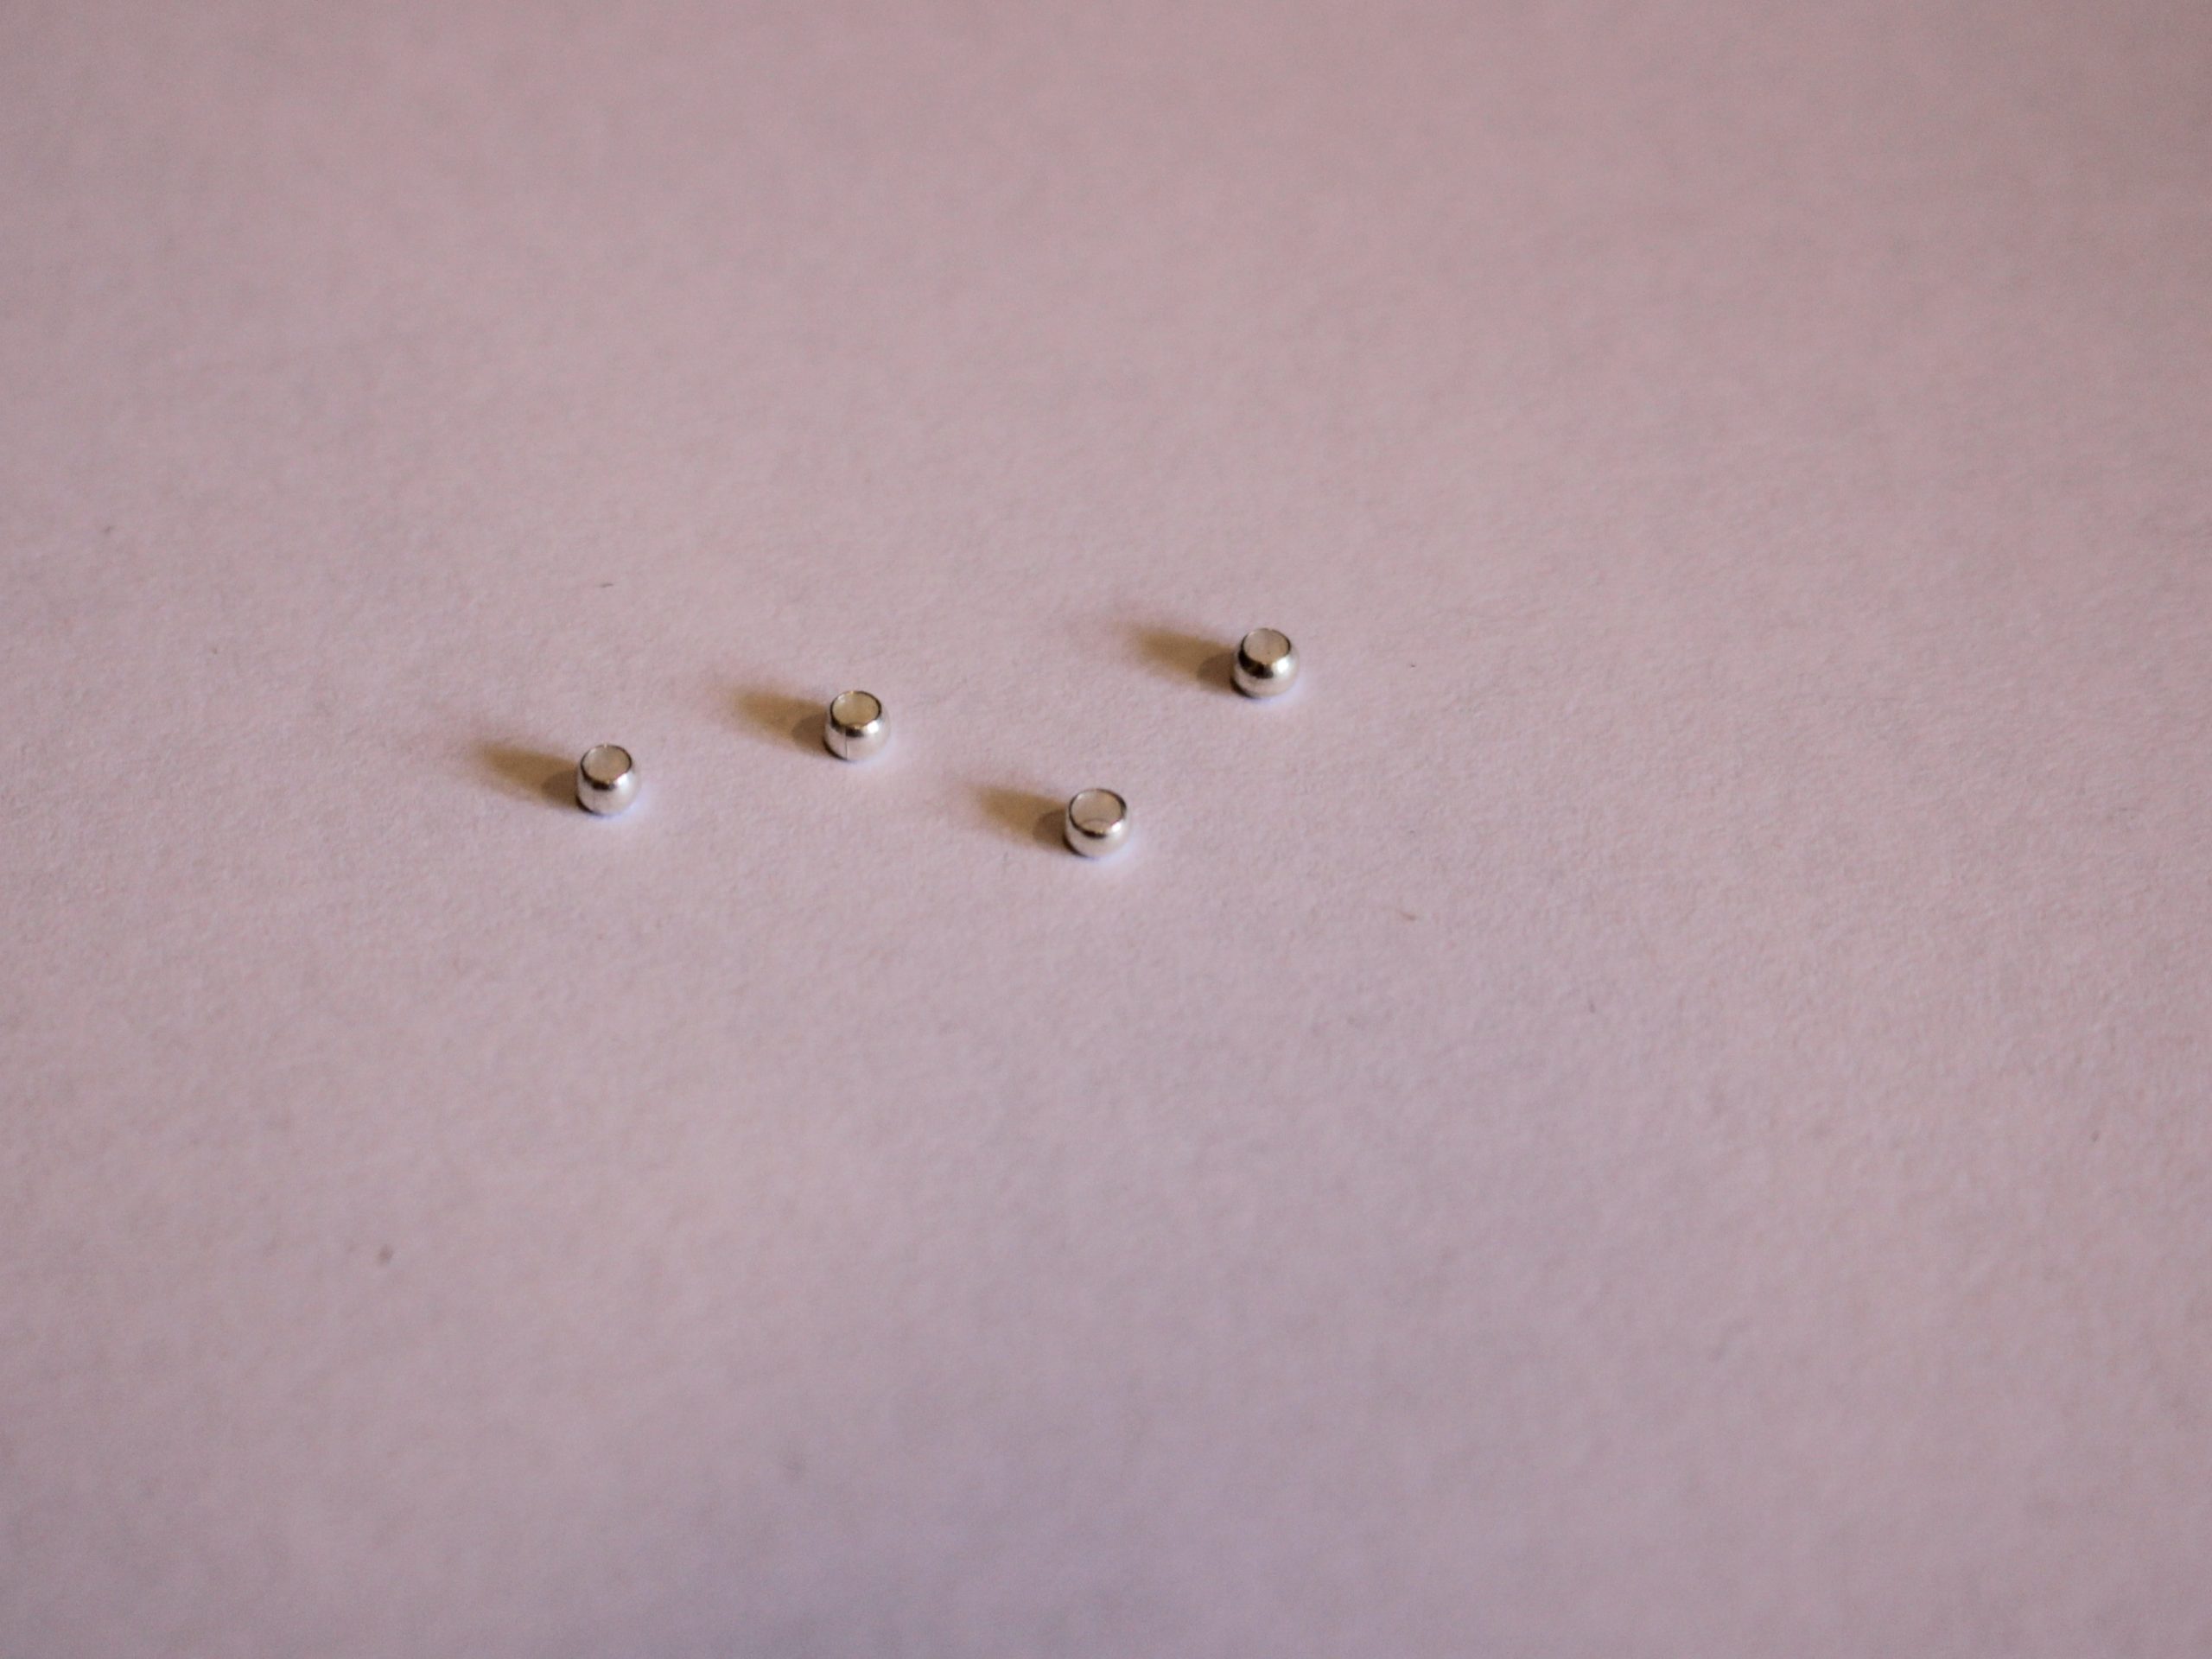
4: Four crimp beads.
You can get some here:
5: A clasp. I used a lobster clasp, but a toggle clasp is also suitable. I prefer toggle clasps for bracelets as they are easier to use by yourself.

Find lobster clasps here:
and toggle clasps here:
6: Pliers. Use your flat nose pliers, round nose or needle nose pliers and cutting pliers.

You can get a set of jewelry pliers here:
Follow these steps to make your double loop bracelet.
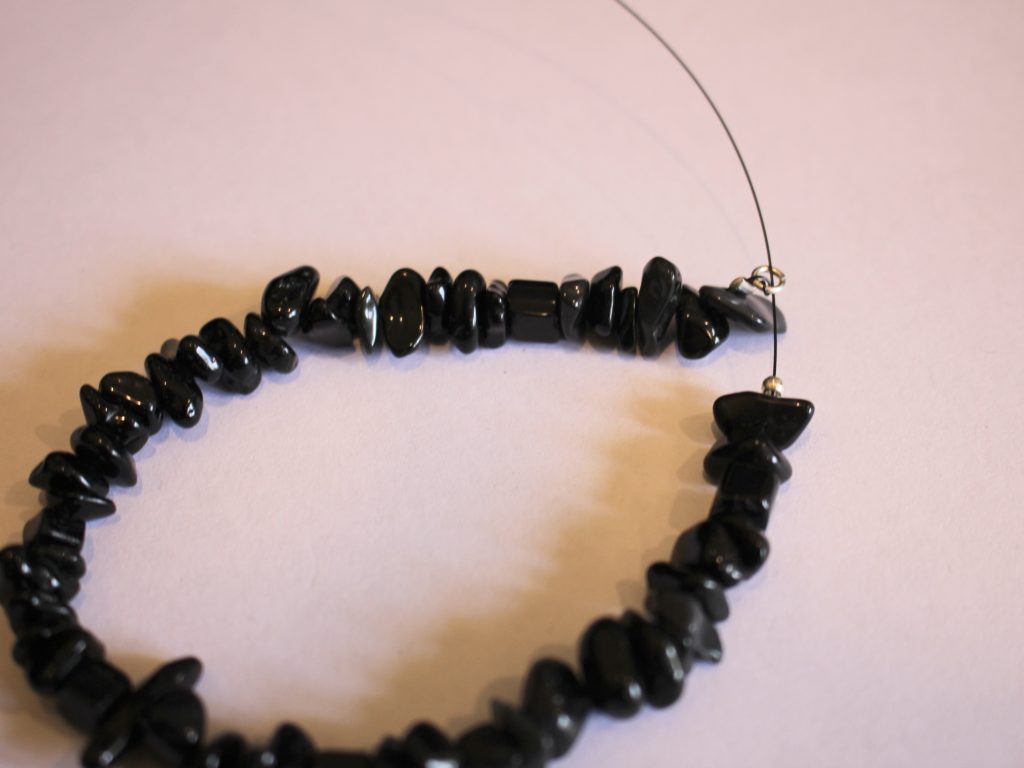
1: Take one of the strands of wire and add a crimp bead and jump ring to one end.

2: Loop the end of the wire through the jump ring, depending on the thickness of your wire, you might want to loop your wire through twice like I have here.

3: Thread the end of the wire through the crimp bead and squash it in place using the flat nose pliers.


4: Begin adding beads.

5: Continue beading until the strand is long enough to wear as a bracelet.

6: Add another crimp bead to the end of the wire.

7: Loop the end of the wire around the jump ring attached to the other side. Thread the end of the wire through the crimp bead and last few beads and pull it tight.


8: Squash the crimp bead using the flat nose pliers again.


9: Trim the excess wire. Now you will have a beaded circle.


10: Attach the clasp to the jump ring on the beaded circle you just made. It will attach to the jump ring on the second half of the bracelet you are about to make.
10: Repeat steps One to Six for the second half of the bracelet, using your contrasting beads.

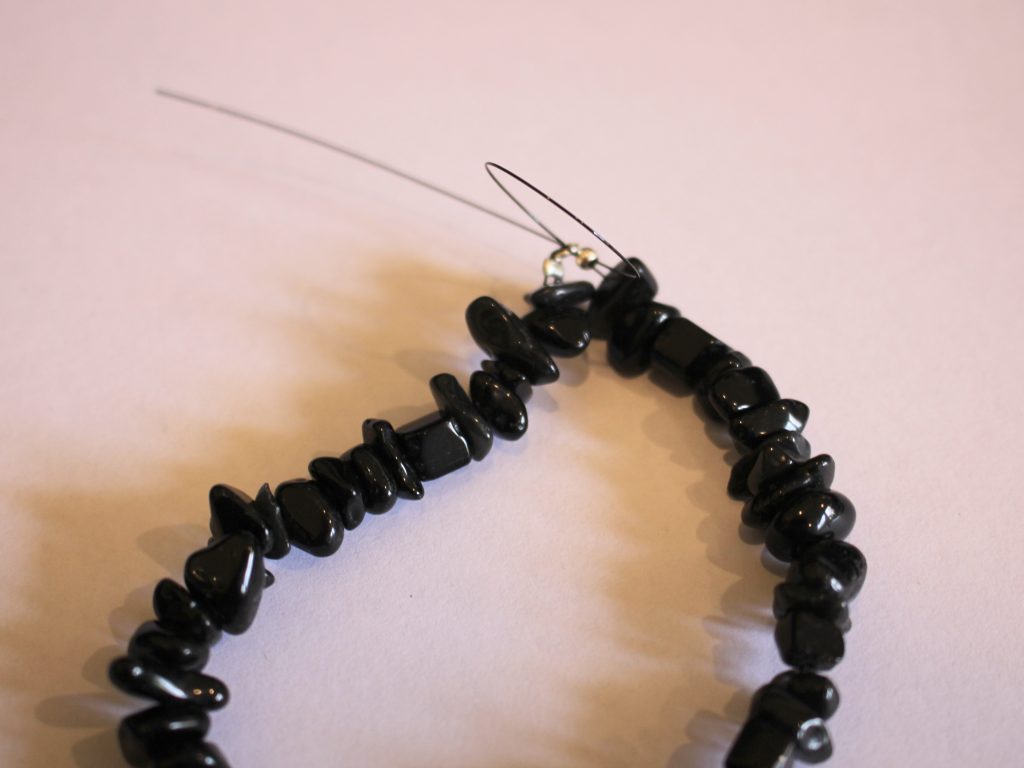
11: Once the second half is fully beaded, loop it through the first beaded half you made.
12: Loop the end of the tiger tail wire through the jump ring at the other end like you did for the first half of the bracelet in step seven.

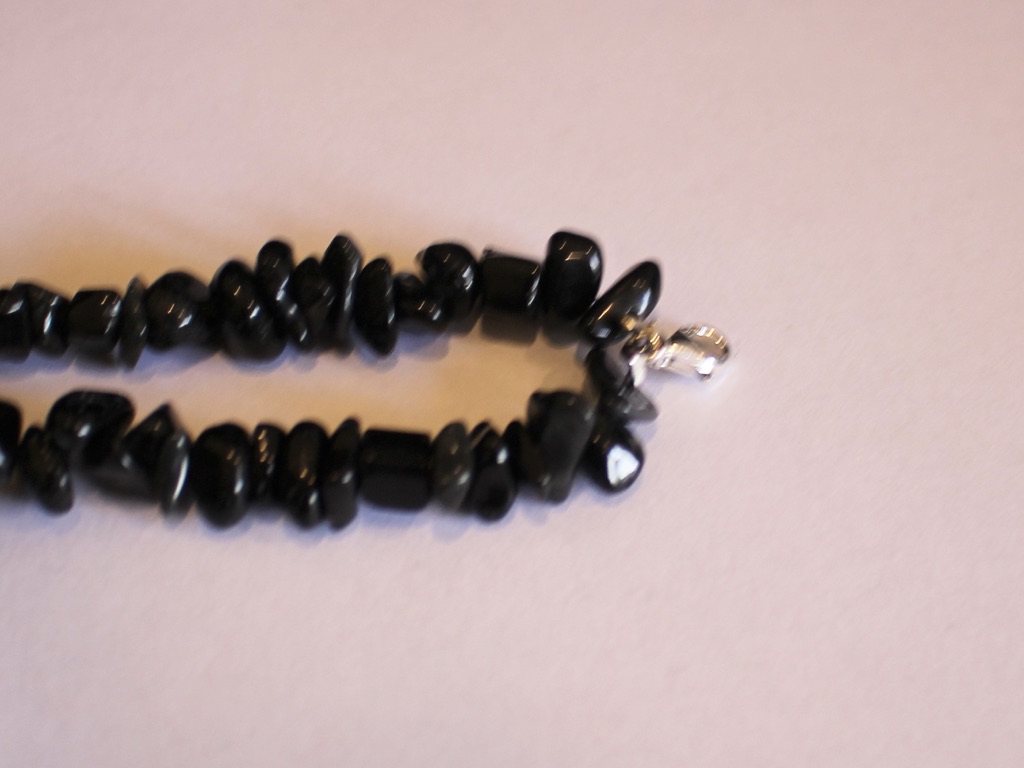
13: Squash the last crimp bead using flat nose pliers and trim the excess wire using cutting pliers.


14: Here’s where you can fold your bracelet in half and close it, attach the ends of the bracelet by clipping the lobster clasp to the jump ring on the other side.


Now your bracelet is ready to wear!
Here’s another version I made using pearl beads.


-
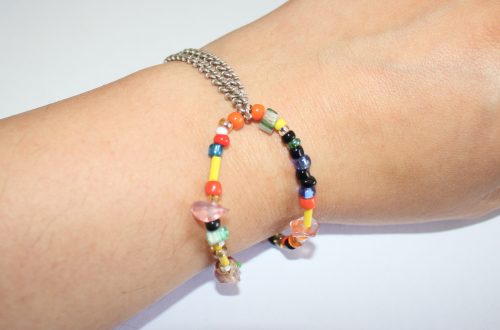
Here’s how you can make a fun mixed bead bracelet to show off your personality!
I love the trend towards the craft-core bead explosion designs in jewellery! I’ve shared a few other similar tutorials in the form of mixed bead anklets and necklaces, but this one is a bracelet! This bracelet features a mixture of handmade, recycled and new beads for a unique look! What beads will you use in yours? Please note that this tutorial contains affiliate links.
You’ll need these tools and materials to make your own mixed bead bracelet:
1: Some tiger tail wire cut to a length that will fit your wrist plus a few extra cm.

2: A selection of beads. I used a mix of plastic, clay and glass beads from different sources, recycled, new and handmade.

3: A clasp. I used this gold-tone parrot claw clasp.

4: A jump ring.

5: Four crimp beads.

6: Pliers. I used cutting pliers to cut the wire, flat nose pliers and round nose pliers.
Cutting pliers, round nose pliers, flat nose pliers. Follow these steps to make your crazy mixed bead bracelet:
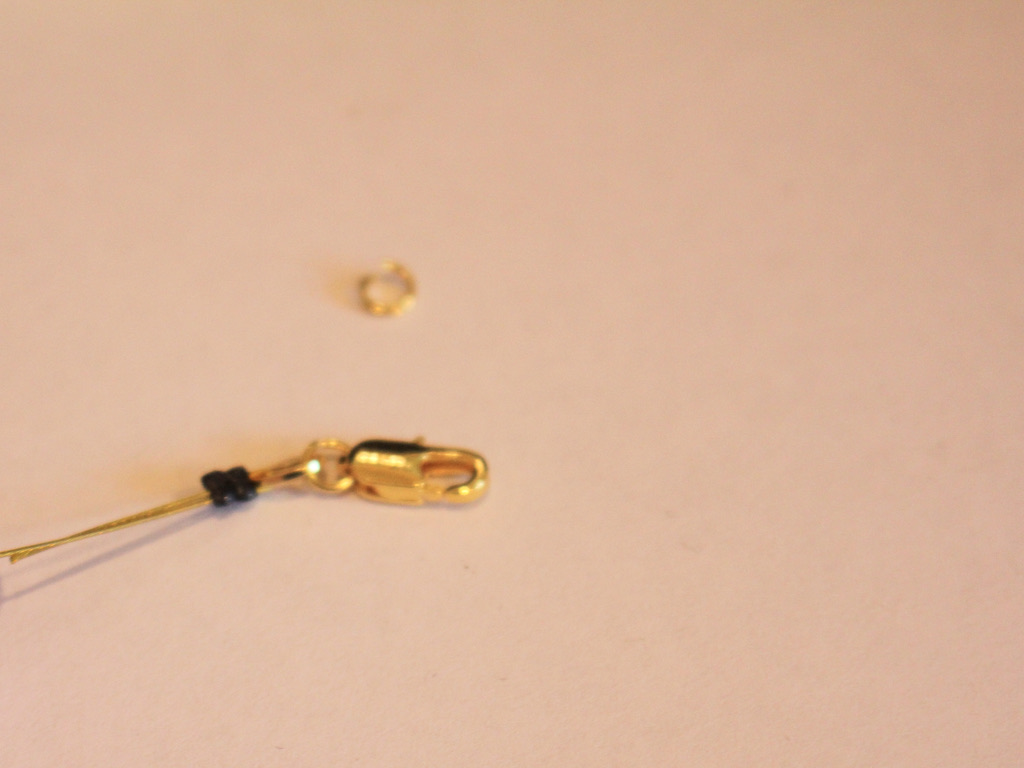
1: Take the tiger tail wire and add two of the crimp beads.

3: Add the clasp to the wire and loop the end of the wire back through the crimp beads.

4: Squash the crimp beads using the flat nose pliers.

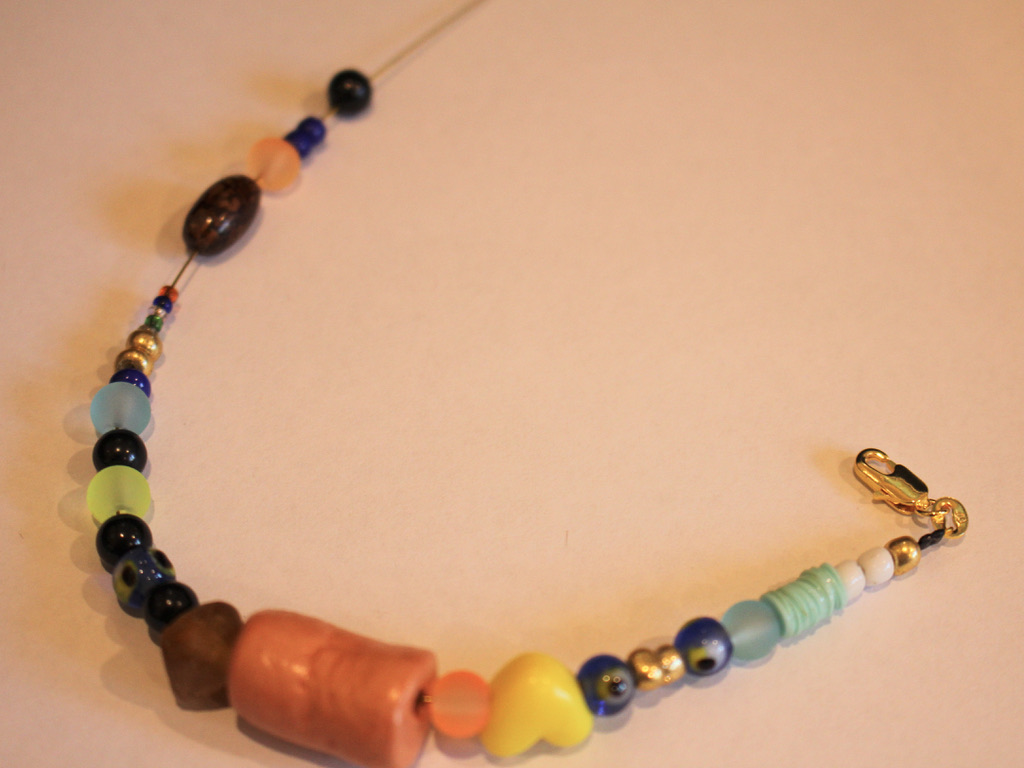
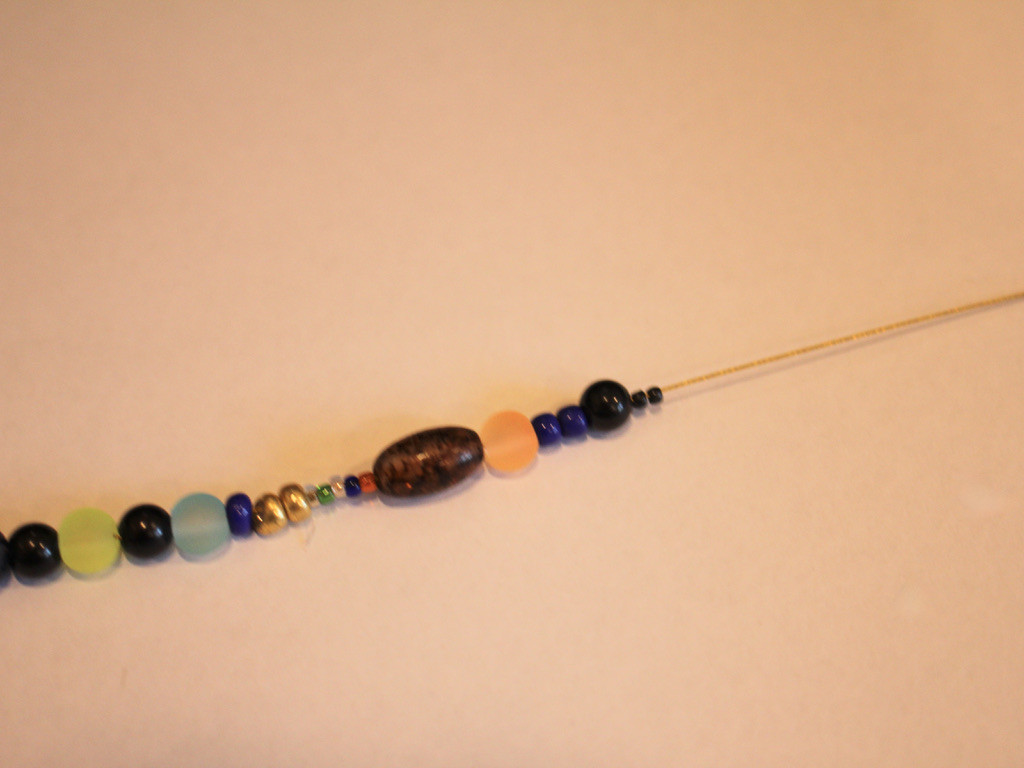
5: Begin adding beads to the wire in random order.
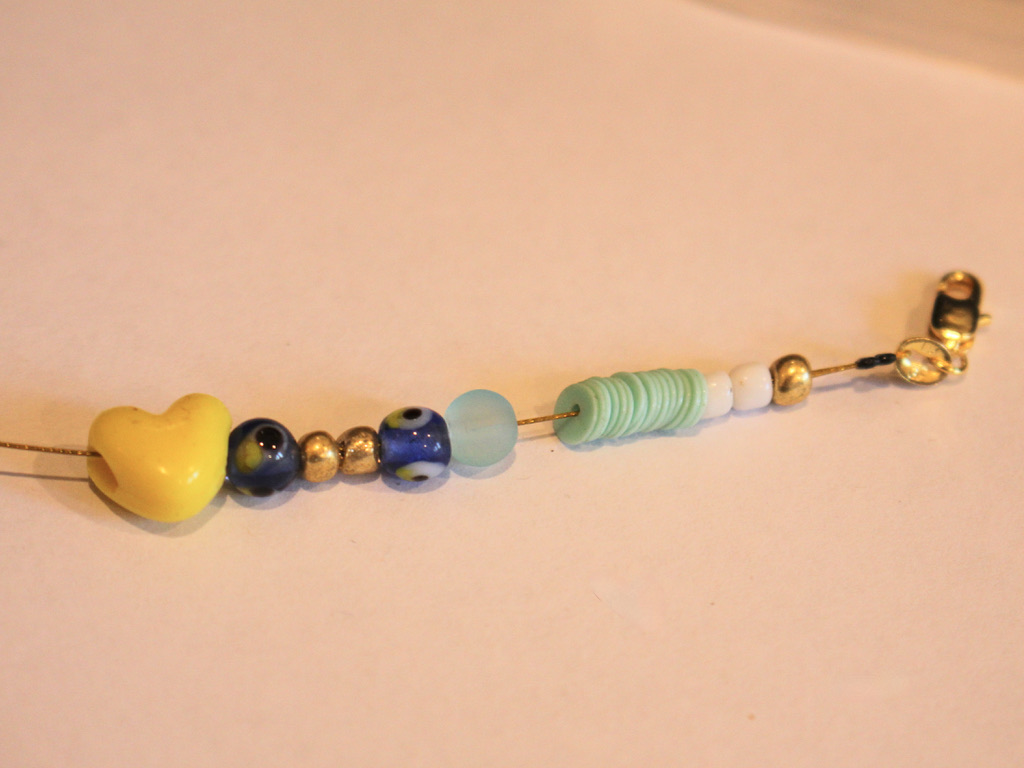
6: Continue adding beads until you get it to the length that feels comfortable around your wrist.
7: Add the second set of crimp beads to the wire.
8: Add the jump ring to the wire.
9: Loop the wire around the jump ring and back through the crimp beads and the first few beads at the end of the bracelet.

10: Pull the wire tight.
11: Squash the crimp beads using the flat nose pliers.
12: Trim the excess wire using the cutting pliers.


13: Now your bracelet is finished and ready to wear!


Here are some other mixed bead, craft-core tutorials for you to follow:
- A crazy mixed bead necklace
- A mixed bead necklace with letter beads
- This special mixed bead shoe chain that can also be worn as an anklet
- A simple mixed bead anklet
If you love the clay bead featured on this bracelet, here’s a tutorial that you can follow to make your own.
-
Here’s how to make a floating bead bracelet!
little while ago, I showed you how to make a floating pearl necklace, and now here’s the bracelet version of that tutorial! This bracelet is made using tiger tail wire and a special bead. I used an evil eye bead for this one, but you can use any bead you like. I think a single pearl with a glorious lustre would be perfect too. Please note that this tutorial contains affiliate links.
You’ll need these tools and materials to make your floating bead bracelet:
1: Pliers. I used my flat nose, round nose and cutting pliers for this bracelet.
Cutting pliers, round nose pliers, flat nose pliers. 2: A piece of tiger tail wire. I used a scrap piece I had, you’ll need enough to fit your wrist plus approximately 5cm extra.

3: A bead. I used this glass bead but you can use any type of bead you like.

Alternatively, here’s a link to some freshwater pearls if you want to make a floating pearl bracelet!
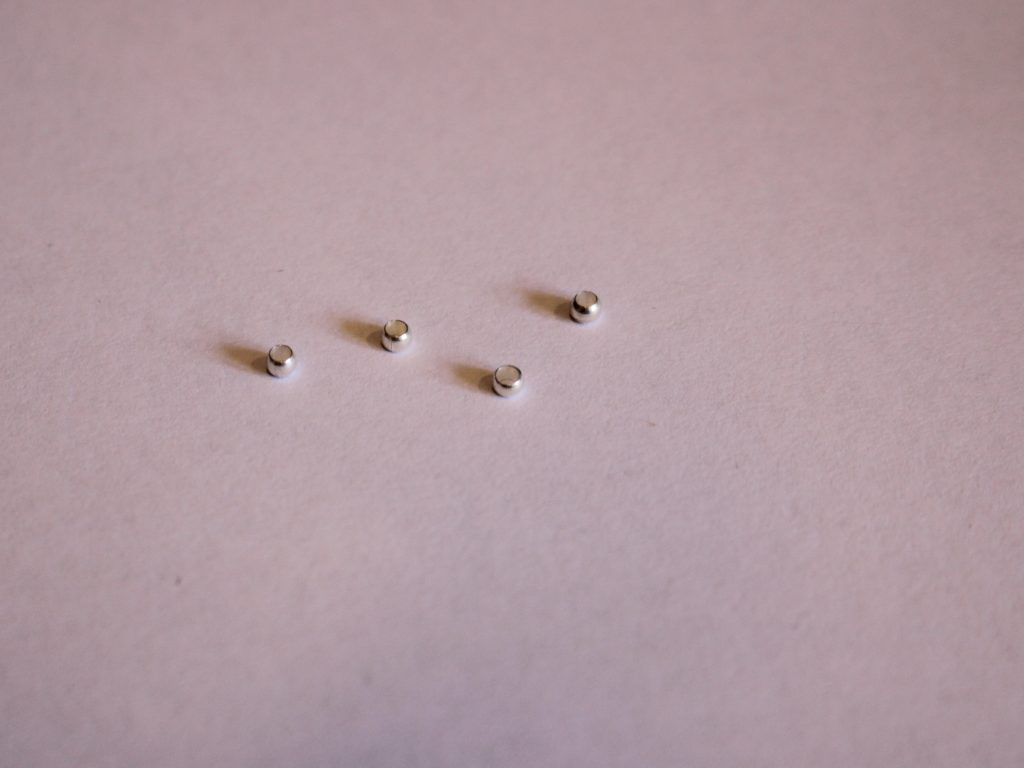
4: Two crimp beads.

5: Two crimp cover findings.

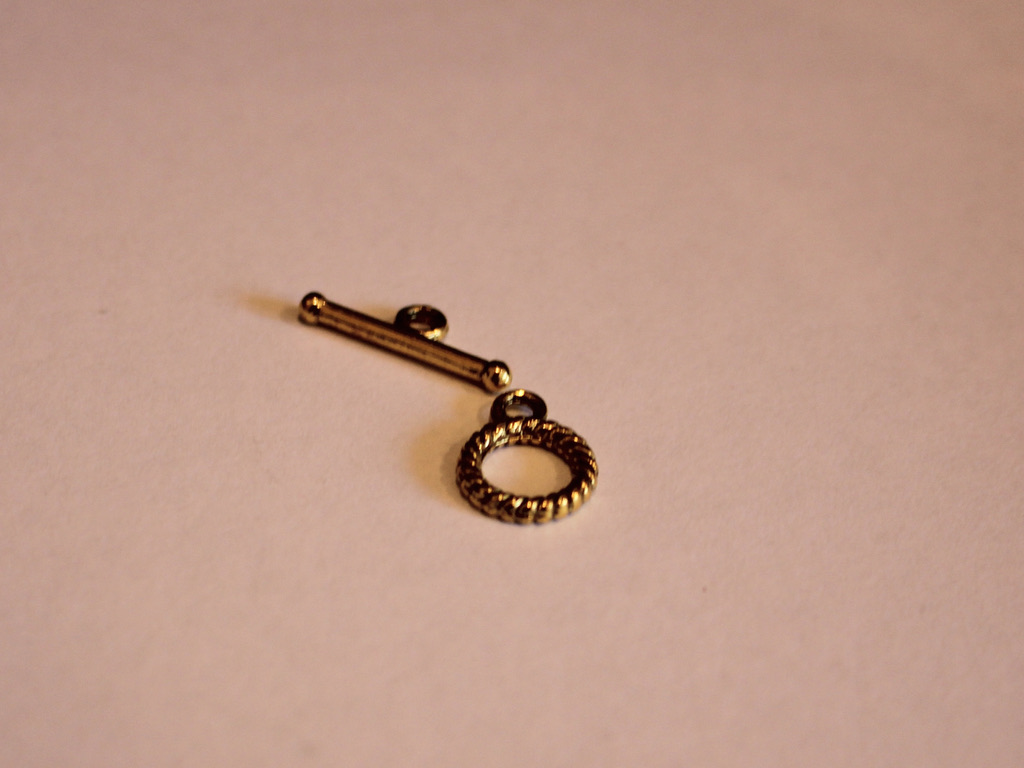
6: A toggle clasp.

Follow these steps to make your cool floating bead bracelet:
1: Add a crimp bead to one end of the wire.

2: Loop the end of the wire around the crimp and back through to create a loop.

3: Pull the wire so that the loop is tight around the crimp bead.

4: Squash the crimp bead using the flat nose pliers.


5: Trim the excess wire using the cutting pliers.

6: Add one of the crimp covers from the other end of the wire and pull it down so that it covers the crimp bead.

7: Squash the crimp cover around the crimp bead end making sure to cover any ‘spikey’ bits.

8: Add the bead to the wire. (If your wire is extra long, you can trim it here, making sure you leave enough room to loop the end of the wire around the second crimp bead so that it still fits).

9: Add the second crimp cover to the wire.

10: Add the second crimp bead to the wire and repeat the steps you performed in steps 1-5 to secure the other end.


11: Place the second crimp cover over the end of the wire that you just secured and close it using your flat nose pliers.

12: Add one part of the toggle clasp to one end of the bracelet wire and use your round nose pliers to close the wire at the end of the crimp cover.


13: Repeat step 12 for the second part of the toggle clasp to secure it in place.


Now your floating bead bracelet is finished and ready to wear! What special bead did you use on yours?


-
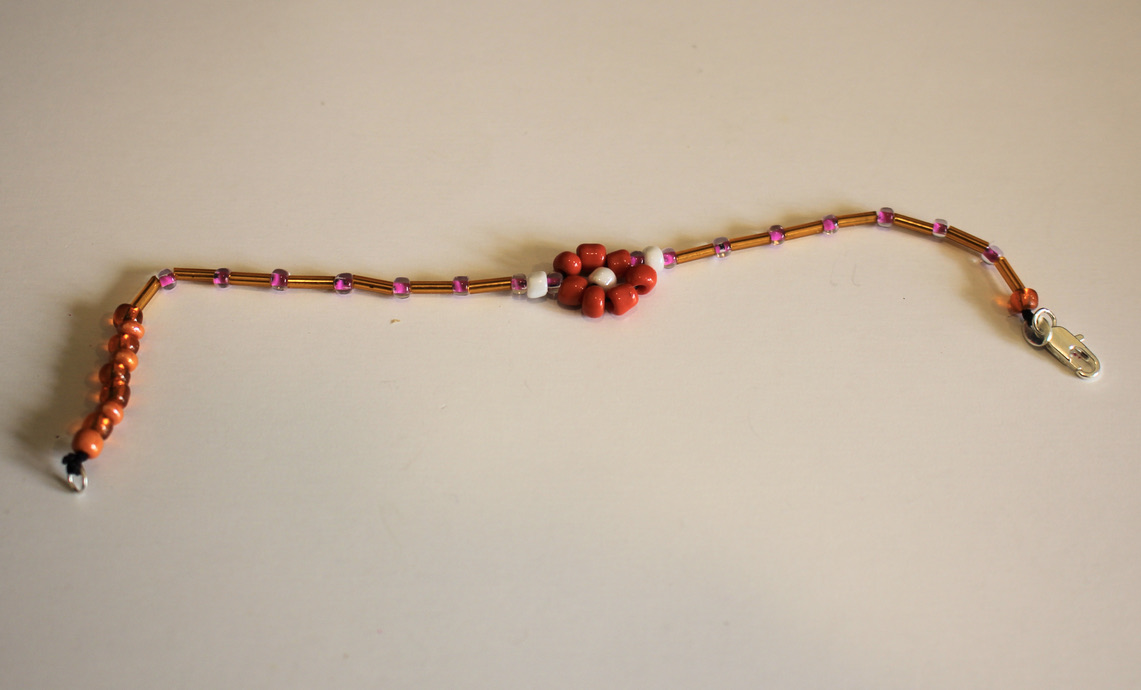
Flower beading is so fun! Here’s how to put together a flower beaded bracelet.
Flower beading was one of the first beading techniques I learned when I was a crafty kid! I still love beading and it is so fun to see this nostalgic style coming back! This bracelet makes a feature of a beaded flower, surrounded by a variety of glass beads. Please note that this tutorial contains affiliate links.
You’ll need these tools and materials to make your flower beaded bracelet:
1: Scissors.

2: Beading thread.

3: A selection of beads. I used some larger glass beads for the flower and some smaller ones for the base of the bracelet.

4: A parrot clasp and jump ring for the ends of the bracelet.


5: Some superglue.

6: A beading needle with a thin loop of thread tied to it.

Here are the steps to follow to make your flower beaded bracelet:
1: Cut a length of thread, about 50cm and fold it in half.

2: Slip the loop around the clasp end and pull the length of the thread back through that loop. Pull it tight to secure it to the clasp.

3: Tie a knot at the base of the clasp and put the thread back through the clasp end, tying one final knot for extra security.


4: Add the looped needle to the beading thread.
5: Begin adding beads, bead to about half of the preferred length of your bracelet. You can check this roughly by laying the bracelet across your wrist and measuring by eye how far it reaches around the wrist.

6: Once you have the length you like, add the seven beads for making the flower.
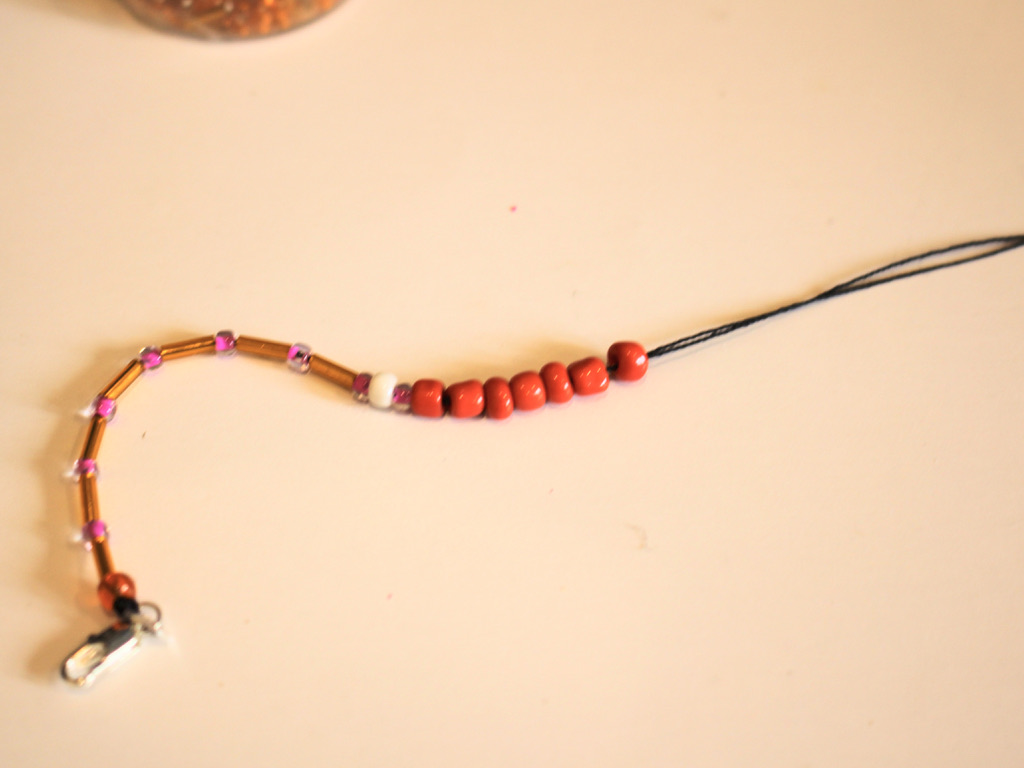
7: Take the needle and put it through the hole of the first of the flower beads. When you pull it tight you will have a circle shape.

8: Add another bead to the thread, this will be the centre of the flower.

9: Place the centre bead into the middle of the circle and then thread the needle through one of the beads opposite the one you used to form the circle.

10: Pull the thread tight, you will now have a flower with a centre.
11: Continue beading until you have the length you like. I didn’t quite make the first part of my bracelet long enough so I decided to add some extra feature beads at the end to make it long enough.


12: Once you have your desired bracelet length, tie a knot at the end of the beads to secure them.
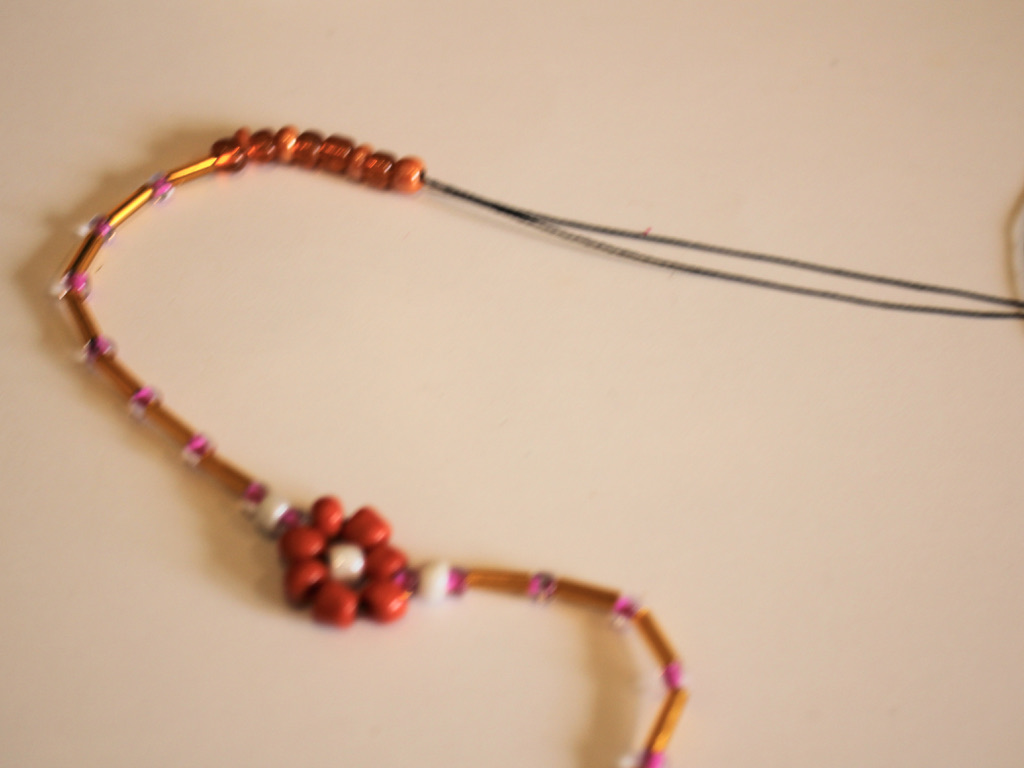
13: Loop the thread around the jump ring and tie a knot. Repeat this to secure the jump ring well.


14: Trim the excess thread from the end of the bracelet, cutting closely. Then add a dab of superglue to the knots on both ends of the bracelet for extra security. Set the bracelet aside and wait for the glue to dry.


Once the glue is dry, your sweet and cheerful floral bracelet is finished and ready to wear!


Here are some more floral bead tutorials you can follow:
-
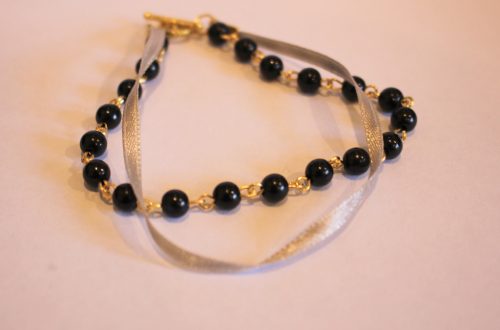
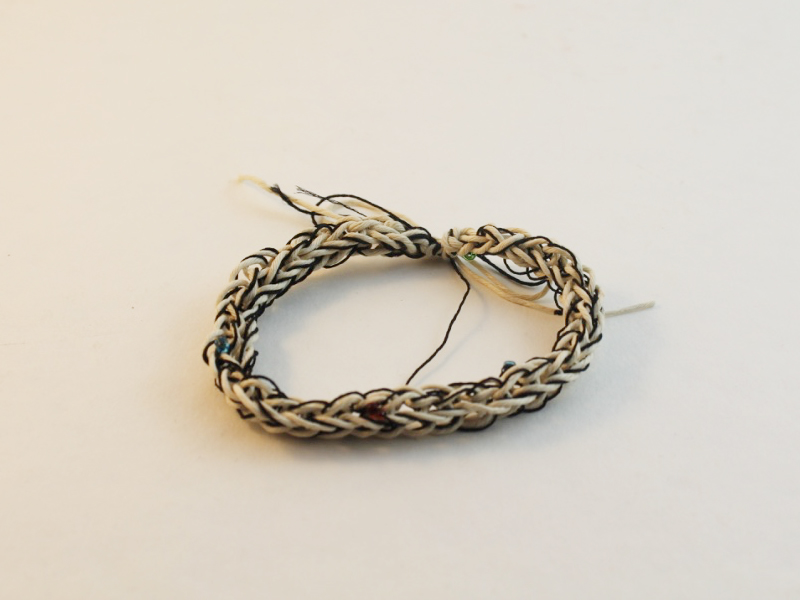
Here’s how to turn some silver chains into a braided choker that you can also wear as a bracelet!
I love jewelry you can wear multiple ways, so this design is a winner in my eyes! This necklace takes three delicate chains which are then braided together to create a unique choker necklace that you can also wrap around your wrist as a bracelet. Please note that this tutorial contains affiliate links.
You’ll need the following tools and materials to make your braided chain necklace:
1: Three delicate chain necklaces. I used chains that had different link types for a textured look.

2: Pliers. I used my round nose and flat nose pliers to open and close jump rings.


Follow these steps to make your braided necklace:
1: Open the jump ring on one end of the chains.


2: Open the jump ring on the other end of the chain and remove the clasp.

3: Remove the jump rings and clasps from the other two necklace chains.

4: Add the additional two necklace chains to the jump ring on the first chain you altered.


5: Close the jump ring to secure the chains together.

6: Braid the chain. It can help to tape the chains to a solid surface, this allows you to get better tension for braiding.

7: When your braid is finished, you might have some excess chain. This is okay, you can use it as a chain extender!

8: Attach the ends of the chain together using the jump ring you left at the other end of the necklace.

9: Add another couple of jump rings to the extender chain if you need it, this will allow you to adjust the length you wear the chains as a necklace or bracelet.


10: Attach a clasp to the first end that you secured together.

Now your braided necklace/bracelet is finished and ready to wear! How versatile and lovely?!


Here are some other braided designs you can make
-
How to make a bracelet that combines leather and beads into one piece!
This tutorial is a bit of a recycling piece. I used some scrap leather combined with some beads I recycled from an old necklace to construct something new. I think this bracelet is a cute statement piece, but it can also be layered with other bracelets to make a cool stack. Please note that this tutorial contains affiliate links.
You’ll need these tools and materials to make your leather and bead bracelet:
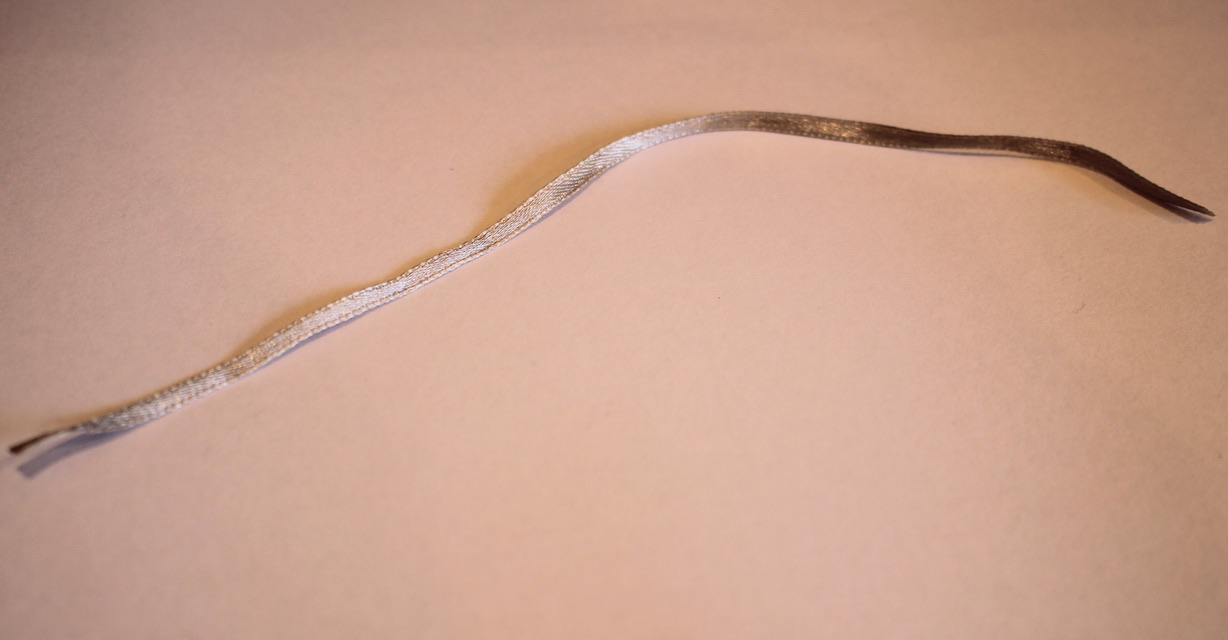
1: A piece of leather, I used this scrap piece of leather that was about 1cm wide and 9cm long. If you don’t have any scrap leather you could also use some leftover ribbon or cord.

2: Some pliers. I used my flat nose pliers and round nose pliers for this piece.
3: A bunch of eye pins. The number you will need will vary depending on the length of your bracelet and your piece of leather.

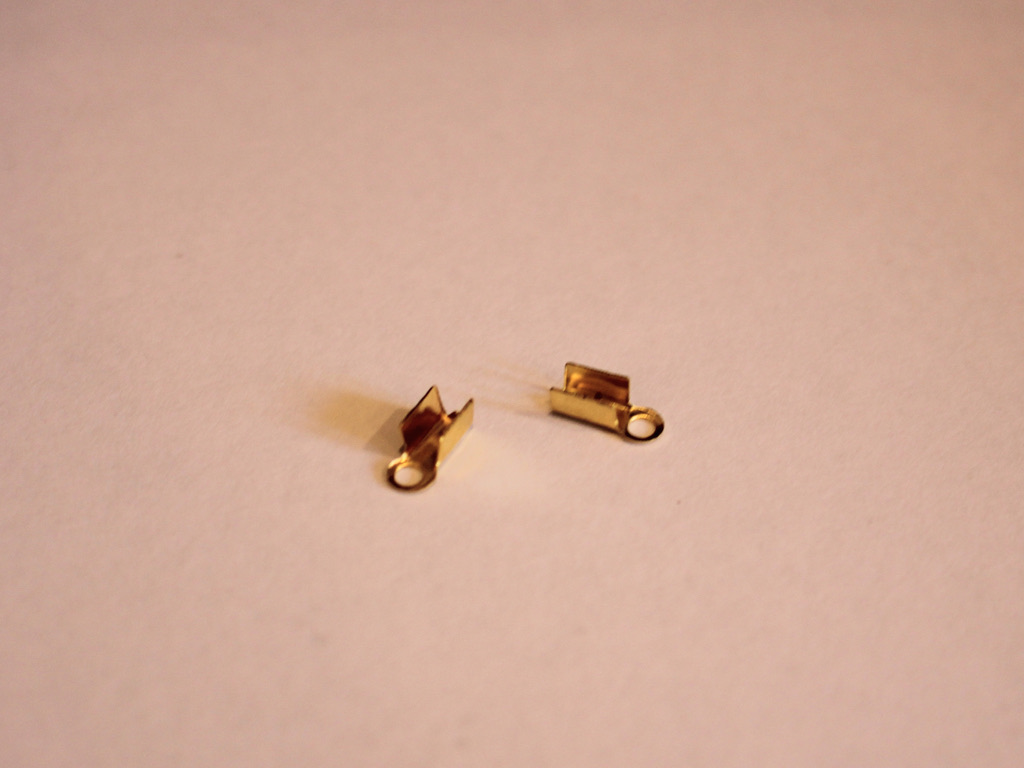
4: Two flat crimp ends.

5: Some beads. I used these timber beads I recycled from an old necklace.

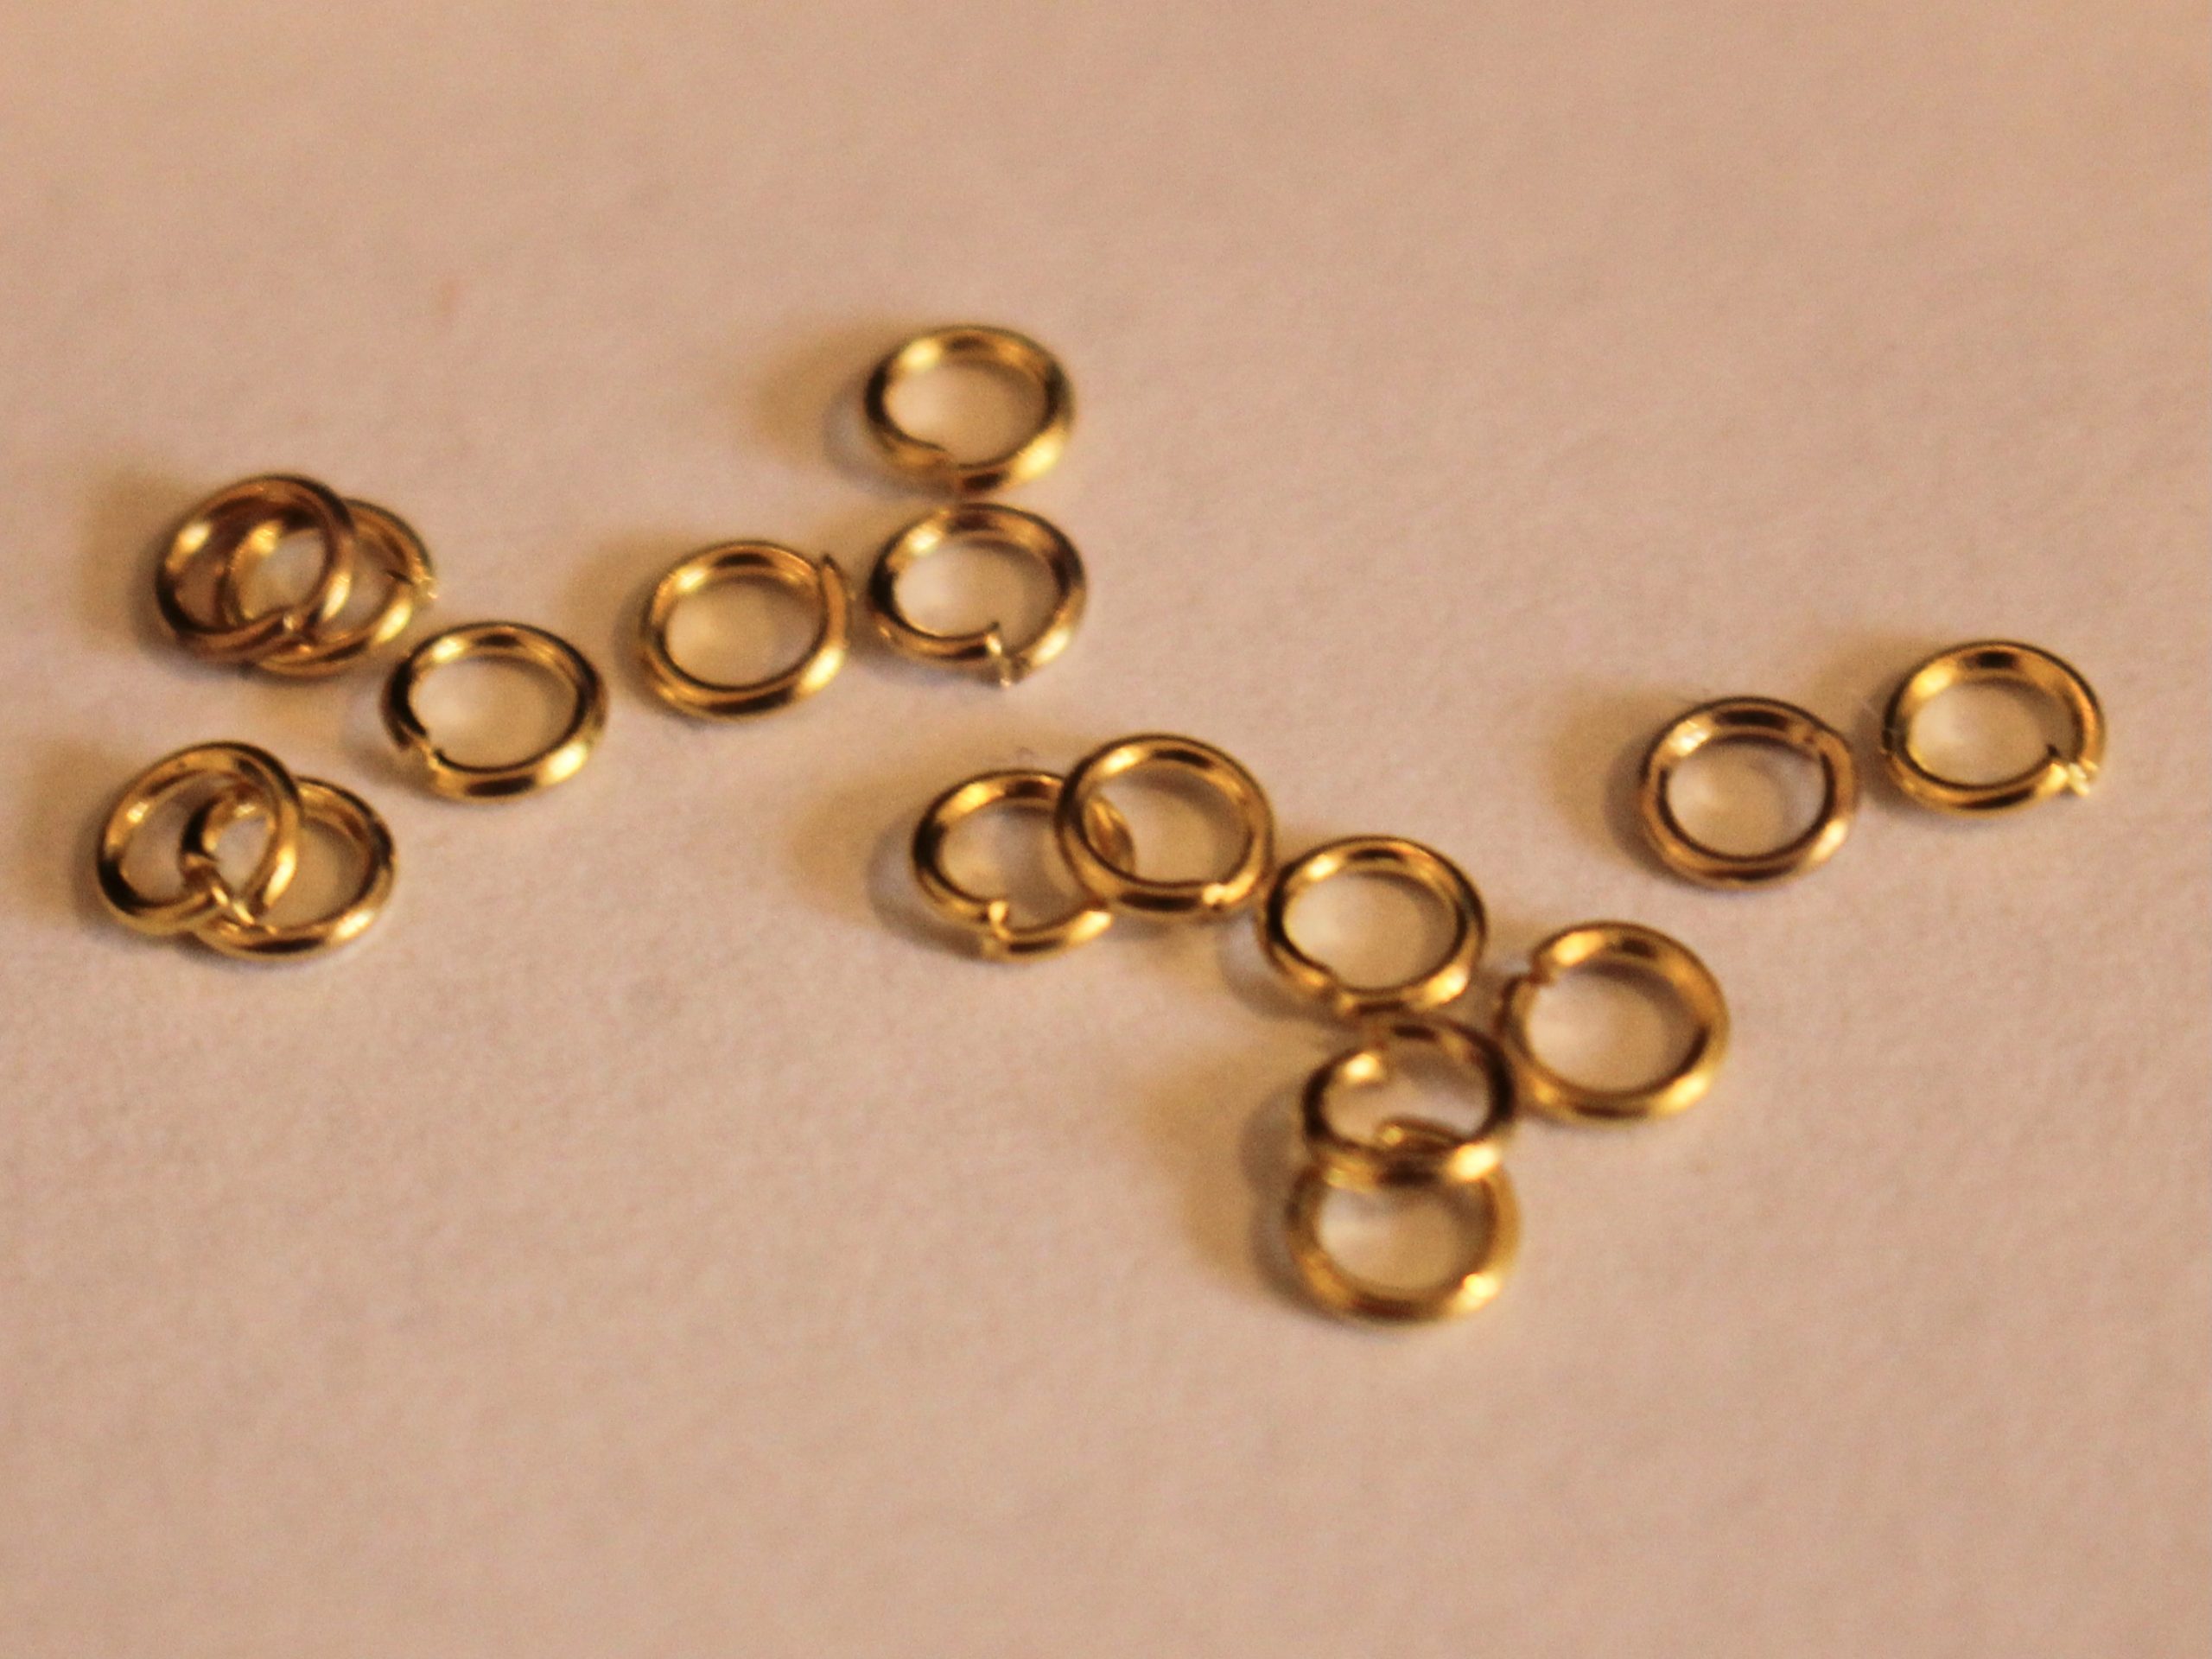
6: Two jump rings.

7: A lobster clasp. I used this large one.

Follow these steps to make your own leather and bead bracelet:
1: Take your piece of leather and place one of the crimp ends on one end. Be careful to line up the edges.

2: Squash the crimp using the flat nose pliers.


3: Repeat steps 1 and 2 for the other end of the leather, attaching the other crimp.

4: Set the piece of leather aside.
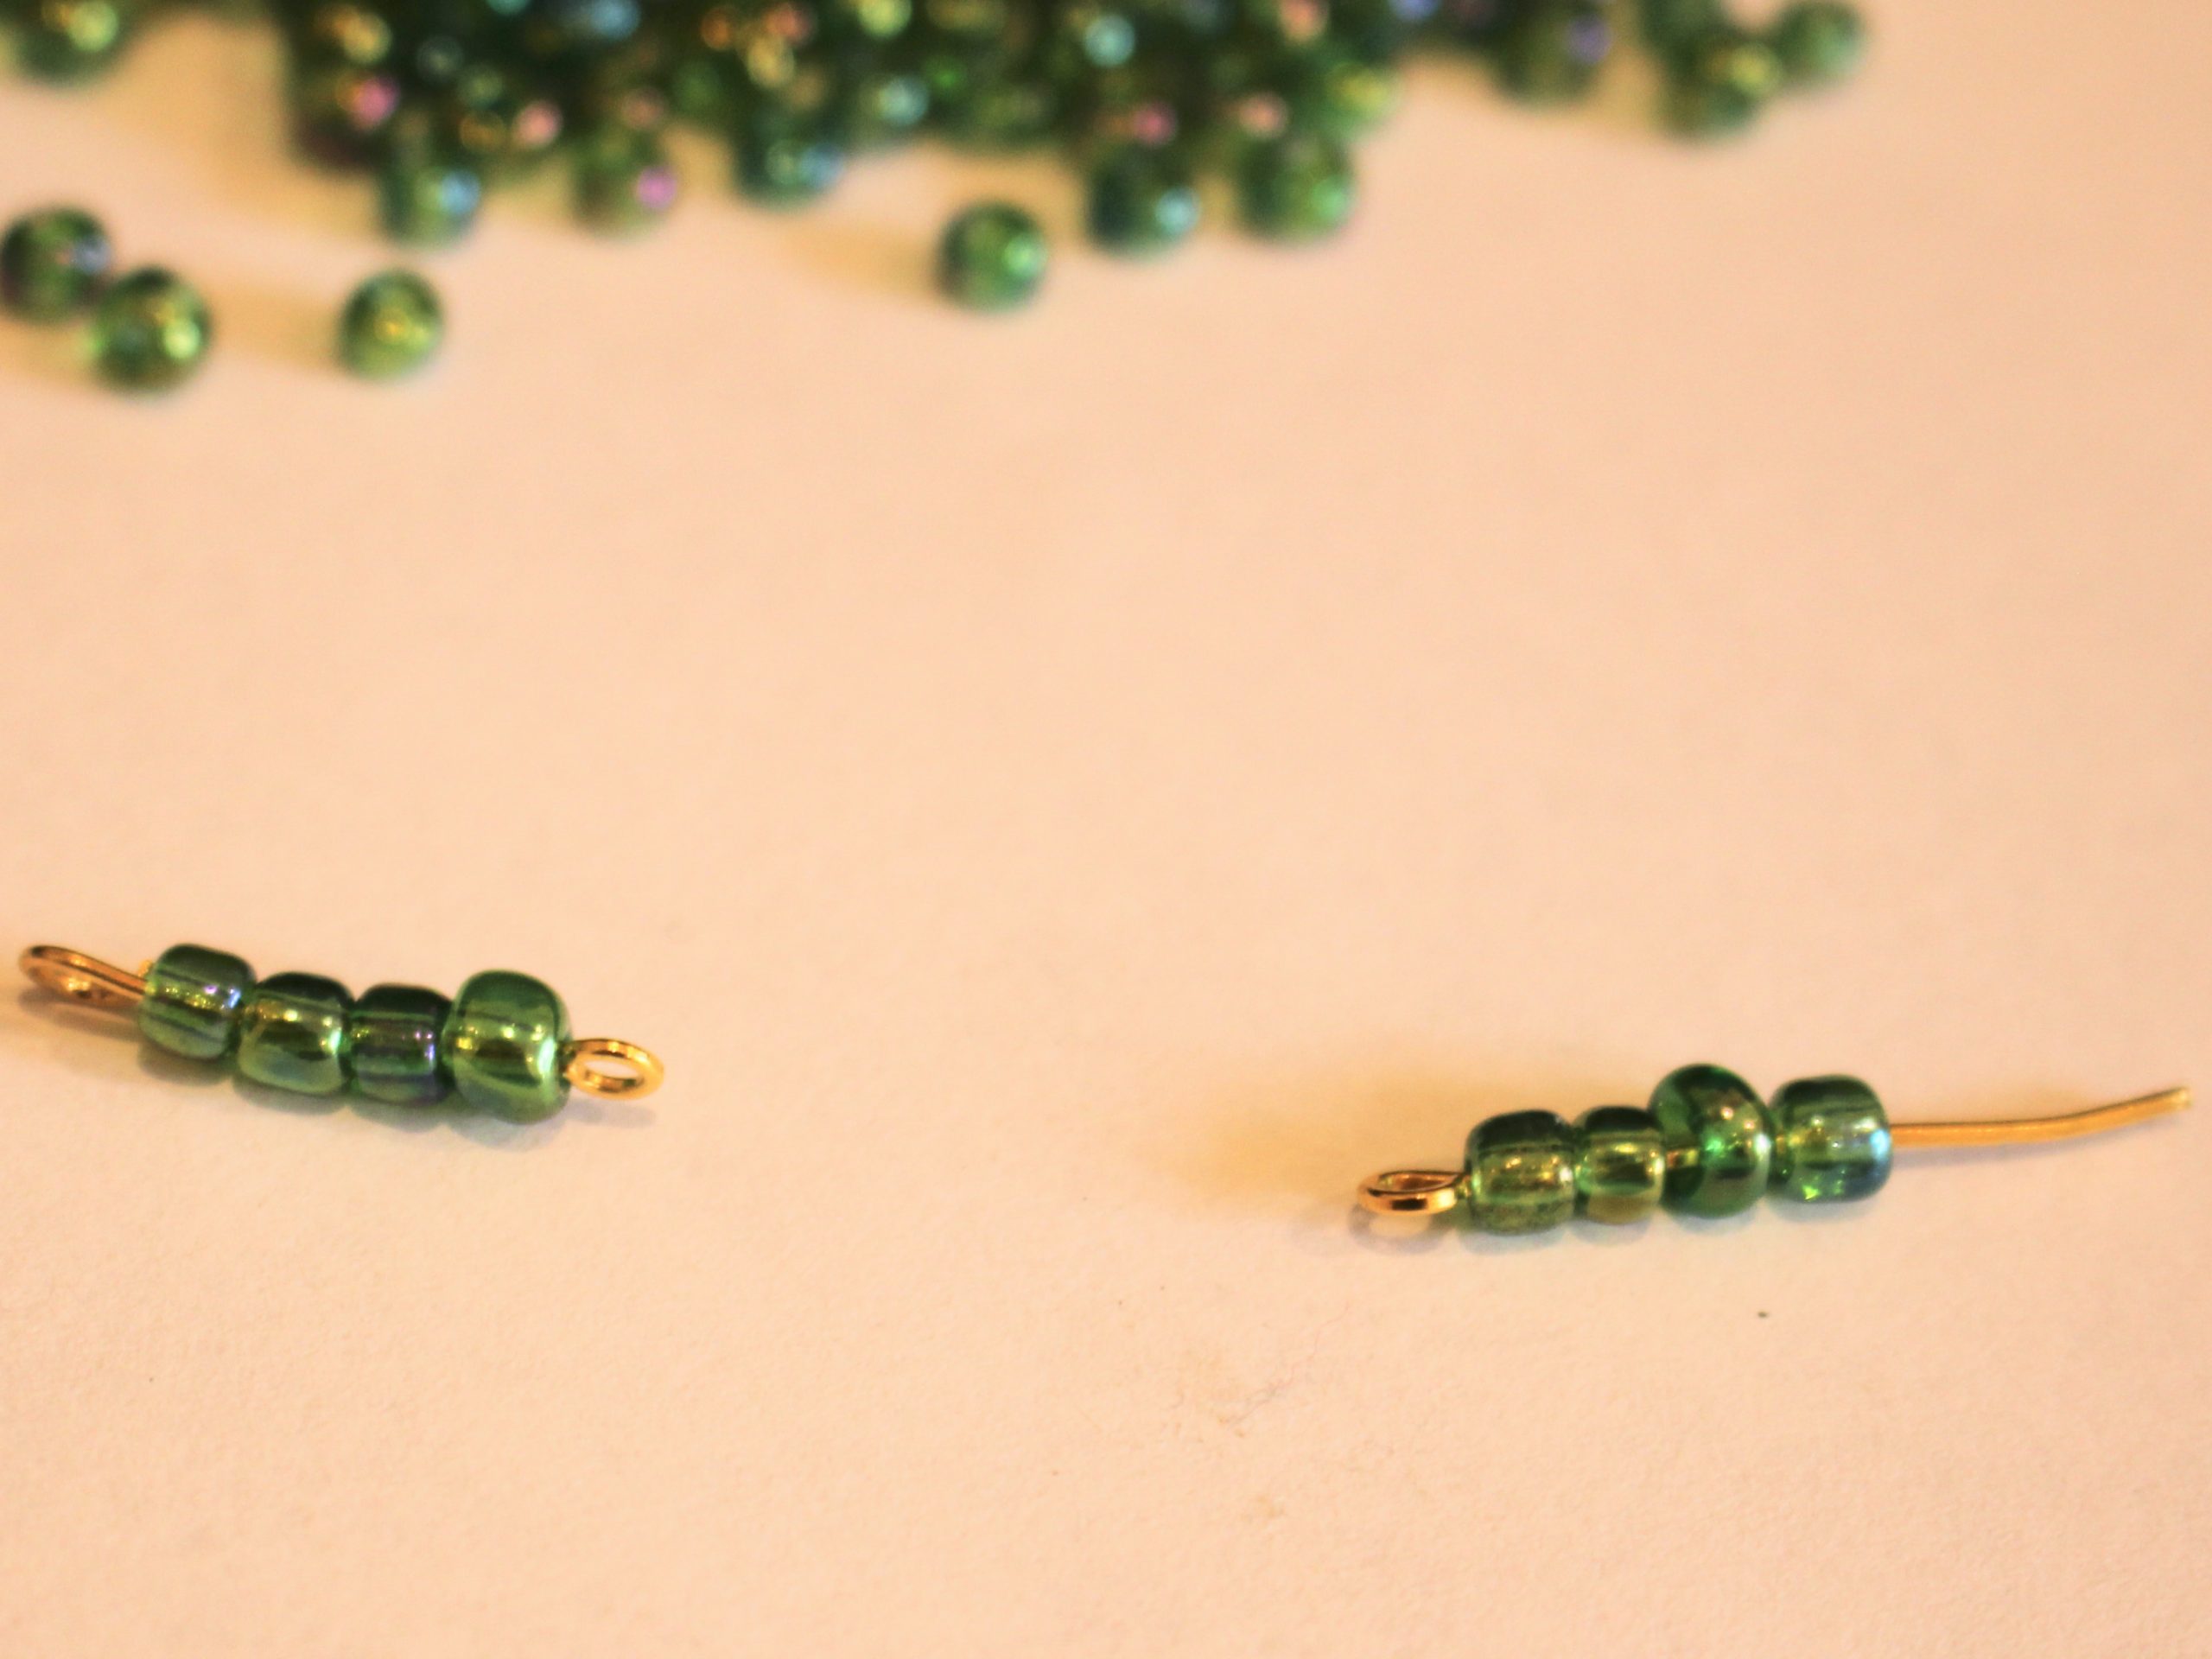
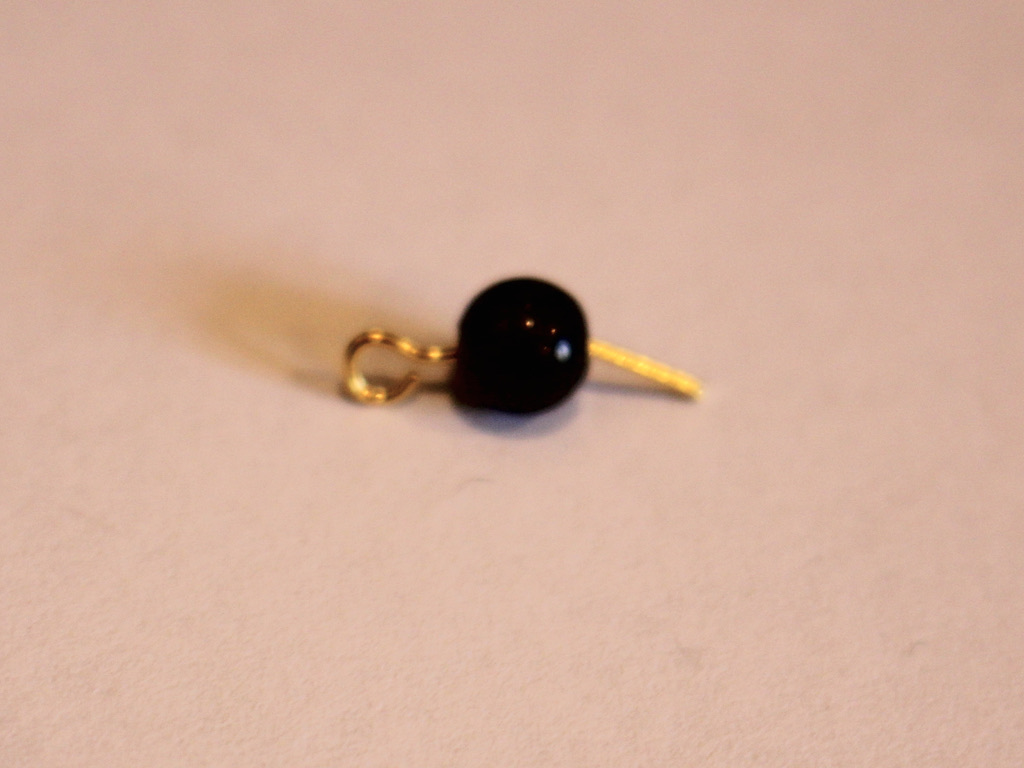
5: Take one of the eye pins and add a bead.

6: Bend the pin to form an angle.
7: Use the round nose pliers to create a loop at the top of the pin, securing the beads in place.


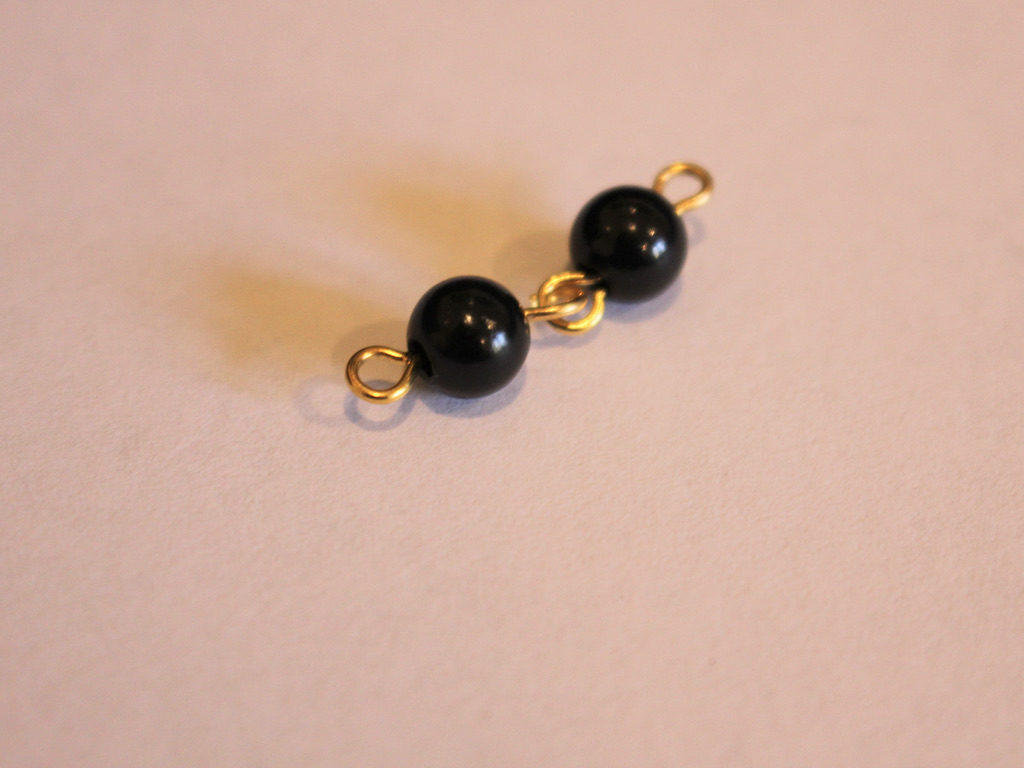
8: Repeat steps 1-7 for another bead, before closing the loop, slide it onto the first charm you made. Close it to secure the charms together.

9: Repeat steps 1-8 for another bead.

10: Attach the small chain you made to one end of the piece of leather, this will help you keep track of the overall bracelet length.

11: Keep adding beads to the chain until your bracelet is long enough to fit around your wrist.

12: Attach the lobster clasp to the beaded end of the bracelet using one of the jump rings.

13: Attach the other jump ring to the other side of the bracelet to finish it off.

Now your bracelet is finished! How will you wear yours?


-
How to make a letter bead chain bracelet!
Sometimes you need to be a bit subtle about how you communicate your feelings. So instead of saying it out loud, or showing it in your body language, why not show how you feel with your jewelry? Here are all the steps you can follow to make a cute letter bead bracelet that says a word on it. Mine says ‘grumpy’ because that’s how I feel a lot of the time ;). Please note that this tutorial contains affiliate links.
You’ll need these tools and materials to make your letter bead chain bracelet:
1: A bunch of eye pins. The number you need depends on the length of your bracelet.

2: Two jump rings.

3: A lobster clasp.

4: Letter beads that make up the word you want to spell. Mine spells G-R-U-M-P-Y.

5: Other beads. I used some black plastic beads recycled from an old necklace. The number of extra beads you need will depend on the length of your word.

6: A small jump ring.

7: A charm. I used this plastic banana charm and drew a little smile on it with permanent marker.

Follow these steps to make your own letter chain bracelet:
1: Add a letter bead to one of the eye pins.

2: Bend the eye pin to form an angle.

3: Bend the top of the pin over to form a loop that secures the bead onto the pin. Use your round nose pliers to do this.

4: Repeat steps 1 to 3 for the other letter beads until your whole word is on pins.

5: Attach each of the letter bead pins together to form a chain.


6: Set the letter chain aside and start making the side chains.
7: Add your other beads to the pins the same way you did for the letter beads. Make two chains so that the whole piece is long enough to wrap around your wrist. Make each chain an even length so that your word sits in the middle.


8: Add a lobster clasp to one end of the bracelet using one of the jump rings.


9: Add the other jump ring to the other side of the bracelet.

10: To finish the bracelet off, attach your charm using the small jump ring.


Now your bracelet is finished and ready to wear! So cute!


Here are some other letter bead tutorials you can follow:
-
How to make a double strand bracelet with ribbon and beads!
This bracelet is another way that you can make a multi-strand bracelet. This bracelet makes use of ribbons and a beaded chain for an alternative look. I used some recycled materials in this design, it is a great way to reuse ribbons and cords from old packaging or gifts. Please note that this tutorial contains affiliate links.
You’ll need these tools and materials to make this double strand bracelet:
1: A piece of ribbon. I used this thin ribbon that I had recycled from a piece of clothing.

2: Scissors. I used my scissors to cut the ribbon to length.
3: Pliers. I used my flat nose and round nose pliers for this design.
4: Some sticky tape.
5: Two crimp ends.
6: A bunch of eye pins. The number you will need depends on the length of your bracelet so it’s good to have a few extra on hand.
7: Beads. I used these black plastic beads that I recycled from an old piece of jewelry.
8: Two jump rings.

9: A toggle clasp.
Follow these steps to make your own double strand bracelet made with mixed materials:
1: Take the ribbon, cut it to a length that fits around your wrist.
2: Add some sticky tape to either end of the ribbon. This will give the crimps a bit more material to grip on to. You can skip this step if you have a thicker piece of ribbon.
3: Place the crimp around the end of the ribbon.

4: Squash one side of the crimp around the ribbon using the flat nose pliers.

5: Squash the other side of the crimp around the ribbon using the flat nose pliers.

6: Repeat steps 3 to 5 for the other end of the ribbon, squashing the other crimp in place.

7: Set the ribbon aside.
8: Take one of the eye pins and place a bead on it.

9: Bend the pin to form an angle with the bead.
10: Loop the end of the pin around the round nose pliers to form a loop.


11: Repeat steps 8-10 for another pin and bead, now you will have two beaded pins that you can now attach together. Do this by slightly opening one of the loops and sliding the other charm on. Close the loop to secure the pieces together.

12: Repeat steps 1-11 until you have a chain that is the same length as the ribbon. It doesn’t matter if it is a tiny bit longer or shorter.


13: Take a jump ring and slide it through one end of each strand. Close the jump ring to secure the strands together.

14: Repeat step 13 for the other end of the bracelet.
15: Attach one side of the toggle clasp to one side of the bracelet by slightly opening the jump ring, sliding the clasp on, then closing the jump ring again.

16: Repeat step 15 for the second part of the clasp.

Now your bracelet is finished and ready to wear! So cute.

-
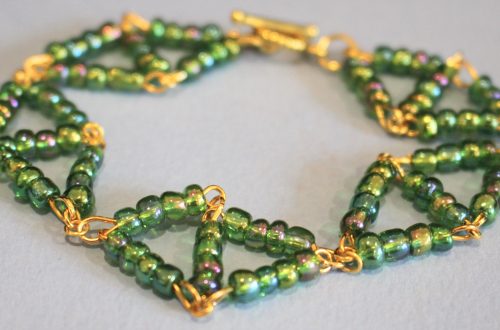
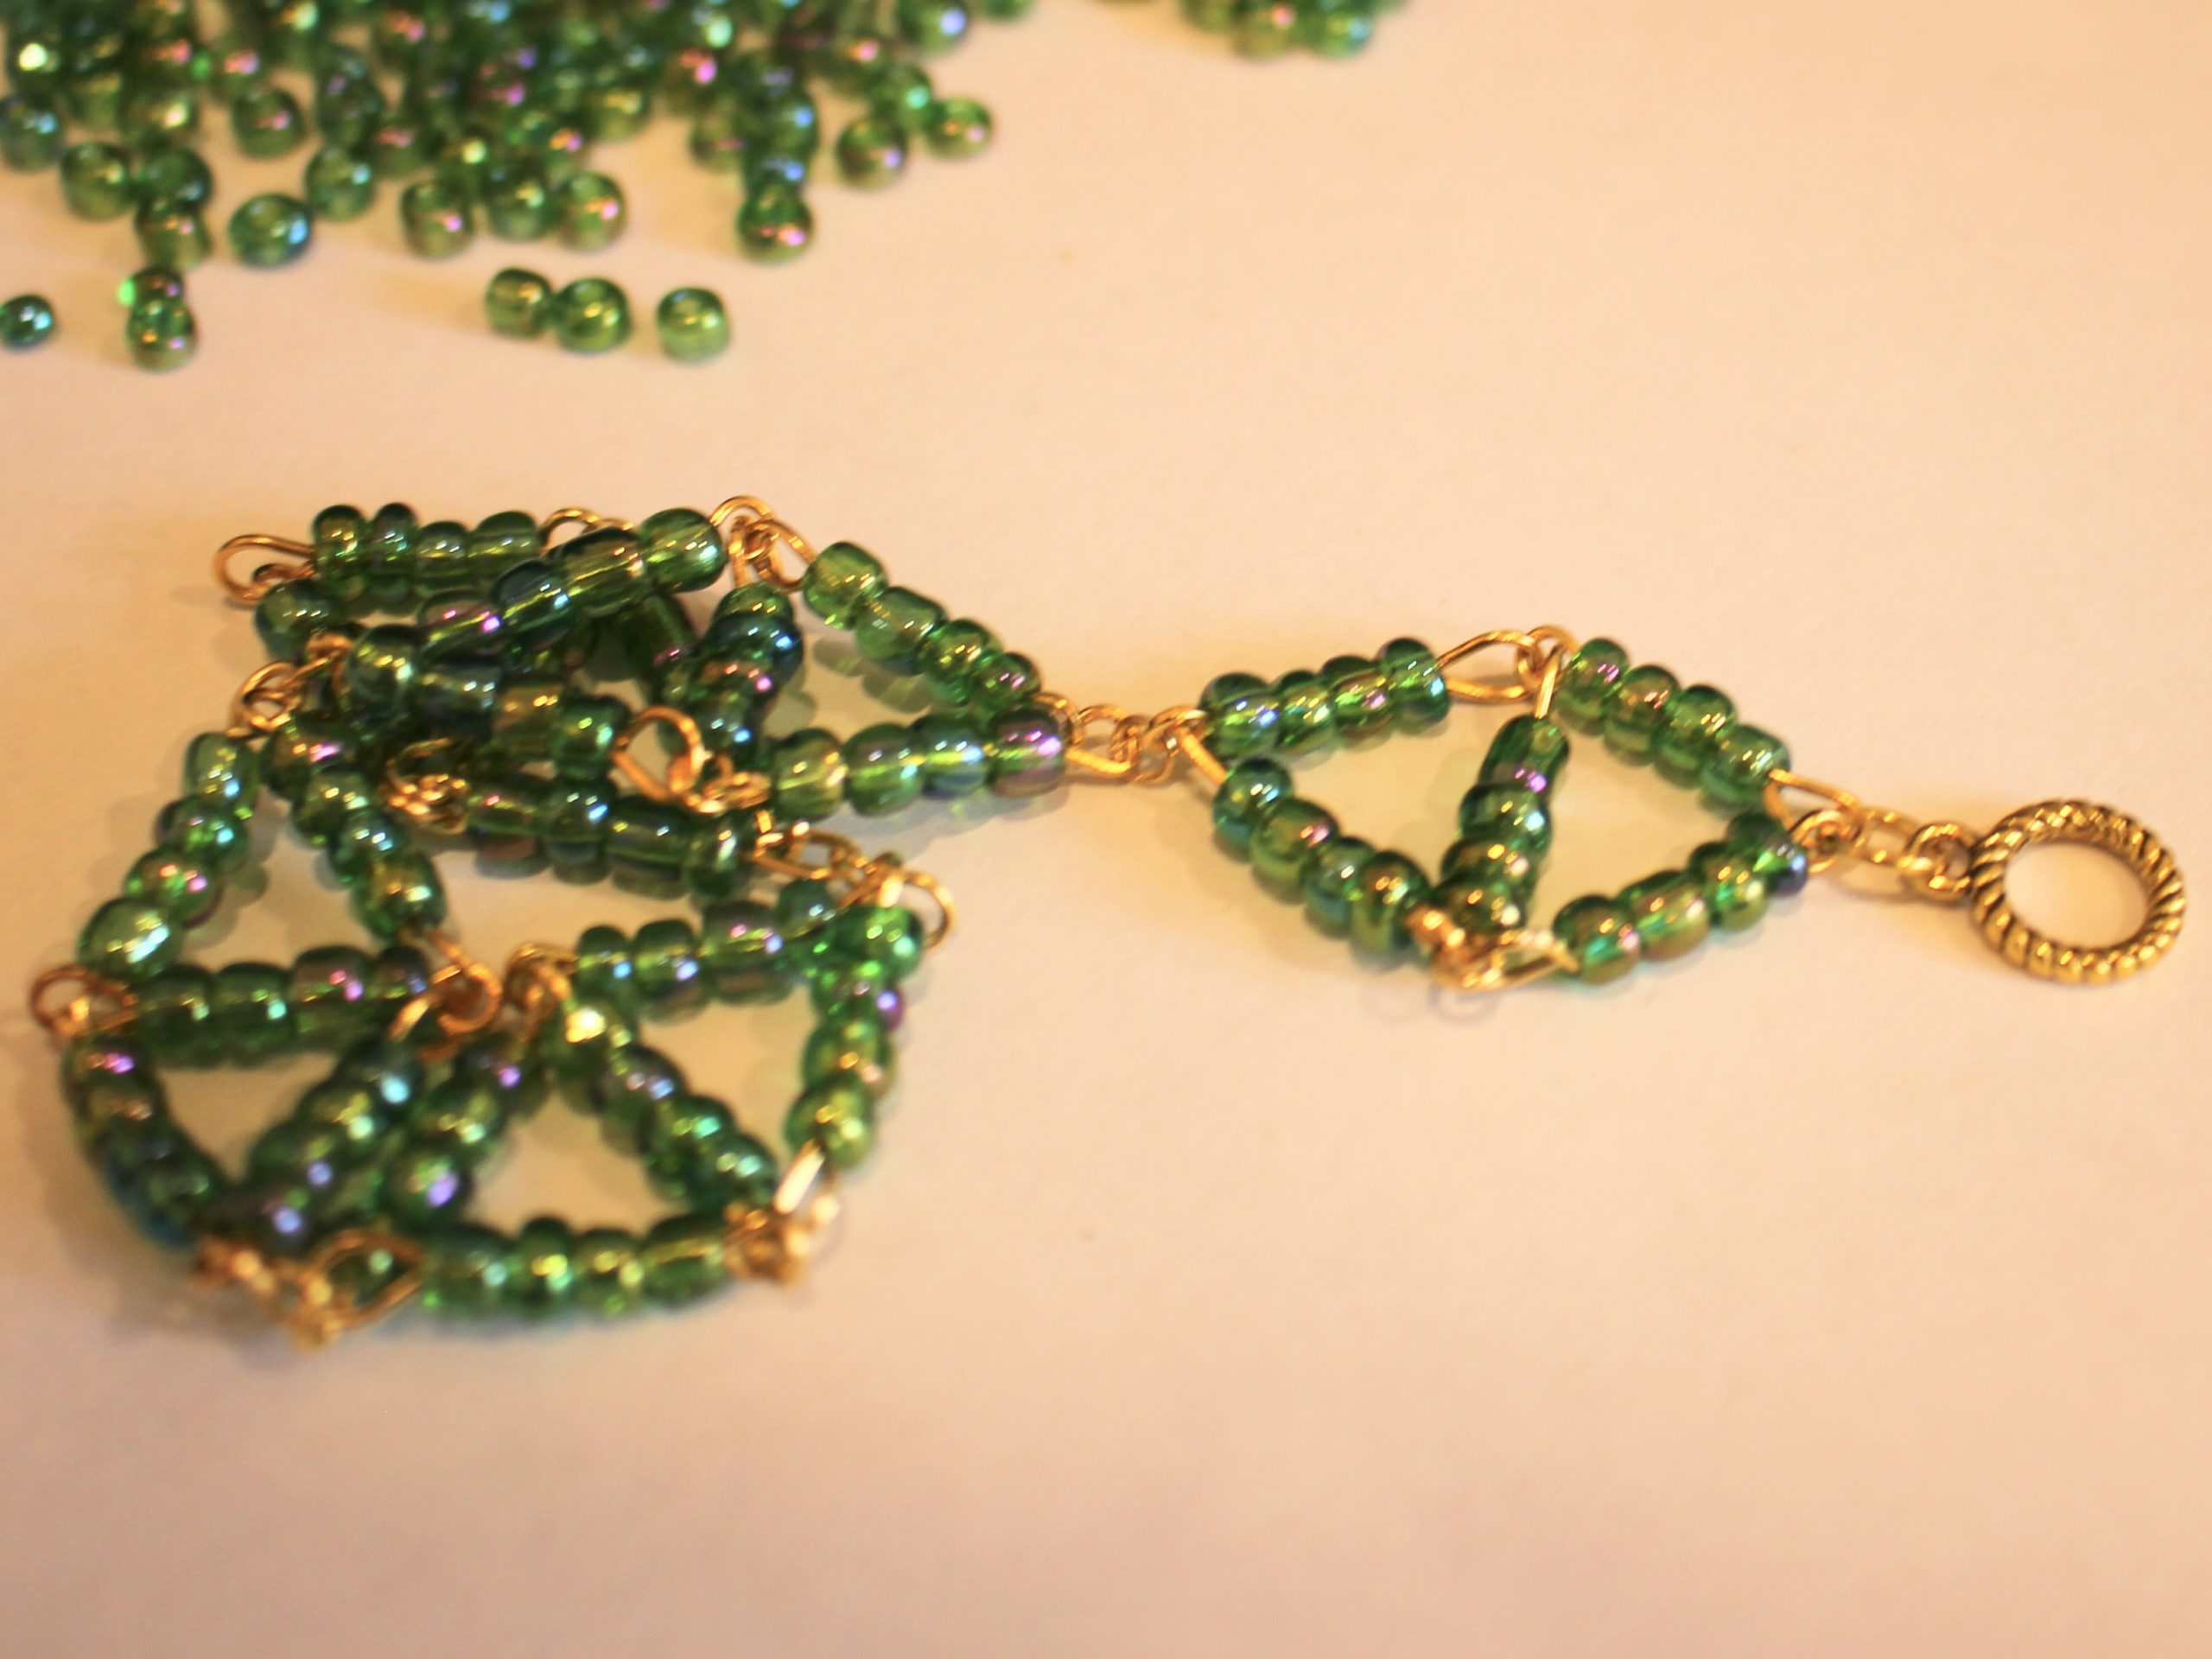
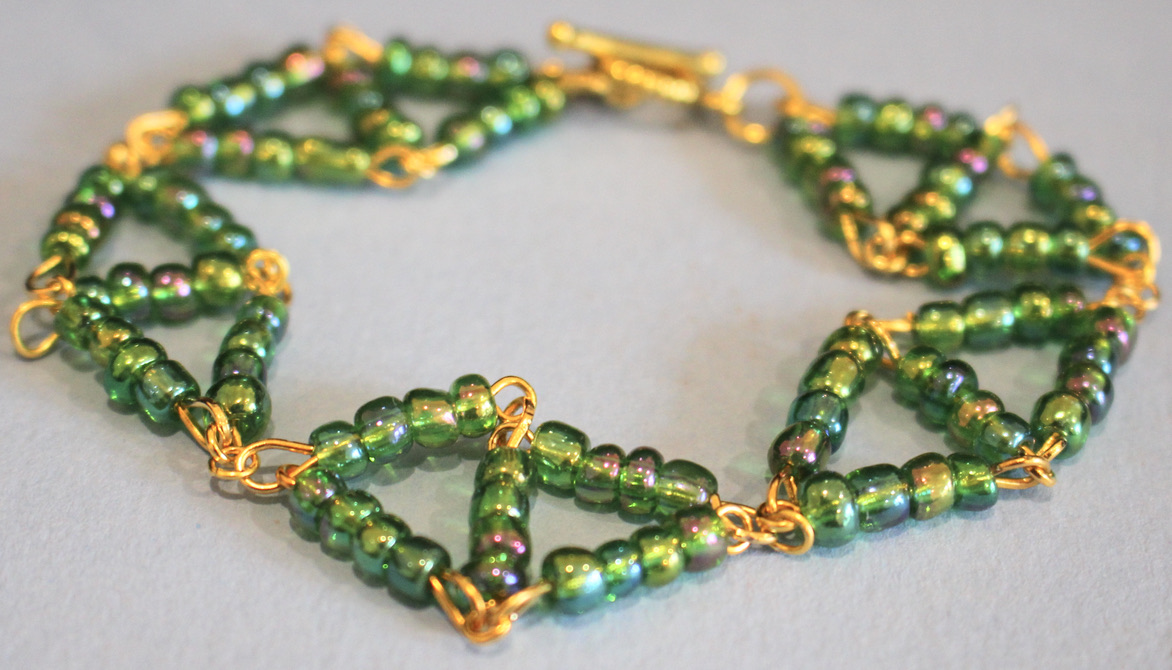
How to make a super cute bracelet with beaded diamond shapes!
This is a cute little bracelet that looks great! the beaded diamond bracelet design uses eye pins and beads to form a series of diamond shapes that link together to create a bracelet. This diamond shaped bracelet is eye-catching and fun to put together, perfect for constructing on a quiet afternoon at home.
You’ll need these tools and materials to make your beaded diamond bracelet:
1: Pliers. I used my round nose and flat nose pliers.
2: A bunch of eye pins. I ended up using about 25 pins. You may need more or less depending on your wrist size.

3: Some small jump rings. I used four, you may need more or less depending on the size of the bracelet.

4: Two larger jump rings.

5: A toggle clasp.

6: Beads of your choice. I used these green glass e-beads.

Follow these steps to make your beaded diamond bracelet:
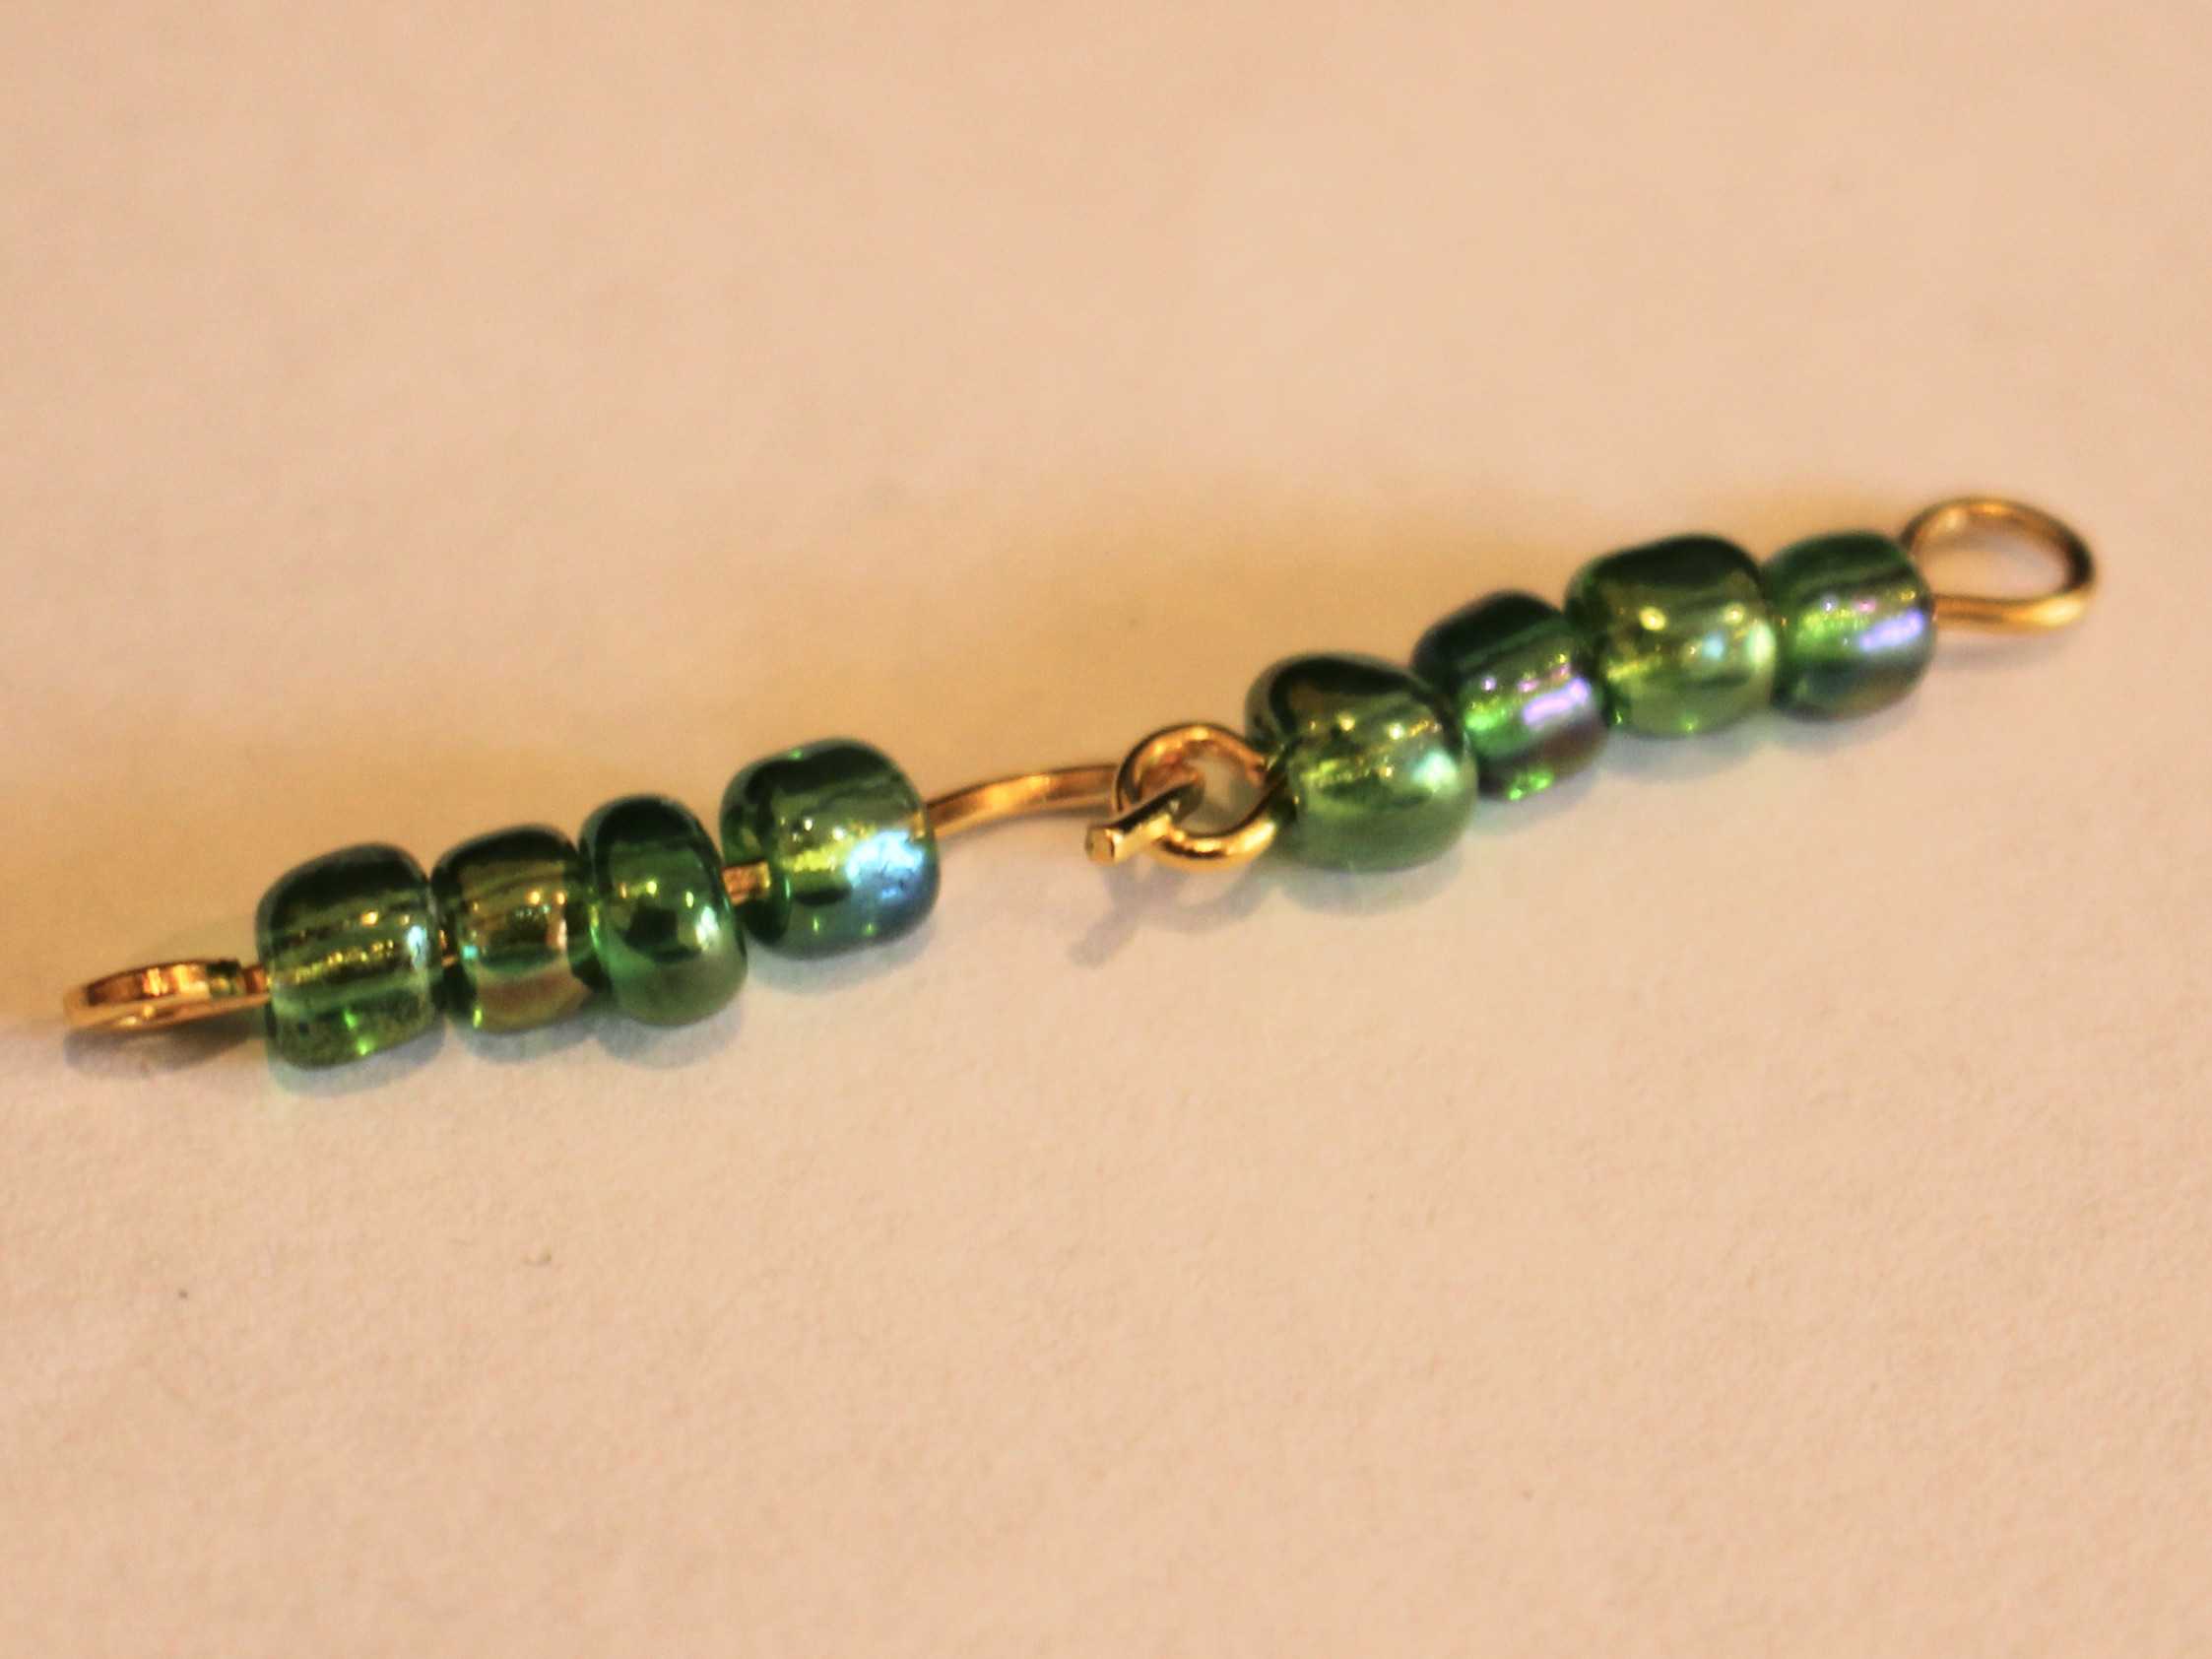
1: Add beads to two of the eye pins.
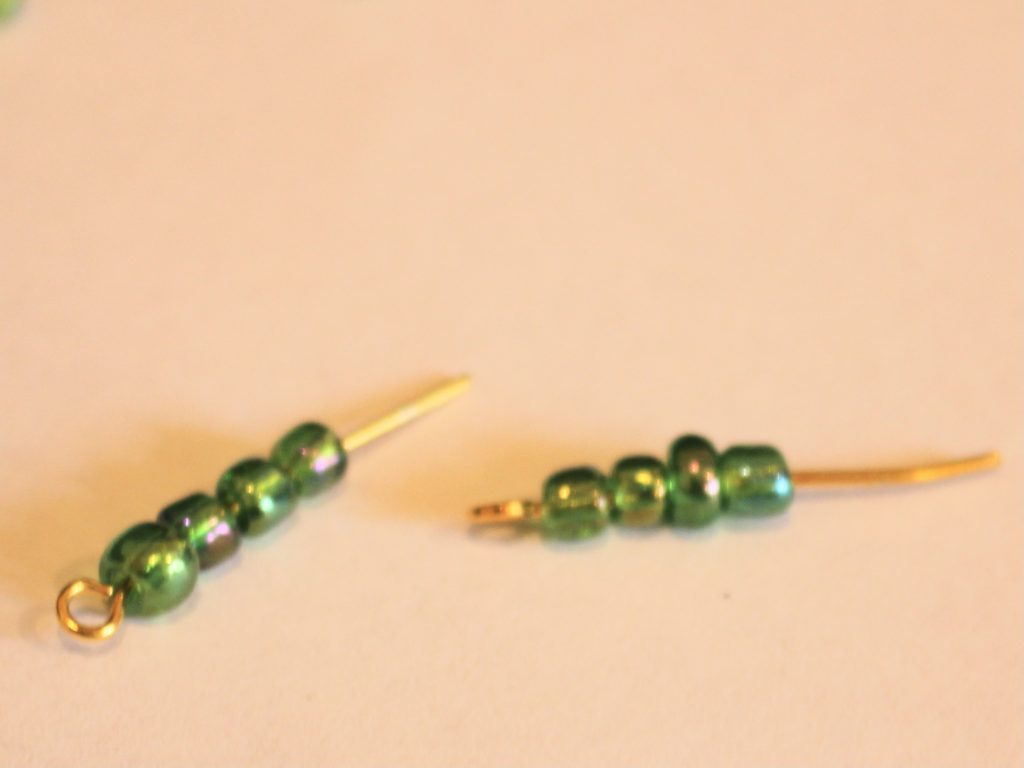
2: Leave about 1cm without beads.
3: Bend the pins to form an angle with the beaded section.

4: Loop the end of the pins around the round nose pliers to create a loop that secures the beads onto the pins.


5: Link the two pins together.

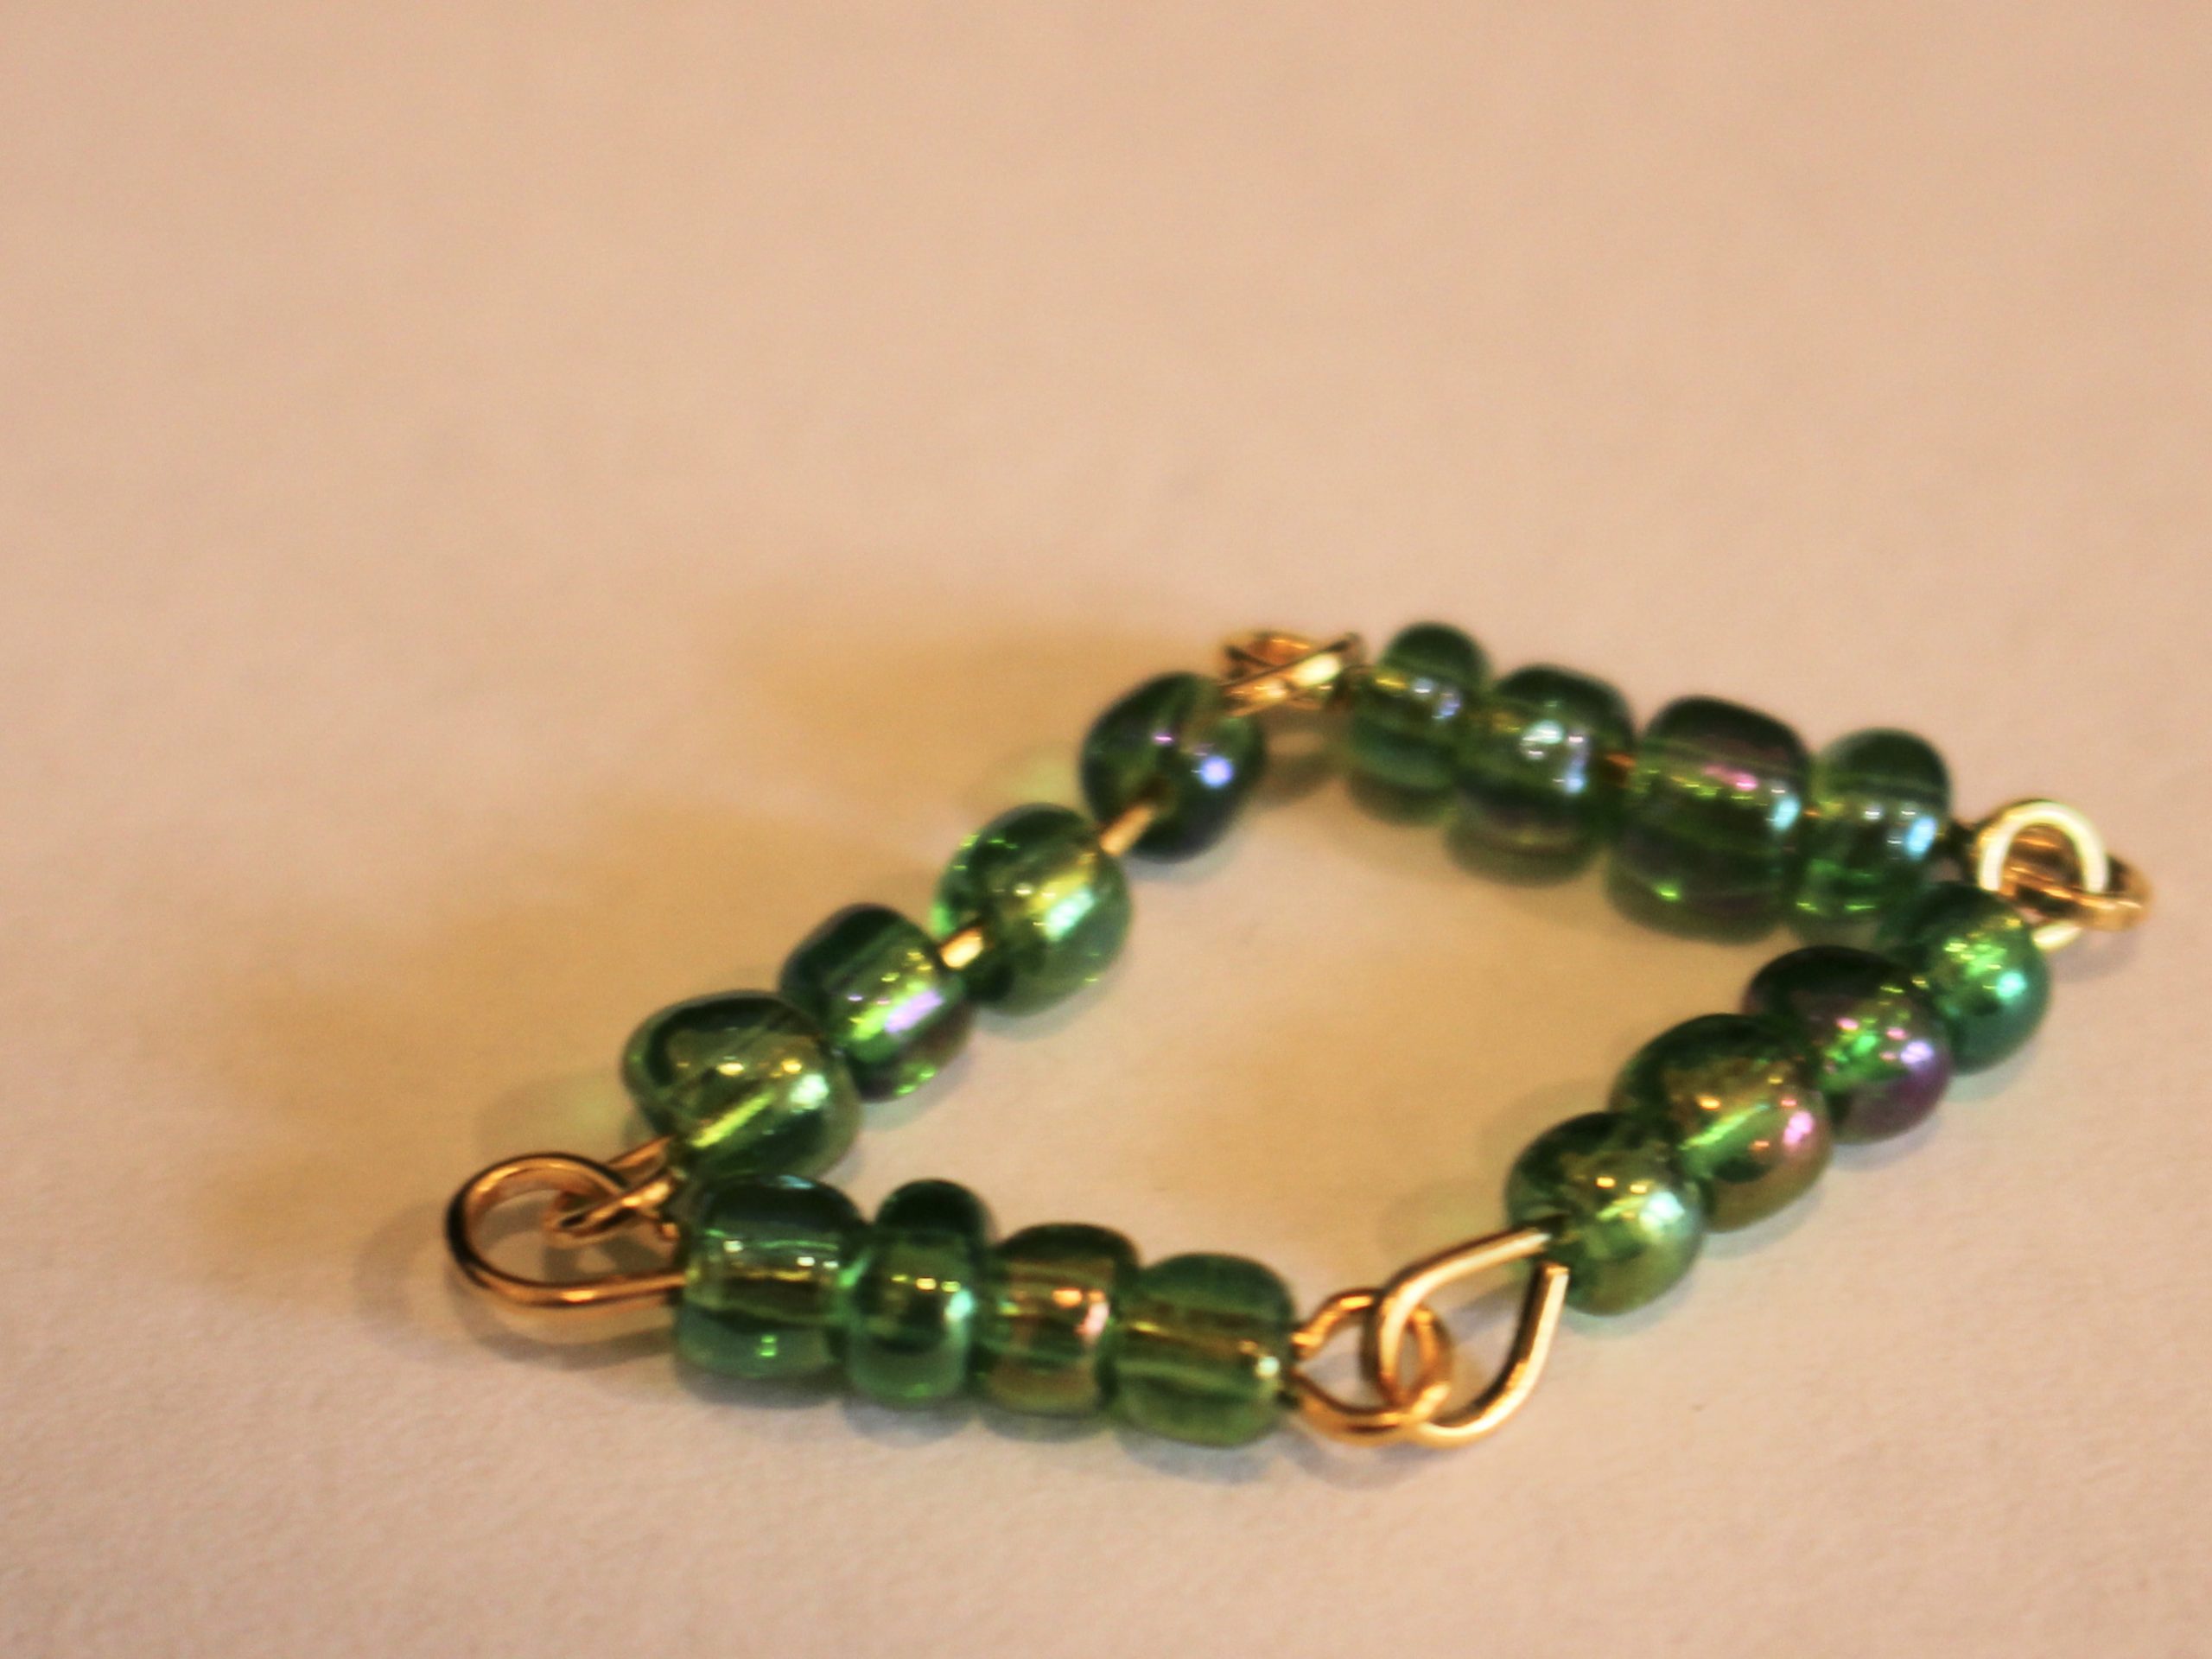
6: Repeat steps 1-5 three more times so that you have 5 beaded pins.
7: Link two more pins to the first two, so you have a square shape.


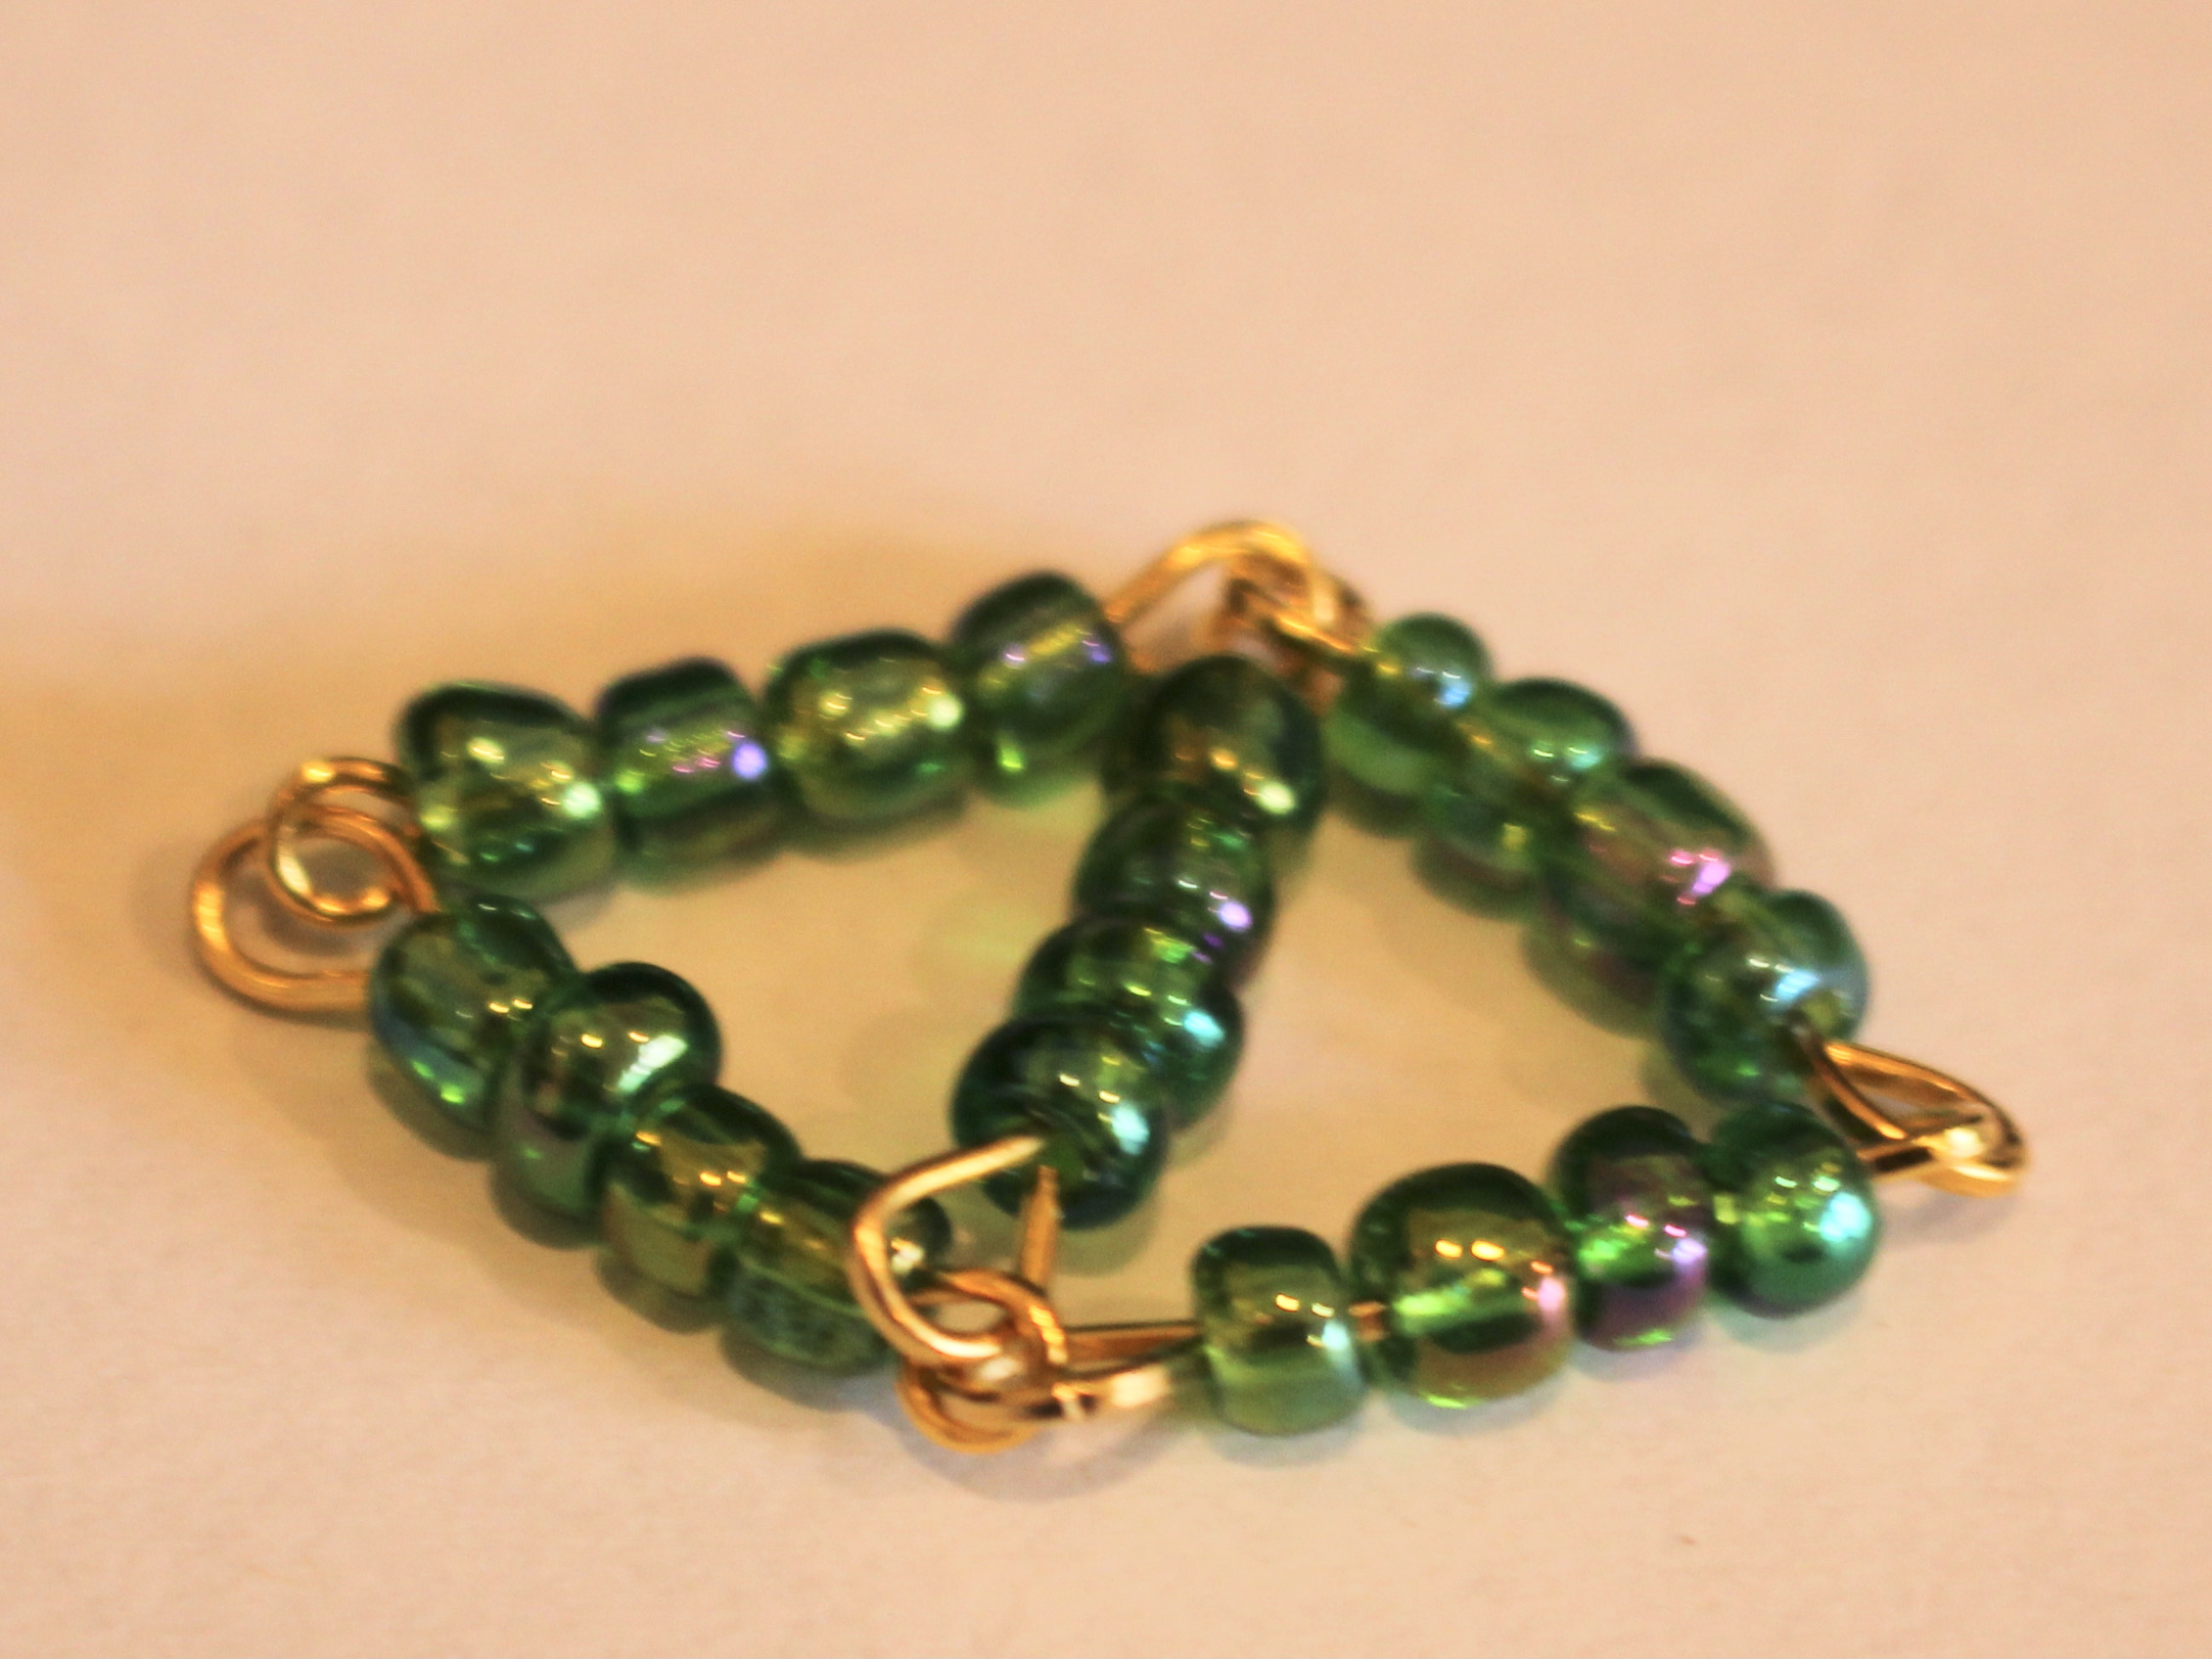
8: Add the last pin to the middle of the four linked pins so that you have a diamond shape that doesn’t shift around.


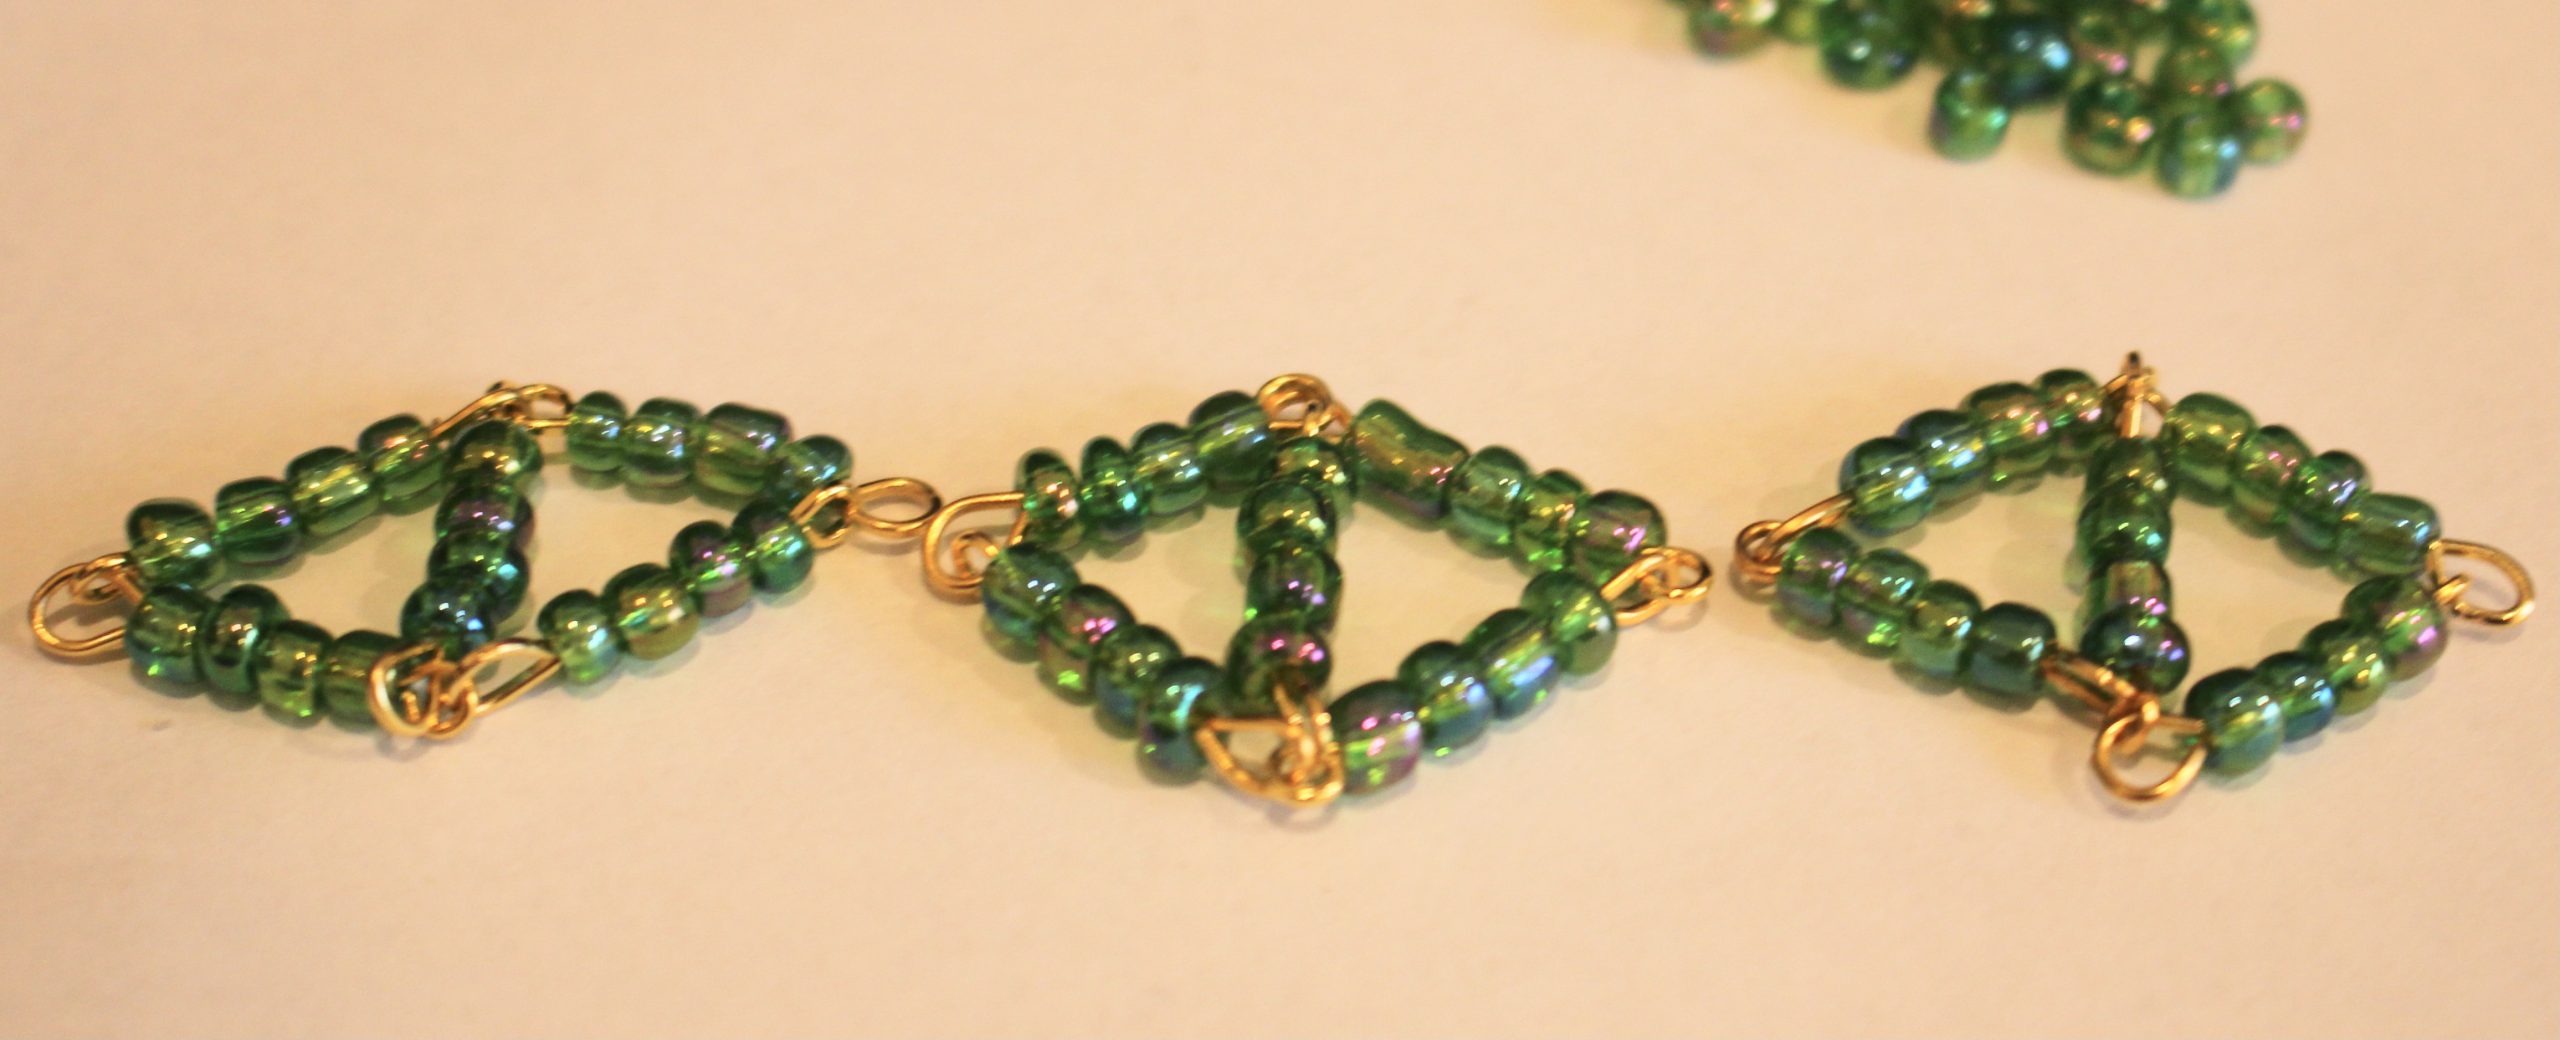
9: Repeat steps 1-8 until you have enough diamond shapes to fit around your wrist. I ended up making 5 diamonds.


10: Attach each of the diamond shapes together with the small jump rings to form a chain.


11: Attach the clasp components to each end of the chain using the larger jump rings, this will finish the design off!


Now your beaded diamond bracelet is finished and ready to wear!


Here is another design you can make using this beaded diamond shape