Here’s how to make round polymer clay beads using a bead maker!
I’m no expert on polymer clay, but I do like using it from time to time. I recently received this polymer clay bead maker as a gift and I thought it would be fun to try it out and take you along for the ride! So here’s how to make some cute round polymer clay beads using a special bead maker! Please note that this tutorial contains affiliate links.
You’ll need these tools and materials to make some polymer clay beads with me:
1: Some polymer clay.

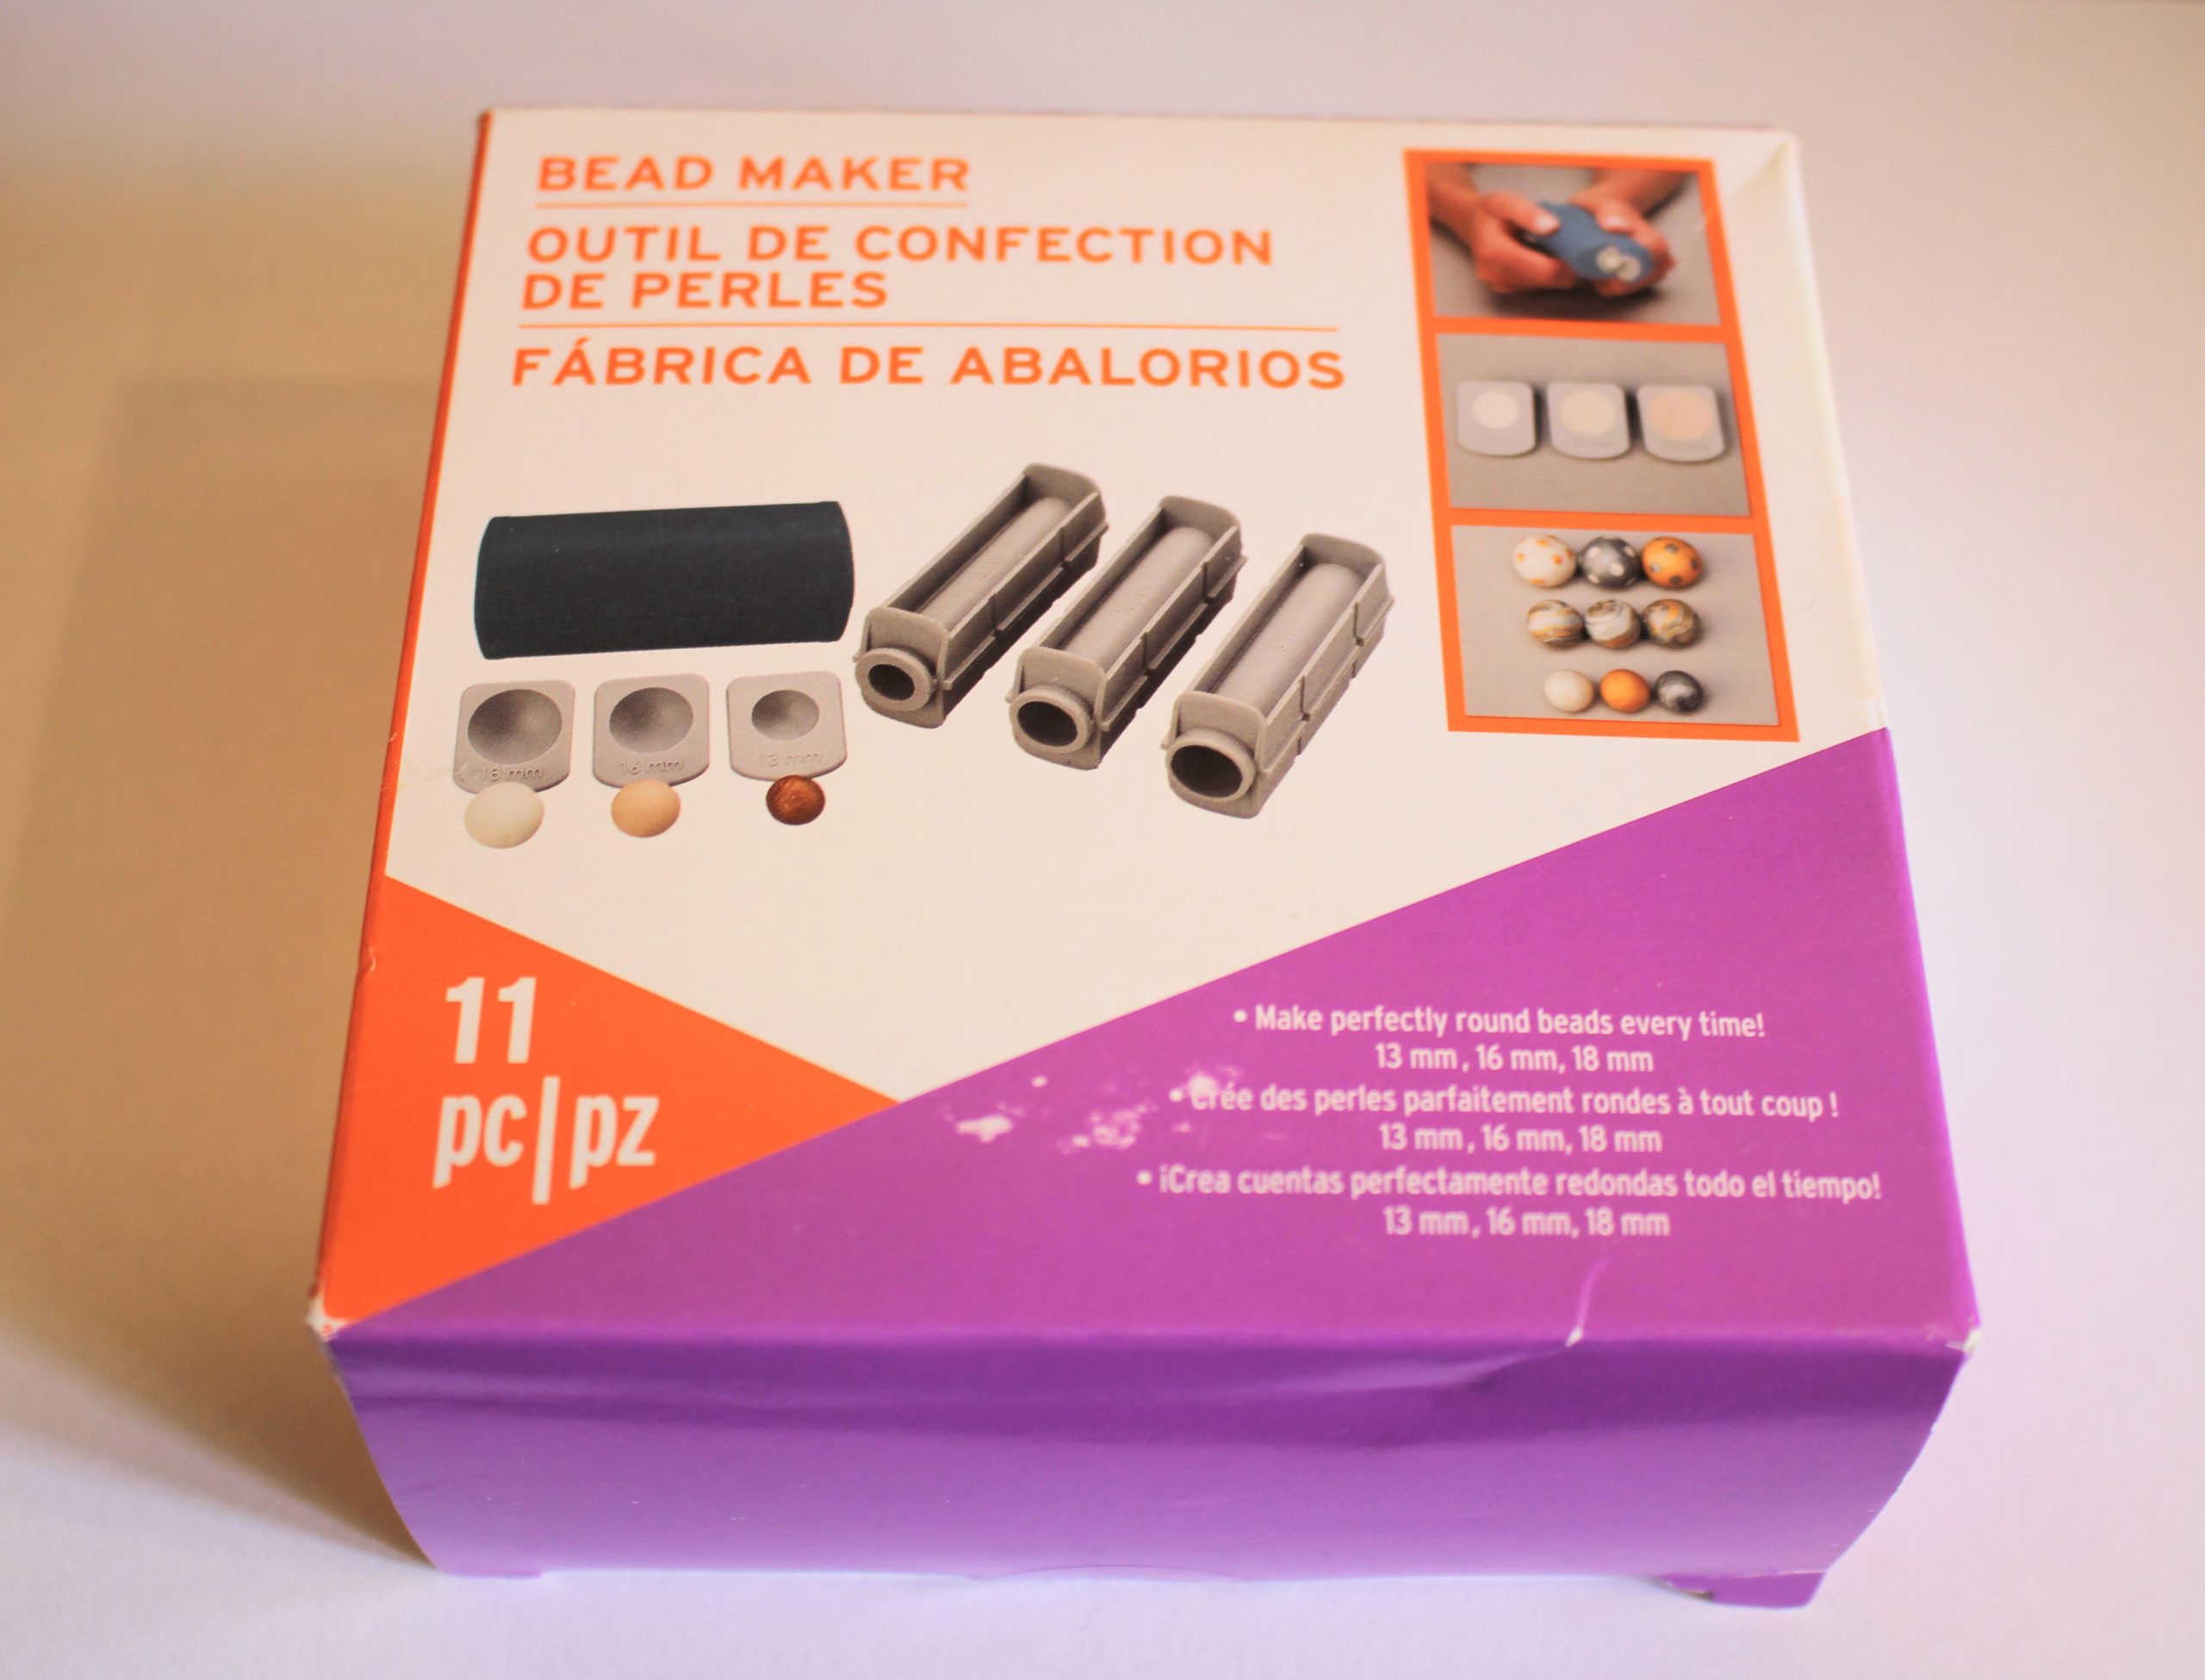
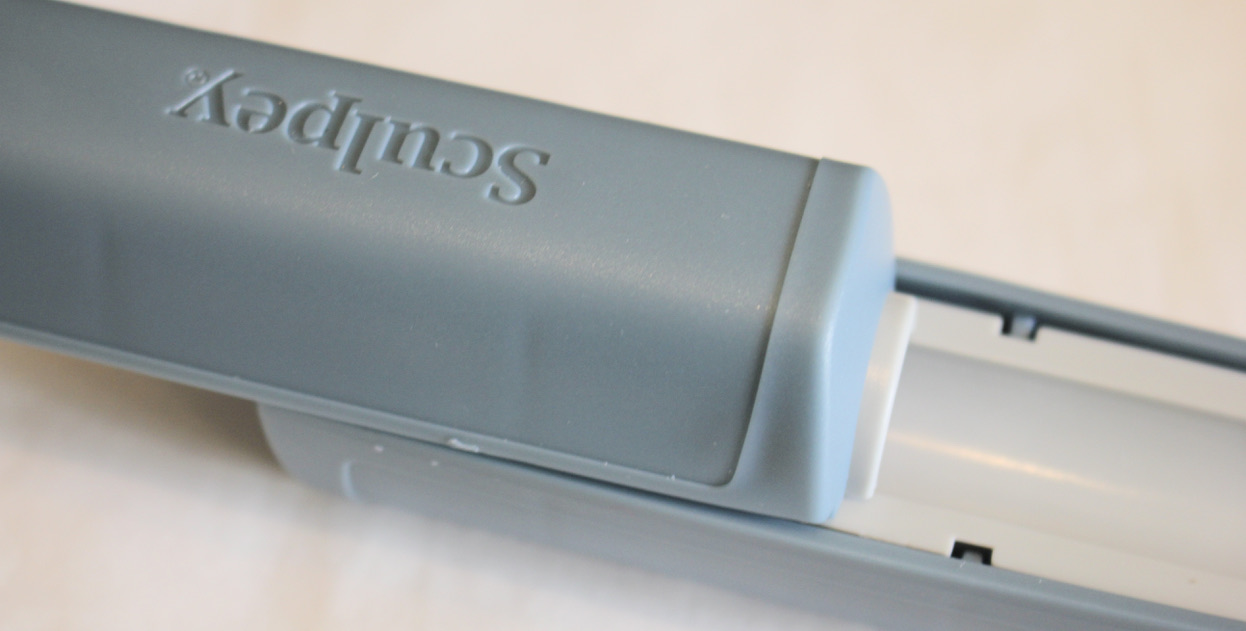
2: A polymer clay bead maker. I used this Sculpey Tools branded one.
3: A carving tool or something similar that has a long pin on it for making the bead hole.

4: Some baking paper and foil for working on and baking. It is best to use a baking surface just for polymer clay and not trays you prepare food in. I like to fashion a little tray out of foil and then recycle it when I’m done.


5: An oven.
Follow these steps to make your polymer clay beads:
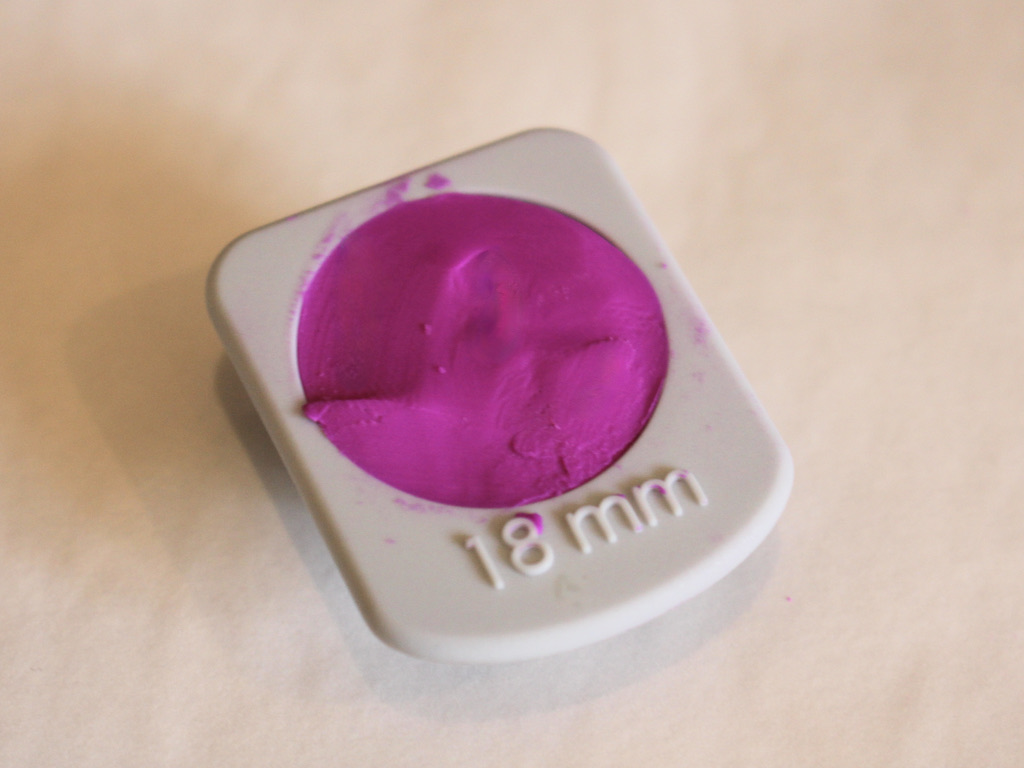
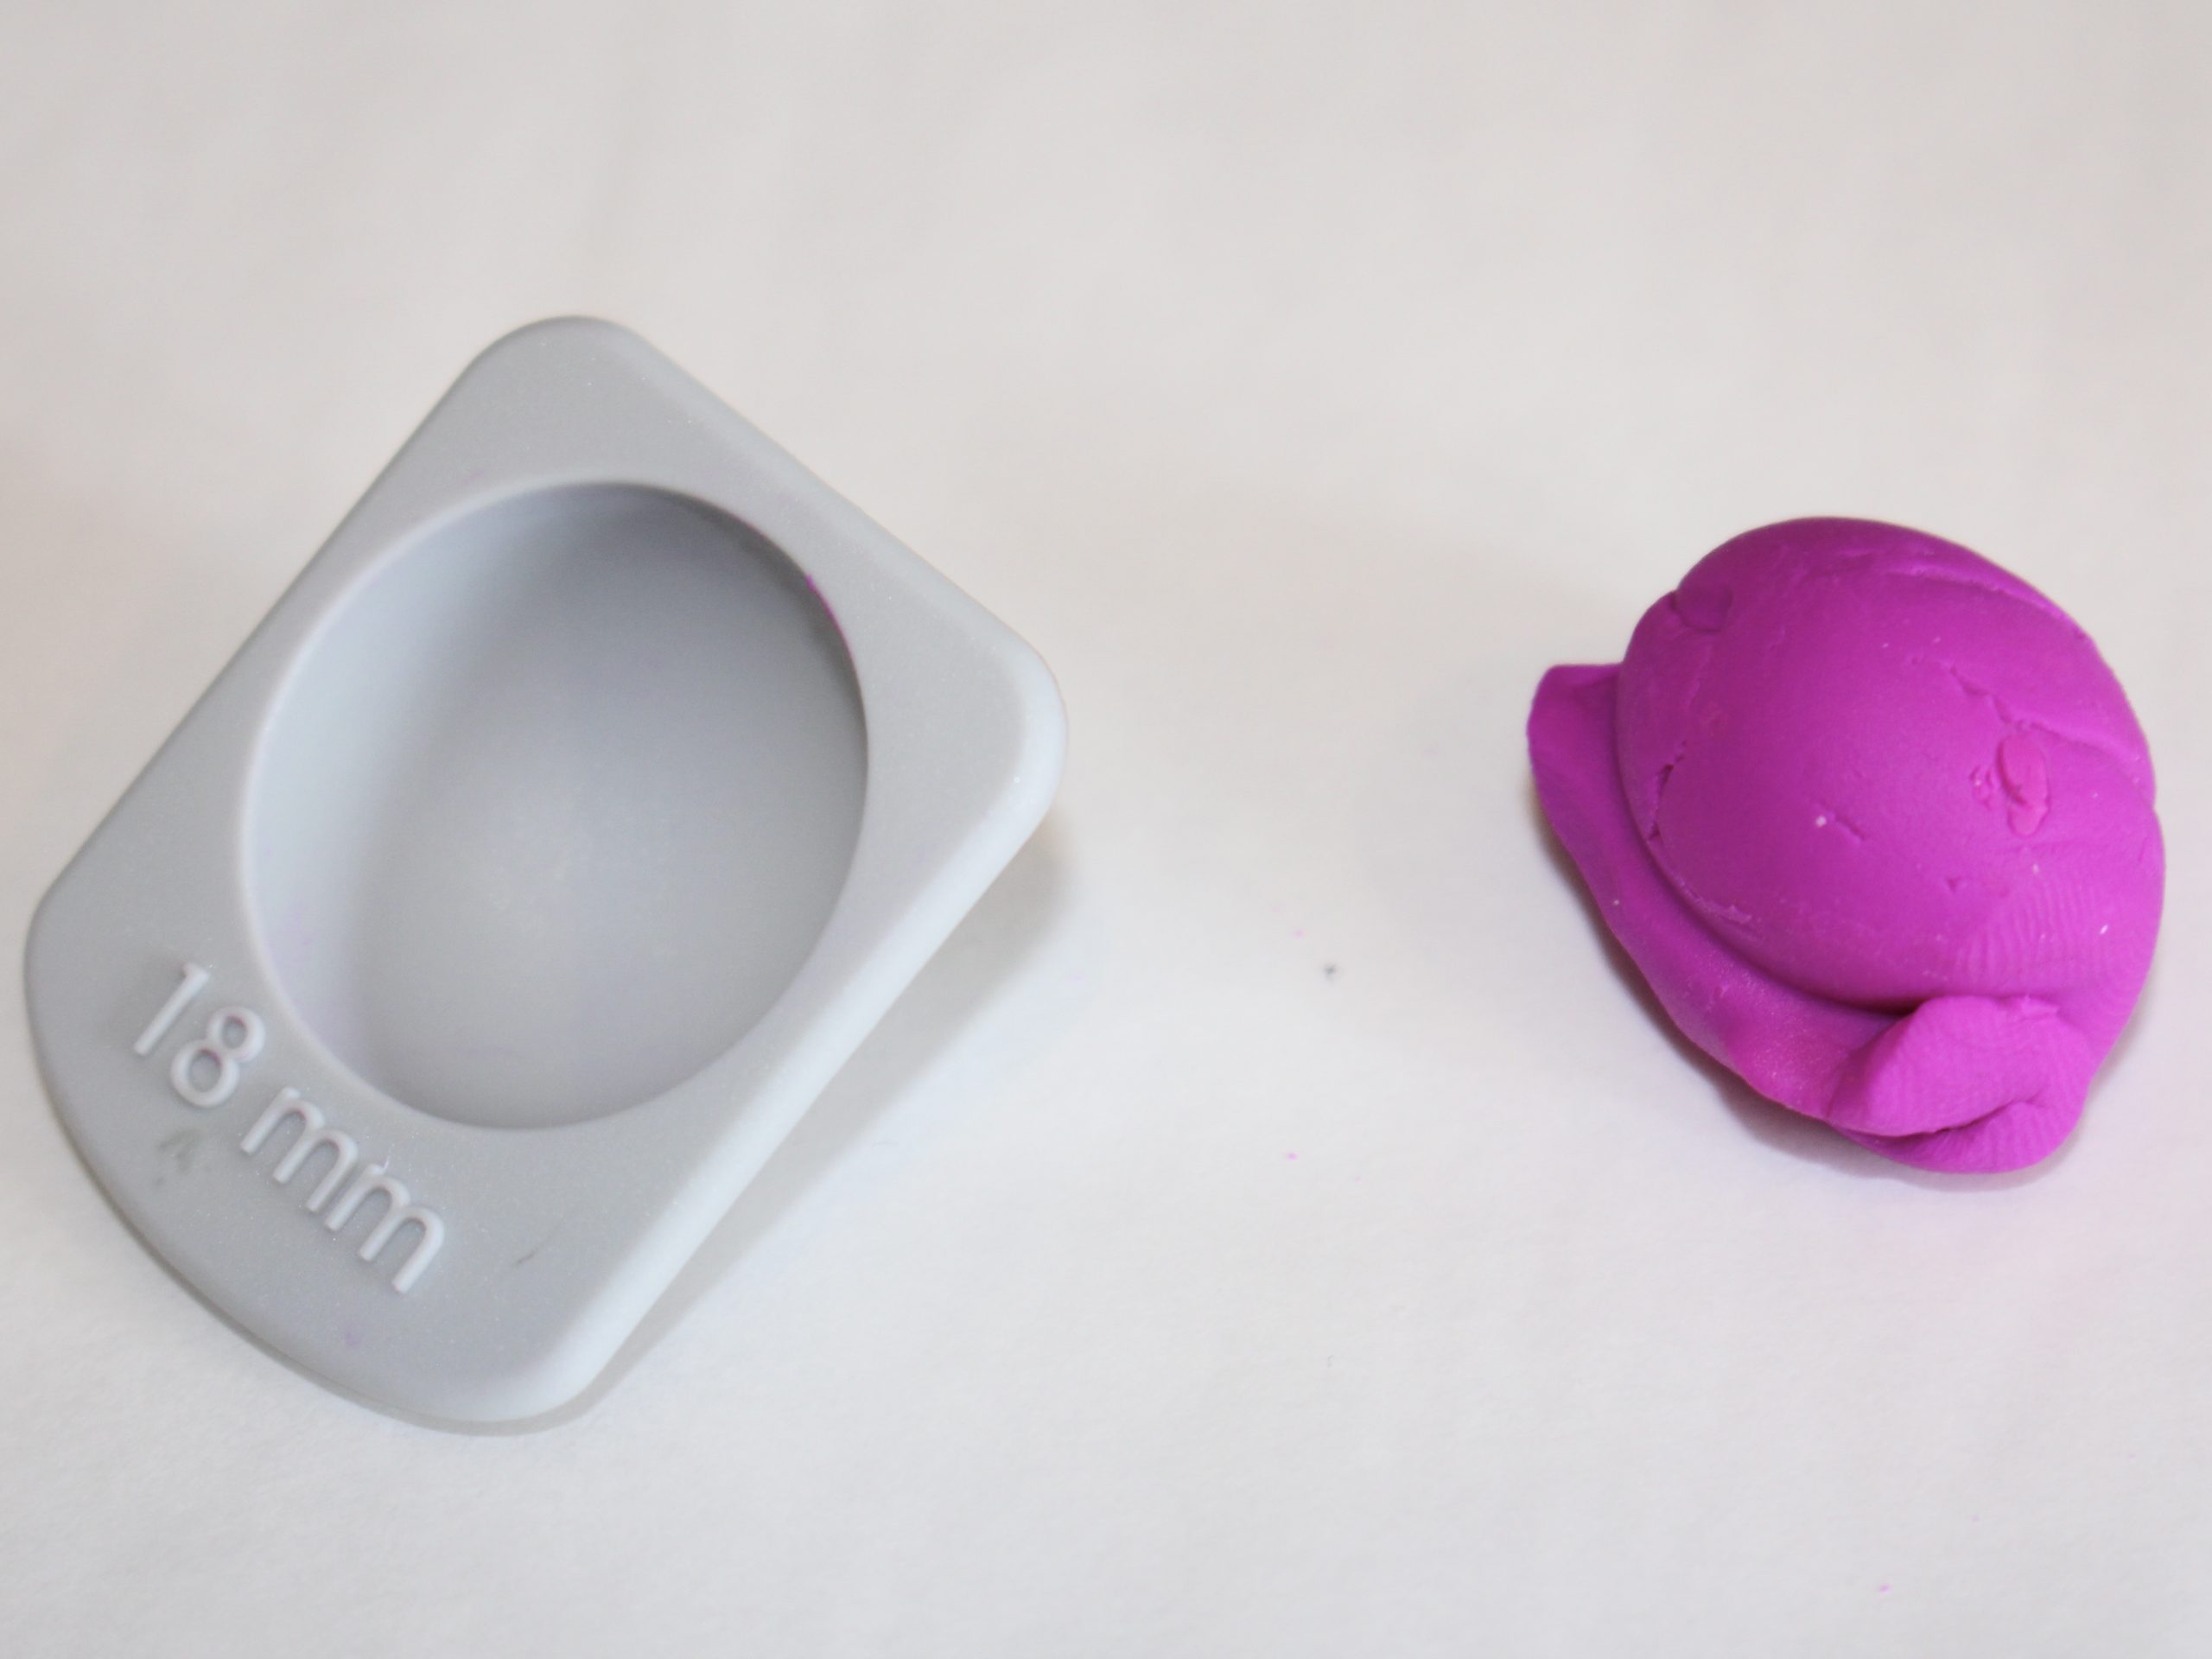
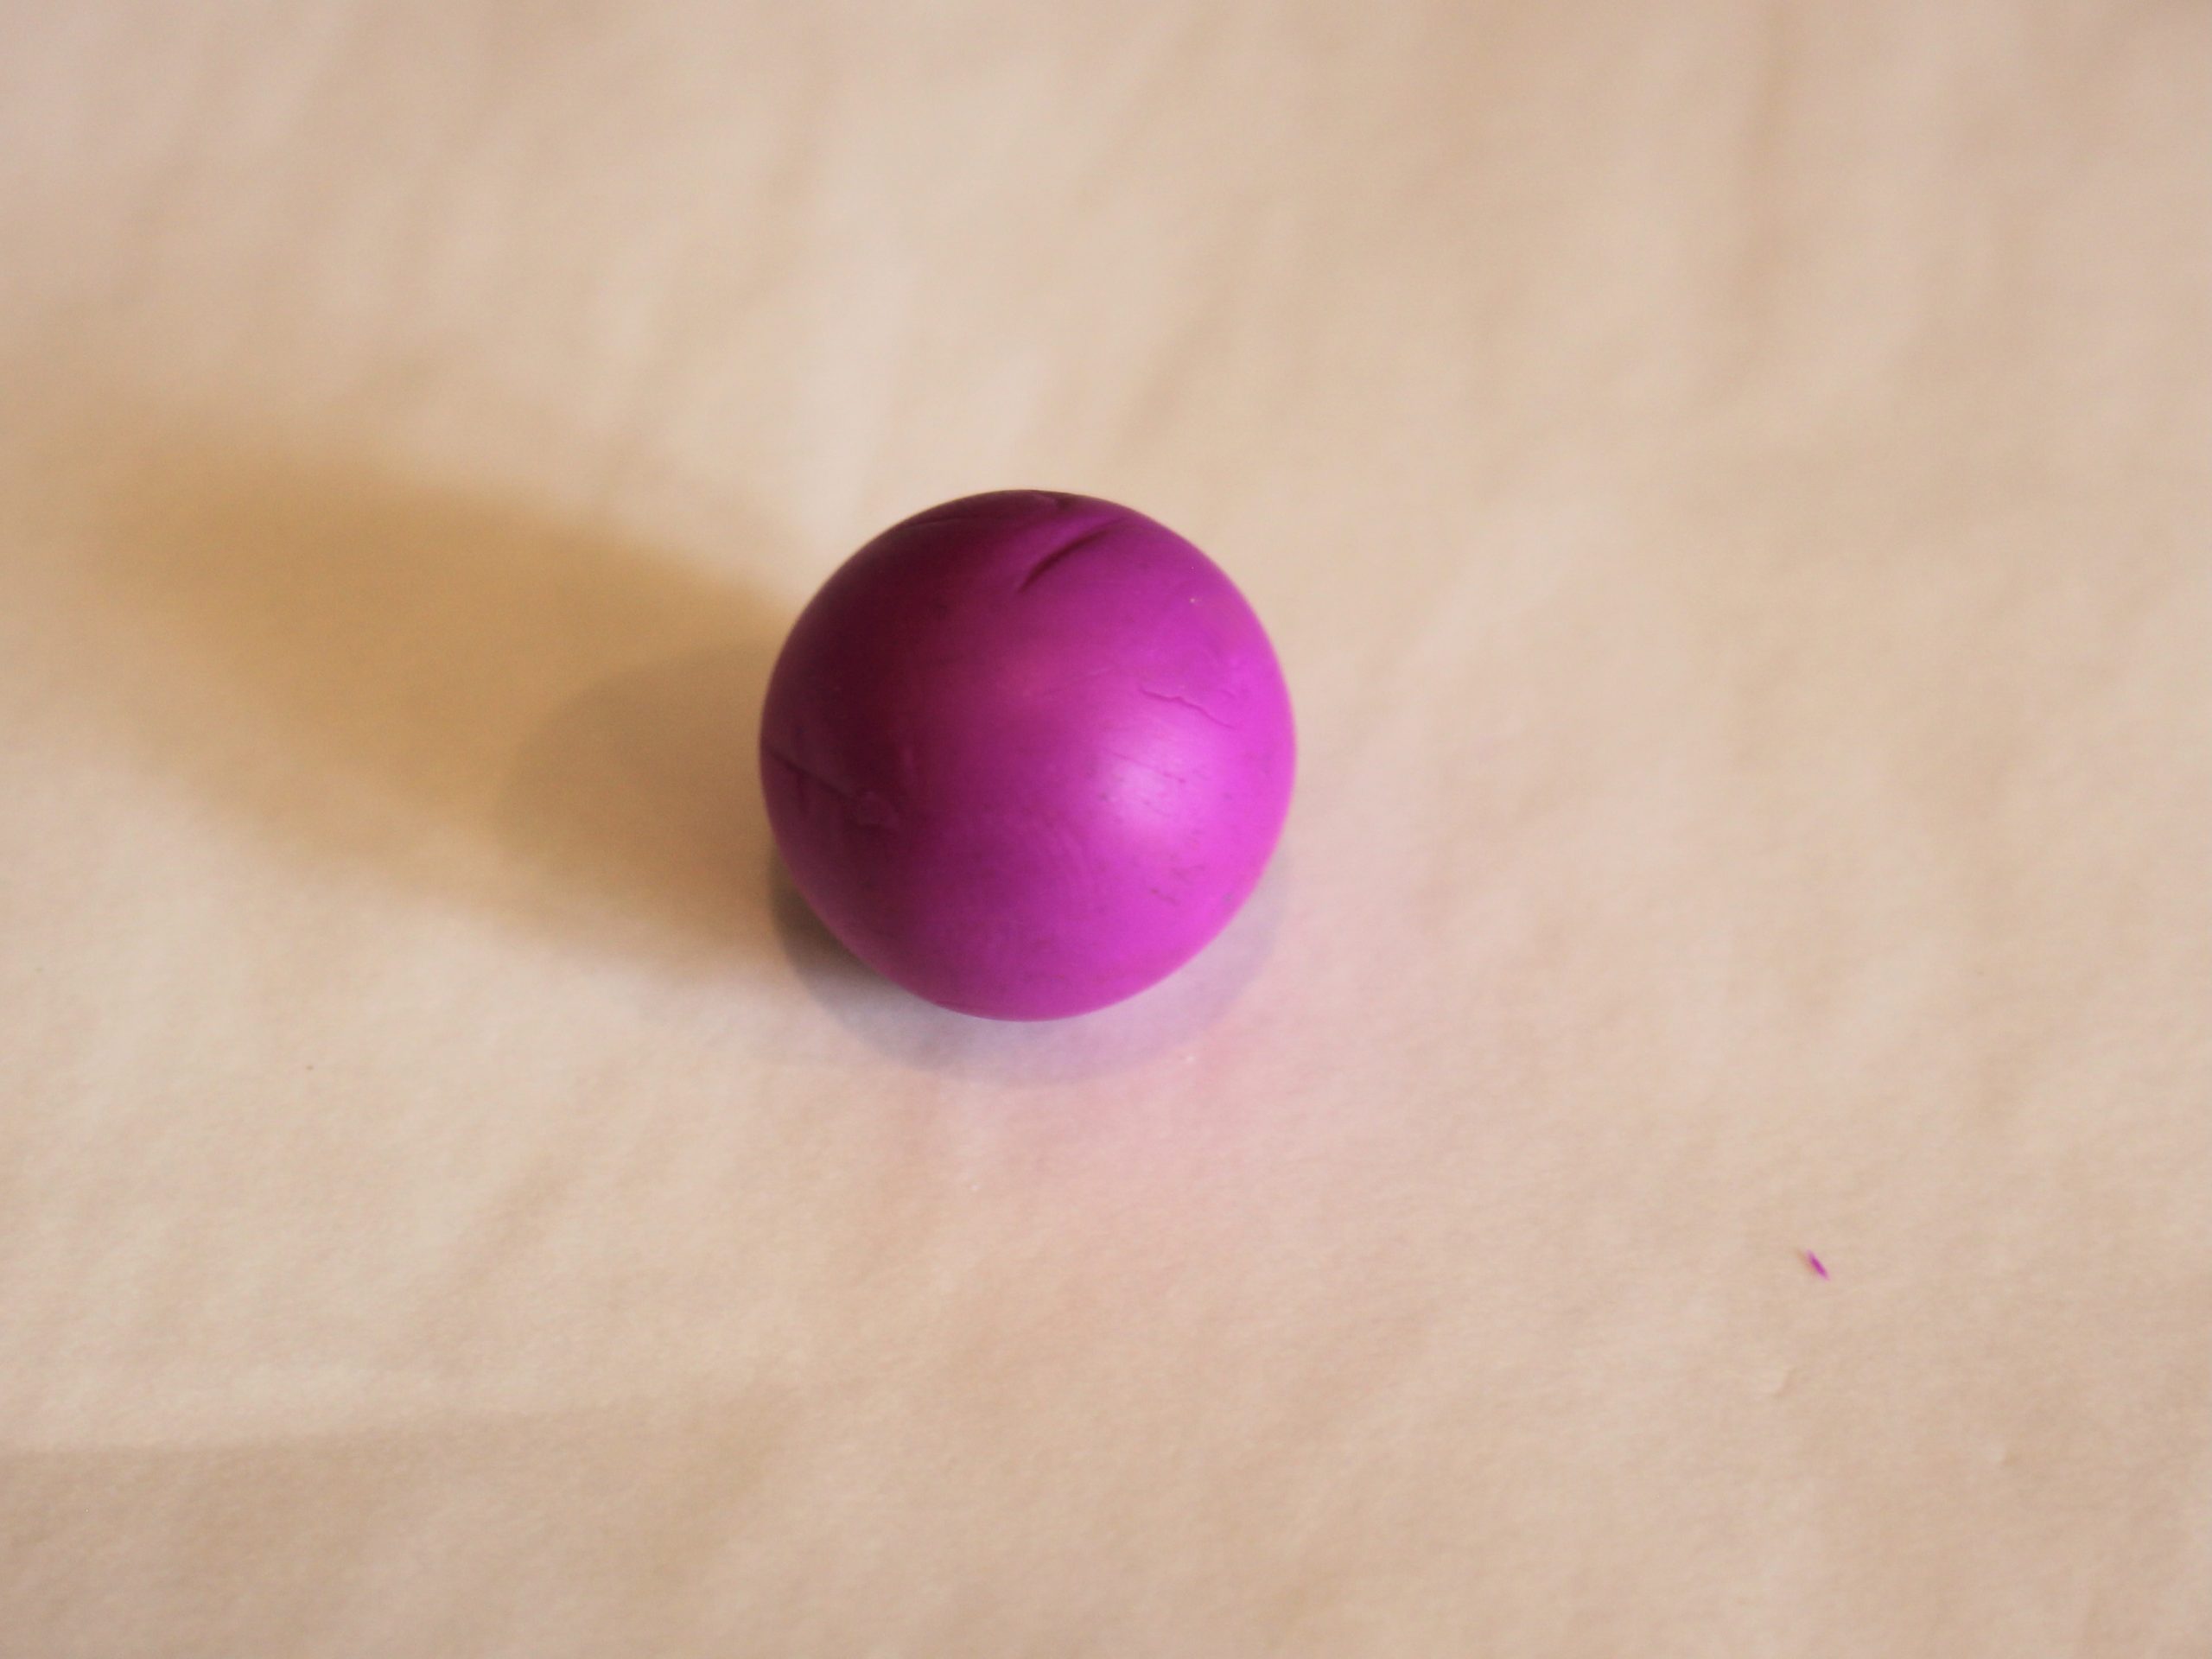
1: Choose the size of bead you want to make and fill the corresponding measuring cup with polymer clay. I chose 18mm.
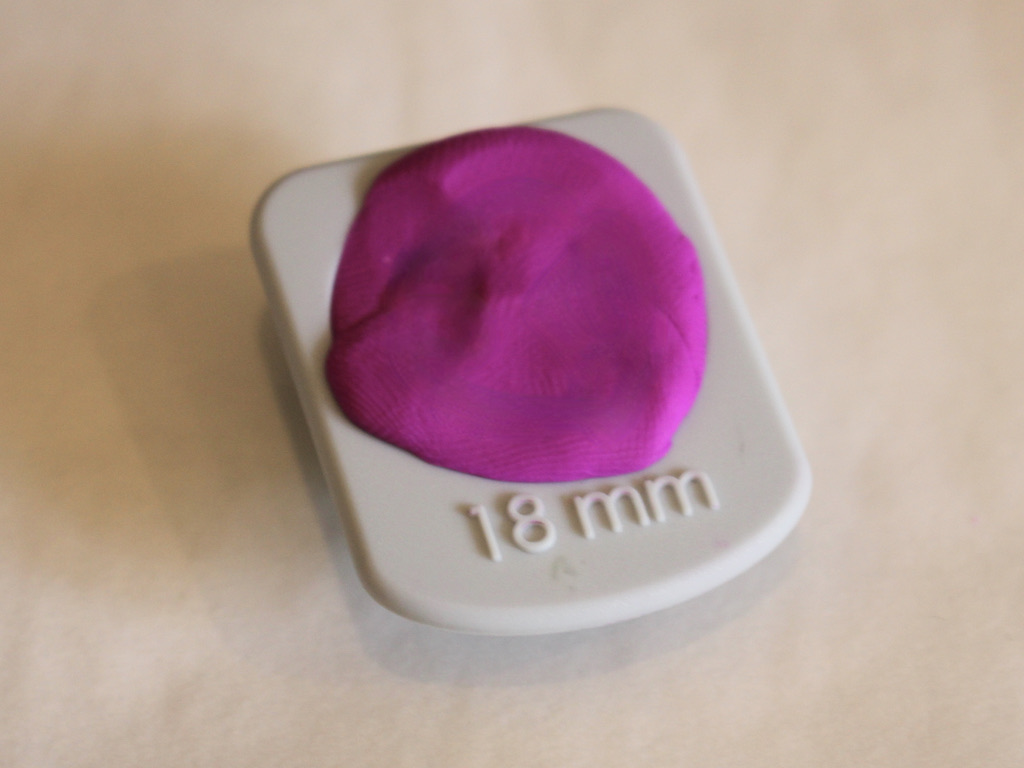
2: Scrape off excess clay so that the clay sits flush in the cup.
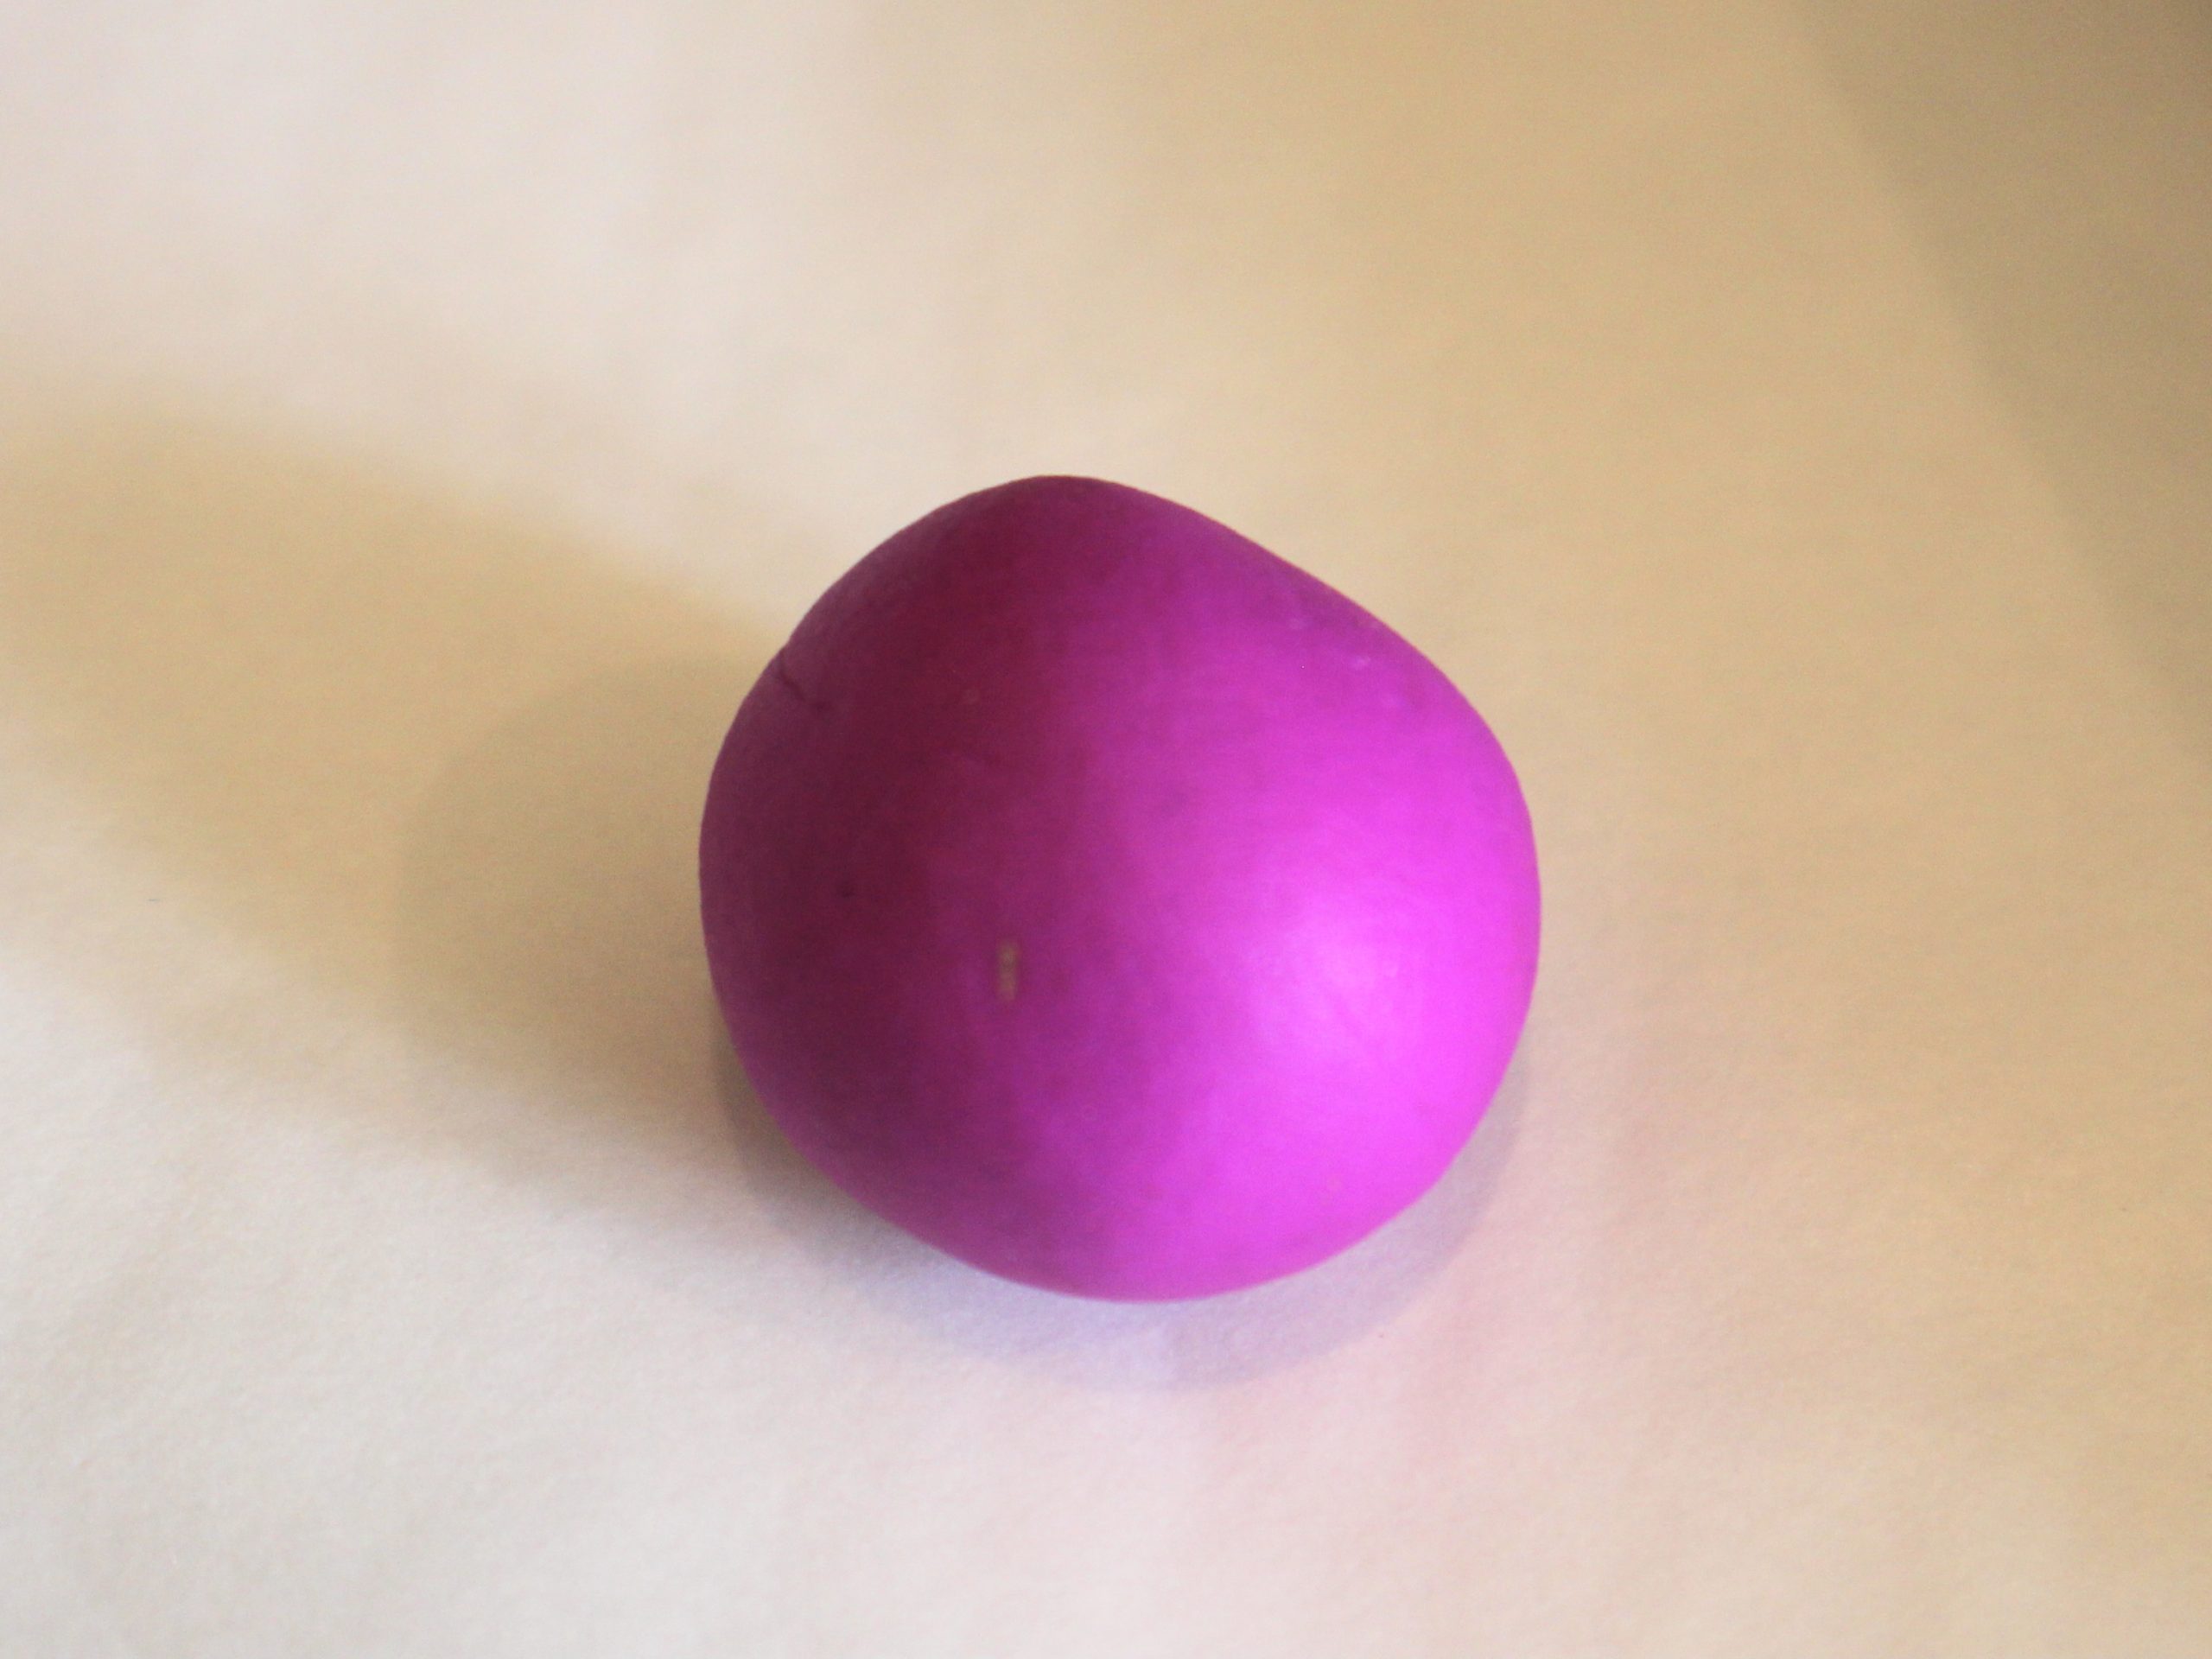
3: Take the clay out of the cup and then roll it into a ball shape.
4: Put the the bead roller inserts that are the right size for your bead into the roller base. I used 18mm rollers.
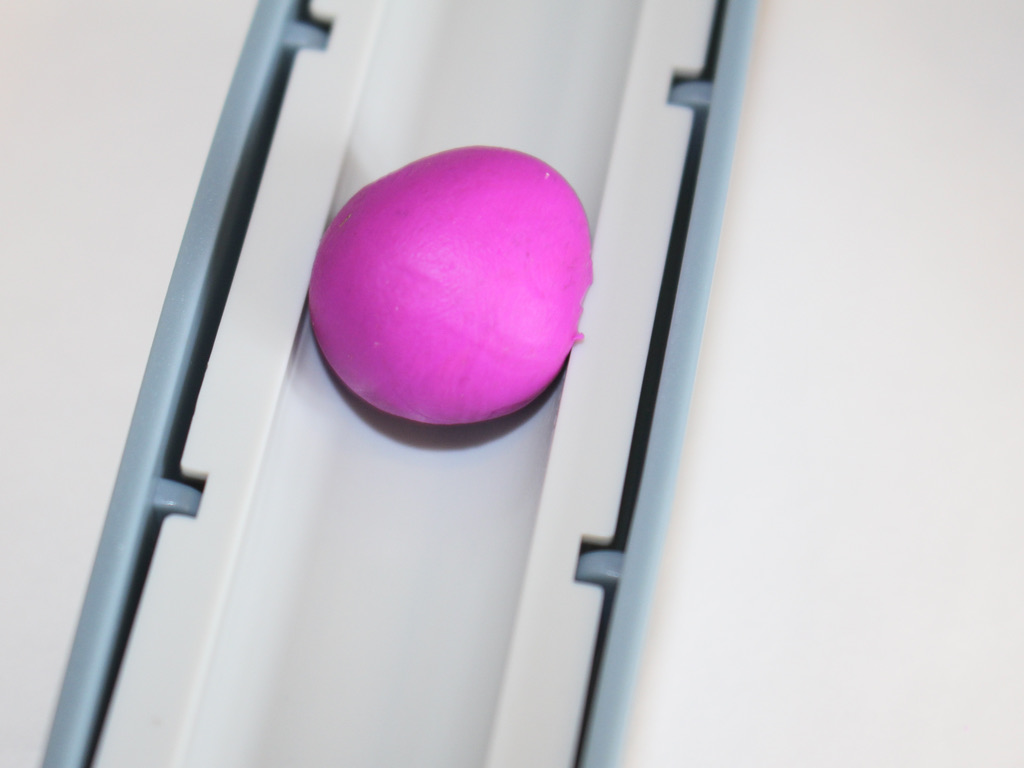
5: Put the polymer clay ball between the two rollers.
6: Push the rollers back and forth with the polymer clay inside to make the ball round.

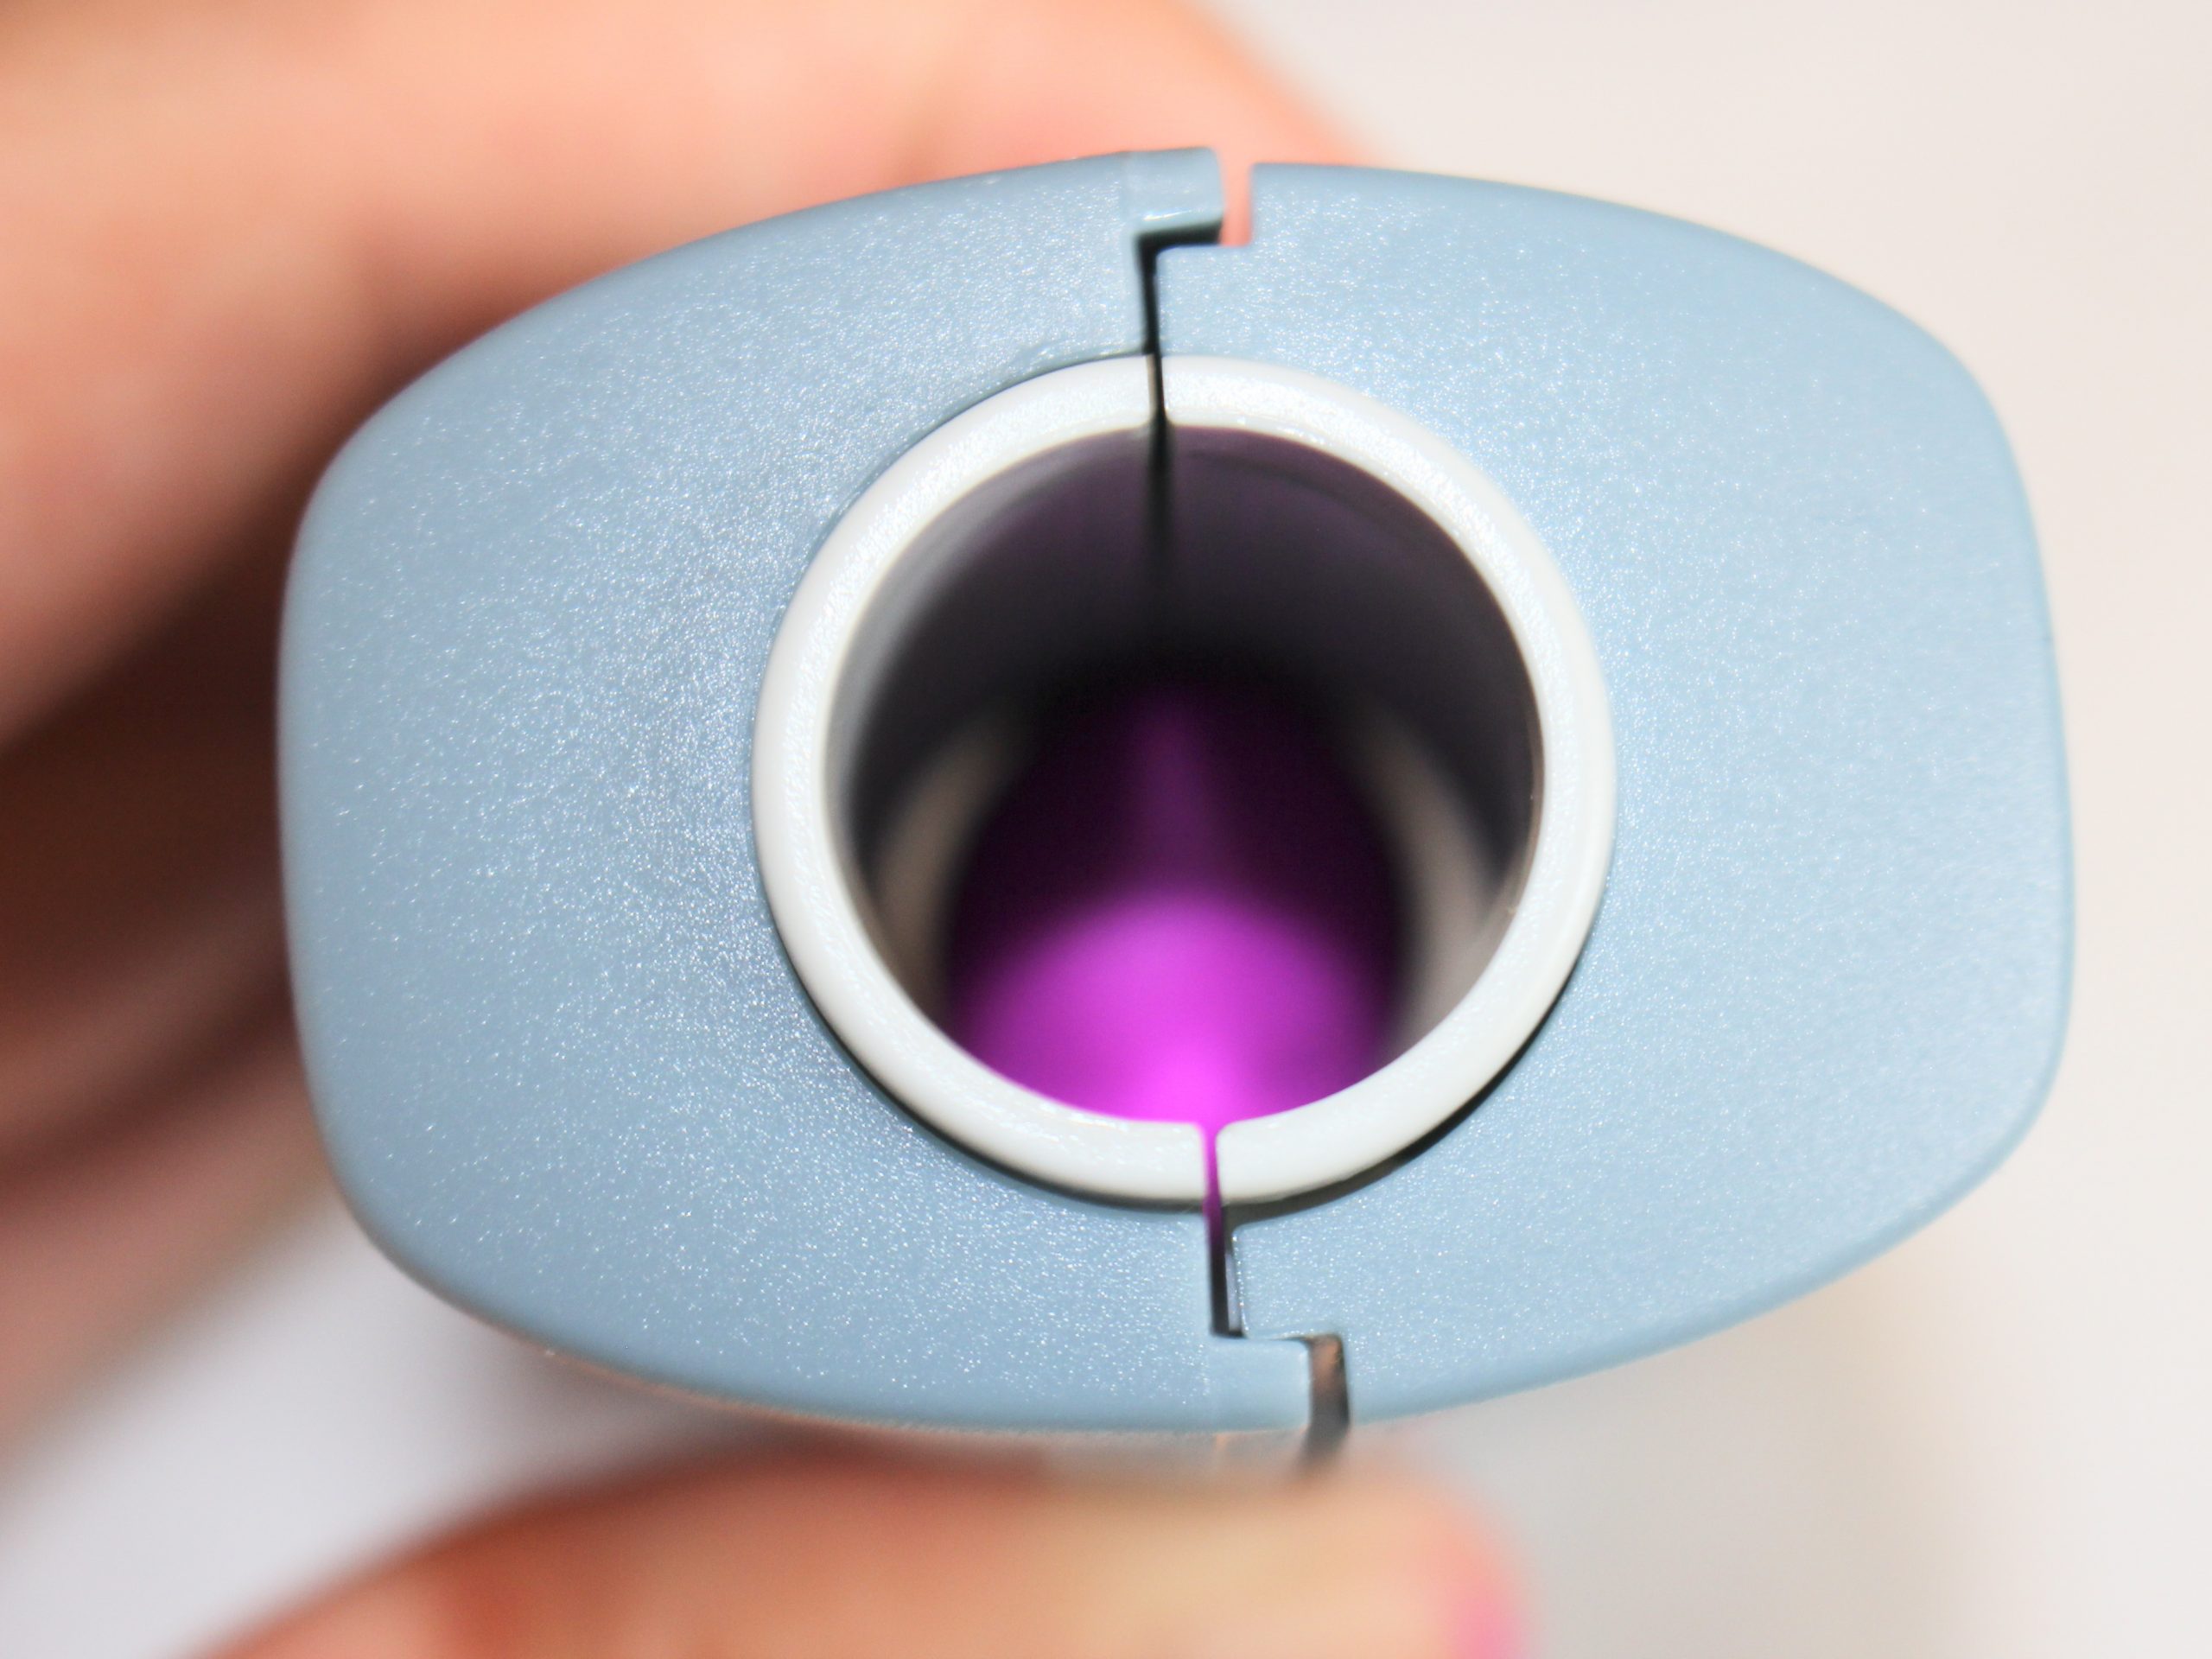
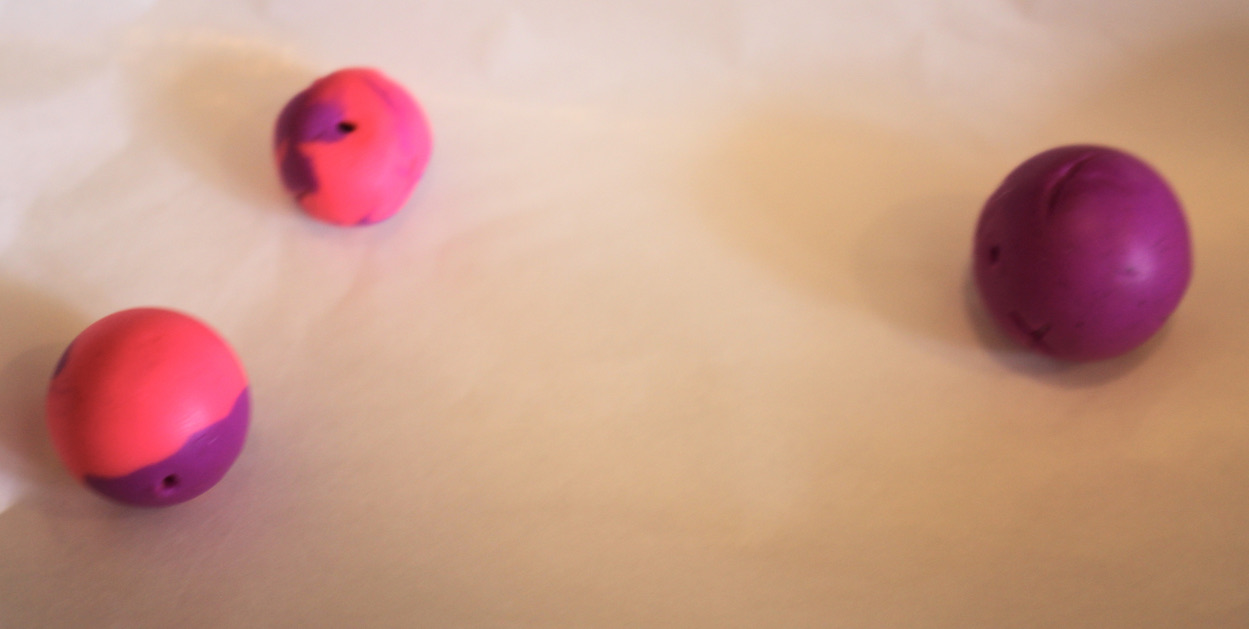
7: Take the ball out of the rollers and poke a hole through it using the poker tool.

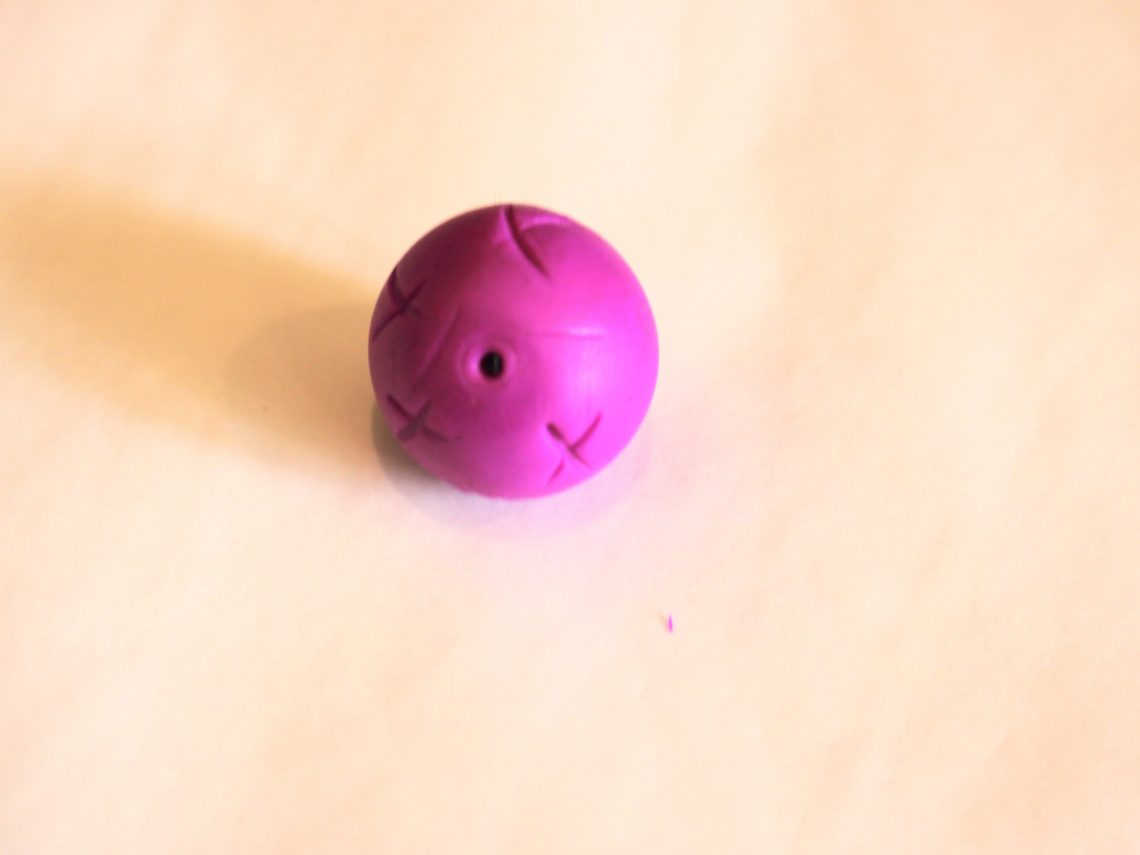
8: Now you can decorate your ball, you might want to roll it again gently to reshape it after making the hole. I used the other end of my poker tool to add some cross designs on my bead.


9: Bake the bead according to the instructions on the package of your chosen brand of polymer clay. I made a couple more beads before I baked them. Here they are before being baked.

Once your bead is baked it is ready to use in your jewellery designs! Stay tuned for a tutorial where I use my polymer clay beads in a design!
If you liked this tutorial, here are some other ways to make polymer clay pieces to include in your jewelry designs:
- Here’s how to make polymer clay earrings with a beaded tassel
- Here’s how to make polymer clay charms for long statement earrings
And here are some pieces that make use of polymer clay beads and charms:
- A bracelet made using polymer clay beads and beading thread
- Maybe you’ll make a funky beaded lanyard with polymer clay beads?
- Make a cute charm bracelet with your handmade polymer clay beads.
- Use some cube shaped polymer clay beads to make a fun stacking ring
- Add some polymer clay beads to a funky beaded phone strap
- Or use polymer clay beads to make a unique anklet
- Maybe you’ll add polymer clay beads to an amazing mixed bead statement necklace.
If you want to make beads in other materials here are some tutorials:
DIY Jewelry Hub
Welcome to DIY Jewelry Hub. If you’ve ever wanted to learn how to make your own jewelry this is the place to start! Jewelry is a great way to show off your individuality and style. You’ll be surprised at how easy it is to create your own unique pieces! DIY Jewelry Hub will equip you with all the knowledge and inspiration you need to make your own jewelry.


You May Also Like

Want to make something sweet for Mom? How about a handmade heart?!
Give Your Jewelry a Unique Edge by Making Your Own Beads!