-
Here’s how to make a cute two-tone beaded necklace!
This tutorial is a simple beaded necklace with a twist, one half is finished with pearl beads and the other features small glittering glass beads. You can use whatever beads you like to make this lovely design. How will you design yours?
Please note that this tutorial contains affiliate links for which we may receive a commission.
You’ll need the following tools and materials to make your necklace:
1: Tigertail wire.

You can get some here:
2: Pliers. I used my cutting pliers and flat nose pliers.


You can get pliers here:
3: Beads. I used chunky pearl beads and some small green bugle beads.

You can get similar beads here:

You can get baroque pearls here:
4: Sterling silver jump rings.

You can get some here:
5: Sterling silver crimp beads.

You can get some here:
6: Sterling silver clasp. I used a bolt-ring clasp.

You can get a bolt ring clasp here:
7: Optional: A pendant that will fit over the beads. I used this pink stone pendant.

You can get something similar here:
Here are the steps to follow to make your own two-tone beaded necklace:
1: Cut a length of tigertail wire to your desired necklace length (remember to add a few extra cm so you have excess for securing the ends.

2: Add a crimp bead and jump ring to the end of the wire. Make sure the jump ring is closed before you do this.

3: Loop the end of the wire around the jump ring and back through the crimp bead.

4: Squash the crimp bead using the flat nose pliers.


5: Begin adding beads.

6: Continue beading until you have reached half of your desired necklace length.

7: Switch to the other beads and continue beading until you have half of each type of bead.


8: Add the second crimp bead.

9: Add the second closed jump ring.

10: Loop the end of the wire around the jump ring and back through the crimp and end bead.

11: Pull the wire tight and squash the crimp to secure it in place.

12: Trim the excess wire using the cutting pliers.


13: Add the clasp to the end of the necklace and close the ring using your pliers to secure it in place.


Now your necklace is done, if you like, you can add a pendant for added interest, or leave it plain to shine on its own.
Here’s the finished necklace.


And here’s the finished necklace with the pendant in place. How will you style yours?


If you like this design, here’s some similar designs you can make:
Turn two bracelets into a two-tone necklace
Make a necklace that is half chain half beads
-
How to make a clip on beaded bag charm! This is such a fun project
Bag charms are everywhere at the moment and if you prefer something a little more personal to adorn your fave handbag, this tutorial is for you. This bag charm features a fun smattering of beads and a resin charm to add some personal pizzaz to your outfit. Super simple but super high impact!
Please note that this tutorial contains affiliate links for which we may receive a commission.
You’ll need the following tools and materials to make this beaded bag charm:
1: Some wire. I used this copper wire.

You can get some copper wire here:
2: A large jump rings. I used a copper one.
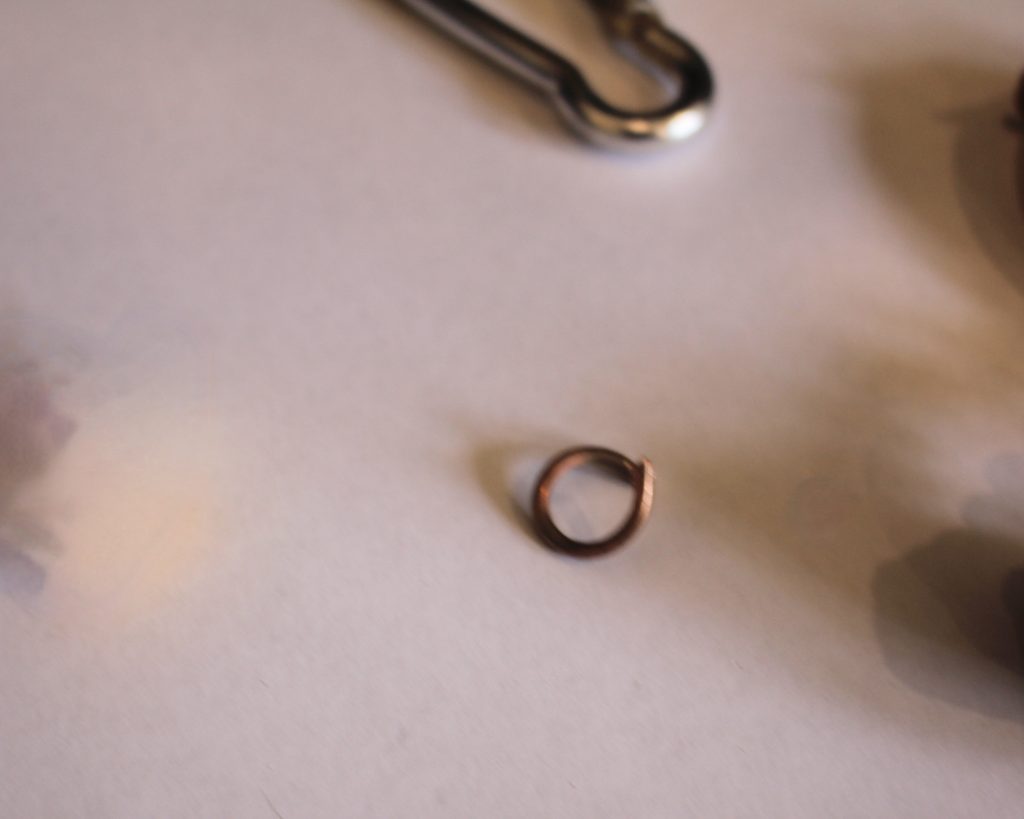
You can get copper-tone jump rings here:
3: A carabiner. I used one recycled from a broken cord.

If you don’t already have one, you can get one here:
4: A charm. I used this pink resin glitter charm with a jump ring attached to the top.

You can get pink resin charms here:
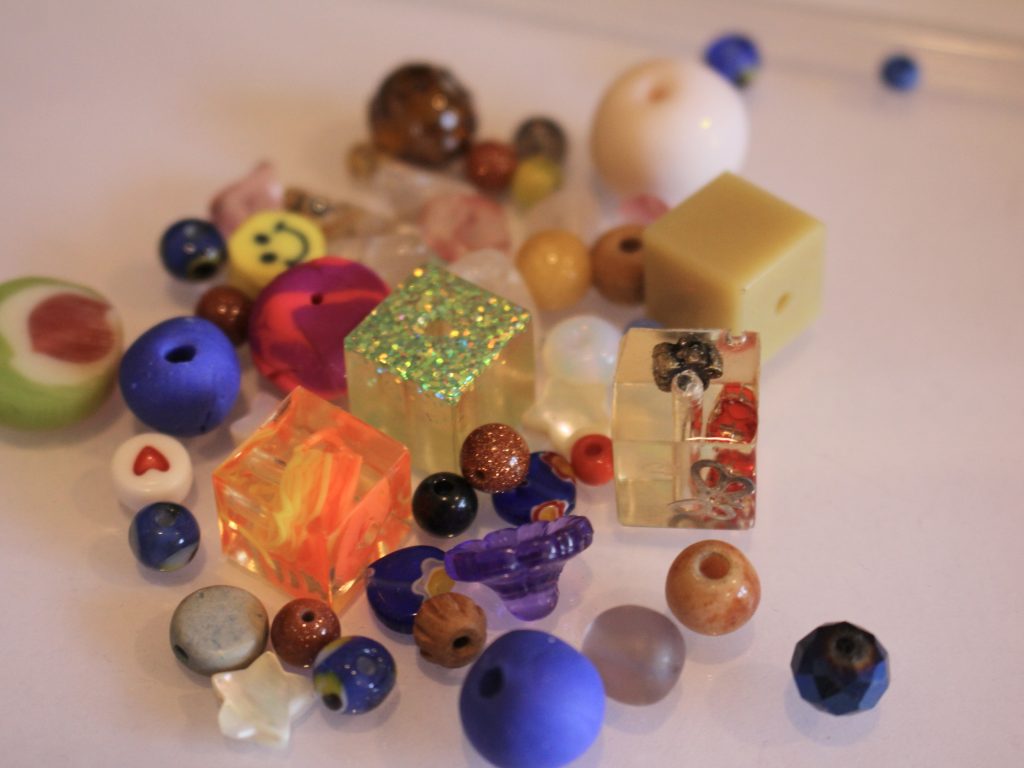
5: Some beads. I used a selection of random beads in different materials. This is a great project for using up and showcasing your eclectic bead collection.
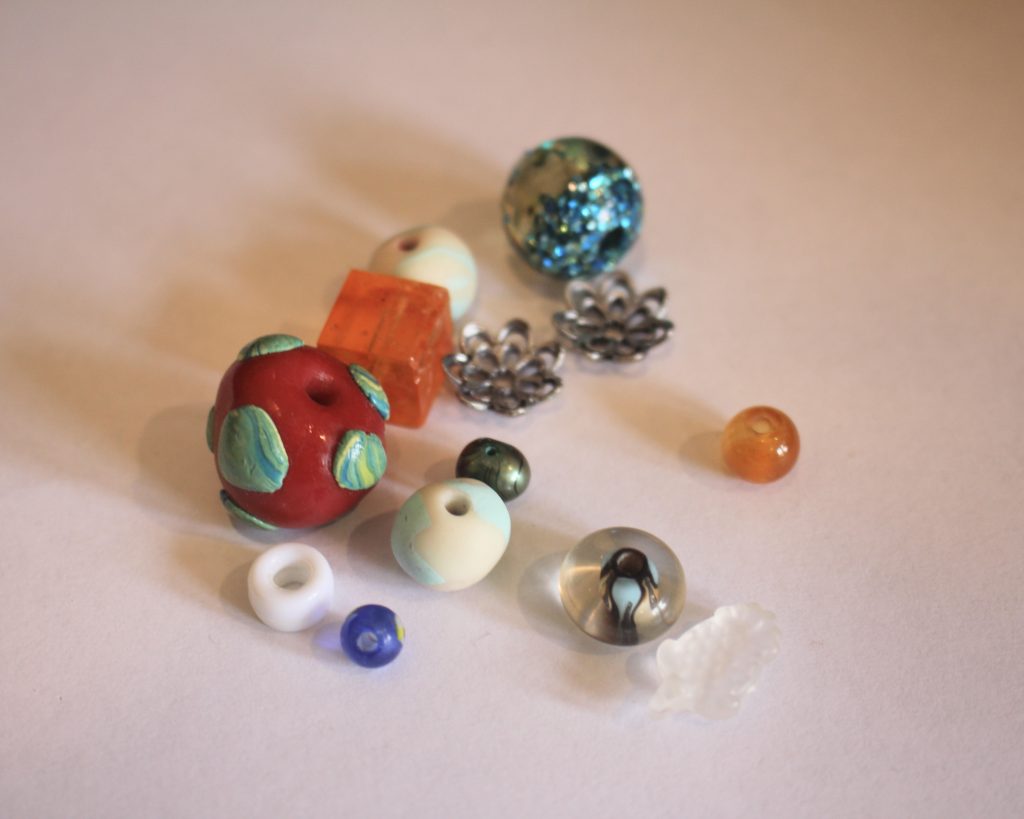
You can get a selection of mixed beads here:
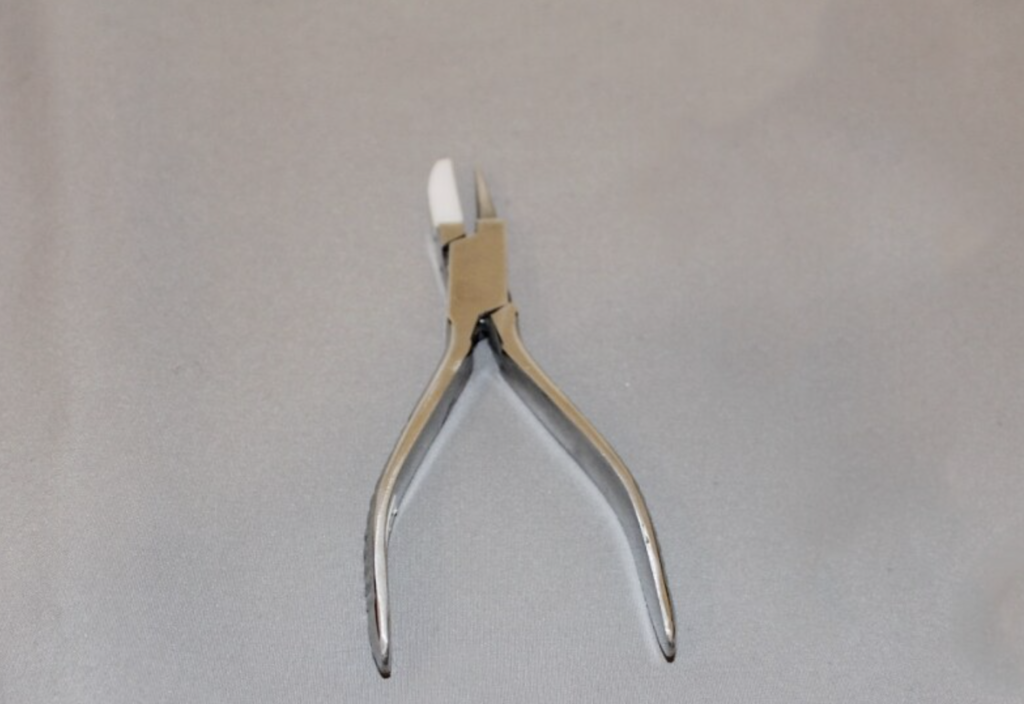
6: Pliers. I used my cutting pliers, round flat pliers, parallel pliers and flat nose pliers for this project.
You can get cutting pliers here:
You can get flat nose pliers here:
You can get round-flat nose pliers here:

You can get parallel pliers here:
Follow these steps to make your unique beaded bag charm:
1: Add a jump ring to the top of the charm if it doesn’t already have one.
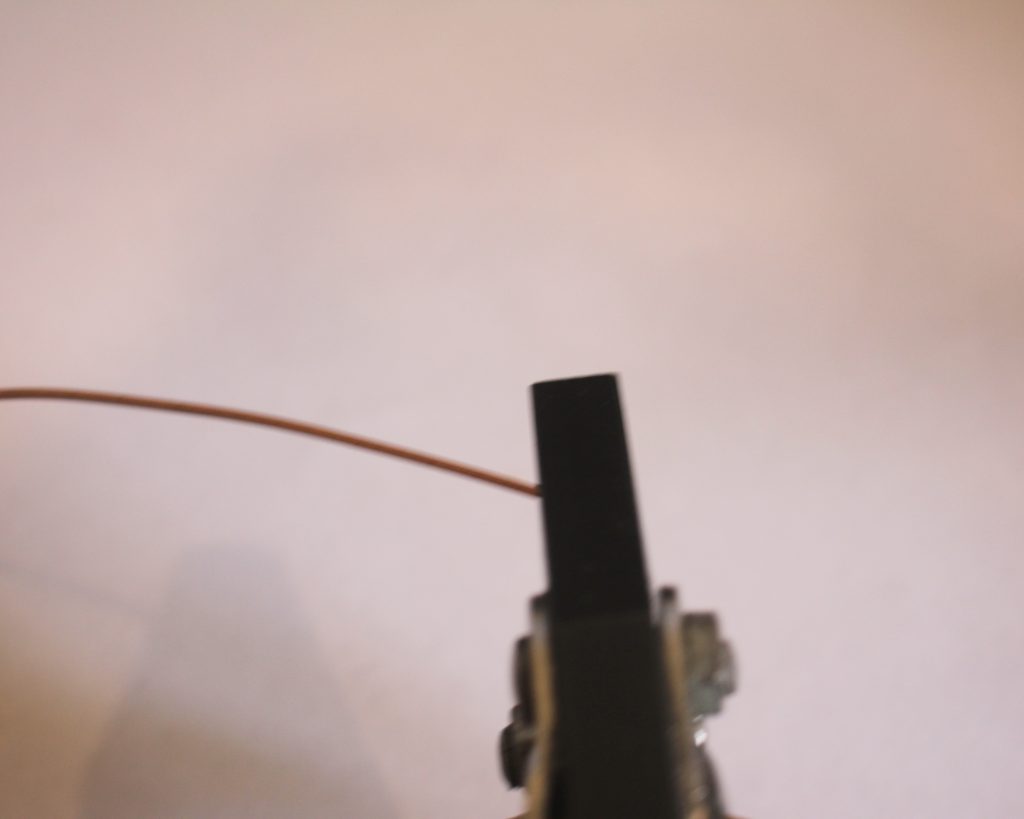
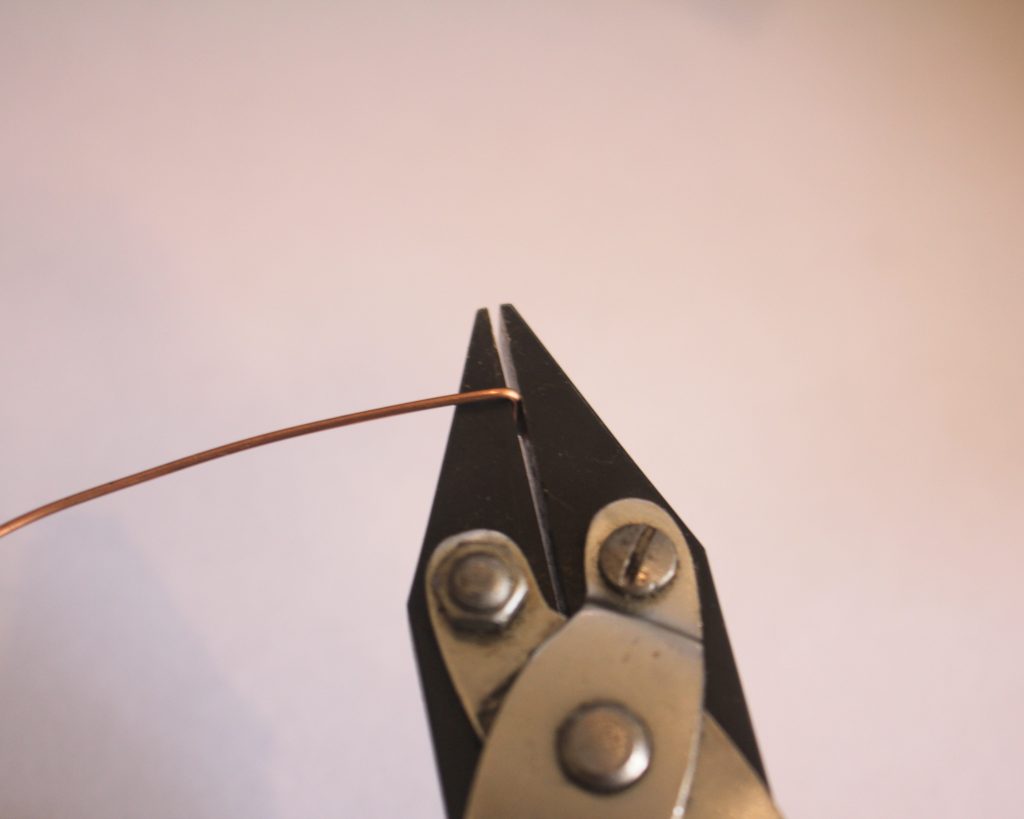
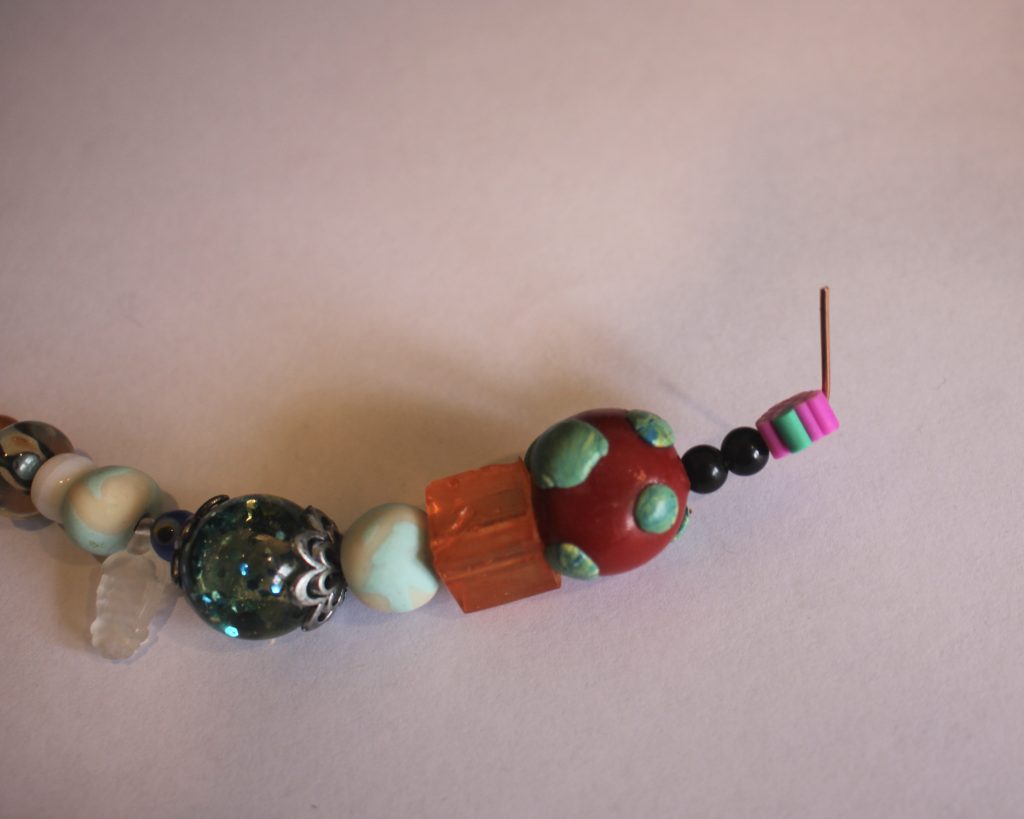
2: Take the wire and hold form the end into a right angle using the flat nose pliers.
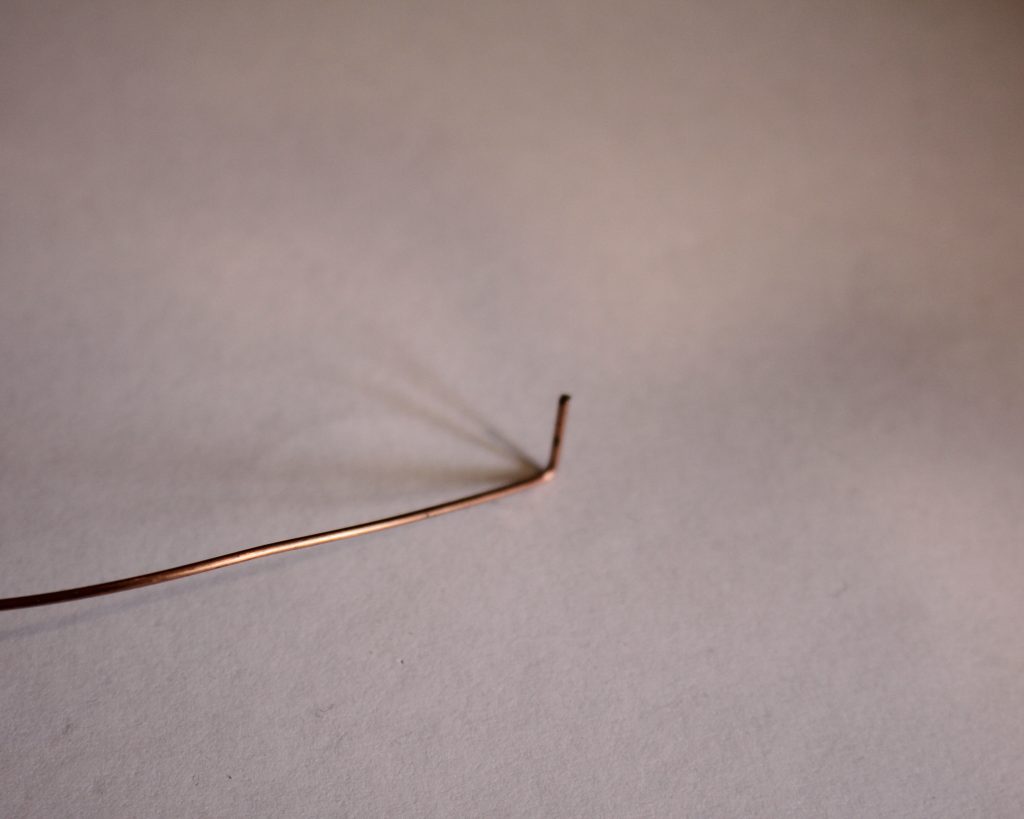
3: Use the round flat pliers to form the bent end into a loop.
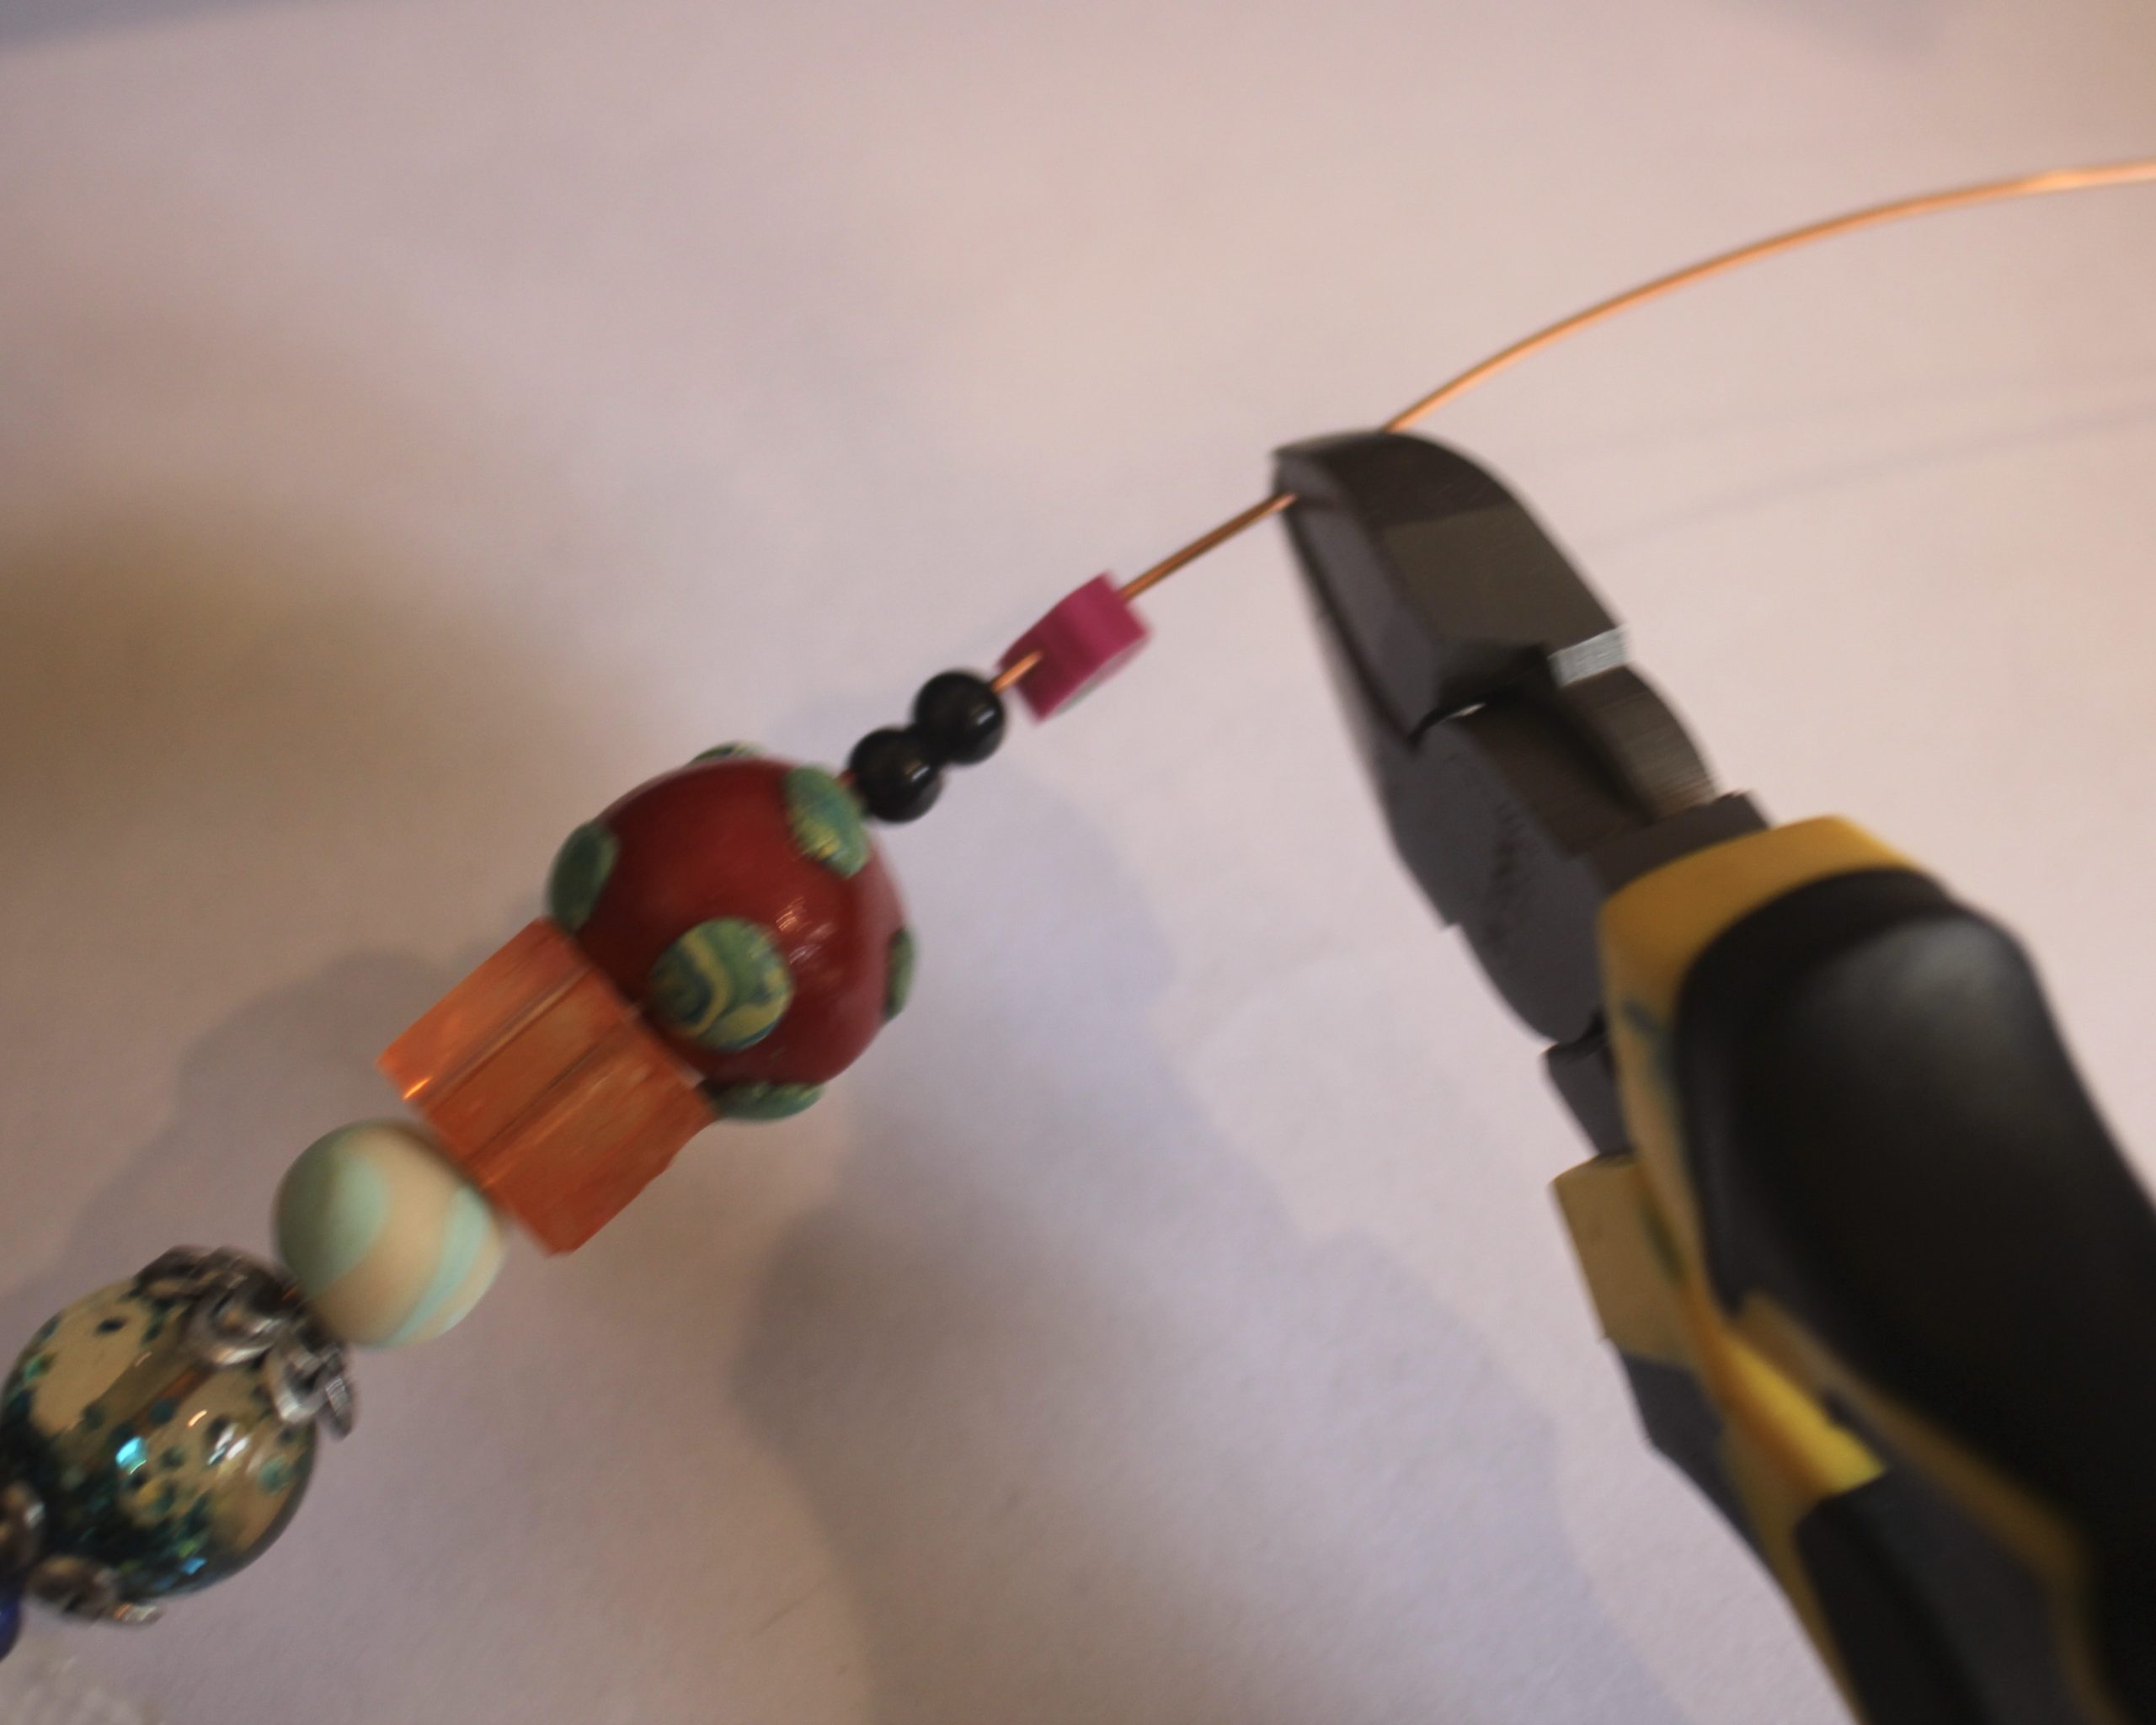
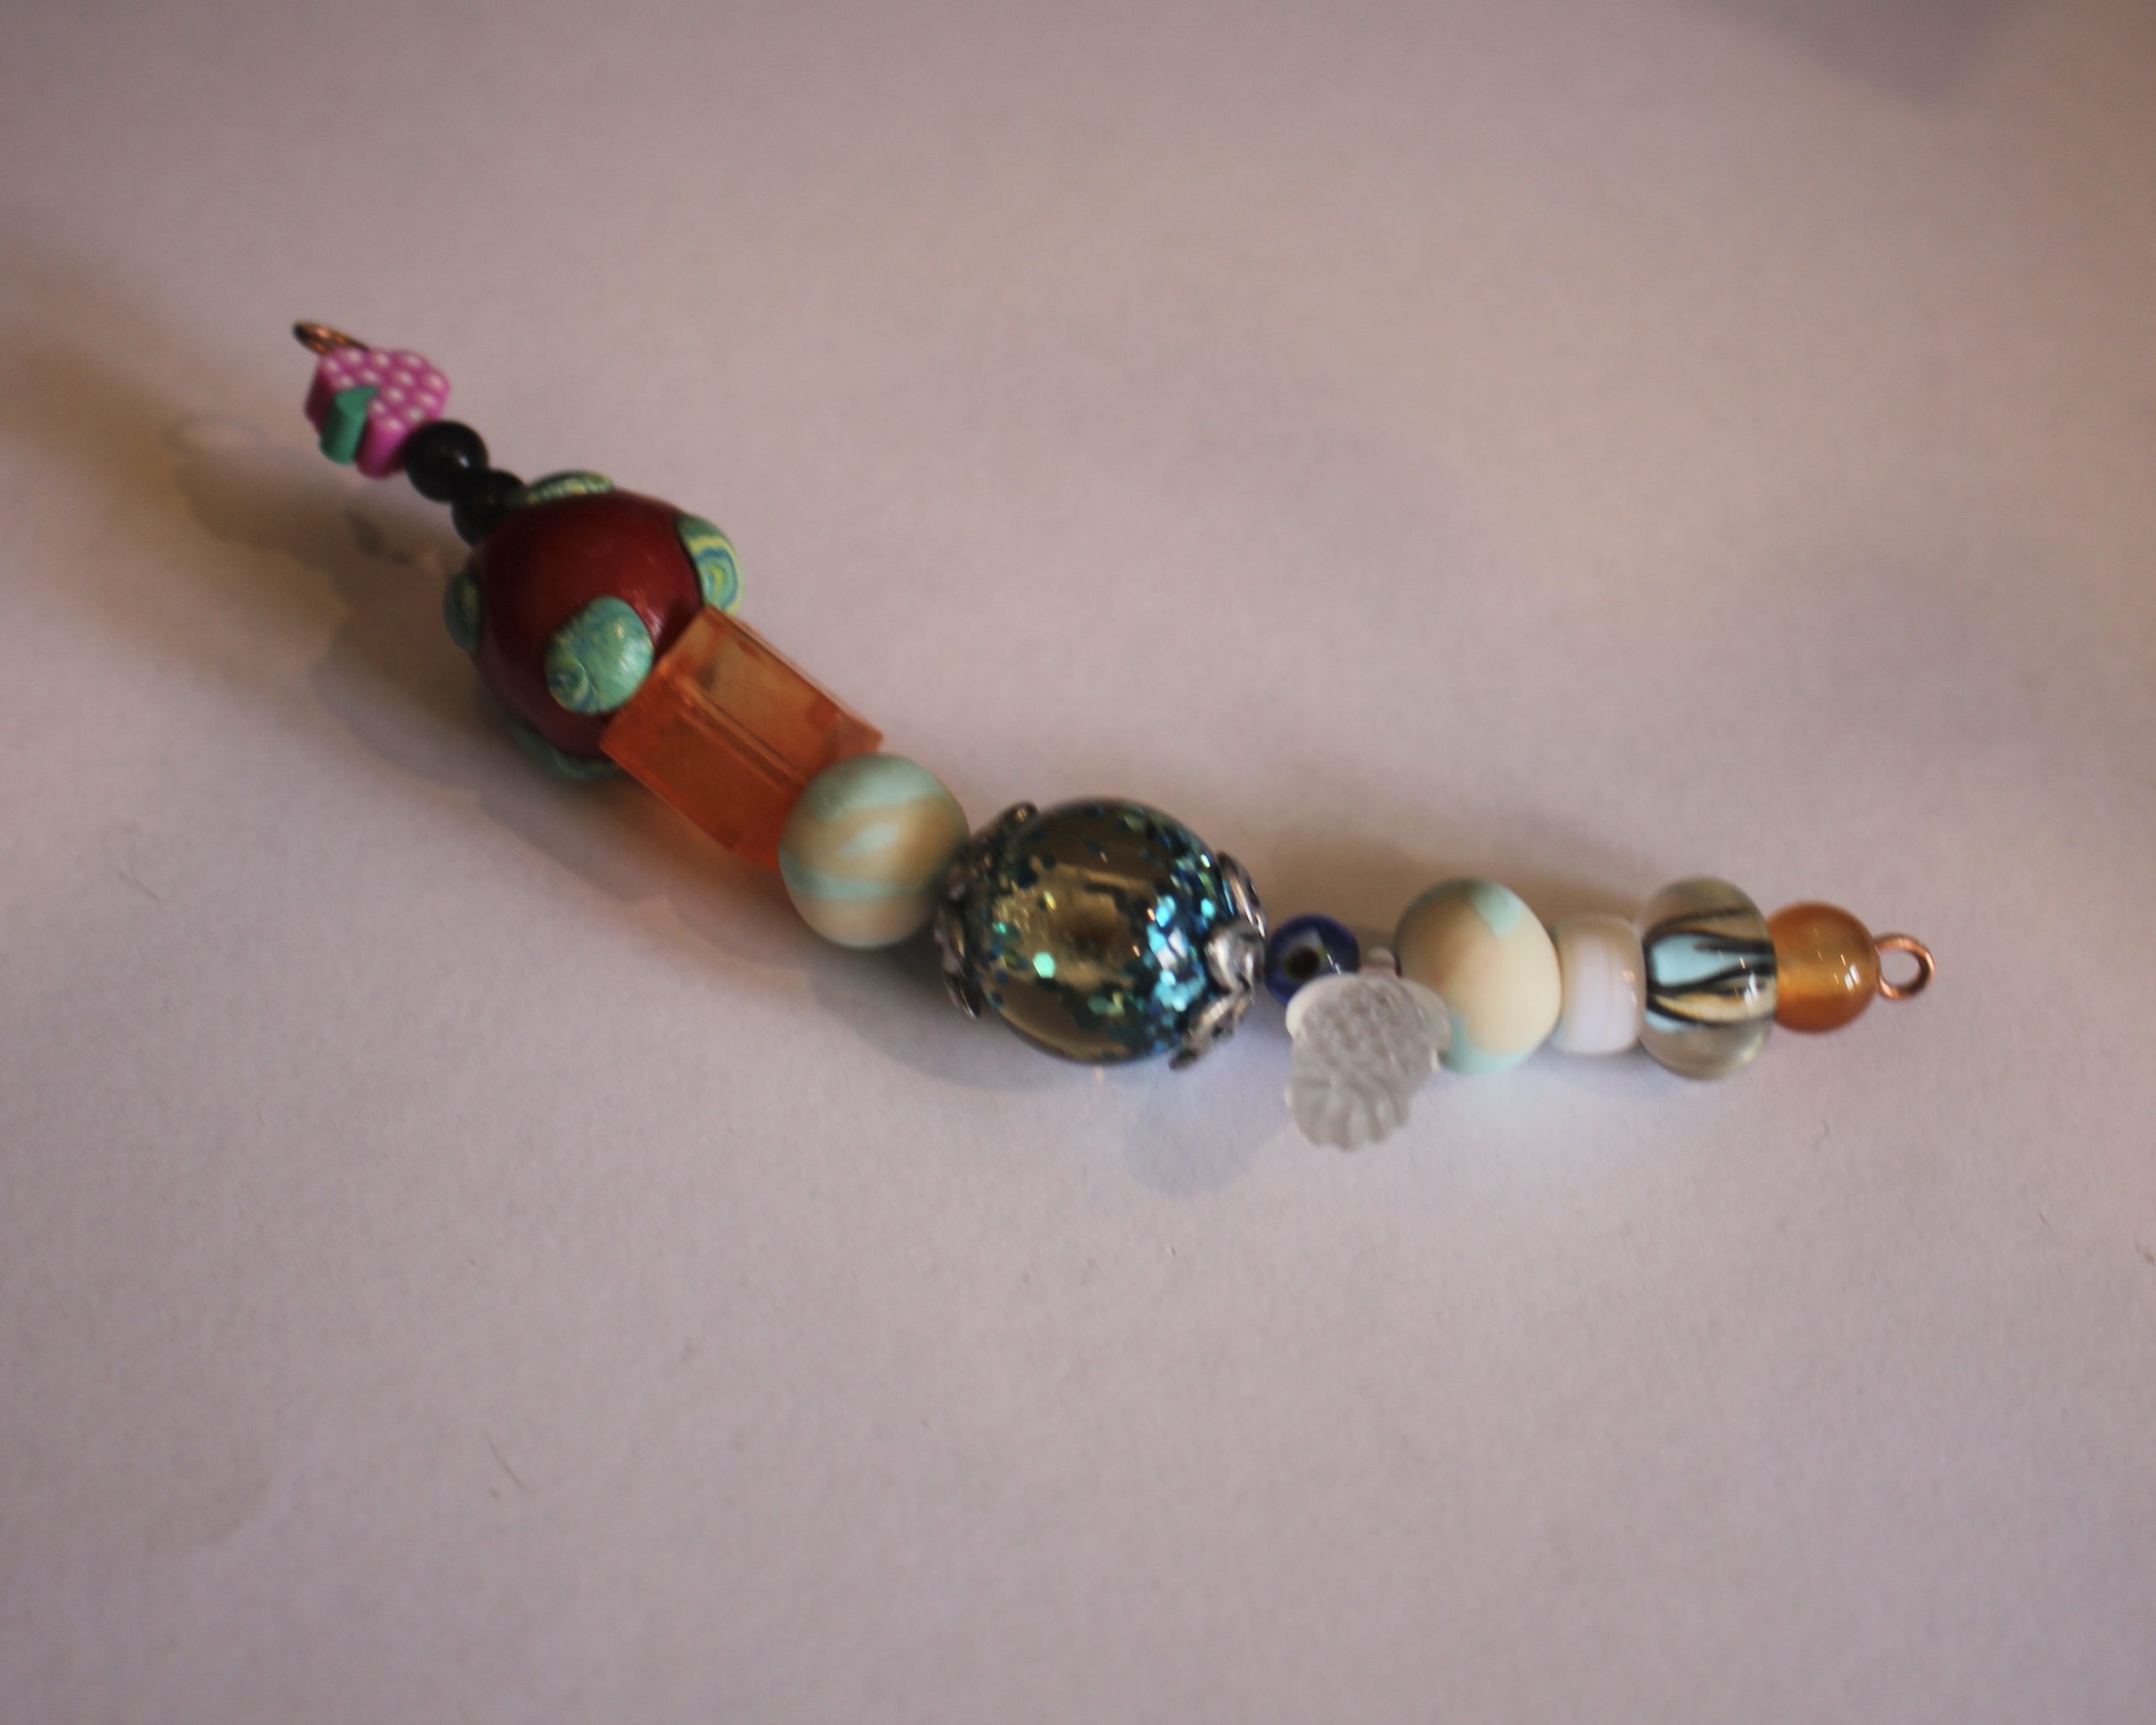
4: Begin adding beads until you have enough wire beaded to form a small loop. If you use bigger beads like I did, you will need to make a larger beaded length.
5: Trim the end of the wire using the cutting pliers.

6: Loop the second end of the wire using the round flat pliers.

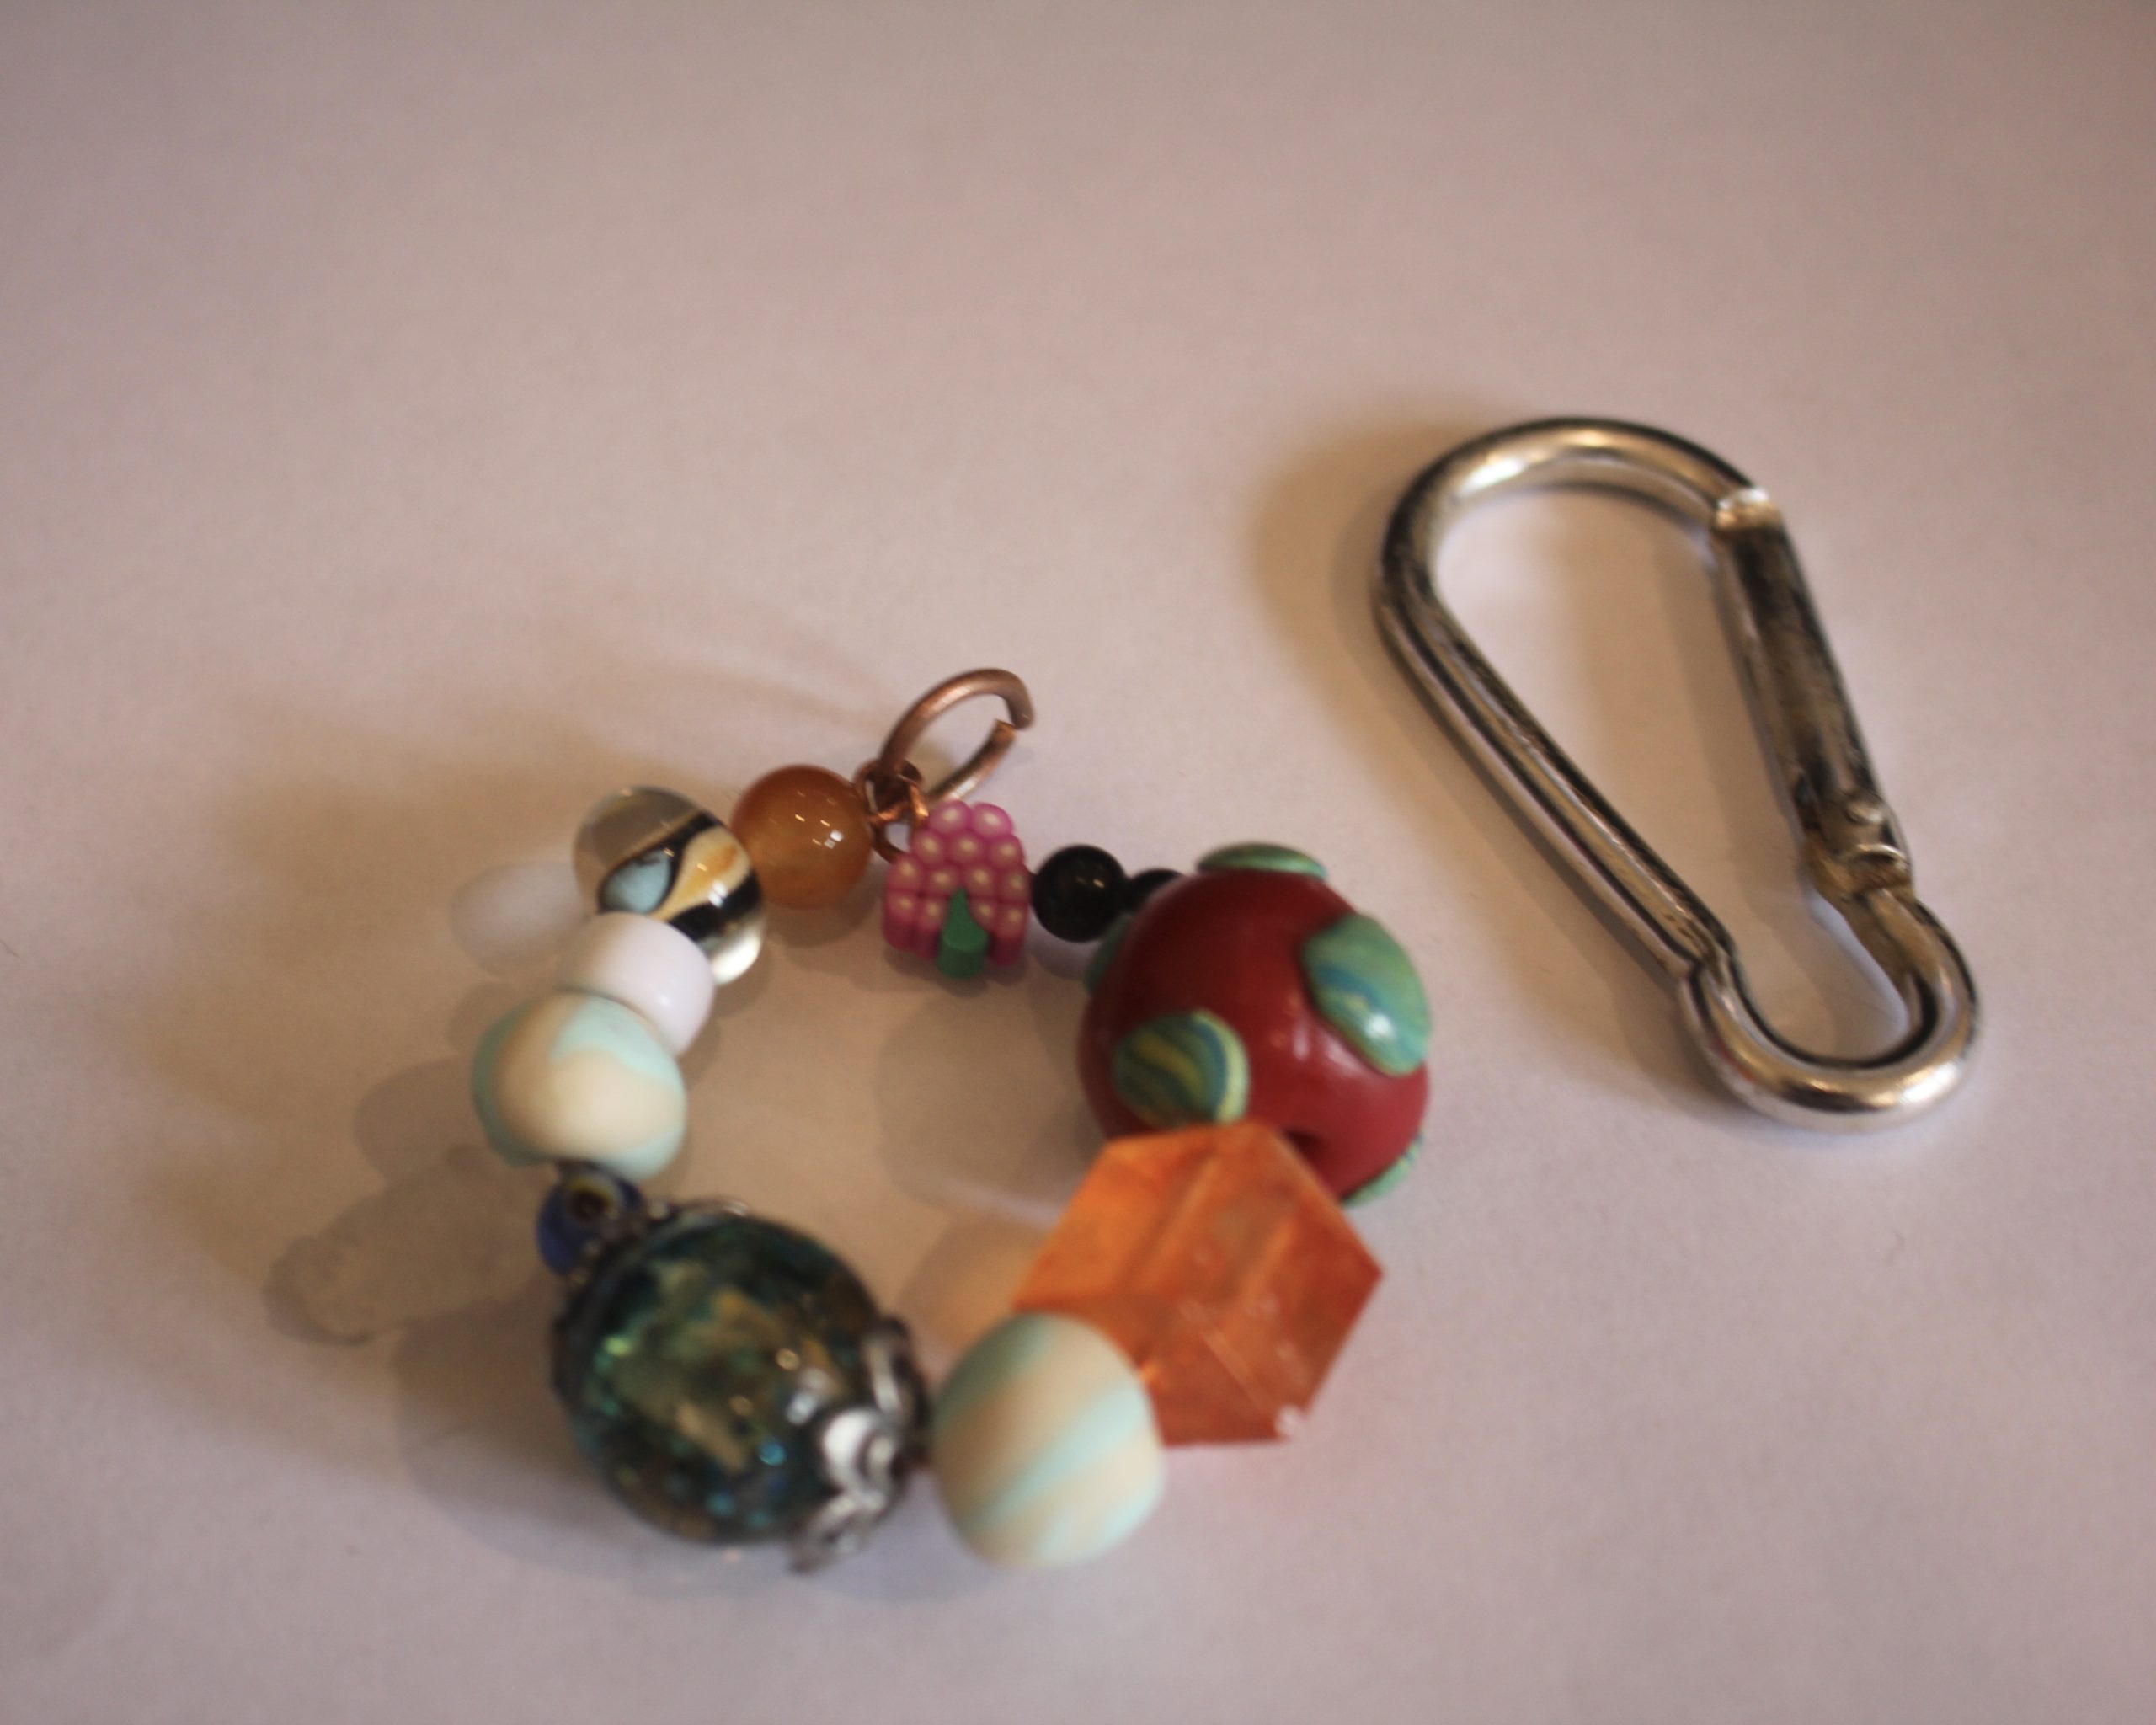
7: Connect the end loops together to form a circle shape of beads.
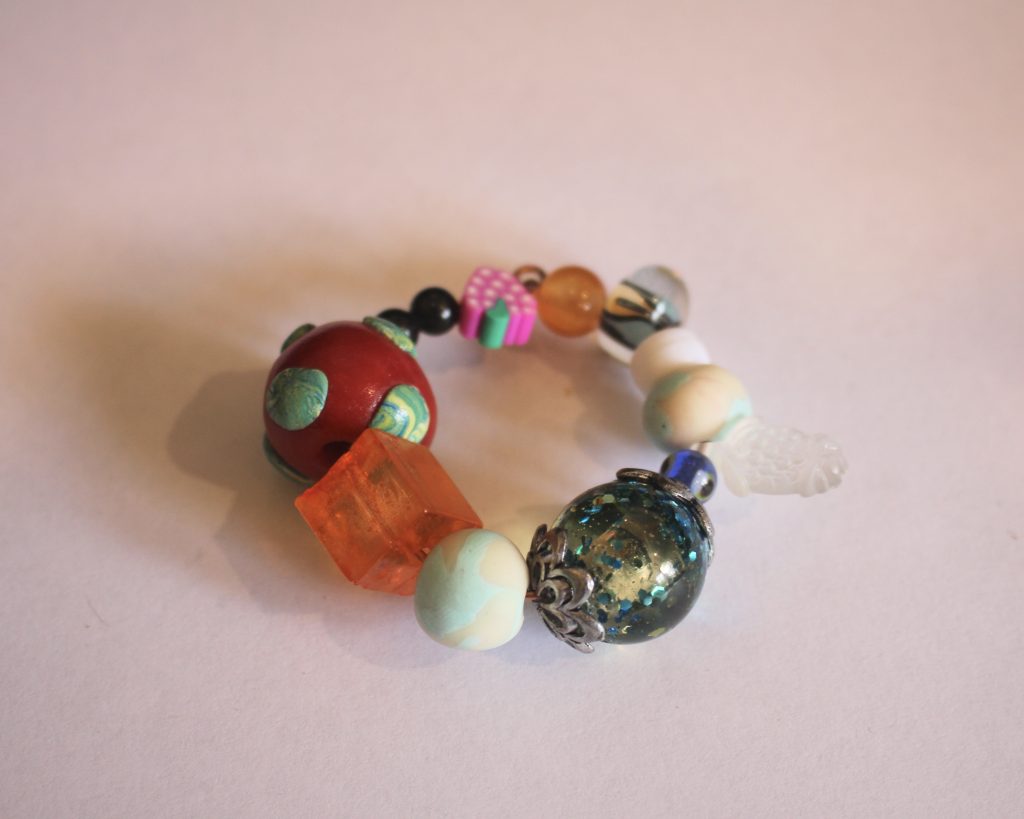
8: Attach the second jump ring to the top of the beaded loop and close it.
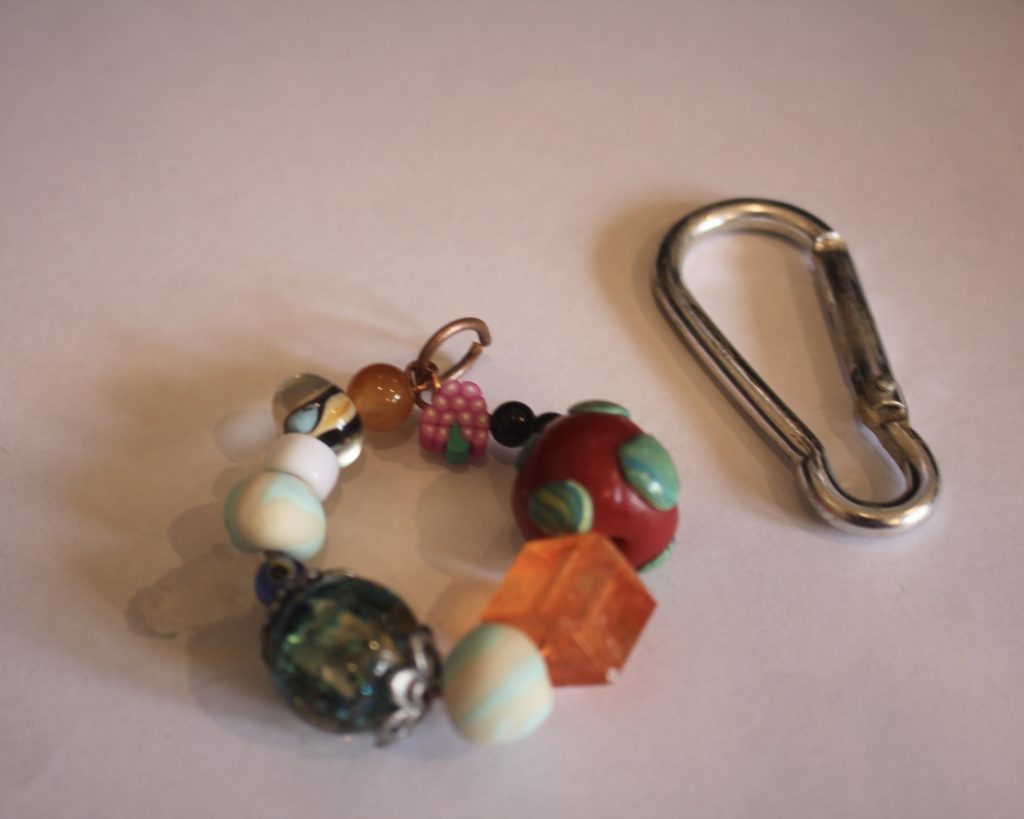
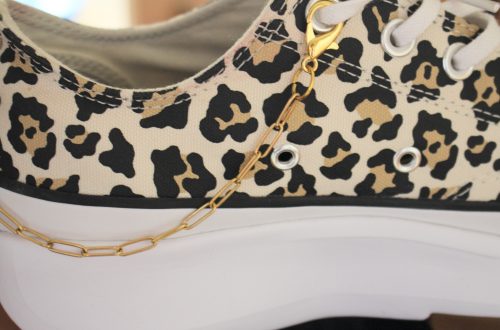
9: Slide the charms onto the carabiner to finish the bag charm off.

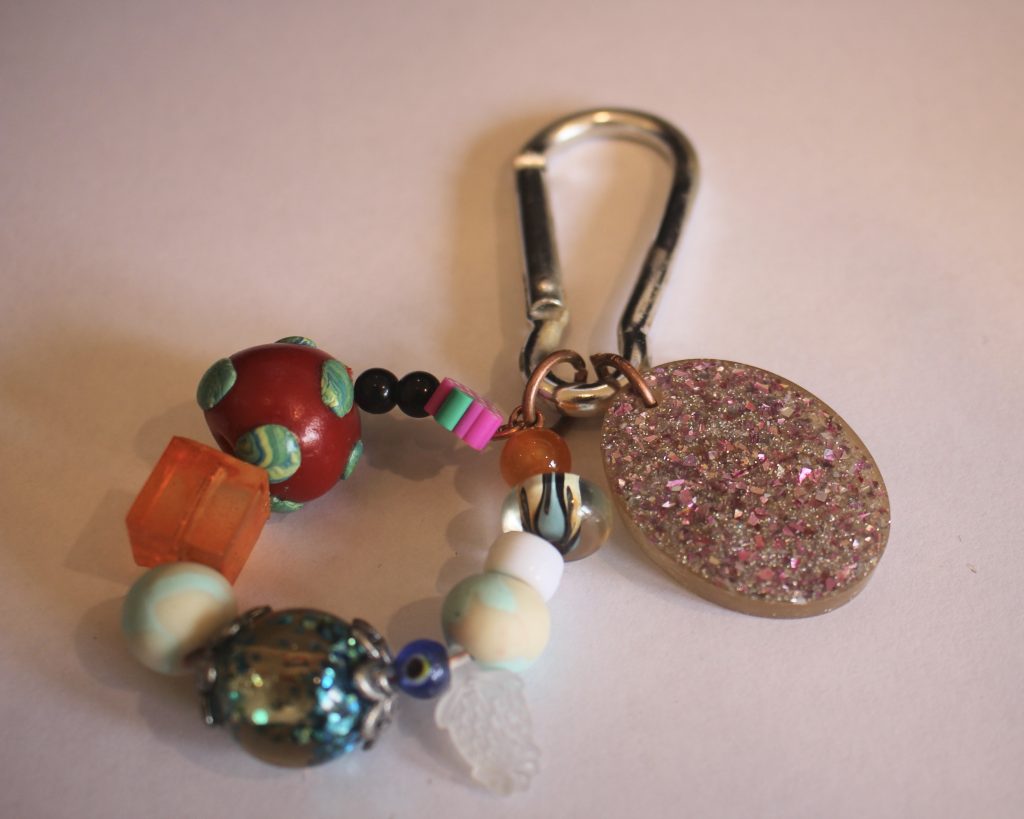
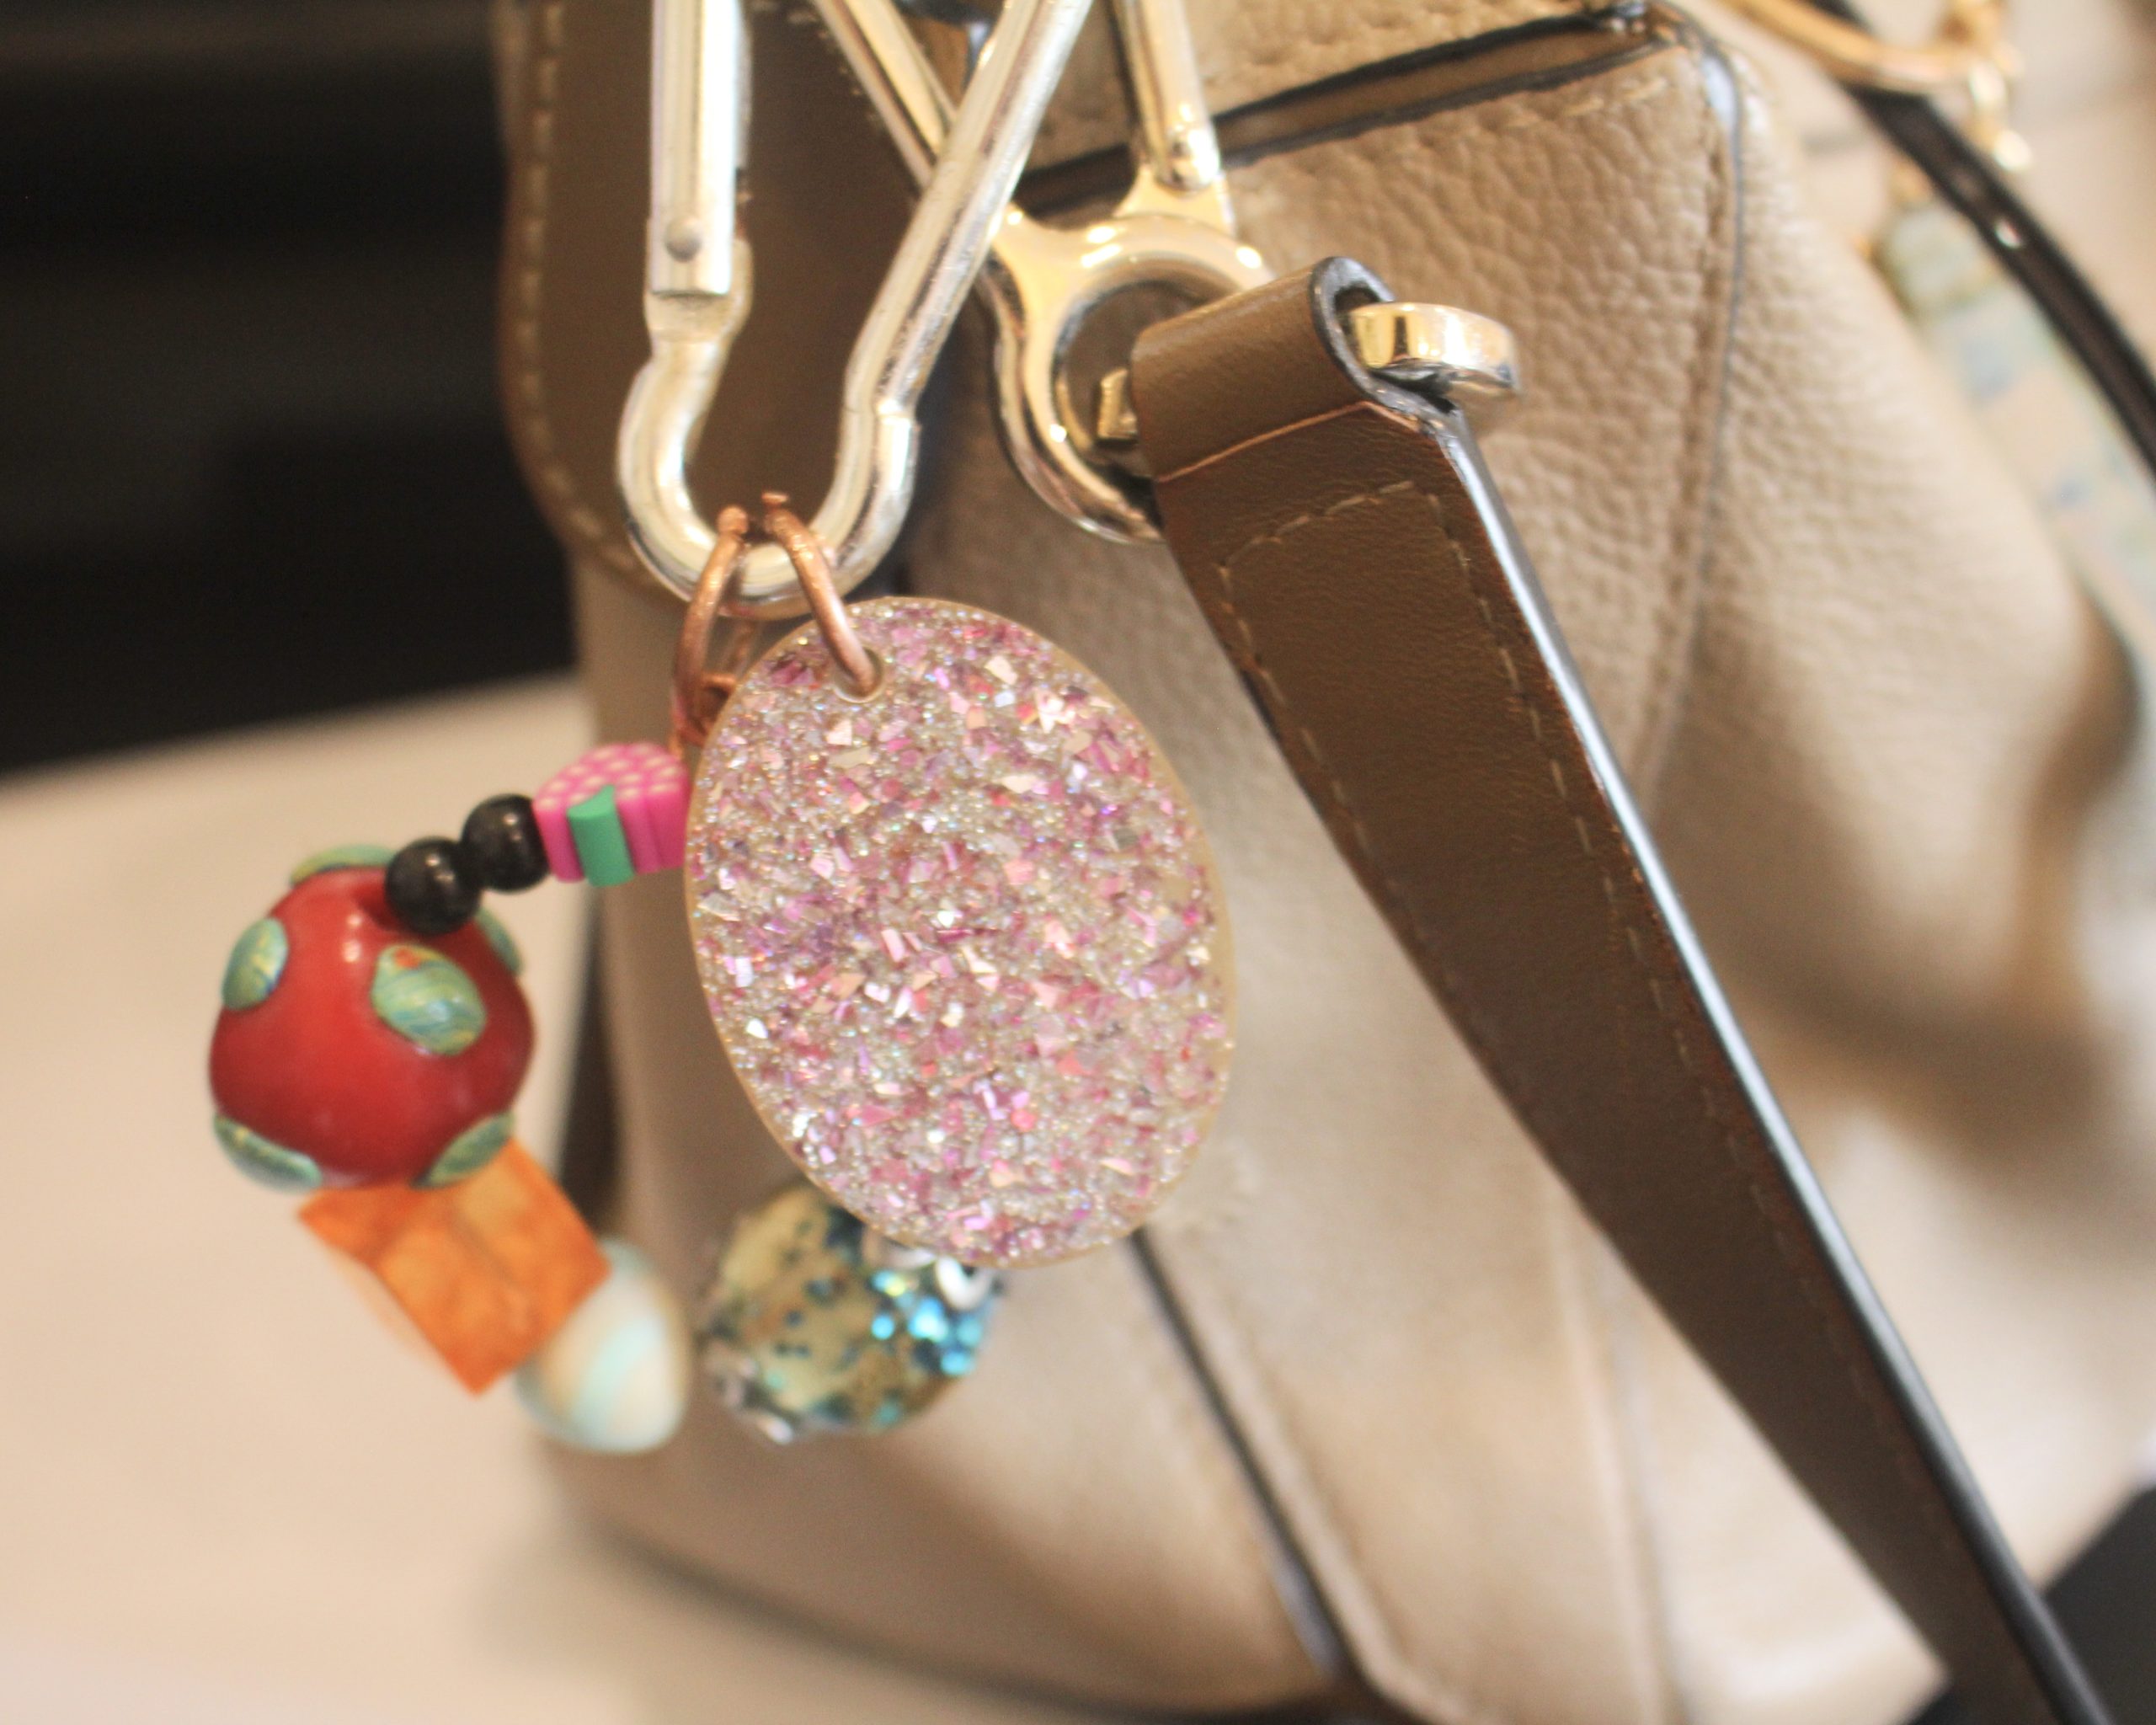
Now your bag charm is completed and ready to attach to your fave handbag!

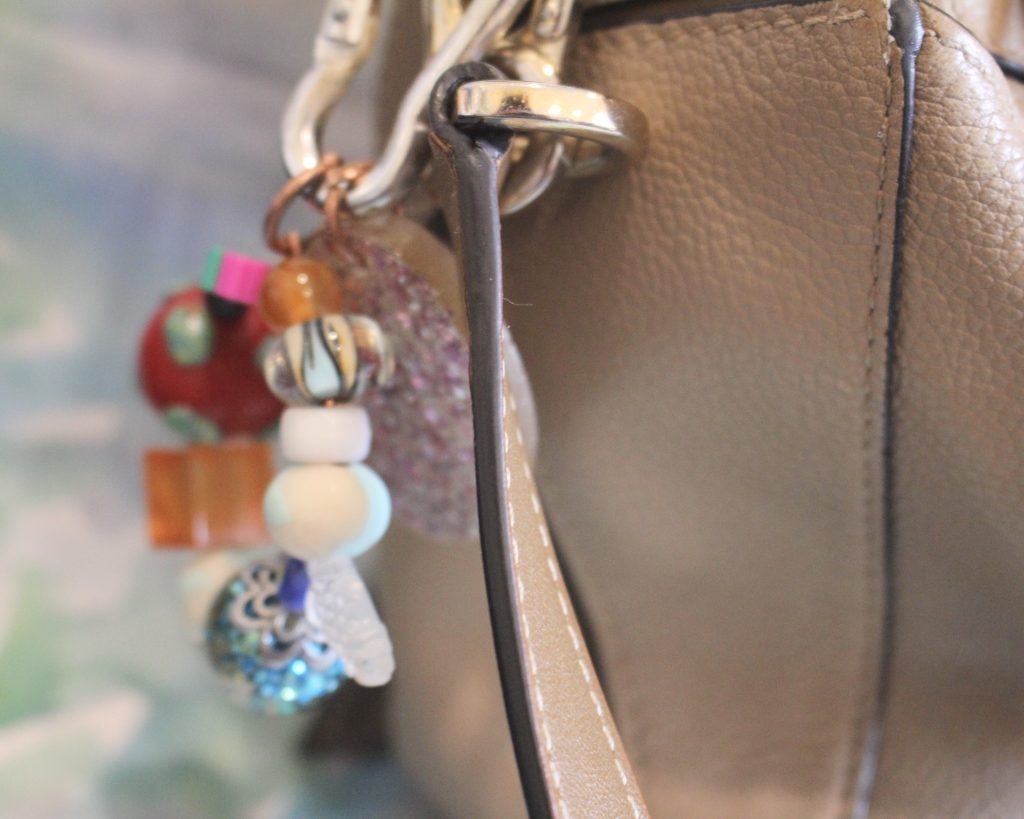
How will you style yours?
-
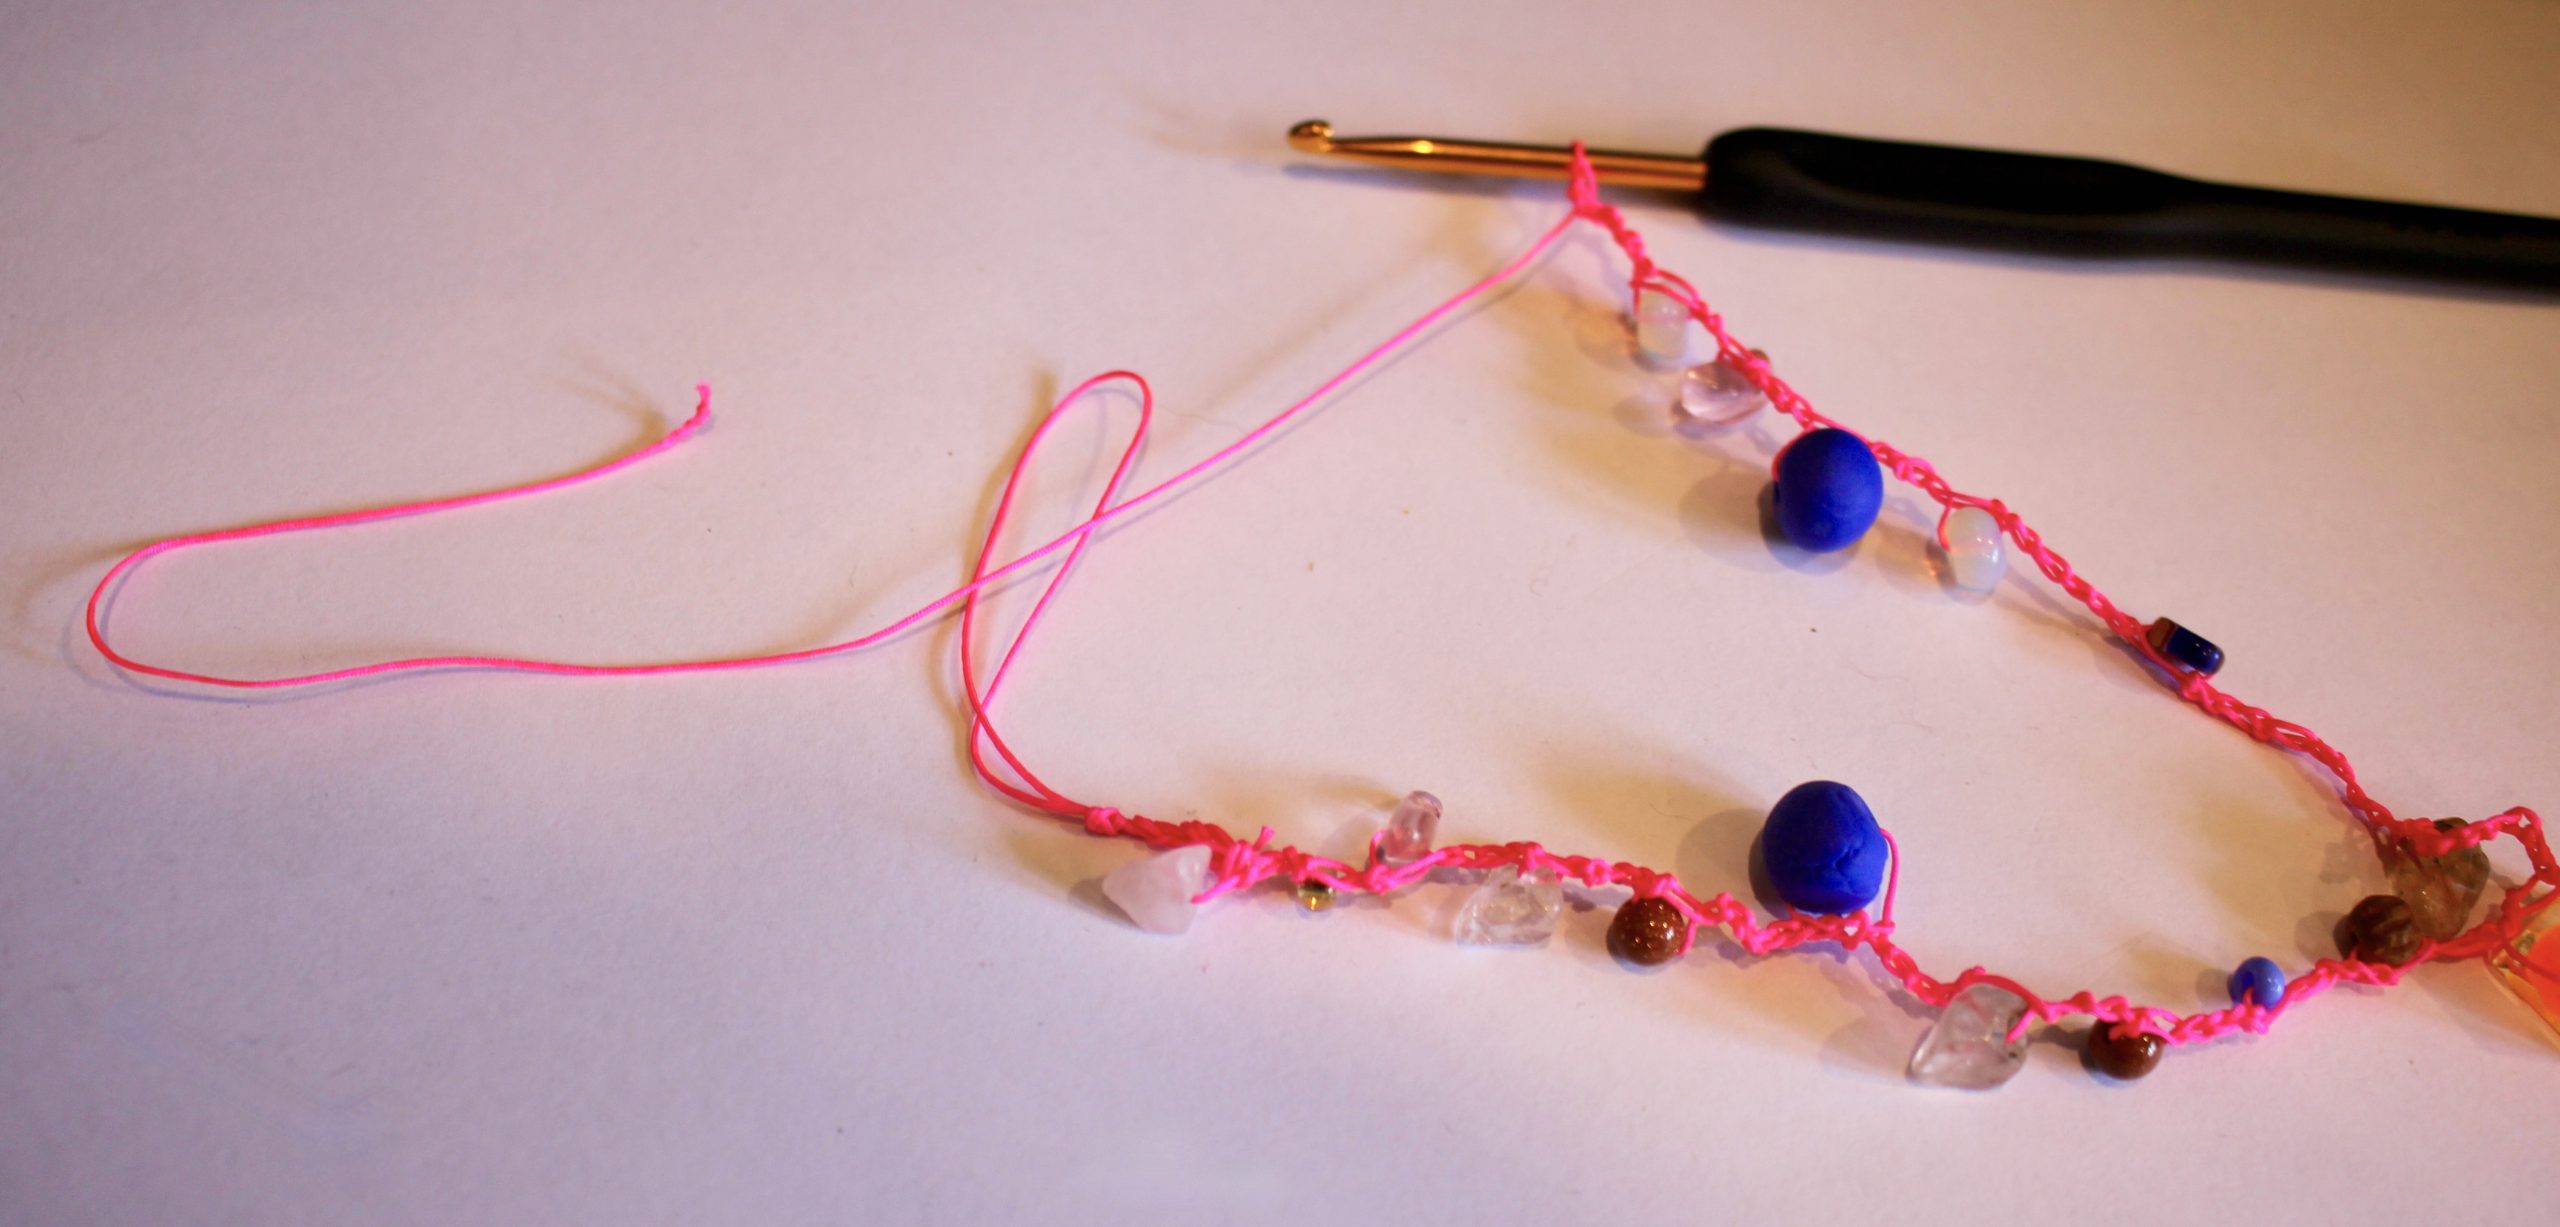
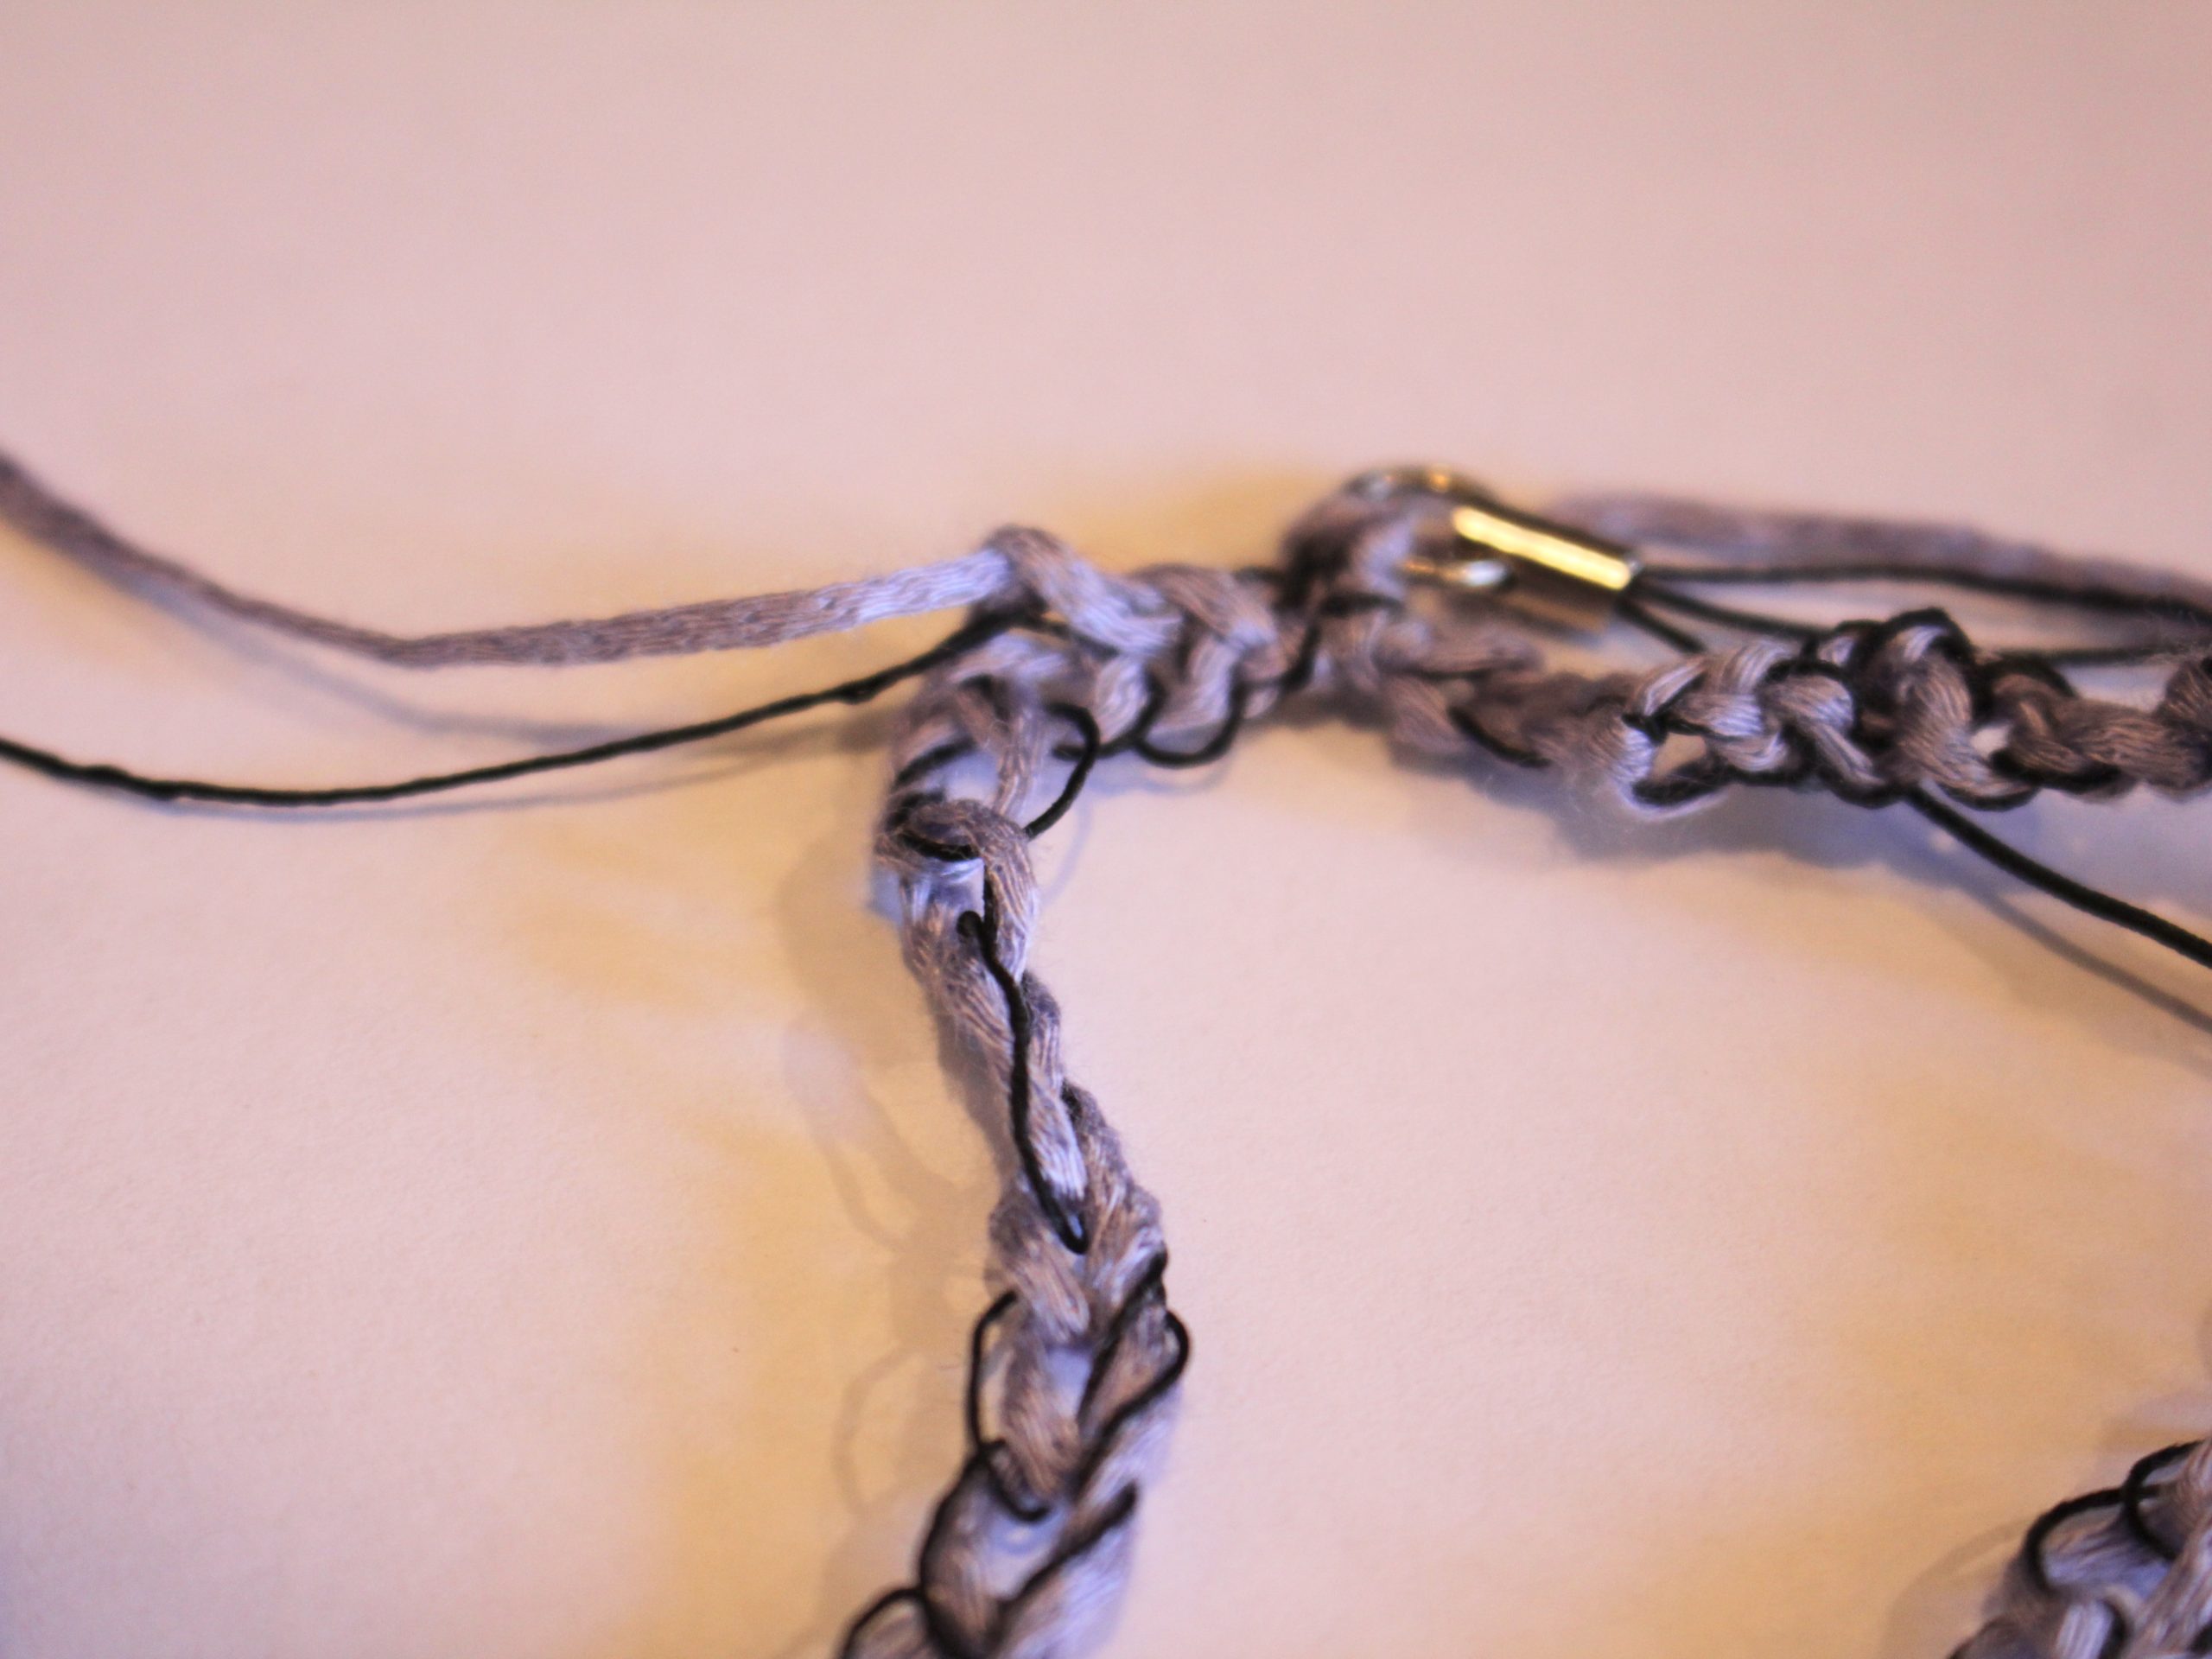
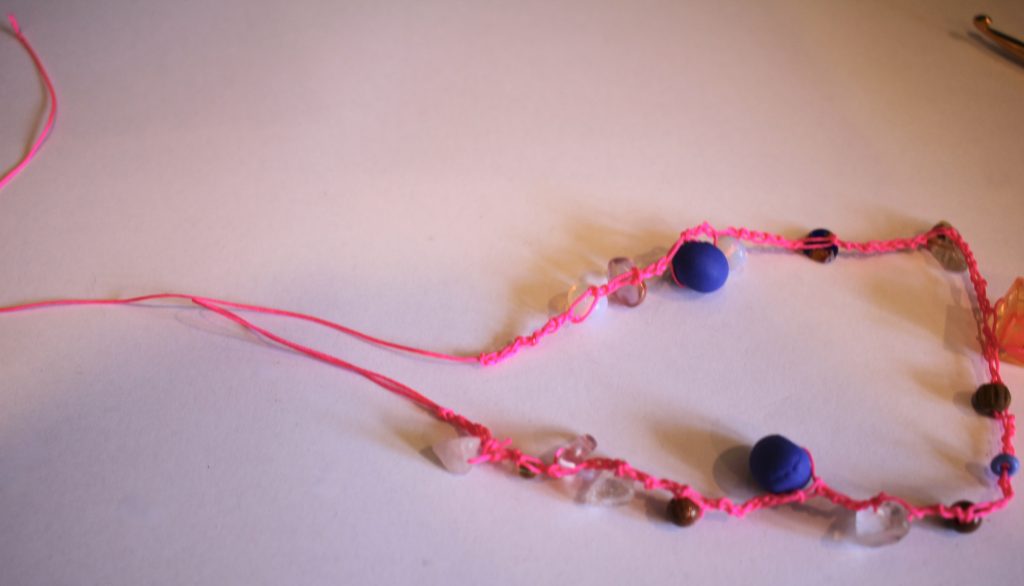
This one is fun! Here’s how to make a crochet phone strap with beads.
I made myself one of these before a recent trip and found it so handy! No dropping your phone when you’ve got one of these on. This phone strap features a range of colourful beads threaded onto some vibrant thread. Perfect for showing your personal style. What colours will you make yours in?
Please note that this tutorial contains affiliate links.
You will need the following tools and materials to make your phone strap:
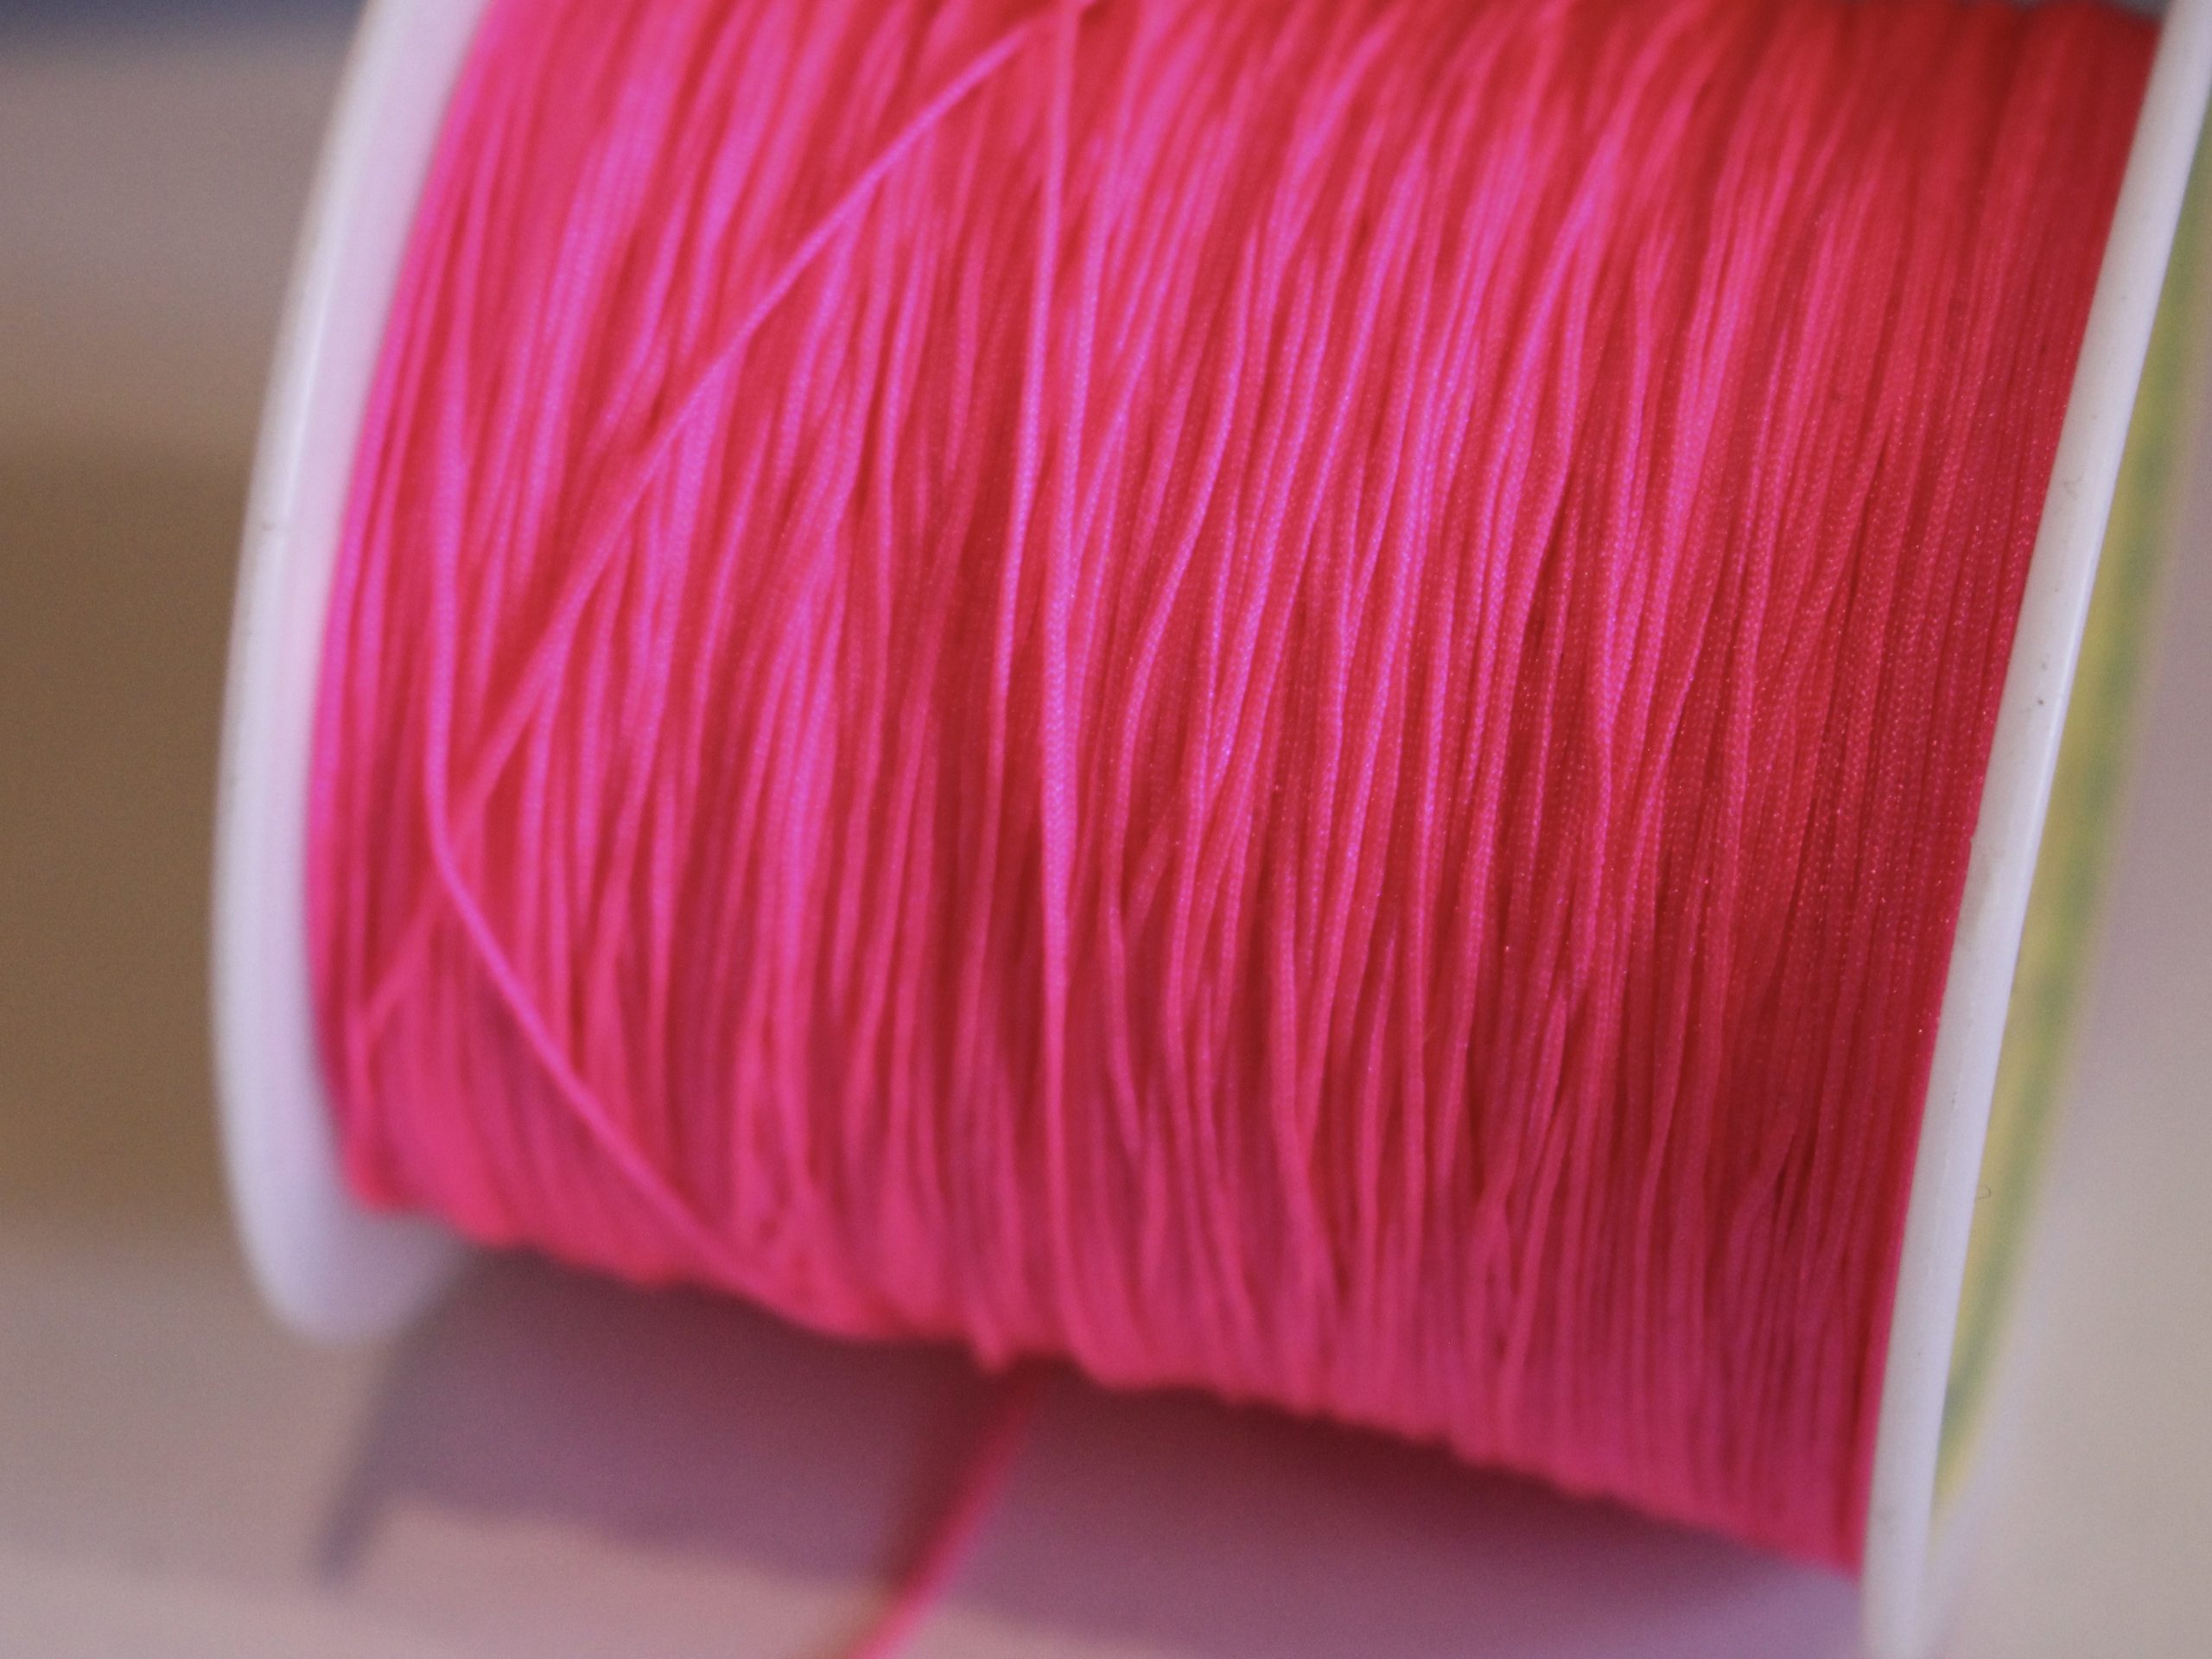
1: Thread. I used this pink nylon thread. Make sure it is thin enough to fit your beads but not too thin.

2: A pair of scissors.

Get some here:
3: Beads. I used a random selection of beads from my collection in a mixture of materials including glass, plastic and timber.
You can get pre-mixed beads here:
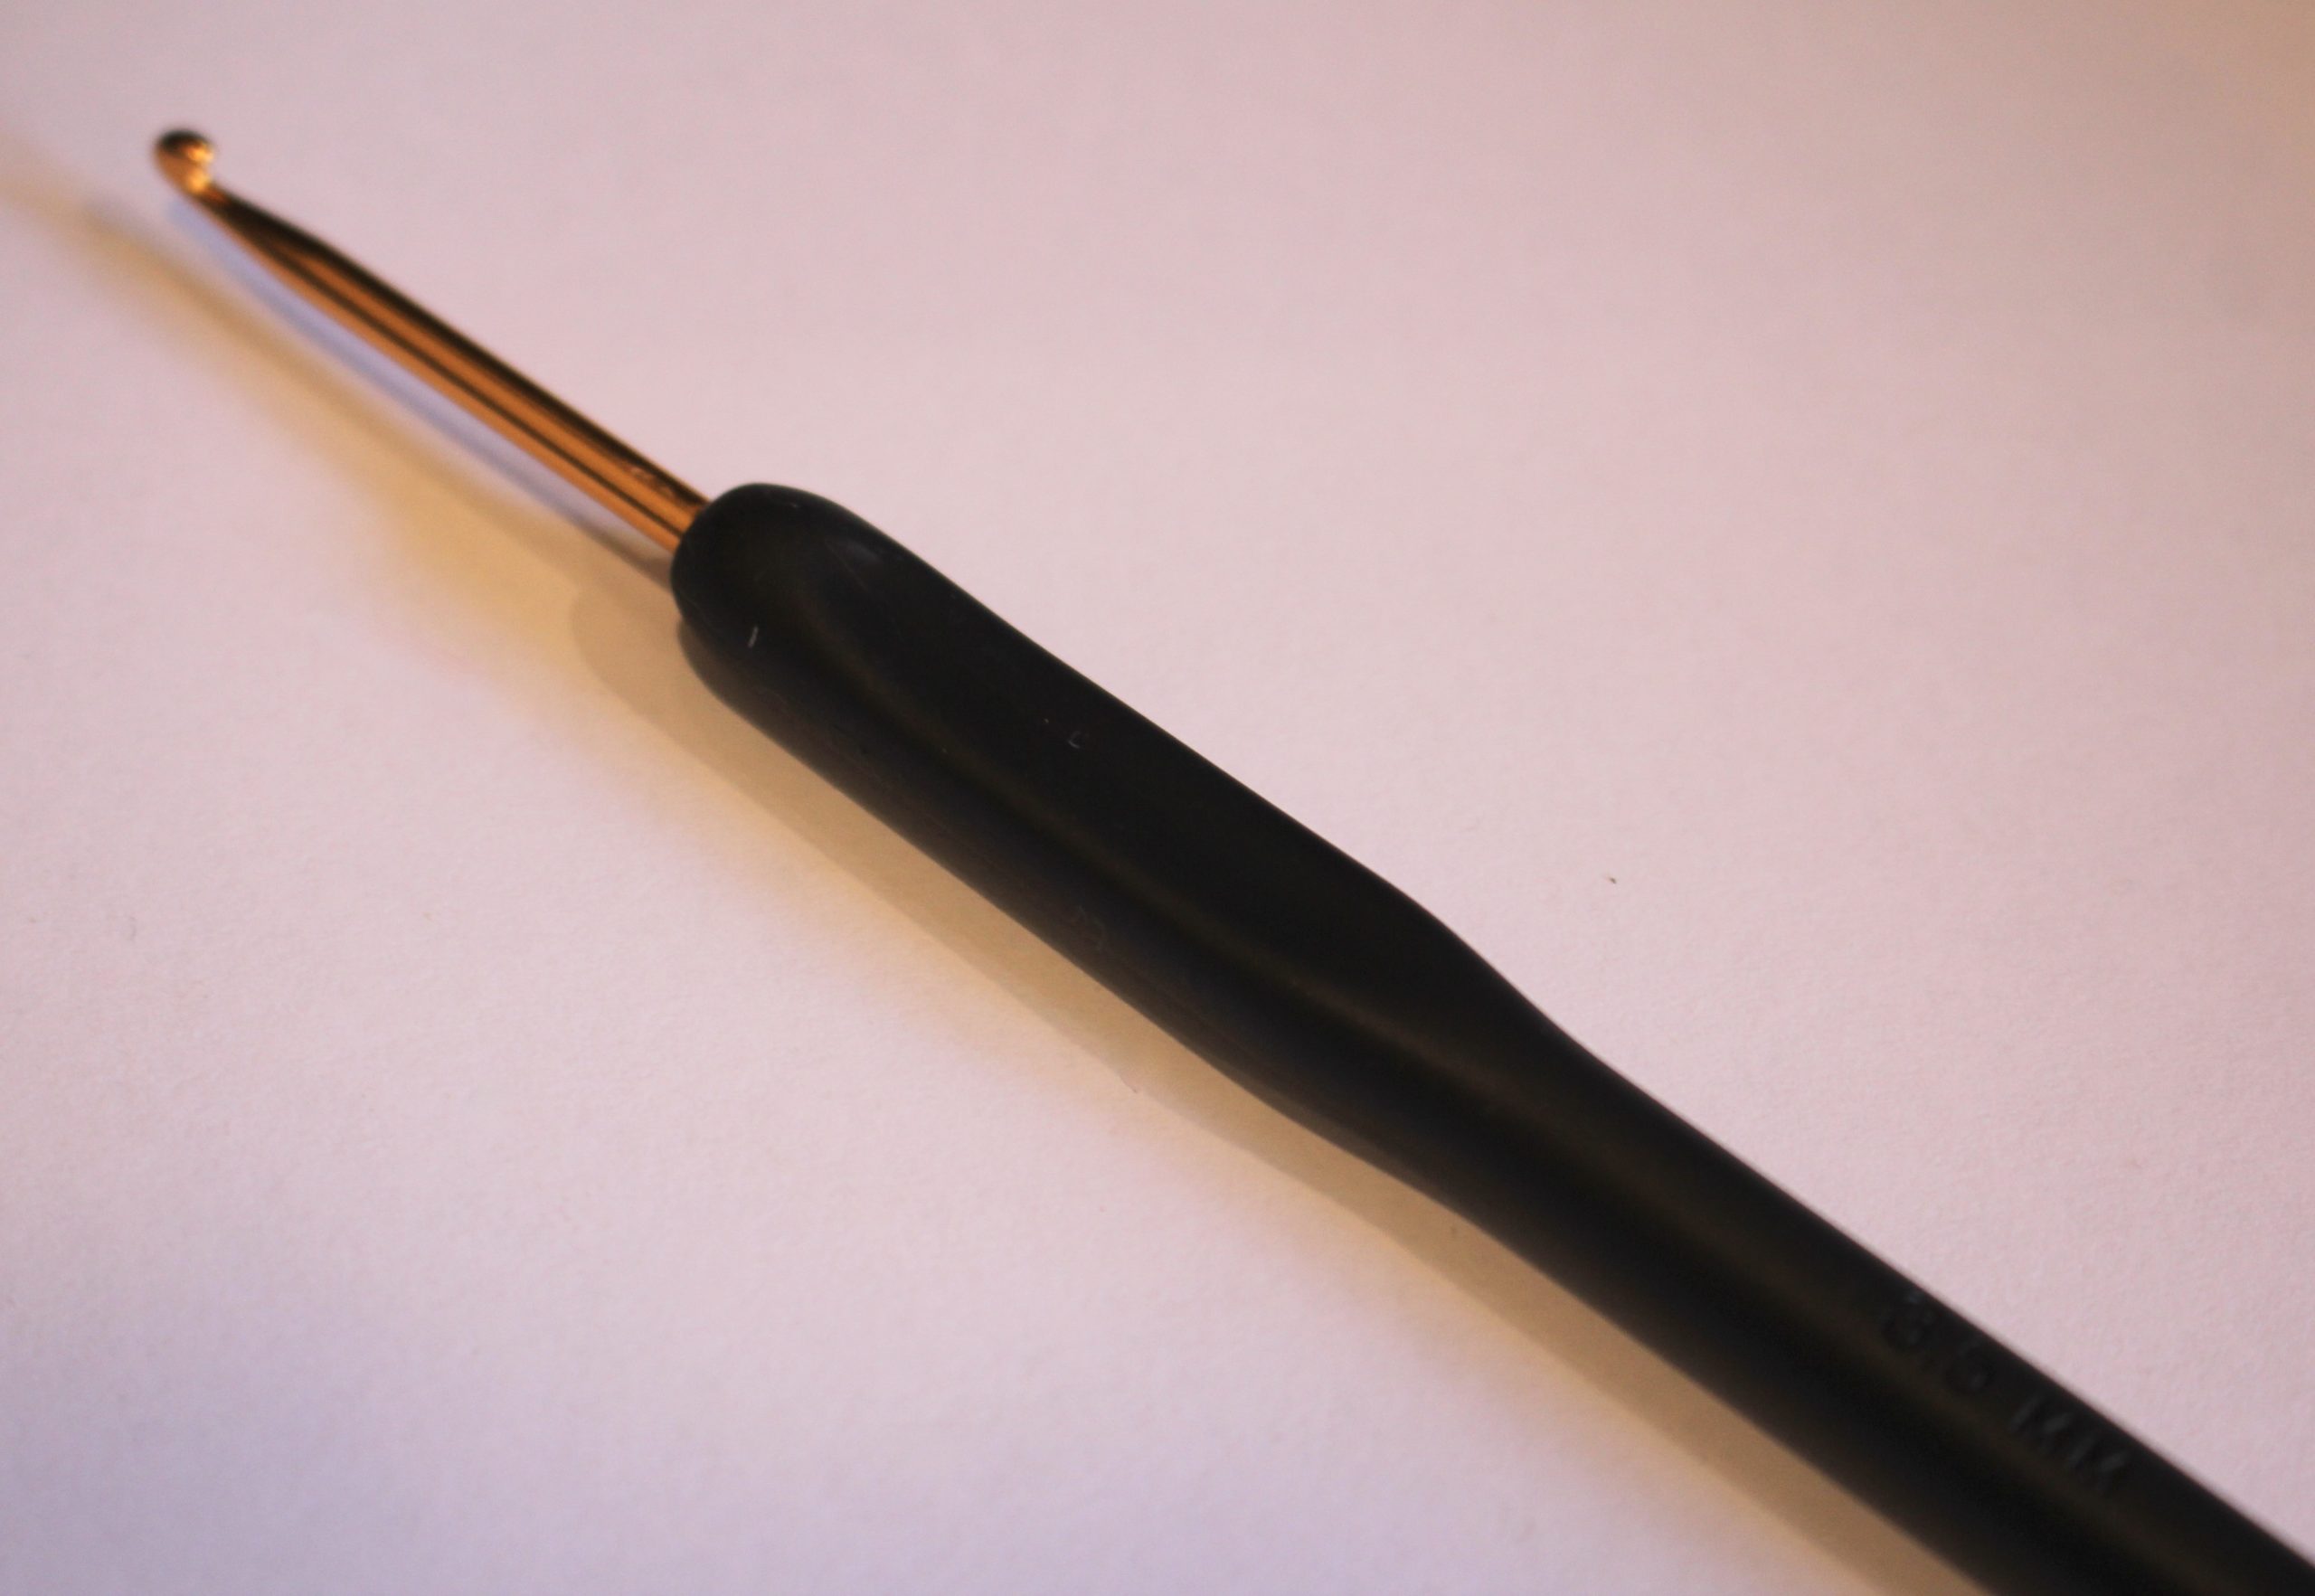
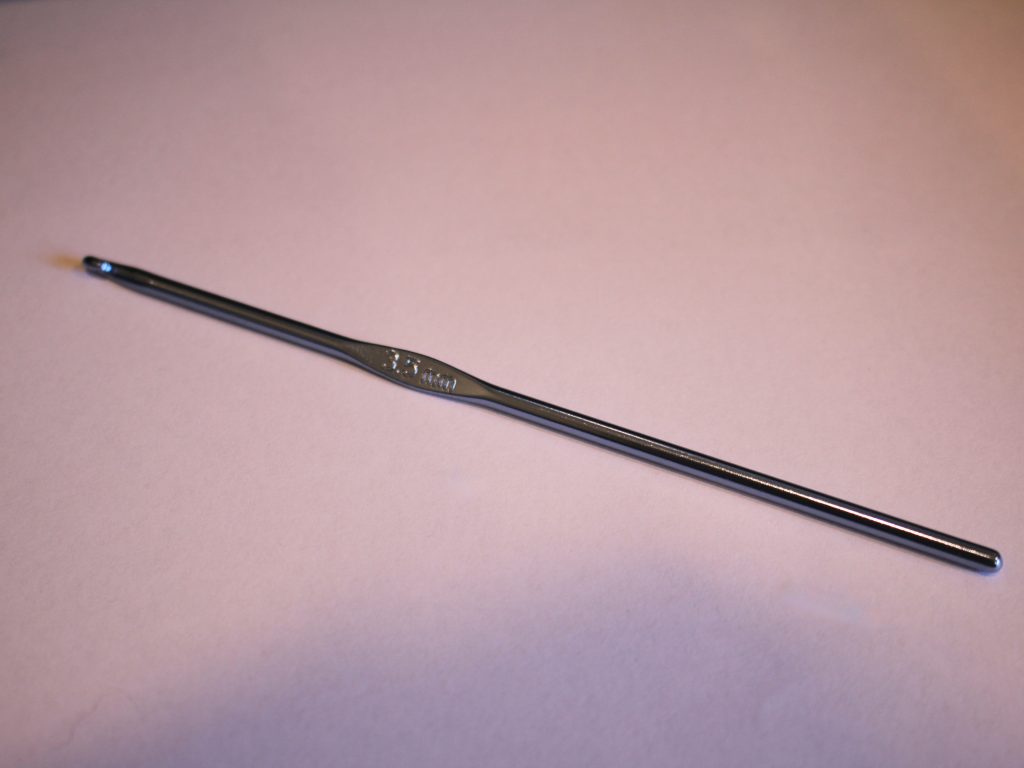
4: A crochet hook. I used a 3.5mm crochet hook.

You can get a crochet hook here:
5: Some superglue to secure the knots.

You will need the following tools and materials to make your phone strap:
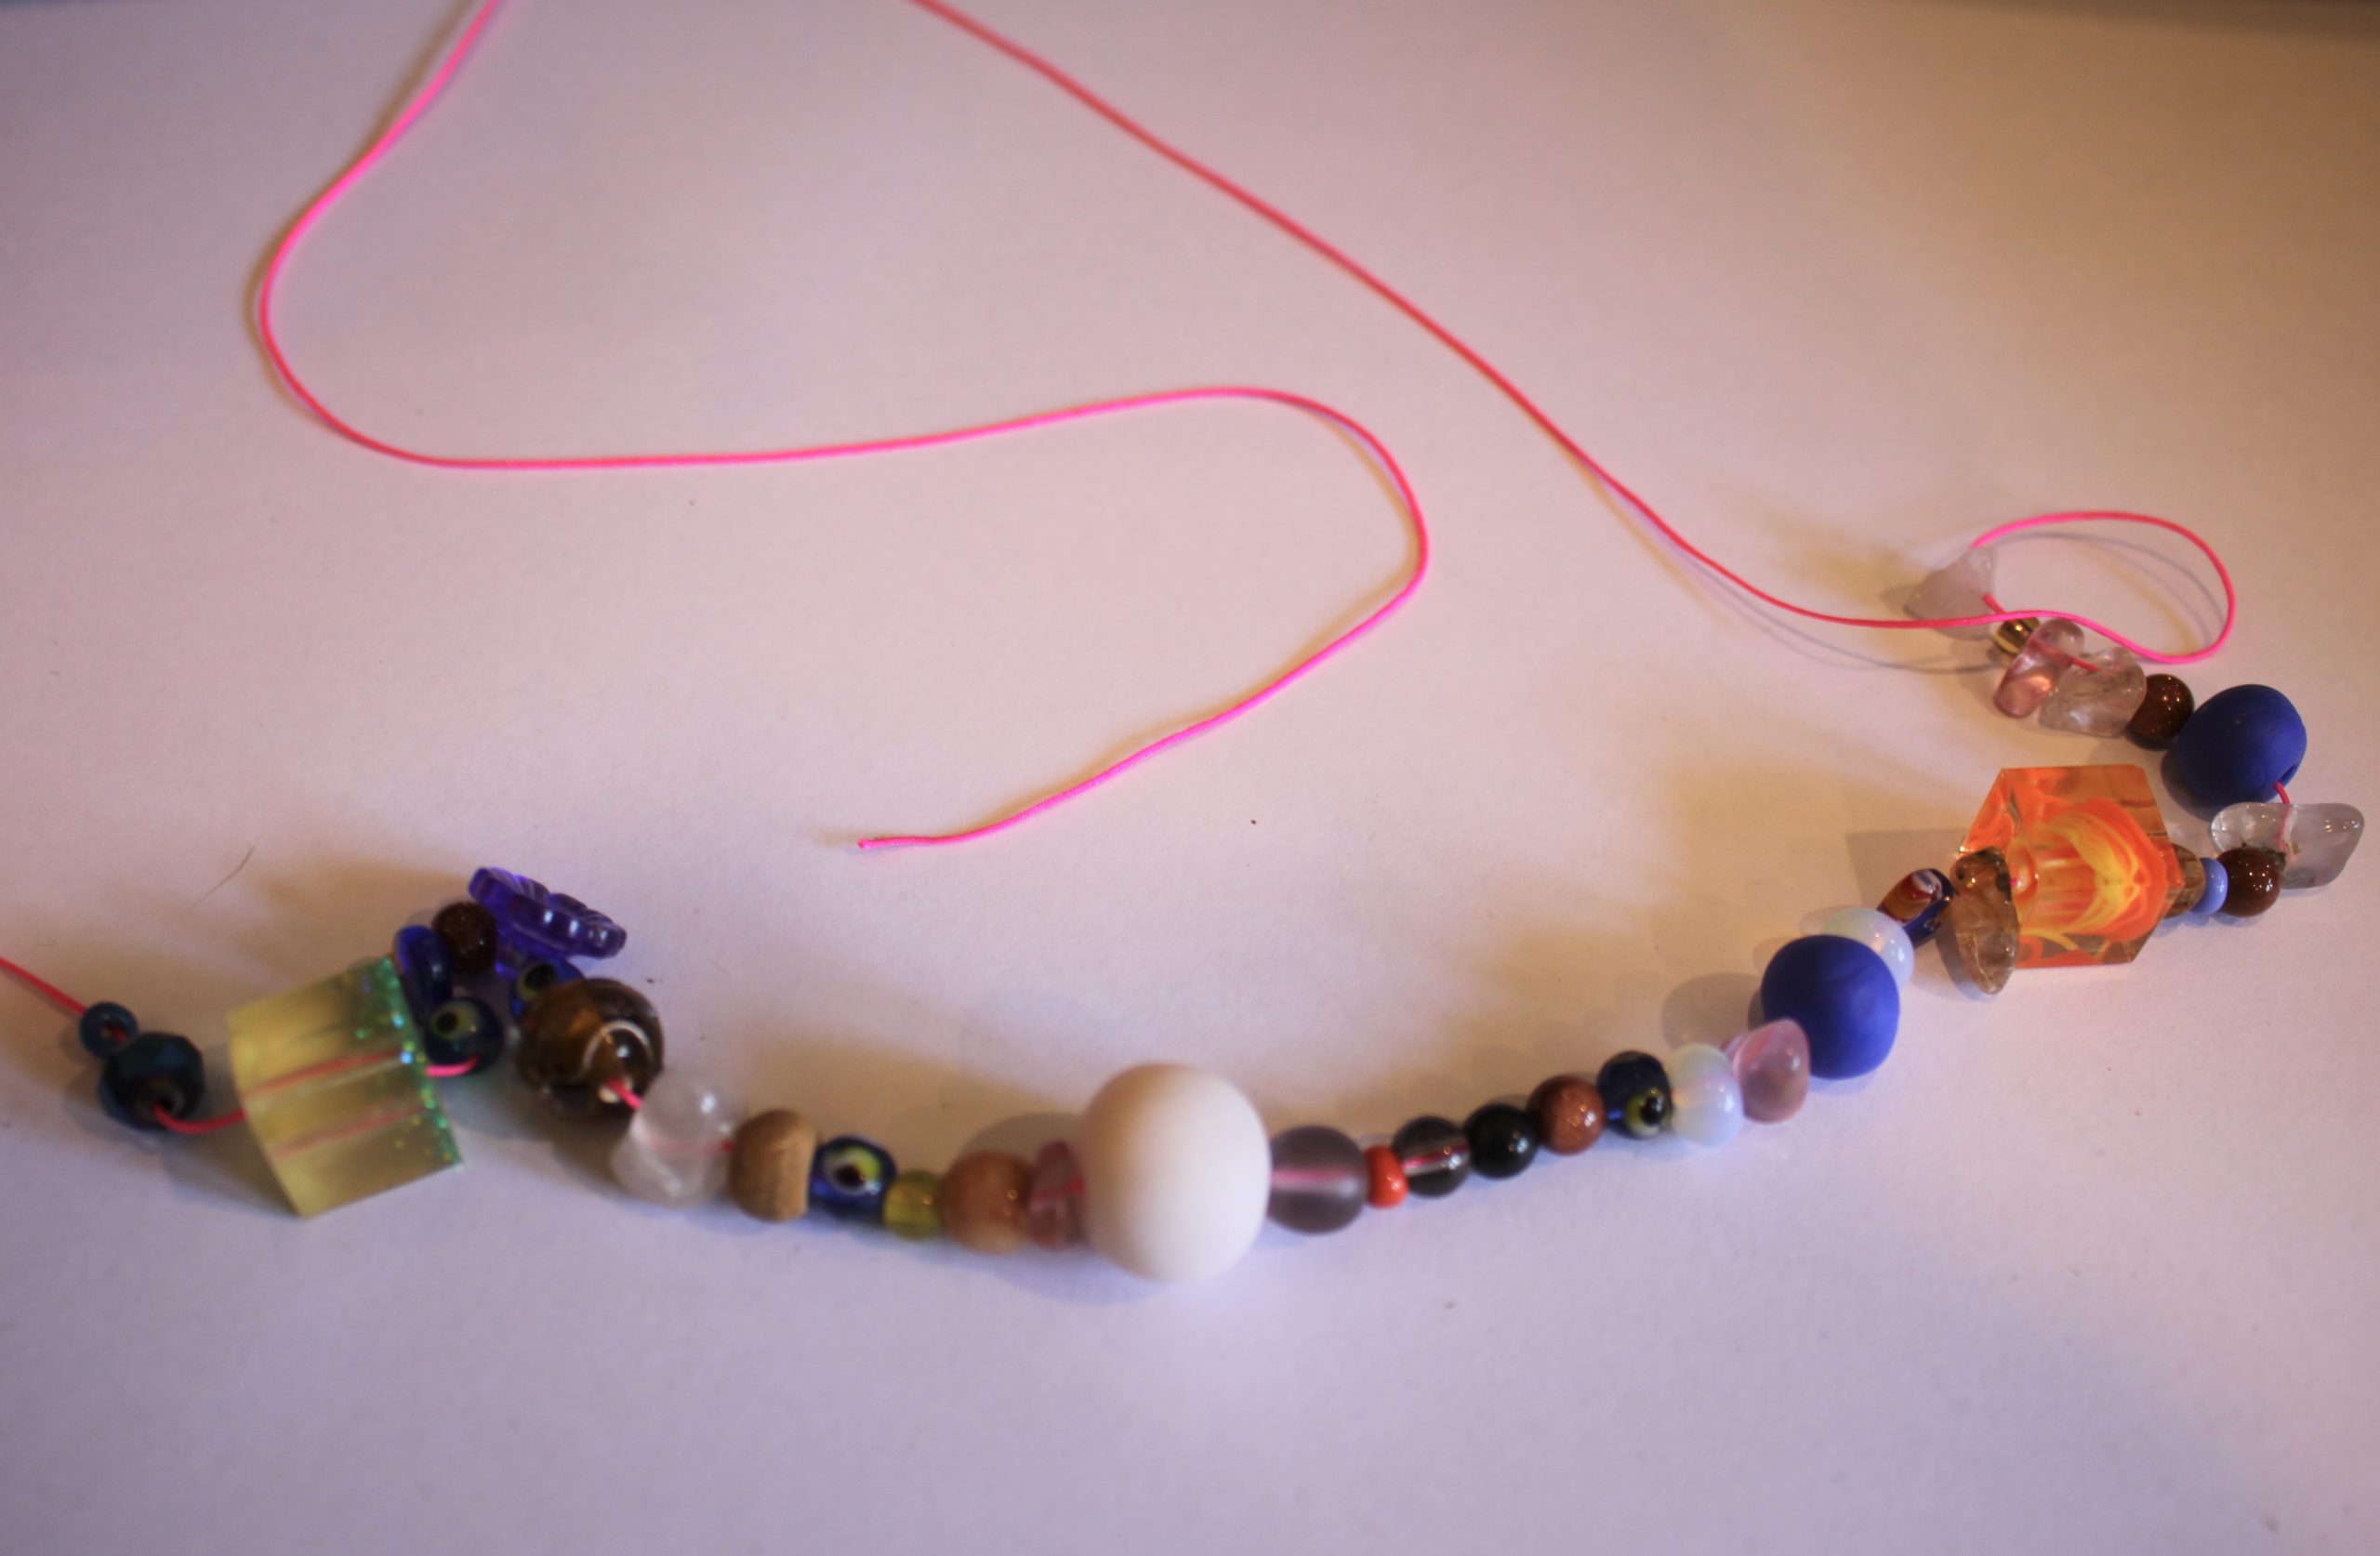
1: Add the beads to the thread.

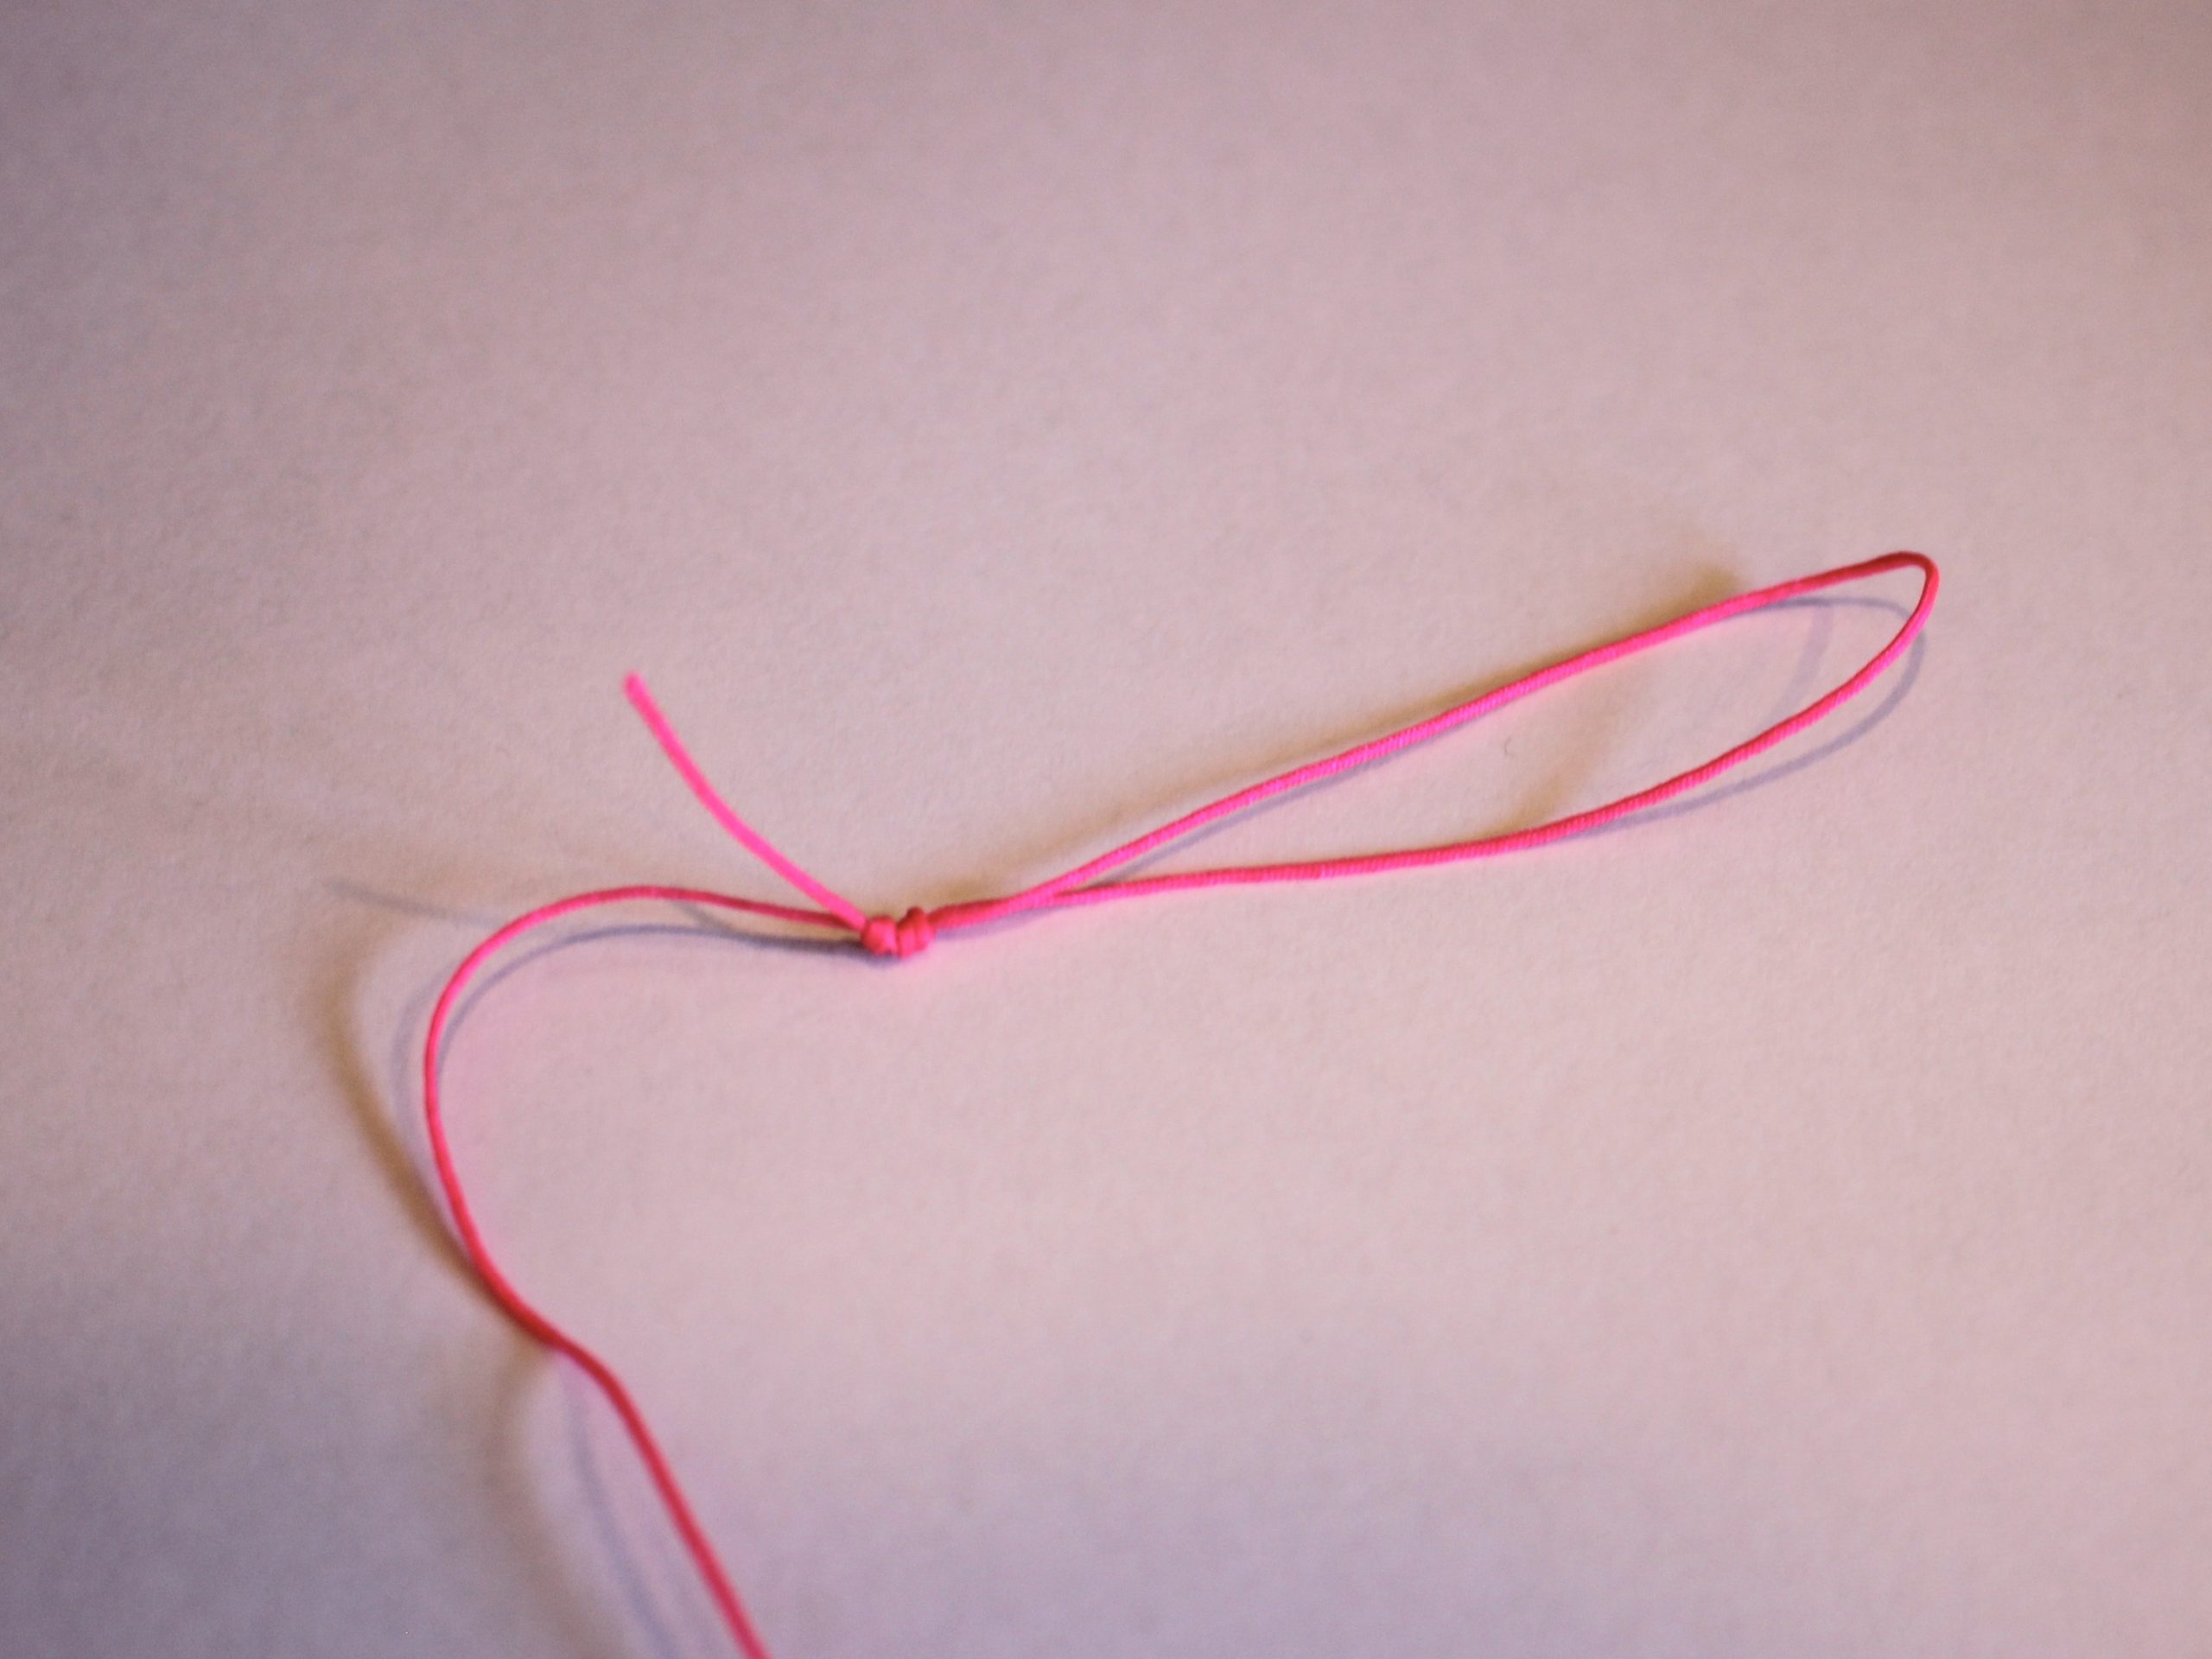
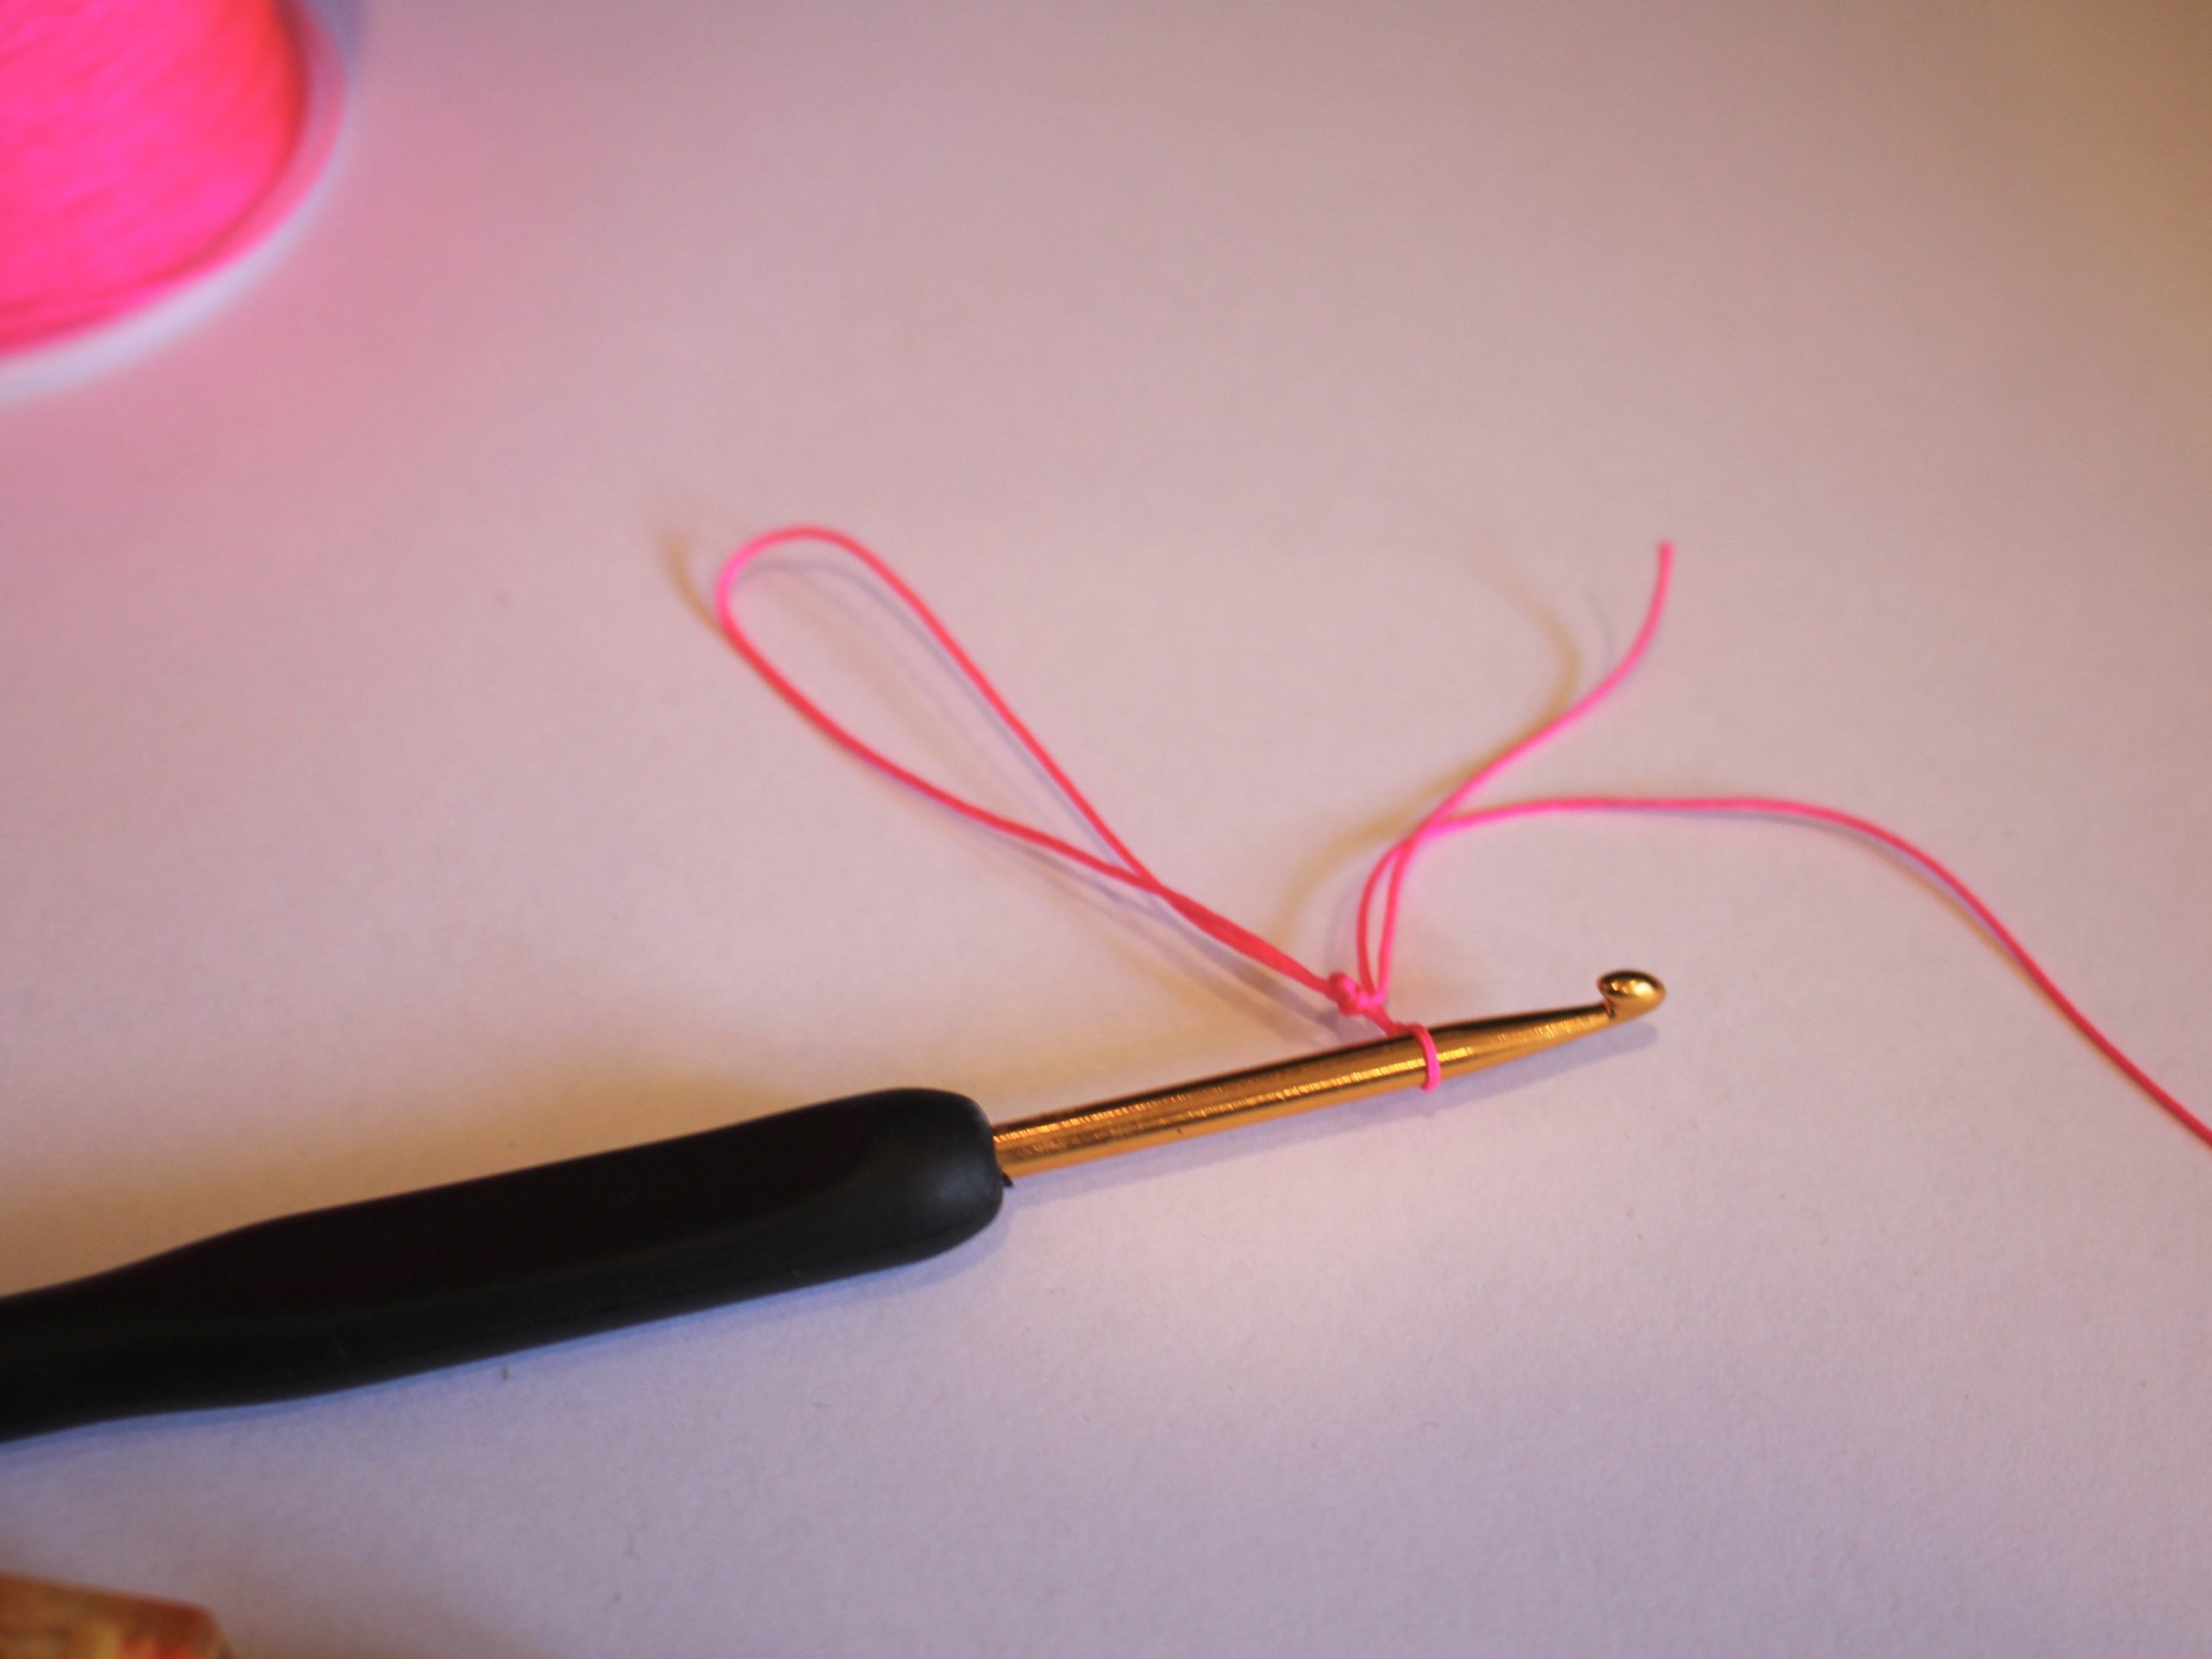
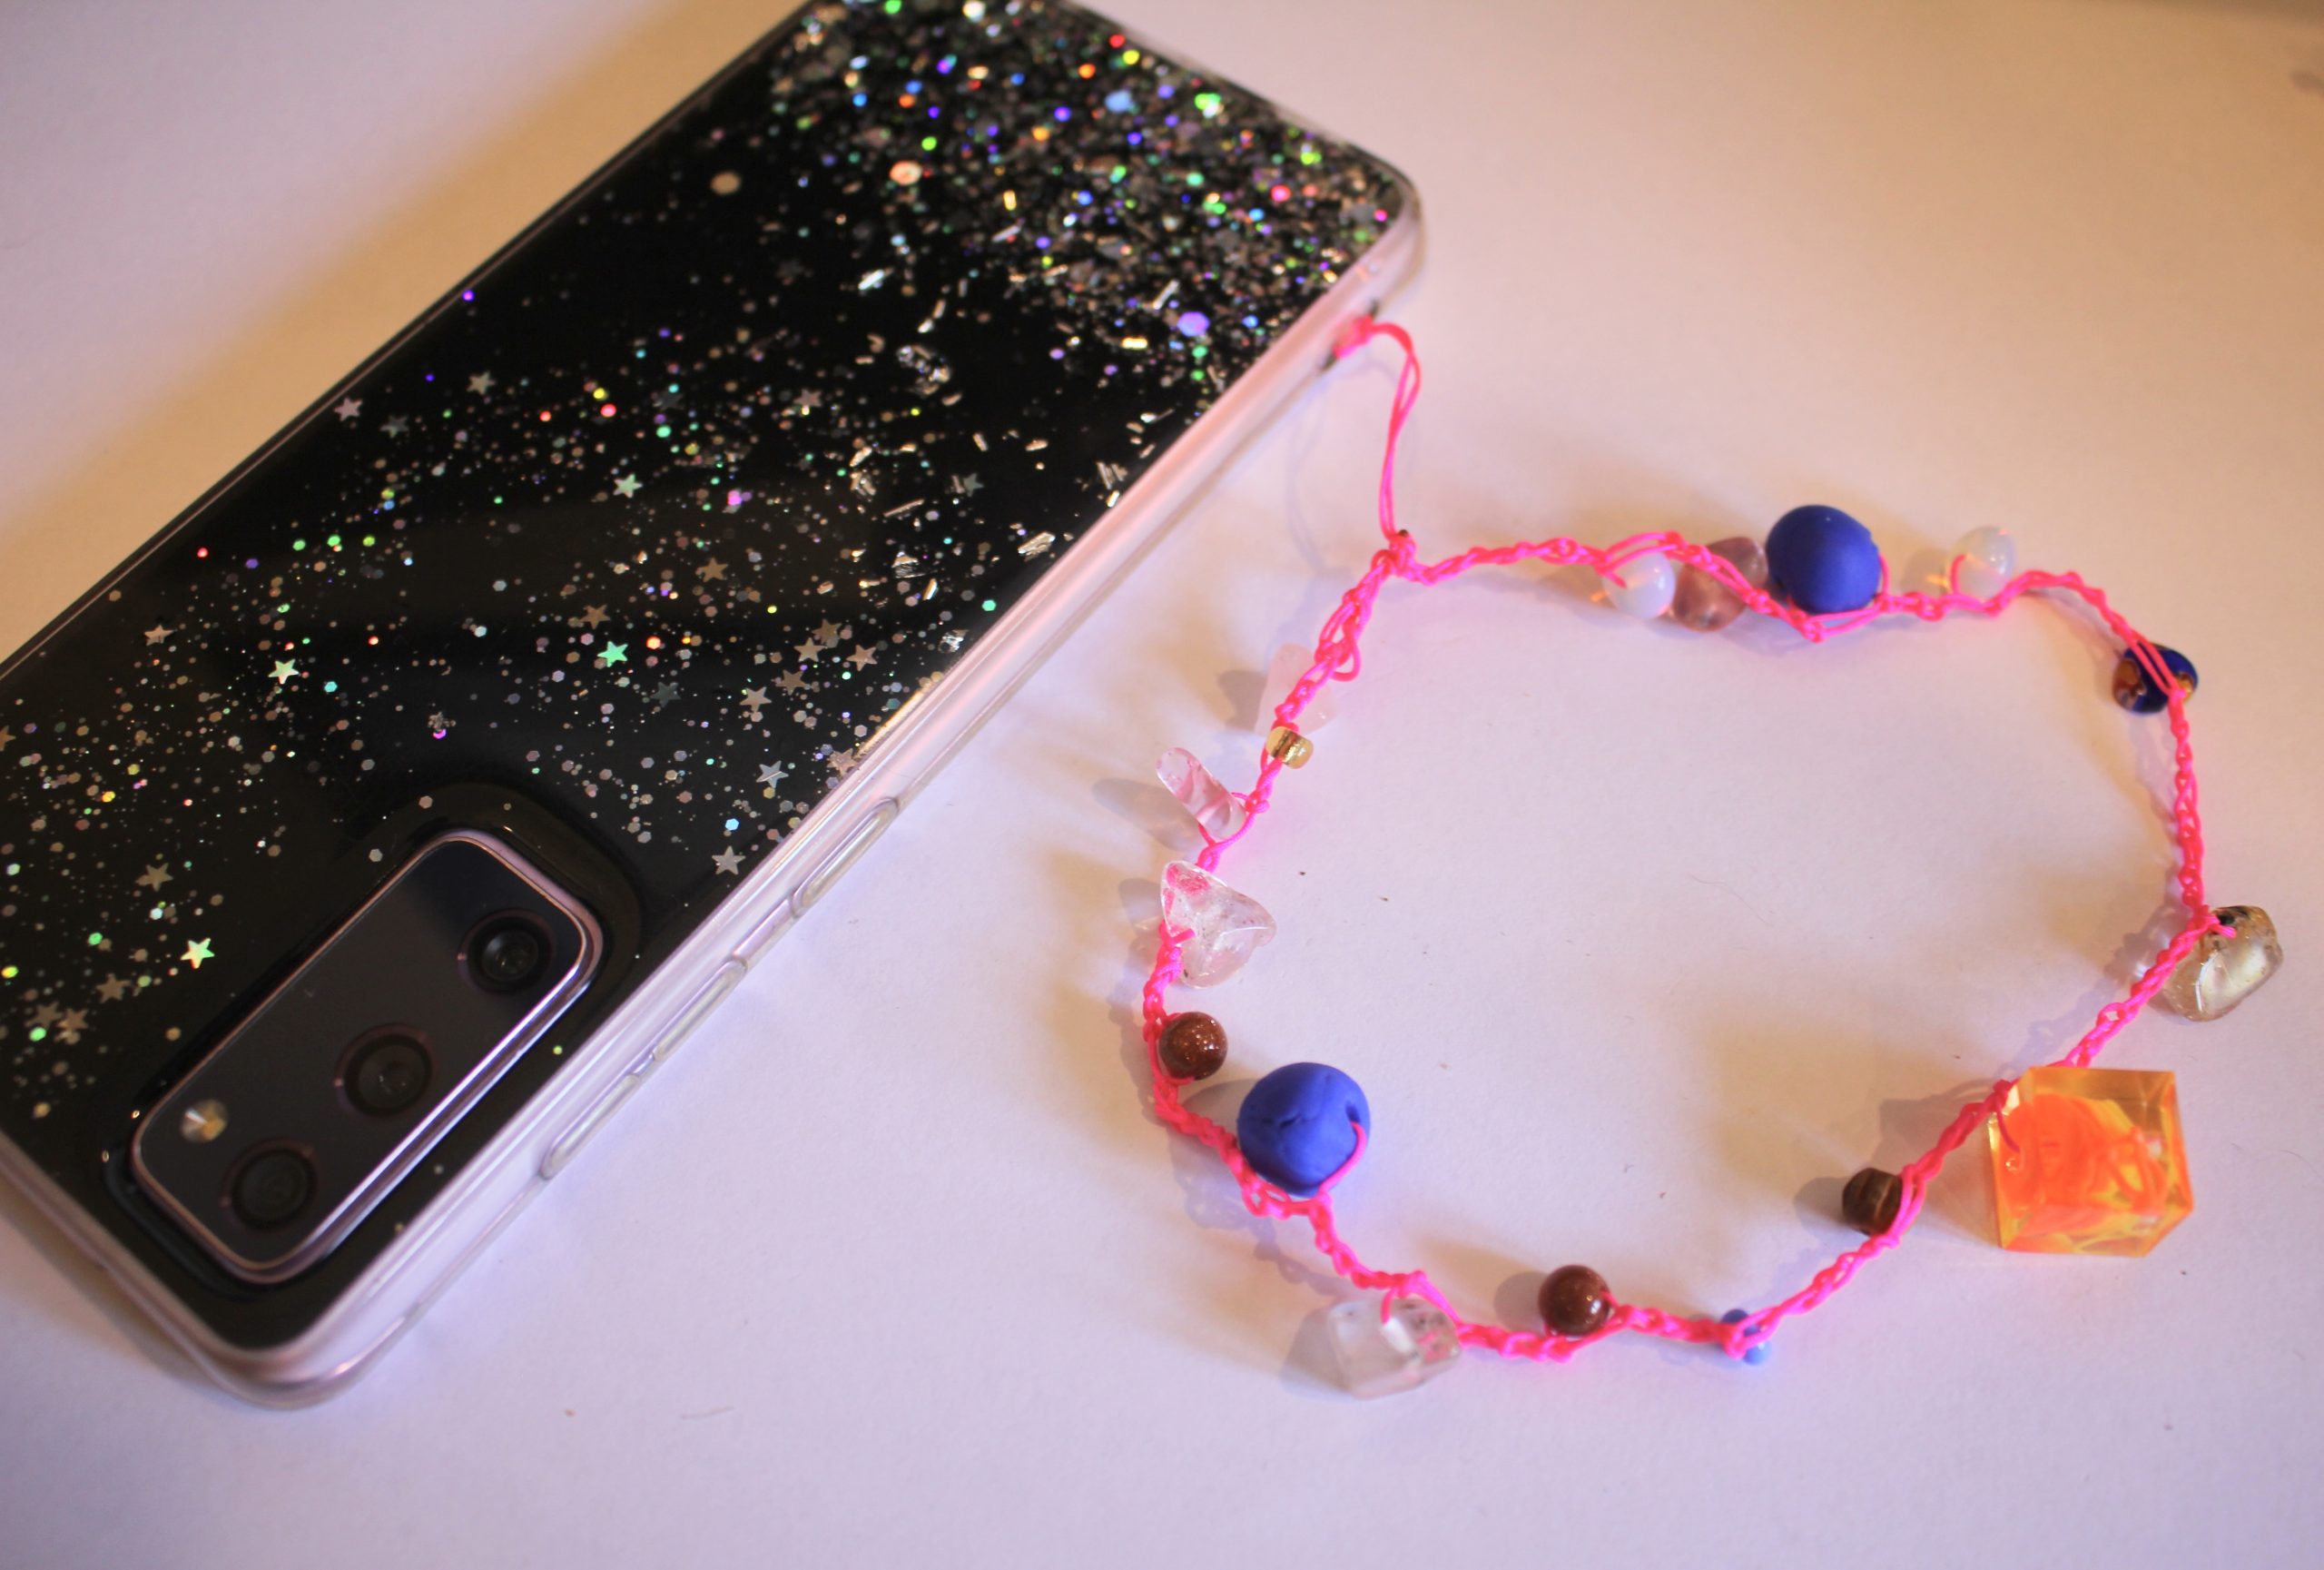
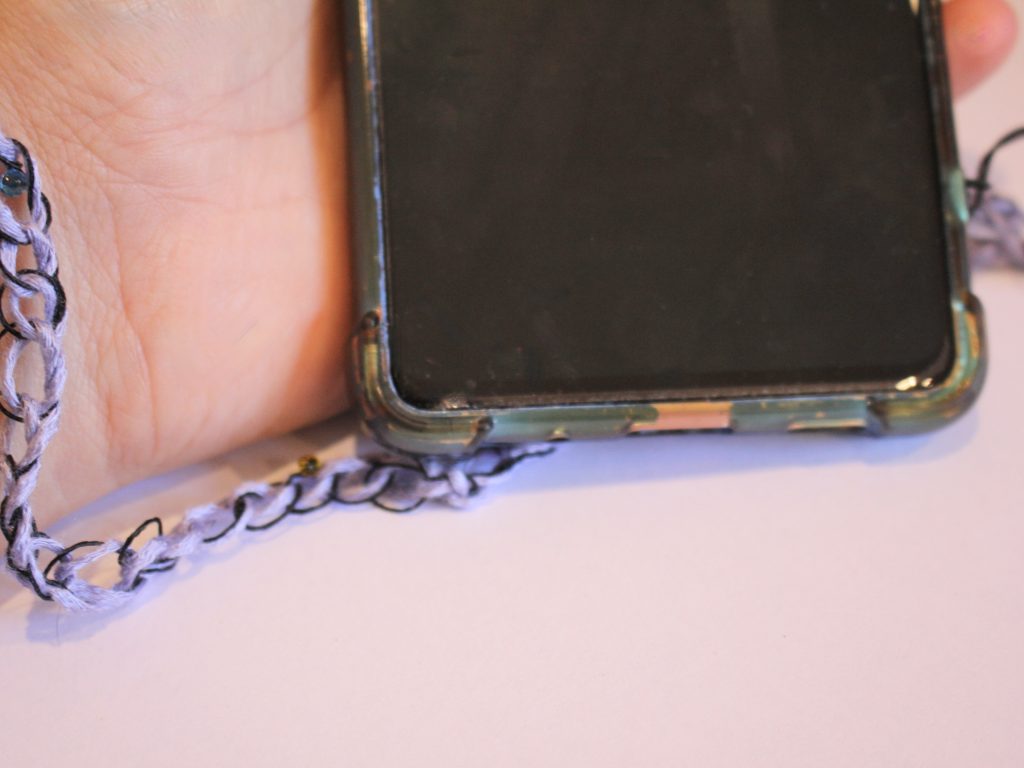
2: Create a loop and tie it in a knot, this will be the loop you use to add the strap to your phone case.

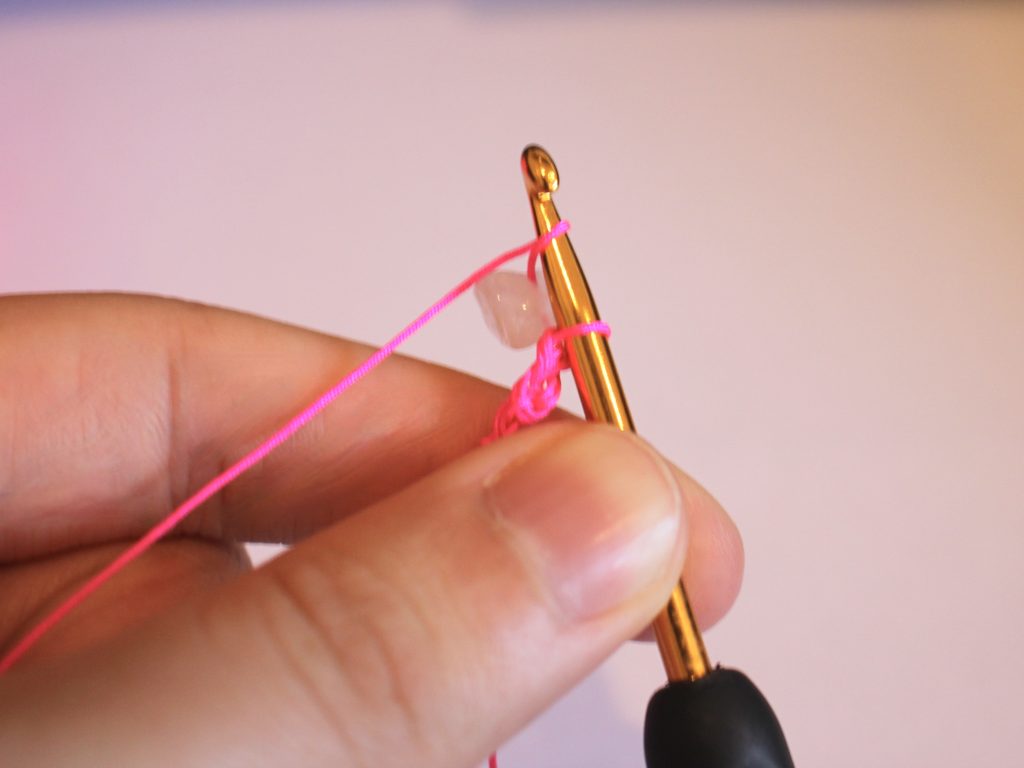
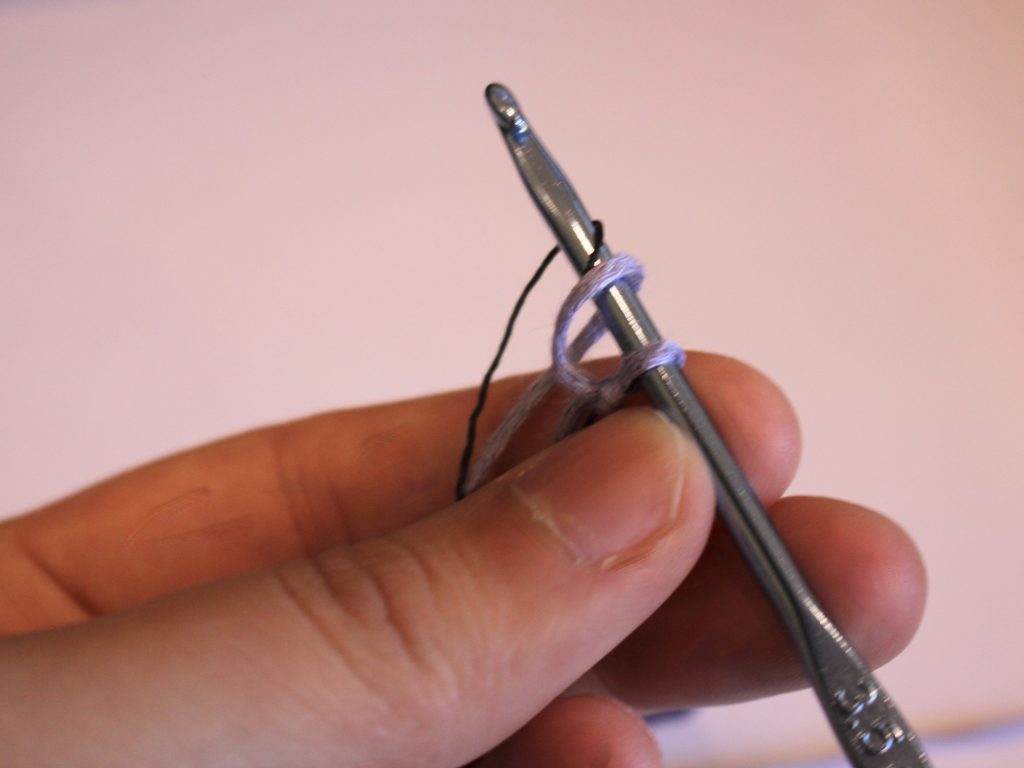
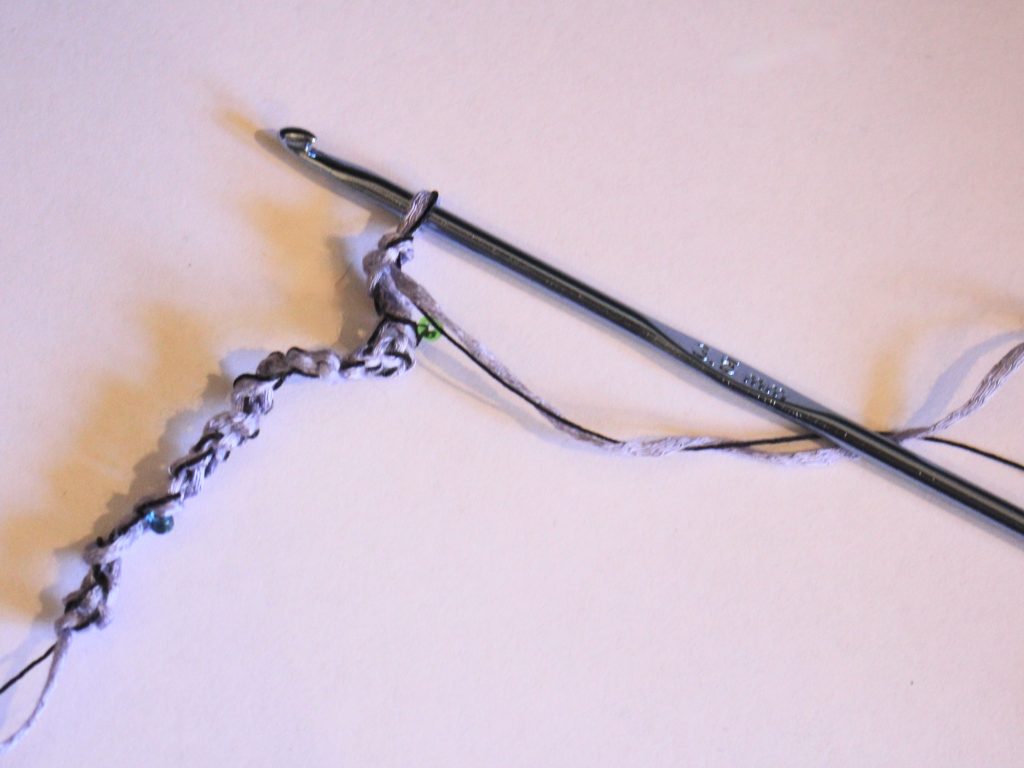
3: Now create a slip knot close to the loop you just made and slip it over the crochet hook.

4: Tighten the loop around the hook.
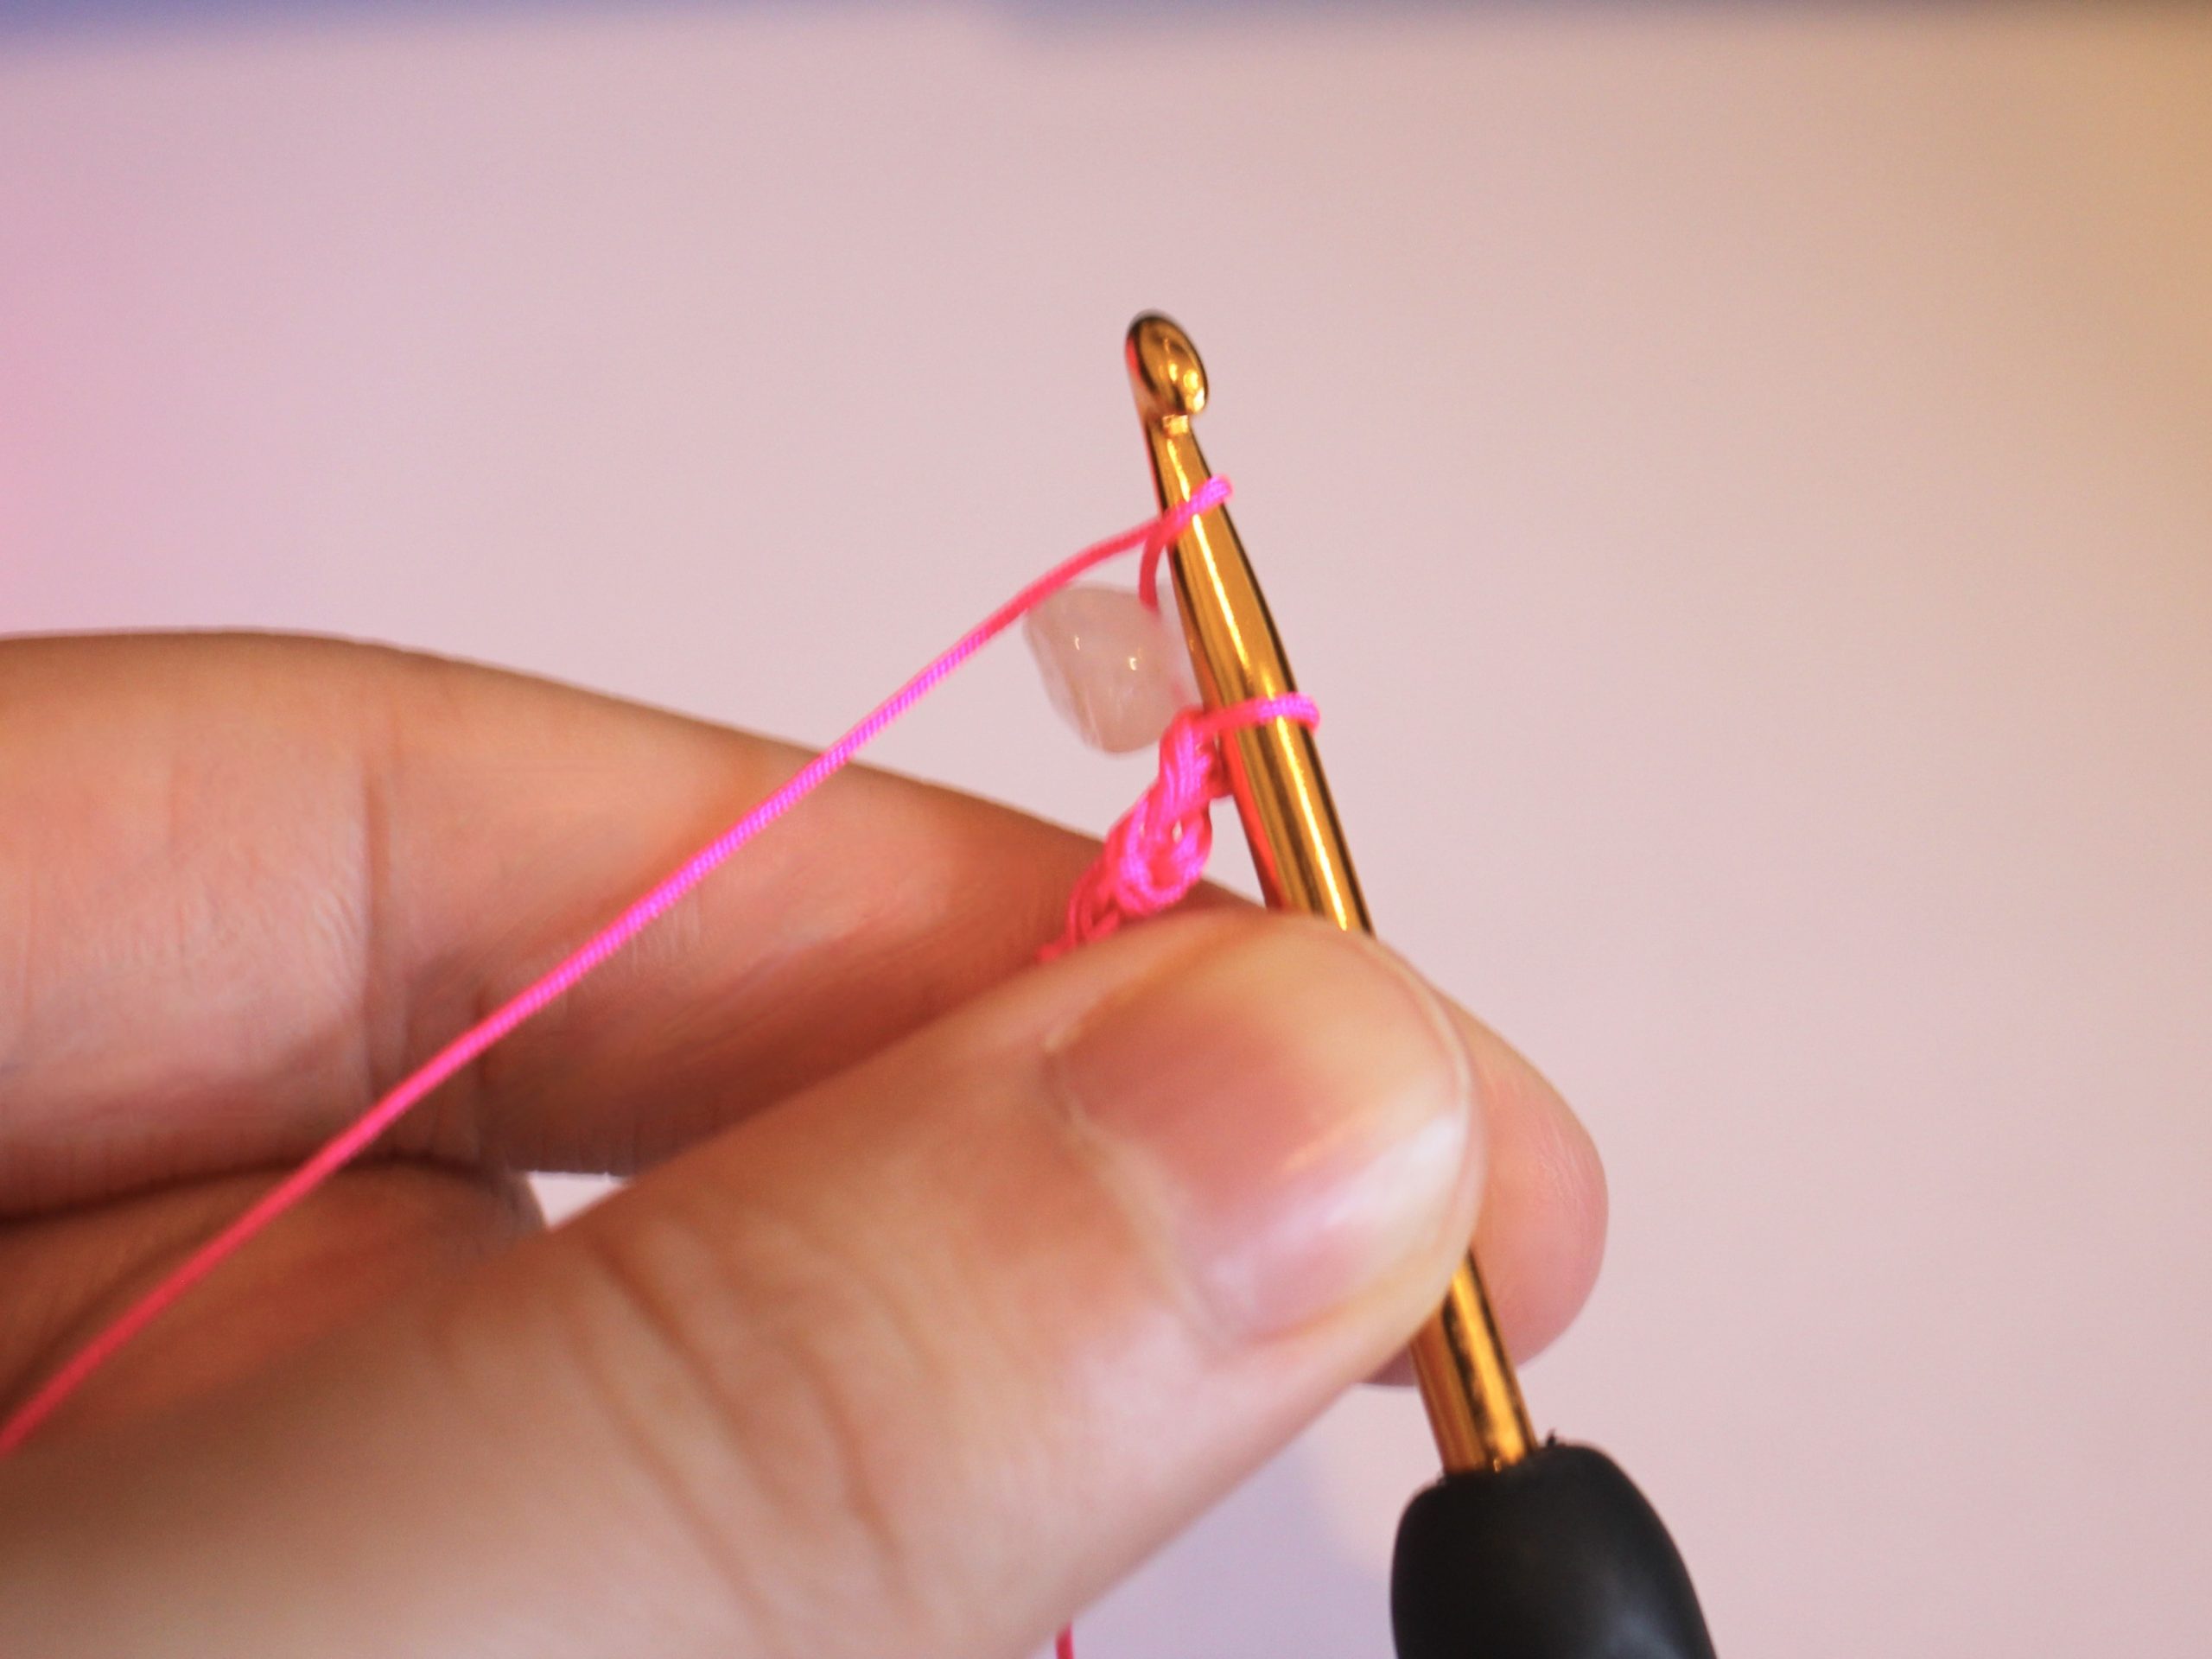
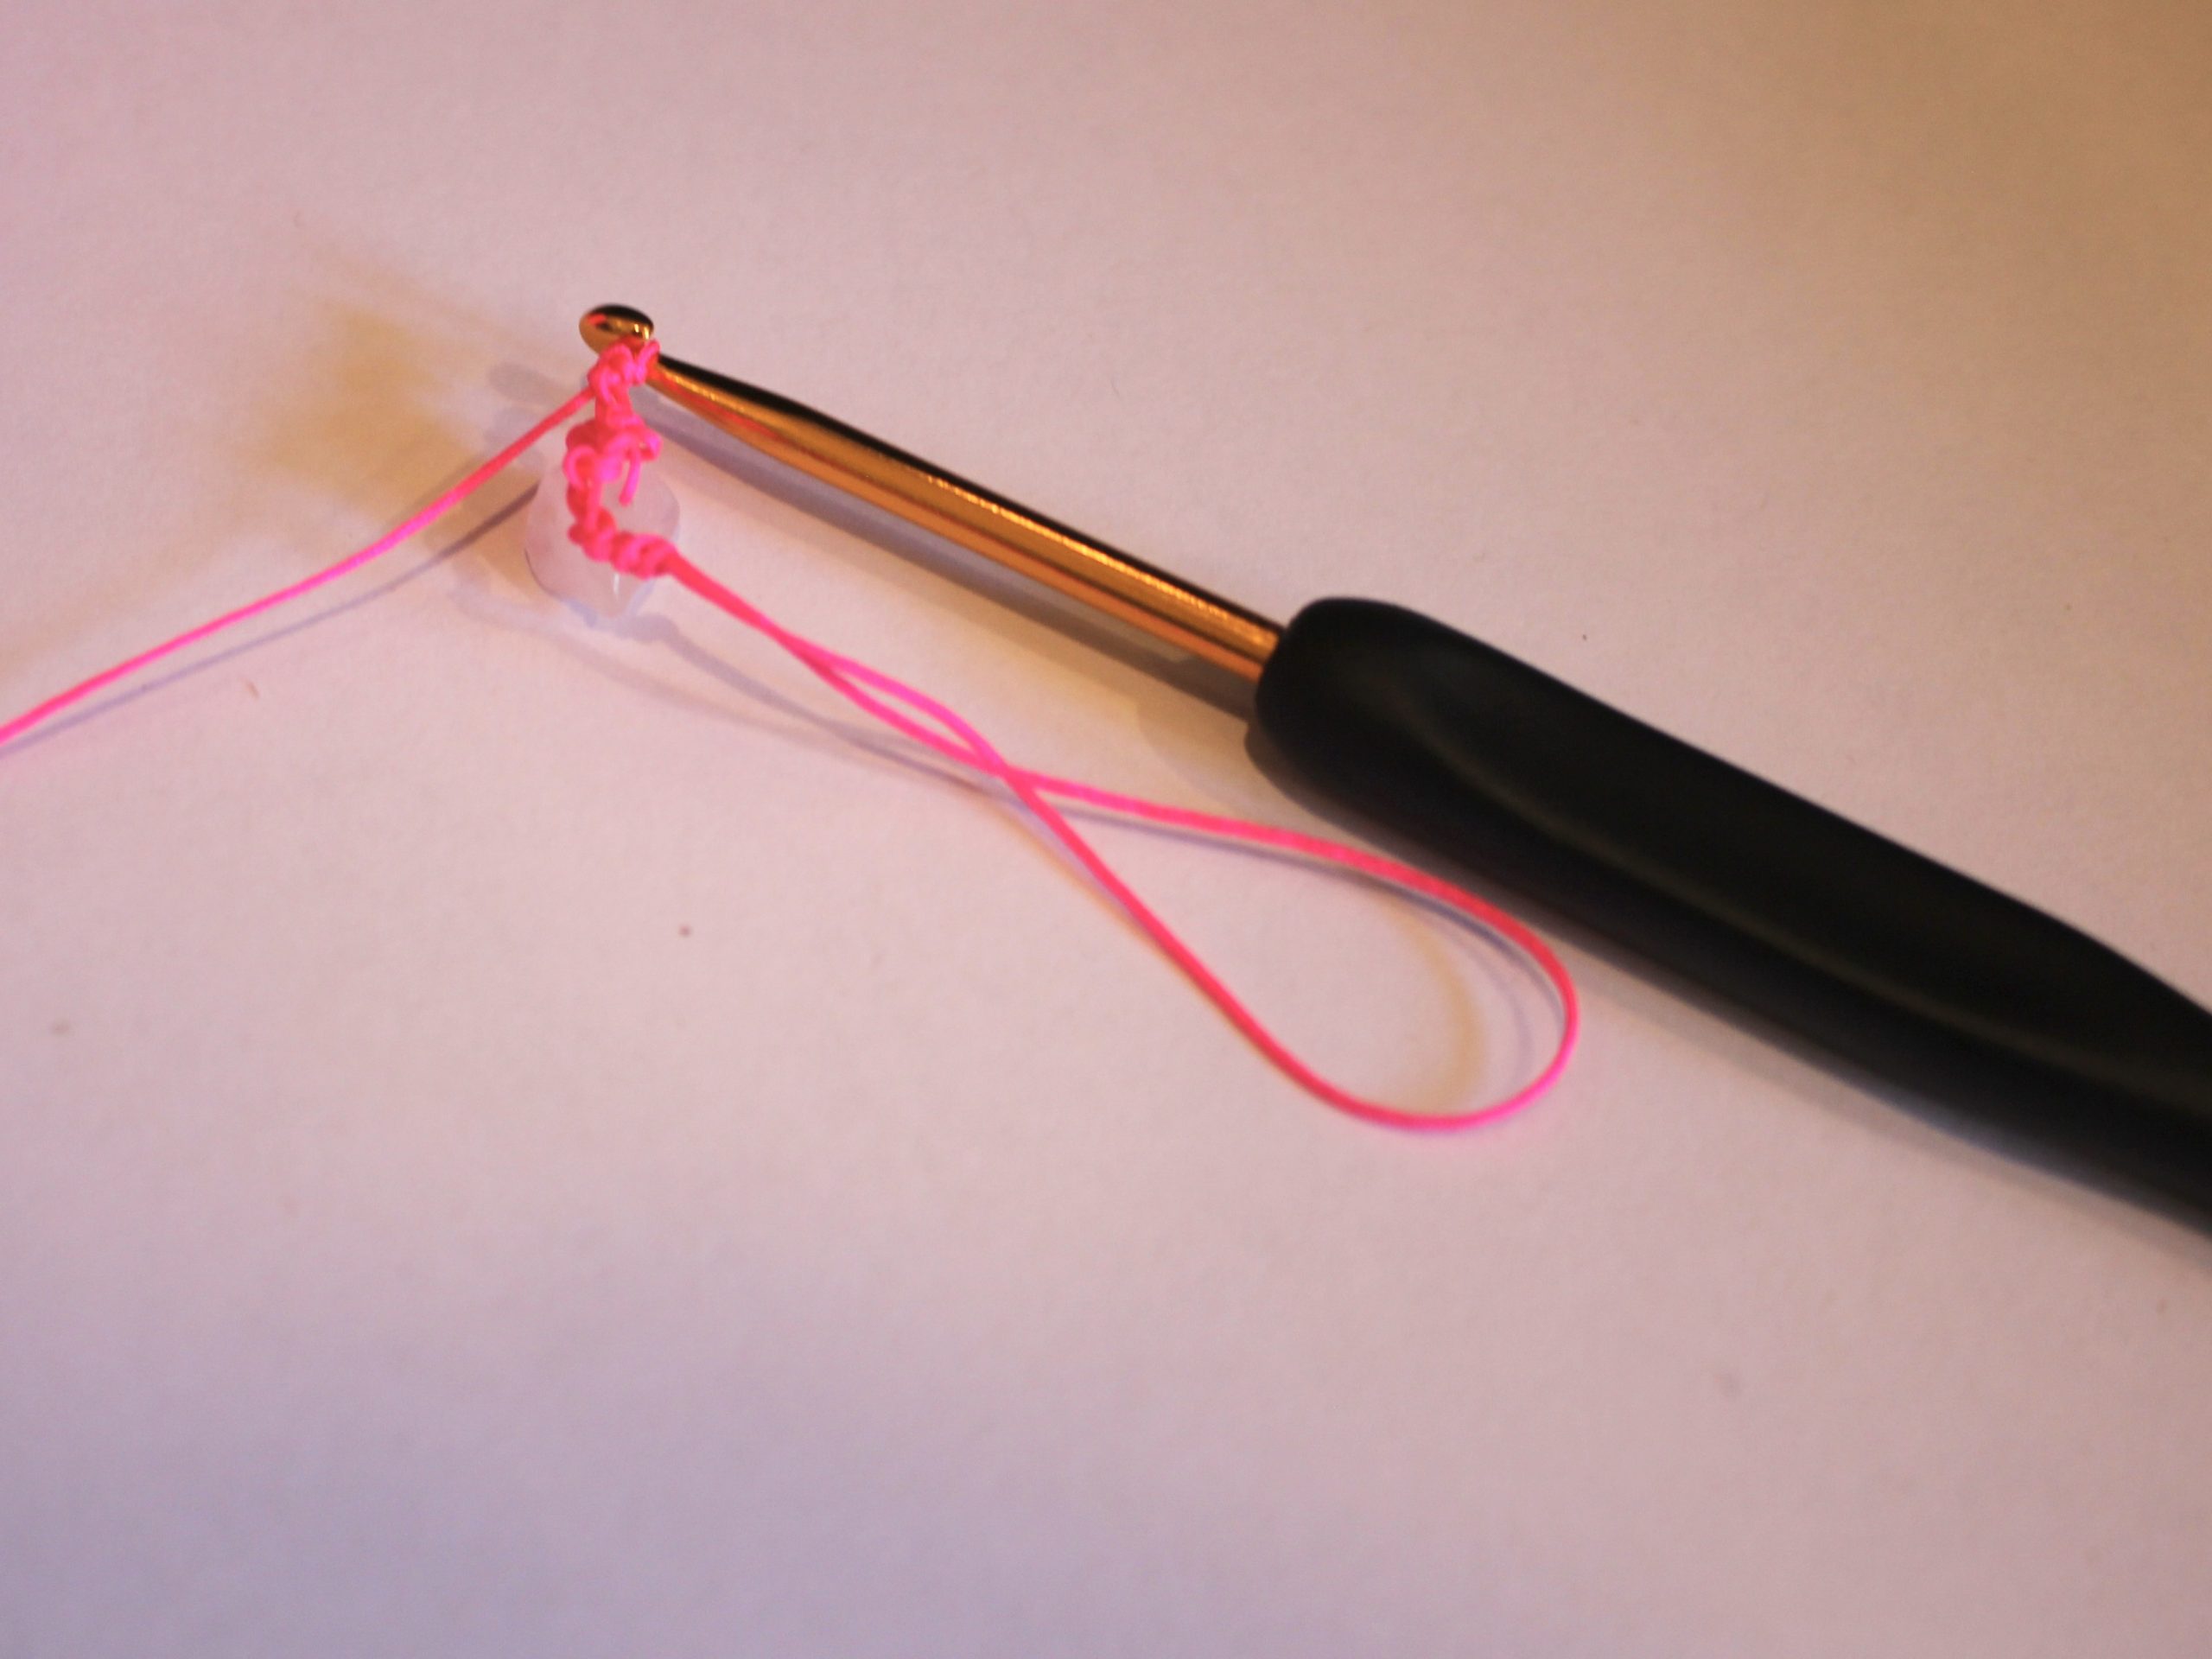
5: Take the longer part of the string and loop it over the crochet hook in front of the first loop.
6: Take the first loop and pull it over the second one and off the crochet hook.
7: Repeat steps 5 and 6 a couple more times before sliding one of the beads up to the hook.
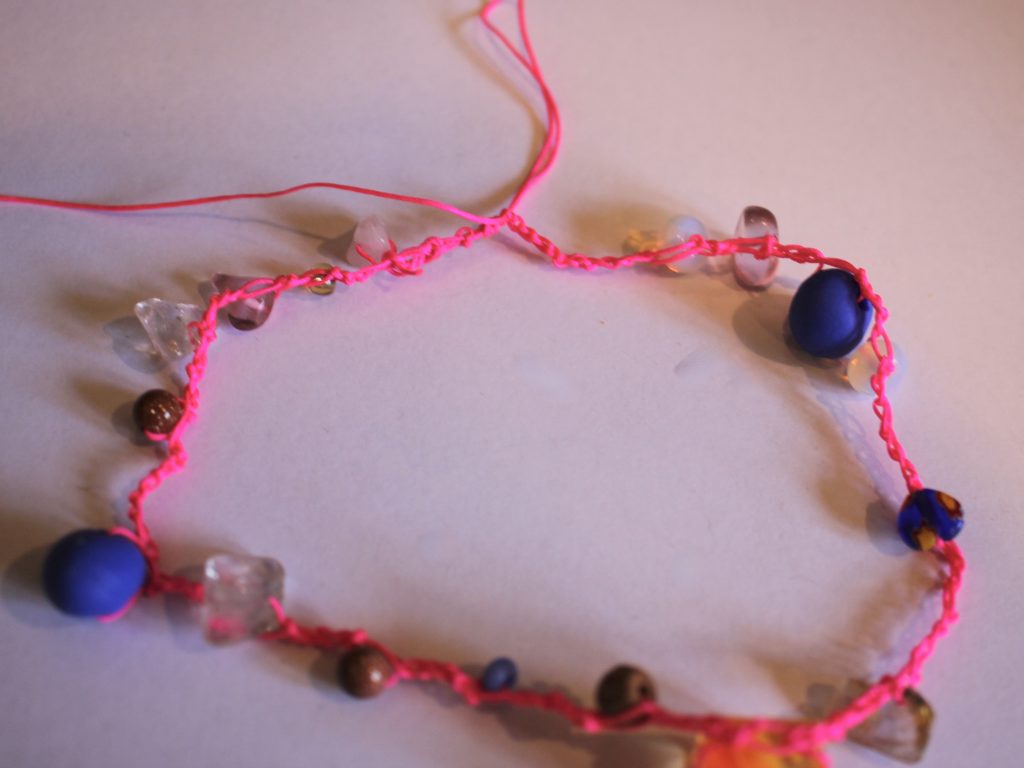
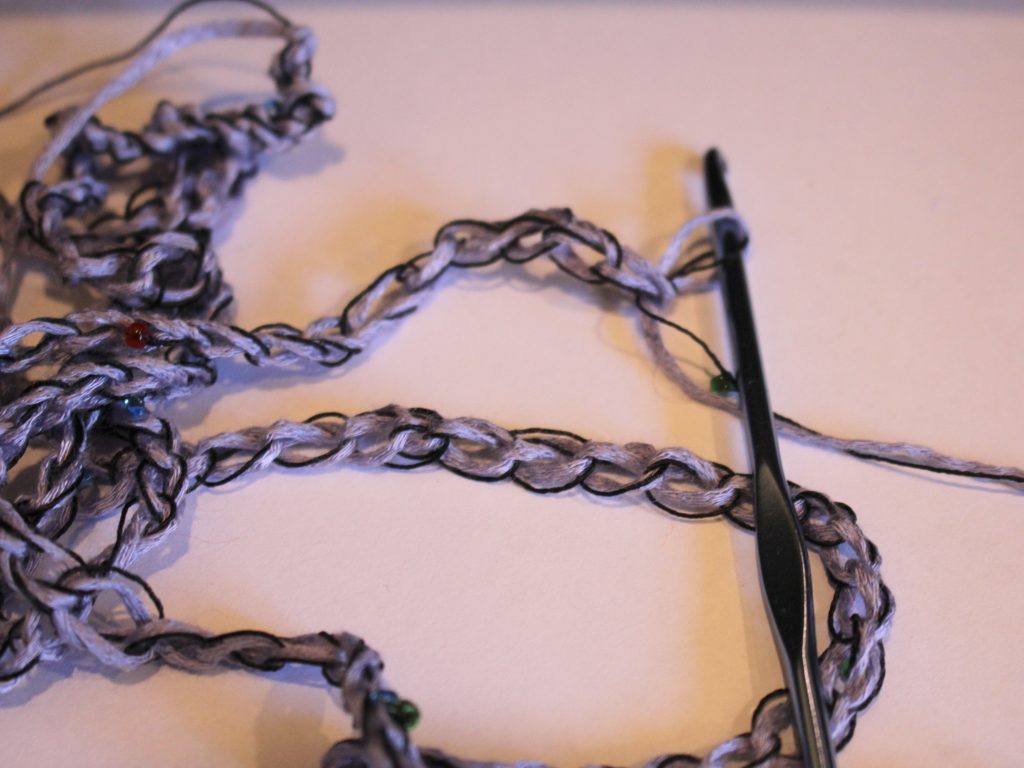
8: With the bead next to the hook, loop the thread around the hook again to create another link to the crochet chain. When you pull the loop over, it will secure the bead in place. Continue in this fashion, adding beads as you see fit until you have a strap long enough to fit around your wrist loosely.


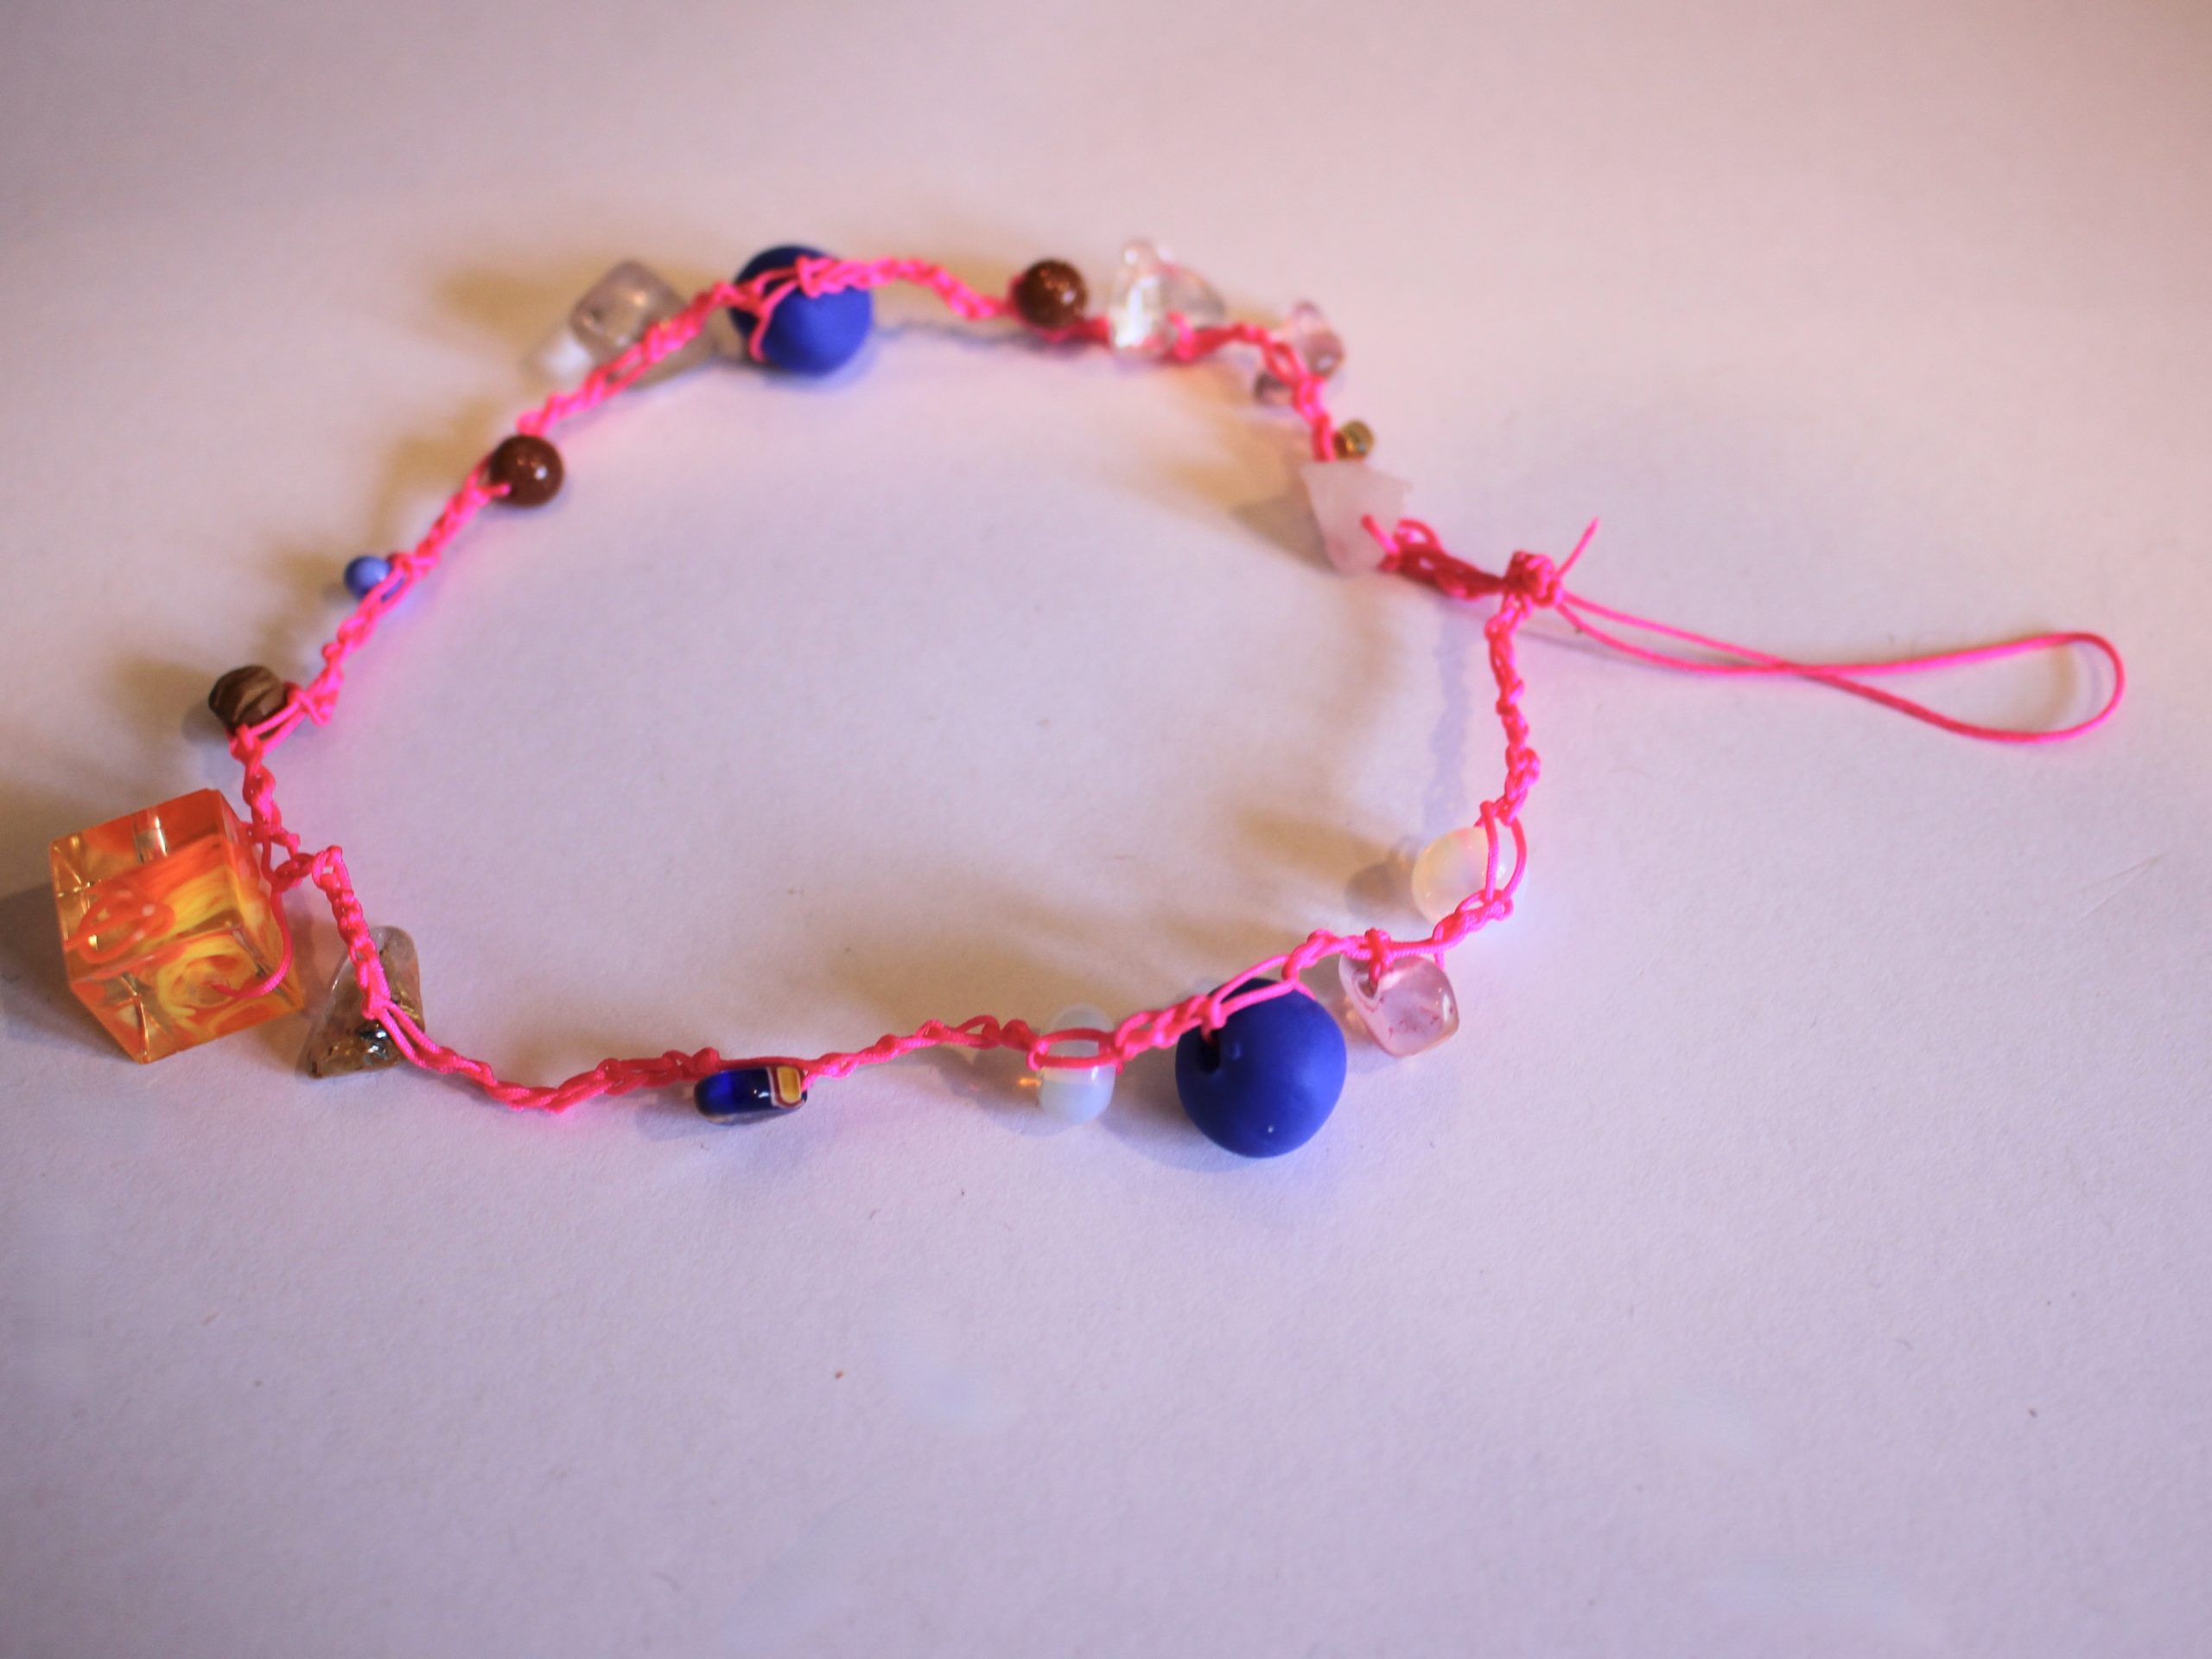
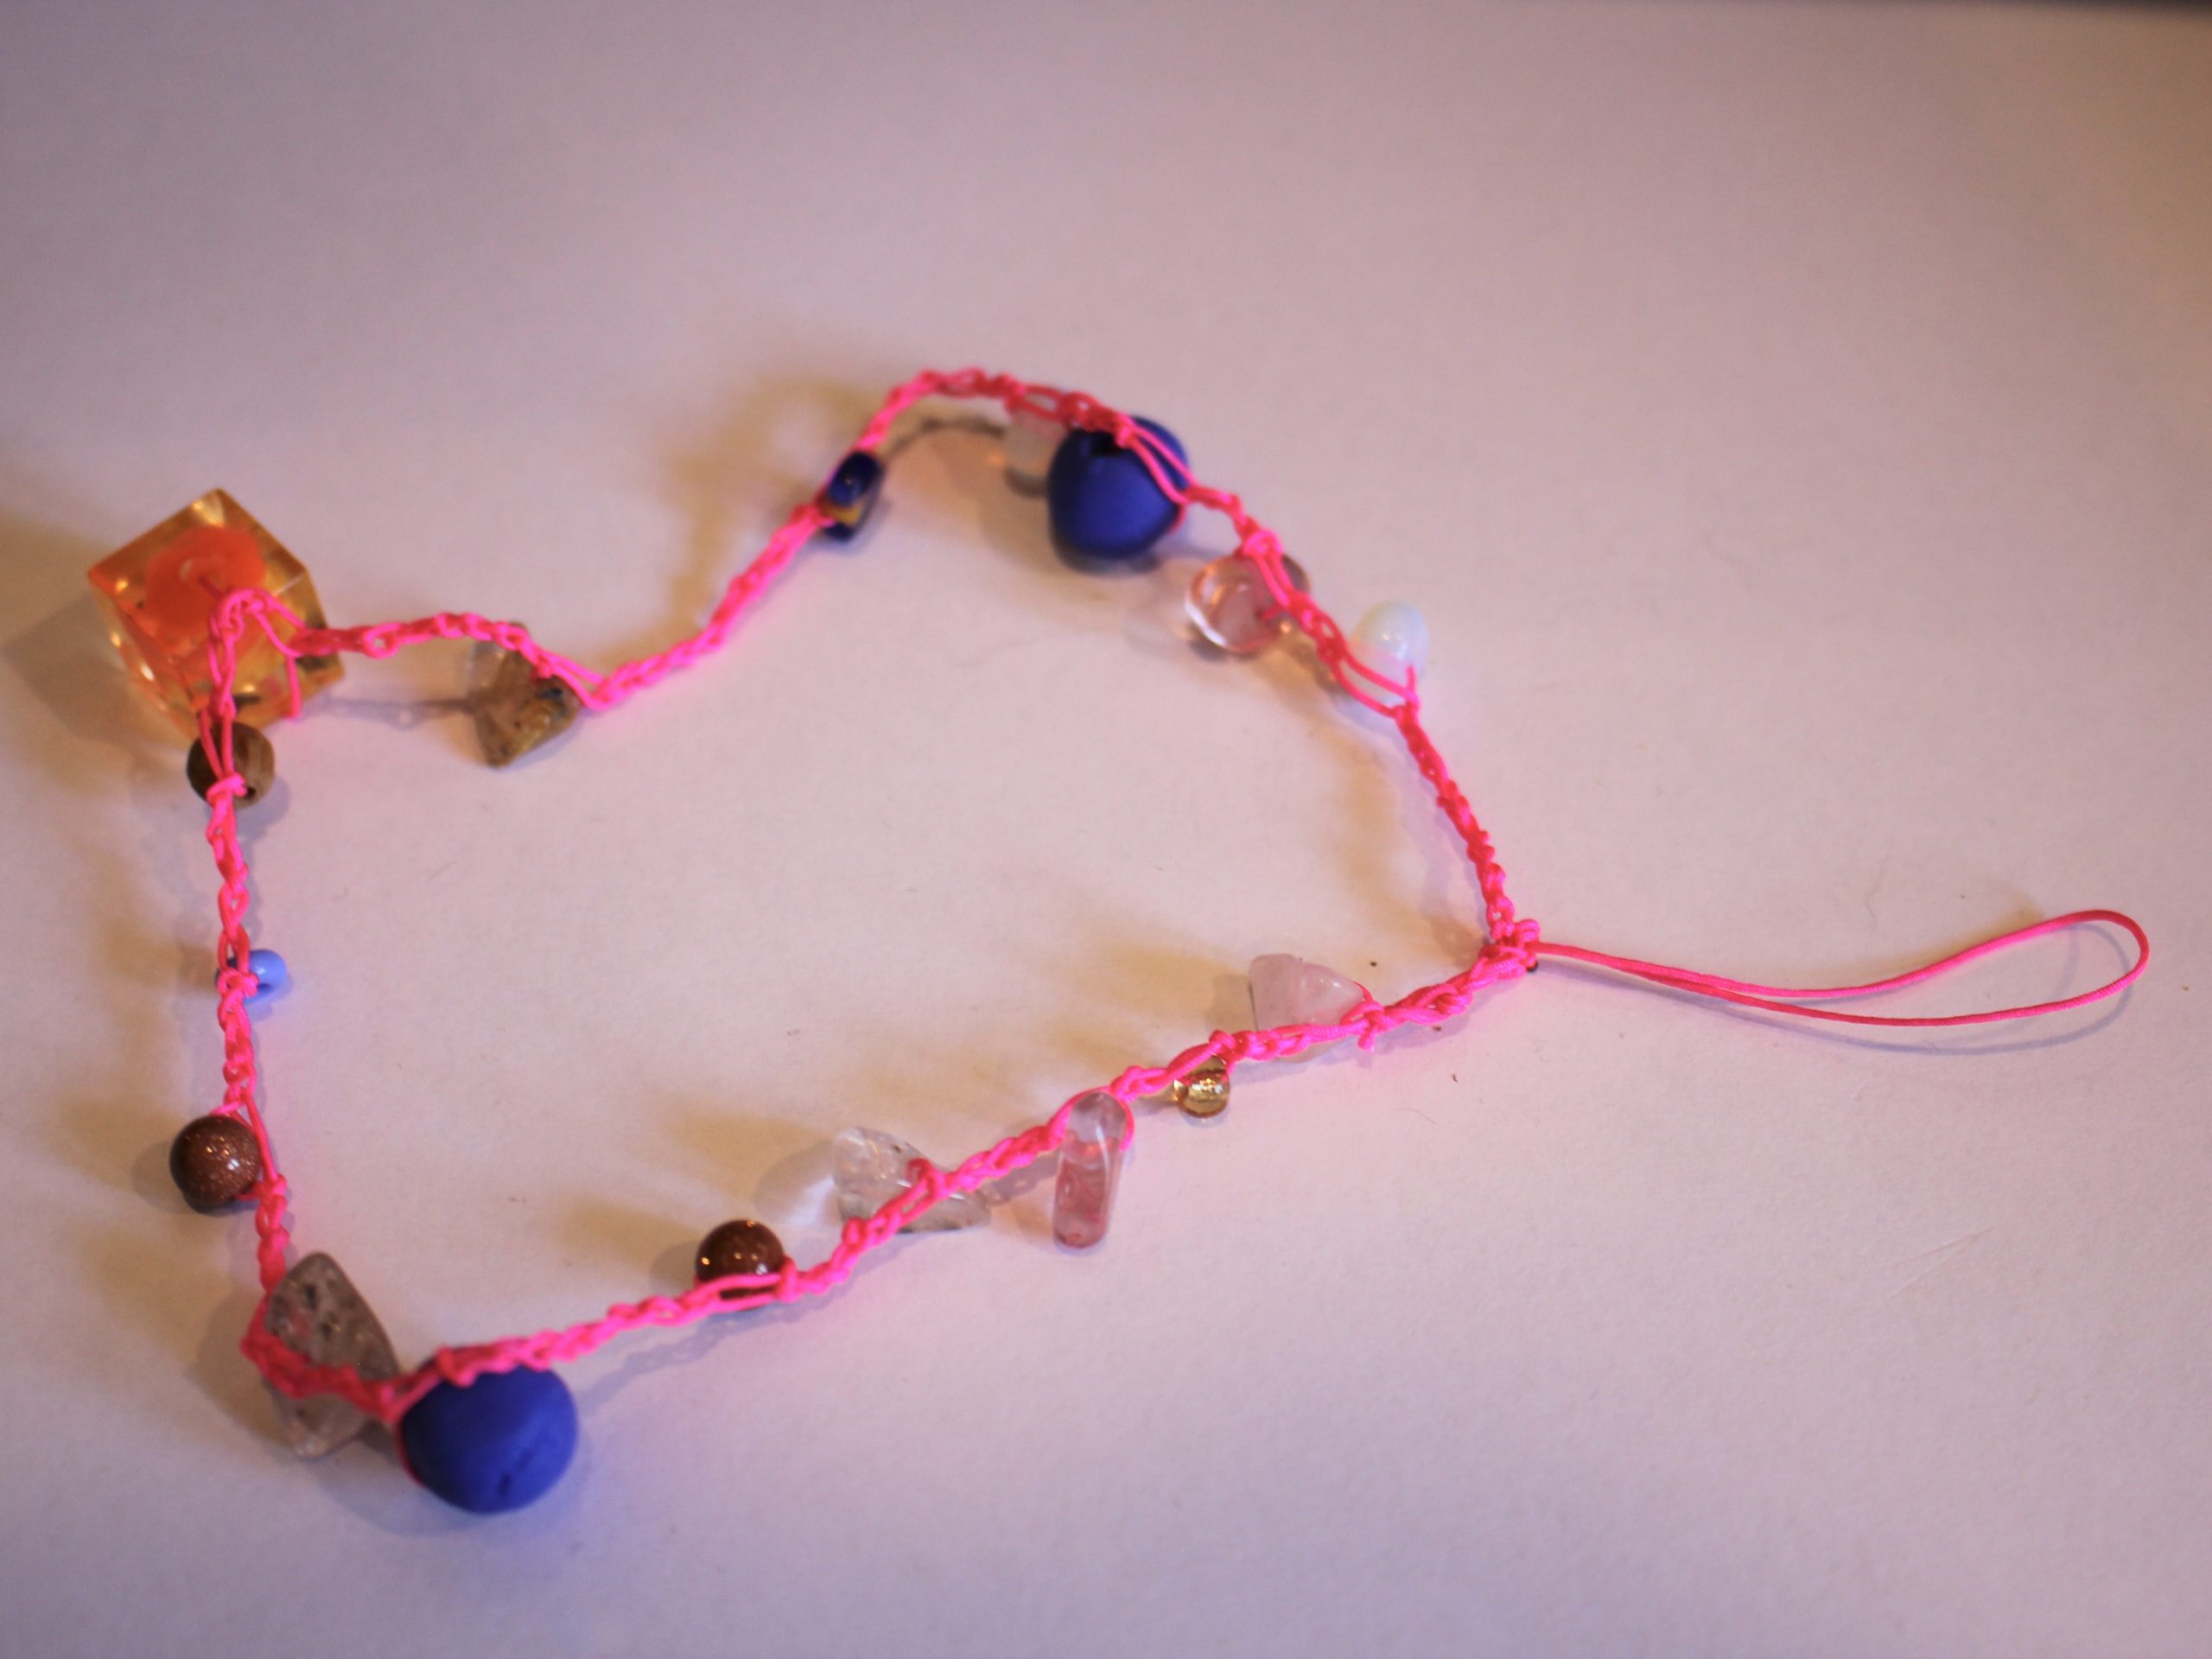
9: Once your crochet chain is long enough, cut the thread and secure the end loop by threading the end through the last loop of the chain.

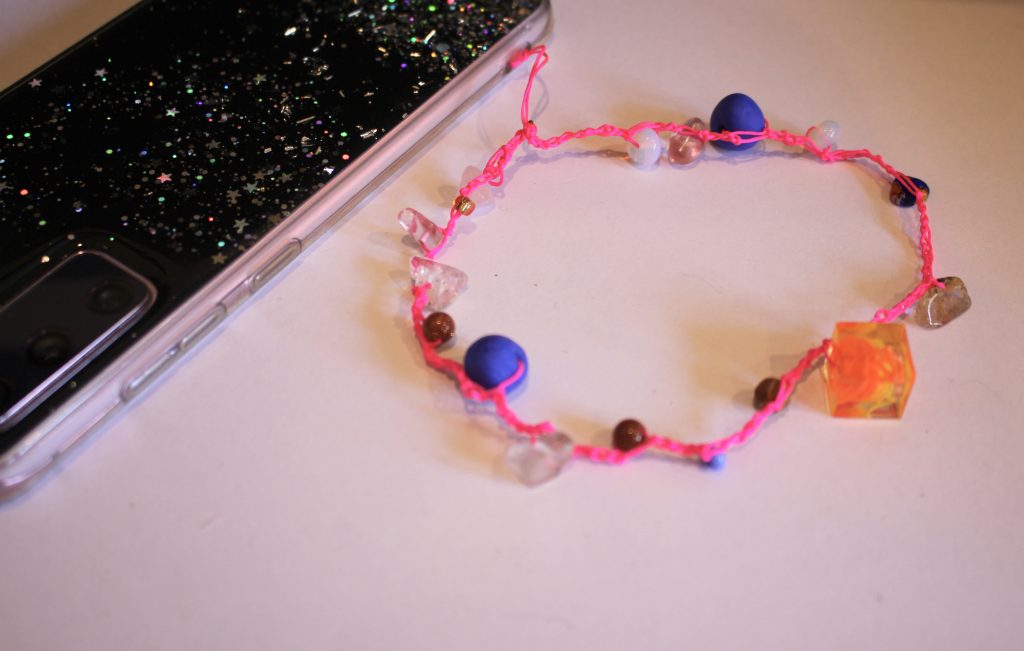
10: Tie the ends of the strap together, securing the knot a few times.
11: Trim the excess thread.

12: Add a dab of glue to the knot to secure it in place.

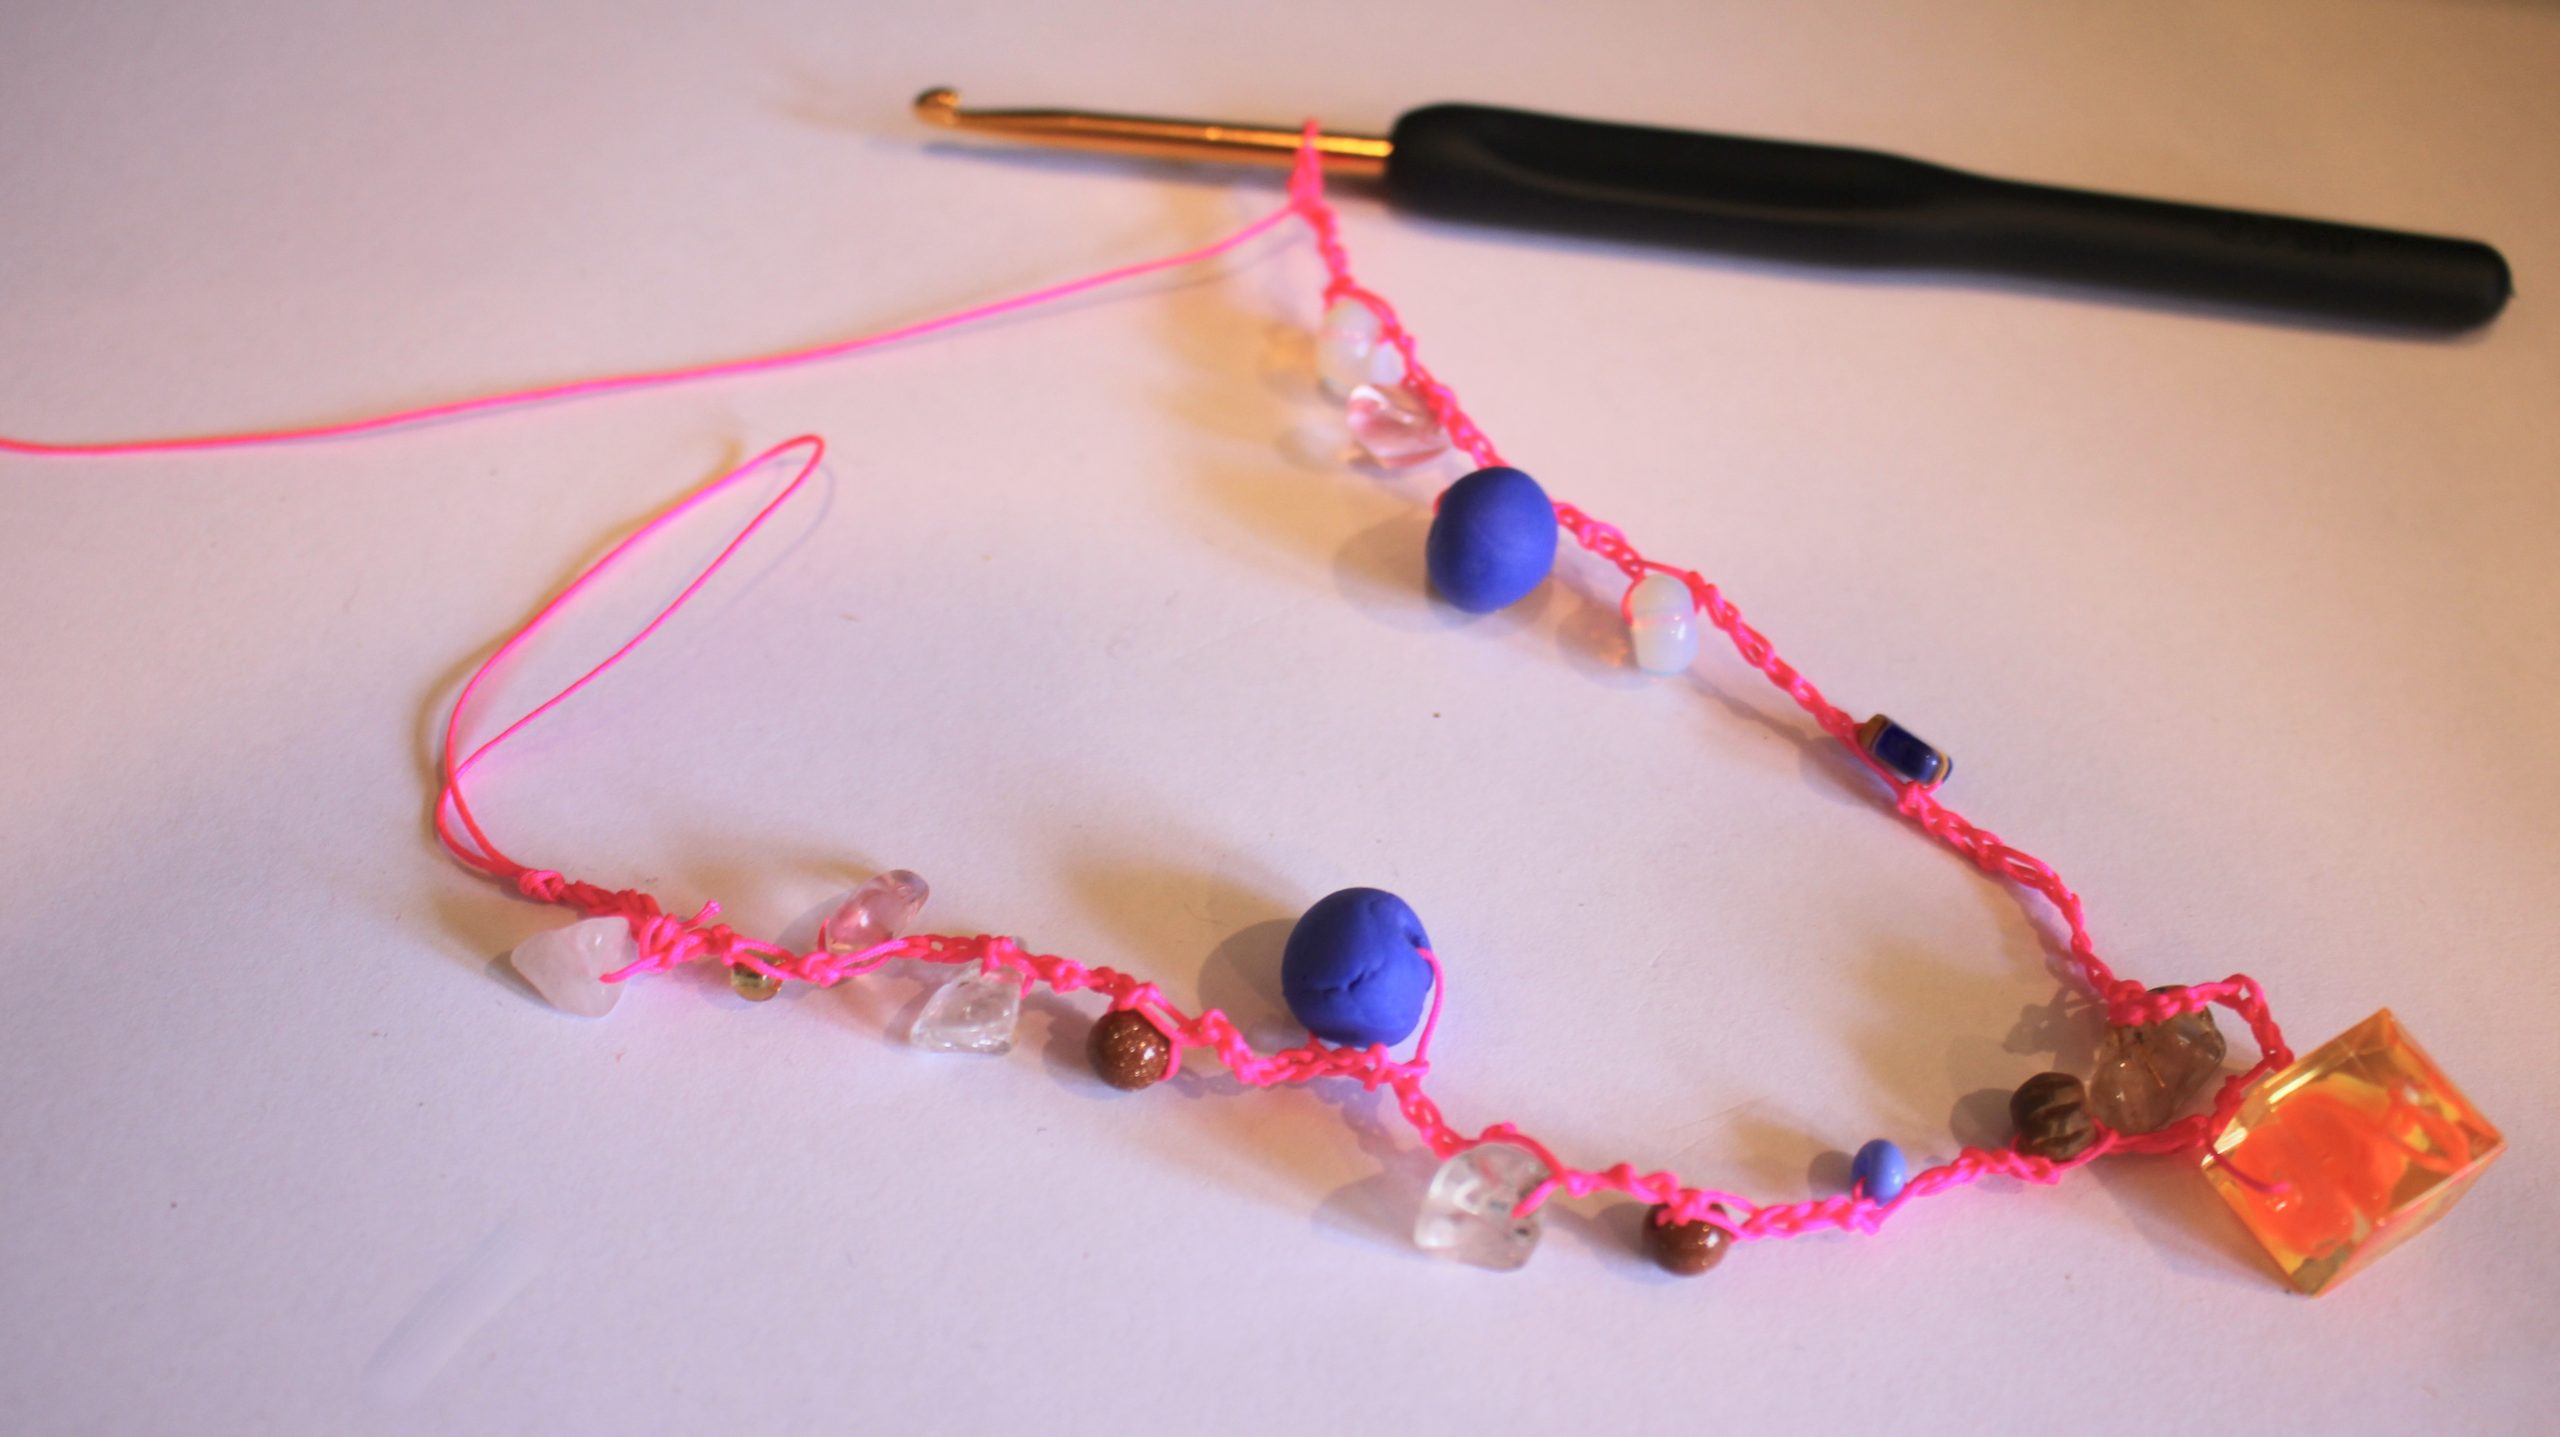
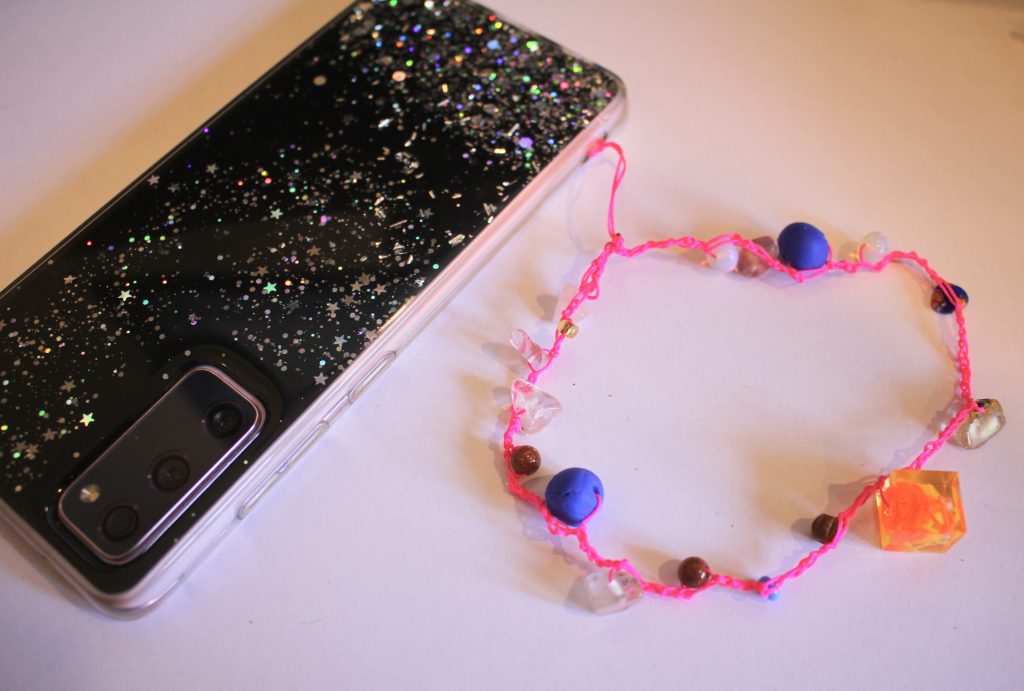
Now your beaded crochet phone strap is finished and ready to use! What will yours look like?
-
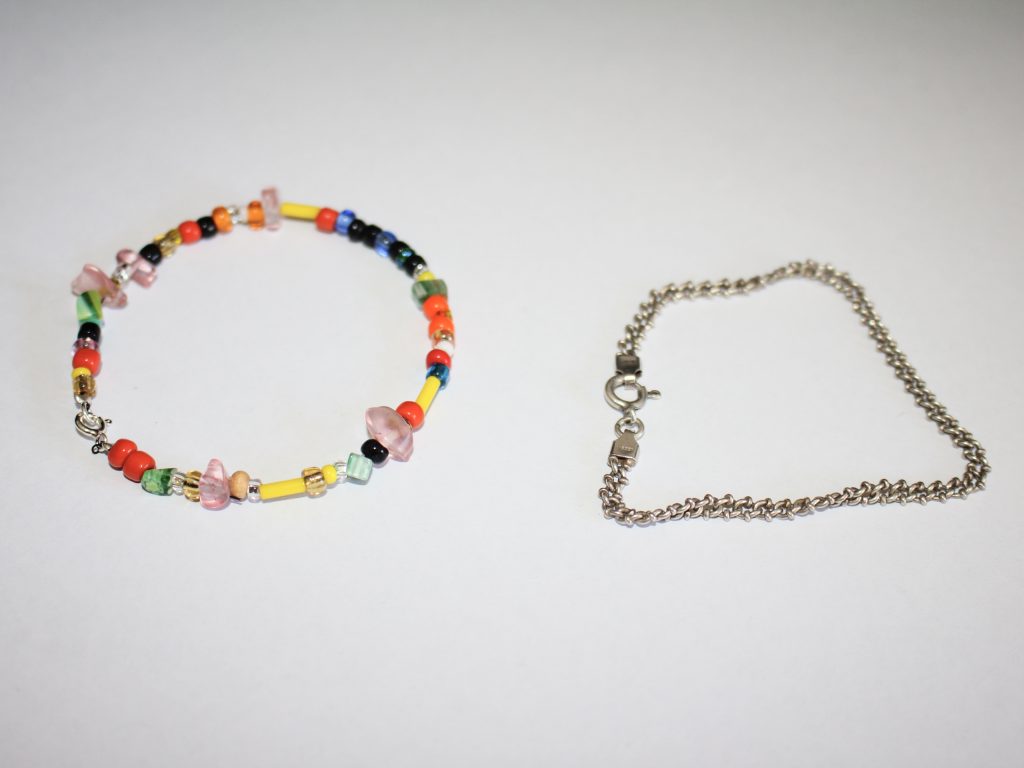
This tutorial shows you how to turn two bracelets into one interlocked statement bracelet!
Do you like it when you’re jewellery shows off different textures and colours? Me too! Sometimes it can be fun to hack you’re existing jewellery collection to make something look cute and new. This tutorial shows you how you can turn two of your favourite bracelets into a new statement bracelet! This tutorial is extra great because you don’t need any tools to make it! Please note that this tutorial contains affiliate links for which this website might receive a commission.
You’ll need the following tools and materials to make your interlocked bracelets:
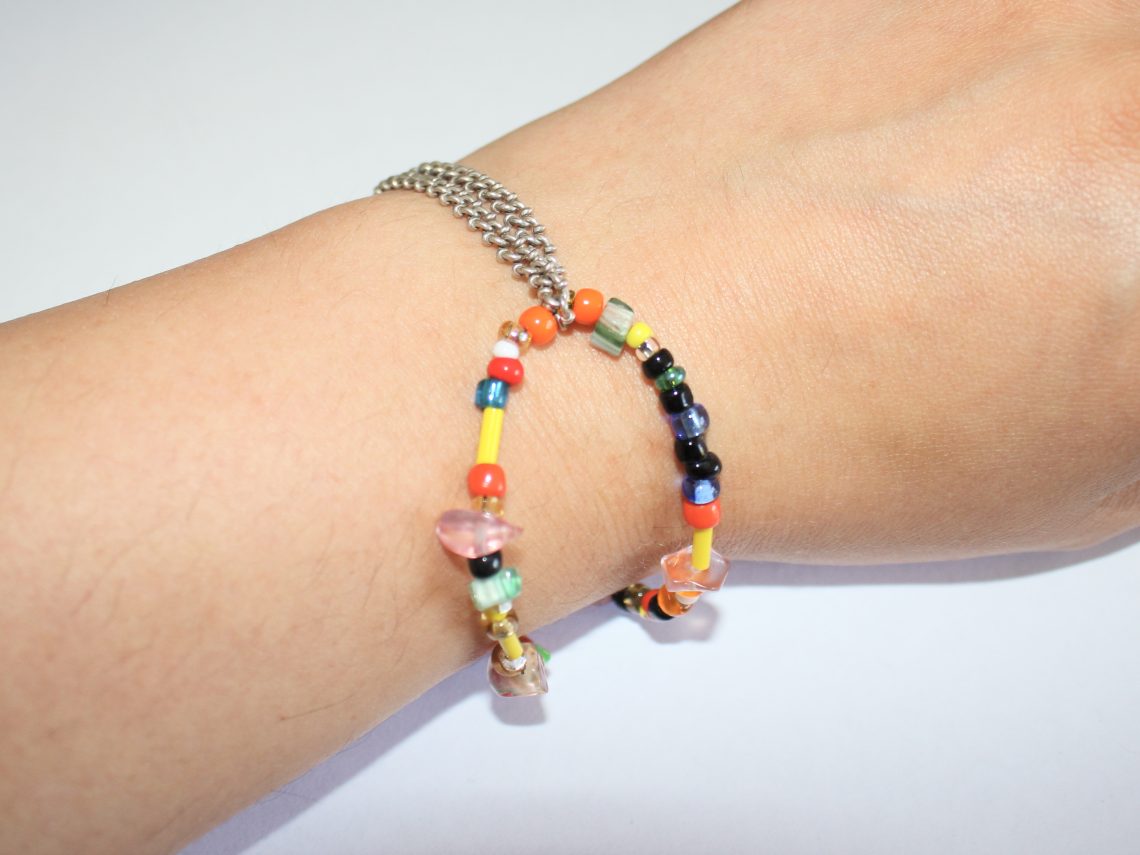
1: All you need for this tutorial is two bracelets. I used a sterling silver chain bracelet and a rainbow beaded bracelet. It is ideal if they are about the same length and each fit your wrist comfortably.
I made this rainbow beaded bracelet but here are some places you can get something similar:
Here are some sterling silver chain bracelets you can purchase:
Follow these steps to make your interlocked statement bracelet:
1: Undo the clasps on each bracelet.

2: Loop the bracelets around each other, folding them in the middle and clasping them together so they are attached.


3: Put it on your wrist, opening one of the clasps and closing it around its closure and the closure on the other bracelet. It can help to add an extender chain to one of the bracelets to make it easier to put on. You can get one here:

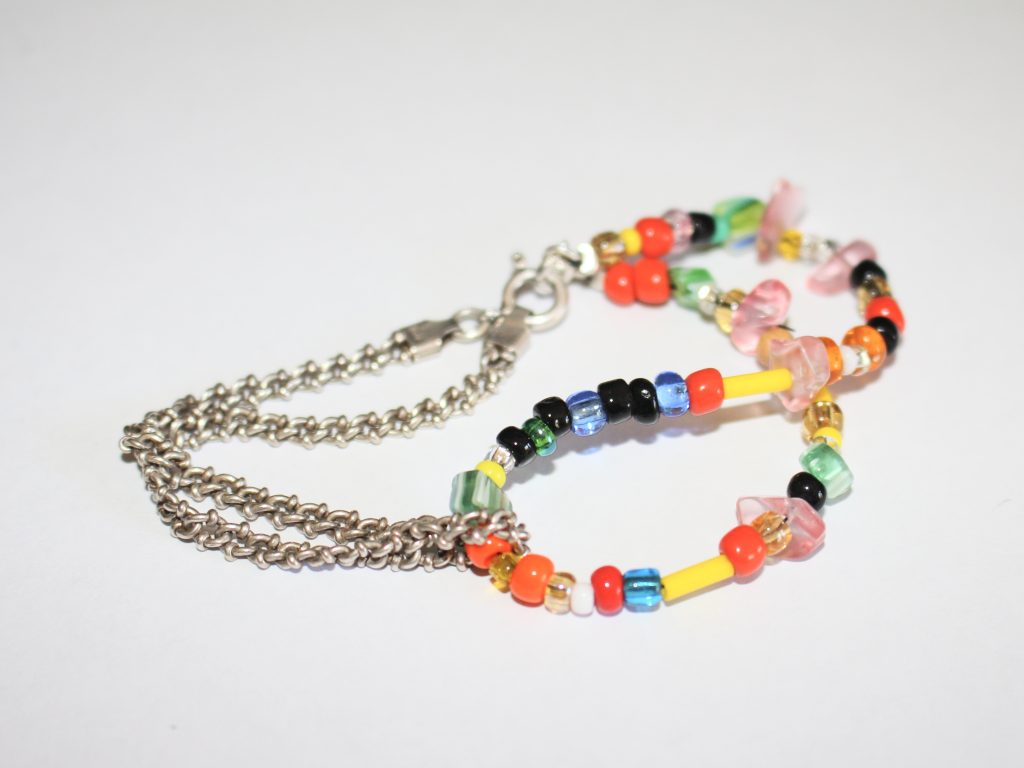
And that’s it! This tutorial is great for adding some spice to your existing jewellery collection. What bracelets will you use to make your own interlocked statement piece?
If you want this look but don’t want to use bracelets you already own, you can follow this tutorial that shows you how to make one from scratch: https://www.diyjewelryhub.com/how-to-make-a-beaded-double-loop-bracelet/
-
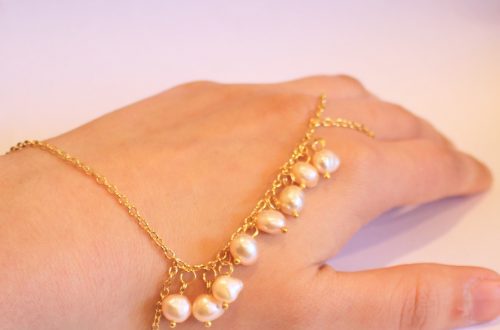
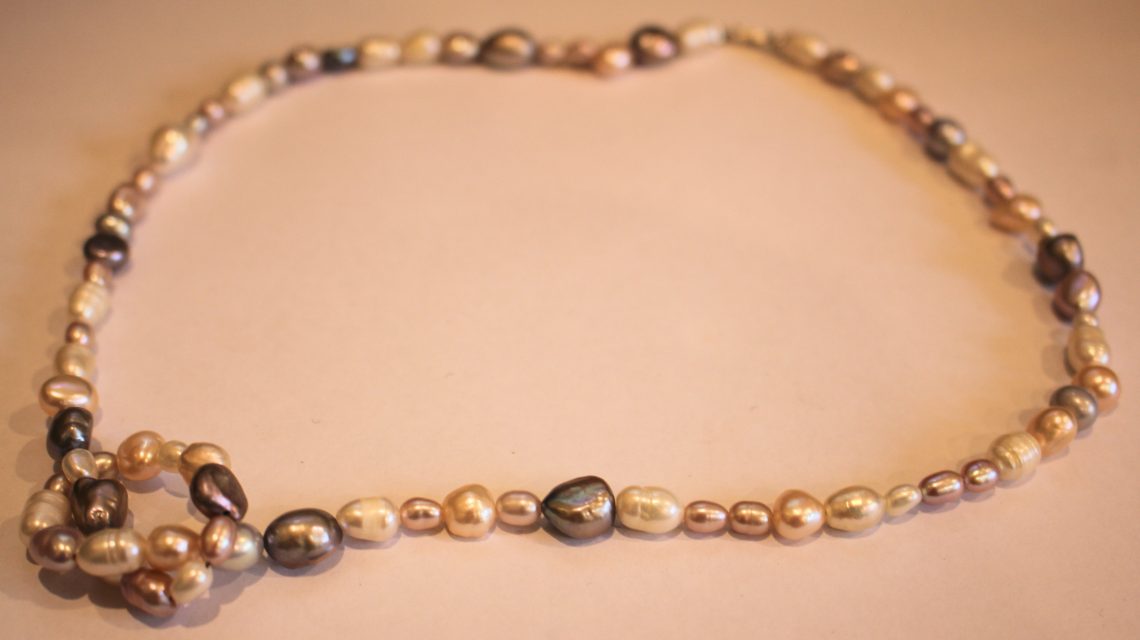
Gorgeous DIY Pearl Necklace: Unleash Your Crafty Charm with this Unique knotted pearl necklace
I love pearl jewellery, but the classic pearl necklace can often look a bit dated, so I decided to try and create a pearl necklace that is a bit more modern! This tutorial shows you how to make a lovely mixed pearl necklace with a knot in the middle for some added visual interest and cool vibes. Please note that this tutorial contains affiliate links.
You’ll need the following tools and materials to make your knotted pearl necklace:
1: Pearls. I used a variety of freshwater pearls in different colours and sizes.

You can purchase some here:
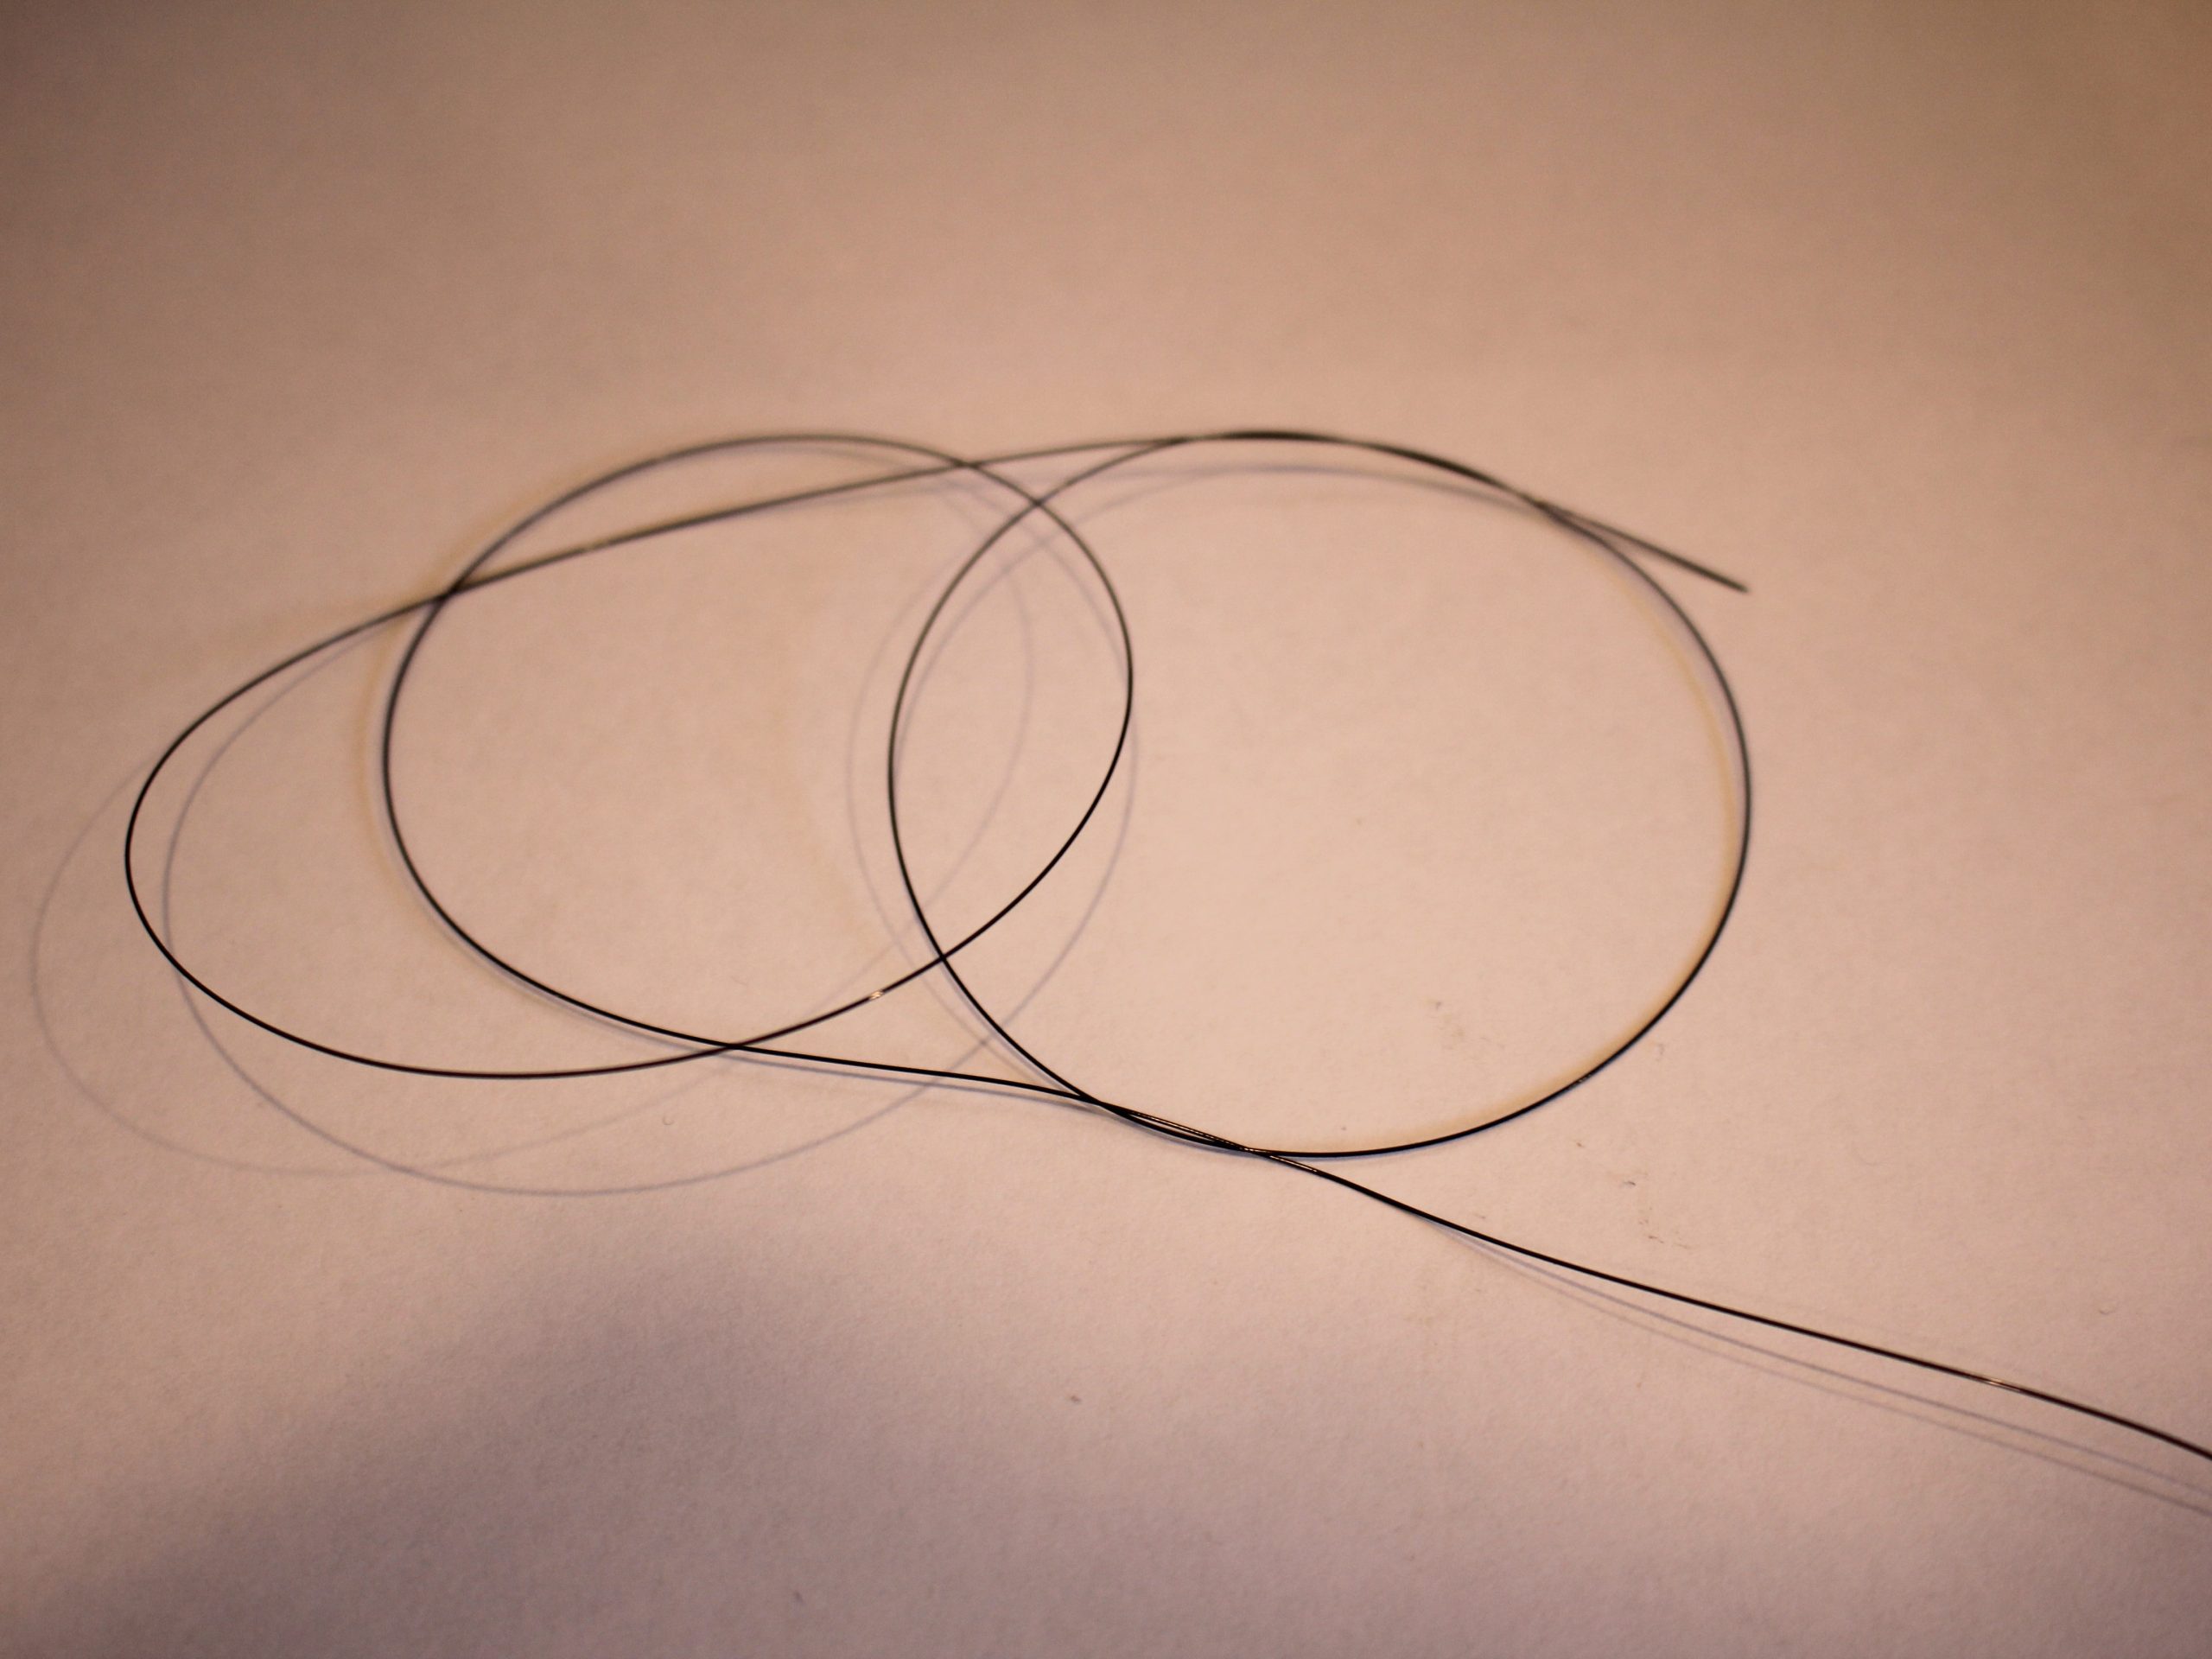
2: Some tiger tail wire. I used some thin black tiger tail.

You can get some here:
3: Your pliers. I used my cutting pliers and flat nose pliers.
You can get a set of jewellery pliers here:
4: A sterling silver clasp and jump ring.
You can get clasps here:
and you can get pre-made jump rings here:
5: Two sterling silver crimp ends.

you can get some sterling silver crimp beads here:
Follow these steps to make your own gorgeous twist on a timeless classic, a knotted pearl necklace:
1: Add a crimp bead to the tiger tail wire.
2: Take the clasp and place it on your tiger tail.
3: Loop the tiger tail around the clasp once and pull it tight (You don’t need to do this if you are using thicker tiger tail wire).

3: Put the short end of the wire through the crimp.

4: Squash the crimp using the flat nose pliers.

5: Add pearls until you have a necklace that is about 7cm longer than the length that you want your necklace to fall.

6: Add the second crimp to the other end of the wire.

7: Thread the wire through the jump ring like you did in steps 1 and 2, pulling it tight and then threading it through the crimp and the first few pearls on the strand. (Remember that if you are using thicker wire, you don’t have to do the extra wire looping around the jump ring).


8: Squash the crimp using flat nose pliers.

9: Trim excess wire using cutting pliers.

10: Take the ends of the wire and knot them as though you are making a basic square or reef knot, but omitting the second step. Adjust the knot to your preferences, moving it to the centre and trying not to make it too tight.


Once your knot is in place, your knotted pearl necklace is ready to wear! How cute!

What colour pearls will you use when you make yours?

If you’re looking for some more pearl jewellery tutorials to follow, you can find some here:
Pearl Earrings
- Mixed bead pearl drop earrings
- A single pearl earring with a chilli charm on the end.
- Pearl and love heart earrings
- Colourful pearl statement earrings
- Rainbow pearl drop earrings
- Pearl tassel hoop earrings
- Pearl hoop earrings
- Pearl charm huggies
- Cresent moon pearl charm earrings
- Shell and pearl earrings
- Simple pearl threader earrings
Pearl Necklaces
- Pearl charm lariat
- Floating pearl necklace
- Colourful beaded pearl necklace
- Single floating pearl necklace
- Mixed bead necklace with pearls
Other pearl accessories
-
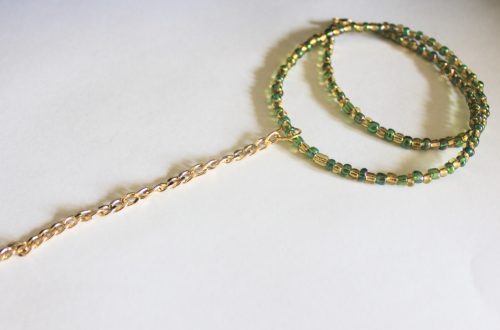
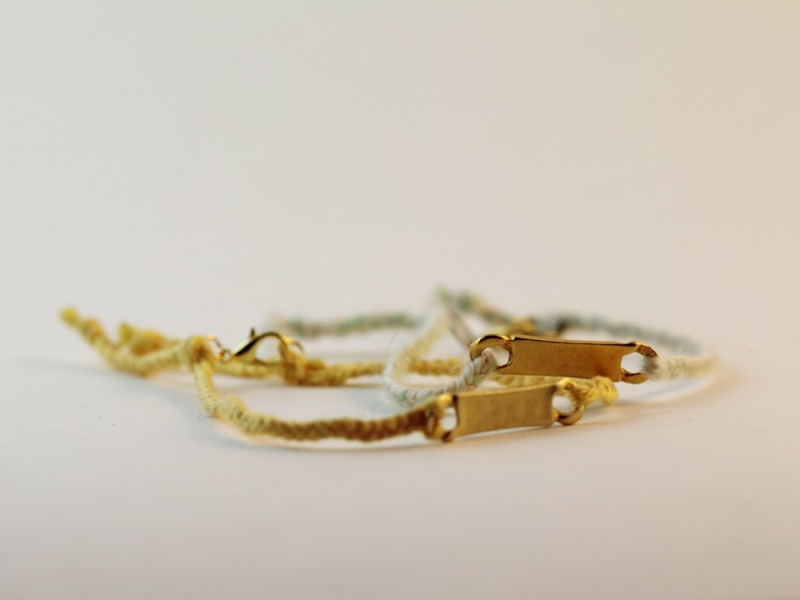
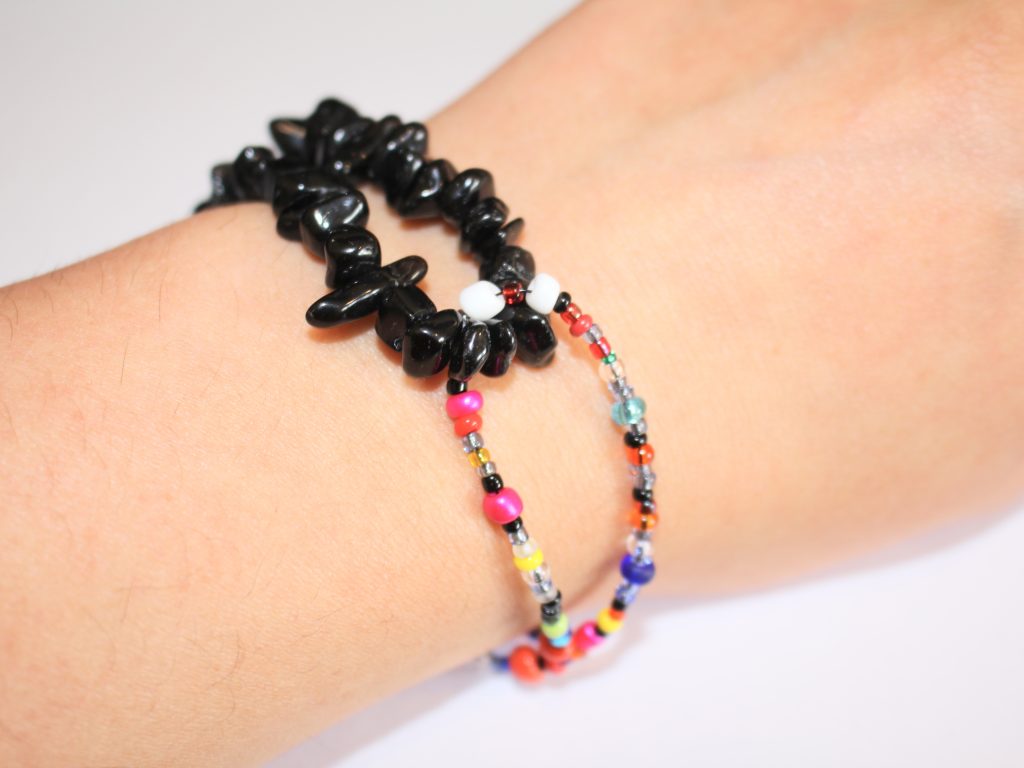
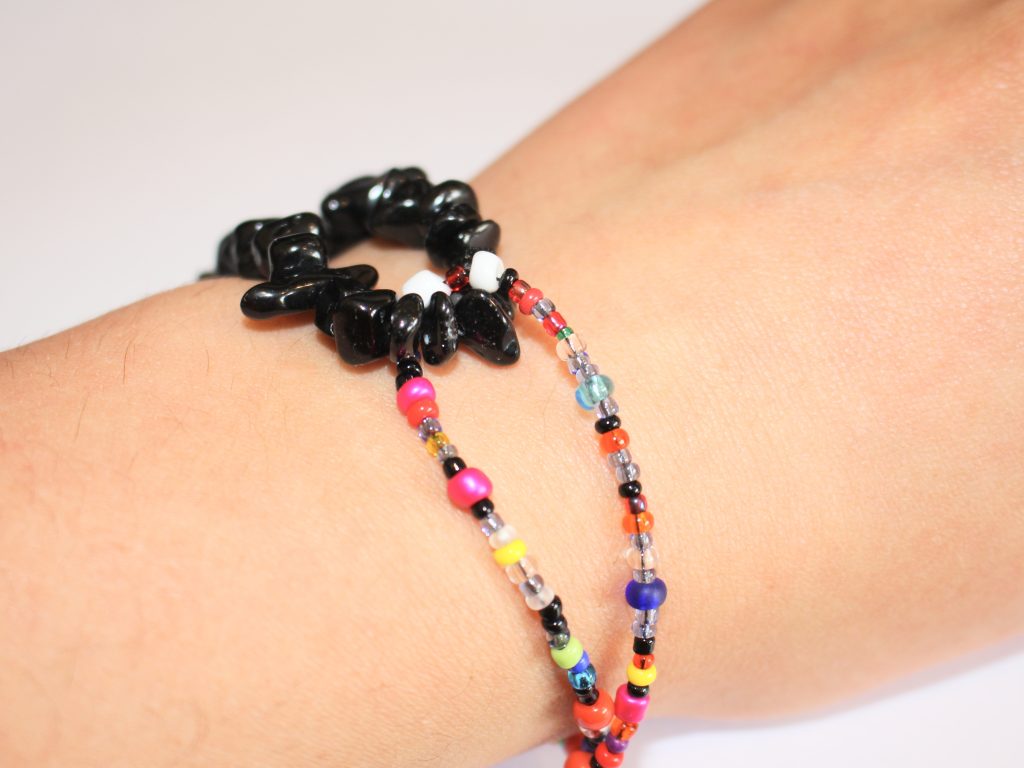
DIY Double Loop Bracelet Tutorial: Create Your Own Stylish bracelet stack
This bracelet gives the illusion that it is two bracelets looped together, but it’s actually an intentional look formed by one bracelet! Use some contrasting beads to create a unique bracelet style that makes a strong statement. Please note that this tutorial contains affiliate links.
You’ll need the following tools and materials to make your double loop bracelet:
1: Some beads. I used some tourmaline chip beads for one side of the bracelet and a mix of glass beads for the other side.

You can get some here:

You can purchased some mixed seed beads here:
2: Two pieces of tiger tail wire long enough to fit your wrist plus about 8cm extra.

You can purchase some here if you don’t already have some:
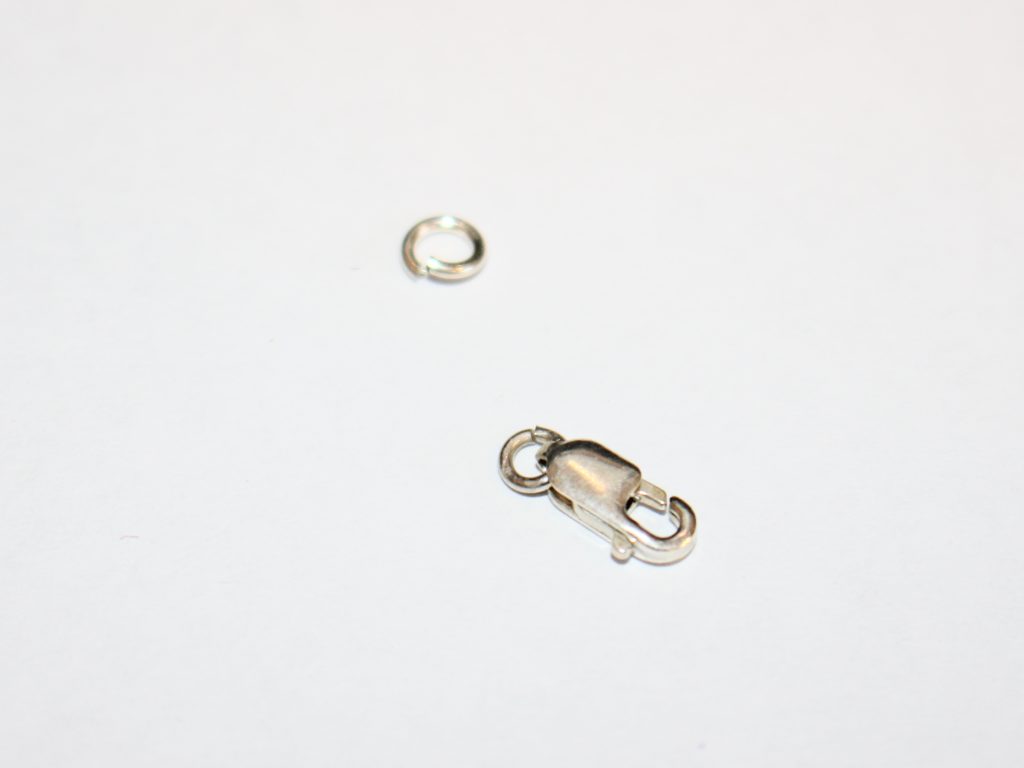
3: Two jump rings.

You can get some sterling silver jump rings here:
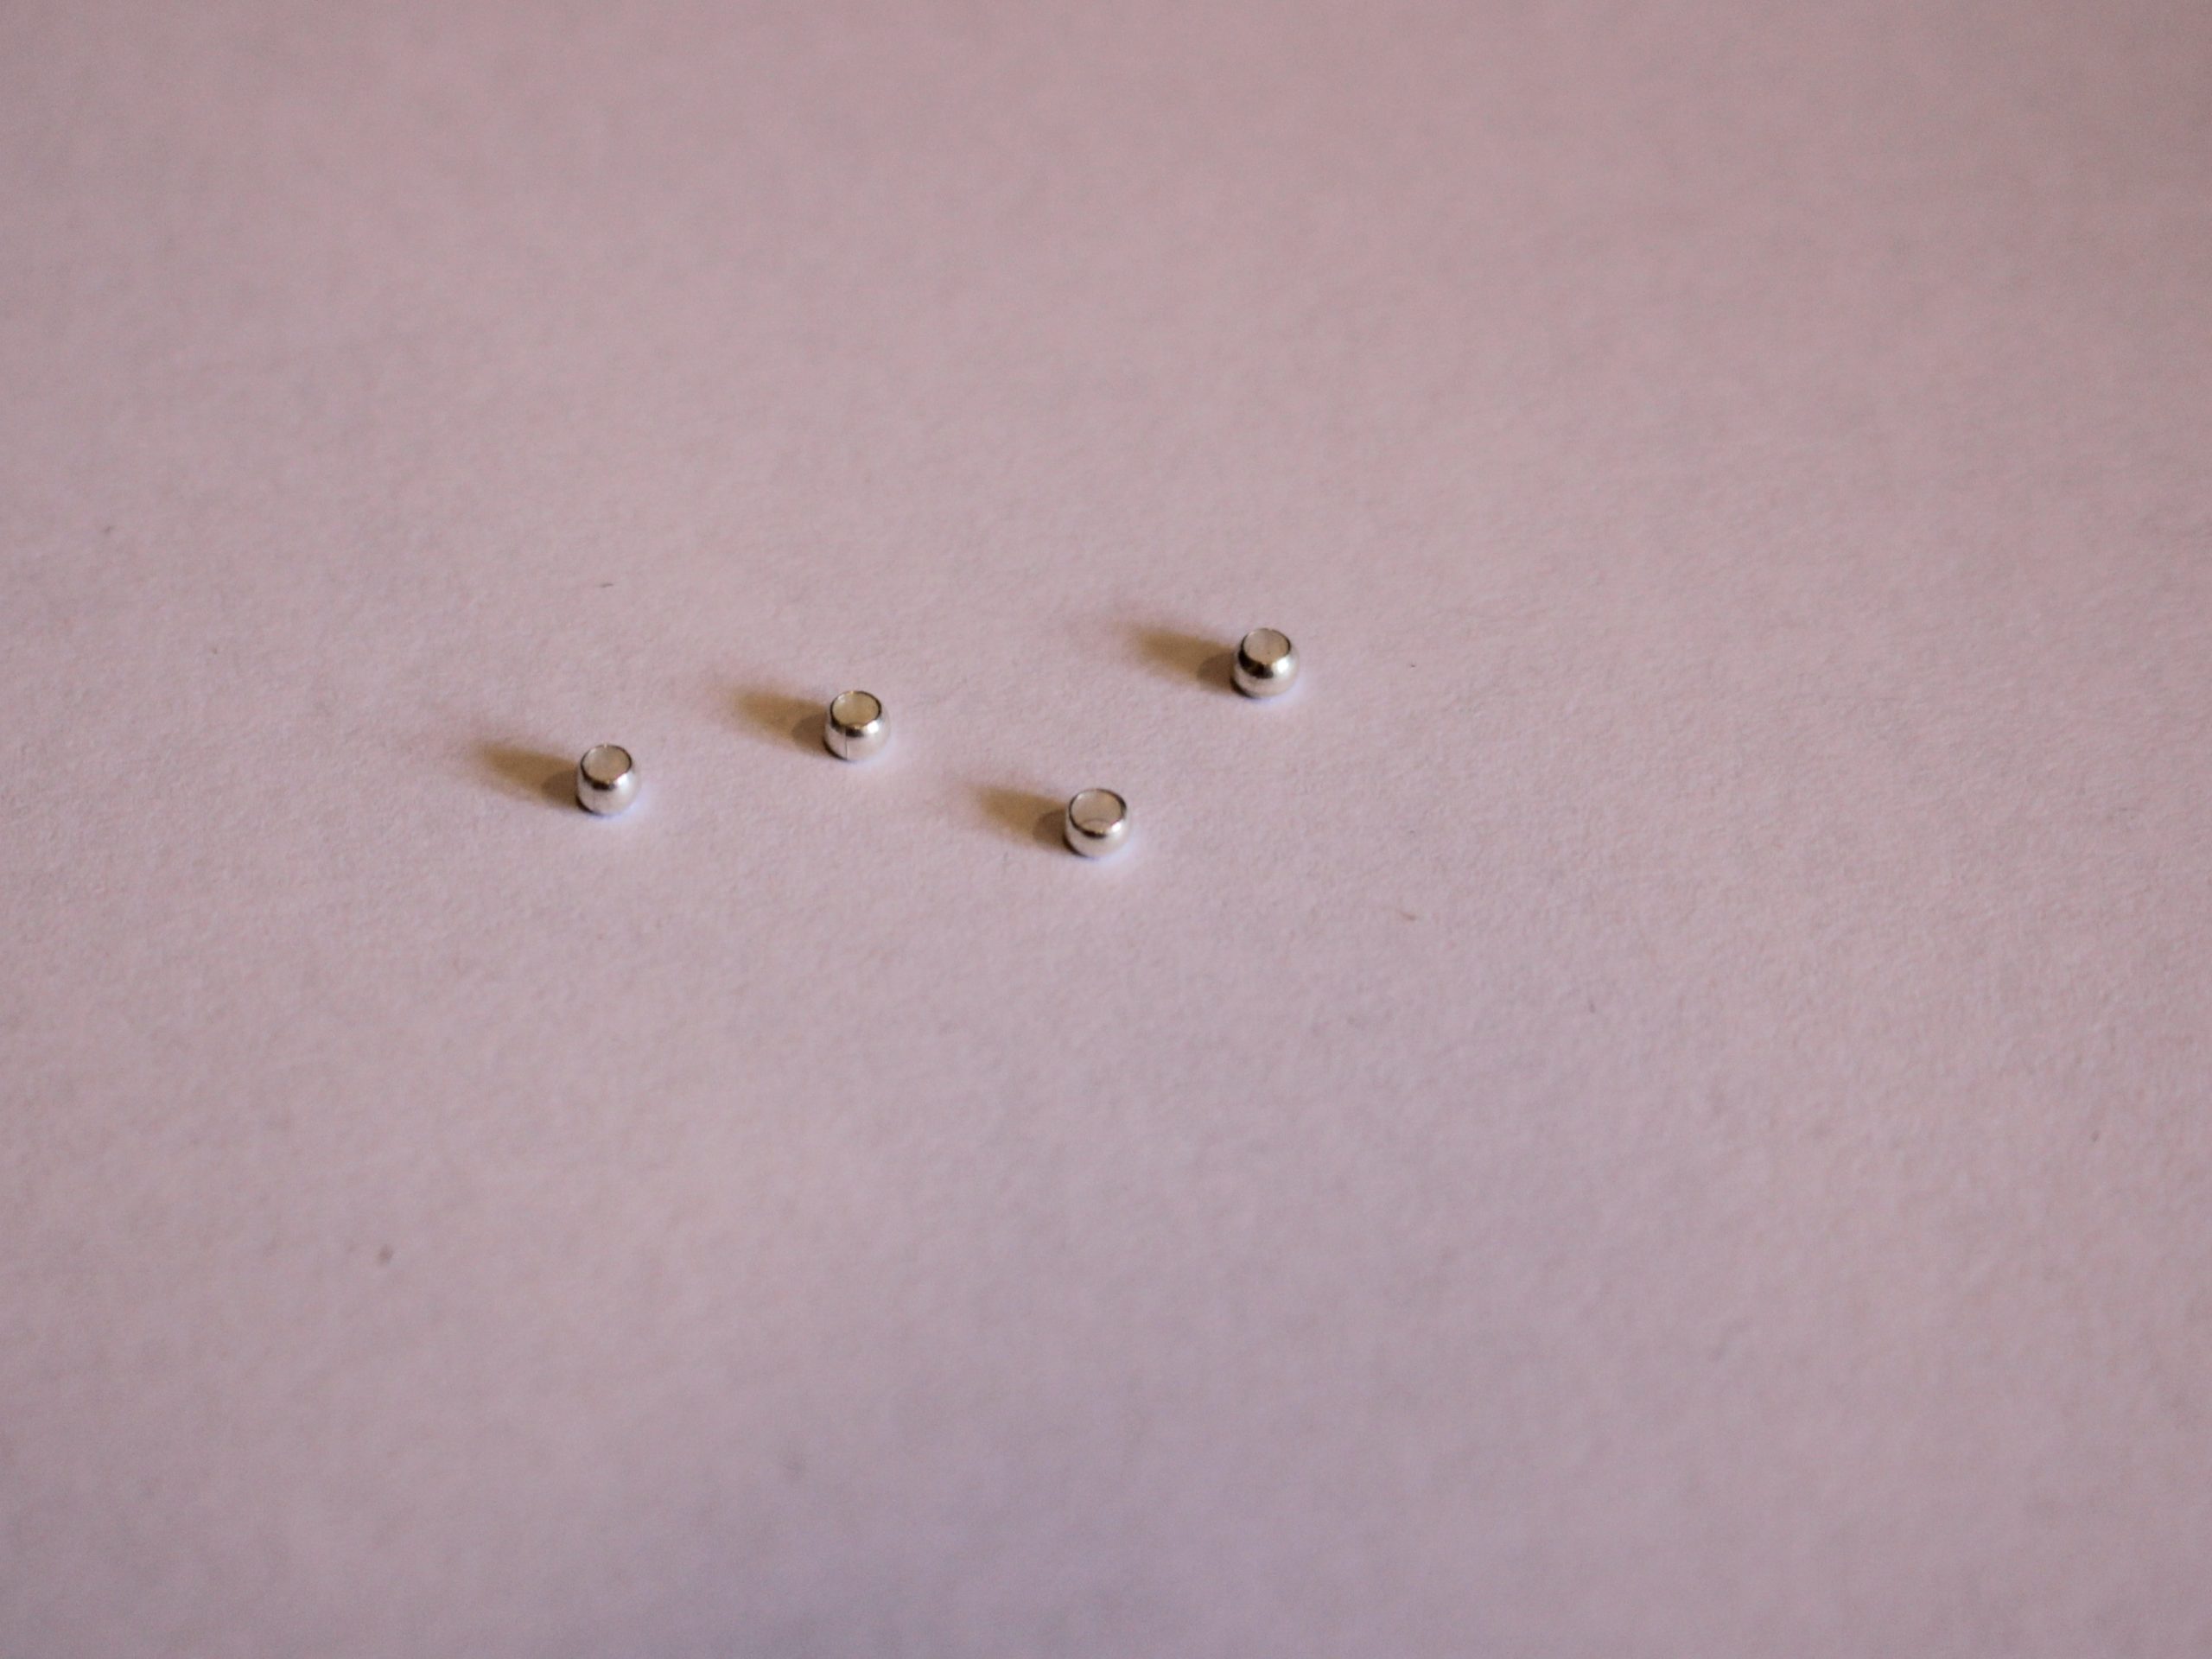
4: Four crimp beads.
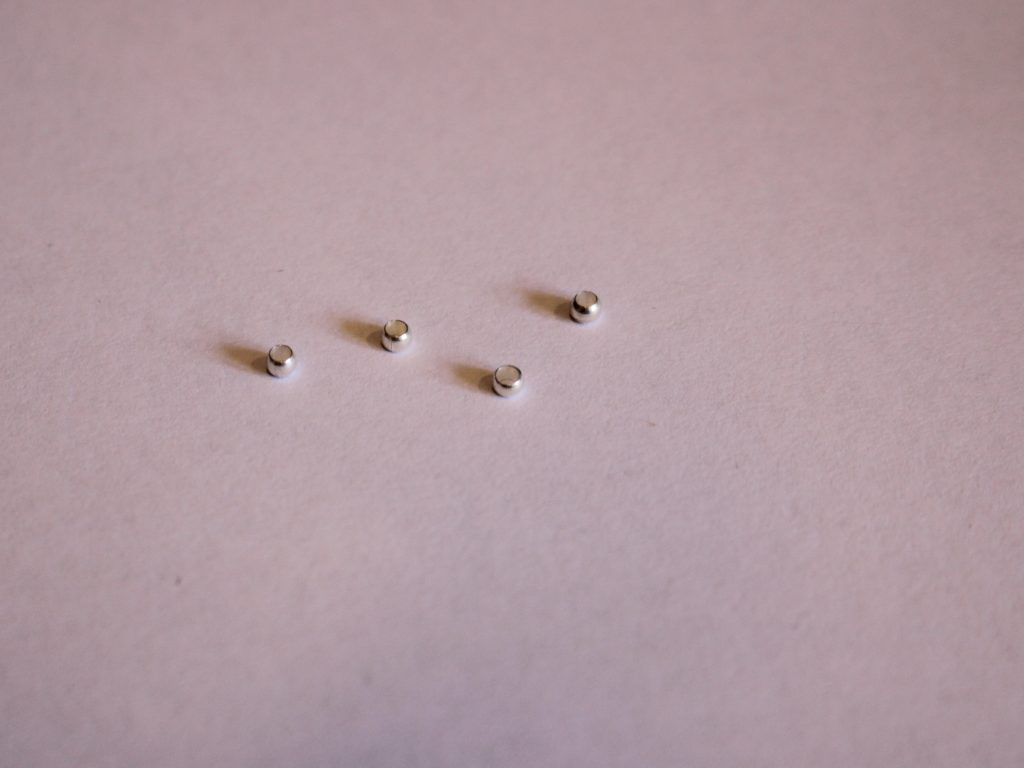
You can get some here:
5: A clasp. I used a lobster clasp, but a toggle clasp is also suitable. I prefer toggle clasps for bracelets as they are easier to use by yourself.

Find lobster clasps here:
and toggle clasps here:
6: Pliers. Use your flat nose pliers, round nose or needle nose pliers and cutting pliers.

You can get a set of jewelry pliers here:
Follow these steps to make your double loop bracelet.
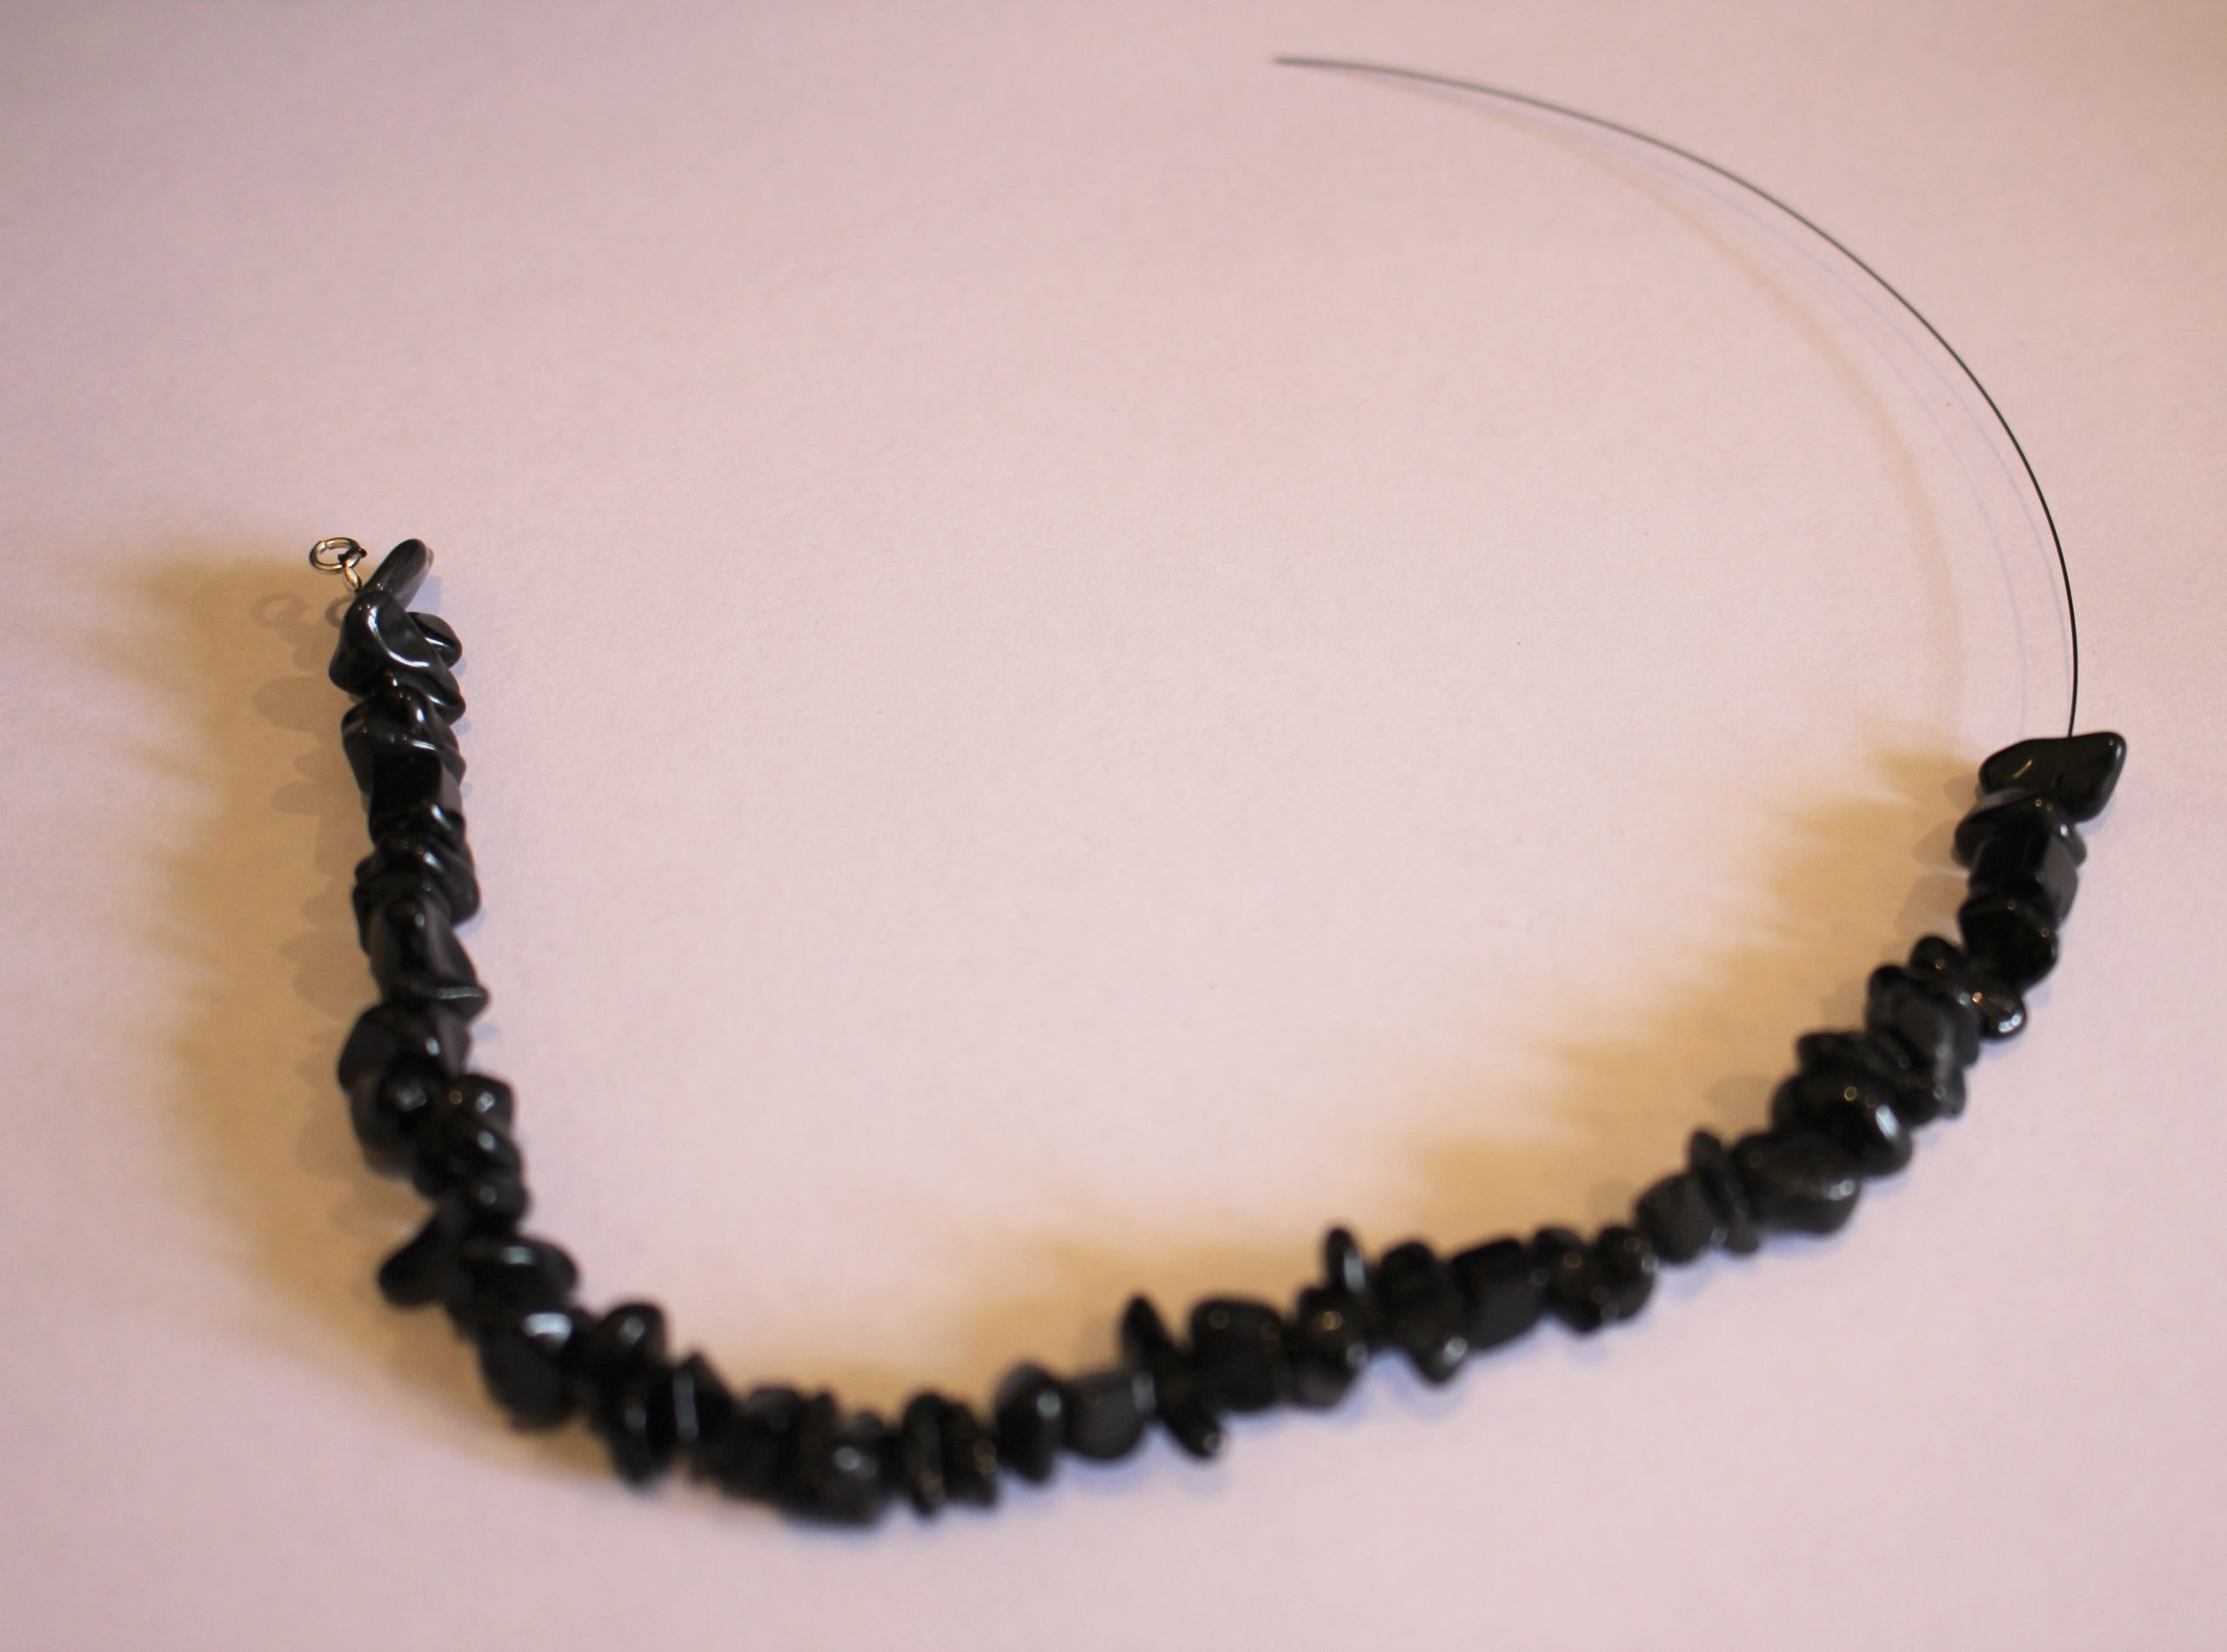
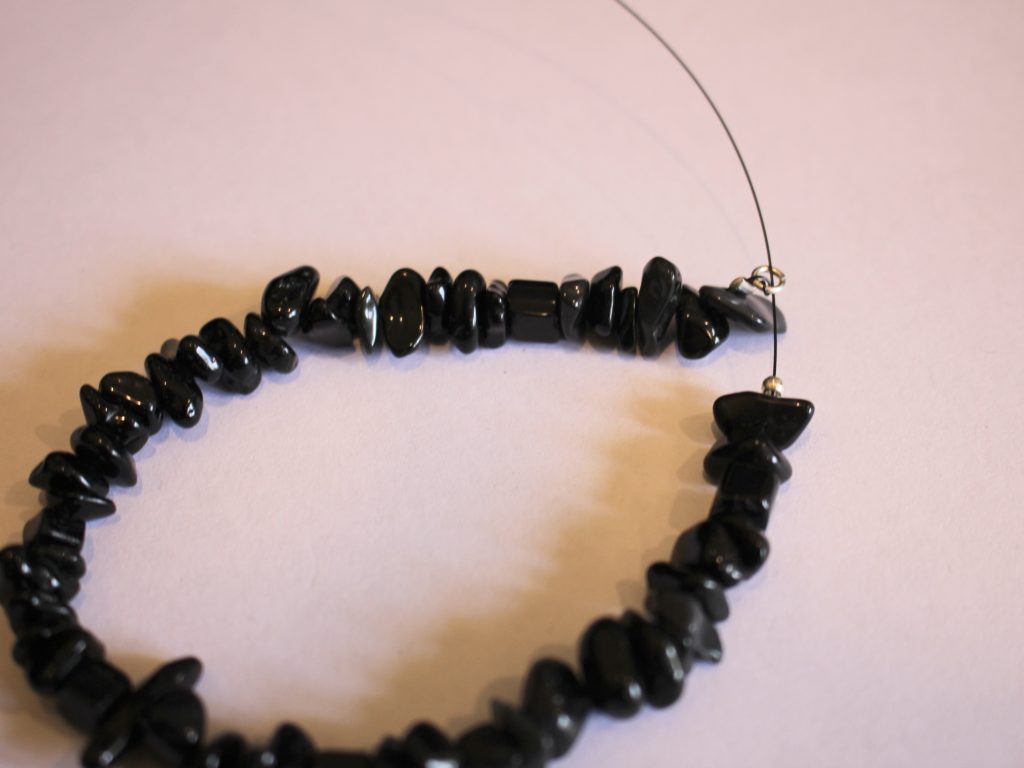
1: Take one of the strands of wire and add a crimp bead and jump ring to one end.

2: Loop the end of the wire through the jump ring, depending on the thickness of your wire, you might want to loop your wire through twice like I have here.

3: Thread the end of the wire through the crimp bead and squash it in place using the flat nose pliers.


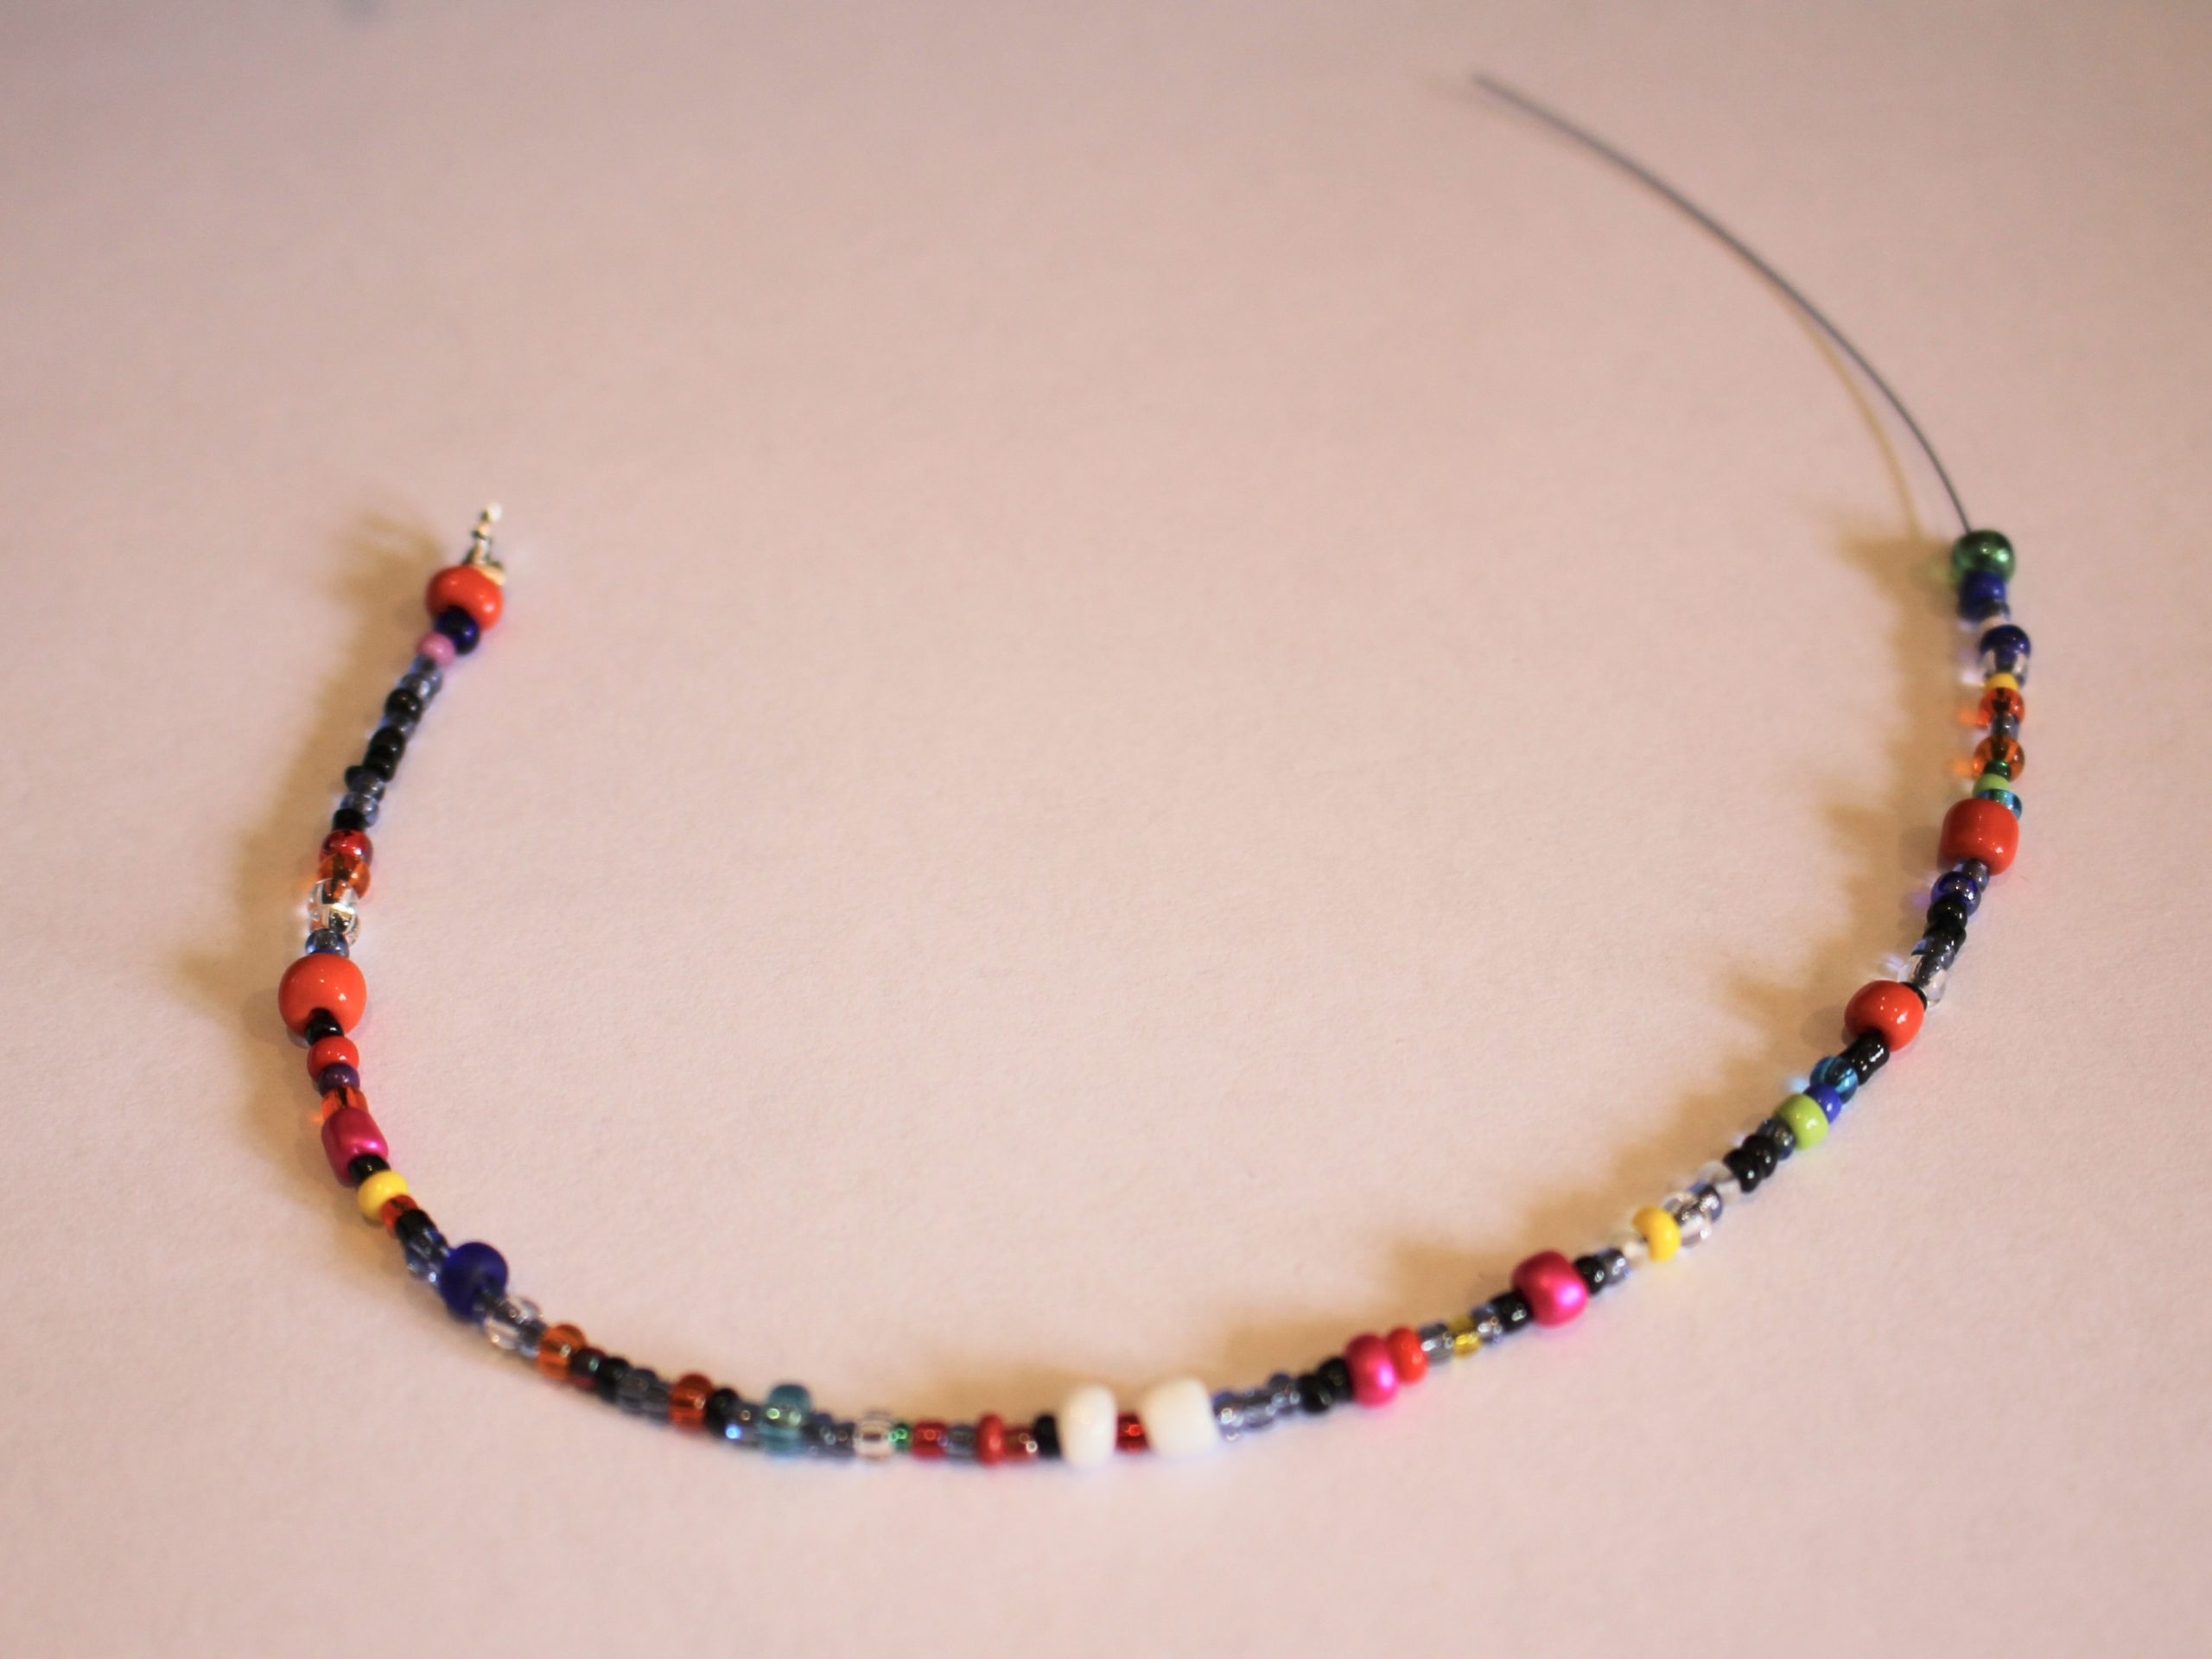
4: Begin adding beads.

5: Continue beading until the strand is long enough to wear as a bracelet.

6: Add another crimp bead to the end of the wire.

7: Loop the end of the wire around the jump ring attached to the other side. Thread the end of the wire through the crimp bead and last few beads and pull it tight.
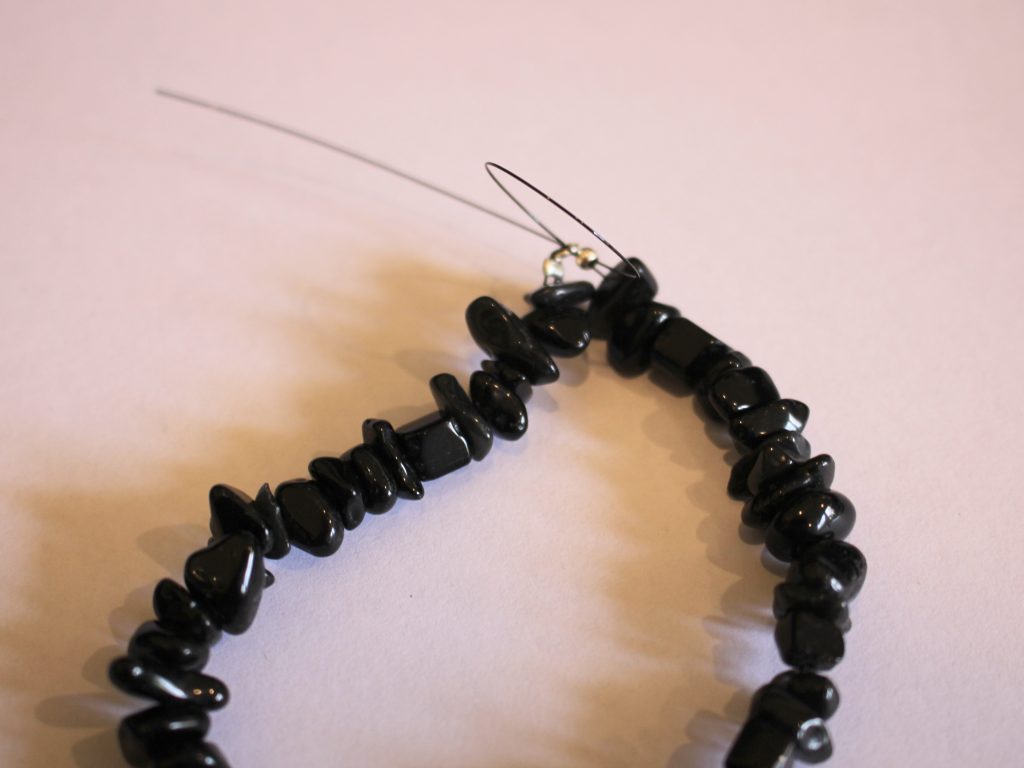


8: Squash the crimp bead using the flat nose pliers again.


9: Trim the excess wire. Now you will have a beaded circle.


10: Attach the clasp to the jump ring on the beaded circle you just made. It will attach to the jump ring on the second half of the bracelet you are about to make.
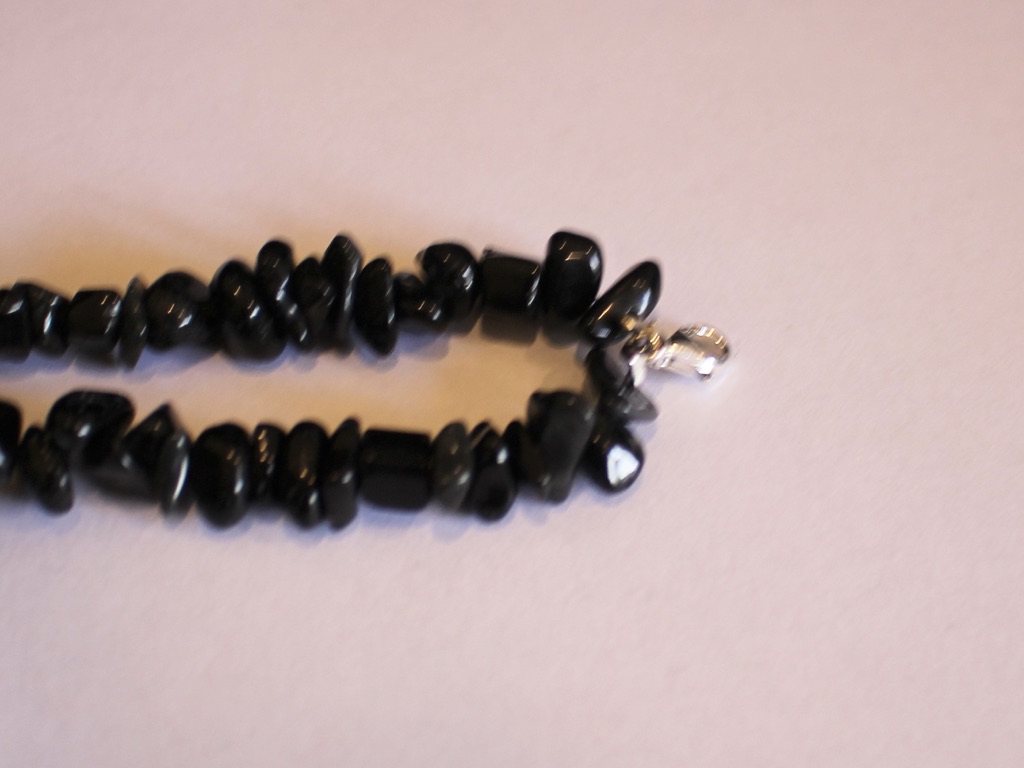
10: Repeat steps One to Six for the second half of the bracelet, using your contrasting beads.

11: Once the second half is fully beaded, loop it through the first beaded half you made.
12: Loop the end of the tiger tail wire through the jump ring at the other end like you did for the first half of the bracelet in step seven.

13: Squash the last crimp bead using flat nose pliers and trim the excess wire using cutting pliers.


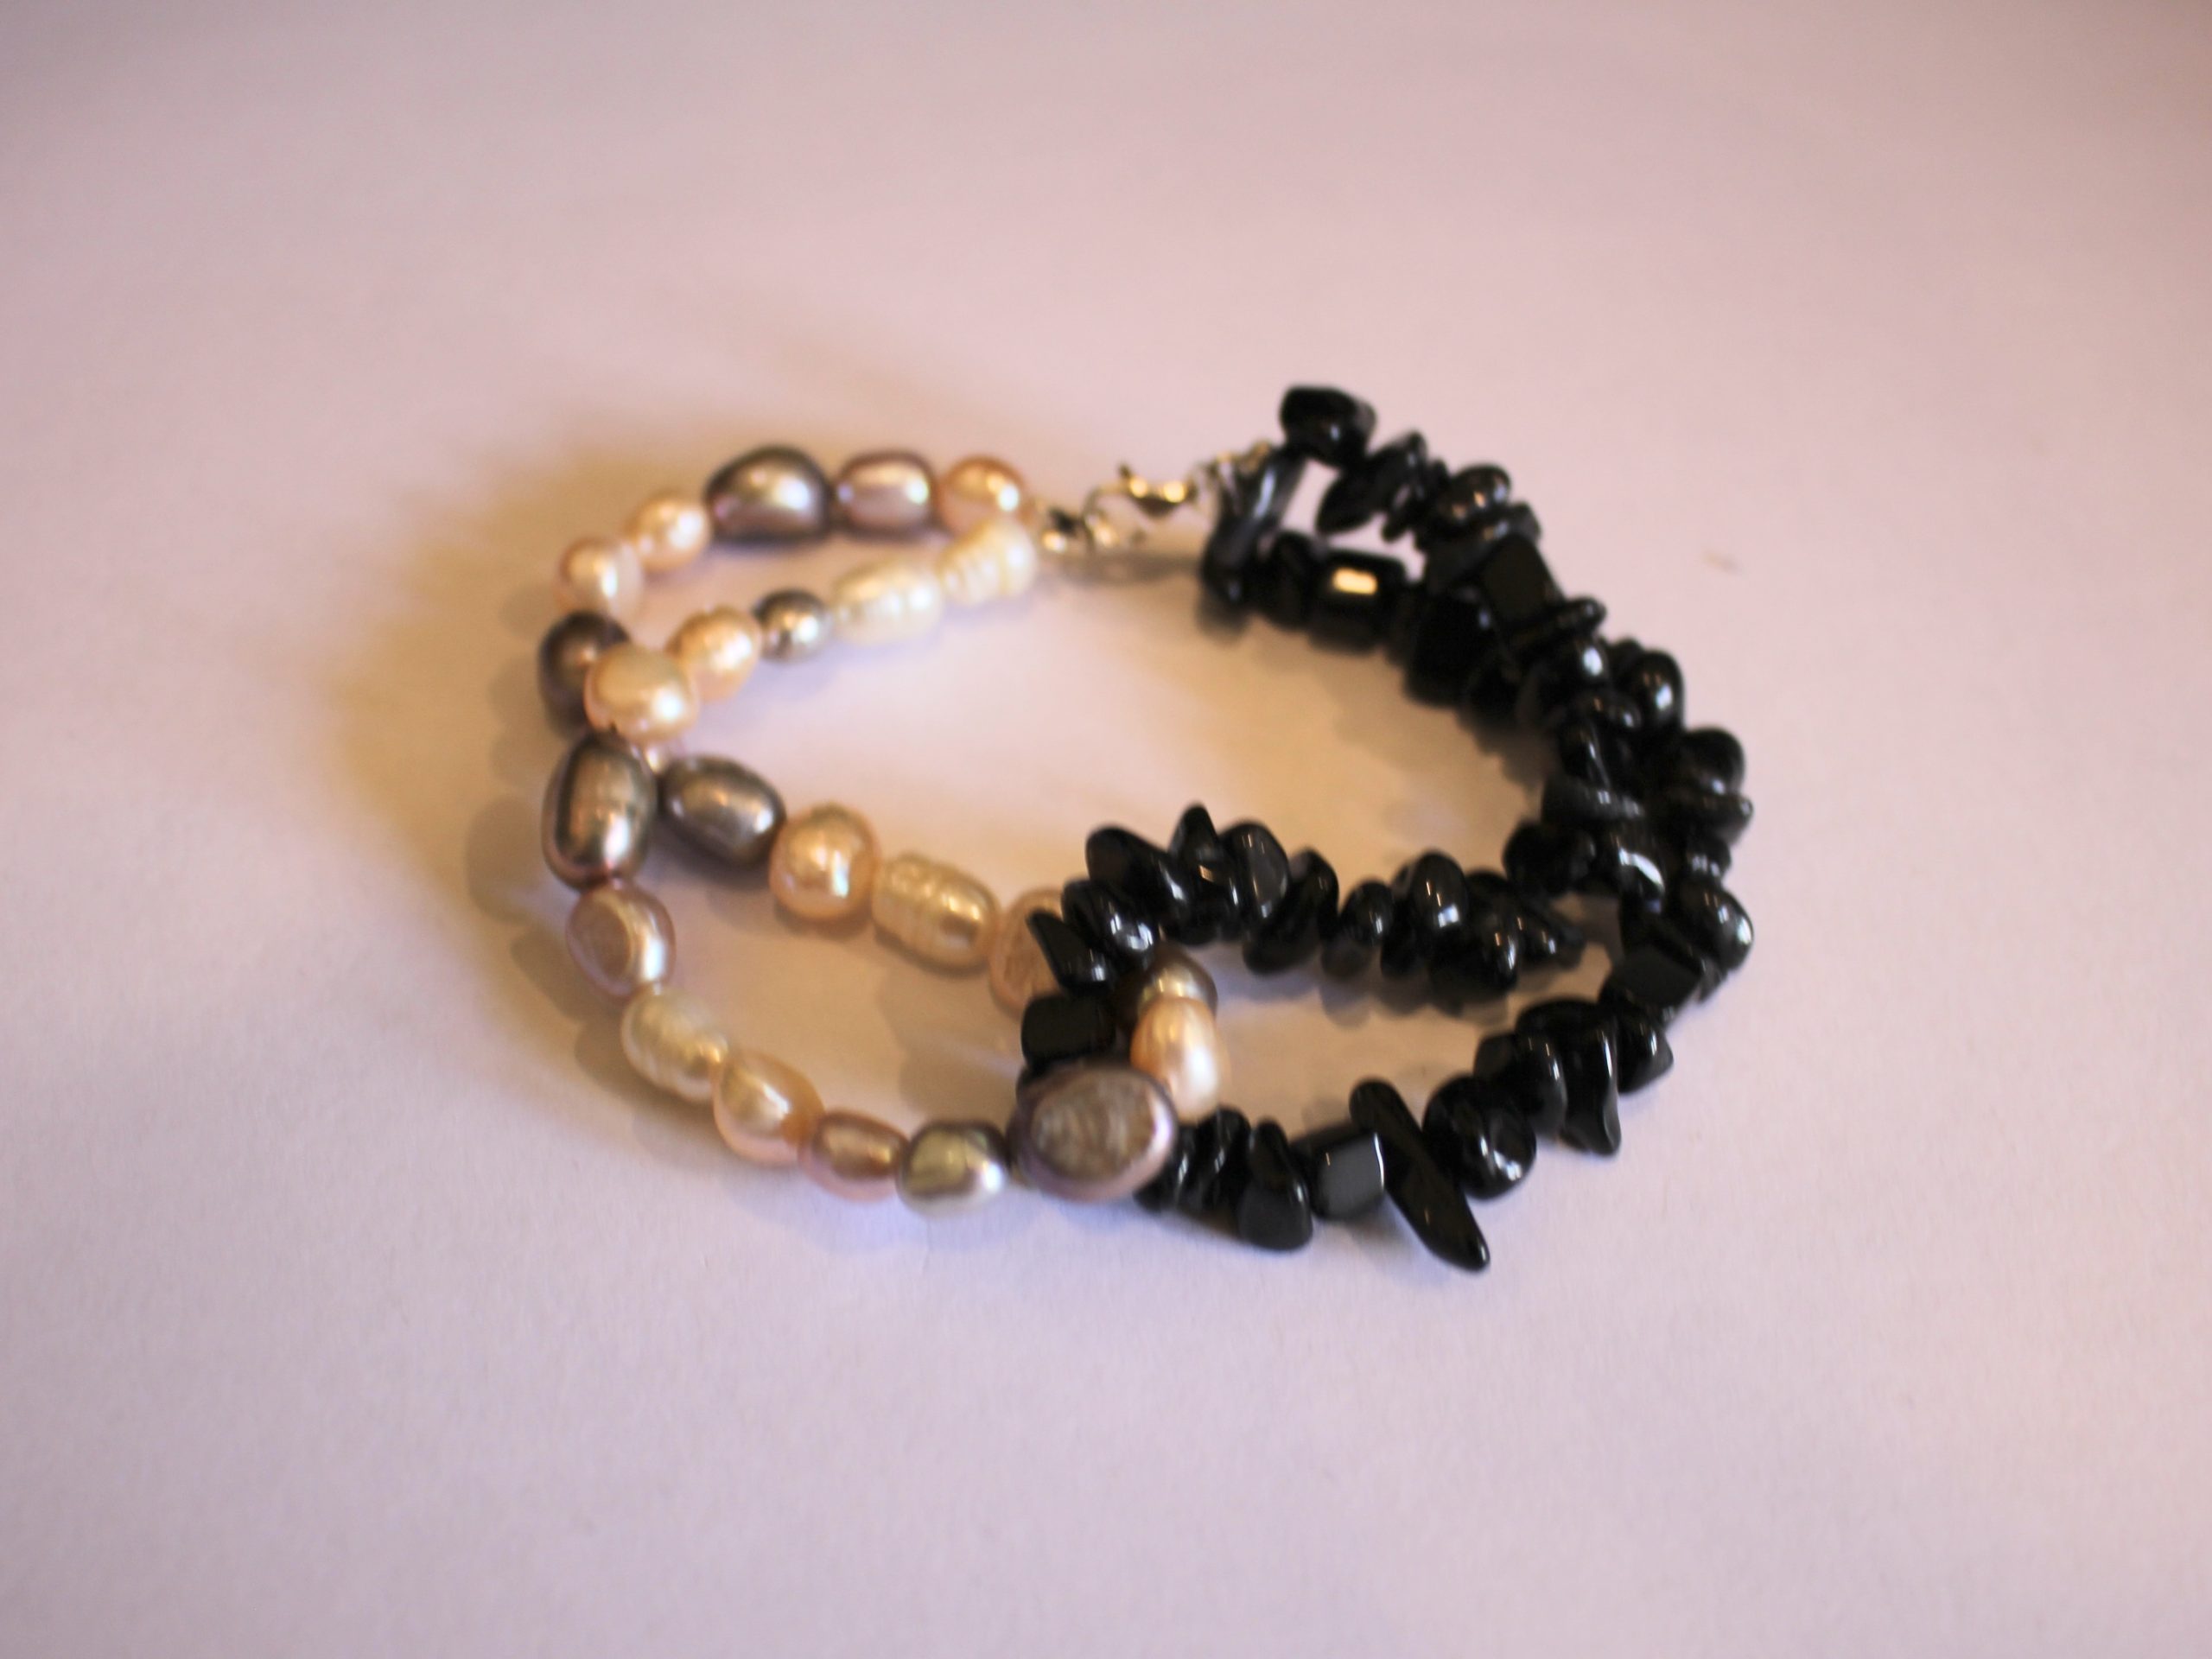
14: Here’s where you can fold your bracelet in half and close it, attach the ends of the bracelet by clipping the lobster clasp to the jump ring on the other side.


Now your bracelet is ready to wear!
Here’s another version I made using pearl beads.


-
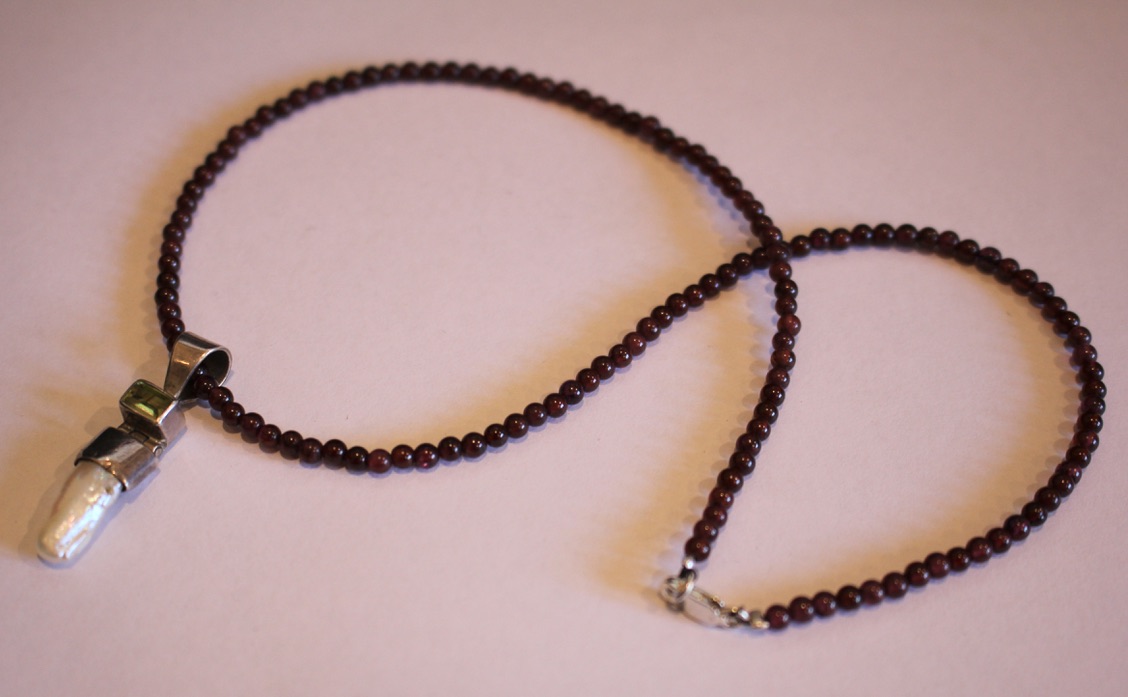
DIY Beaded Necklace Tutorial: Creating a Stunning Strand for Silver Pendants
I love necklaces, but I don’t always need my pendants to sit on a matching chain, sometimes I love the look of metal pendants on a beaded necklace strand. If you love this look too, here’s a fun tutorial that shows you how to make your own so that you can wear your favourite pendants on bead embellished necklaces! Please note that this tutorial contains affiliate links.
You’ll need the following tools and materials to make your beaded necklace strand for your pendant:
1: Some tiger tail wire. I used some thin tiger tail wire. Cut it to length by measuring out the length you would like your necklace to be, and add around additional 15 centimetres.
You can get wire here:
2: Pliers. I used my cutting pliers and flat nose pliers. I kept my round nose pliers on hand in case I needed them.
You can get plier sets here:
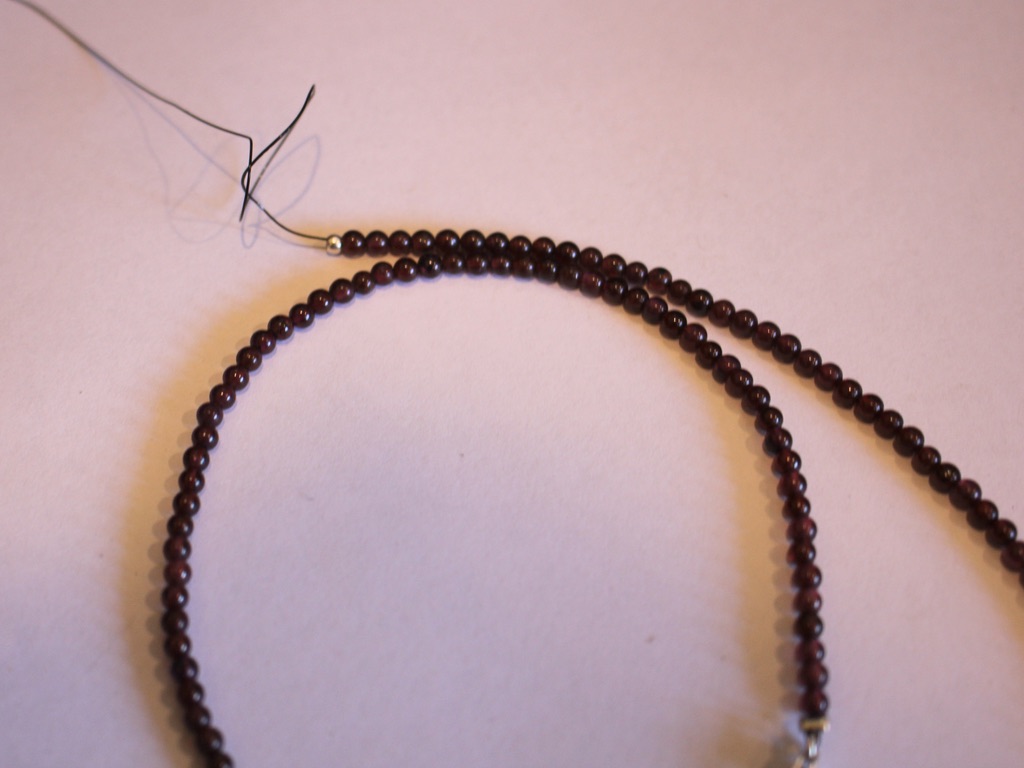
3: Some beads. I used these small round garnet beads. (Choose smaller beads to ensure that your pendant will slide over them easily).

You can get round gemstone beads here:
4: A pendant. I used this silver gemstone pendant. Make sure it has a bail (the loop at the top) that is large enough to fit over the beads you choose. I purchased this one at a local flea market, which can be a place to buy interesting jewellery.
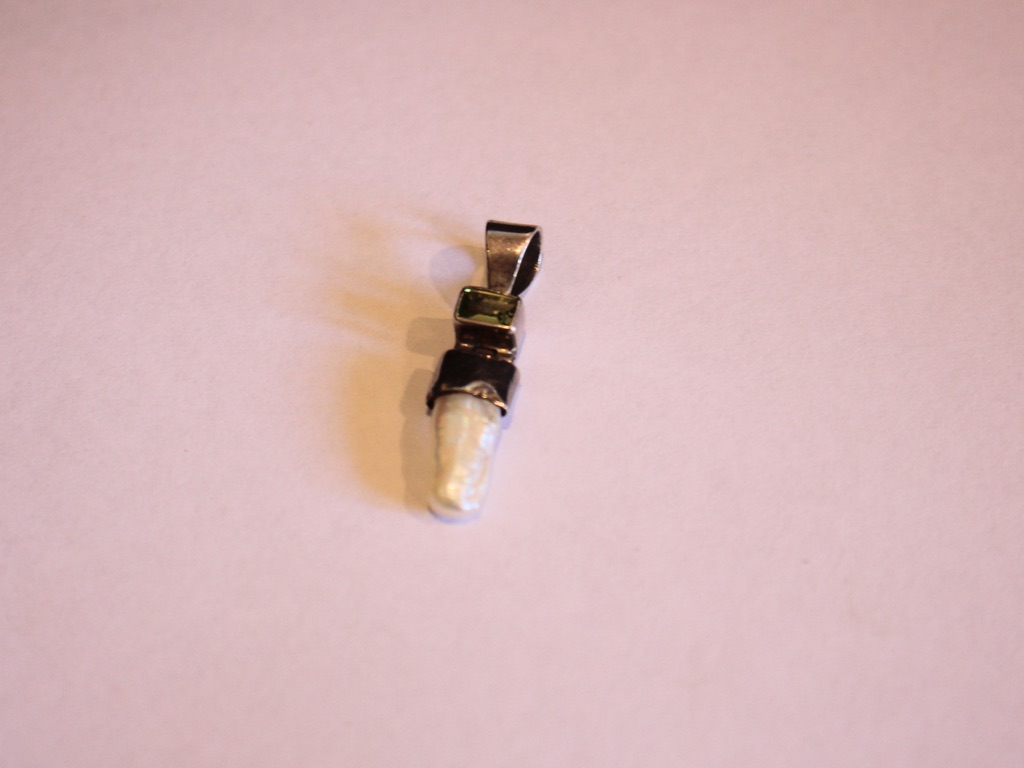
You can get silver and gemstone pendants here:
5: Two sterling silver crimp beads.
You can get sterling silver crimp beads here:
6: A sterling silver clasp and additional jump ring.

You can get silver clasps and jump rings here:
Here are the steps to follow to make your beaded necklace strand to wear your pendant on:
1: Add the crimp bead and clasp to the end of the tiger tail wire.

2: Loop the end of the wire around the jump ring on the clasp twice so that it is secure, then thread it through the crimp bead.
3: Squash the crimp bead using the flat nose pliers.

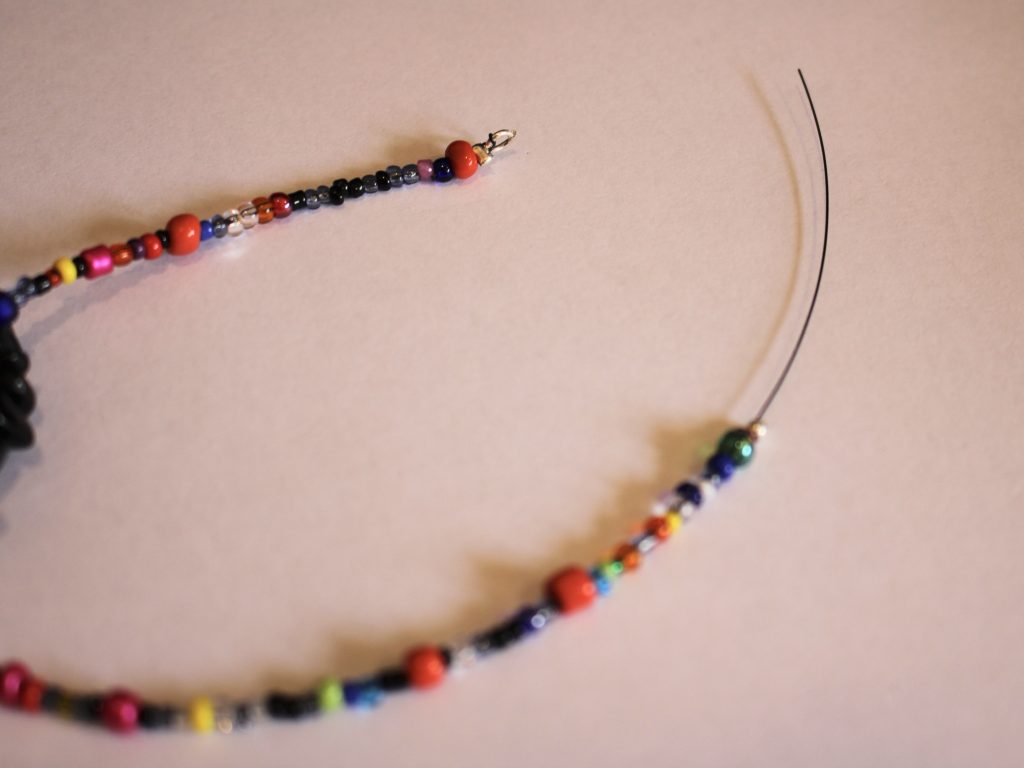
4: Begin adding beads, continue beading until you have a length you like.


5: Add the second crimp bead to the necklace (excuse my bent wire, it got a little tangled, if this happens to you, continue adding beads and it will smooth out, or try to avoid having kinks in the working section of your necklace).
6: Add the second jump ring to the end of the wire.
7: Loop the wire around the jump ring twice like you did in step two.

8: Thread the wire back through the crimp and the first few beads on the wire. Make sure to pull it tight, extra pliers can be useful for getting a tight fit.

9: Squash the crimp using the flat nose pliers again.

10: Trim the excess wire using the cutting pliers.

11: Now you can add your pendant!

12: Once your pendant has been added, your necklace is complete!


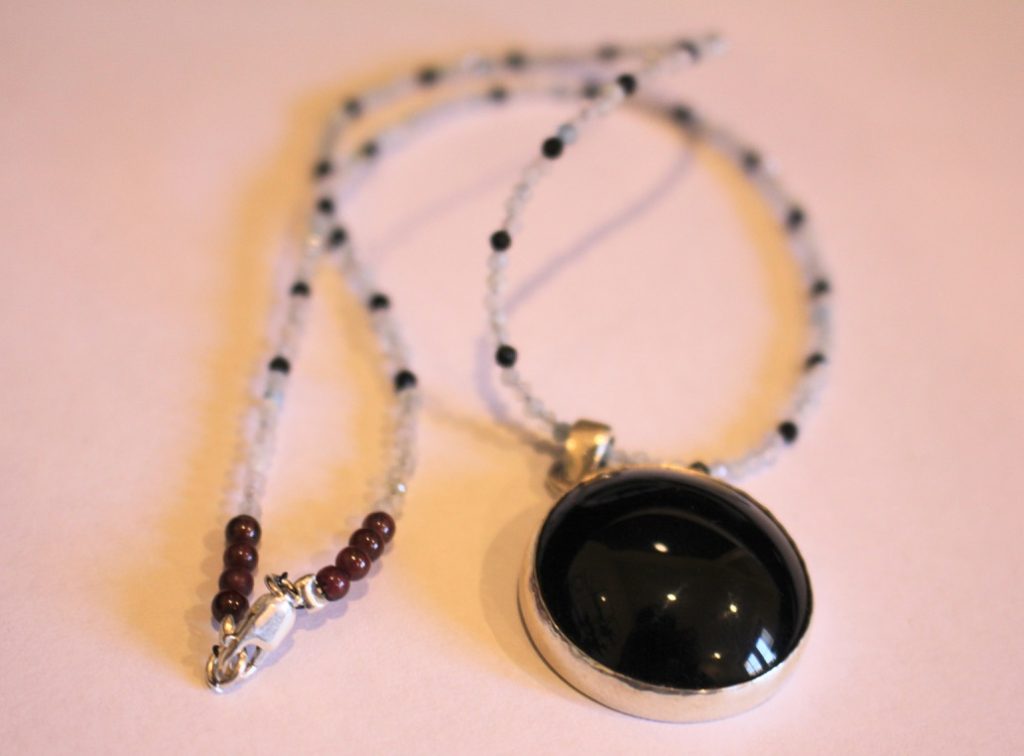
Here’s another one I made using a black cabochon pendant on a necklace made with faceted gemstone beads. So pretty! There are so many options using this technique! What combination will you make?
Here are some other pendant necklace tutorials to follow:
-
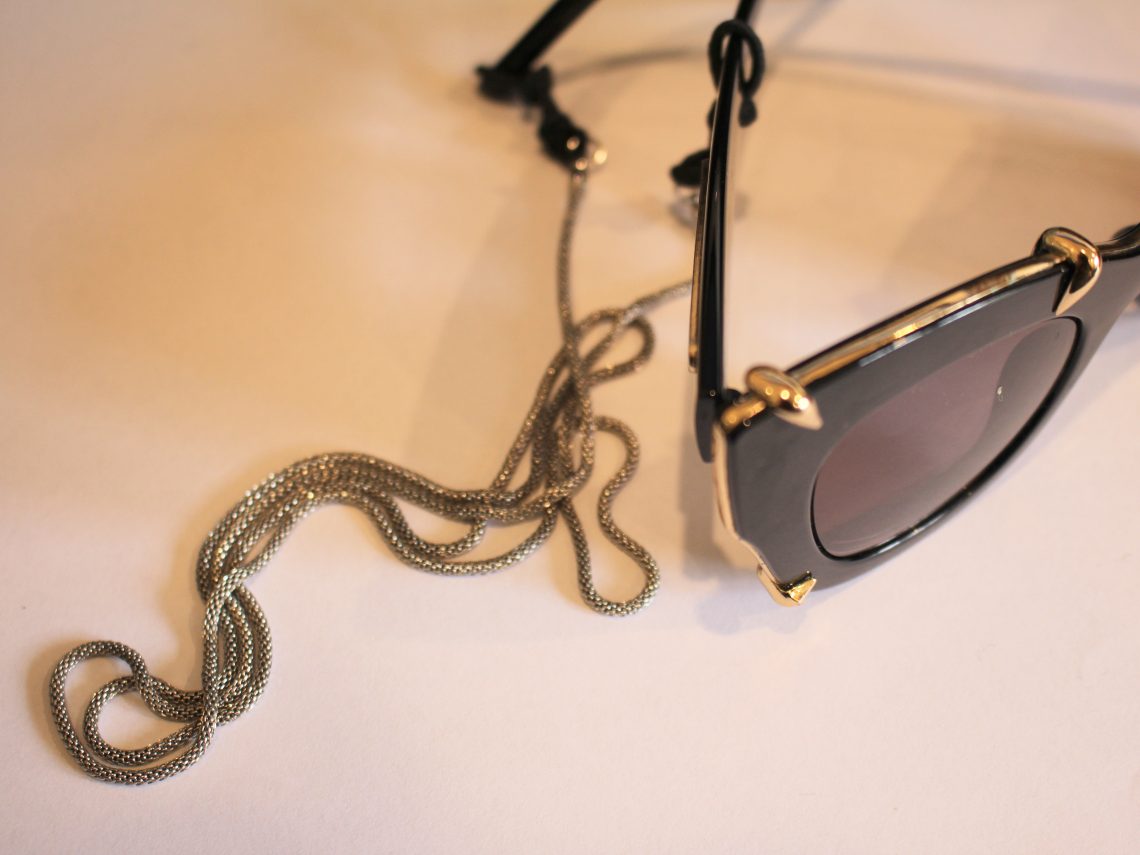
Here’s how to make a glasses chain using an old necklace and some hair elastics!
Sometimes I like to MacGyver some things together to make something far more useful, this is one of those times. I needed a sunglasses chain for an upcoming trip where I definitely didn’t want to lose my glasses. In the past I’ve made glasses chains using specialised findings, but I found that the rubber would wear out and break very quickly, so I wanted a more durable option… cue hair elastics! By tying some hair elastics cleverly, I’ve now got a stylish glasses chain that is far more long lasting than my old rubber pieces. How cool!?!
Please note that this tutorial contains affiliate links.
You will need the following tools and materials to make your glasses chain:
1: Two thin hair elastics.

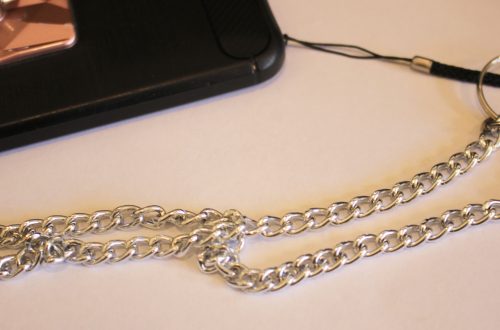
2: A long chain that you don’t use anymore. I used this snake chain costume jewelry necklace.

3: Some flat nose pliers for opening and closing jump rings.
Here are the steps to make your own handy glasses chain using hair elastics:
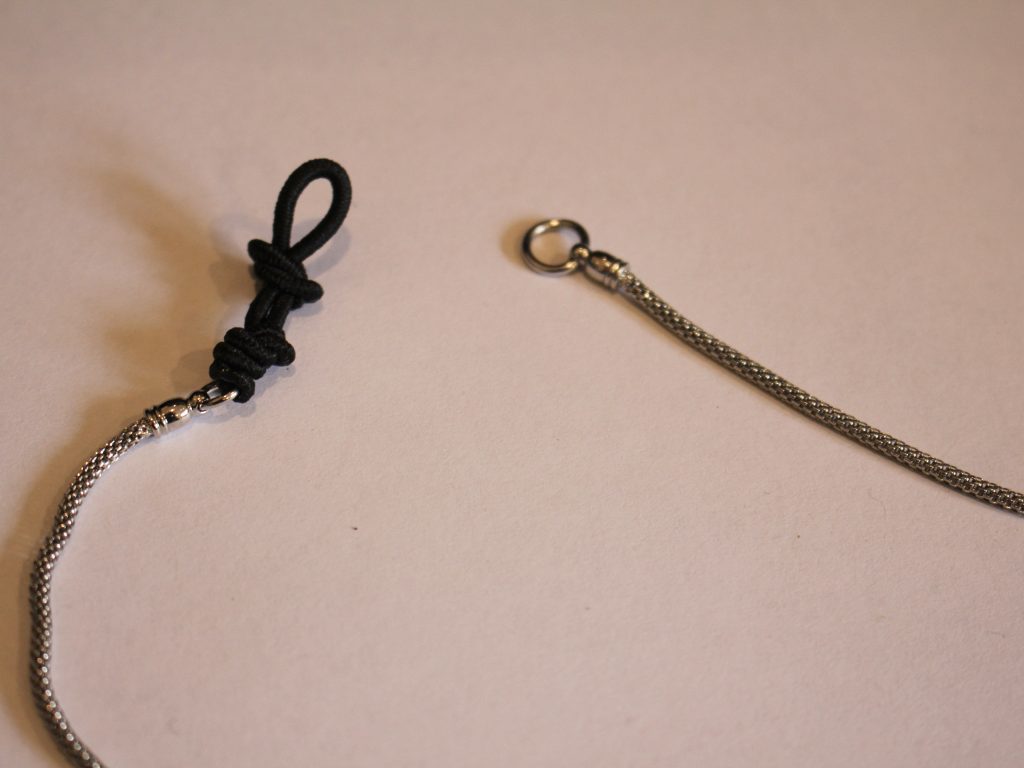
1: Using your pliers. Remove the clasp and any additional hardware from the jump rings on either end of the chain.

2: Close the jump rings.

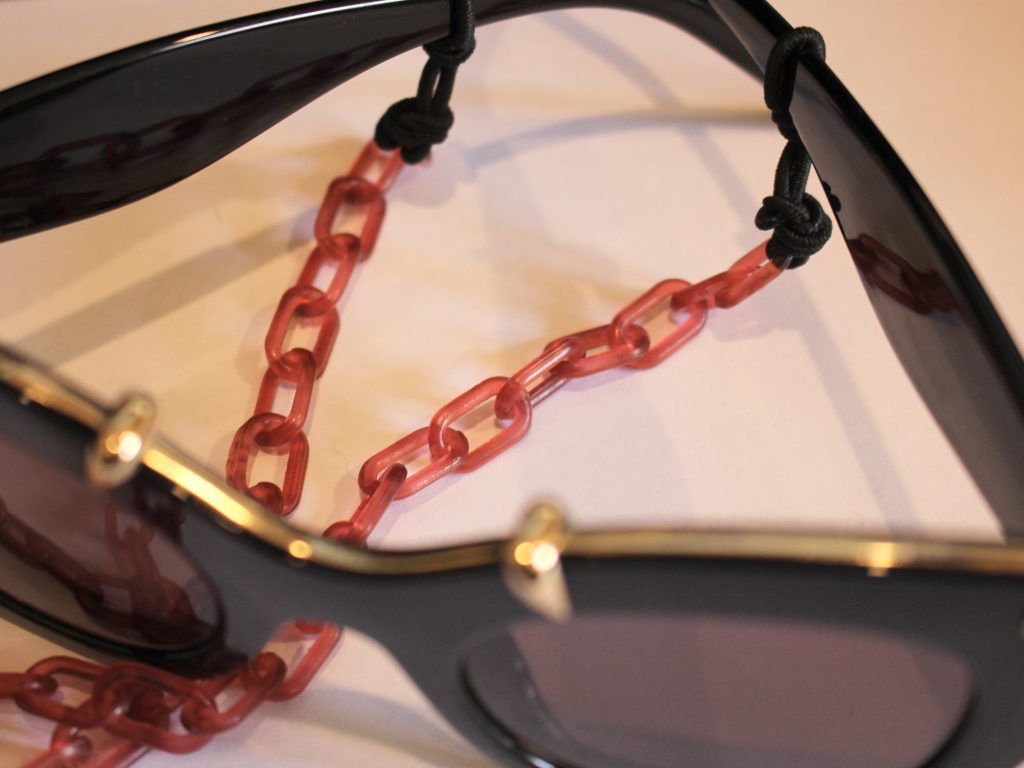
3: Take one of the hair elastics, fold it in half and thread it though one of the jump rings at the end of the chain.

4: Loop the other end of the elastic through the loop that you just threaded through the jump ring and pull it tight.


5: Create a knot above the loop you just made to secure the elastic on the jump ring.

6: Now find a spot near the middle of the elastic, but closer to the open end of it, and create a knot. You might need to make it closer to the end of the elastic or further away depending on the width of your glasses arms.
7: Repeat steps 3 to 6 for the second elastic to complete the glasses chain.
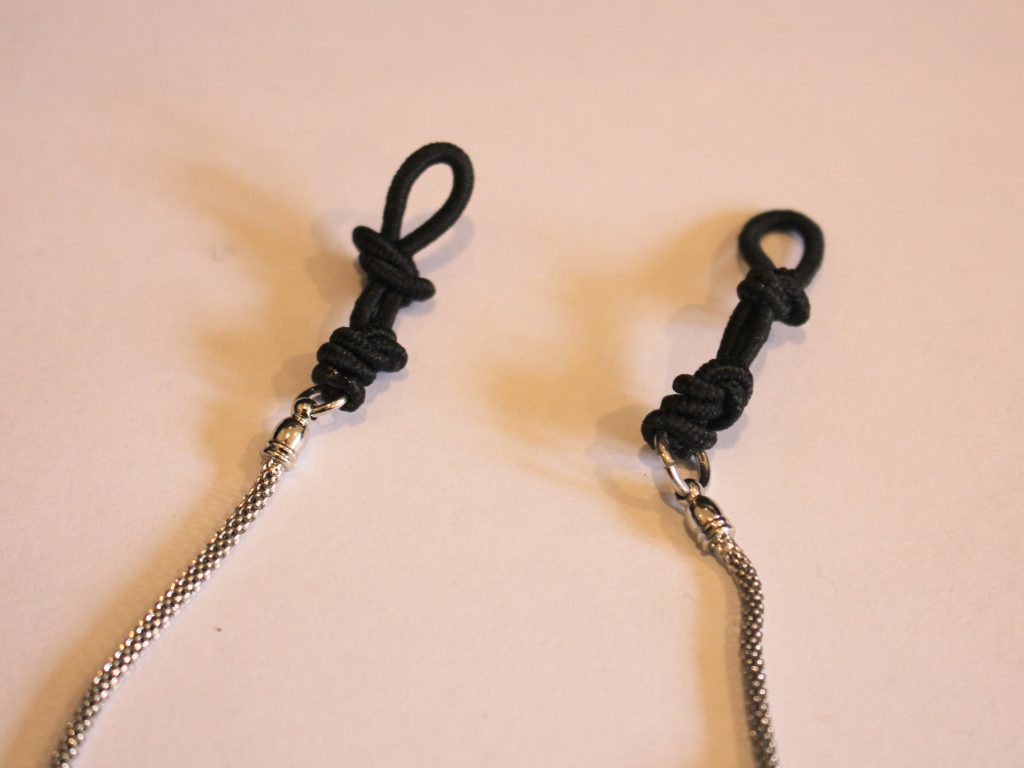
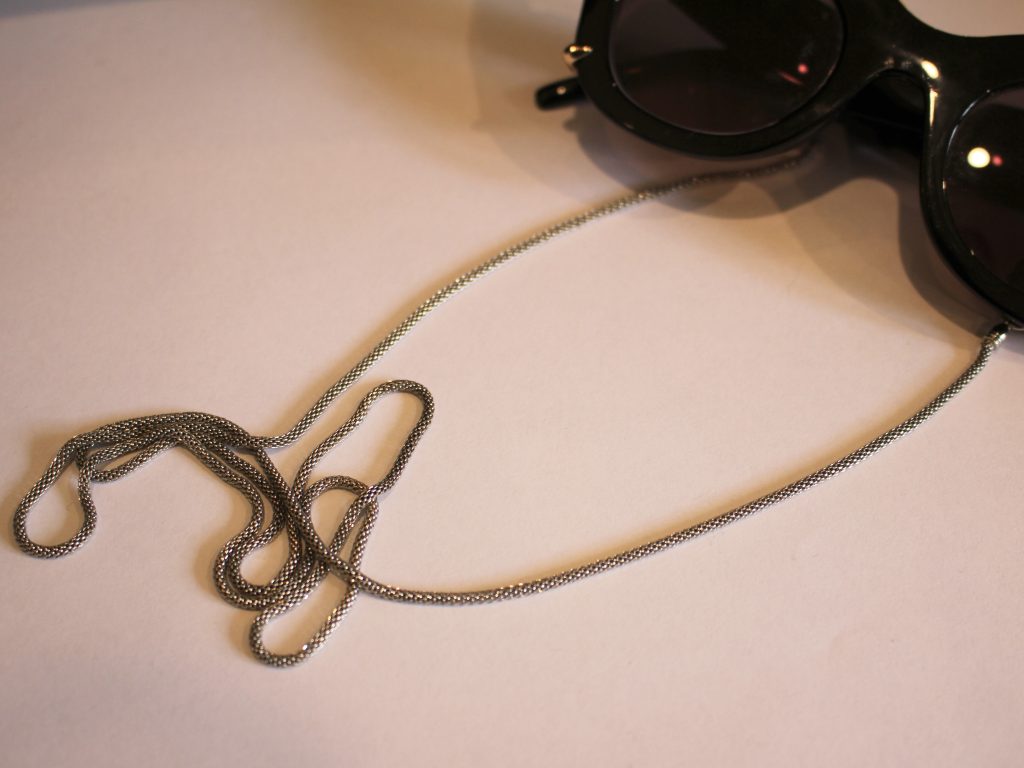
Once you have both elastics in place your glasses chain is ready to use! Here’s my finished chain.

And here are some more I made:
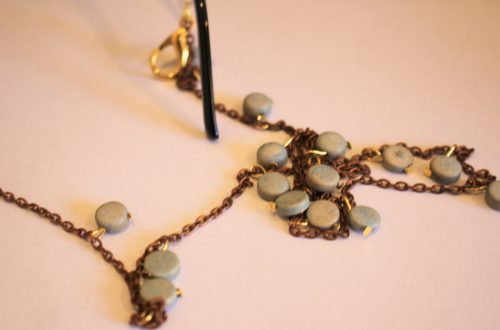
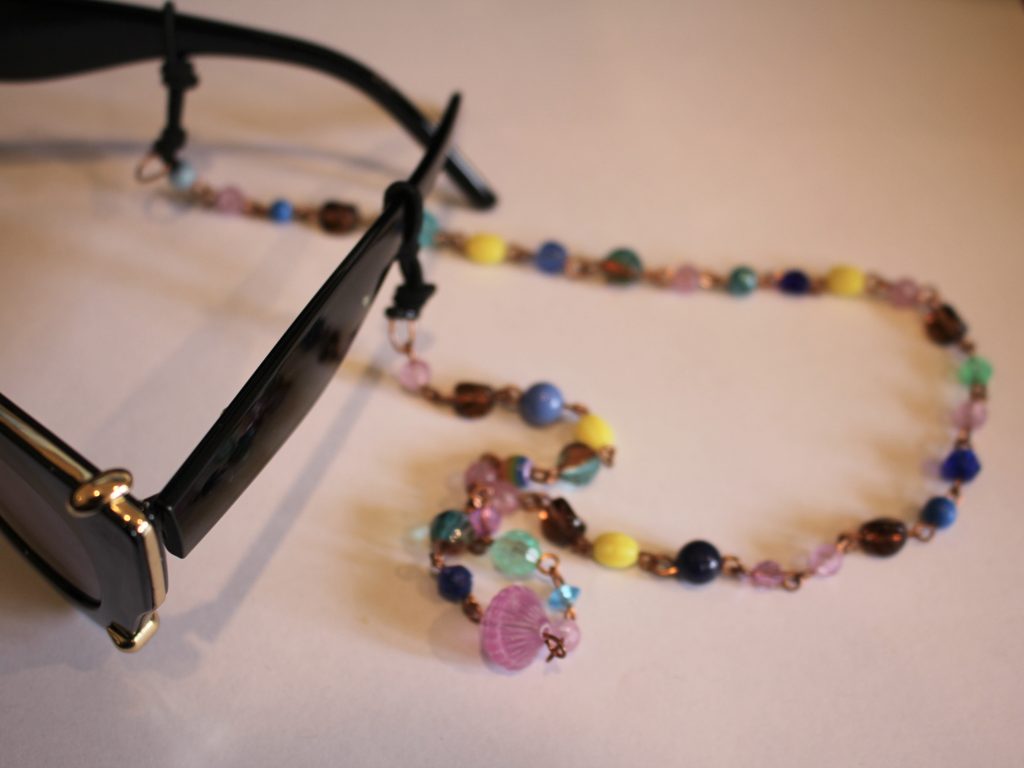
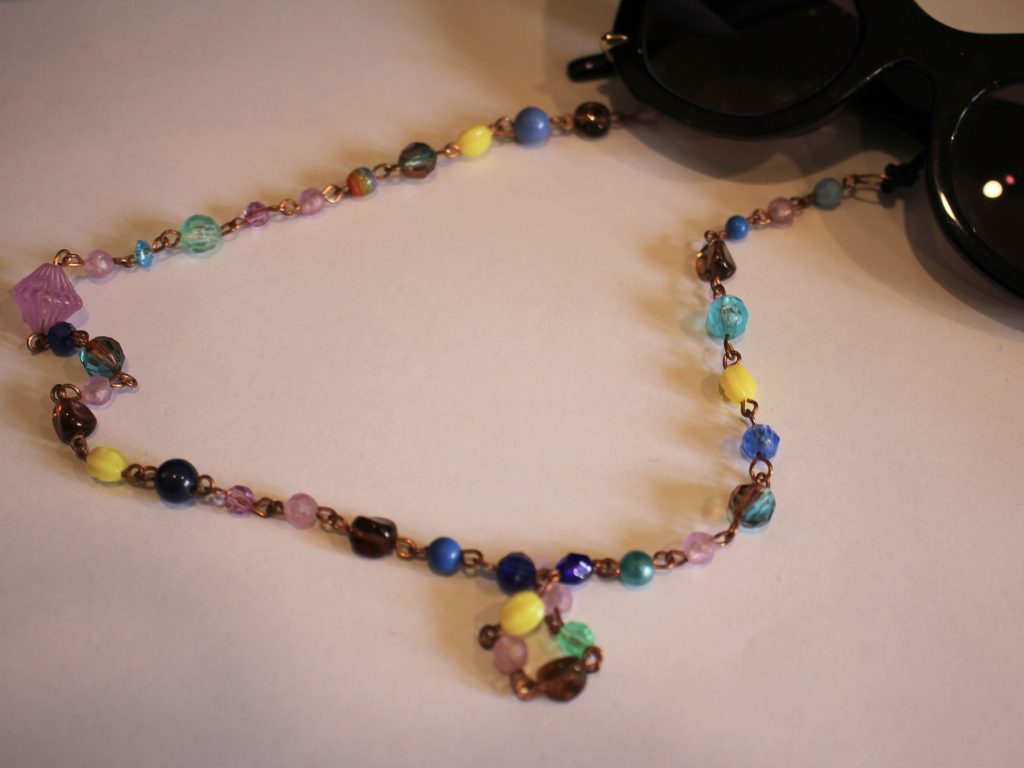
This one was made with a handmade beaded copper chain.
Here’s some pre-made beaded chain you can use if you don’t want to make your own:
And this one was made using a vintage plastic chain.
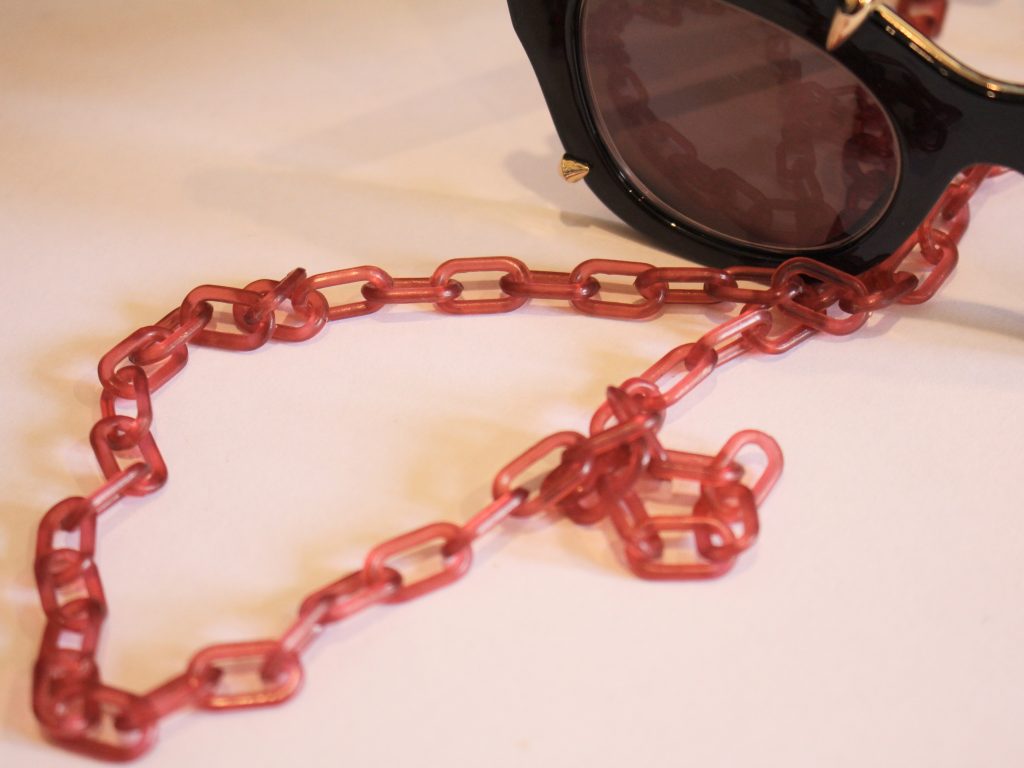
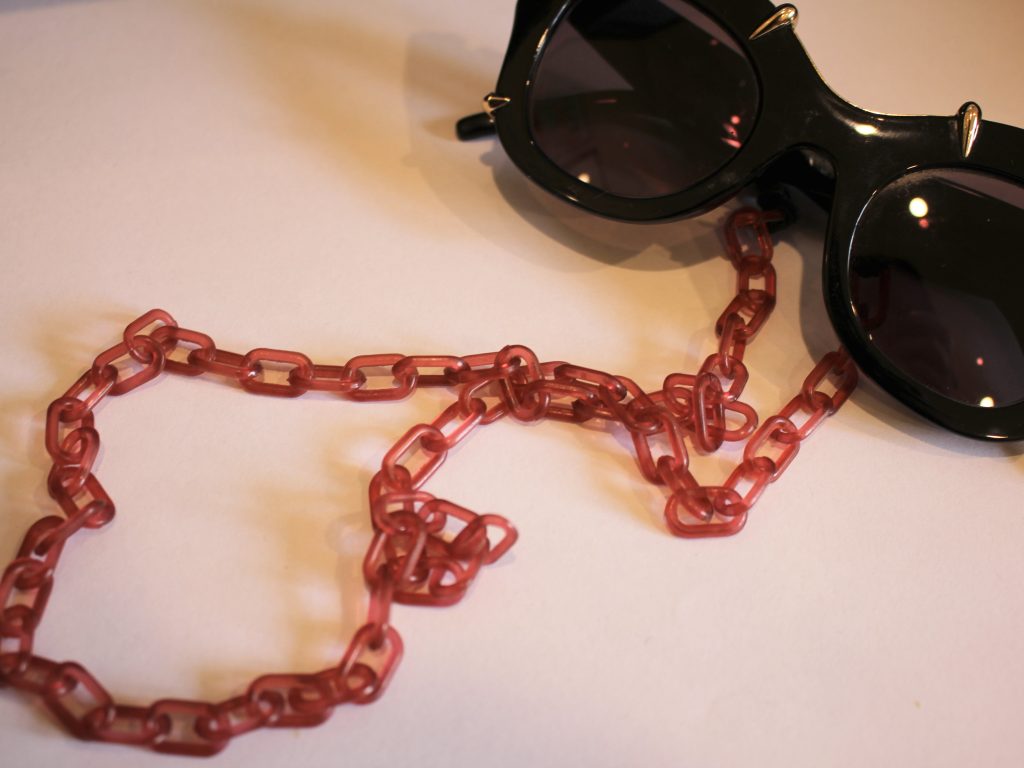
Here are some plastic chain options you can use:
Here are some more glasses chain tutorials you can follow using traditional findings, if you want to use elastics instead, just follow the steps in this tutorial to knot them in place 😉
- Here’s how to make a glasses chain using a ball chain. This one also has clips so you can use it to keep track of a face mask or other accessory.
- Here’s a simple glasses chain with bead accents.
- This is a fully beaded glasses chain.
- This one shows you how to make a chain using head pins and beads.
- This glasses chain is made from recycled materials.
- Here’s a tutorial that shows you how to make a rhinestone glasses chain.
- This glasses chain has dangling charms on it.
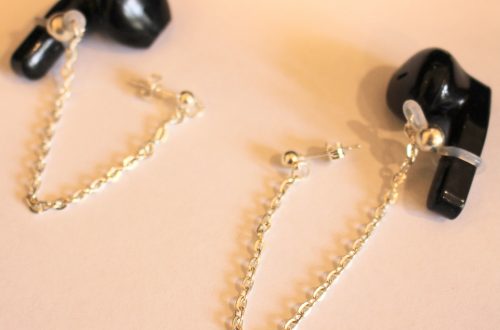
- And finally, this tutorial shows you how you can use a glasses chain as a holder for your wireless headphones!
-
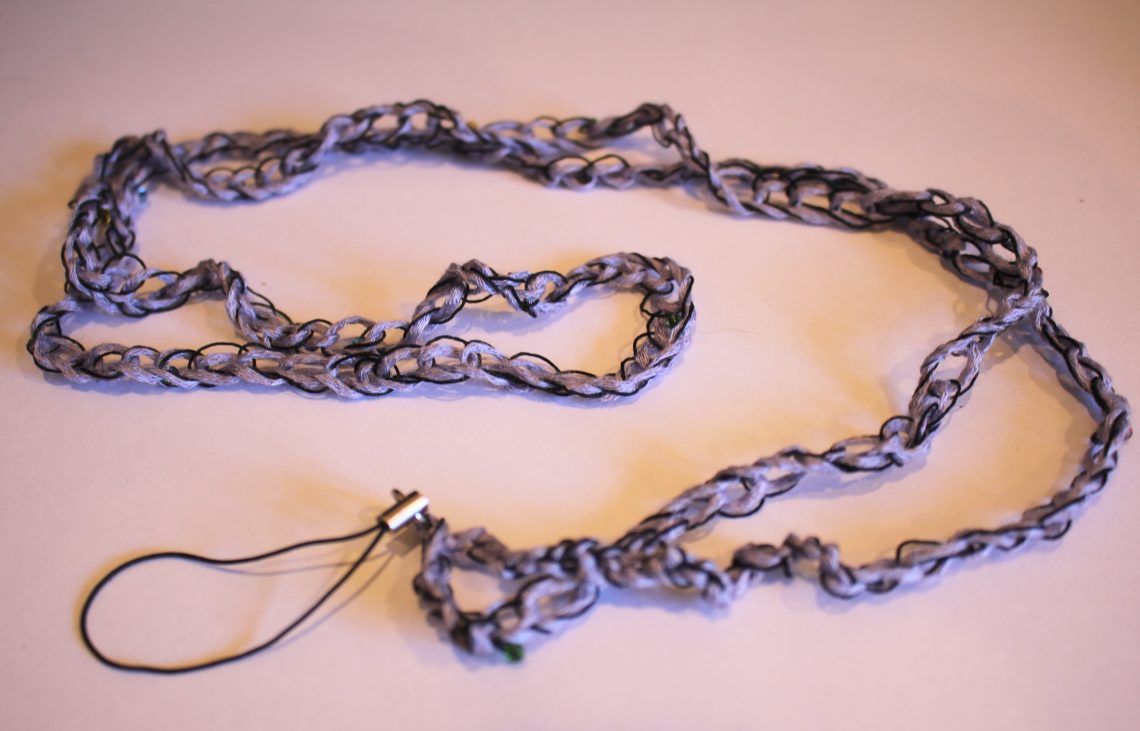
Never Lose Your Phone Again: Learn How to Crochet Your Own Stylish Phone Lanyard!
I sometimes worry that my phone could be easily lost or stolen from me, so I decided to make this sweet crochet lanyard so I can wear my phone and tuck it into my bag or pocket at the same time! This lanyard uses loose crochet and thin thread to add length. Kinda cute and also practical! Please note that this is a beginner crochet tutorial that contains affiliate links.
You’ll need the following tools and materials to make this phone lanyard:
1: Some yarn. I used two yarns held together, purple bamboo yarn and thin beaded thread.
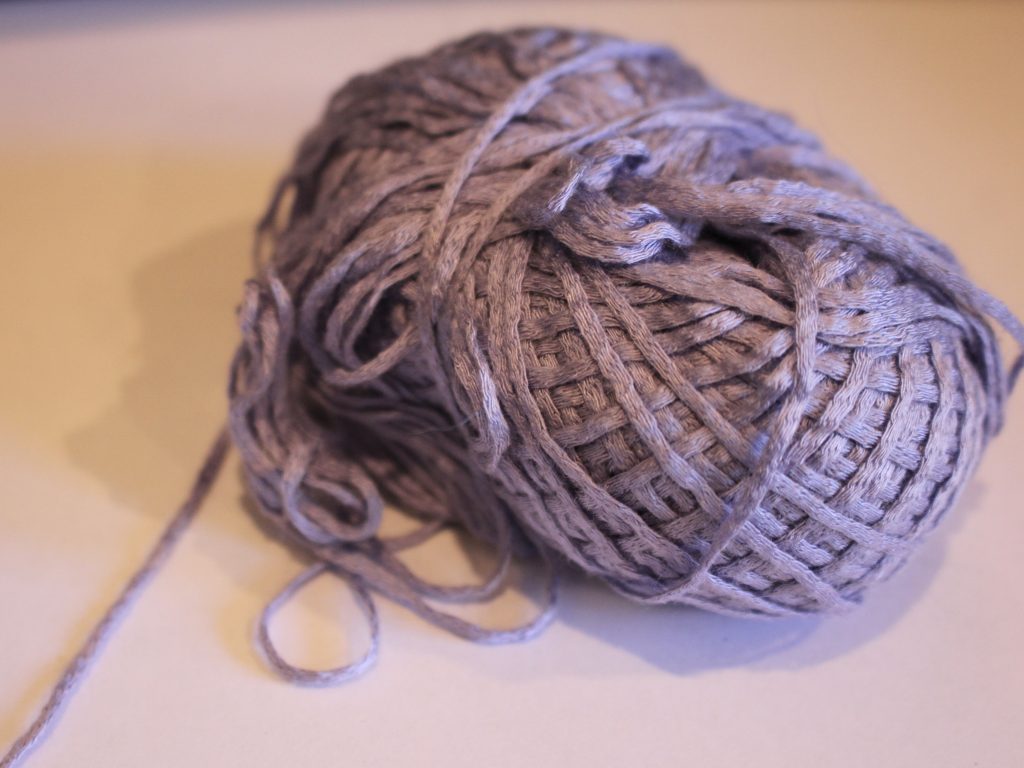
Get some purple bamboo yarn here: https://amzn.to/41yN7Qa

Get some black sequin yarn here: https://amzn.to/44VeNS8
or here: https://tidd.ly/3O34oxP
2: A crochet hook. I used one that was 3.5mm in size. If I made this again I would use a crochet hook that was slightly smaller. The size crochet hook you will need depends on the thickness of your yarn.
You can get a 3.5mm crochet hook here
Here: https://amzn.to/3Ml08si
or here: https://tidd.ly/3O2YDQF
3: A phone loop keychain.

You can get one here: https://amzn.to/42vJzzs, or

5: A pair of scissors.
Here are all the steps you need to follow to make your crochet phone lanyard:
1: Hold the two yarns together.

2: Create a slip knot with the two yarns held together.

3: Slide the open knot over the crochet hook and then tighten it around the hook.

4: Take the long thread and loop it around the hook close to the hook end and in front of the slip knot loop you just tightened. You can see a video of this technique here.
5: Now take the first loop and pull it over the second one and off the crochet hook.

6: Continue steps 4 and 5 to create your crochet chain. Keep making loops until you have a chain long enough to fit across your body like a cross body bag. You can use your favourite cross body back to measure a length you like.

7: Once your crochet chain is long enough, cut the yarn so that you have a shorter length of yarn.

8: Take the last loop off of the crochet chain and loop the end of the yarn through it, pull it tight to create a knot and finish the crochet chain.

9: Knot the two ends of the crochet chain together.

10: Slide the excess yarn through the jump ring at the end of the phone loop and then create a couple of knots.


11: Use the needle to weave the ends of the yarn into the crochet chain. Trim any excess.


Now your crochet phone lanyard is finished and ready to use! Make one to protect your phone during your travels, or to keep it safe at home! I’ll be wearing mine across my body to protect my neck and help keep track of my phone.

If you want some other phone strap tutorials, you can find some here:
1: Turn a chain necklace into a phone wrist strap.
2: Transform some string into an amazing beaded phone strap.
3: Make your own sparkly rhinestone wrist strap for your phone.
4: Construct a simple chain phone strap.
And if you want some lanyard inspiration, here are some additional tutorials you can try:
-
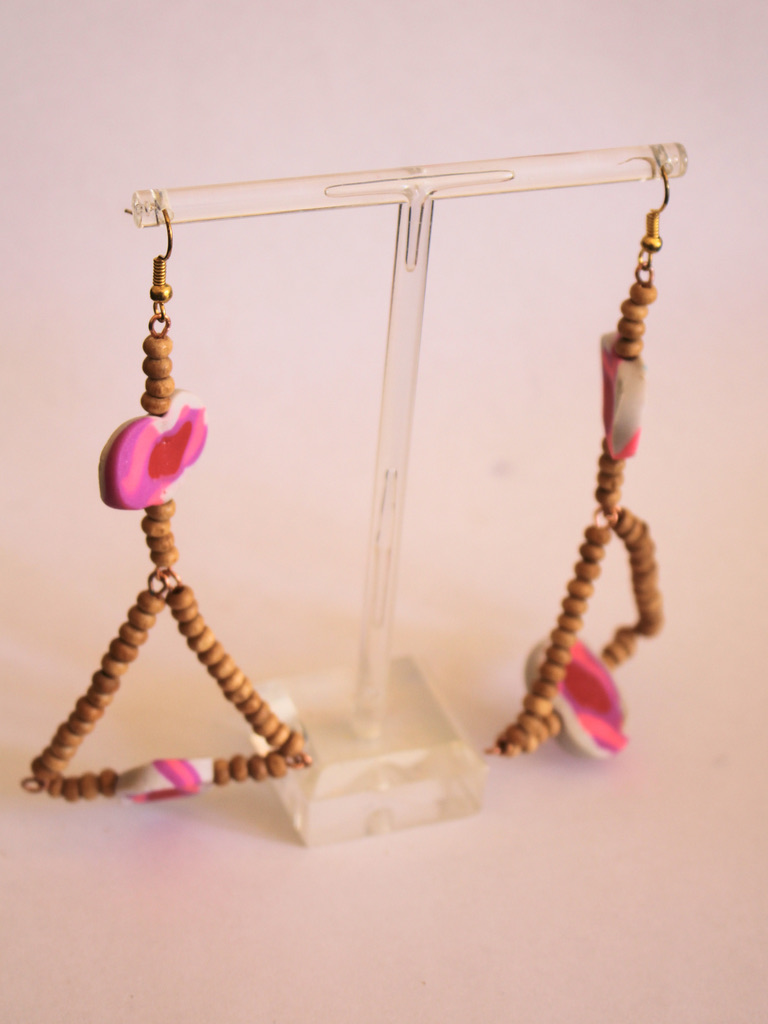
How to make a pair of triangle statement earrings!
Here’s how to make a cute pair of statement earrings, these are such a fun design that pack a bold punch with their size and colours. Please note that this tutorial contains affiliate links.
You’ll need these tools and materials to make these earrings:
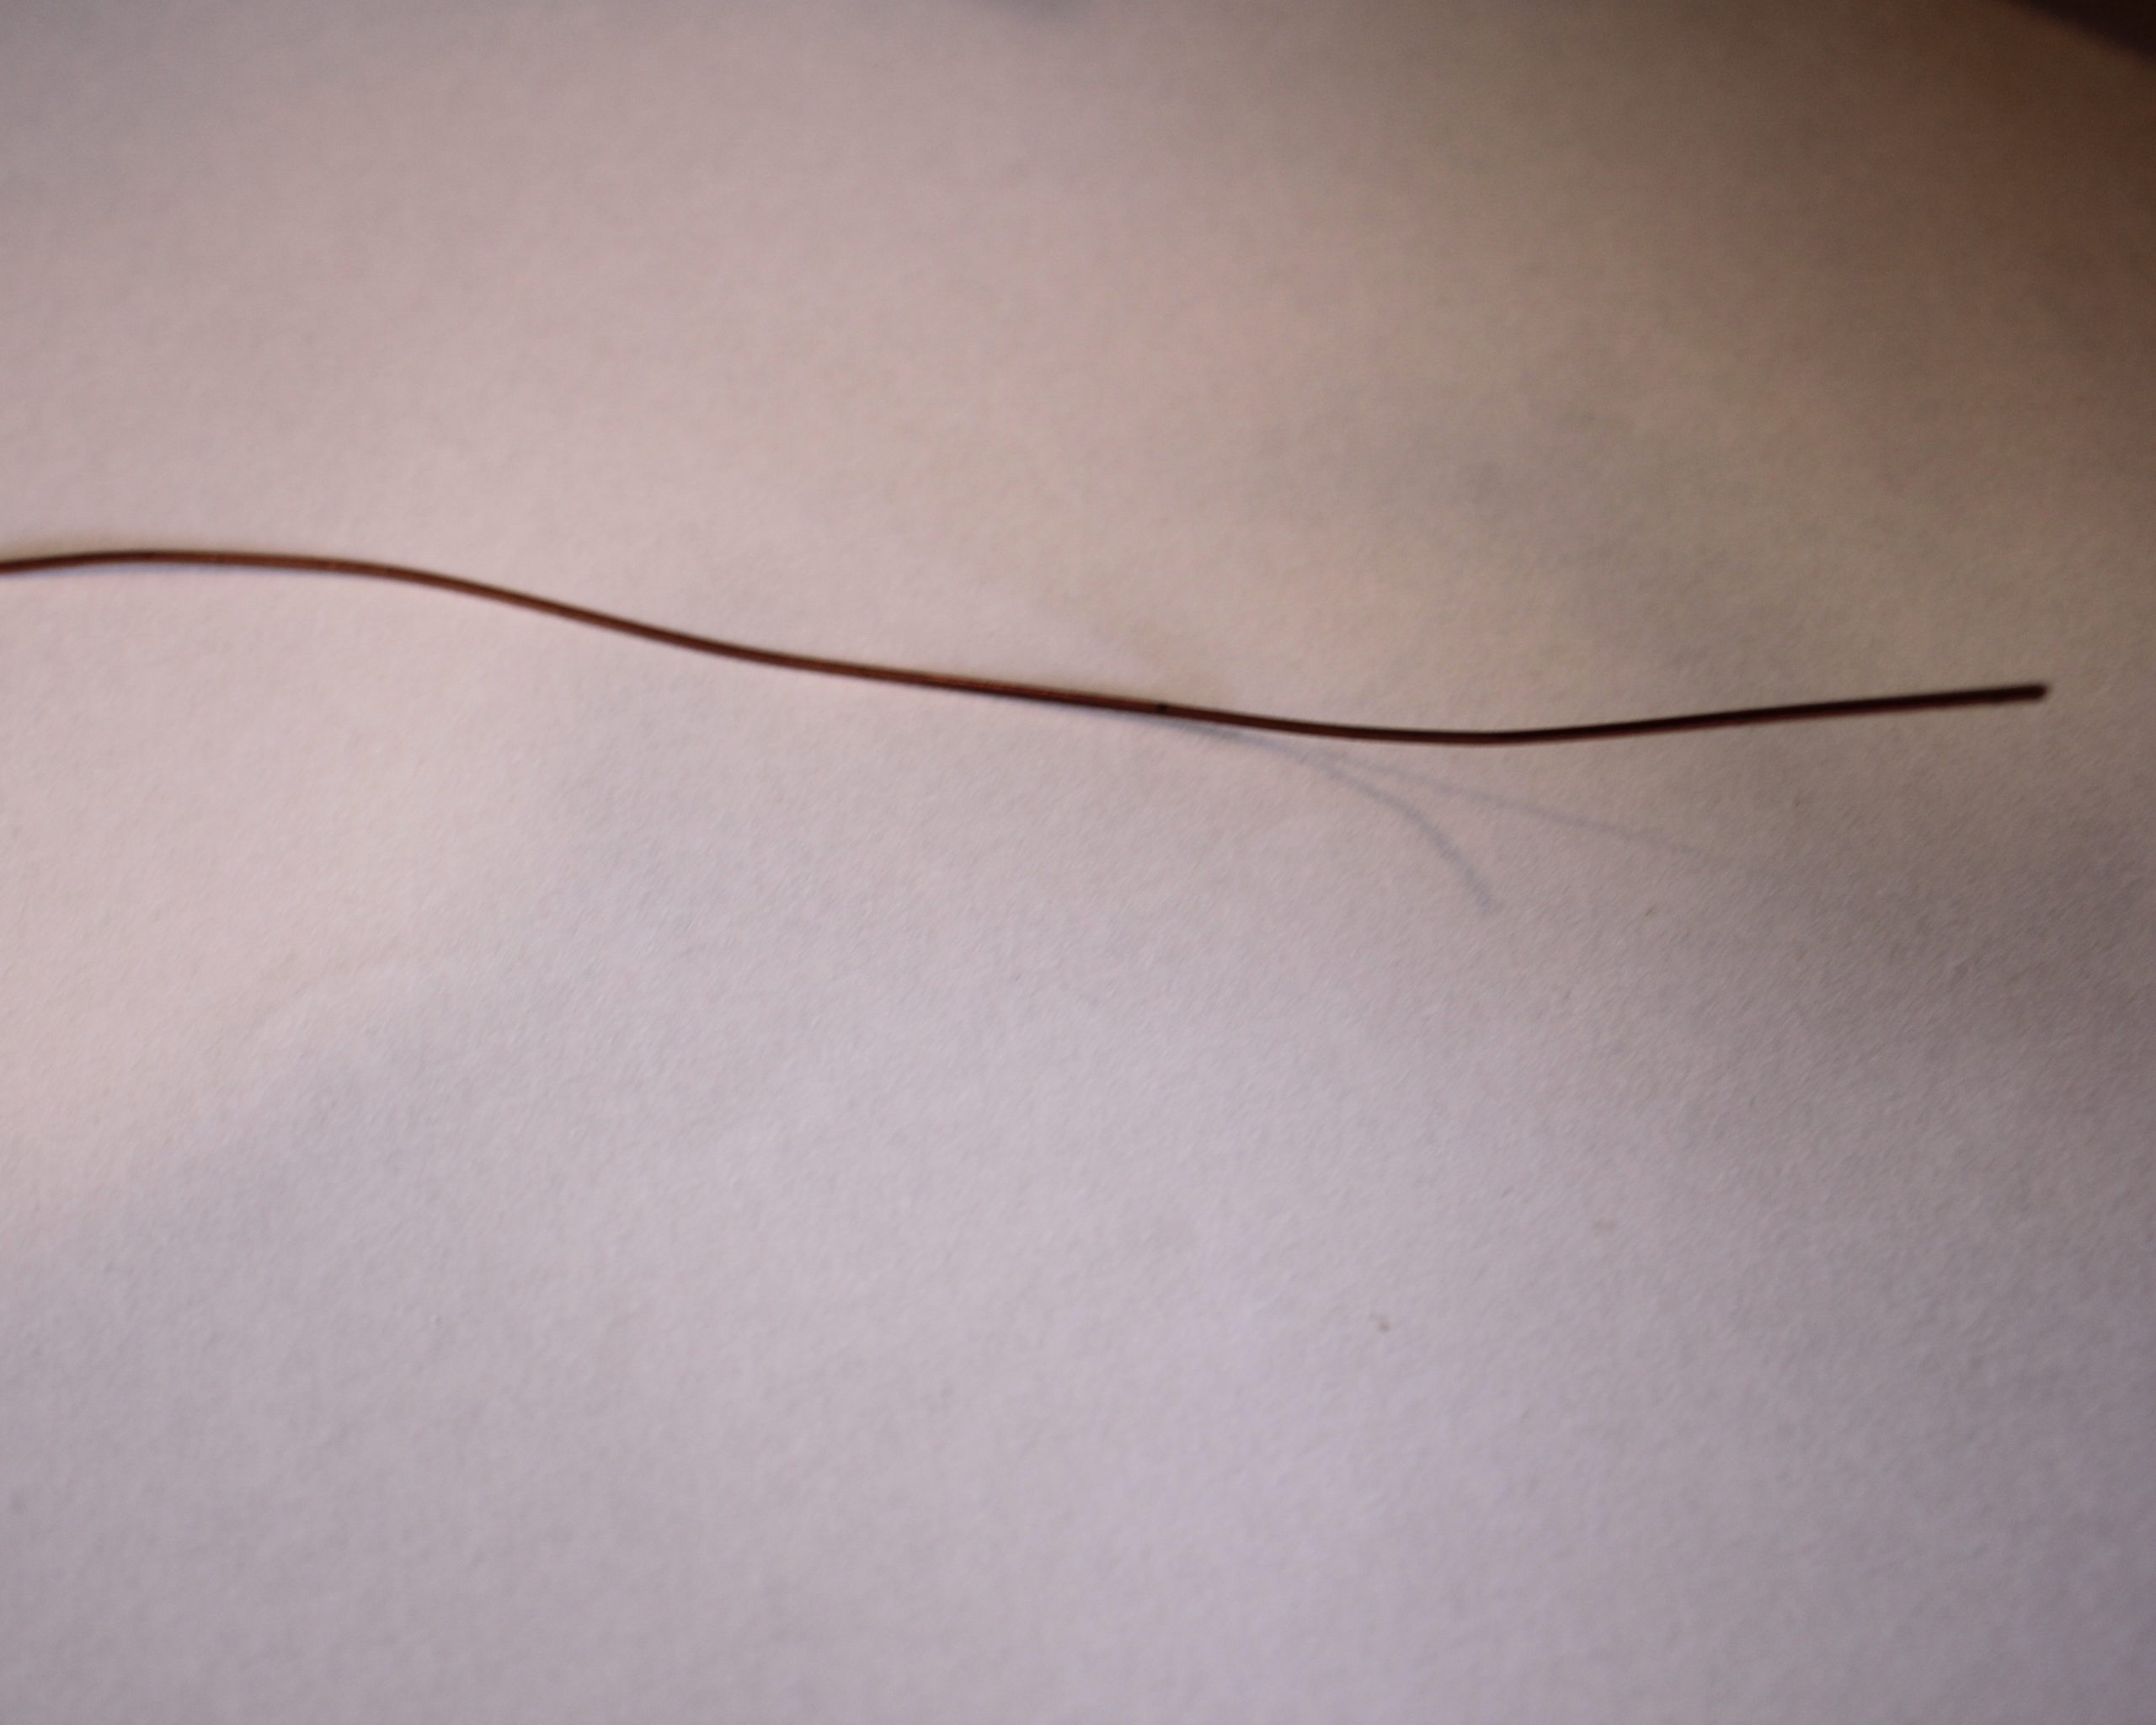
1: Eight pieces of wire all the same length. I used 0.8mm copper wire.

Here’s a pre-made eye pin option if you don’t feel like making them yourself: https://tidd.ly/3WCad6D
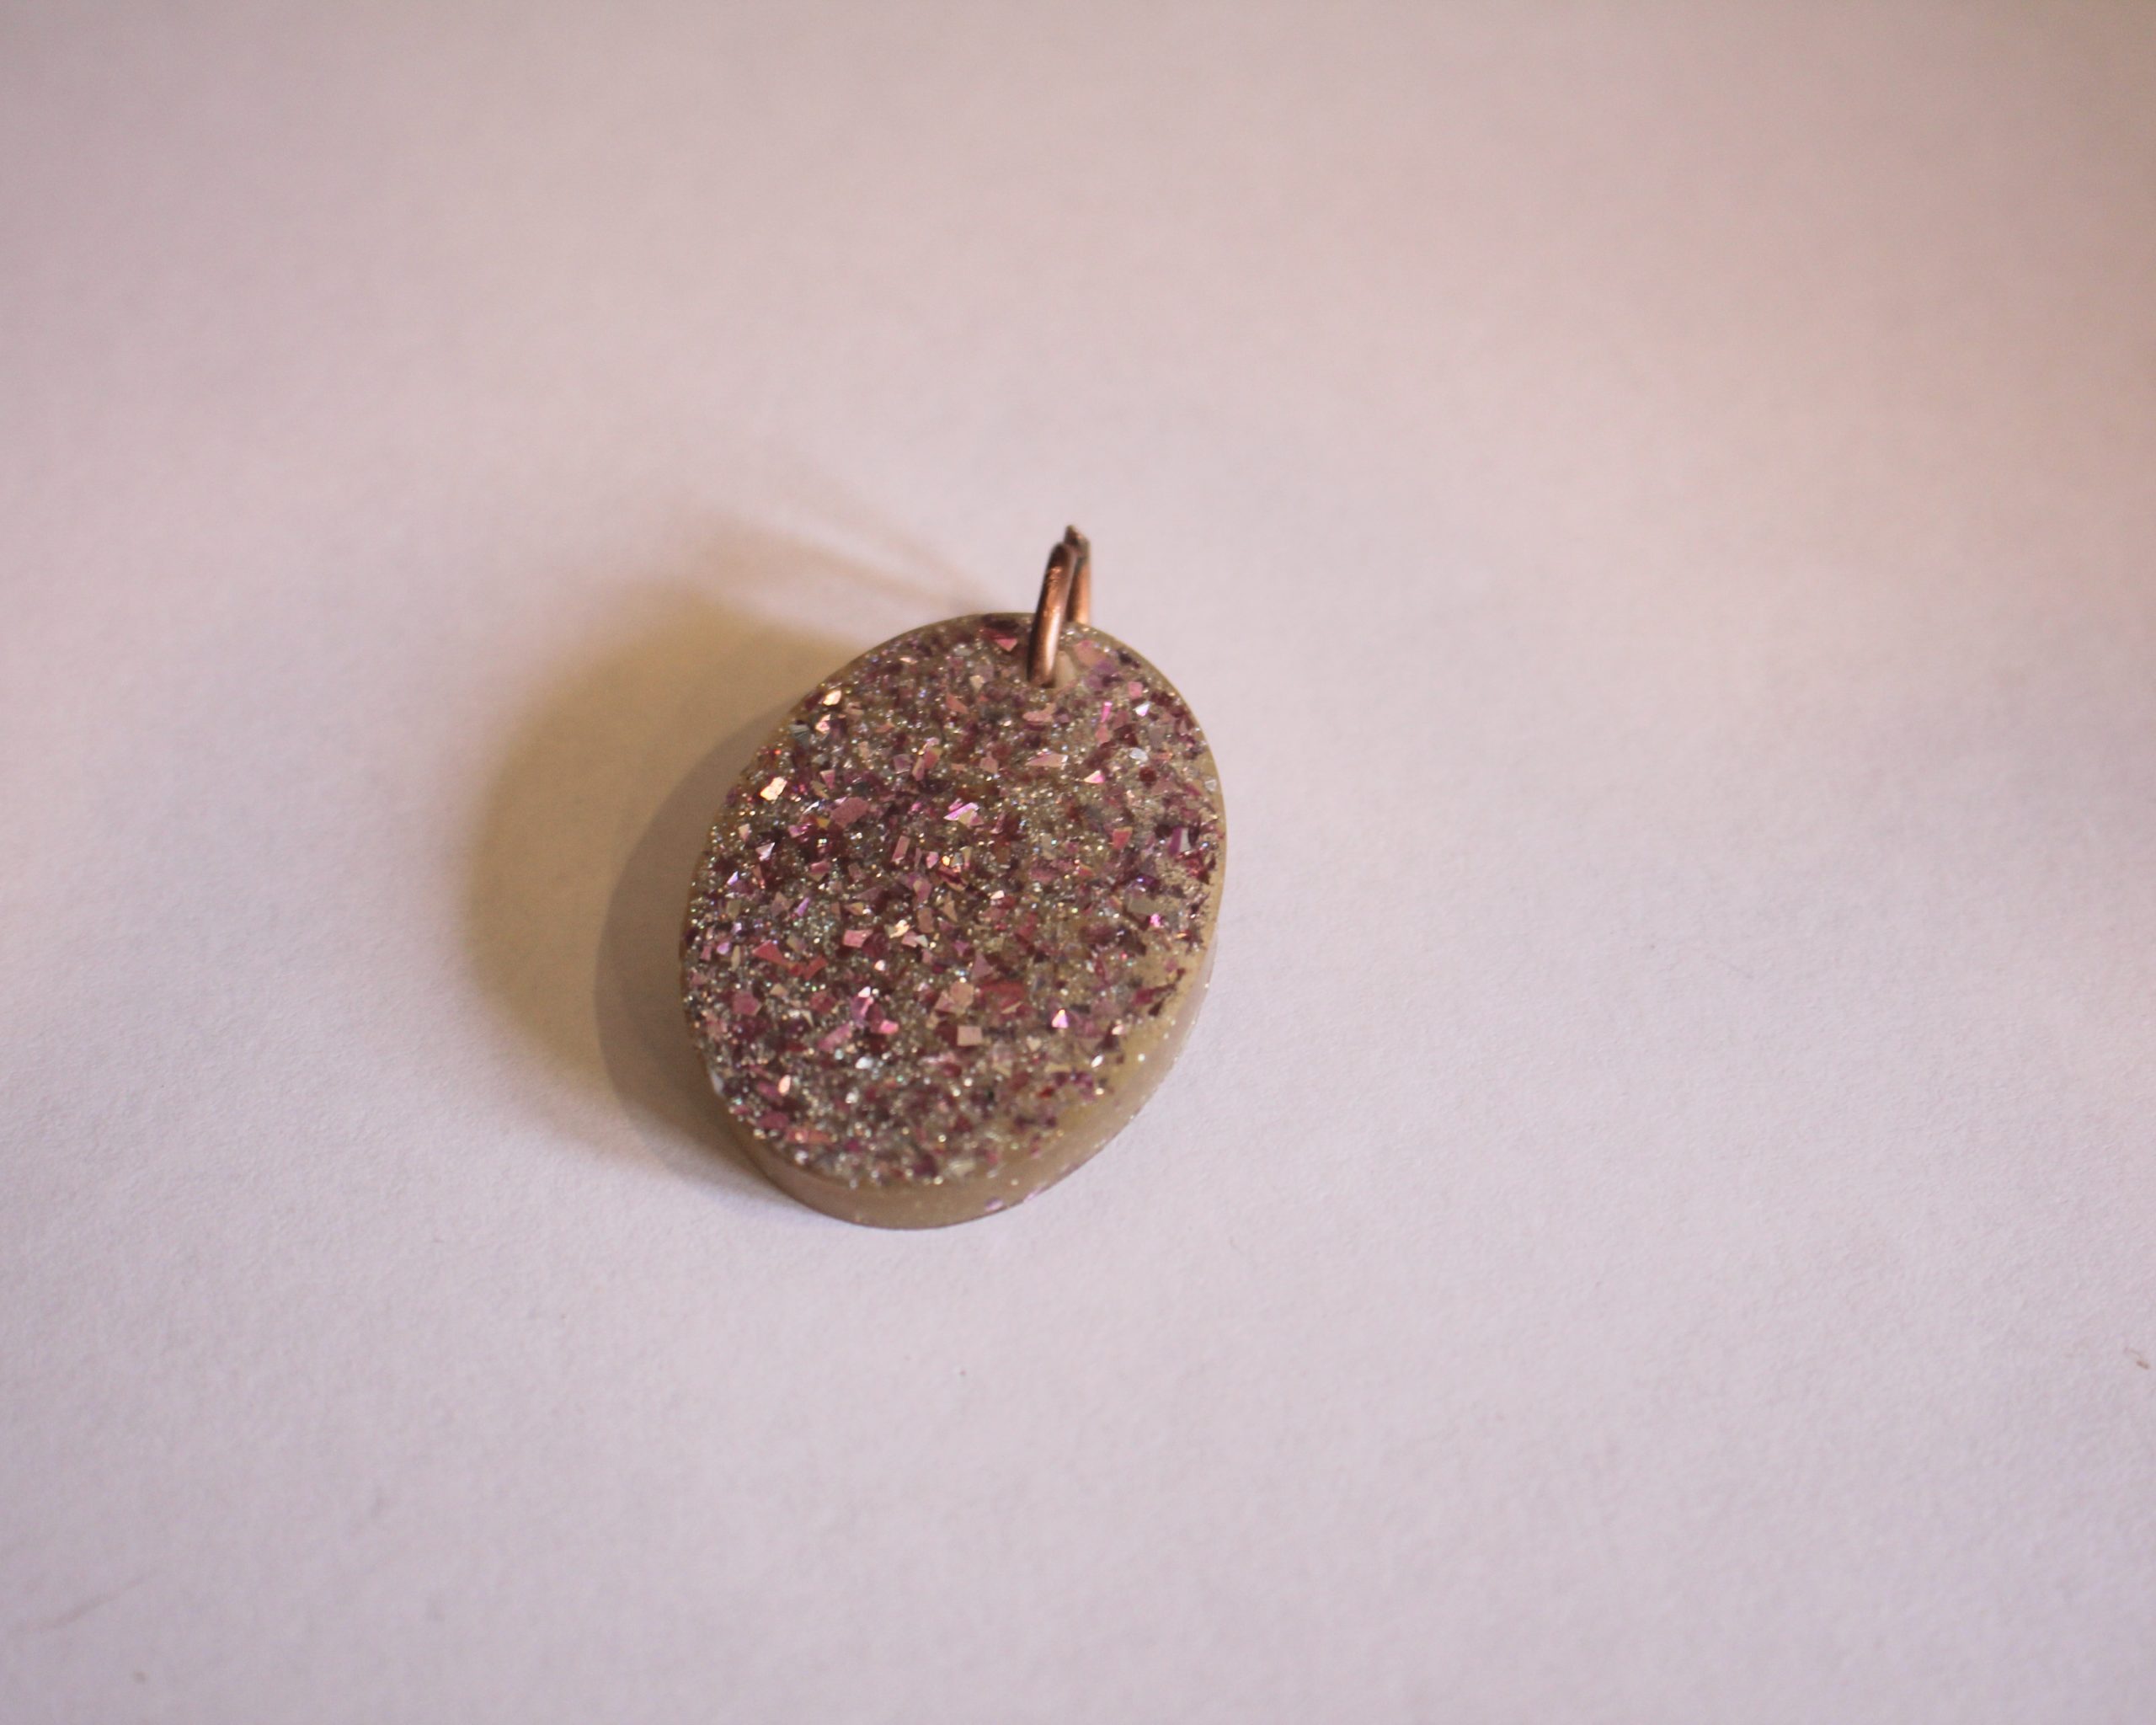
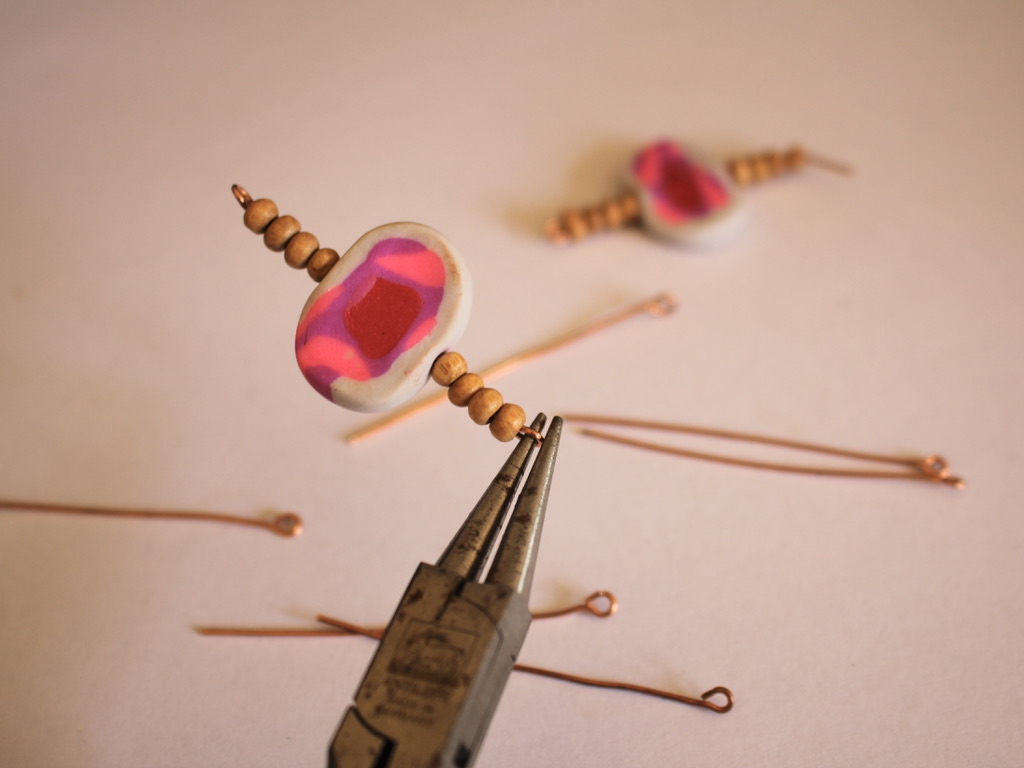
2: Four statement beads. I used these polymer clay beads I made. Here’s a polymer clay bead tutorial for you.

3: Some accent beads. I used these timber beads.

4: A pair of earring hooks. If you don’t have any, you can find tutorials that show you how to make your own here, here and here.

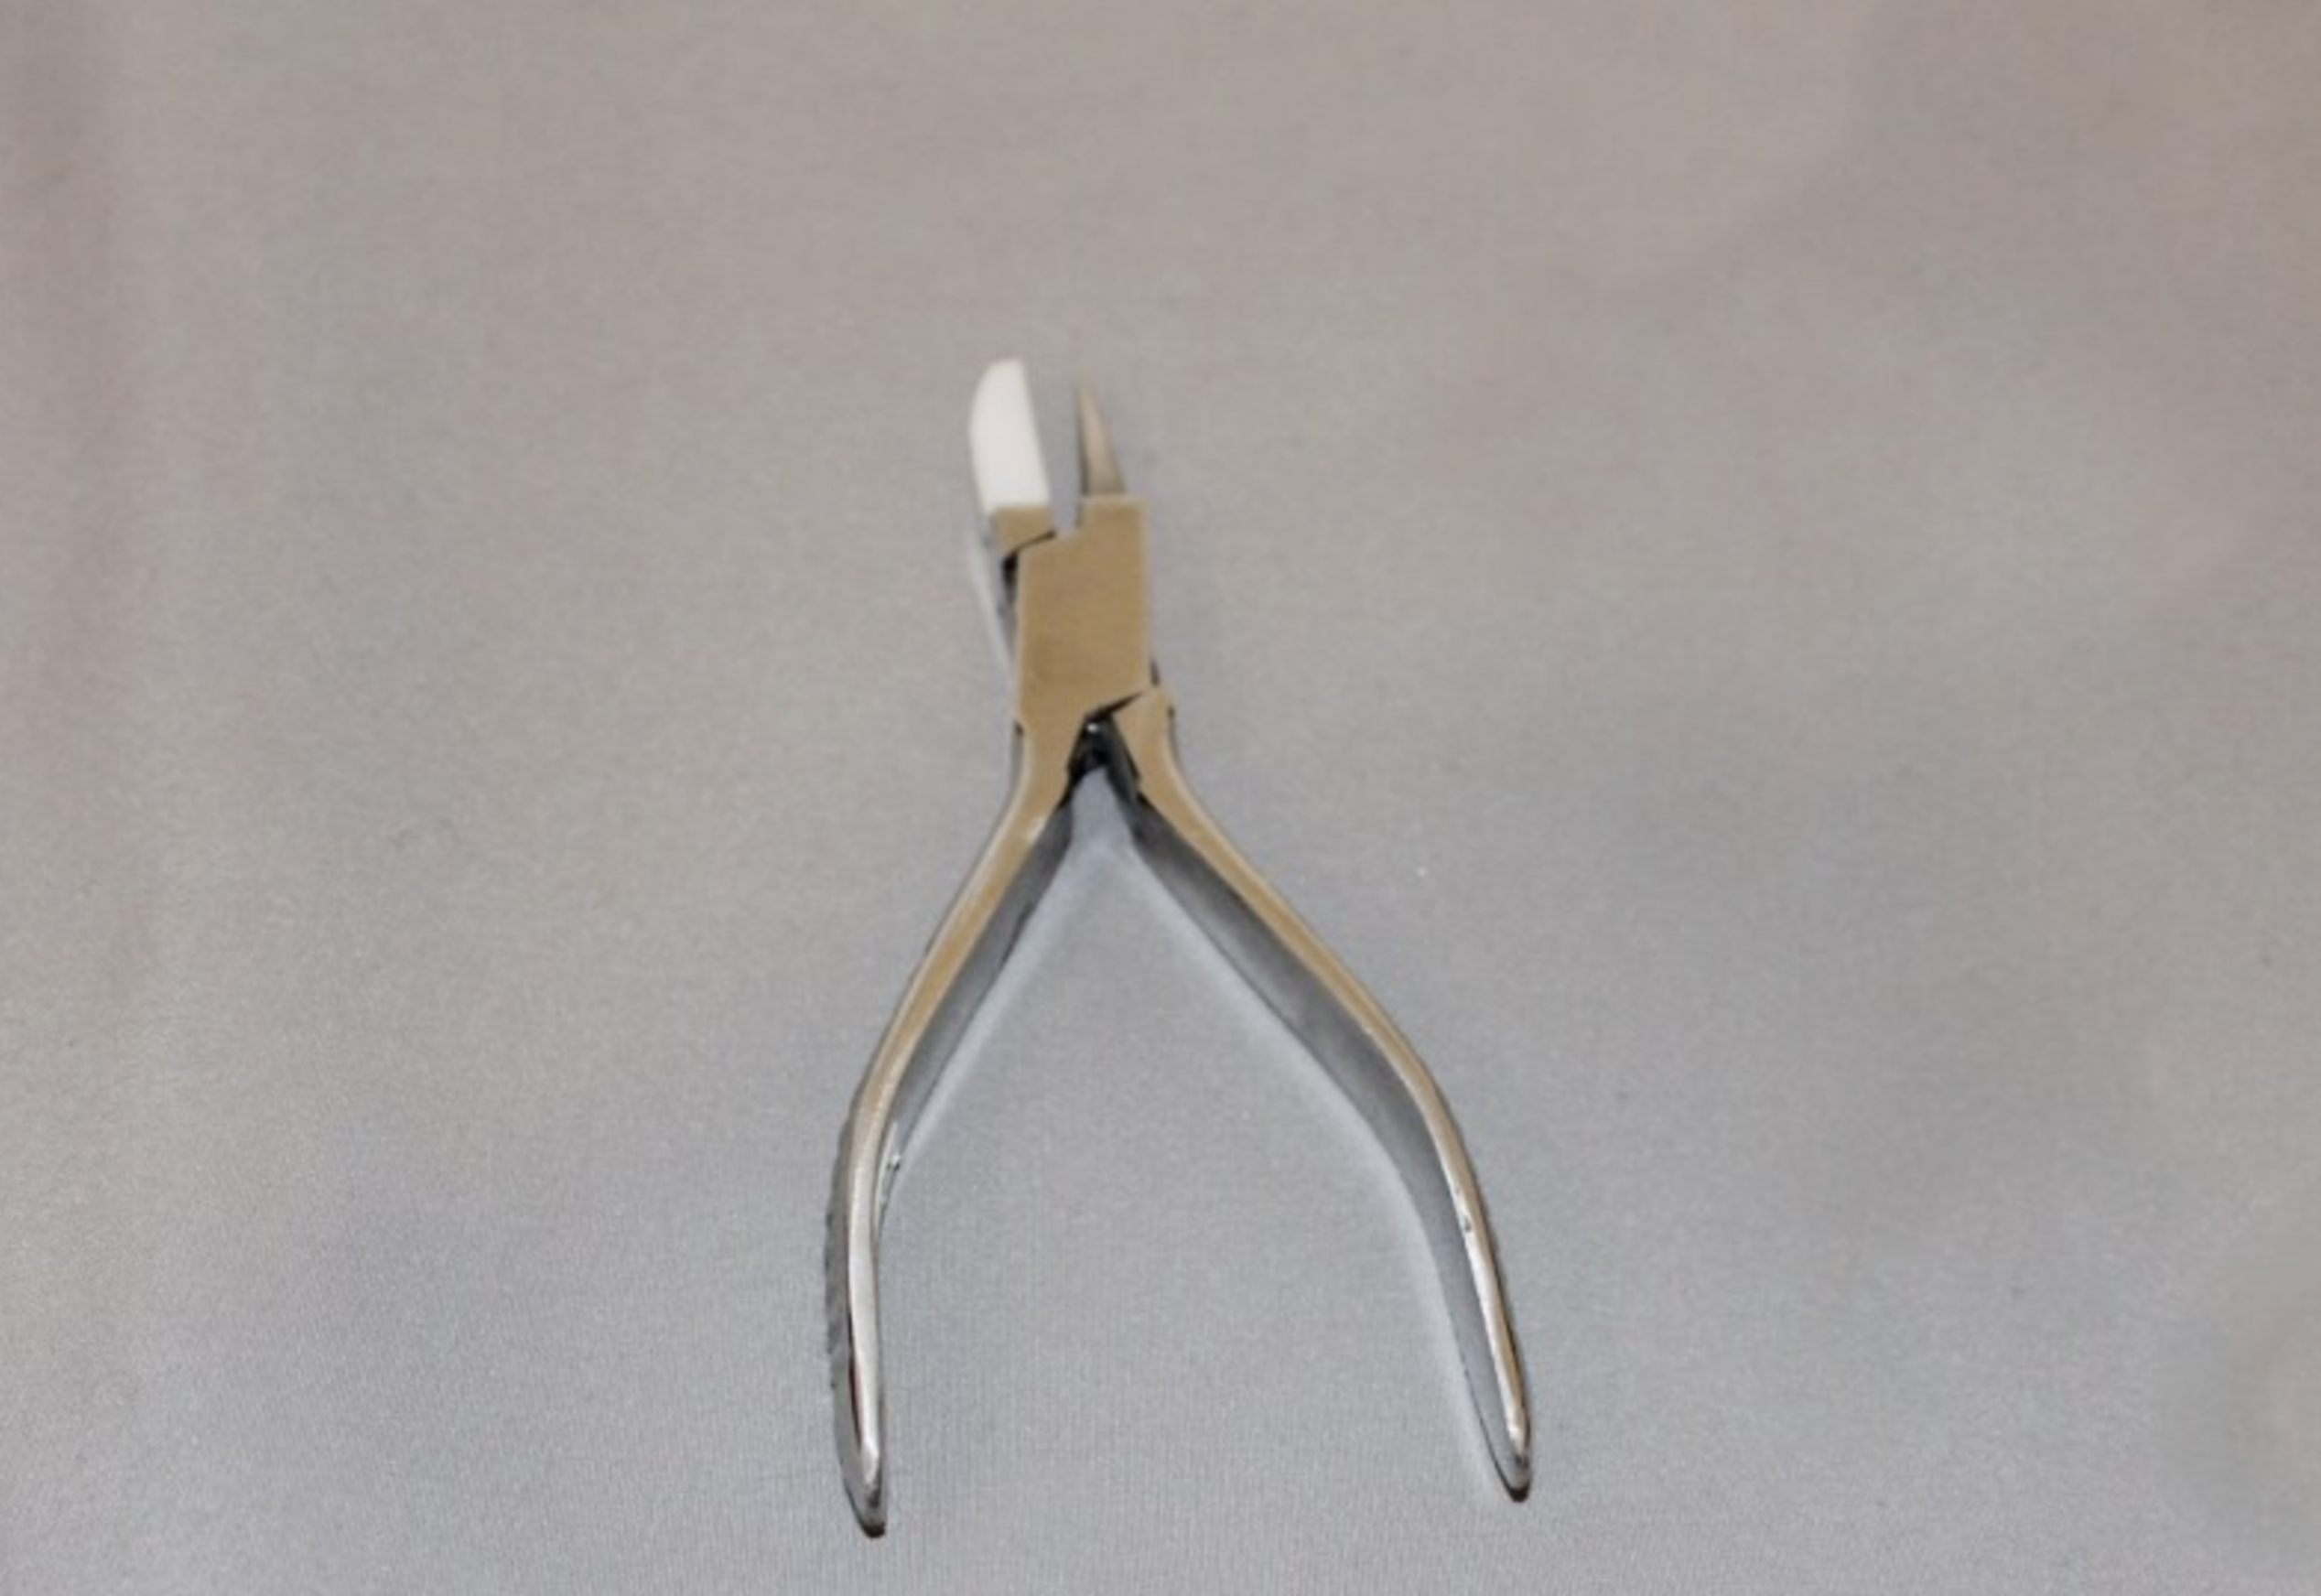
5: Some flat nose pliers and round nose pliers. You will also need your cutting pliers if you are not using pre-made eye pins.

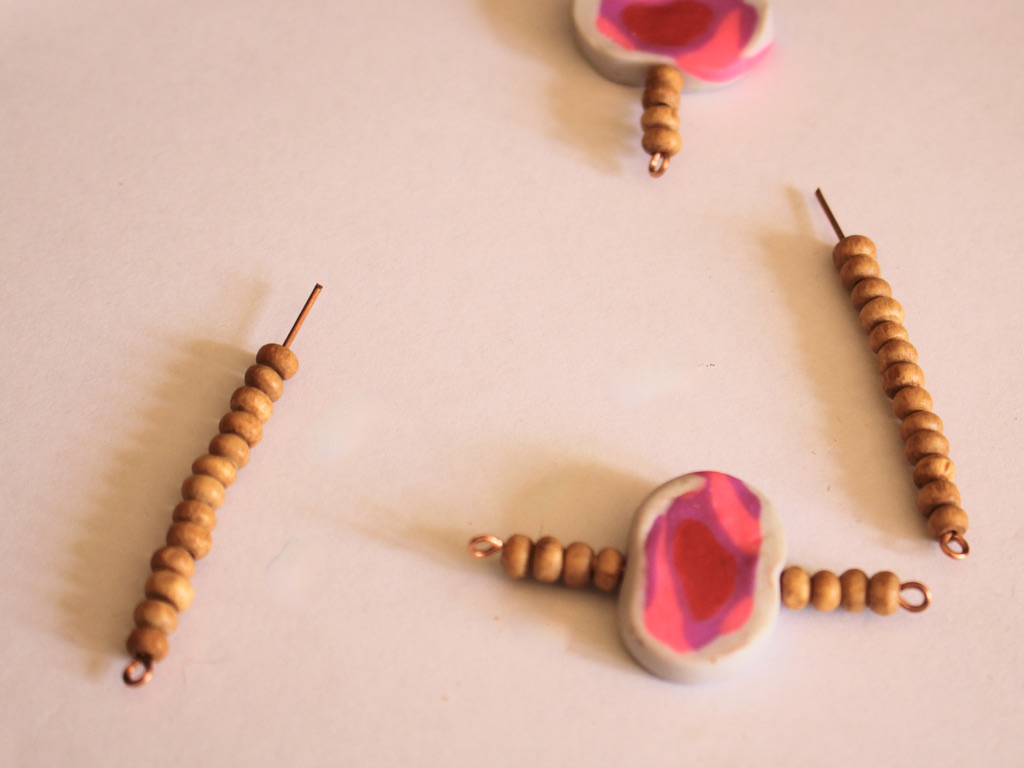
Follow these steps to make your amazing triangle statement earrings:
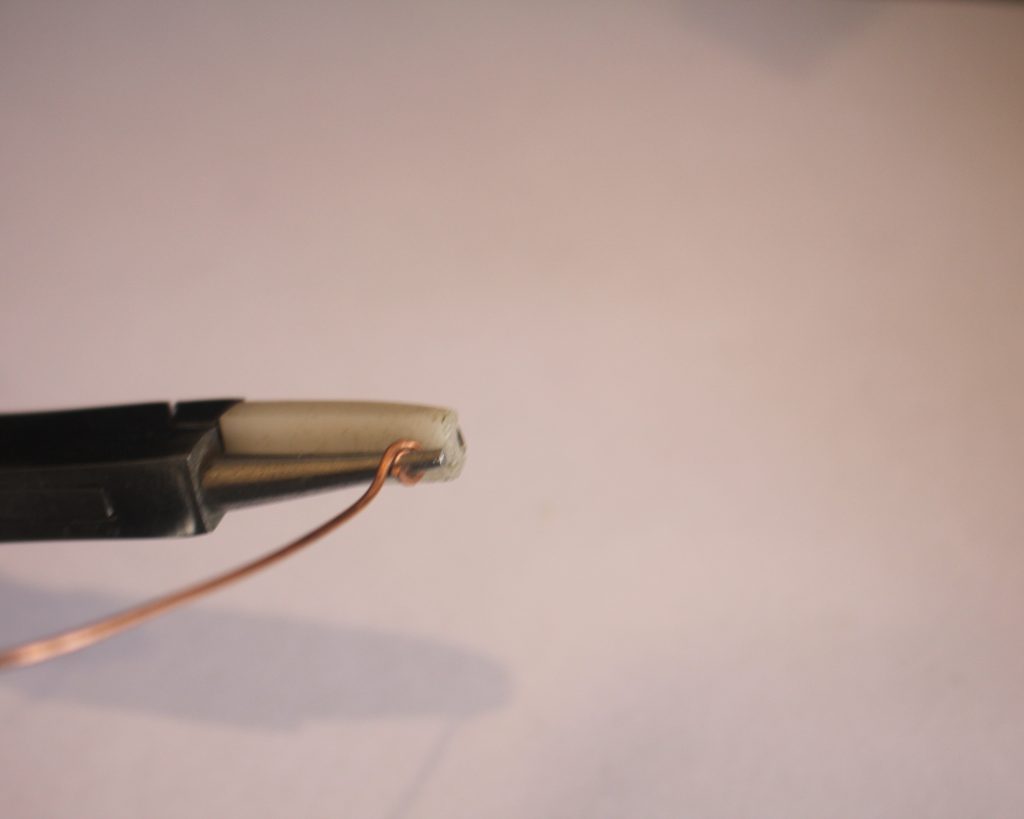
1: Bend the end of each wire to form a right angle using the flat nose pliers.


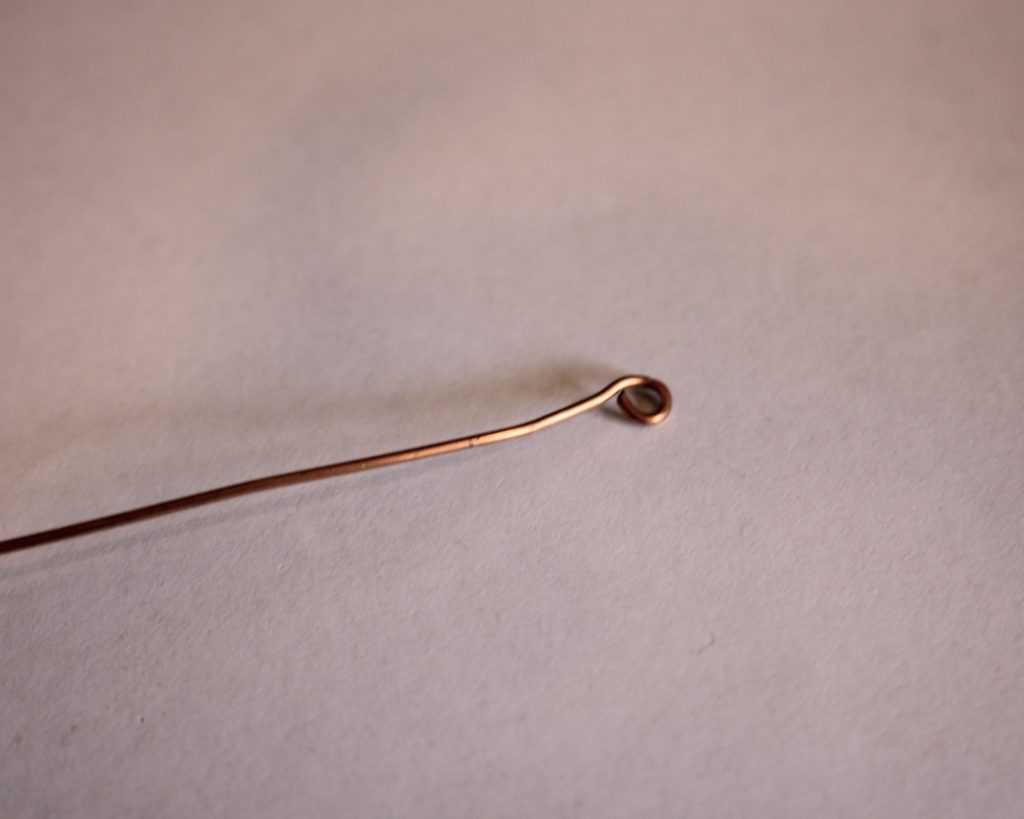
2: Loop the end of each wire using round nose pliers.

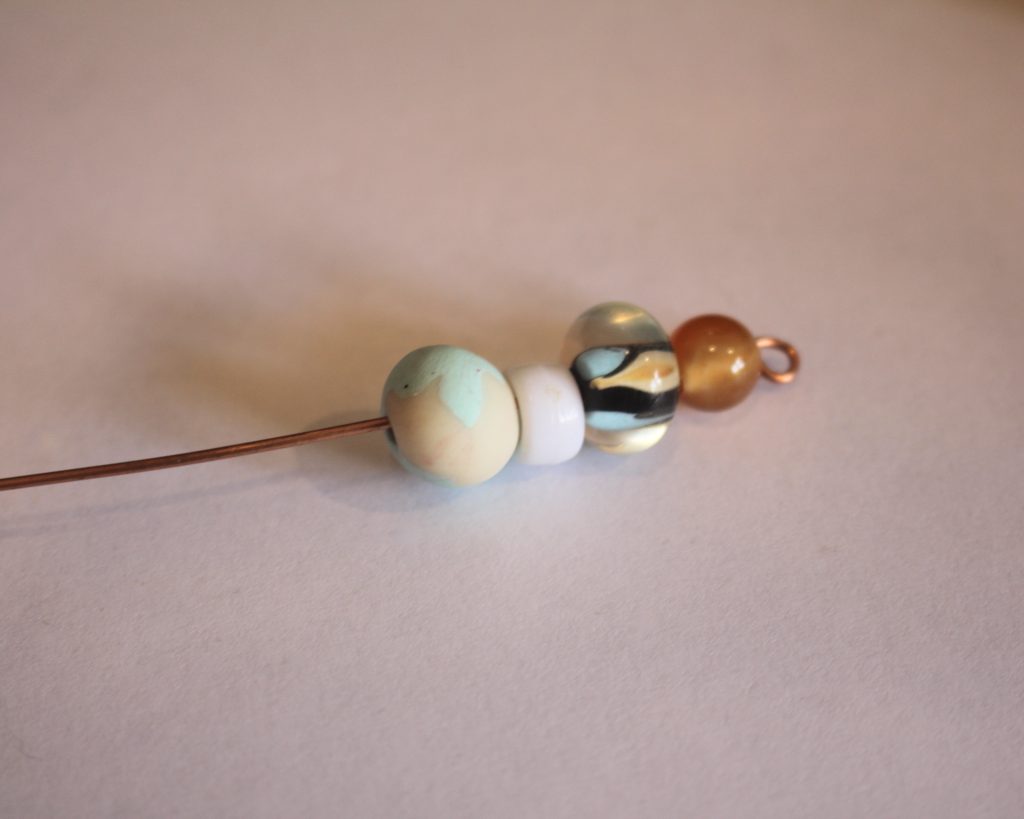
3: Add beads to two of the wires, these will form the bottom of your triangles. I added some statement beads to each of these wires.

4: Bend the ends of the beaded wires to form another right angle.


5: Loop the end of the wire using the round nose pliers. This will secure the beads in place.

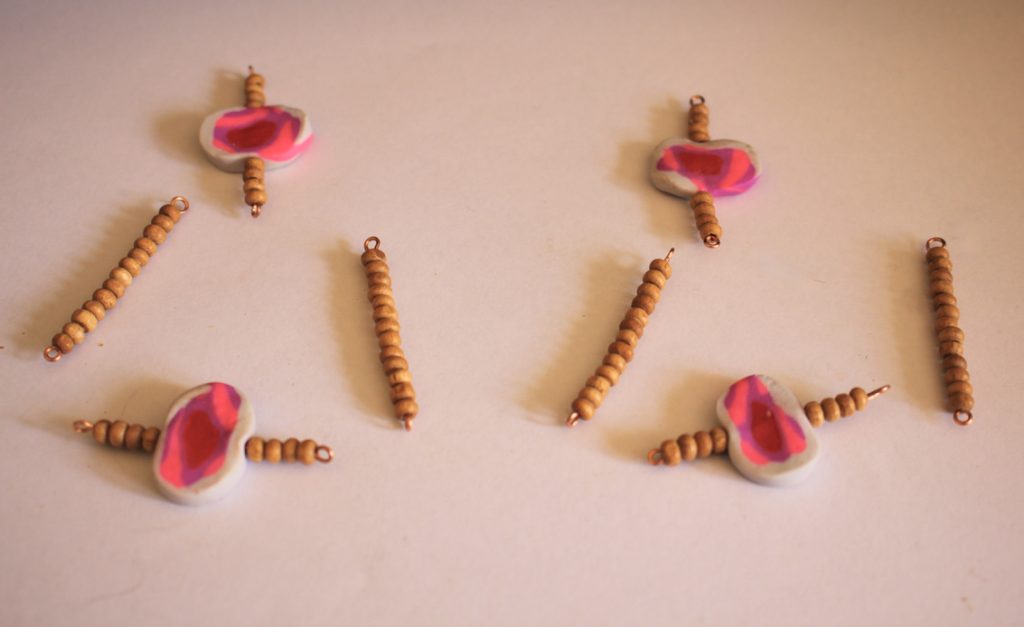
6: Repeat steps 3-5 for two more of the pins, these will be used to attach the triangles to the earring hooks.

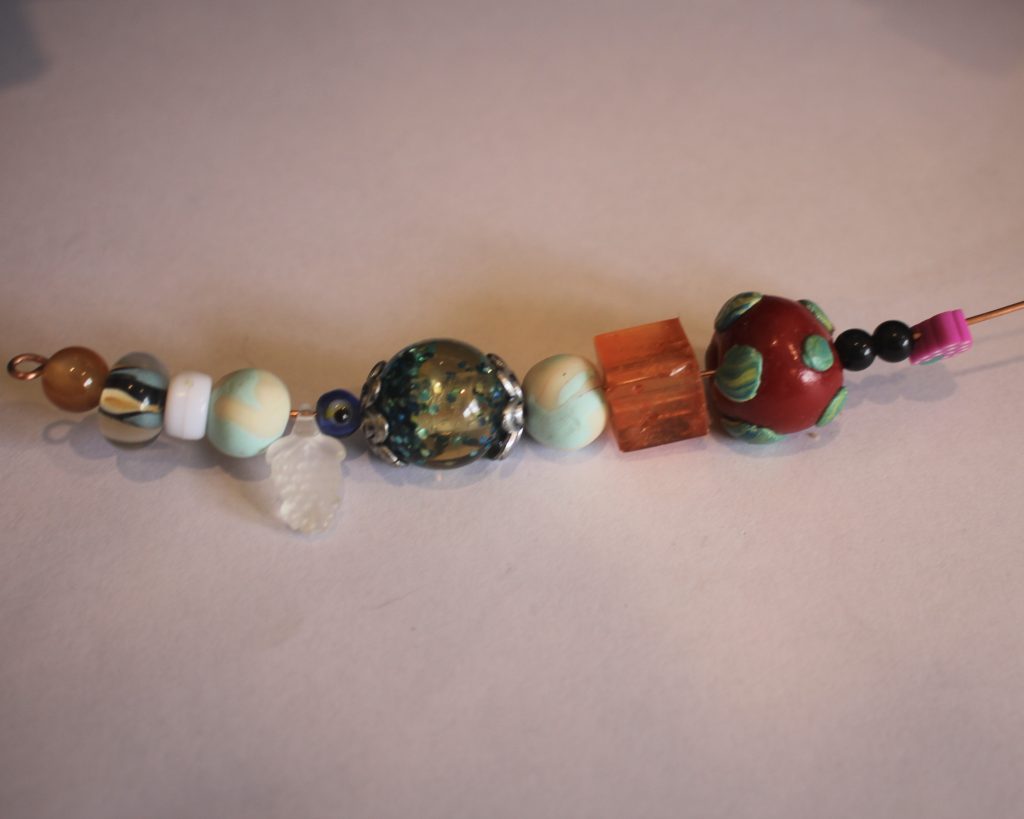
7: Add your accent beads to the four remaining wires to create four solid beaded pins, secure the beads in place as you did in steps 4 and 5.


8: Now it is time to start assembling your earrings, Add one of the solid beaded wires to one of the accent beaded wires.
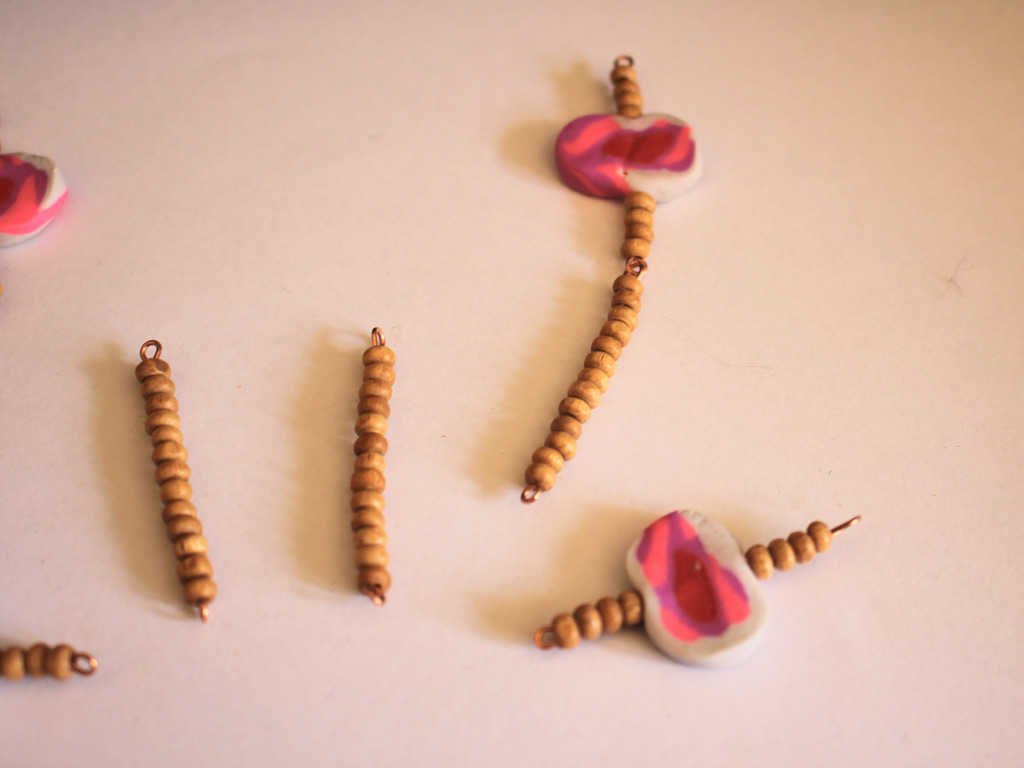
9: Add a second solid beaded wire to the first accent beaded wire, so you have one statement beaded wire with two solid beaded wires attached.
10: Add a second statement beaded wire to the earring, attaching each end to each of the solid beaded wires to form a triangle shape.


11: Repeat steps 8 to 10 for the second earring.

12: Attach each of the earring hooks to the triangle forms. Once both earring hooks are attached your earrings are finished and ready to wear out! How will you style yours?


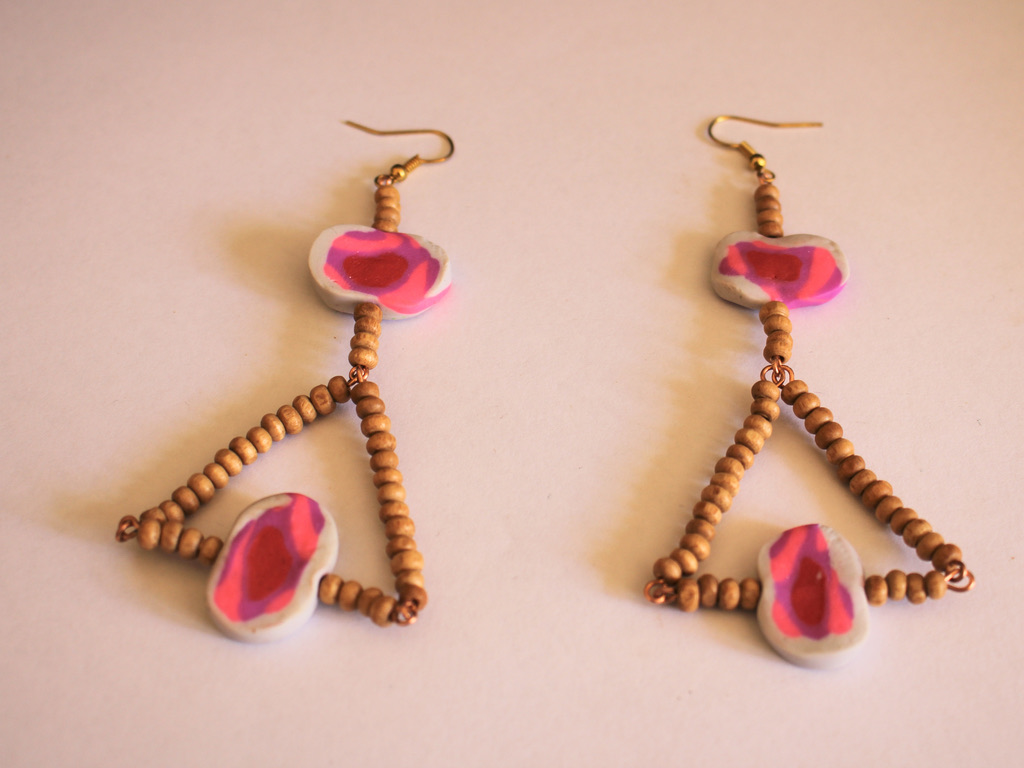
Here are the finished earrings!