-
Here’s how to add eclectic charms to a chain to make a unique necklace.
I love the look of eclectic charms on a necklace, so I decided to make a tutorial to show you how easy it is to make your own custom charm necklace design. Gather up some gorgeous vintage and new charms and pop them onto a lovely chunky chain.
Please note that this tutorial contains affiliate links for which we may receive a commission.
You’ll need these tools and materials to make your charm necklace:
1: A sterling silver chain with large links for you to attach your charms to.

You can get something similar here:
2: A selection of charms. I used some vintage charms in different materials that I have collected over the years. I also made sure I had matching jump rings made from sterling silver. I used 5 charms but you can add as many as you like.

Here’s something similar to the bird charm:
Shell charm:
Here’s an option, or…
Dolphin Charm:
Here’s a sterling silver version
Bead charm:
Quartz charm:
3: Flat nose and parallel pliers to open and close the jump rings.

You can get a pair here:

Get some parallel pliers here:
Now here are all the steps you need to follow to make your charm necklace:
1: Find the centre of the necklace and place your first charm in the middle. Attach it using your pliers to open the jump ring and then close it around the chain link.


2: Place the second charm a few centimetres (or around an inch) away from the first charm and attach it the same way you did the first charm.

3: Repeat step 2, adding the next charm to the other side of the first charm.

4: Do this again until all your charms have been added in the order you like.


Now your necklace is finished and ready to wear! So cute! I love this design so much.


Here’s what it looks like on!

If you love this, here’s a charm bracelet tutorial you can follow to make something that matches!
-
Add a charm bracelet to your collection with this cute bracelet tutorial!
I’ve wanted a traditional charm bracelet for ages, so I decided to add some charms I collected to this sterling silver chain to create my own. This is a simple and fun tutorial that you can follow to add some personalised flair to your jewelry wardrobe. Please note that this tutorial contains affiliate links for which we may receive a commission.
You will need the following tools and materials to make your charm bracelet:
1: A bracelet with large links. I used this silver bracelet.

You can get something similar here:
2: A selection of charms with jump rings attached to the top. I used some vintage and new charms that I collected over time.

You can get charms here:
You can get jump rings here:
3: Parallel and flat nose pliers for opening and closing the jump rings.
You can get parallel pliers here:
And flat nose pliers here:
Here are all the steps to follow to make your charm bracelet:
1: Lay out your charms in the order you want them on your bracelet.

2: Begin adding charms to the bracelet. You can do this by gently opening the jump rings using your pliers, sliding the open ring onto the bracelet and then closing it again using the pliers to secure the charm in place.


3: Continue adding charms until each one is in its desired place.

Now your charm bracelet is finished and ready to wear! So cute. I think I will layer mine with other silver and beaded bracelets.


If you liked this tutorial, you might like these too:
-
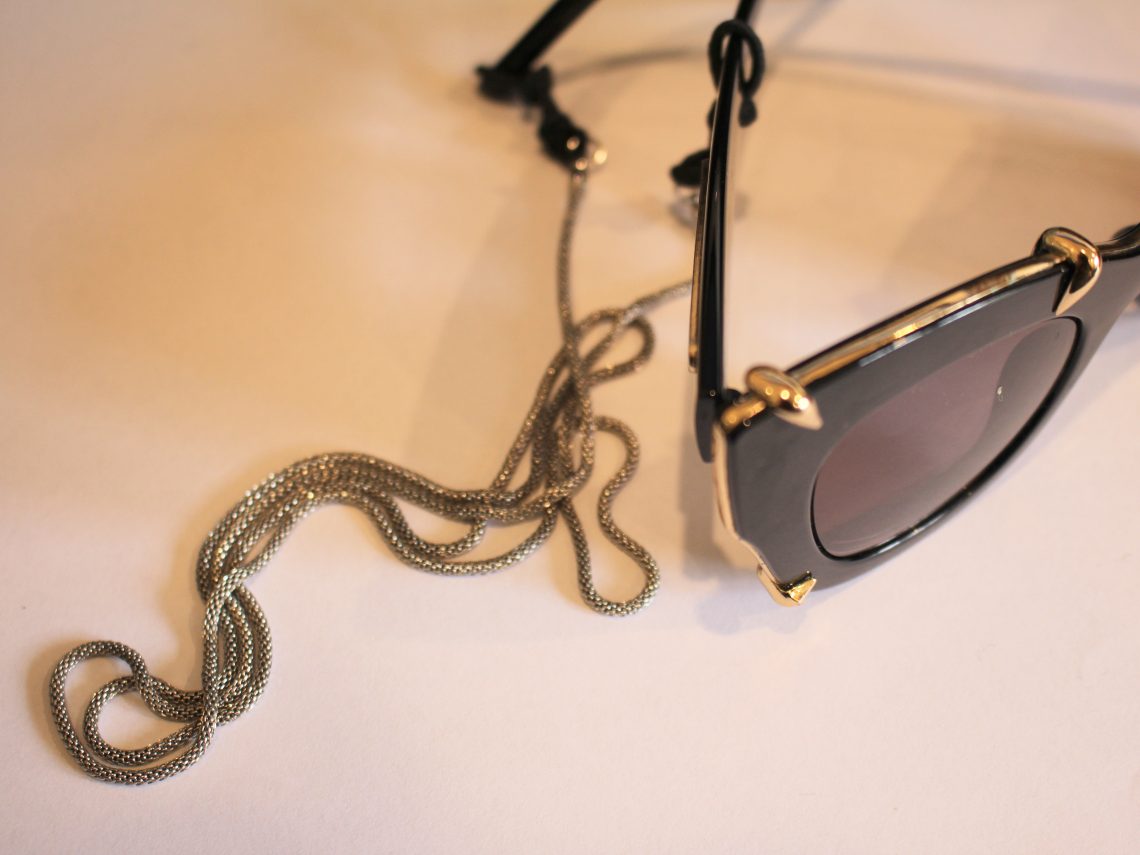
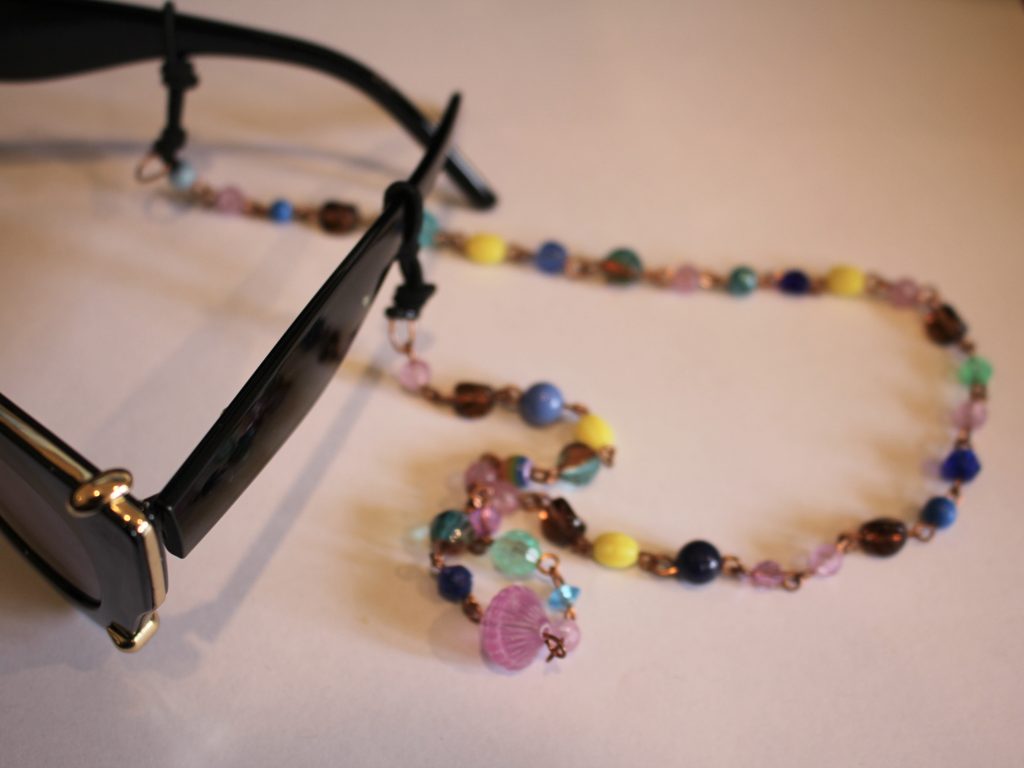
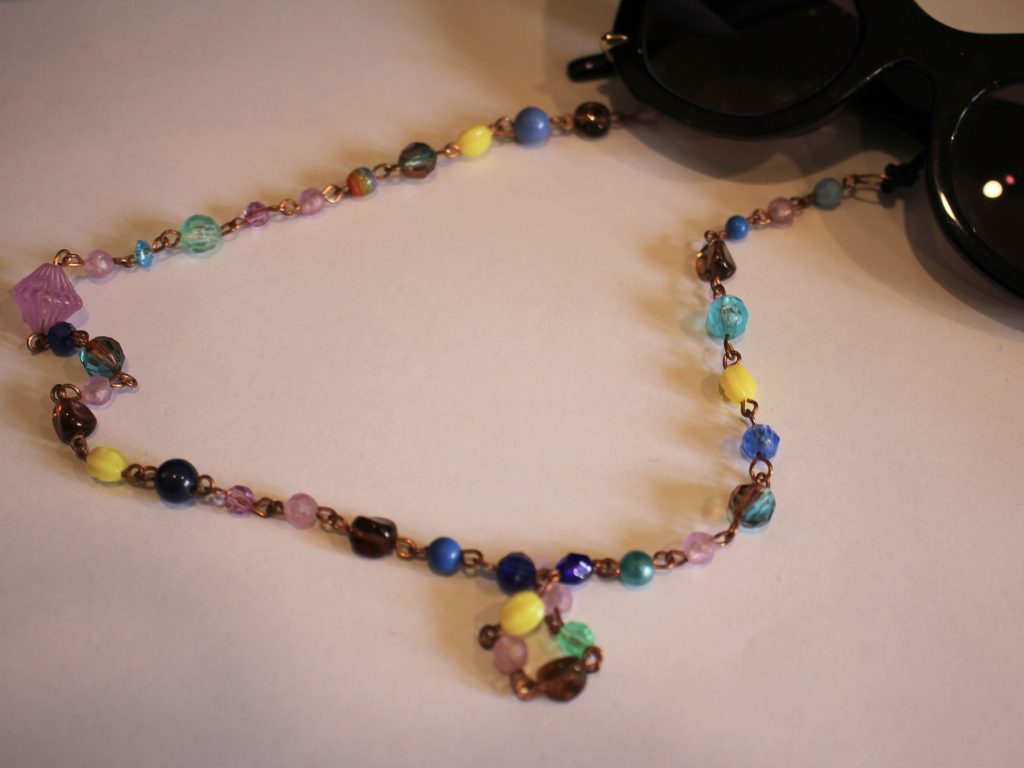
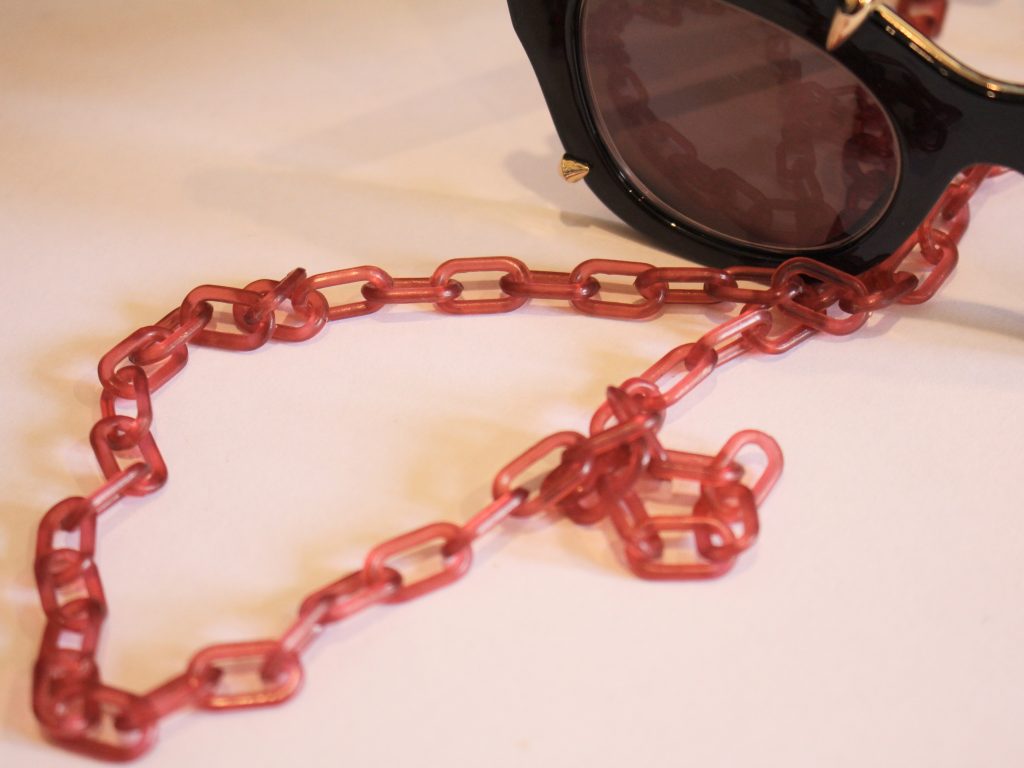
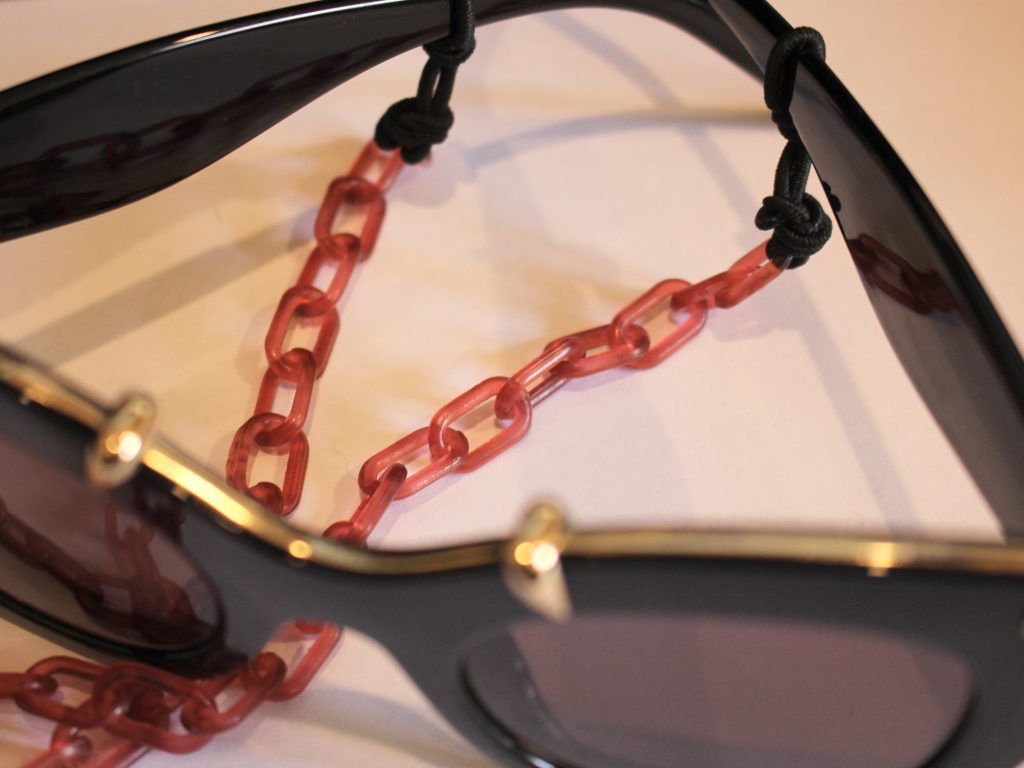
Here’s how to make a glasses chain using an old necklace and some hair elastics!
Sometimes I like to MacGyver some things together to make something far more useful, this is one of those times. I needed a sunglasses chain for an upcoming trip where I definitely didn’t want to lose my glasses. In the past I’ve made glasses chains using specialised findings, but I found that the rubber would wear out and break very quickly, so I wanted a more durable option… cue hair elastics! By tying some hair elastics cleverly, I’ve now got a stylish glasses chain that is far more long lasting than my old rubber pieces. How cool!?!
Please note that this tutorial contains affiliate links.
You will need the following tools and materials to make your glasses chain:
1: Two thin hair elastics.

2: A long chain that you don’t use anymore. I used this snake chain costume jewelry necklace.

3: Some flat nose pliers for opening and closing jump rings.
Here are the steps to make your own handy glasses chain using hair elastics:
1: Using your pliers. Remove the clasp and any additional hardware from the jump rings on either end of the chain.

2: Close the jump rings.

3: Take one of the hair elastics, fold it in half and thread it though one of the jump rings at the end of the chain.

4: Loop the other end of the elastic through the loop that you just threaded through the jump ring and pull it tight.


5: Create a knot above the loop you just made to secure the elastic on the jump ring.

6: Now find a spot near the middle of the elastic, but closer to the open end of it, and create a knot. You might need to make it closer to the end of the elastic or further away depending on the width of your glasses arms.
7: Repeat steps 3 to 6 for the second elastic to complete the glasses chain.
Once you have both elastics in place your glasses chain is ready to use! Here’s my finished chain.

And here are some more I made:
This one was made with a handmade beaded copper chain.
Here’s some pre-made beaded chain you can use if you don’t want to make your own:
And this one was made using a vintage plastic chain.
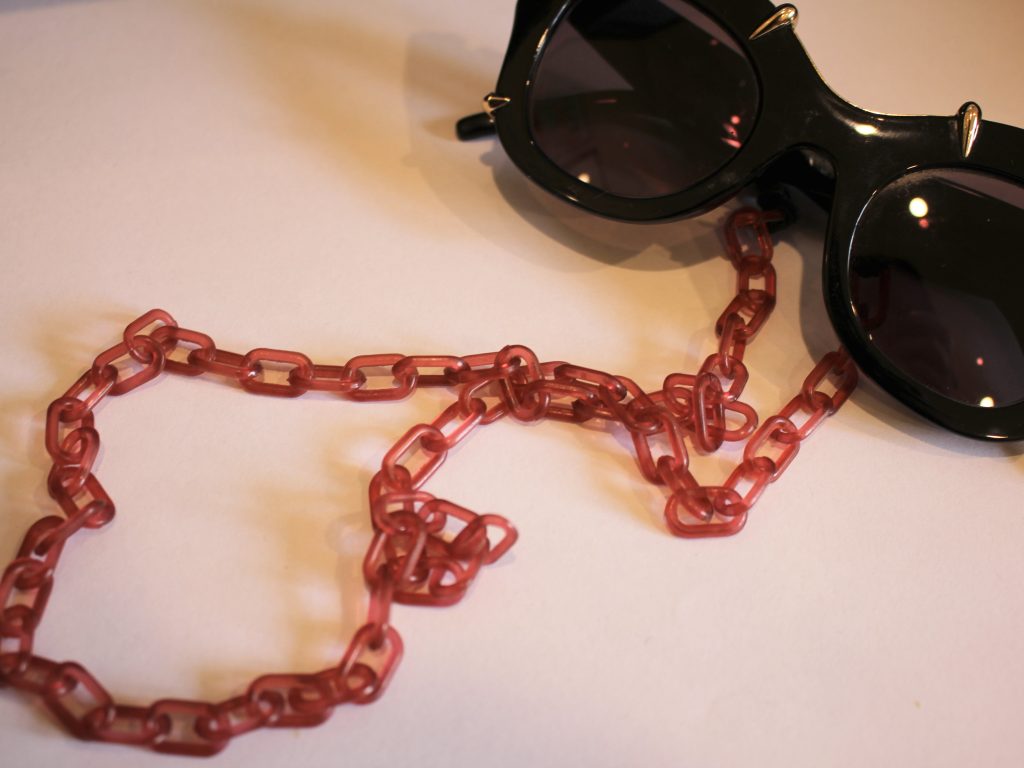
Here are some plastic chain options you can use:
Here are some more glasses chain tutorials you can follow using traditional findings, if you want to use elastics instead, just follow the steps in this tutorial to knot them in place 😉
- Here’s how to make a glasses chain using a ball chain. This one also has clips so you can use it to keep track of a face mask or other accessory.
- Here’s a simple glasses chain with bead accents.
- This is a fully beaded glasses chain.
- This one shows you how to make a chain using head pins and beads.
- This glasses chain is made from recycled materials.
- Here’s a tutorial that shows you how to make a rhinestone glasses chain.
- This glasses chain has dangling charms on it.
- And finally, this tutorial shows you how you can use a glasses chain as a holder for your wireless headphones!
-
How to make some gorgeous chain earrings from scratch!
Have you ever wanted to make your own chain? This lovely earring tutorial shows you how to make your own simple chains from scratch and turn them into a stunning pair of earrings. Please note that this tutorial contains affiliate links for which the website might receive a commission.
You’ll need the following tools and materials:
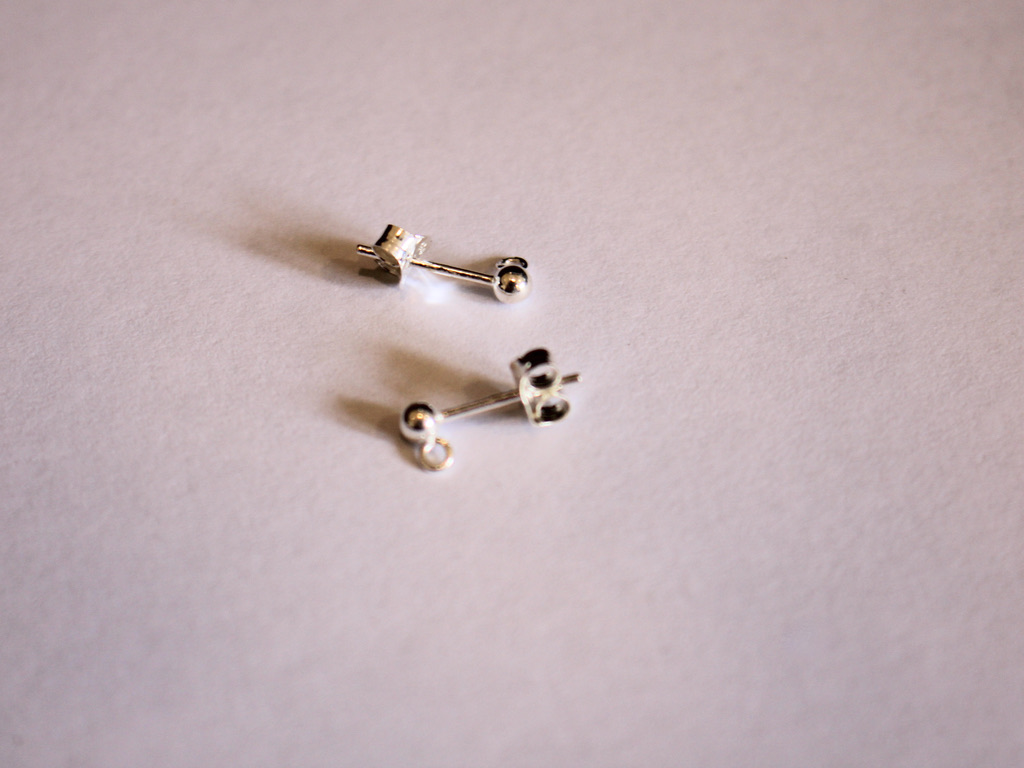
1: Two earring posts with charm connectors on them. I used sterling silver ball post findings.
2: Two large jump rings. I used sterling silver.

3: Sixteen smaller jump rings. Mine were made from sterling silver.

4: A pair of drilled gemstone beads. You want beads that are drilled through the top rather than the middle like a typical bead. I used some greenstone disk beads.

5: Pliers. I used my flat nose and parallel pliers to open and close all the jump rings.
Follow these steps to make your gorgeous chain drop earrings:
1: Add one of the large jump rings to each of the beads, use your pliers to open and close them making sure to get the ends close together so that your bead doesn’t fall off.


This picture shows one jump ring in place and the other attached to the bead but not yet closed. 
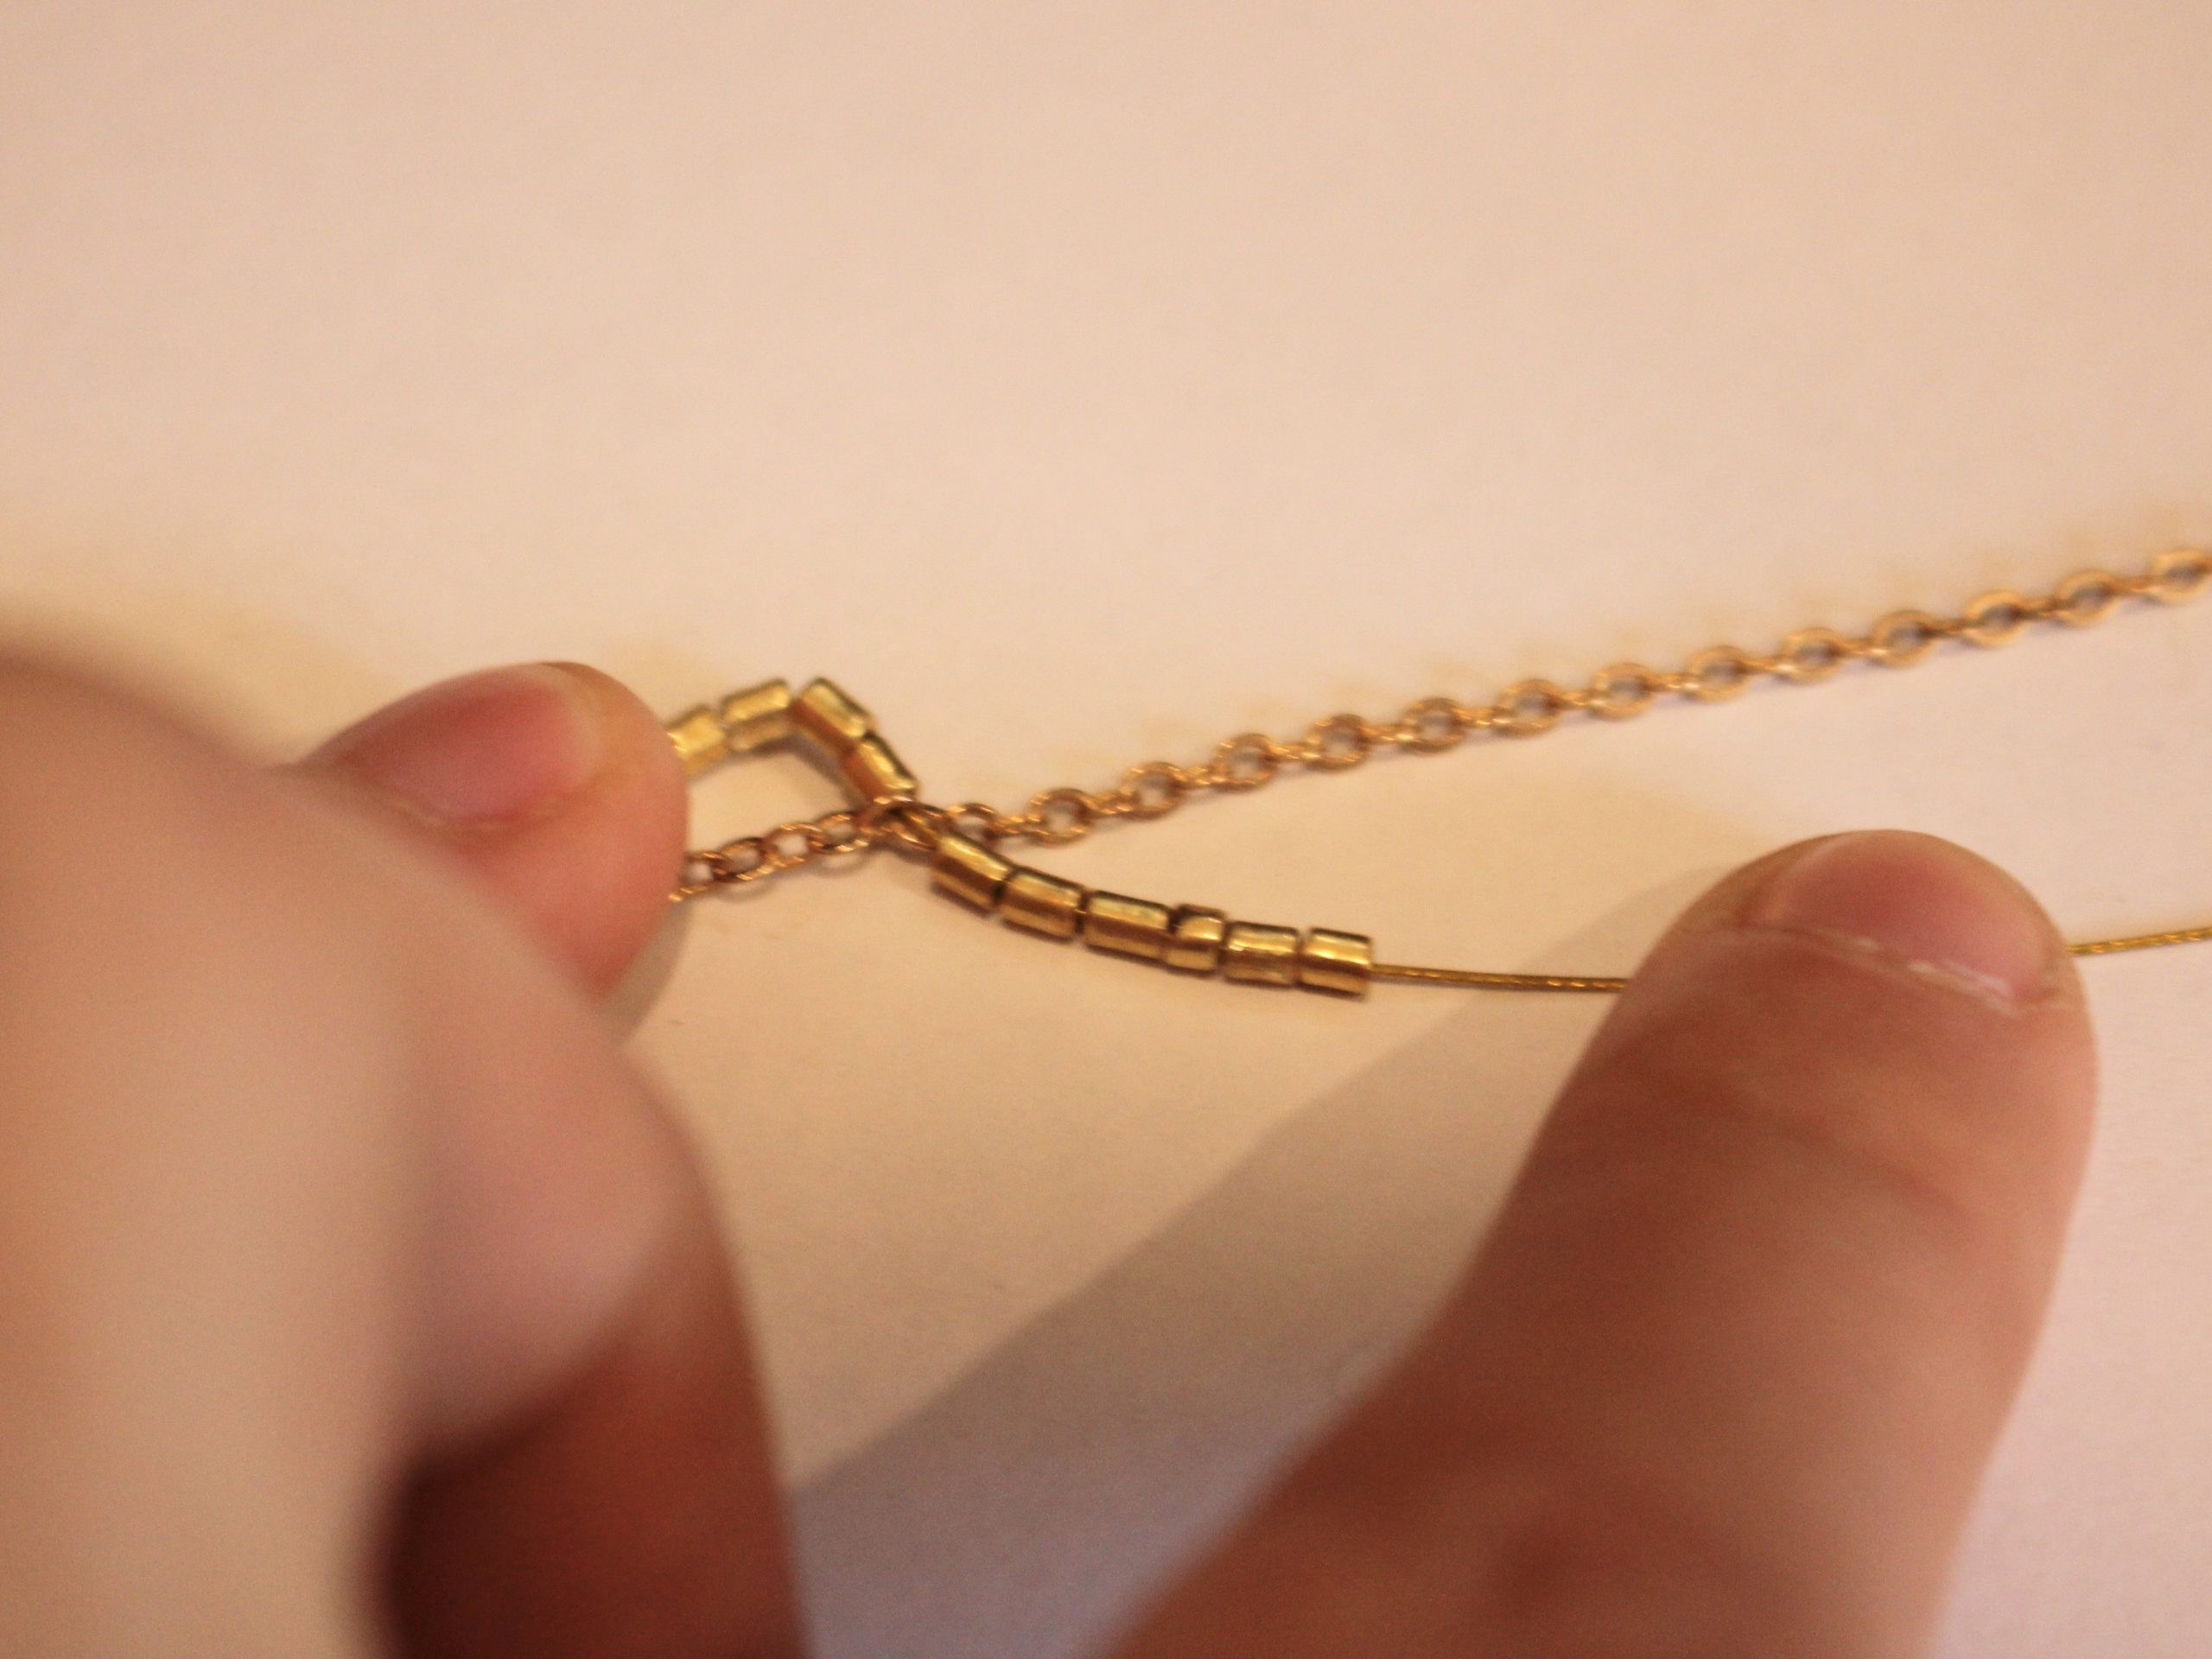
Both of the beads with closed jump rings in place 2: Start adding some of the smaller jump rings together to form a chain. Do this by sliding a jump ring though a closed one, then closing the next one using your flat nosed pliers. You can see this in the pictures where I join two jump rings together. Create 2 chains that are 8 jump rings long, one for each earring.


The full chain formed with one jump ring left open at the end ready to attach to the bead. 3: Attach the chain to the jump ring attached to the bead, closing it carefully with pliers.


4: Attach the chain to the earring post by opening one of the jump rings at sliding it onto the charm connector, close the jump ring again to secure it.


5: Repeat steps 3 and 4 for the second earring to finish them off.

Now you have a gorgeous pair of earrings featuring a handmade chain detail. How special is that? Below are some pictures of the finished product!


-
Here’s how to make a beaded necklace out of wire!
If you want to make a beaded chain necklace, but don’t have any head pins, or if you want to add some handmade flair to your work, here’s how you can use wire instead! This necklace tutorial uses the clasp from last month’s tutorial, you can follow it here.
Please note that this tutorial contains affiliate links
You’ll need these tools and materials to make your necklace:
1: Some wire. I used some copper wire that was about 1mm in diameter.

Here’s some silver wire if you prefer it: https://amzn.to/3M8DgL0
2: A clasp. I used the clasp made in this tutorial.

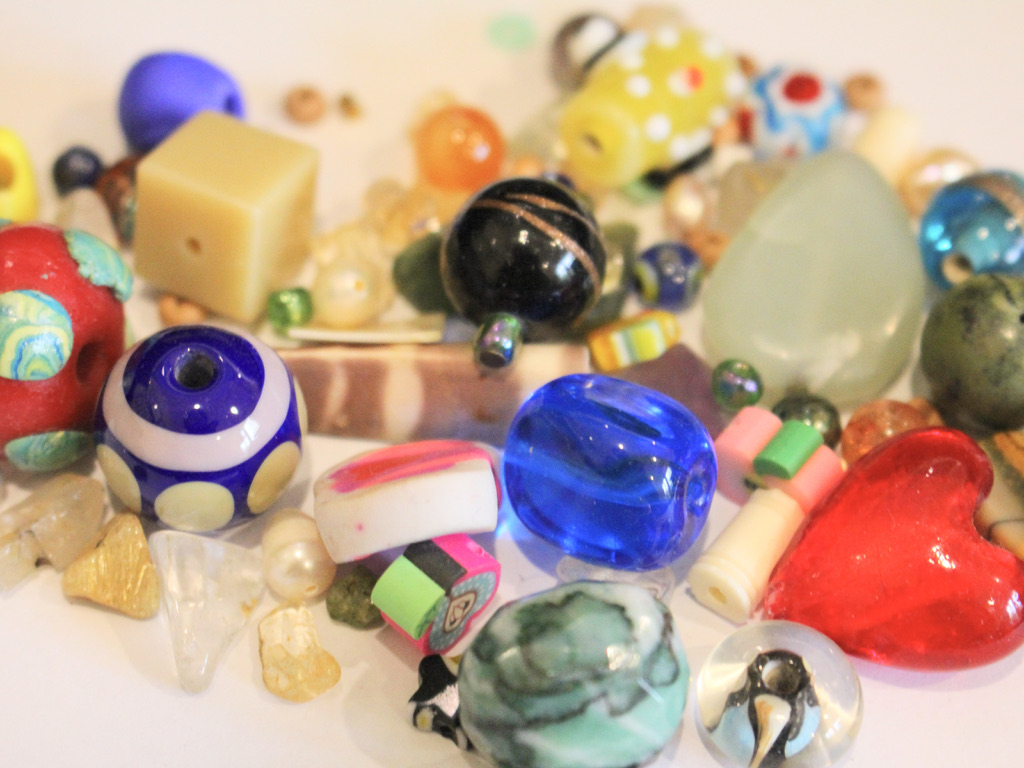
3: A selection of beads. I used a random selection of glass, plastic and clay beads.
4: A pair of flat-round pliers.

5: A pair of cutting pliers.

6: A pair of flat nose pliers or flat nose parallel pliers.
7: A file in case you want to smooth the ends of your wire. This isn’t totally necessary but adds to giving your work a quality finish.

Follow these steps to make your beaded wire chain necklace:
1: Bend the end of the wire using the flat nose pliers to form a right angle.


2: Loop the end of the wire using the round-flat pliers.

3: Add your first bead to the wire.

5: Trim the wire. I measured where to trim by holding the wire with the flat nose pliers and then cutting next to it.


6: At this point, you can file the end of the wire to flatten it, or you can simply create a loop at the top of the bead using the flat-round nose pliers.


7: Repeat steps 1-6 for the next bead link for the necklace. Once the link is formed, use the flat nose pliers to open the jump ring, slide it onto the first charm and close the link to start forming the chain.


8: Repeat these steps until you have a length you like for a necklace.


9: Open one of the loops at the end of the necklace and attach the clasp. Close the loop to secure the clasp in place. Add the clasp ring to the other side of the necklace to finish it off.


Now your necklace is finished! How fun to make your own jewellery without any pre-made findings?!


You May Also Like

Do you need more colorful jewelry in your life? Why not make this rainbow beaded choker with a feature pendant?
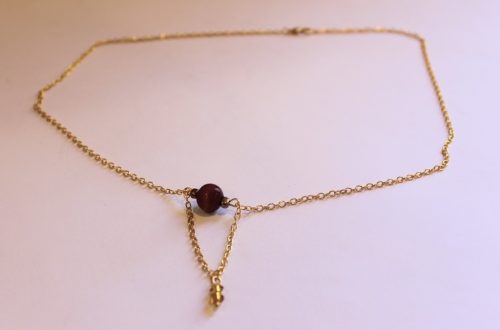
This necklace is kind of cute. It features a looped chain charm for something a little different.

Need a Little Something Sexy for Valentine’s Day? Make This Vampy Choker!
-
Here’s how to add a clasp to any charm to make it a clip on charm!
I like to switch my jewellery around, adding charms to different chains to suit my needs. For this tutorial, I’ll show you how to attach a charm to a bolt ring clasp so that you can clip it easily to another charm, chain, bracelet or earring depending on your desires! Please note that this tutorial contains affiliate links.
You’ll need these tools and materials to make your clip on charm:
1: A bolt ring clasp. I used one made from sterling silver to match my charm.

2: A charm. I used this sun charm that was a gift from my grandmother.

3: An existing necklace, bracelet or earring. I attached my charm to this snake chain necklace with a fluorite and silver charm.

4: A pair of flat nose pliers for closing the clasp.
Follow these steps to create your clip on charm:
1: Slide the charm onto the open ring at the bottom of the bolt ring clasp.

2: Close the ring using the flat nose pliers.

3: Now you can attach your charm to any piece you like. Here’s mine attached to the fluorite charm and to the chain. How great to add some versatility to your jewelry collection?!

Opening the clasp to attach it to the necklace. 
Here is the charm clipped to the fluorite charm. 


Here’s the charm attached to the snake chain. A note for future posts, I will be posting monthly for the foreseeable future. I hope you continue to enjoy my tutorials.
-
Here’s a fun one to make! Here’s how to make a beaded wiggle bracelet.
This design is a little tricky to make but it looks amazing! Using some chain, tiger tail wire and beads, you can create an interesting, almost sculptural, bracelet to wear. Please note that this tutorial contains affiliate links.
You’ll need these tools and materials to make this bracelet:
1: Some tiger-tail wire, I used about 1m of wire to make mine. I suggest cutting off slightly more than you need so you don’t run out.

2: A piece of chain that is bracelet length. I used a piece recycled from an old project that I took apart.

3: Two jump rings.

4: Four crimp beads.

5: A clasp.

6: Beads. I used these gold glass beads.

6: Your jewelry pliers. I used my cutting pliers, round nose and flat nose pliers.

Follow these steps to make your own wiggle bracelet:
1: Add two crimp beads and a jump ring to one end of the wire.

2: Loop the end of the wire around the jump ring and back through the crimps.

3: Squash the crimp beads using the flat nose pliers.

4: Attach the wire to the chain using the jump ring.


5: Add some beads to the wire. I added 6 beads.

6: Thread the end of the wire through a link in the chain, I threaded mine through the 7th link of the chain. You want the distance between links to be shorter than the length of each beaded section in order to make an arch shape.


7: Repeat steps 5 and 6, adding another 6 beads and threading it through another link on the opposite side of the chain, 7 links away from the first loop.


8: Keep beading and looping the wire until the chain is early complete, with just one loop to go.

9: Add the second jump ring to the end of the chain.

10: Add the last 6 beads and two crimp beads.

11: Loop the end of the tiger tail wire around the jump ring at the end and back through the crimps and end beads.
12: Squash the crimp beads.

13: Trim the excess wire.


14: Add the clasp to one end of the bracelet to finish it off! Now your fun wiggle bracelet is finished.


Here’s what the wiggle bracelet looks like when it’s being worn!


-
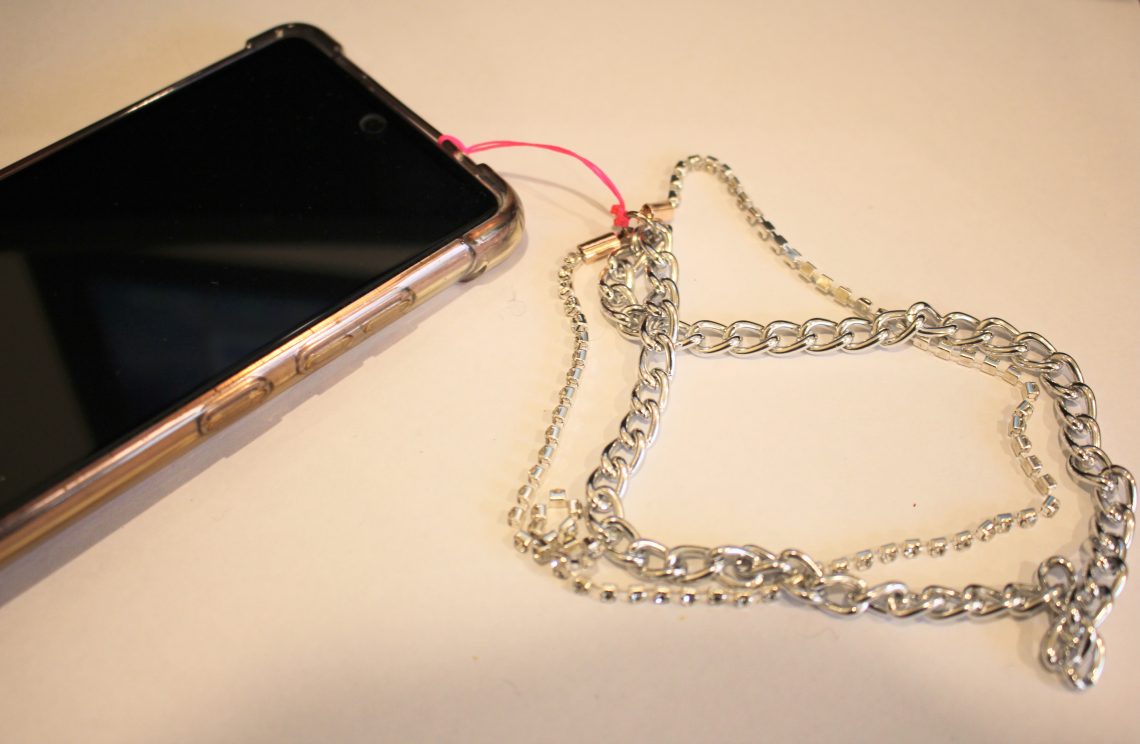
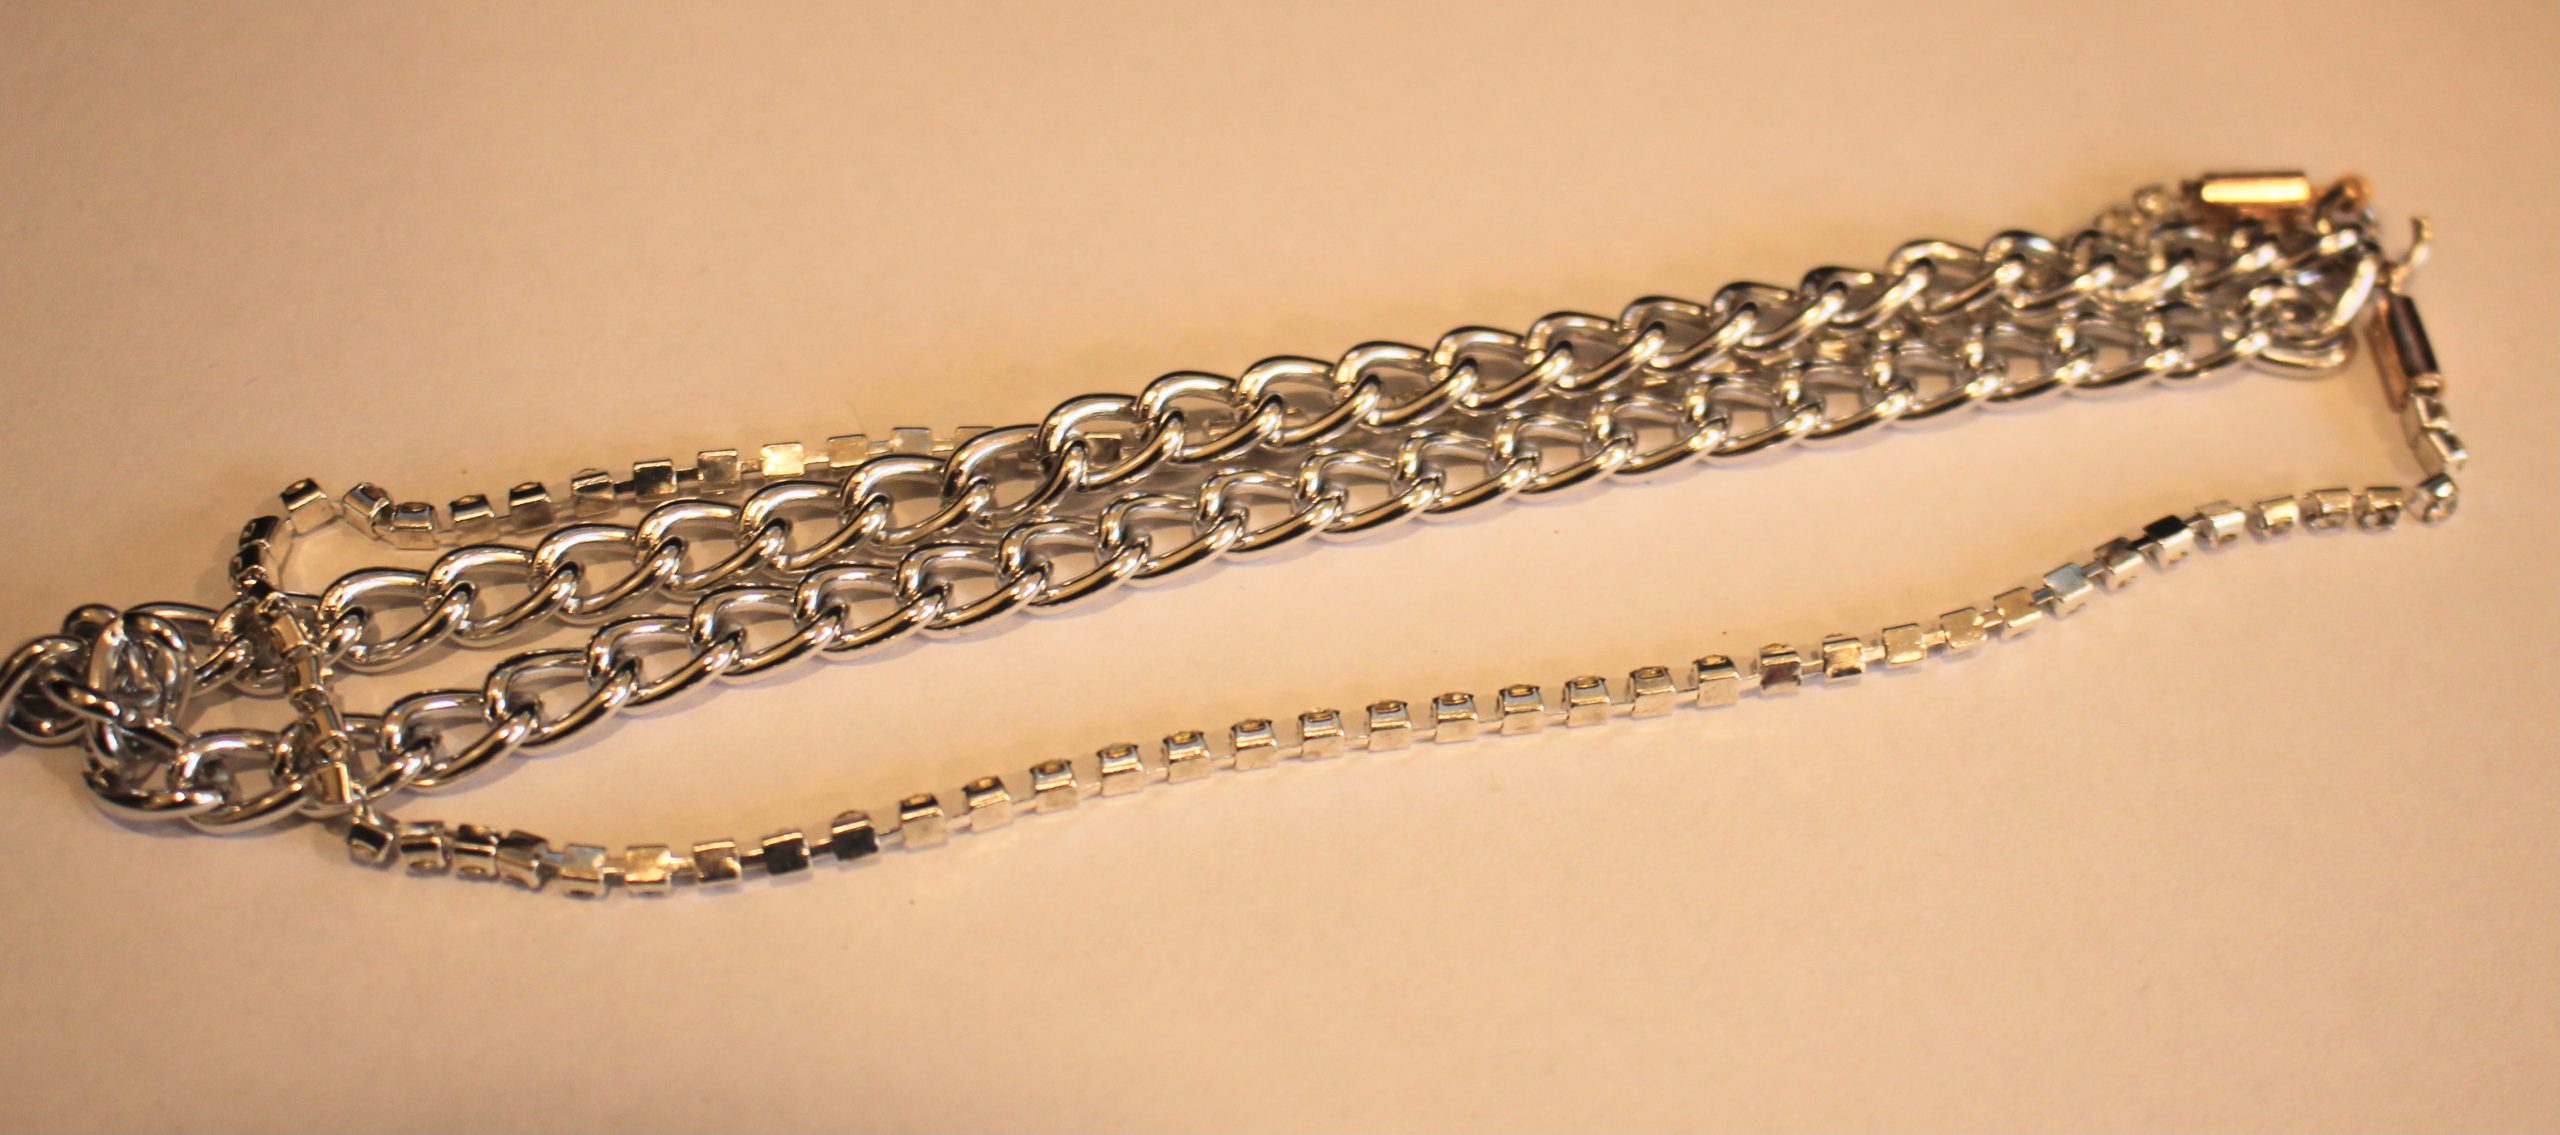
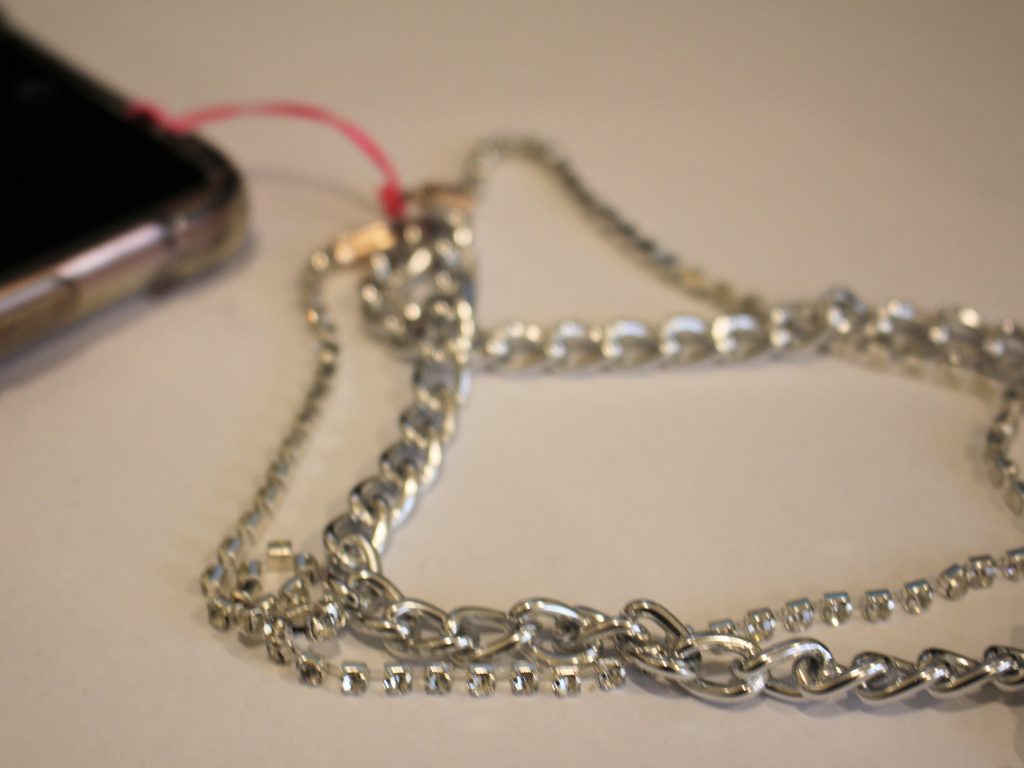
Need help keeping hold of your phone? Here’s how to make a cute chain and rhinestone phone strap so its harder to lose!
I’m loving making phone straps lately! This one combines a chunky chain with some rhinestone trim to create this double stranded phone strap. I decided to add the extra chain for more strength! Please note that this tutorial contains affiliate links.
You will need the following tools and materials to make this phone strap:
1: Pliers. I used my flat nose pliers, round nose pliers and cutting pliers. I also used scissors to trim my string.


2: A piece of chain about 30cm long. I used this silver tone chunky curb chain.

3: A piece of rhinestone trim about the same length as the chain.

4: Two crimp ends.

5: A large jump ring.

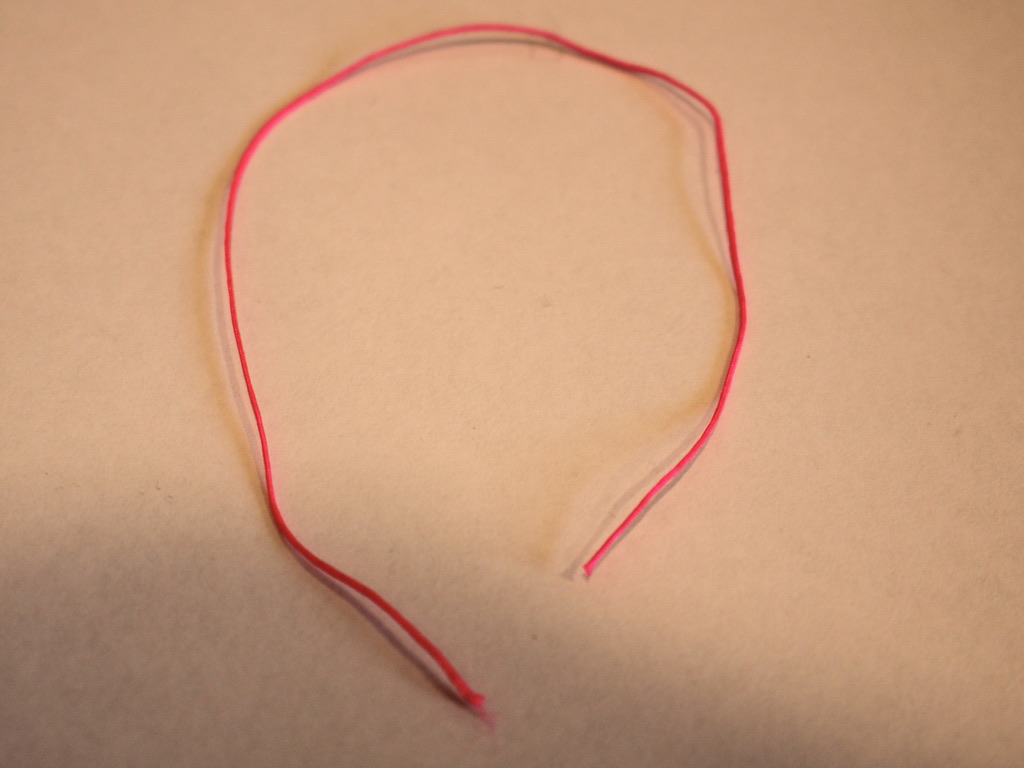
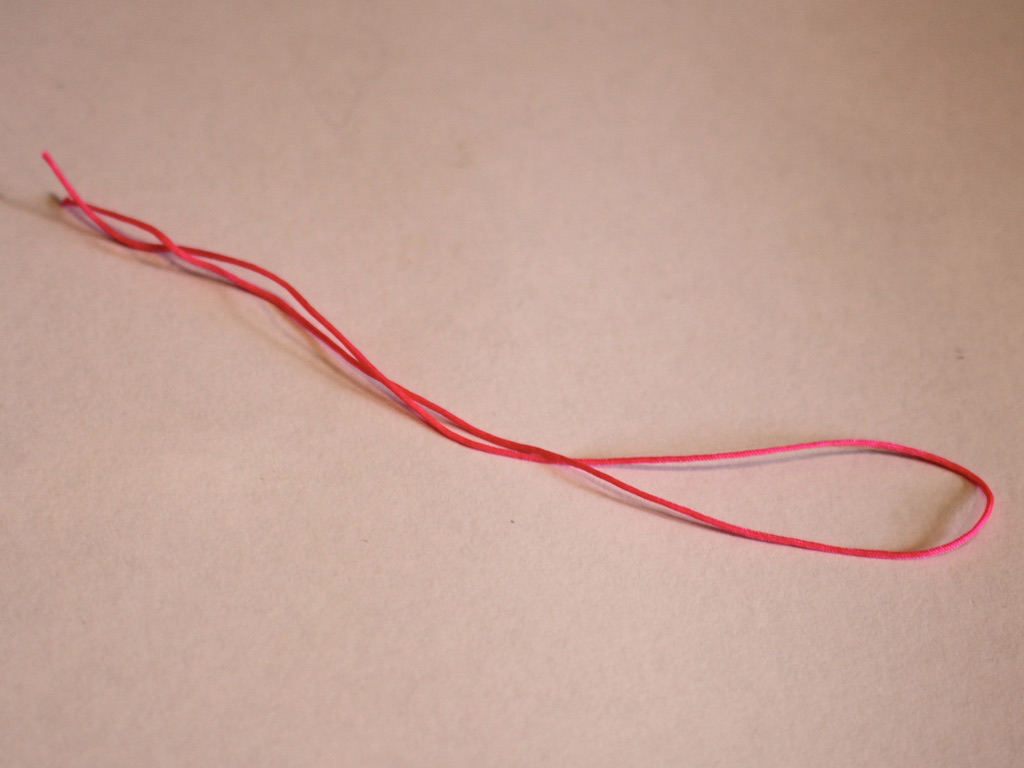
6: A piece of string. I used this hot pink nylon string that I cut to be about 15cm long.
7: Super glue.

Follow these steps to make your rhinestone phone strap:
1: Take one end of the rhinestone strand and place it in one of the crimp ends.

2: Squash one side of the crimp around the end of the rhinestones using the flat nose pliers.

3: Repeat the squeezing of the crimp for the other side, folding it around the end of the rhinestones. Squeeze until the crimp feels securely attached to the rhinestone strand.


4: Repeat steps 2 and 3 for the other end of the rhinestone chain.

5: Add one end of the chain and rhinestone strand to the jump ring.

6: Add the other end of the chain and rhinestone strand to the jump ring in the same order.

7: Close the jump ring using your pliers.

8: Fold the string in half and tie the open ends around the jump ring, loop and knot it a few times to secure it.

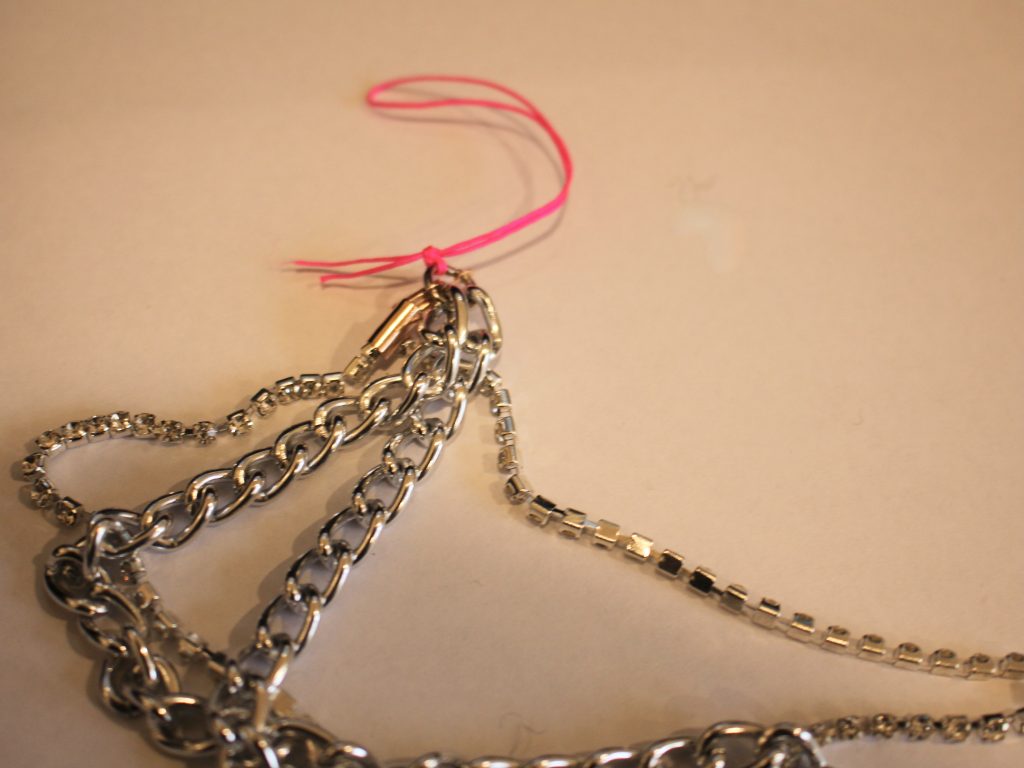

9: Trim the ends of the string.

10: Add a dab of super glue to the ends of the string to secure the knot.

Now your double strand phone strap is finished and ready to pop on your phone. Loop it through on of the holes on your phone case for more phone customisation!


-
Got a project you don’t like anymore? Here’s one way you can take a piece apart so you can re-use the materials!
I have made many pieces of jewellery over the years. Some work out great… others not so much! So when I’ve got a piece that didn’t really work, or that I don’t like anymore, I take it apart and re-use the materials in other designs. This video shows you how to take apart a beaded chain design so that you can re-use the components and beads again! Please note that this tutorial video contains affiliate links.
The only tools you really need to take apart your old jewellery pieces are pliers and a pot to put the beads in so they don’t roll away!
And here’s where you can get a little pot to pop your beads in:
Watch this video to see how I took my beaded chain pieces apart.
Here are all the materials I ended up with that I can use again!


The pins won’t be completely straight, but you can trim them down and use them for smaller beads! I hope you found this video tutorial useful! I love taking apart my old work and transforming it into something new and I hope you do to!
-
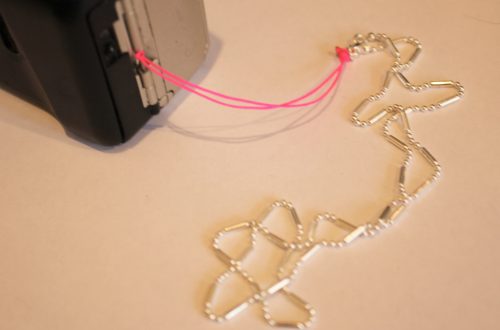
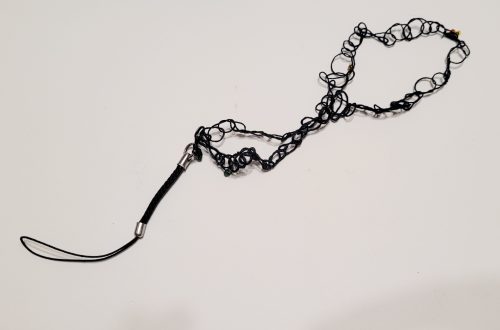
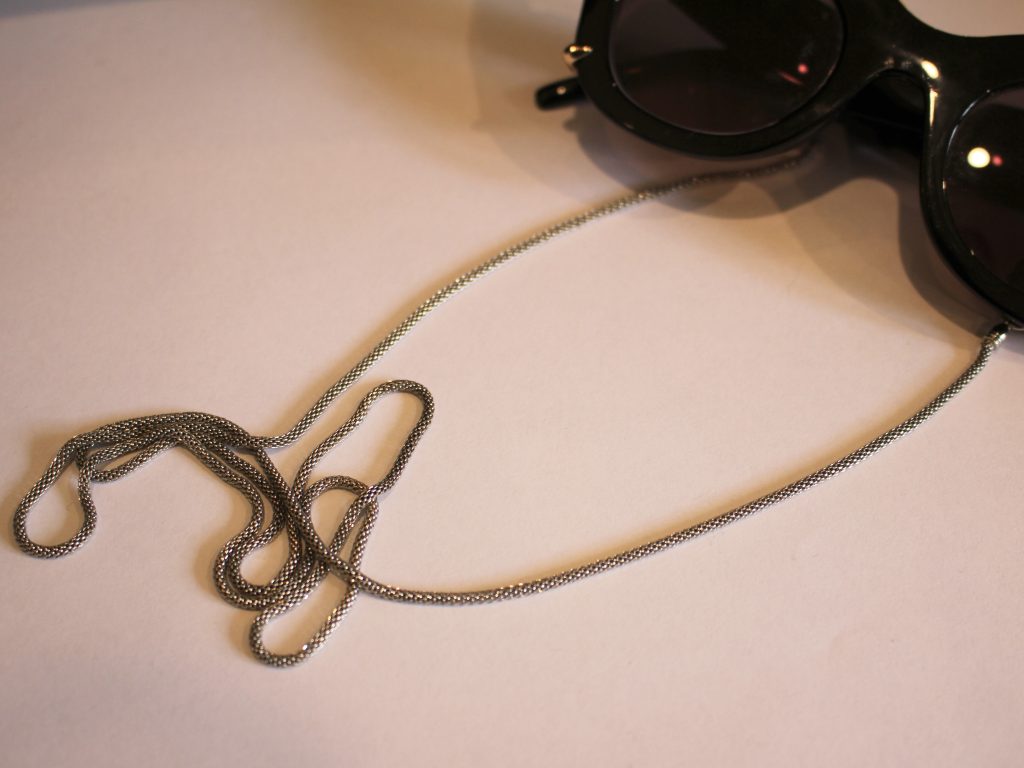
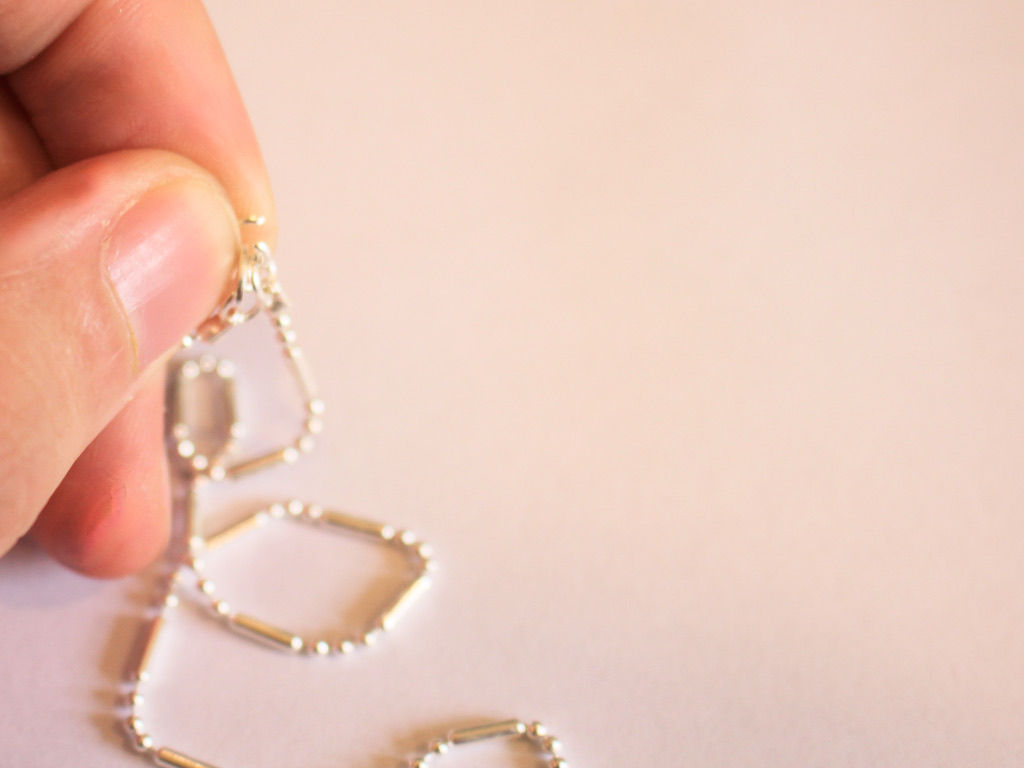
Here’s how to turn a necklace into a strap for your electronics!
You never want to lose your gadgets! I love having a wrist strap for my camera, my phone, all sorts of things… If you want a cute new wrist strap for your fave toy, here’s one you can make from an existing necklace chain and a piece of string! Please note that this tutorial contains affiliate links.
You’ll need these tools and materials to make your electronics strap:
1: A necklace chain.

2: A piece of string, I made mine about 25cm long.
3: A pair of scissors for cutting and trimming string.
4: A couple of pairs of pliers to open and close jump rings.

5: Super glue for securing the end of the string.
Follow these steps to make your wrist strap:
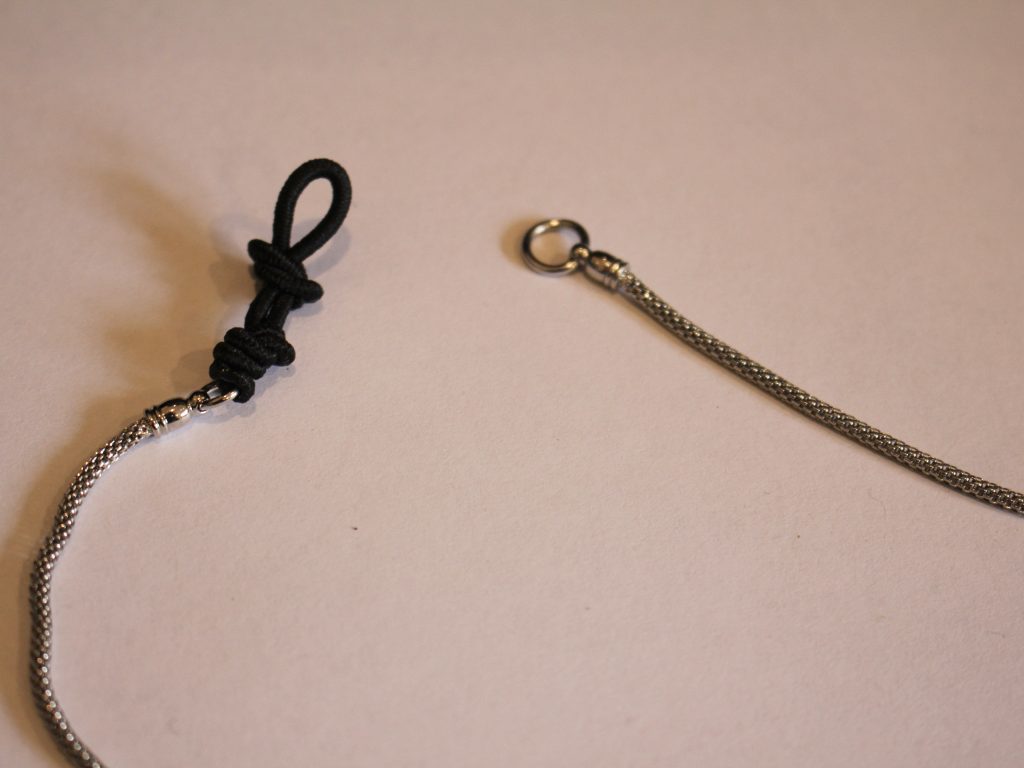
1: Open the jump rings on the chain to remove the clasp.

2: Attach the ends of the chains together using the jump rings.

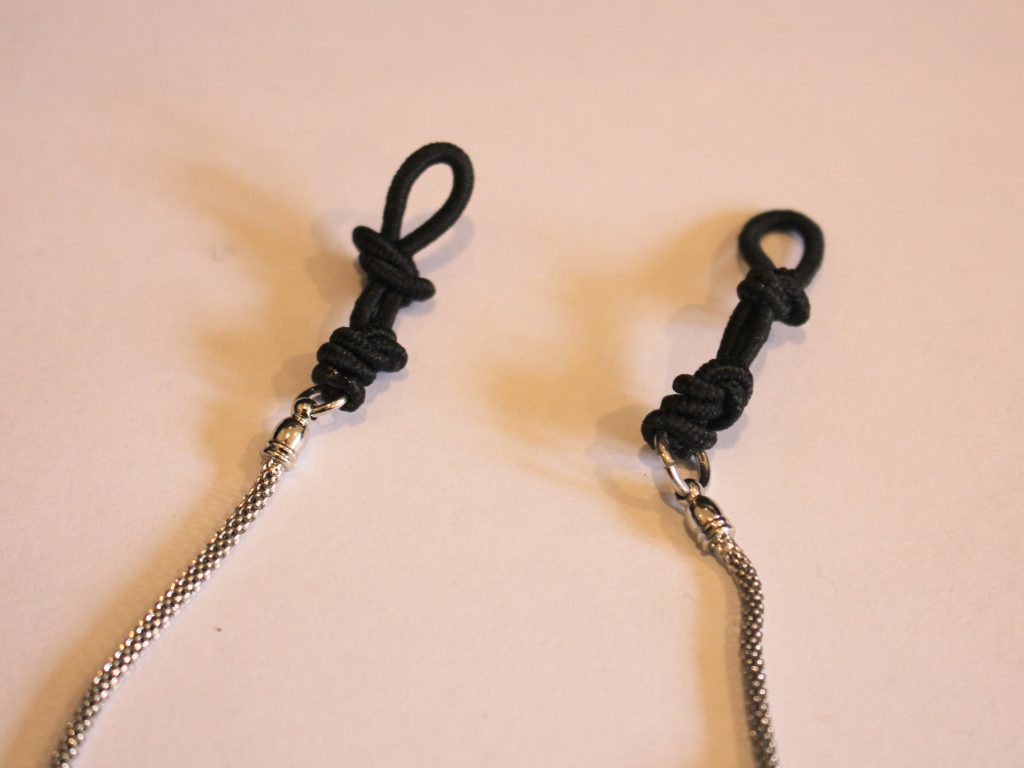
3: Fold the string in half and thread it through one of the jump rings.

4: Tie a knot in the string, leaving a loop on one side.
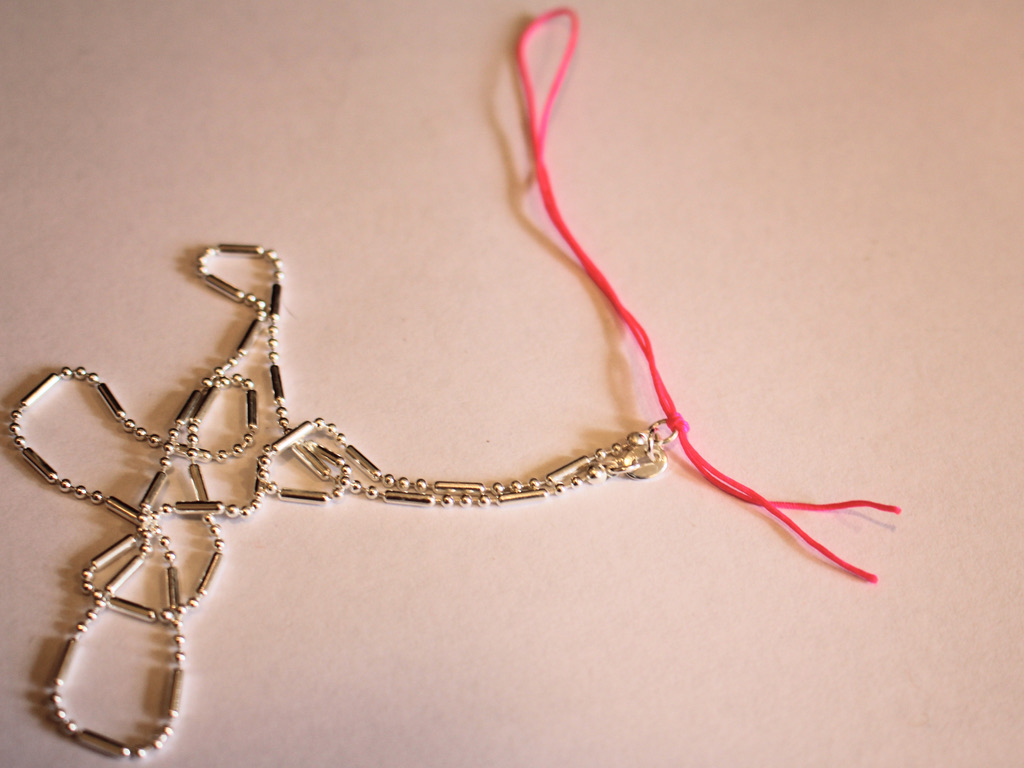
5: Wind the end of the threads through the jump rings and tie an extra few knots to secure the string to the chain.

6: Trim the excess string.

7: Add a dab of superglue to the end of the string to secure it and stop the knot from unraveling.

Now your wrist strap chain is finished! I added mine to my film camera because I’m a super cool hipster 😉