-
Here’s how to make a pair of pearl earrings with matching curved ear jackets.
This tutorial makes such a cute pair of earrings! A pair of pearl studs with matching ear jackets that hug the ear with a little pearl on the end. Simple to construct but looks incredible. I love ear jacket designs because you can mix and match them with other stud earrings, it’s a fun way to add versatility to your jewellery collection.
Please note that this tutorial contains affiliate links for which we may receive a commission.
Here are all the tools and materials you’ll need to make your own pair:
1: Two pieces of 0.8mm sterling silver wire cut to earring post length (you can cut them to length using cutting pliers or a saw blade. It is best to file and emery them so that they aren’t sharp after cutting.)

You can get sterling silver wire here:
And you can get sterling silver earring posts here:
2: Two pieces of sterling silver wire approx 4-5cm long, the length you use might change depending on your ear lobe size. I made mine a tiny bit smaller than I would like.

You can get sterling silver wire here:
3: Four pearls. I used two white freshwater pearls and two smaller black ones.

You can get half-drilled white pearls here:

You can get black half-drilled pearls here:
4: Earring backs. I used sterling silver ones.

You can get earring backs here:
5: Two part epoxy glue. Be sure to follow the instructions on the packet for safe use.

You can get glue here:
6: A scrap piece of paper for mixing glue.

7: A skewer or toothpick to mix and apply the glue.

You can get skewers and toothpicks here:
8: Round flat pliers.

You can get a pair of round-flat pliers here:
9: Flat nose or parallel pliers.

You can get parallel pliers here:

You can get a pair of flat nose pliers here:
10: Half-round flat pliers.

You can get a pair of half-round flat pliers here:
11: Something round like a pen to form the wires around. I used a jewellery scribe.
Here are all the steps you need to make your own pair of sterling silver pearl earrings with curved ear jackets.
1: First step is to shape the ear jacket wires.
2: Take each wire between the jaws of a pair of flat nose or parallel pliers and bend it to form a right angle.


3: Bend the shorter part of the wire using the flat round pliers to form a loop. Adjust it using your flat nose pliers.


4: Now bend each of the wires around the pen or round item to give it it’s curved shape.

5: Once you have the initial shape you can adjust it using the half-round flat pliers.


6: Now all your wires are shaped you can prepare to attach the pearls.
7: Squeeze a small amount of glue onto the scrap paper and mix it well using the skewer.


8: Dip one of the earring posts into the glue, wiping off excess, and place it into one of the white pearls. Repeat for the second white pearl so that both have earring posts.


9: Repeat step 8 with the earring jackets, adding glue to the ends of each wire and placing them into the black pearl.


10: Set the components aside to cure and dry.

11: Once the pearls are secured in place, your earrings are ready to wear! So cute.

Here’s how they look on.

If you love ear jacket designs, here are some other tutorials you can follow:
-
Here’s how to make some crescent moon shaped earrings with wire :)
These earrings look one way when you lay them down… but then when you hang them from your ears they turn into beautiful crescent moons. So cute! Please note that this tutorial contains affiliate links.
Here are the tools and materials you will need to make your own crescent moon earrings:
1: Pliers. I used my cutting pliers, round nose pliers and flat nose pliers.

2: Some bracelet length memory wire cut into four half circle lengths.

3: Four small jump rings.

4: Two larger jump rings.

5: Six small head pins.

6: Earring hooks.

7: Beads. I used mixed glass seed beads and six pink freshwater pearl beads.

https://rover.ebay.com/rover/1/705-53470-19255-0/1?mpre=https%3A%2F%2Fwww.ebay.com.au%2Fitm%2F1kg-SUPER-MIX-Glass-Seed-Bugle-BEADS-Mixed-Assorted-Sizes-Colors-BULK%2F322739925149%3Fhash%3Ditem4b24cc709d%3Ag%3AXHgAAOSw791ZuJjX%26frcectupt%3Dtrue&campid=5338747881&toolid=10001&customid=5338747881 
Follow these steps to make your cute crescent moon earrings:
1: Add each of the pearls to the head pins and curl the tops using your round nose pliers to secure the pearls in place. Once you have made all your pearl charms you can set them aside.


2: Take one of the memory wire pieces and create a loop at one end using the round nose pliers. I curled my wires in towards the inside of the curve.


3: Add beads to the wire until there is about 1cm left without beads.


4: Loop the other end of the wire to secure the beads on.

5: Repeat steps 2 to 4 for the remaining three pieces of memory wire.

6: Take two of the pieces of memory wire and attach them at one end using one of the small jump rings.

7: Attach the bottom of the memory wire pieces together using another of the small jump rings to form an oval shape.

8: Repeat steps 6 and 7 using the remaining beaded memory wire pieces and small jump rings.

9: Add three of the pearl charms to one of the larger jump rings and attach it to the end of the memory wire ovals. Repeat this for the remaining three pearls and attach them to the other memory wire charm.


10: Add an earring hook to the top of each of the ovals to finish the earrings off.


Now you can hang them from your ears and have some fun!


-
These earrings are super easy to DIY and look really stylish.
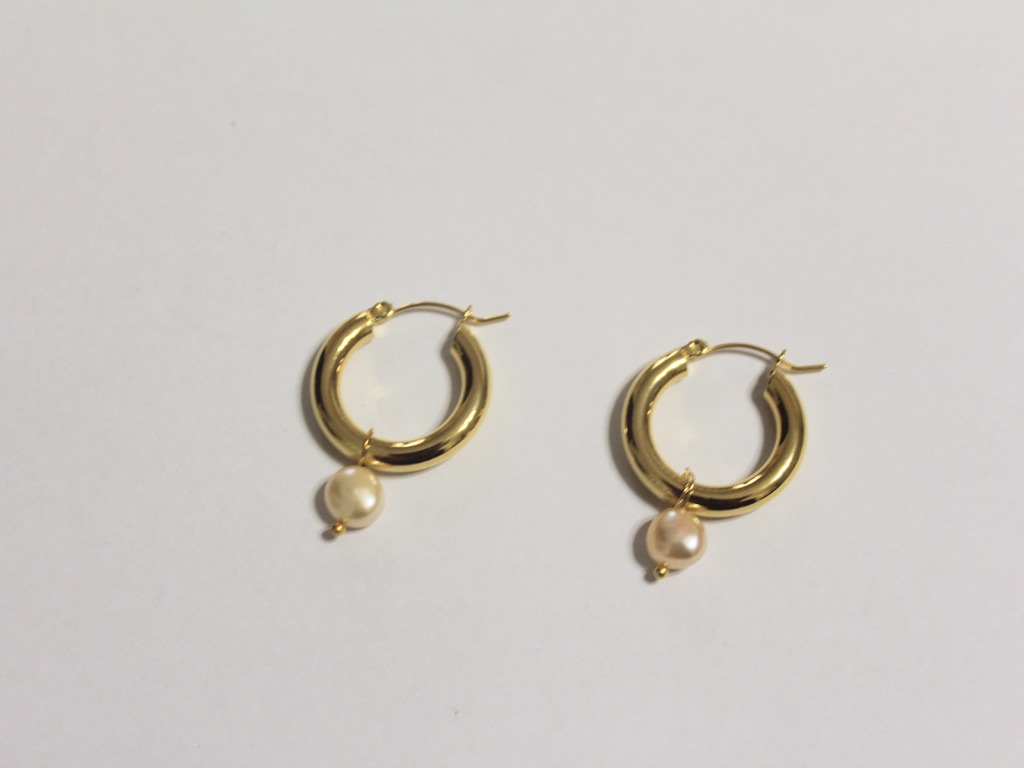
I’ve seen gold hoops with pearl charms dangling from them around a lot in the past year, they look elegant and expensive but are actually really easy to make on your own!
You’ll need the following tools and materials to make these pearl hoop earrings:
1: A pair of gold-tone hoops. I used these gold-tone huggie style hoops.

2: Two pearls. I used these pink freshwater pearls.

3: Two head pins.

4: Pliers. I only used my round nose pliers to make these earrings.

Follow these steps to make your elegant pearl hoops:
1: Add each of the pearls to the head pins.

2: Create a loop at the top of one of the head pins by wrapping it around the barrel of the round nose pliers.

3: Place the newly formed charm onto one of the earrings.
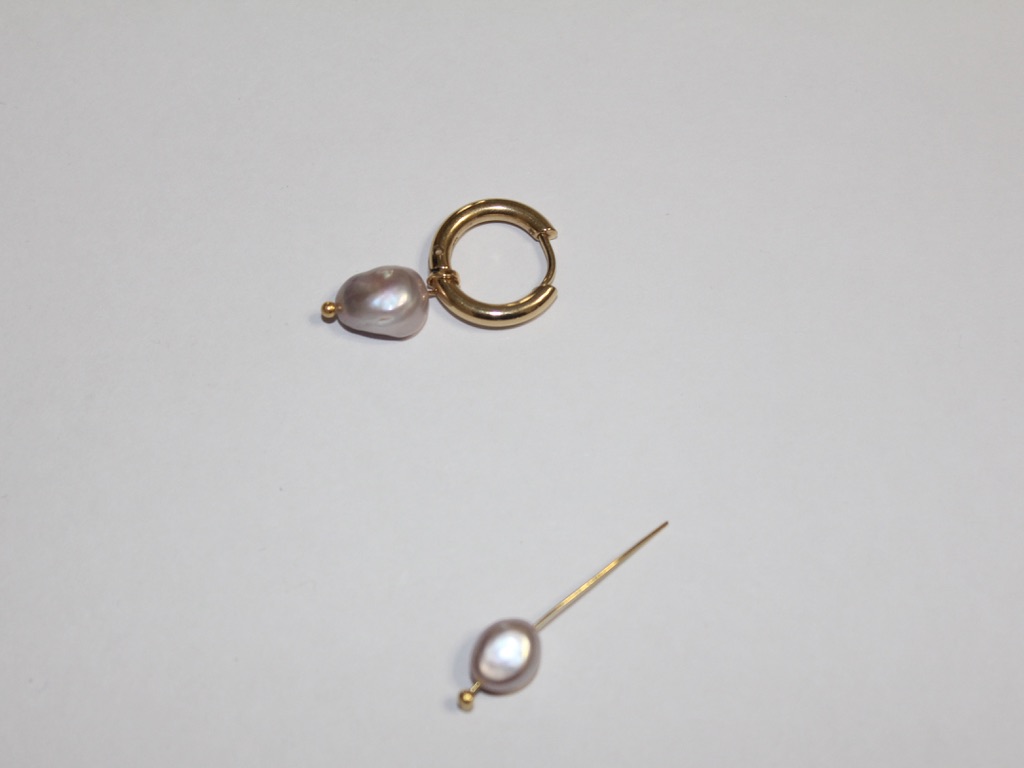
4: Repeat steps 2 and 3 for the second earring to finish the pair off!

Now your elegant pearl earrings are ready to wear!
Here are some other pairs I made with extra pearls and with pearls attached to a chunkier pair of hoops.

This tutorial contains affiliate links.