-
How to make a beaded necklace with cute little bead charms!
This is a cute little piece that looks great layered with chains! Use some fun gemstone beads to add some pizazz to your design. Please note that this tutorial contains affiliate links.
You’ll need these tools and materials to make this necklace:
1: Some tiger tail wire long enough to fit around your neck, plus some extra.

2: A set of pliers. I used my cutting pliers (left), flat nose pliers (right) and round nose pliers (middle).

3: Some glass beads. I used these green glass e-beads.

4: Some statement beads. I used 5 stone beads.

5: Four crimp beads.

6: Two jump rings.

7: Five head pins.

8: A lobster clasp.

Follow these steps to make your beaded charm necklace:
1: Add each of the statement beads to each of the head pins.

2: Curl the tops of each pin using the round nose pliers. This will keep the bead in place.


3: Set the charms aside.
4: Put two of the crimp beads onto the tiger tail wire.

5: Add one of the jump rings.
6: Loop the wire around the jump ring and back through the crimp beads. Pull the wire tight.

7: Squash the crimp beads using the flat nose pliers.


8: Begin adding beads to the wire.

9: Bead until you get to a length you like, before the middle of the wire.

10: Add the first bead charm from the set you made earlier.

11: Add some more glass beads and then add another bead charm.

12: Continue adding charms in your chosen pattern until they are all in place.


13: And now you can add the glass beads until your necklace is at the right length and is beaded evenly so that the bead charms are at the bottom.


14: Add the second pair of crimp beads and the jump ring.

15: Loop the wire around the jump ring and back through the crimps and the last few beads on the strand.

16: You should now pull the wire tight and squash the crimps with the flat nose pliers.


17: Now you can trim the excess wire with cutting pliers.

18: Open one of the jump rings and attach the lobster clasp. Close the ring to secure the clasp in place.


So now your necklace is finished and ready to wear! So so cute. What necklaces will you layer yours with?


Or maybe you’ll wear it as a statement on its own?!


-
I am obsessed with fruit charms right now, here’s another way to use them!

These fruit threader earrings are amazing and super easy to make! Tutorial contains affiliate links.
You will need the following tools and materials to make your fruit threader earrings:
1: Pliers. You’ll need your round nose and flat nose pliers.


2: Two threader earring findings.

3: Two jump rings.

4: Two fruit charms. I used these glass orange charms.

Follow these steps to make your fruit threader earrings:
1: Add a charm to the bottom of the threader using one of the jump rings.

2: Close the jump ring to secure the charm in place.

3: Repeat steps 1 and 2 for the second earring.

That’s all! An amazing pair of earrings in three steps!
-
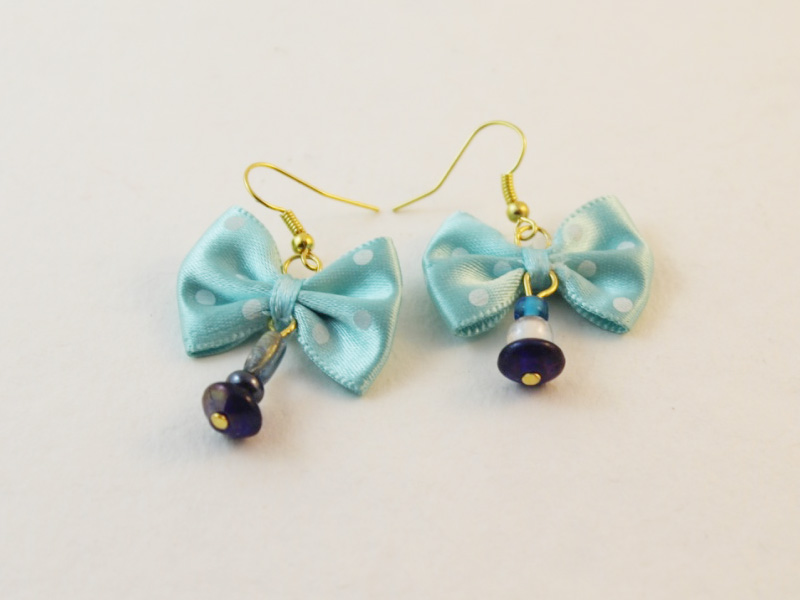
Seeking Some Kitschy Cute? You Need To Make These Adorable Bow Earrings!
Sometimes, there is nothing I like more than some adorable kitsch to top off my outfit. These earrings are SUPER cute and very easy to make. Dangle some beautiful earrings from the bottom of some precious little bows and you’ll be looking as sweet as can be.
You will need the following tools and materials to make these cutie pie bow earrings:
1:Pliers. You will need your round nose pliers and cutting pliers to make these bow earrings.

2: Two pre-made fabric bows.

Here are some bows to purchase to make your own lovely bow and bead earrings.
3: Two earring hooks.
You can grab a whole load of earring hooks to create with right here:
4: Two jump rings.

5: Two head pins.

6: Beads of your choice. I chose from this assortment of blue and clear glass beads.

Feeling the blue? Get stuck into this assortment of blue glass beads:
The Steps:
1: Add your chosen beads to each of the head pins. I decided to use blue beads in different shapes for a mismatched look.

2: Bend the pins at a right angle to the beads using the round nose pliers.


3: Trim each pin approximately 1cm (0.4 inches) from the beaded section using the cutting pliers.


4: Use the round nose pliers again to create a loop at the top of each beaded pin. This loop will help to keep the beads in place and allows you to attach the bead charm to the bows.


5: Take a jump ring, open it slightly and carefully push it through the middle section of the bow.

6: Add an earring hook to the ring and secure it in place by carefully closing the jump ring using your pliers.


7: Take one of the bead charms and add it to the opposite end of the bow’s center section. You can do this by carefully it pushing the open charm loop through the middle section of the bow.

8: Close the bead charm loop again using your pliers.

9: Repeat steps 5 to 8 for the second earring. Once you’ve got the second one done your earrings are ready to wear. throw them on to add an adorable and unique element to your daily style.