-
Here’s how to make a cute two-tone beaded necklace!
This tutorial is a simple beaded necklace with a twist, one half is finished with pearl beads and the other features small glittering glass beads. You can use whatever beads you like to make this lovely design. How will you design yours?
Please note that this tutorial contains affiliate links for which we may receive a commission.
You’ll need the following tools and materials to make your necklace:
1: Tigertail wire.

You can get some here:
2: Pliers. I used my cutting pliers and flat nose pliers.


You can get pliers here:
3: Beads. I used chunky pearl beads and some small green bugle beads.

You can get similar beads here:

You can get baroque pearls here:
4: Sterling silver jump rings.

You can get some here:
5: Sterling silver crimp beads.

You can get some here:
6: Sterling silver clasp. I used a bolt-ring clasp.

You can get a bolt ring clasp here:
7: Optional: A pendant that will fit over the beads. I used this pink stone pendant.

You can get something similar here:
Here are the steps to follow to make your own two-tone beaded necklace:
1: Cut a length of tigertail wire to your desired necklace length (remember to add a few extra cm so you have excess for securing the ends.

2: Add a crimp bead and jump ring to the end of the wire. Make sure the jump ring is closed before you do this.

3: Loop the end of the wire around the jump ring and back through the crimp bead.

4: Squash the crimp bead using the flat nose pliers.


5: Begin adding beads.

6: Continue beading until you have reached half of your desired necklace length.

7: Switch to the other beads and continue beading until you have half of each type of bead.


8: Add the second crimp bead.

9: Add the second closed jump ring.

10: Loop the end of the wire around the jump ring and back through the crimp and end bead.

11: Pull the wire tight and squash the crimp to secure it in place.

12: Trim the excess wire using the cutting pliers.


13: Add the clasp to the end of the necklace and close the ring using your pliers to secure it in place.


Now your necklace is done, if you like, you can add a pendant for added interest, or leave it plain to shine on its own.
Here’s the finished necklace.


And here’s the finished necklace with the pendant in place. How will you style yours?


If you like this design, here’s some similar designs you can make:
Turn two bracelets into a two-tone necklace
Make a necklace that is half chain half beads
-
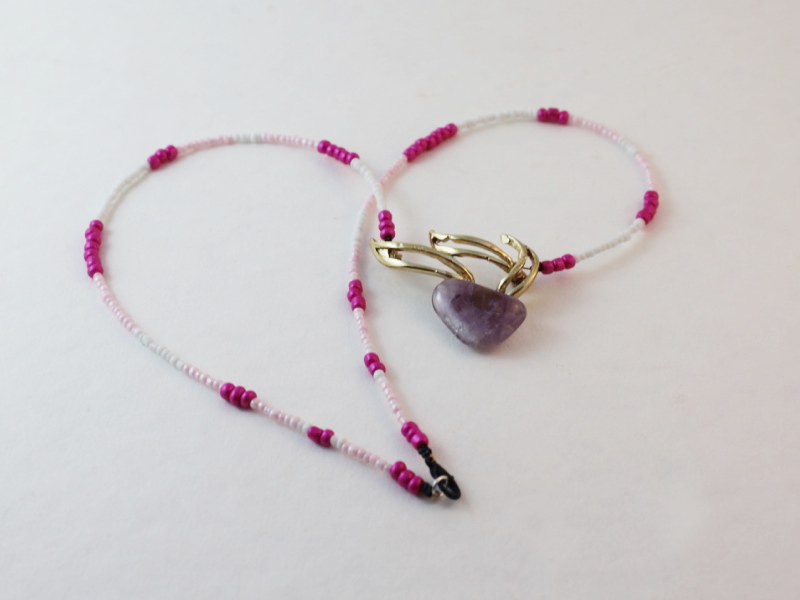
Here’s how to make a stunning crystal choker necklace!
This choker length necklace is really special! It’s simple look is a really powerful way to show off your special crystal beads. I used a small green crystal bead for my design. Please note that this tutorial contains affiliate links.
Grab these tools and materials to make your special crystal choker:
1: A pretty crystal bead. I used this green bead.

2: A short eye pin.

3: Four small jump rings.

4: Two pieces of chain that are long enough in total to fit closely around your neck.

5: A lobster clasp.

6: Some pliers. I used my round nose and flat nose pliers to make this necklace.


Follow these steps to make your pretty crystal choker necklace:
1: Add the crystal bead to the eye pin.

2: Bend the pin to form an angle.

3: Secure the bead onto the pin using the round nose pliers to make a loop.

4: Attach one side of the chain to one side of the charm using one of the small jump rings.


5: Repeat step 4 for the other side of the necklace attaching the other side of the chain to the other side of the crystal charm.

6: Attach the lobster clasp to the end of one of the chains using another of the small jump rings.

7: Attach the remaining jump ring to the other side of the necklace to finish it off.

Now your lovely crystal chain choker is finished and ready to wear! Let it stand out on its own or layer with some longer pieces. Perfect for hot girl summer!


Here are some other crystal designs you can make at home:
-
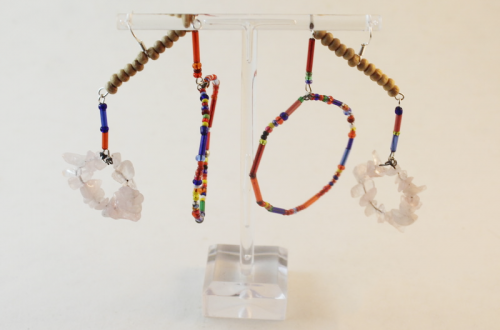
How to make a cute pair of beaded statement earrings!
These earrings are really cute, they are a twist on the typical beaded hoop, as they feature a beaded bar in the centre and are slightly oval in shape. I used some green and blue beads to make this pair of earrings. Please note that this tutorial contains affiliate links.
You’ll need these tools and materials to make these earrings:
1: Two pieces of bracelet sized memory wire, one coil for each earring.

2: Two long eye pins.

3: Two jump rings.

4: Two earring hooks.

5: Beads. I used four plastic blue beads and some green glass beads.

https://www.ebay.com.au/itm/263927947665?hash=item3d7354e191:g:cjMAAOSwrKBgh0ma&frcectupt=true

6: Pliers. I used my cutting pliers, round nose pliers and flat nose pliers.

Follow these steps to make your statement earrings:
1: Add beads to the eye pins in your chosen pattern.

2: Bend the top of the pin to form an angle.

3: Loop the top of the pin using the round nose pliers.


4: Repeat steps 1-3 for the second eye pin.

5: Take one of the pieces of memory wire and loop one end using the round nose pliers.


6: Add beads to the wire. Bead to about half-way through the hoop.

7: Add one of the eye pins to the wire.

8: Add beads to the rest of the memory wire, leaving about 1cm without beads.

9: Loop the other end of the wire using the round nose pliers again. Thread it through the first loop you made before closing it fully.

10: Open the top loop of the eye pin and thread it through the two loops at the top of the hoop. Close it to secure the pin in place.

11: Repeat steps 1-10 for the second earring.

12: Attach an earring hook to each hoop using the jump rings.


Now your statement earrings are finished and ready to wear!! So cute and pretty!


-
How to make a cute statement necklace with cord!
This cute necklace features a beaded ladder pendant threaded onto a recycled cord necklace. This is a cool way to use recycled materials and make a cool pendant that stands out from the usual jewellery you see! Please note that this tutorial contains affiliate links.
You’ll need these tools and materials to make your cord statement necklace:
1: Some eye pins. The number depends on how many ‘rungs’ you want to make. I used 10.

2: Two head pins.

3: A piece of cord. I used this one that I had already attached some crimp ends and a clasp to. If you don’t have one already made up, you’ll also need two flat crimp ends, two jump rings and a lobster clasp.

4: A couple of large jump rings.

5: Some beads. I used these green e beads and some glass floral beads. I had to use an extra e-bead on one of the charms because the bead hole was bigger than the end of the head pin. You won’t need this extra bead if you’re pins are the right size!


6: Pliers. I used my flat nose and round nose pliers. Keep your cutting pliers on hand just in case.
Follow these steps to make your cord statement necklace:
1: Add the glass beads to the head pins.

2: Bend the pins to form a right angle and then loop the tops to secure the beads in place.


3: Set the charms aside.
4: Add beads to one of the eye pins, leave about 1cm without beads.

5: Bend the end of the pin to form a loop which will secure the beads in place.


6: Repeat steps 4 and 5 for the rest of the eye pins, so you have ten pins beaded.

7: Attach two of the pins together, do this by slightly opening one of the loops and sliding the other pin through. Close the loop again to secure them together.

8: Repeat step 8 to attach another two pins so that you have a chain of four pins.

9: Take the ends of the chain and attach them together to form a square shape.

10: Attach another three pins together.


11: Attach the three pins to the bottom of the first square you made. This will form the second square.


12: Repeat steps 10 and 11 for the remaining three pins, now you will have a ladder shape with three rungs.


13: Take the charms you made at the start and attach each one to the bottom corners of the ladder.


14: Add a jump ring to each corner of the top of the ladder.


15: Now slide the ladder charm onto the cord necklace.

Now your necklace is finished and ready to wear! So so unique and cute! I think this is a great summer piece perfect for your boho hippie look!


-
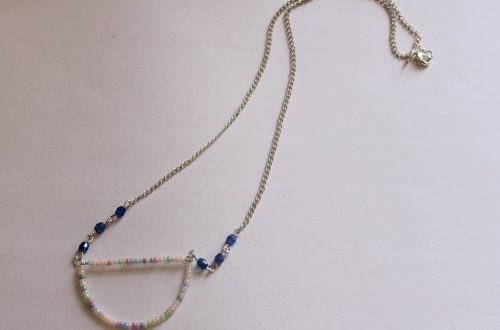
How to make a double-strand knot necklace.
This one didn’t really turn out how I had anticipated, but I thought I would share it with you anyway. I had more success making two beaded strands to knot together compared to this design that knots together a beaded strand with a chunky chain. If you don’t want the chain just make one bead strand and knot it loosely in the middle for a cool knot necklace look! This tutorial contains affiliate links.
You’ll need the following tools and materials to make your double-strand knot necklace:
1: Tiger tail wire. Make it a little longer than the chain you are using.

2: Four crimp beads.

3: Pliers. I used cutting, flat-nose and round-nose pliers.
4: A length of chunky chain.

5: Two jump rings.

6: A lobster clasp.

7: Beads. I used some blue plastic beads and some green glass beads.


Follow these steps to make your two-strand knot necklace.
1: Add the crimps to one end of the tiger tail wire.

2: Add the jump ring and loop the end of the wire around it and back through the crimp beads.

3: Squash the crimp beads using the flat nose pliers.

4: Begin adding the beads in your chosen pattern.


5: Bead until it is at your desired length.

6: Add the second pair of crimp beads to the wire and repeat steps 2 and 3 to secure the beads onto the strand.


7: Trim the excess wire using the cutting pliers.


8: Add the chain to the bead strand by opening the jump rings at either end of the necklace and adding the ends of the chain.


9: Add a lobster clasp to the necklace.


10: Tie the strands into a loose knot that sits at the centre of the necklace opposite the lobster clasp closure.

Now your necklace is finished and ready to wear! Like I said, the chain looks a bit weird on this one, so you can leave it out if you like. You could also make the double strand necklace and skip the knot!

You can make this necklace with materials you already have, but if you need some new supplies this tutorial contains affiliate links.
-
Want some lightweight earrings? This ribbon design has you covered.
These lightweight earrings are really cute! Made out of beads and ribbons they’ll pack a visual punch without weighing your lobes down. They can also be made with materials you might already have at home. I don’t know about you but I have loads of ribbons that I have saved from gifts and shopping bags.

You’ll need the following tools and materials to make these lightweight ribbon earrings:
1: Pliers. You’ll need your flat nose and round nose pliers.
2: Two pieces of ribbon. I used this thin (approx 1cm wide) blue satin ribbon. Each piece was approximately 7cm long.

3: Two large jump rings.

4: Two flat end crimps.

5: Two earring hooks.

6: Two small head pins.

4: Beads. I used four green glass beads.

Follow these steps to make your lightweight ribbon earrings:
1: Fold the ribbon around so that it forms a folded loop. You can achieve this by layering the ends over each other facing the same way up.

2: Add the flat crimp to the ends of the ribbon and squash them using the flat nose pliers.


3: Add the glass beads to each of the head pins.

4: Curl the ends of the pins to secure the beads.


5: Add the beaded pins to each of the jump rings.

6: Close the jump rings around the bottom of each ribbon loop.


7: Attach each of the earring hooks to the crimps at the top of each ribbon charm.


Now your cute ribbon earrings are ready to wear!

Note: This article contains affiliate links
Here are some other ribbon earring DIYs
-
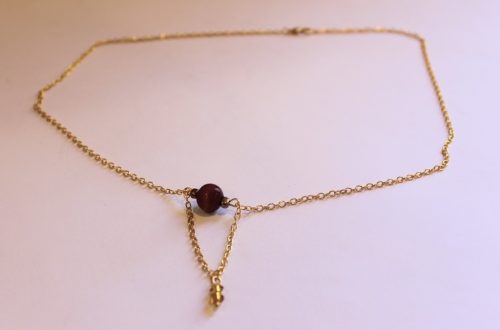
How to make a delicate layered necklace!
Layered statement necklaces are set to be on trend in the coming months. Here’s how you can make one for yourself with some delicate chain and pretty beads.
You’ll need the following tools and materials:
1: Pliers. I used my round nose and flat nose pliers.
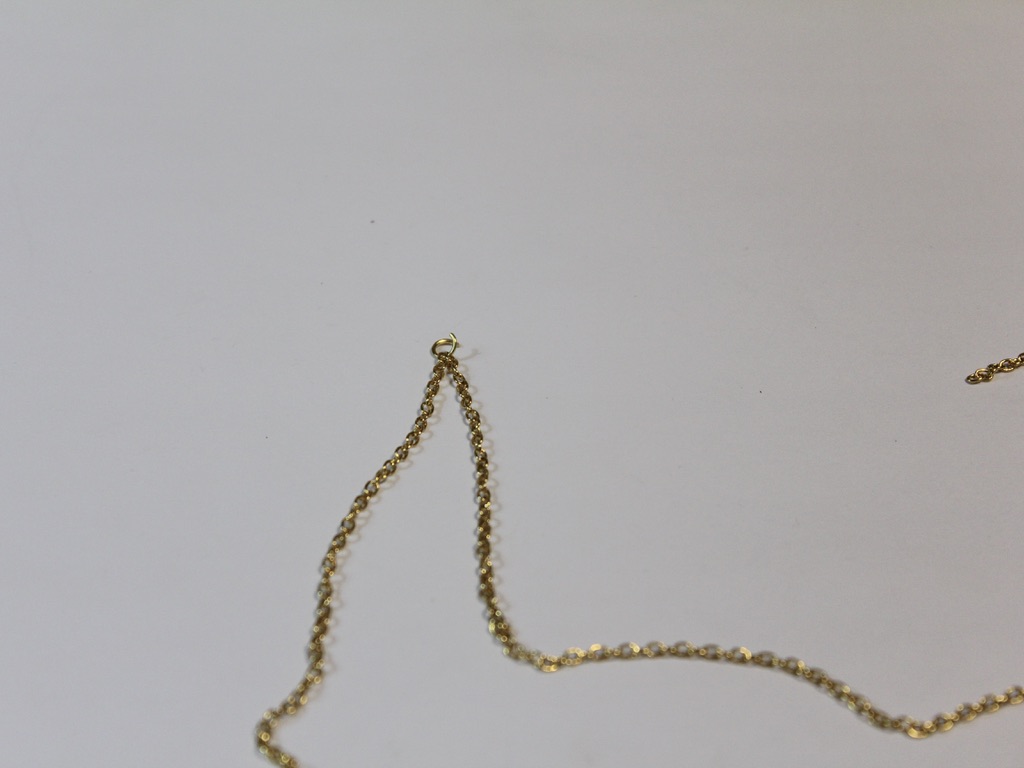
2: Two pieces of chain, one longer than the other. I used gold-tone rolo chain.

3: Four beads. I used these matching glass beads.

4: Three pins with no ends.

5: One head pin.

6: Three larger jump rings.

7: Four small jump rings.

8: A lobster clasp.

Follow these steps to make your layered chain necklace:
1: Add one of the beads to the head pin.

2: Curl the top of the pin around the round nose pliers to form a loop.

3: Attach one of the larger jump rings to the top of the pin.

4: Slide the newly formed charm onto the shorter piece of chain.

5: Create a loop at one end of one of the pins using the round nose pliers.

6: Add one of the remaining three beads.

7: Create a loop at the other end of the pin to secure the bead in place.
8: Repeat steps 5-7 for the other two beads.

9: Join the bead charms together to form a chain using two of the small jump rings. Then split the longer chain in half.
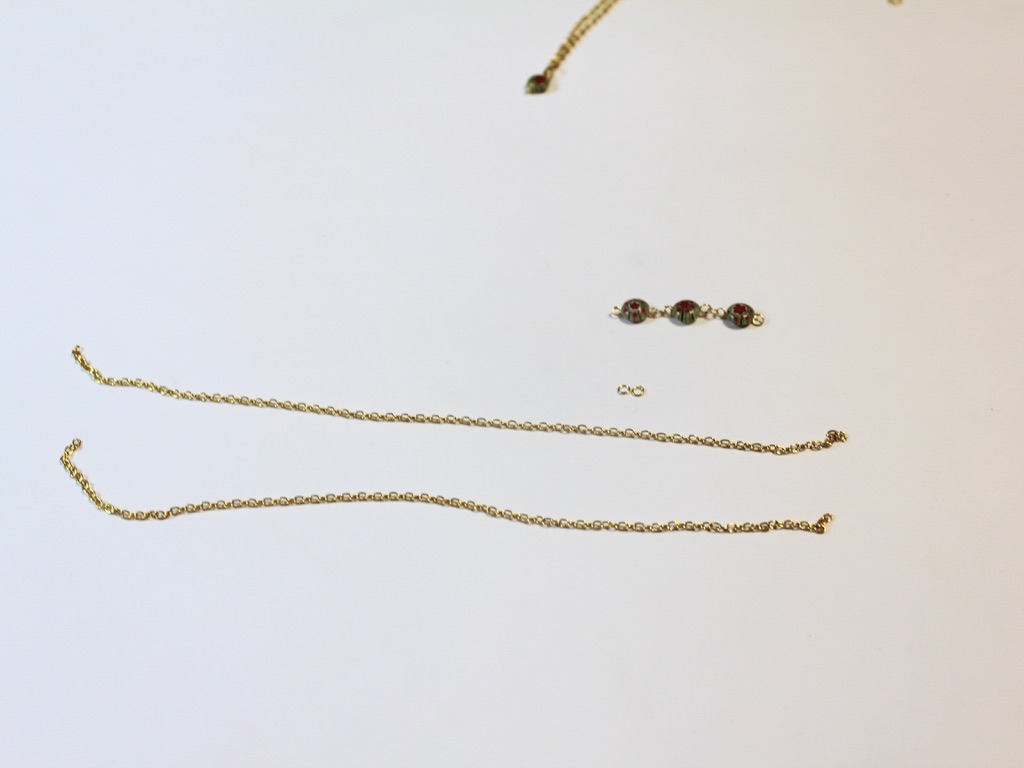
10: Use one of the remaining small jump rings to attach the bead chain to one of the two necklace chains you just split.


11: Attach the other end of the bead chain to the other necklace chain using the last small jump ring.

12: Join the two chains together by sliding them onto one of the larger jump rings.

13: Repeat this for the other side of the necklace, adding the lobster clasp before closing the ring.

Now your layered necklace is finished! How cool!!


Here are some other multi-chain necklace tutorials:
- A double strand necklace made using string
- A necklace made with two beaded strands
- A layered necklace made with recycled materials
- A mixed material double strand necklace
- A two tone double chain choker
- A triple strand leather necklace
- A double chain necklace with gemstones
This tutorial contains affiliate links.