-
Here’s how to assemble a pair of pearl stud earrings!
Have you ever wanted a pair of pearl earrings, but been curious wether you could make them yourself? Well look no further than this tutorial. We’ve got all the steps to show you how to make your own pair of pearl studs. So cute and elegant. Please note that this tutorial contains affiliate links for which we may receive a commission.
You’ll need the following tools and materials to make your pearl earrings:
1: A pair of half-drilled pearls.

2: A pair of sterling silver pearl post studs. I had flat pearls so I used a flat post, but if your pearls are more rounded, I recommend using a cup stud finding. If you want to be extra fancy, you can also buy posts made in solid gold.
You can get some pearls here:

I used these ones:
You can get some similar ones here:
3: Two part epoxy glue. I used Araldite but you can use other brands too.

You can get some here:
4: A piece of scrap wire or something thin for applying the glue.

5: A scrap piece of paper.

6: A skewer or paddle-pop stick for mixing the glue.

You can get skewers here:
7: A pair of earring backs.

You can get some here:
Follow these steps to construct your very own pair of pearl stud earrings:
1: Squeeze the glue out in equal parts onto the scrap piece of paper.


2: Mix the glue using the skewer. You will need to work quickly once your glue is mixed to ensure the glue holds well.

3: Using the thin wire, apply a small amount of glue to each of the pearl posts and the holes in each of the pearls.


4: Place the pearls on the posts and wipe up excess glue
5: Set the earrings aside to dry.
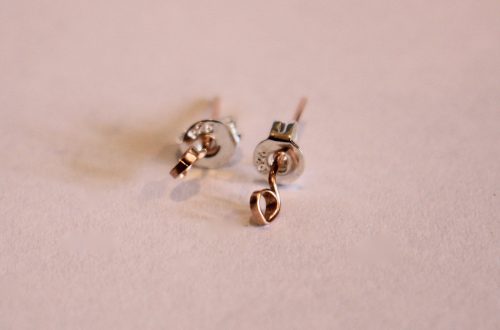
Once the glue is set, and you have added your earring backs, your new pearl stud earrings are ready to wear! A gorgeous and simple DIY that you can do in an afternoon. Here’s what the finished product looks like. Simple and lovely.


-
Let me show you how to make a pretty pair of beaded earrings!
Mixed beads seem to be all the rage right now! These beads feature a variety of gemstones and a couple of cute little glass heart beads for a cool look. Use your choice of beads to create your own twist on this simple-but-bold design. Please note that this tutorial contains affiliate links.
You’ll need these tools and materials to make your own pair of beaded statement earrings:
1: Two earring hooks.

2: Two long eye pins.

3: Two small head pins.

4: A variety of beads. I used some gemstone chip beads, some pearls, shell beads, round lapis lazuli beads and two glass heart beads.

5: Pliers. I used my round nose and flat nose pliers.


Follow these steps to make your beaded earrings:
1: Add each of the heart beads to the small head pins.

2: Loop the top of the pins using the round nose pliers and then set them aside.


3: Add beads to one of the eye pins in the pattern of your choice.

4: Bend the top of the pin to form an angle.

5: Loop the top of the pin using the round nose pliers.


6: Repeat steps 3 to 5 for the second eye pin re-creating the pattern you established with the first pin.

7: Attach one of the heart charms to one of the beaded eye pins.

8: Attach the other heart to the other eye pin.

9: Attach an earring hook to each of the pins to finish the earrings off!


Now your sweet earrings are finished and ready to wear! These are so lovely and fun! Perfect for a playful but glam look!


If you loved these earrings, here are some other pearl earrings you can make at home:
-
Here’s how to make some crescent moon shaped earrings with wire :)
These earrings look one way when you lay them down… but then when you hang them from your ears they turn into beautiful crescent moons. So cute! Please note that this tutorial contains affiliate links.
Here are the tools and materials you will need to make your own crescent moon earrings:
1: Pliers. I used my cutting pliers, round nose pliers and flat nose pliers.

2: Some bracelet length memory wire cut into four half circle lengths.

3: Four small jump rings.

4: Two larger jump rings.

5: Six small head pins.

6: Earring hooks.

7: Beads. I used mixed glass seed beads and six pink freshwater pearl beads.

https://rover.ebay.com/rover/1/705-53470-19255-0/1?mpre=https%3A%2F%2Fwww.ebay.com.au%2Fitm%2F1kg-SUPER-MIX-Glass-Seed-Bugle-BEADS-Mixed-Assorted-Sizes-Colors-BULK%2F322739925149%3Fhash%3Ditem4b24cc709d%3Ag%3AXHgAAOSw791ZuJjX%26frcectupt%3Dtrue&campid=5338747881&toolid=10001&customid=5338747881 
Follow these steps to make your cute crescent moon earrings:
1: Add each of the pearls to the head pins and curl the tops using your round nose pliers to secure the pearls in place. Once you have made all your pearl charms you can set them aside.


2: Take one of the memory wire pieces and create a loop at one end using the round nose pliers. I curled my wires in towards the inside of the curve.


3: Add beads to the wire until there is about 1cm left without beads.


4: Loop the other end of the wire to secure the beads on.

5: Repeat steps 2 to 4 for the remaining three pieces of memory wire.

6: Take two of the pieces of memory wire and attach them at one end using one of the small jump rings.

7: Attach the bottom of the memory wire pieces together using another of the small jump rings to form an oval shape.

8: Repeat steps 6 and 7 using the remaining beaded memory wire pieces and small jump rings.

9: Add three of the pearl charms to one of the larger jump rings and attach it to the end of the memory wire ovals. Repeat this for the remaining three pearls and attach them to the other memory wire charm.


10: Add an earring hook to the top of each of the ovals to finish the earrings off.


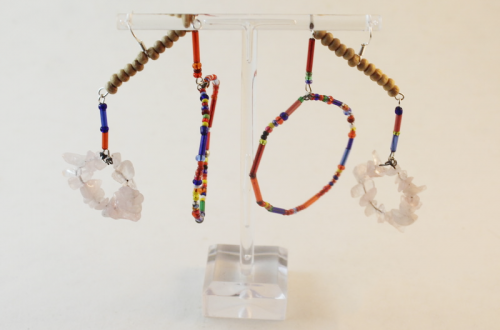
Now you can hang them from your ears and have some fun!


-
Hop on the pearl trend with these beaded pearl hoop earrings!
I am loving the pearl jewelry trend right now! Here’s how you can DIY your way into unconventional pearl earrings. Contains affiliate links.
You will need the following tools and materials to make your beaded pearl hoops:
1: Pliers. I used cutting pliers to cut my wire, round nose pliers and flat nose pliers.
2: Some wire. I used this wire that I reclaimed from an old jewelry project.

3: Charm connector stud earrings.

4: Two small jump rings.

5: Two medium jump rings.

6: Two larger jump rings.

7: Two small head pins.

8: Two pearl beads. I used these freshwater pearl beads.

9: Seed beads. I used these mixed glass seed beads.
Follow these steps to make your beaded pearl hoops:
1: Curl the end of the wire to form a loop using the round nose pliers.

2: Add the seed beads to the wire.

3: Once the wire is beaded and there is only about 1cm left of the wire left use the round nose pliers again to curl the end into a loop.

4: Repeat steps one to three for the second piece of wire.

5: Form the beaded wires into circle shapes.

6: Join the ends of the wires using the two small jump rings and then set the hoops aside.


7: Add the pearls to each of the head pins.

8: Create a loop at the top of each pin using the round nose pliers. This will secure the pearls on the pins.

9: Attach each of the pearl charms to the beaded hoops using the medium sized jump rings.


10: Attach the earring posts to the top of the hoops using the largest jump rings.

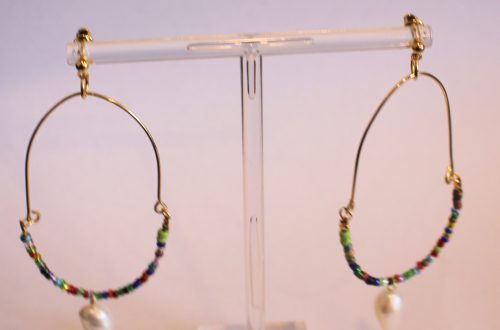
Once the earring posts are in place they are ready to wear! How cute are they?!

Here’s another pair I made with some green pearls.