-
How to make a cute pair of threader earrings with dangling charms!
These earrings are great! They’re elegant, edgy and minimalist. I like wearing mine layered in multiple piercings, but they look great threaded through each ear too! What pretty gemstones will you use on yours? These ones feature amazing snowflake obsidian globe beads. (This tutorial contains affiliate links).
You’ll need the following tools and materials to make your threader earrings with dangling charms:
1: Pliers. I used my cutting pliers, flat nose pliers and round nose pliers for this design.

2: A file or rough sandpaper for smoothing the ends of the wire.

3: Two pieces of wire. I used this gold-filled wire and cut two pieces approximately 8cm long.

4: Two small head pins that match the colour of your wire.

5: Two beads of your choice. I used these round snowflake obsidian beads.

Follow these steps to make your minimalist threader charm earrings:
1: File the ends of the wire so they are flat and smooth, hold the wires together so you can keep them about the same length.

2: Place the wires in the jaws of the flat nose pliers. I did them together so they would be bent at the same length.

3: Bend one side of the wires around the pliers using your fingers to gently push them down.

4: Repeat this for the other side of the wires. Now your wires will have a square shape bent into the top.

5: Bend the wires gently into your desired shape (getting rid of any unwanted curves etc.) using your fingers. You won’t need to exert a lot of pressure on the wire to do this.

6: Now take the short end of the earrings and bend them gently to form a wide angle using the flat nose pliers again. This will be the start of your charm loop.


7: Create a loop at the end of each earring by bending the angled end of the wire into a loop using the round nose pliers.

8: Once you’ve looped both earrings, you can set them aside for a little while.

9: Add each of the beads to each of the head pins.

10: Curl the end of each pin using the round nose pliers to form a loop that secures the bead onto the pin.


11: Attach the bead charms to the loops on each earring, carefully bending them closed with pliers to keep the charms in place.


Now your pretty, elegant beaded threader earrings are ready to wear! How lovely are these for a quiet date night or for adding some glamour to your social isolation outfit?


Here’s another pair I made using silver wire and malachite and moonstone gemstone beads.

If you like this design, here are some other threader earring tutorials you might like:
- Minimalist silver wire threader earrings
- Chain threaders with star charms
- An arched single threader earring with a pearl charm
- Shell charm chain threader earrings
- Hammer texture arch earrings
- elegantly arched wire threaders
- Bead embellished wire threader earrings
- Pearl chain threaders
- Glass fruit charm chain threader earrings
-
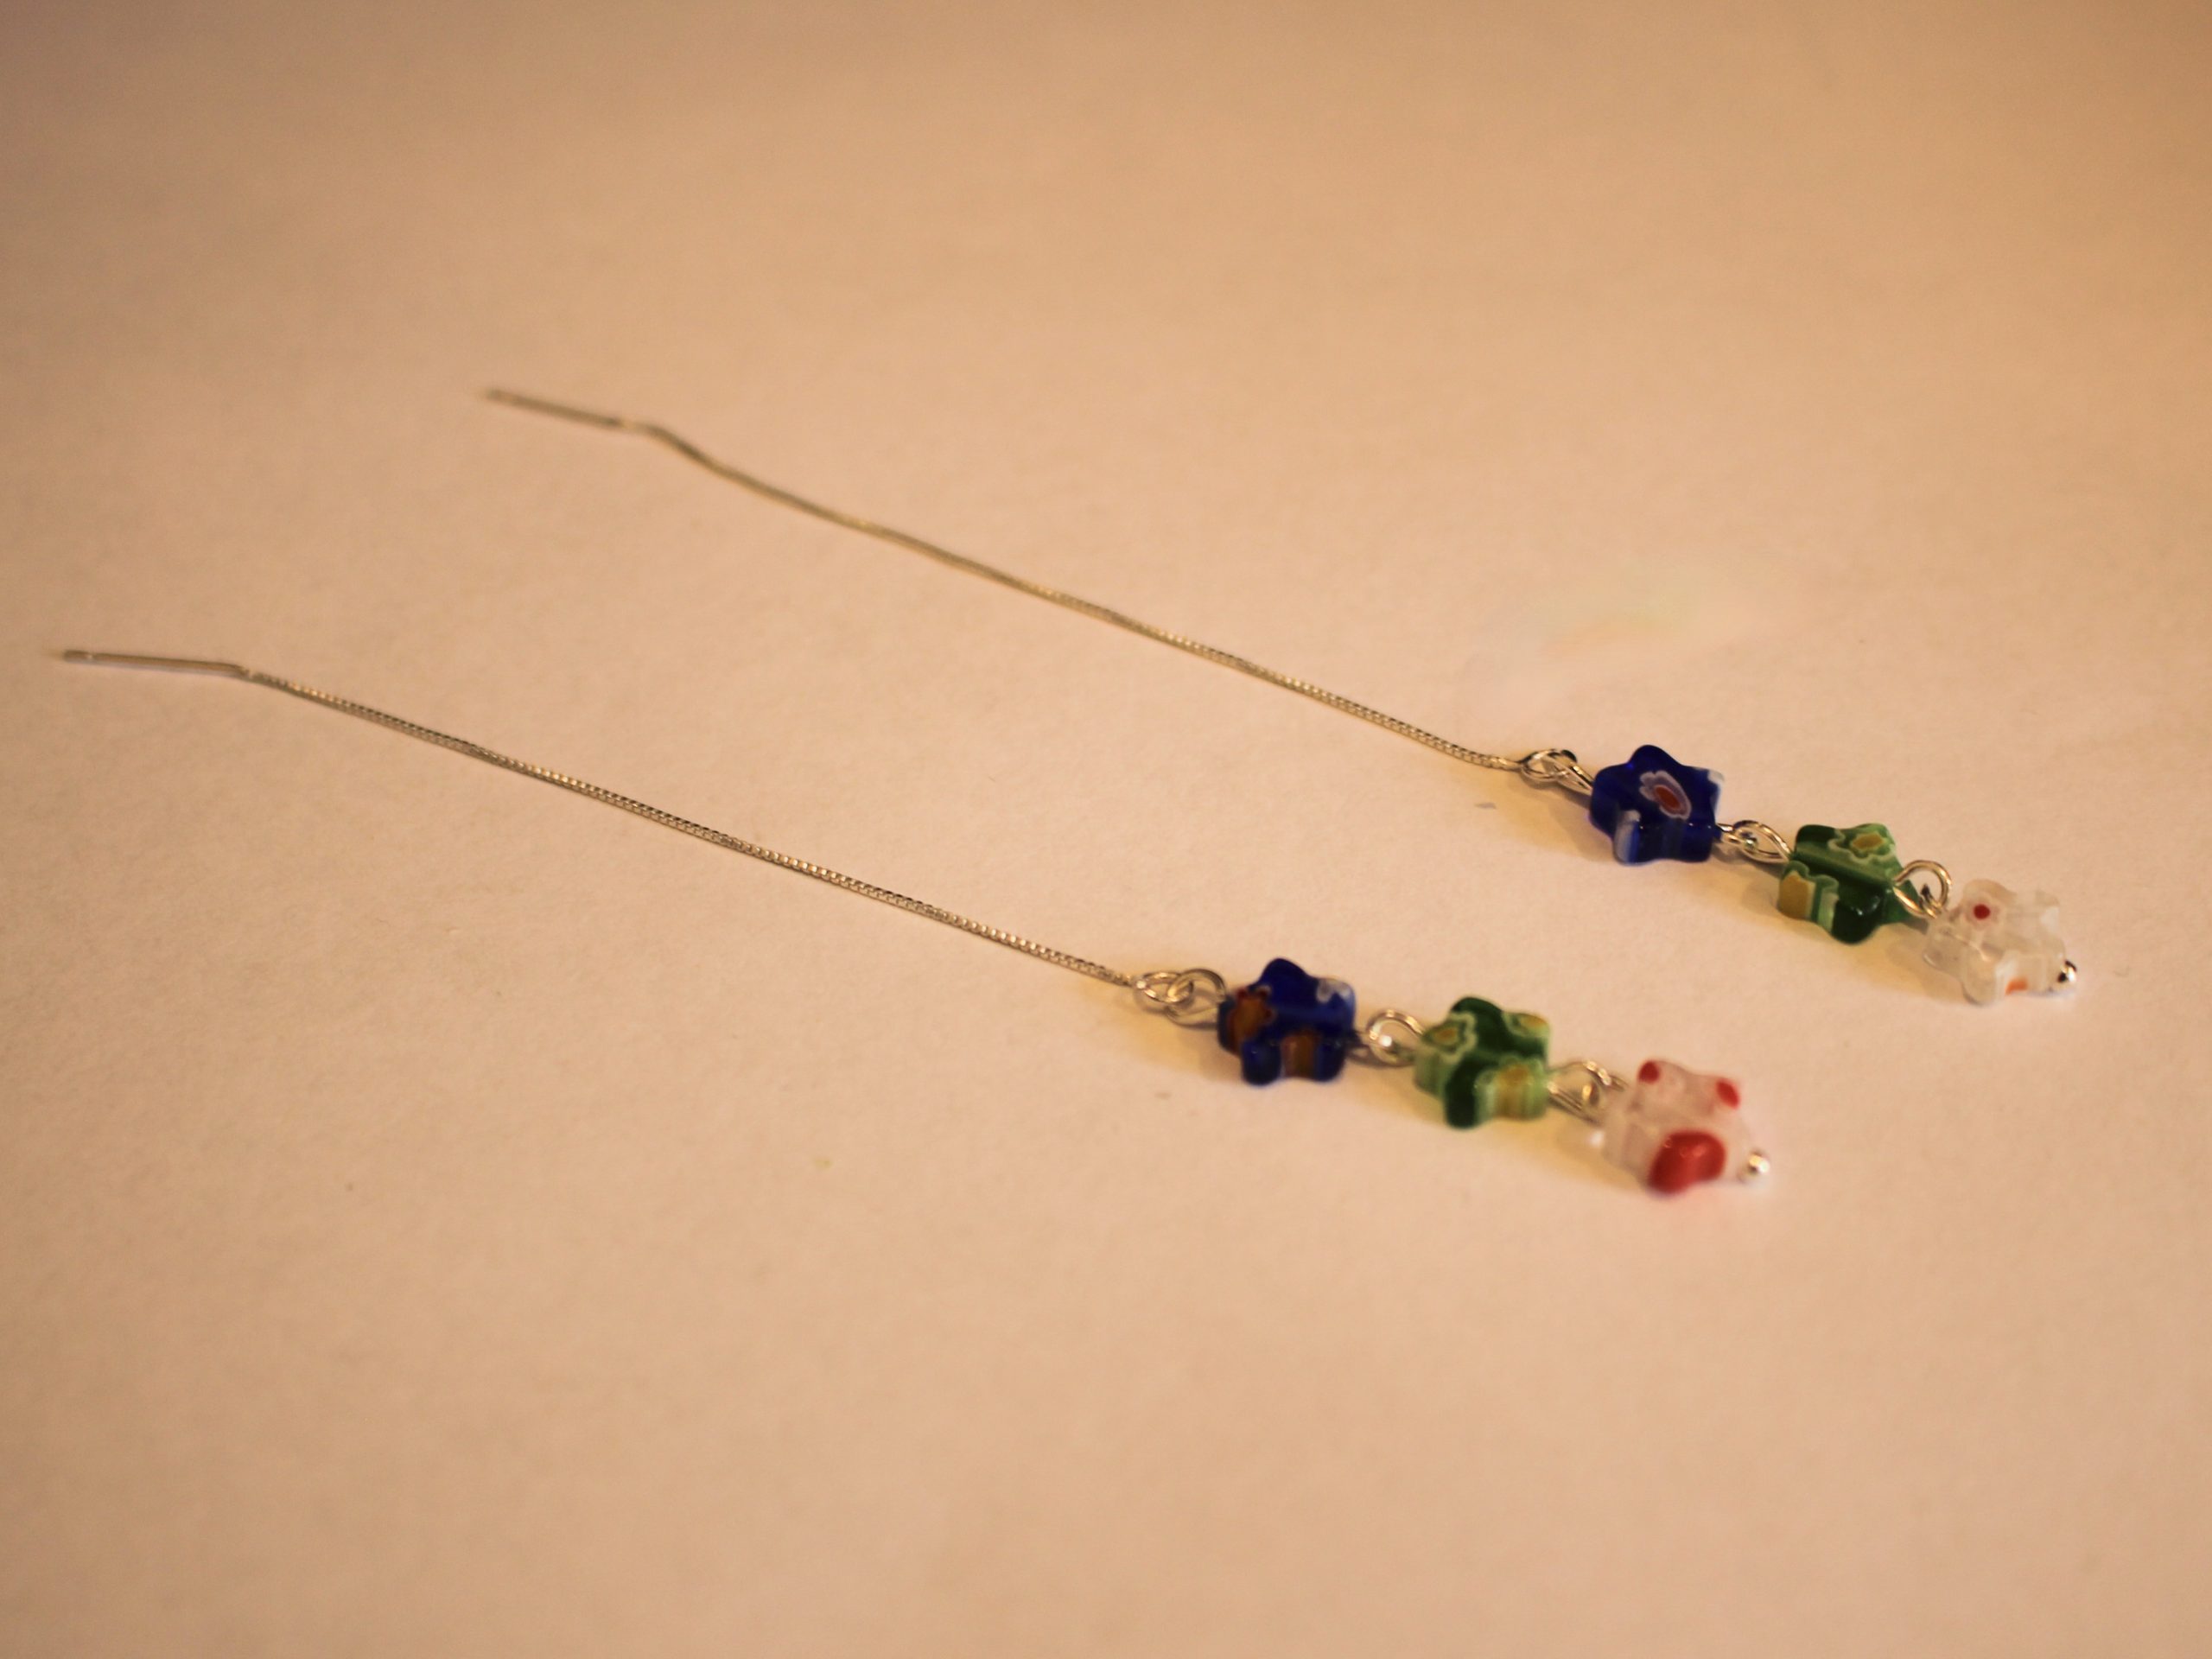
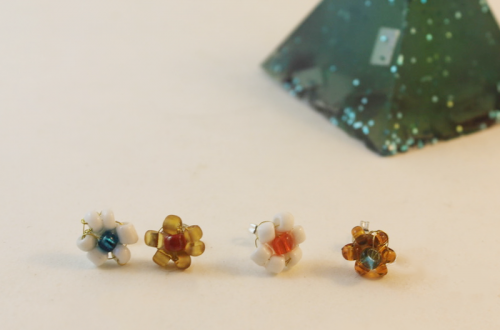
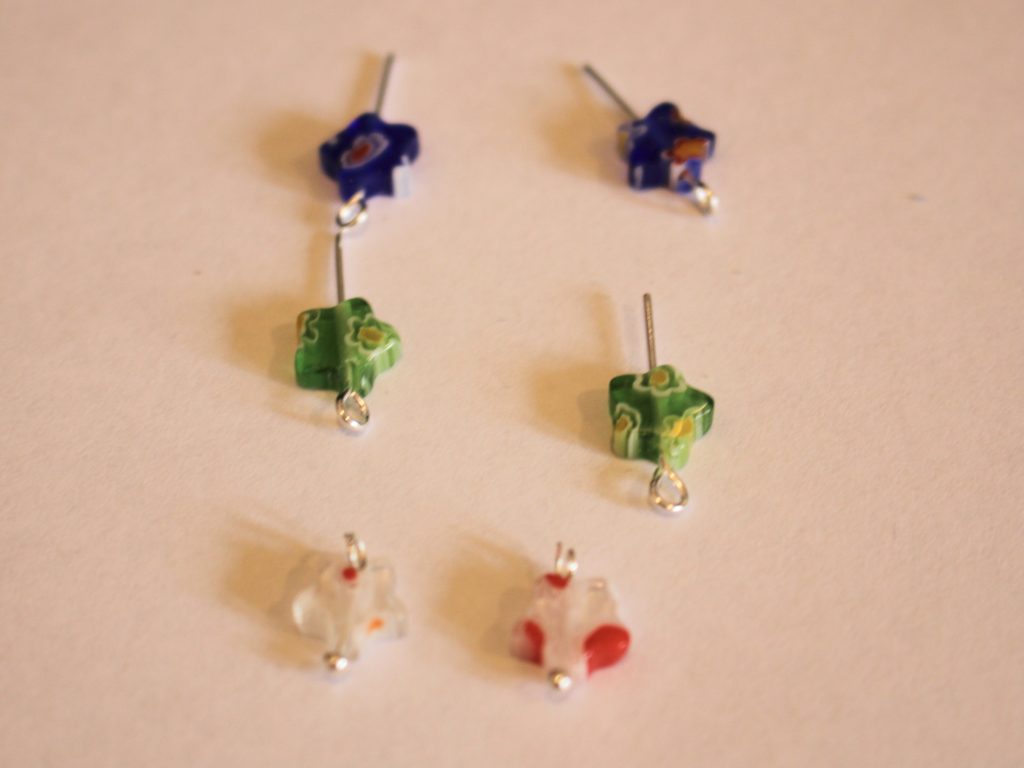
How to make some dangling star threader earrings!
Threader earrings are really cool! This design uses some cute glass star-shaped beads for an adorable effect. Please note that this tutorial features affiliate links.
You’ll need these tools and materials to make your star embellished threader earrings:
1: Pliers. I used my flat and round nose pliers.


2: Two threader earrings with charm connectors at one end.

3: Four eye pins the right length for the beads you are using.

4: Two small head pins.
5: Six star beads, three matching pairs.

Follow these steps to make your star threader earrings:
1: Add two beads to each of the head pins.

2: Bend the top of one pin to form a right angle.

3: Loop the top of the pin using the round nose pliers to secure the bead in place.

4: Repeat steps 2 and 3 for the other bead.

5: Add another bead to one of the eye pins and repeat steps 2 and 3 to secure the bead on the pin.
6: Open one of the loops on the eye pin and attach it to one of the head pin charms you made.


7: Add another bead to a pin in the same manner and attach it to the other two so that you have a chain of three stars.

8: Repeat for the other three beads so that you have two little star chains.

9: Attach each of the star chains to each of the threader earring findings using your flat nose pliers to open and close the jump rings.


10: Now your star threader earrings are finished and ready to put on. Perfect for some zoom earring fun!


If you like this design here are some other treader earring tutorials:
-
How to make a charm embellished threader earring…
Are you looking for a way to use the charm you made in this tutorial? Why not make a cool single statement threader earring. This earring looks so cool in a second piercing or worn on its own! This tutorial contains affiliate links.
The Materials
You’ll need the following tools and materials to make this earring:
1: Pliers. I used my round nose pliers and cutting pliers.

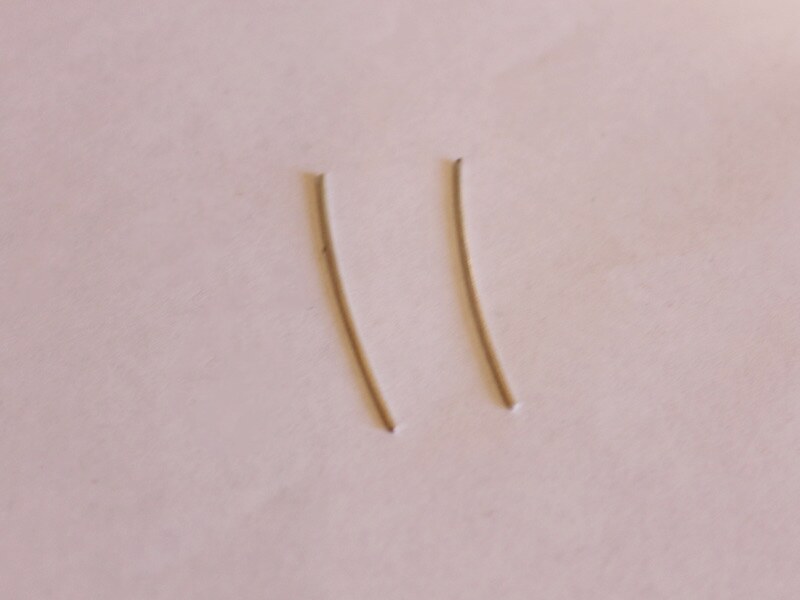
2: A piece of wire at your choice of length, mine was approximately 6.5cm long. My wire was a piece of rose gold-filled wire approximately 0.65mm wide.

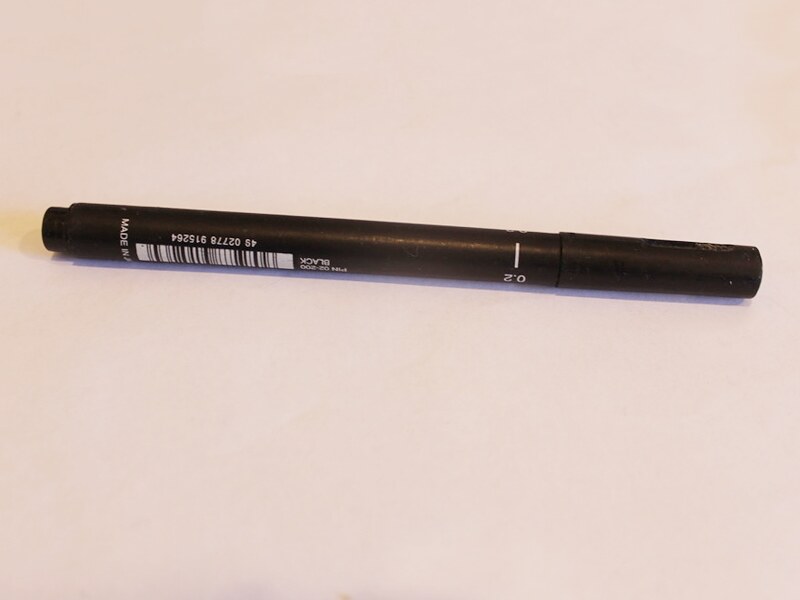
3: A pen or something else round to form your earring wire around.

4: A file or course sandpaper to smooth the ends of the wire.
5: The charm you made in this tutorial.

The Steps
Follow these steps to make your single charm threader earring:
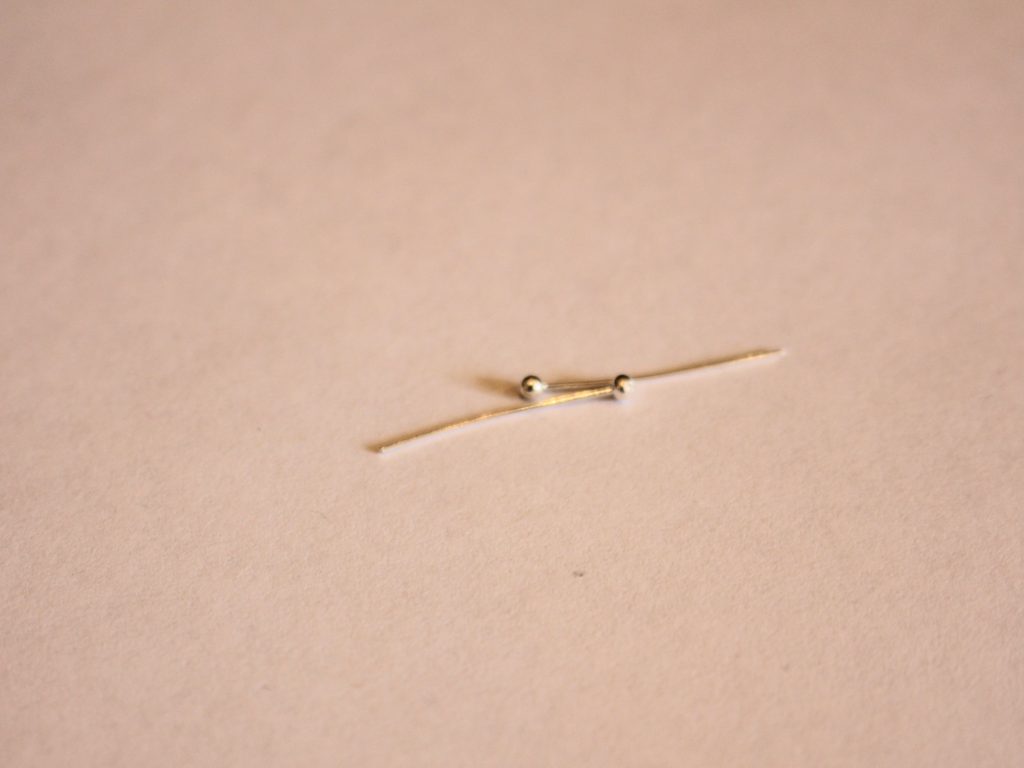
1: Cut your wire to the desired length using cutting pliers.
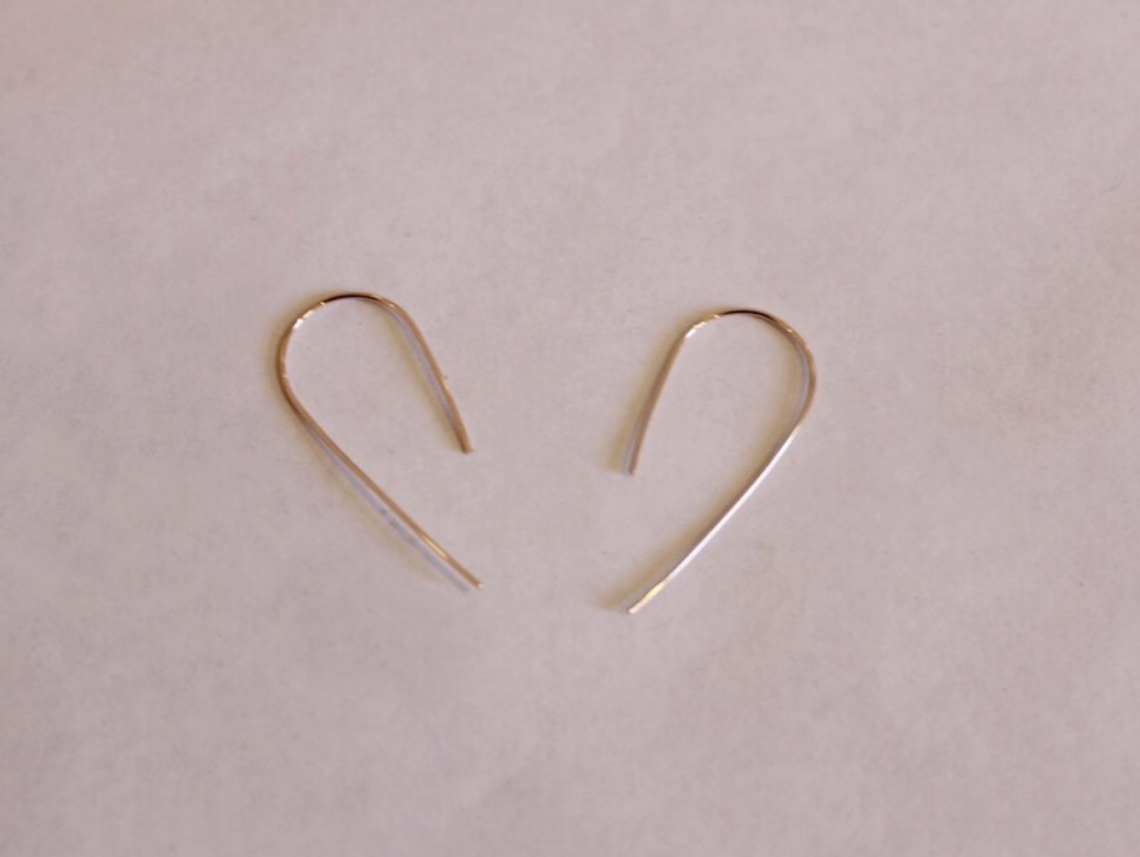
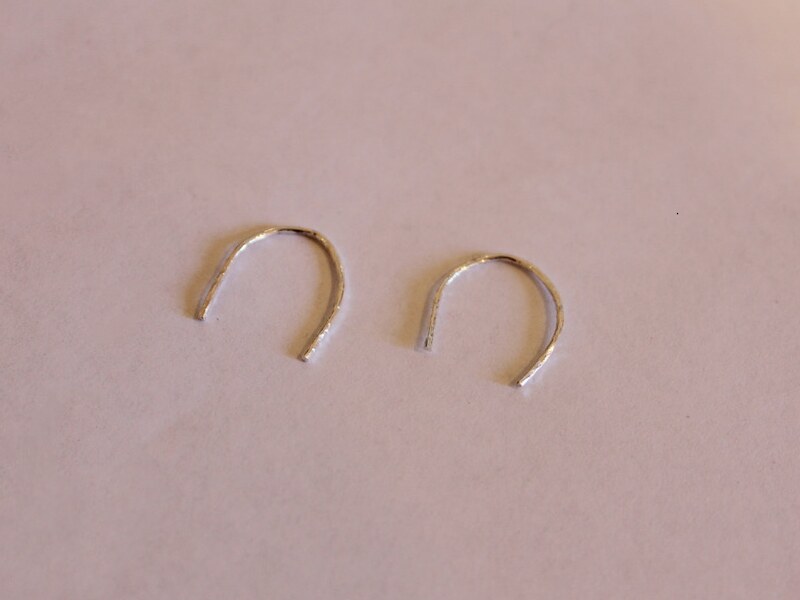
2: Place your wire on the pen and gently bend it around to form a curve that will allow it to stay in your lobe. I made it so that one side was longer than the other.


3: Create a loop on the short end of the bent wire using the round nose pliers.

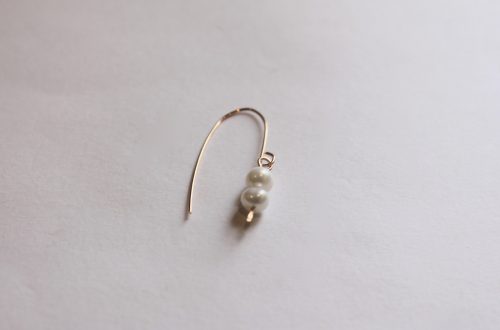
4: Open the loop slightly to attach the charm. Close it using your pliers to secure it in place.

5: File or sand the end of the wire so that it isn’t sharp any more.
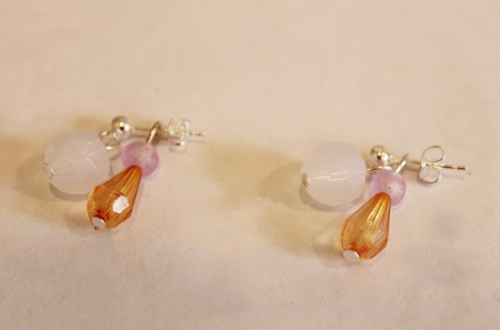
Now your cute little charm threader earring is ready to wear!


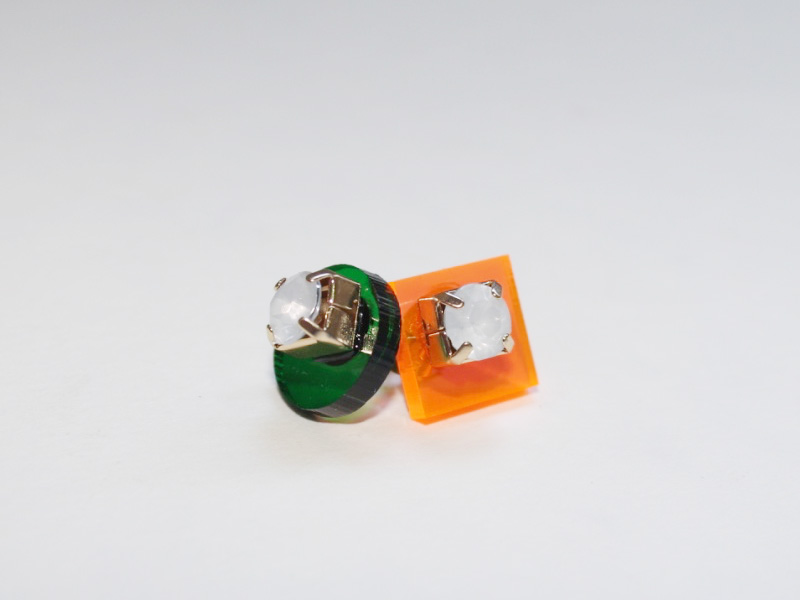
Here’s another pair of charm threader earrings I made using silver wire and a square bending technique. The gemstone beads on this design are made of moonstone (the white round ones) and malachite (The green chip beads). I like to wear these next to each other in my double piercings, they look really cool when paired together.
Here are some other wire threader earring tutorials:
- Minimalist silver threader earrings
- Hammer texture arch earrings
- Rounded threader earrings
- Beaded threader earrings with hammered ends
This tutorial contains affiliate links.
-
Stuck for Mother’s Day gift ideas? Here’s our DIY jewelry gift guide!
If you need some ideas for Mother’s Day, here are some tutorials that might inspire you to make the mother figure in your life something special and sentimental.
Gift idea one: A necklace made out of an upcycled brooch.
Find all the steps to make a brooch necklace here.
Gift idea two: A lock and key jewelry set.

This is such a cute idea, turn your childhood diary lock and key into a sweet jewellery set! Find the steps here.
Gift idea three: Some delicate wire threader earrings.

These are for the Mother who loves the simple things. The full threader earring tutorial can be found right here.
Gift idea four: An elegant floating pearl necklace.

This necklace is so cool! Find the tutorial here.
Gift idea five: A custom made charm.

Use a special bead or a handmade one and transform it into a one of a kind charm. All the steps to create this special charm are right here.
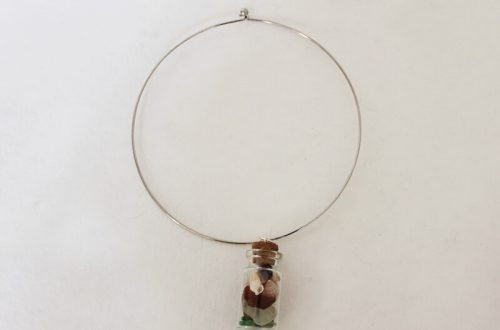
Gift idea six: A beachy pendant.

Fill this pendant with reminders of the beach or the bush. All the steps to make this sentimental pendant right here.
-
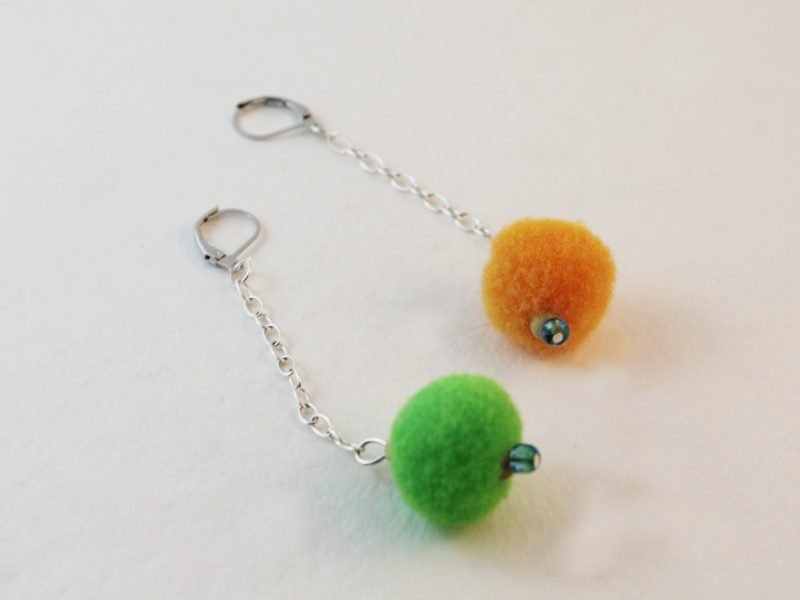
I am obsessed with fruit charms right now, here’s another way to use them!

These fruit threader earrings are amazing and super easy to make! Tutorial contains affiliate links.
You will need the following tools and materials to make your fruit threader earrings:
1: Pliers. You’ll need your round nose and flat nose pliers.
2: Two threader earring findings.

3: Two jump rings.

4: Two fruit charms. I used these glass orange charms.

Follow these steps to make your fruit threader earrings:
1: Add a charm to the bottom of the threader using one of the jump rings.

2: Close the jump ring to secure the charm in place.

3: Repeat steps 1 and 2 for the second earring.

That’s all! An amazing pair of earrings in three steps!
-
Last Minute Handmade Gifts for Christmas 2018!
Have you left your gifts to the last minute? Why not make your friends and family some special accessories? Here are five DIY Christmas gift ideas.
A Festive Headband.
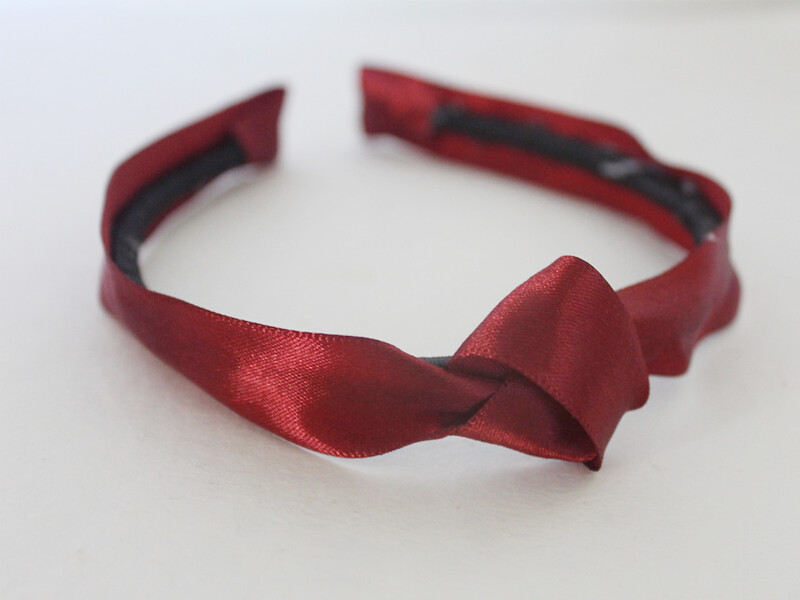
Headbands are back! This headband design uses some luxurious ribbon for a cool effect. Find all the steps here.
Collar clips for your stylish friend with all the flair!
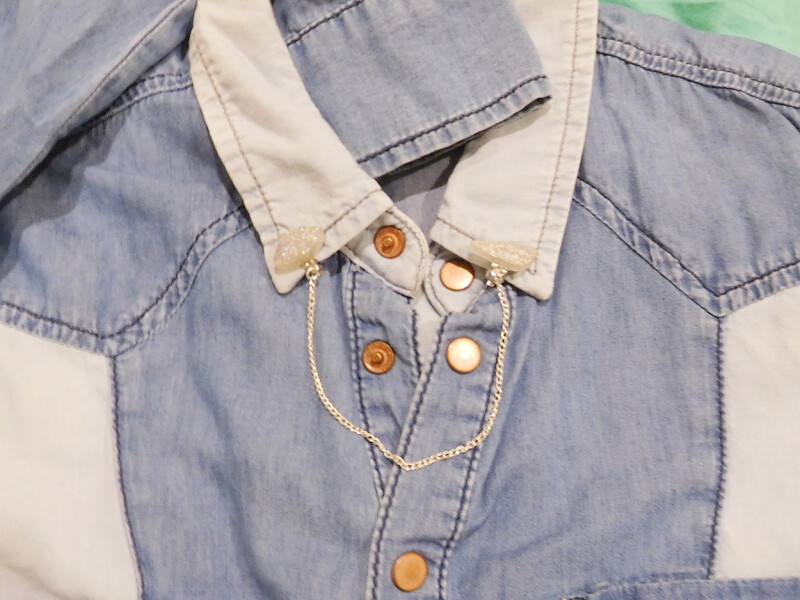
These collar clips make clever use of clip on earrings. They’re perfect for people who love quirky accessories. Find out how to make them here.
For the person who likes to keep it simple: curved threader earrings.
These earrings look so delicate and elegant! Make your own by following this tutorial.
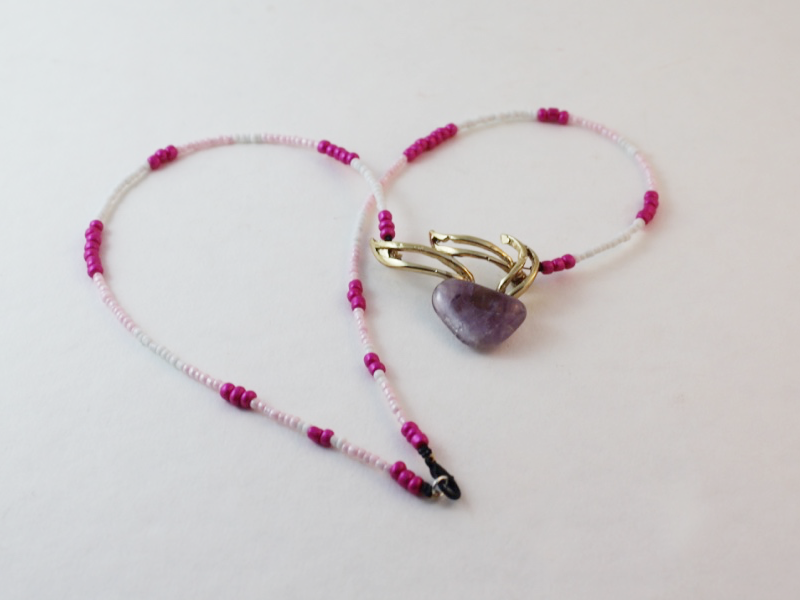
For the crystal lover: a leather and crystal choker.
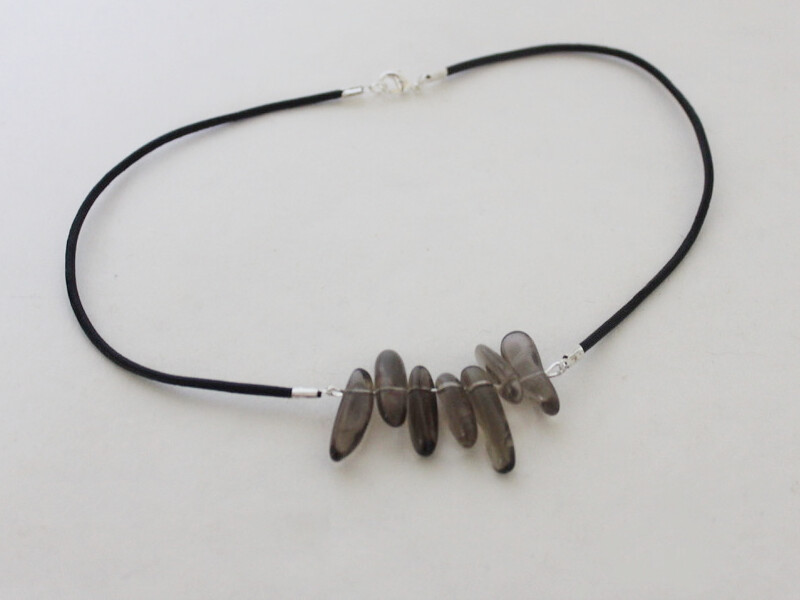
This choker design is perfect for showing off those protective crystals. Find all the steps here.
Here’s something for the sentimental: Earrings made with found feathers.
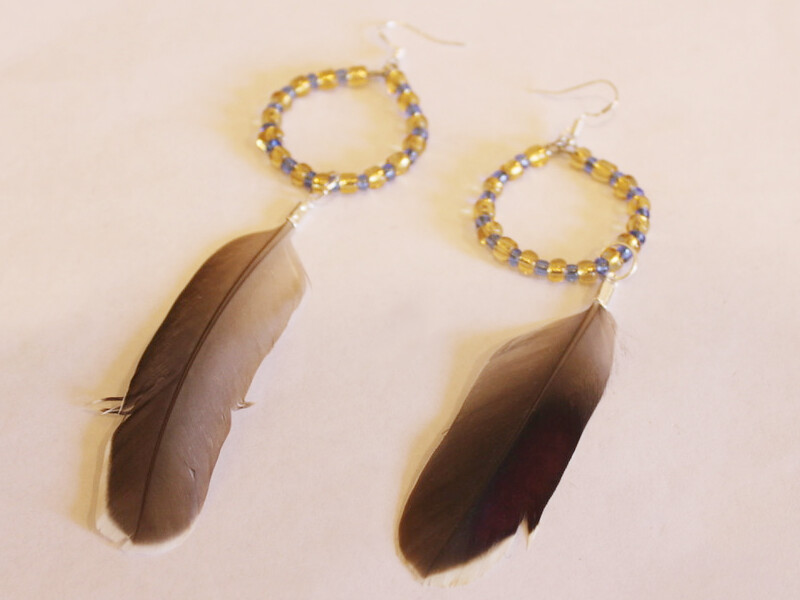
I made these earrings using feathers I found myself. Using found materials can make your designs extra special for the people who receive them. Here’s how to make these feather earrings.
-
Here’s how to make delicate shell threader earrings.

These shell earrings are a subtle way to get in on the shell jewelry trend. They’re simple, delicate and beautiful.
You will need the following tools and materials to make these earrings:
1: Pliers. You’ll need your flat nose and round nose pliers for these earrings.
2: Two threader earring findings.
4: Shells and beads of your choice. I used these small shell beads and two blue glass seed beads.


Follow these steps to make your shell threader earrings:
1: Add the beads and the shells to each of the head pins.

2: Create loops at the top of each pin using the round nose pliers to secure the beads in place.


3: Attach each bead charm to the loops at the ends of the threader earring findings.


Now your shell threader earrings are finished! So cute!
You May Also Like
Do your earrings need an update? Try making these interchangeable earring jackets!

Got a pair of dangly earrings you aren’t quite in love with? This tutorial shows you how you can swap earring hooks for studs.

Want to make your own hoop earrings out of wire? Here’s how you can do it!
-
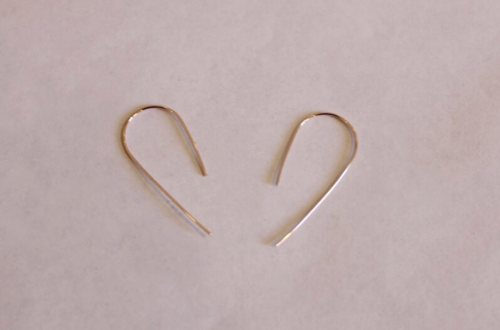
How to make textured arch threader earrings
Here’s how to add some extra flare to your threader earrings… add some texture! Use a hammer to add some glittery facets to your wire threader earrings.
You will need the following tools and materials to make your earrings:
1: Cutting pliers to cut your wire to length.
2: Two pieces of wire. I used some sterling silver wire approximately 4.5cm long.
3: A steel block.

4: A hammer.

5: A file.
6: Tape.

7: A pen or something else that is round to shape your wire around.
Follow these steps to make your textured wire threader earrings:
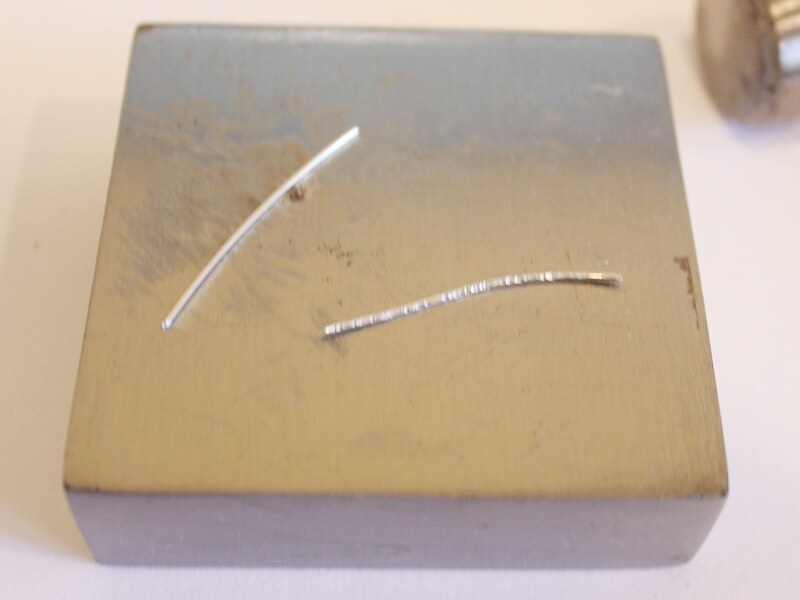
1: Hammer the wire so that it is textured on all surfaces. Do this by hitting the wire lightly with the edge of the hammer.
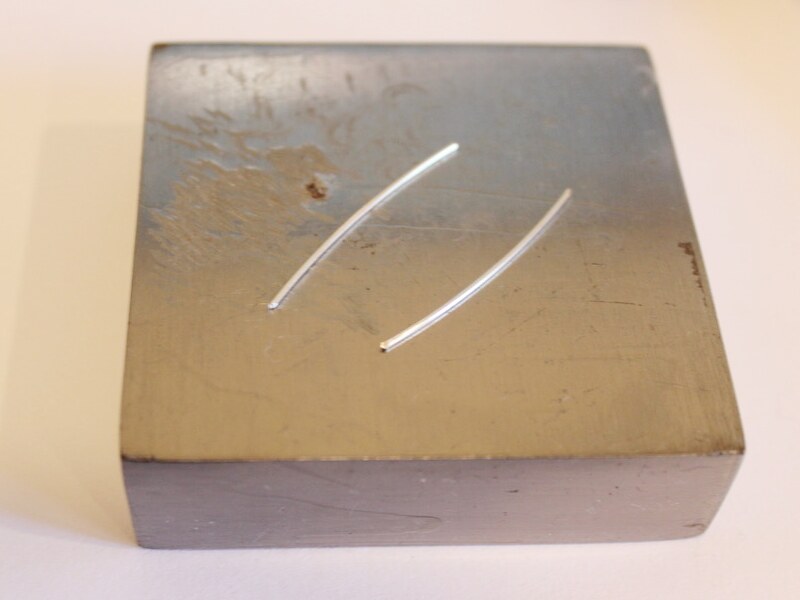
2: Once both pieces are textured line them up and tape them to the pen.
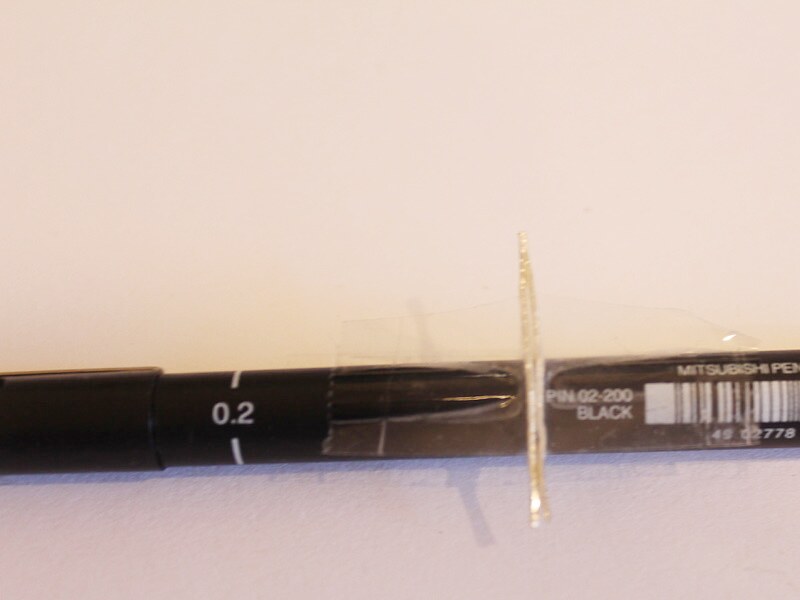
3: Bend the wire around the pen to form a curved arch shape.
4: Take the wire off the pen.
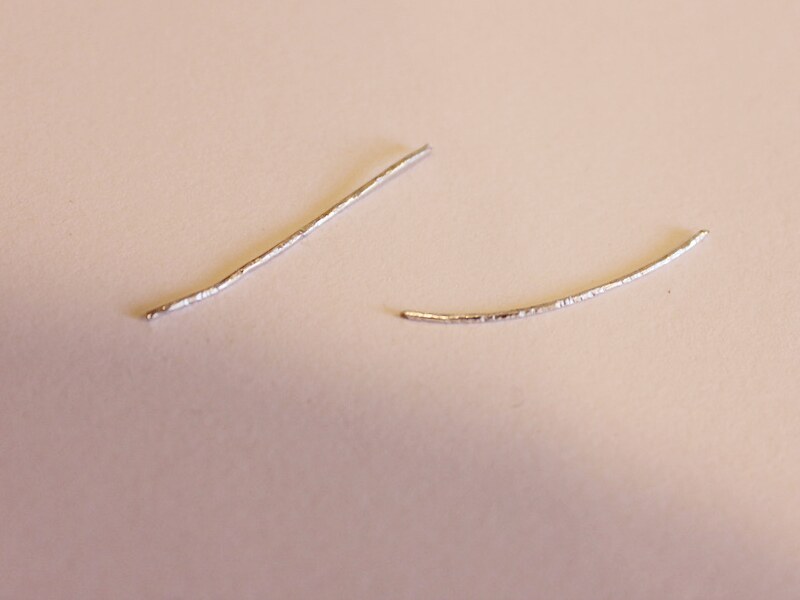
5: File the ends of the wire until they are smooth.
Once your earrings are filed they are ready to wear! How cute are these little arch threader earrings?!
-
Here’s another way to make threader earrings

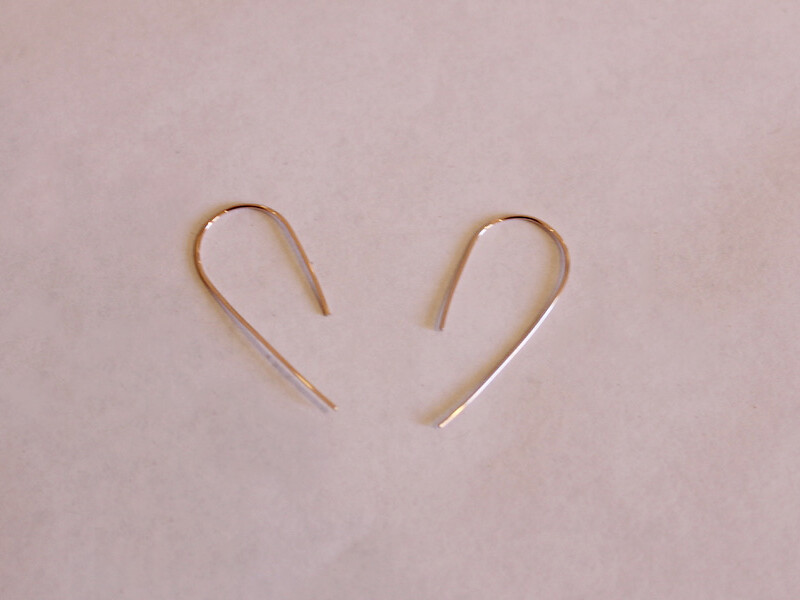
So we’ve already had a couple of tutorials that show you how to make square top threader earrings, which you can find here and here. So here’s one that shows you how to make threader earrings with a curved top.
You will need the following tools and materials to make these earrings:
1: Pliers (you will need cutting pliers to cut your wire).
2: Two pieces of wire the same length. I used some rose-gold fill wire. Mine were approximately 8.5cm long.

3: A pen or something else that is round to bend your wire around.
4: Tape.
5: A file.
Follow these steps to make your curved threader earrings:
1: Line up the ends of the wire and tape it to your pen.

2: Gently push the wire around the pen until you have the shape you like.


4: Take the earrings off the pen.

5: Use the file to smooth down the ends of the earrings so that they are the same length.
Once you have finished filing your earrings are finished and ready to wear! Who thought it would be so easy to make such delicate and elegant earrings.
You can find another way to make curved wire threader earrings here.
This tutorial contains affiliate links.
-
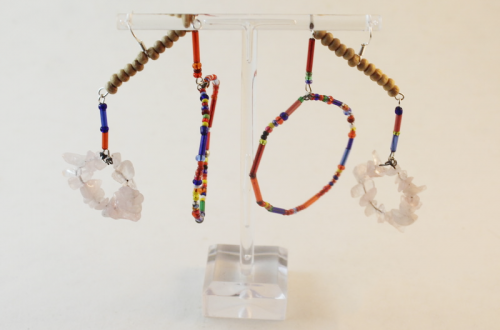
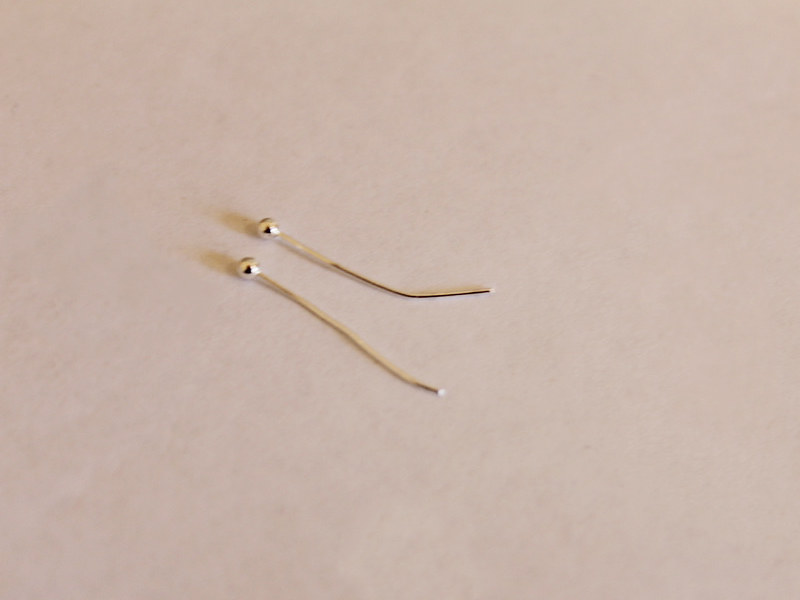
Want Something Simple and Delicate for Your Ear Lobes? Make Some Dainty Threader Earrings!
Threader earrings are simple to make and stunning to wear, these simple earrings thread right through your piercings and dangle delicately. Add your favorite gemstones to the end of your earrings for a unique and edgy look.
You will need the following tools and materials to make your earrings:
1: Pliers. You will need your round nose pliers for these earrings.
2: Two threader earrings with jump rings attached.
3: Two small head pins.

4: Beads of your choice. I used these grey freshwater pearls.

Follow these steps to make your threader earrings:
1: Add each bead to each of the head pins.


2: Bend each pin at a right angle to the bead using the round nose pliers.

3: Loop each head pin around the barrel of the round nose pliers to form a closed loop.


4: Open the jump ring at the end of the earring.

5: Add a bead charm to each of the threader earrings and close the jump ring to secure it in place.


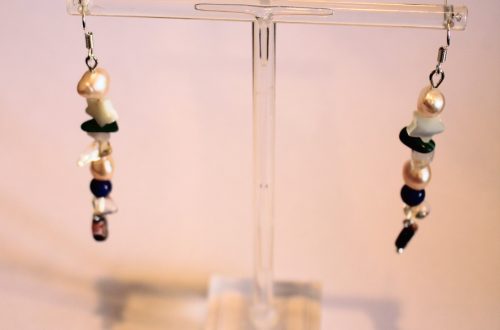
Once your charms are in place your earrings are ready to go, thread them in and head on your way!


These threader earrings have multiple bead charms made with moonstone and garnet beads.


If you LOVE these threader earrings I have some more threader earring tutorials for you, check them out by clicking on the links below. I’ve got six more threaders waiting for you!
- Delicate shell threaders
- Silver textured wire arch threaders
- Rose gold curved threaders
- Beaded wire threaders
- Glass fruit threaders
- Minimalist silver wire threaders
This DIY jewelry tutorial contains affiliate links.