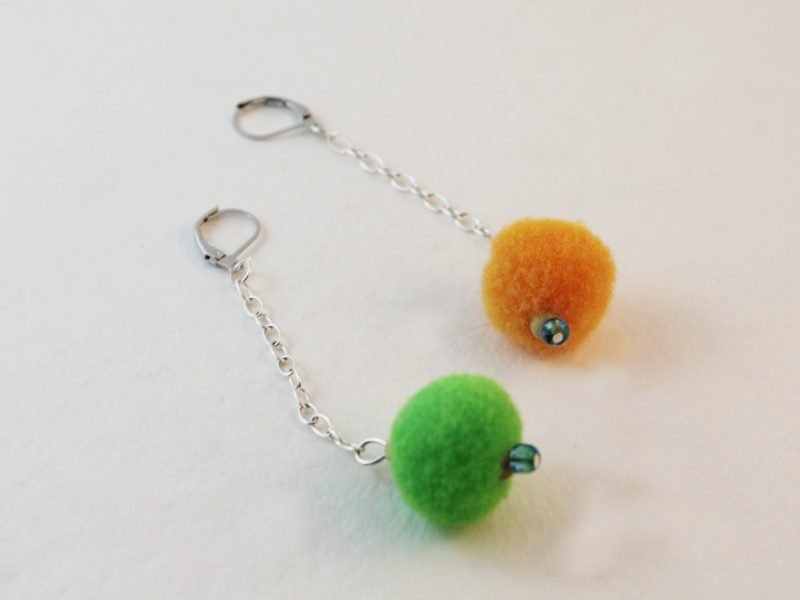
Liven up your earlobes with these fun pom pom chain earrings!
I love pom poms, they are such a fun and lively addition to simple jewelry pieces! It is so easy to inject some extra pizzazz into your jewelry designs when you use some bright and colorful pom poms. These earrings are a variation on my beaded chain drop earrings, I bet you’ll be able to have some fun experimenting with this design. There’s nothing more exciting than playing around with color and texture in your DIY jewelry designs!
You will need the following tools and materials to make these pom pom chain earrings:
1: Pliers. You will need your flat nose pliers, round nose pliers and cutting pliers to make these earrings.

2: Two pom poms. I used two different colors for my earrings.
3: Two head pins.

4: Two earring hooks.

5: Two small pieces of chain. The length depends on how far you would like your earrings to dangle!

6: Two jump rings.

7: Beads of your choice. I used two blue glass e-beads and four small timber beads.

 I love designing with timber beads, you can order your own right here:
Here are the steps to make these pom pom chain earrings:
1: Add the beads to each of the head pins. I placed a blue glass bead and one timber beads on each pin.


2: Add a pom pom to each head pin.


3: Once the pom poms have been added, add another bead to the top of each pom pom.

4: Once all the beads and pom poms have been added, use the round nose pliers to bend each pin at a right angle to the beaded section.


5: Use the cutting pliers to trim each pin approximately 1cm (0.4 inches) from the beaded section.


6: Once each pin has been trimmed, create a loop at the top of each pin using the round nose pliers.


7: Open each loop at the top of each pin slightly and add a piece of chain to each pom pom charm. Secure the chain in place by closing the loop using the round nose pliers.


8: Open a jump ring and add the earring hook.

9: While the jump ring is still open, add the chain with the charm attached as well.

10: Close the jump ring to secure the earring and chain in place.

11: Repeat steps 8 to 10 for the second earring to complete the pair.

DIY Jewelry Hub
Welcome to DIY Jewelry Hub. If you’ve ever wanted to learn how to make your own jewelry this is the place to start! Jewelry is a great way to show off your individuality and style. You’ll be surprised at how easy it is to create your own unique pieces! DIY Jewelry Hub will equip you with all the knowledge and inspiration you need to make your own jewelry.
You May Also Like

These triangle earrings are SICK! Make yours today!

Update your worn out costume jewelry with this cool trick!