-
Feeling Romantic? Here’s Some Valentine’s Day DIY Inspiration!
Do you want to make sure that your honey receives something EXTRA special this Valentine’s Day? If the answer is a big loud YES then have I’ve got some sweet DIY jewelry gift ideas for you.
If you’re anything like me, you know that there is nothing more special than giving someone a beautiful gift that you made yourself. If you’ve got a spare afternoon you’ll be able to whip up one of these beautiful DIY jewelry gifts for your special someone ready to impress them on Valentine’s day this Sunday.
Check out these adorable Valentine’s Day gift ideas:
1: Make a special piece of jewelry using a souvenir from a memorable trip.
Use a key chain or a charm purchased overseas to make a stunning and sentimental piece of jewelry.


2: Make a special charm bracelet featuring charms that are meaningful to yourself and your significant other.

I honestly cannot think of any item of jewelry that is more sentimental than a charm bracelet, so surely one that you’ve made yourself will be the most romantic treat! If the idea of giving a unique charm bracelet this Valentine’s Day tickles your fancy, here is my easy charm bracelet tutorial so you can make one of your very own.

Alternatively you could try and make this special beaded charm bracelet, ensuring that your chosen charm stands out on the wrist of your beloved.

3: Make something together!
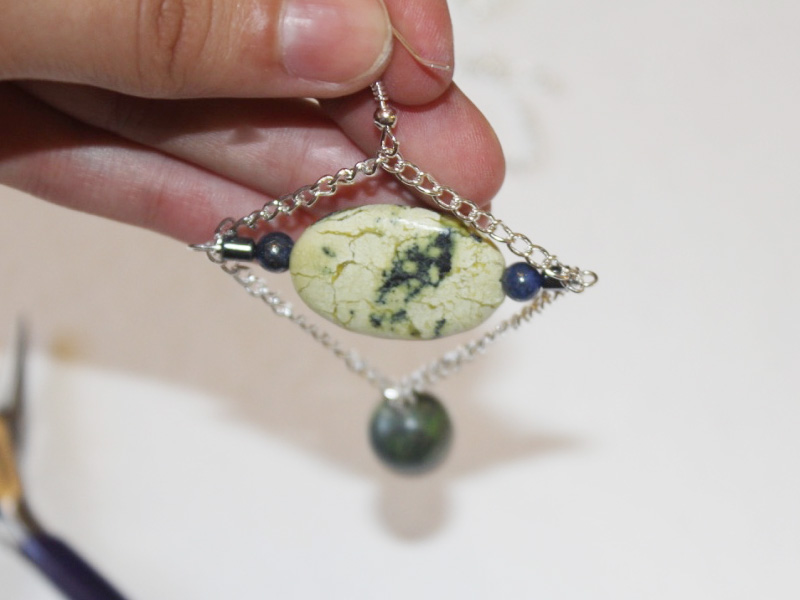
What could be more romantic than creating a special memory making some incredible jewelry together? Pick a tutorial, some pretty materials and get to making. You could even make pieces for each other, how cute is that? I recommend that you make these diamond drop earrings together… Because diamonds that you make yourself are sure to last forever!
4. Celebrate your friends with friendship bracelets.

If you don’t have a special someone in your life this Valentine’s Day, why not celebrate some fabulous friends instead. Show them your appreciation and create a memento of your friendship by making them a beautiful and sweet friendship bracelet. Try making this braided charm connector friendship bracelet, or have some fun with some shiny glass beads and make this classic bracelet design for all the wonderful friends in your life.
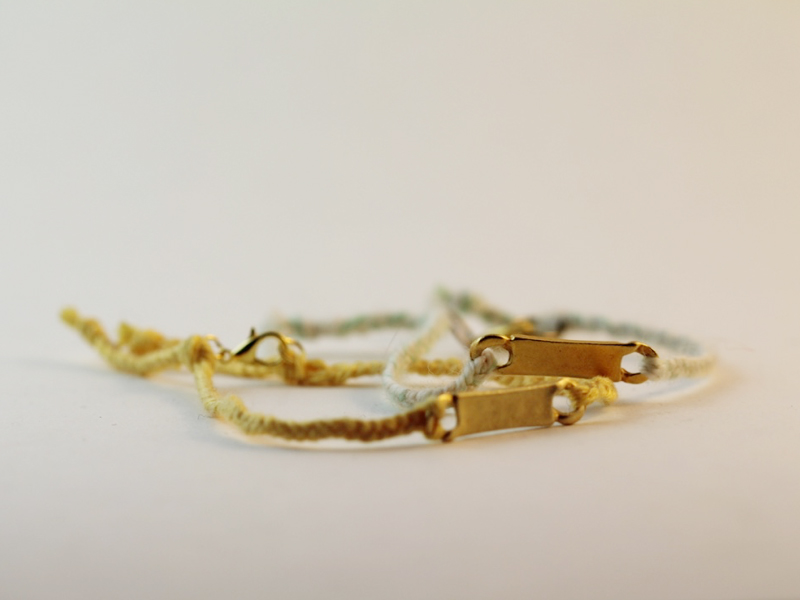
These are just a few ideas for sweet handmade gifts that you can give to your sweetie this Valentine’s Day, and if you are REALLY stuck for ideas, try making my cute Valentine’s bracelet. Happy making, they’ll love you for it!
-
Wear Your Adventures: Taking DIY Jewelry Inspiration From Your Travels
While on my own travels I have been inspired to share my tips for acquiring special jewelry making materials while on the go! Traveling is so wonderful for so many reasons, but I think that one of the most exciting things about traveling to new places is the opportunity to obtain some beautiful and special DIY jewelry supplies. I have been lucky enough to travel to some wonderful destinations and I almost always return home with a suitcase full of beads, pendants, charms and stones. Jewelry making materials that I have brought home from overseas travels always hold an extra special quality about them; anything I make with them will instantly remind me of the places I’ve been and the wonderful experiences I had there.
Here are some of my tips and tricks for collecting DIY jewelry making materials while you are traveling.
1: Visit markets. I almost always find beautiful and affordable jewelry making materials when I visit markets in any city. Don’t be afraid to sift through trays of assorted knick-knacks and vintage findings, you never know what treasures you might find inside.
I got this rhinestone charm for one Euro at an Amsterdam market. 
This ring was made with a shell button that I found at a market in Papeete, French Polynesia. 2: Repurpose pre-made pieces. Sometimes I will buy beaded bracelets or necklaces that I later take apart so that I can use the materials in my own designs. If you love the beads on a piece but you don’t love the design, don’t be afraid to make that purchase… you can always dismantle it and make something super special later.

These pearl beads came from a bracelet that I bought in French Polynesia that later fell apart. 3: Key chains can make for wonderful pendants. Key chains aren’t usually made in the finest of materials, but if you are looking for a souvenir that you will actually use, you could try turning a key chain charm into a cute pendant to hang around your neck instead.
This citrine charm was originally a key chain that I purchased in Banff, Canada. 4: Visit small or hidden stores. Smaller stores often stock all sorts of goodies that you might not normally see in larger stores or chain stores. Like markets, smaller, locally owned stores are likely to be the places where you find the real DIY treasures!

I found this pretty charm in a little store in San Gimignano, Italy. 6: Just explore. Get out there are wander around, you are bound to stumble upon something wonderful to take home and turn into amazing, one of a kind jewelry designs.
8: Use your travels as inspiration for your own special jewelry designs.
- You can use the colors you saw on your travels as inspiration for new bead combinations.
- Look at what the locals are wearing, their everyday style could influence yours
- Consider using new materials; collect fabric samples, new beads, metal charms and small decorative items to incorporate into your designs.


I bought these glass fish beads on a trip to Hawaii. 
These pretty lace agate beads were also found in Banff, Canada. -
Don’t Let Them Get Bored These Holidays! DIY Jewelry Crafts for Kids
The end of the calendar year often coincides a little extra down time and the chance to with time spent with family and friends, if you’ve got any kids running around you might be starting to think about how you can entertain them during the holiday period. If you’re struggling to think of some inspired ideas on how to keep the kids busy this festive season I’ve got some fun DIY jewelry craft suggestions for you!
1: Check out my finger knit bracelet tutorial. All that is required for finger knitting is some yarn and some fingers (and a pair of scissors). You can get the kids inspired to finger knit all kinds of DIY goods, from bracelets and necklaces to hair accessories or even some new pieces to decorate your home with!
2: Why not try getting the kids into making bangles and pendants out of colorful pipe cleaners? These wire pipe cleaners are easy to bend into shape with little hands, and they are pretty fun to play around with too, I had a great time making these pretty pastel bangles.
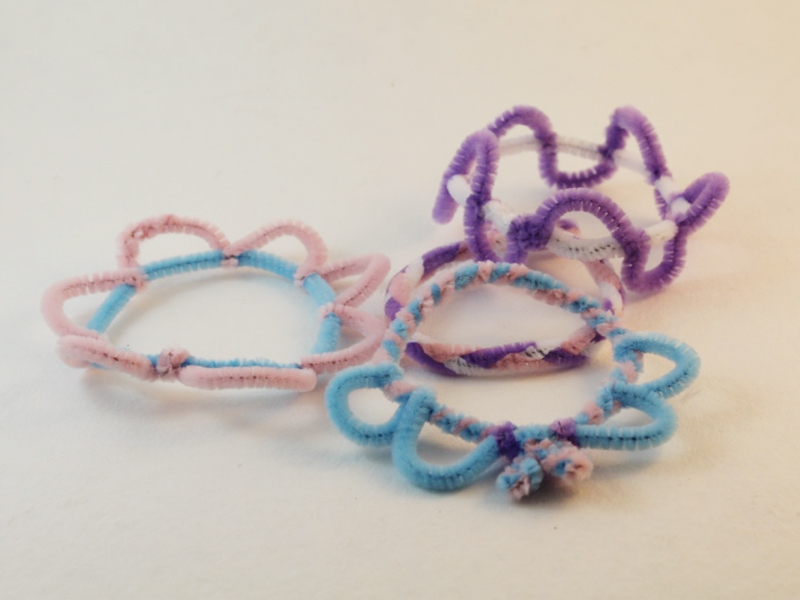
Get some chenille pipe cleaners to play around with right here:
3: Do you remember my elastic bead bracelet tutorial? This is the perfect jewelry tutorial you can follow along with the little ones. These elastic beaded bracelets are easy to make and they’ll have lots of fun picking out lots of colorful beads to include on their handmade bracelets. Make sure to supervise because beads can be a choking hazard.
4: Maybe you are stuck for festive gift ideas… why not put together a bespoke DIY jewelry kit as a present for a crafty kid? Load it up with lots of big and bold plastic beads, pipe cleaners, pom poms and lots of other goodies and let them work away on all their creative ideas!

Whatever you decide to do I think it should be creative, colorful and fun fun fun. Happy crafting!
-
How do You Show Yours Off? Here are My DIY Jewelry Display Tips
You can’t wear your favorite DIY jewelry pieces all the time, but that doesn’t mean you have to hide them away in a box either. Here are a couple of ideas for displaying your DIY jewelry creations all the time.
1: Hang your jewelry on the wall.

If you aren’t afraid to add some extra nails to your walls then hanging jewelry like it is art is a great way to show off your DIY jewelry making skills and it allows you to admire your handiwork even when you aren’t wearing your favorite pieces!
2: Place your jewelry into decorative bowls and dishes.

If you aren’t interested in adding any extra holes to your walls, consider placing your DIY jewelry pieces into open topped trays, boxes or bowls so that they can be admired on the shelf. This method of display also has the added benefit of making your pieces easy to find when putting outfits together!
How do you display your jewelry? Share your ideas with me in the comments section or via social media, you can find me on Instagram, Pinterest and Twitter.
-
How to Measure Your Ring Size So You Can Make Sure Those Sparkler’s Fit Perfectly.
There are many complicated ways to measure your fingers for DIY ring making, but when you are just working on rings for yourself, these simple methods will do the trick!
Method 1.
All you need for this measuring method is a soft measuring tape and your hands!

Wrap the measuring tape snugly around your chosen finger, make a note of the length by looking at where the end meets the tape again.


You can then use this measurement to cut your ring wire to length. When you cut your wire, make sure you add a little extra to account for the thickness of both the wire and the beads you are using. This is more important when using thicker gauge wire.
Method 2.
This method is a little more involved but comes in handy when you don’t have a flexible measuring tape available. For this method you will need some scrap paper, some scissors and a pen.


Step 1:
Using the scissors, cut a thin strip of paper that will be long enough to wrap around your finger.


Step 2:
Wrap the piece of paper around your chosen finger, folding at the point where the end meets the paper again.


Step 3:
Mark the fold using the pen.

Step 4:
You can check the length using a ruler or cut your ring wire against the paper. You will need to make sure you add a little extra length to your wire to account for the thickness of your beads and wire.

And there you have it, two easy methods for measuring your ring size!
If you want to be more accurate here are some ring measurement tools:
This tutorial contains affiliate links.
-
Style Inspiration: How to wear (and absolutely rock) your DIY Jewelry Creations
I wear jewelry every day, over the years I have developed some fun and interesting ways to style my jewelry accessories. I thought I would share a few of my favorite DIY jewelry styling tips with you here.
1: Stacking and layering.
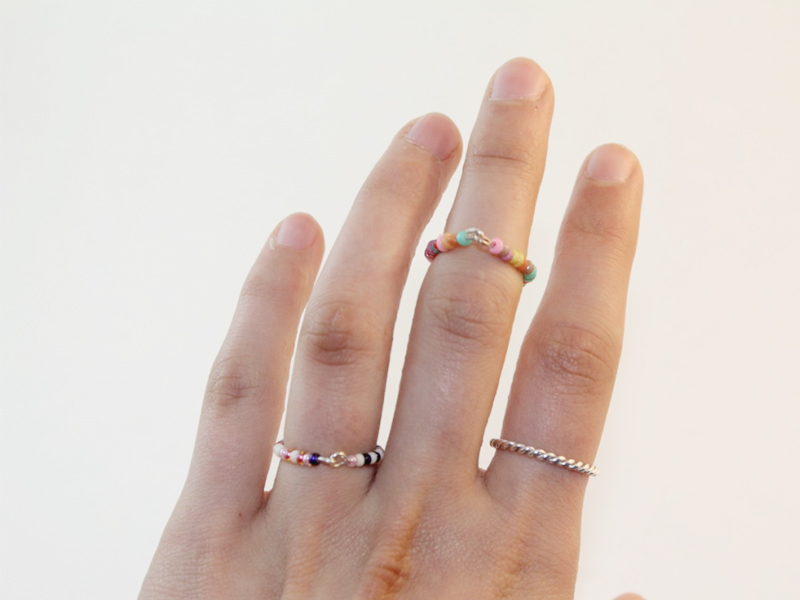
I layer my jewelry all the time! One piece just never feels like enough. Sometimes I like to stack my bracelets and bangles on both wrists, and other times I just leave one adorned. I also like to stack my rings and necklaces and I think that layering delicate necklaces can look particularly charming.
Why not try layering a couple of bar charm necklaces or some cute beaded bangles like I have here?


When it comes to rings, stacking rings of different sizes can be a fun way to wear them. I love to have my fingers hands covered with shiny baubles!
2: Make your designs POP by wearing neutral colors
Some of my jewelry designs, particularly the earrings, are very bold. I like to make my DIY jewelry accessories stand out by wearing them with a pared back, neutral outfit. My colors of choice are usually grey and black, which are great base colors for making your bright and beautiful earring designs really stand out.
3: Don’t be afraid to mix metallics
I usually think of gold and silver as neutral colors. They look great with everything! Don’t be afraid to layer up with lots of shiny metallic jewelry. It’s also been said that gold and silver don’t go together… I say they most certainly do! One of my favorite styling tricks is to layer gold and silver colored necklaces and bracelets together. Delicate chains work together to create a unique layered look.
4: Mix your gemstone jewelry with other materials
If you have a lot of jewelry that you have made using gemstones and precious metals, you might be tempted to only wear these pieces with other gemstone designs, but I like to mix it up and wear my more ‘precious’ pieces along with jewelry made from other materials like glass beads, shell and knitted strands. Combining materials adds texture and interest to your look and helps you to avoid looking to ‘done’ or prissy!

So there you have it, these are my tips for styling my jewelry. How do you like to wear yours? I’d love to hear how you like to wear your DIY jewelry, comment and share your styling tips with me!
-
Don’t Like It? Recycle It! Here’s Why You Should Consider Recycling Your Old Jewelry
I’m a bit of a jewelry hoarder; rings, beads, necklaces and charms seem to just appear in my jewelry box (lucky me)! Some pieces have stayed firm favorites over the years; others however, don’t quite stand the test of time for a myriad of reasons.
I hate see jewelry sit around unworn so I try to reinvent those pieces that are tired, worn out or that are just ‘not quite right’. Jewelry and accessories are a great addition to a boring outfit, rather than buying new pieces, why not recycle some older jewelry to bring new life to your wardrobe?
I think recycling jewelry is one of my favorite DIY jewelry making tricks. I have made many special pieces using old pieces of jewelry that have broken, become dated or don’t quite match my style any more. Scroll down to check out some of my recycled jewelry designs.
Happy making!

This star charm came from an old pair of earrings. 
This plain metal bangle was made more exciting with the addition of some glass beads. 
This braided bracelet features a charm from a childhood necklace. 
I sprayed these rhinestone earrings with red spray paint. 
These bangles have been covered with ribbon and a beaded loom strand. 
These mismatched stud earrings were made using a glass charm and a polished gemstone. 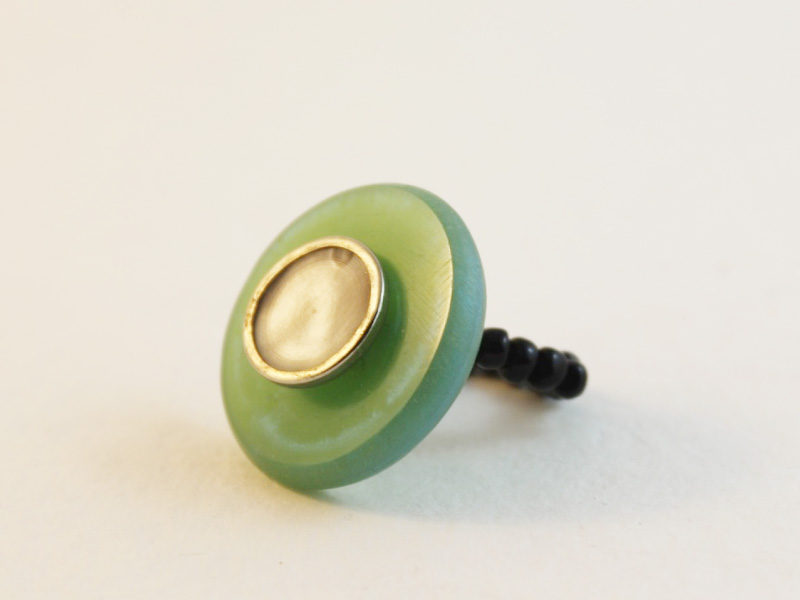
The green disc on this ring comes from an earring and the center piece is made from a shell button. 

These bangles were updated with some ribbon and some knitted I-cord. -
Here’s why You Should start Giving DIY Jewelry Gifts

Buying gifts for people can be tricky, they can be expensive, difficult to find or just uninspired. Sometimes, the thought of having to head out and choose a gift for someone can be almost too overwhelming. So why not try making gifts for the special people in your life instead? I love making jewelry for different occasions, bracelets, earrings, necklaces and all kinds of other jewelry pieces make great gifts for all kinds of celebrations.
There are so many great things about giving someone one of your very own DIY jewelry designs. My favorite thing about giving a handmade jewelry design as a gift is that I know that they won’t already have one! Isn’t it the worst when you think you’ve found someone the perfect gift only to find that they already have it?
Another wonderful thing about DIY jewelry gifts is that it makes your present seem that much more special. Giving someone something that you took the time and effort to makes it just that bit more sentimental… and when they wear it they’ll always think of you!
Another, slightly less adorable, reason why handmade jewelry gifts are so awesome is that they be a bit friendlier on the wallet. Making your own jewelry is often far less expensive than purchasing something that has already been made. How’s that for a bonus… you can keep your friends and your wallet happy at the same time!
To be honest, I can’t think of any reasons why you shouldn’t start making DIY jewelry gifts for your friends and family. Go on, get experimental and share your DIY jewelry designs with the people you love!
Get creating and have fun!
-
Stuck In A Rut? Here Are Some DIY Jewelry Design Tips
Sometimes you need a little bit of extra help when it comes to designing your own DIY jewelry, so here are some of my favorite tips and tricks that I use to design and make my jewelry.
My number one rule when it comes to designing jewelry is to go with your gut, I usually find that too much planning stifles creativity. My personal DIY jewelry design process is quite intuitive; I might choose a feature bead or a particular material and then select my colors and materials accordingly.
Choosing a color scheme can also be an interesting starting point for your designs. Selecting colors that are complimentary, contrasting or using a monochrome color scheme can lead to some stunning results. Color blocking your beads can also be a fun way to use different colors in your designs.

This bracelet design uses color blocking and texture blocking. Or you can just throw caution to the wind and a random assortment of multicolor beads like I have in this charm bracelet design.

This cute charm bracelet was made using a random assortment of colored seed beads. Check out my tutorial on how to make a beaded necklace for an example of a monochrome color scheme. I used mostly white and clear glass beads to create a monochrome background for the turquoise feature beads at the center of the necklace.
The fundamental steps for making your own jewelry are easy, once you’ve got them mastered you can start to explore, experiment and inevitably create your own incredible and unique DIY jewelry designs.
Go on, get making!