-
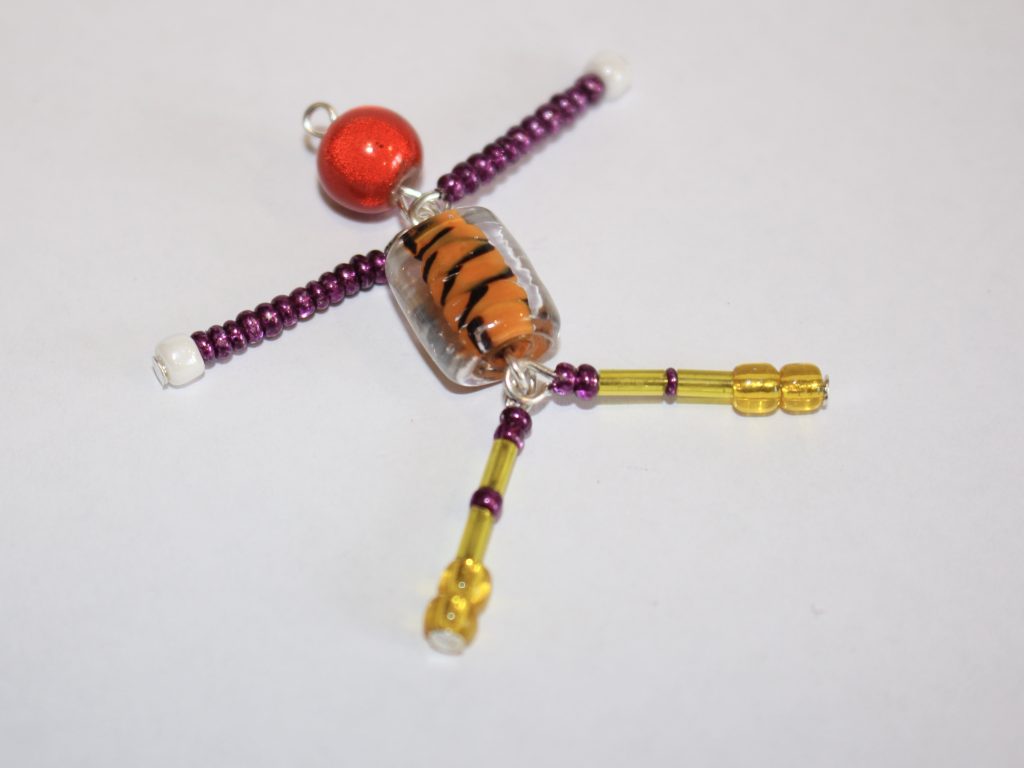
Here’s how to make a little person out of beads! This is such a cute tutorial!
I love things that look like other things, so I just had to make this little beaded body! This bead person is made using some head and eye pins and a bunch of beads. Please note that this tutorial contains affiliate links.
You’ll need these tools and materials to make this funny bead person charm:
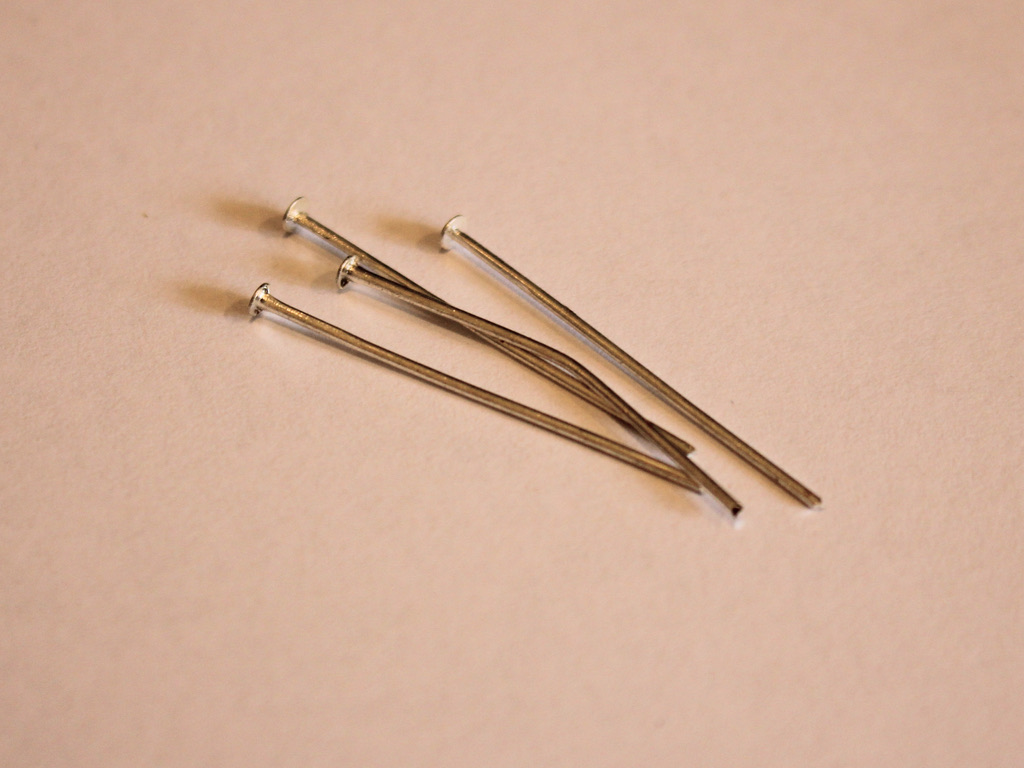
1: Pliers. I used my round nose, flat nose and cutting pliers for this piece.

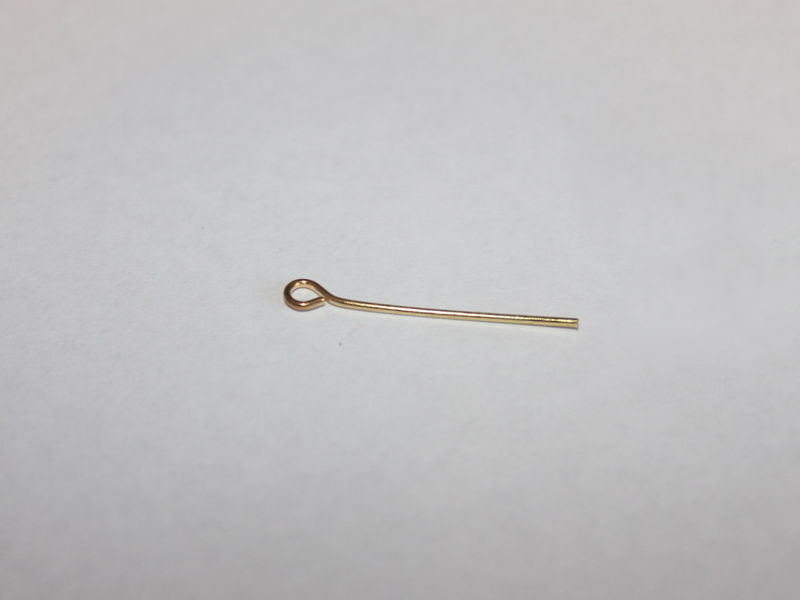
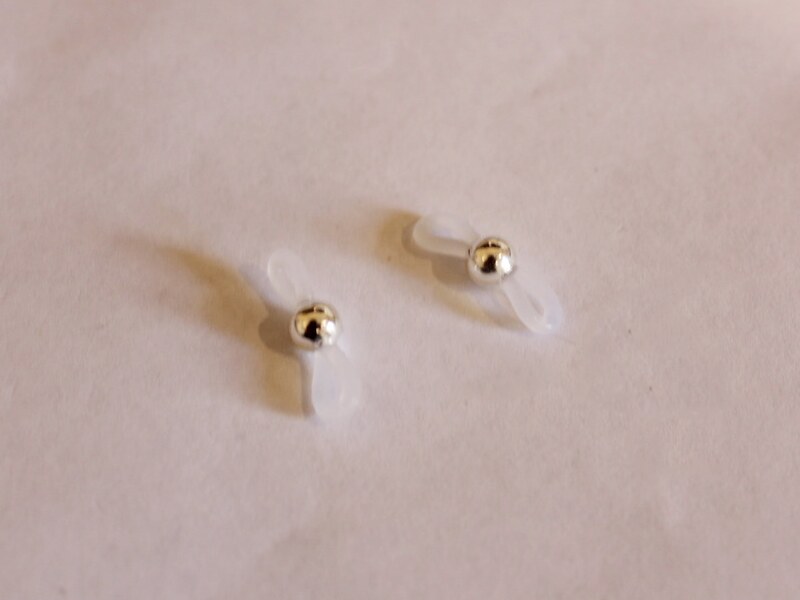
Cutting pliers (left), Round nose pliers (middle) and flat nose pliers (right) 2: Two eye pins, one longer and one shorter. These will be for the head and body.
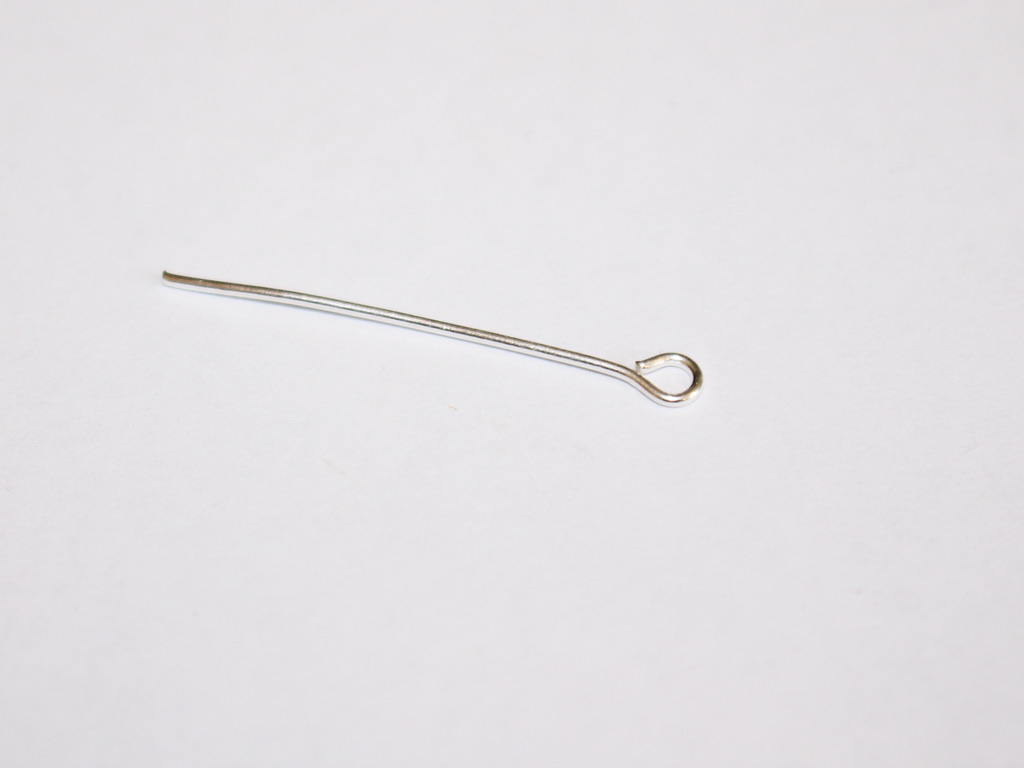
The longer eye pin 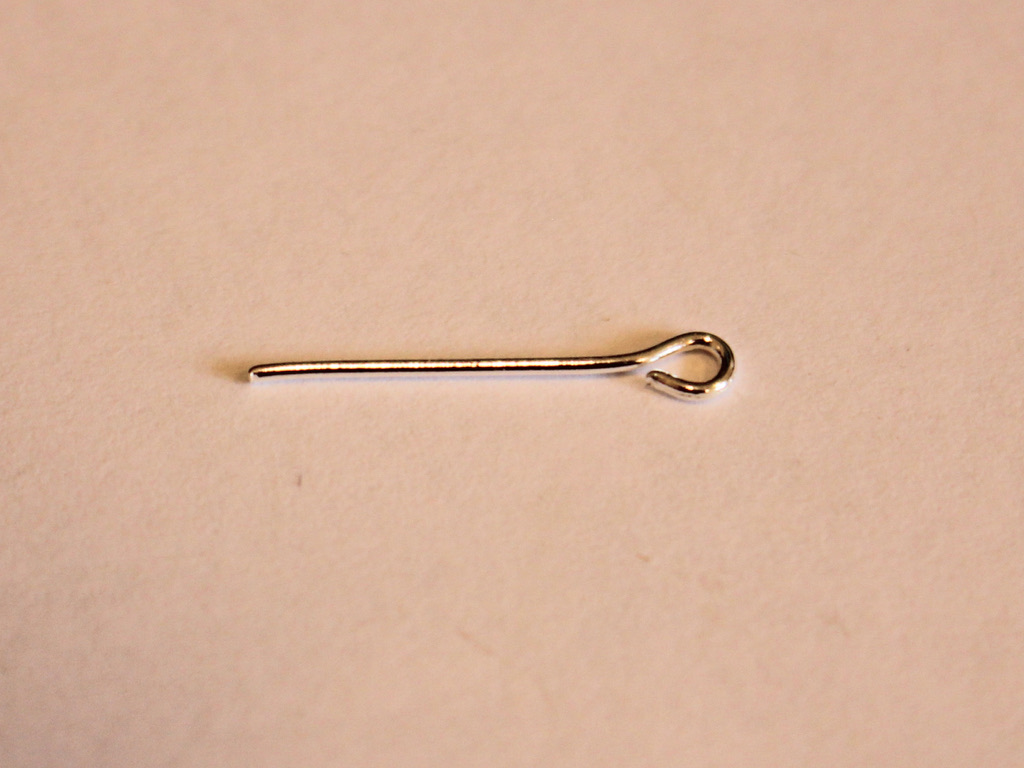
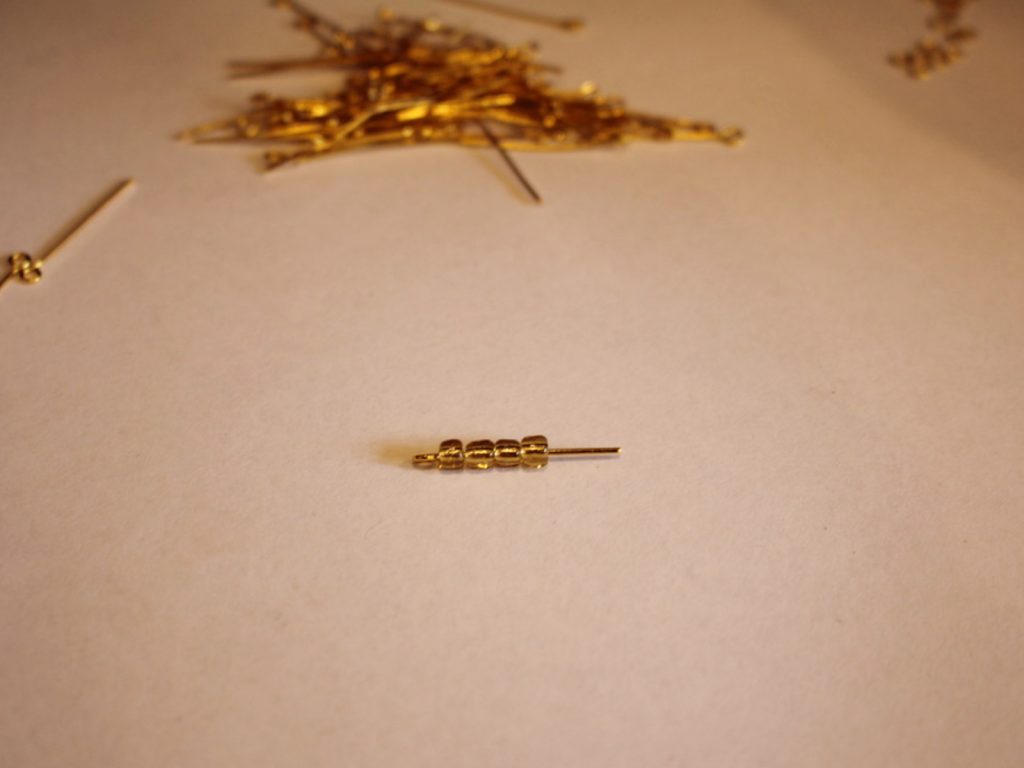
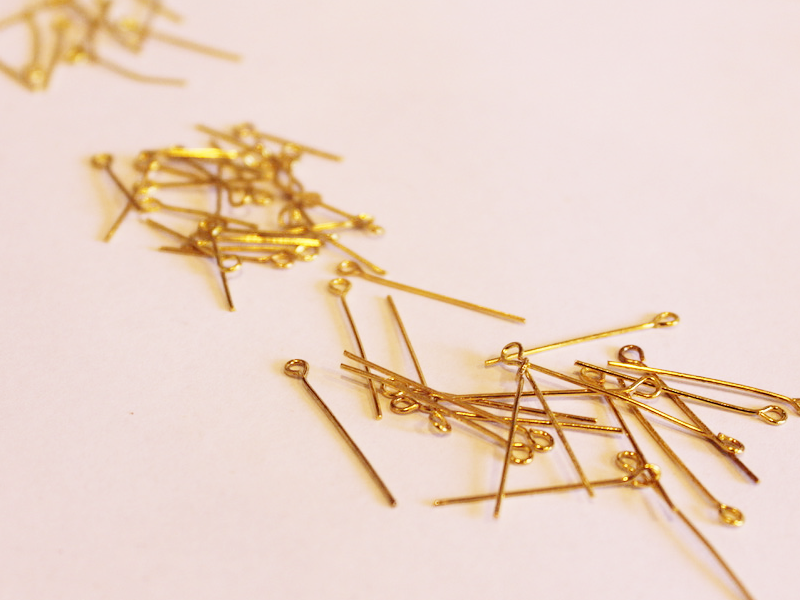
The shorter eye pin 3: Four head pins for the arms and legs.
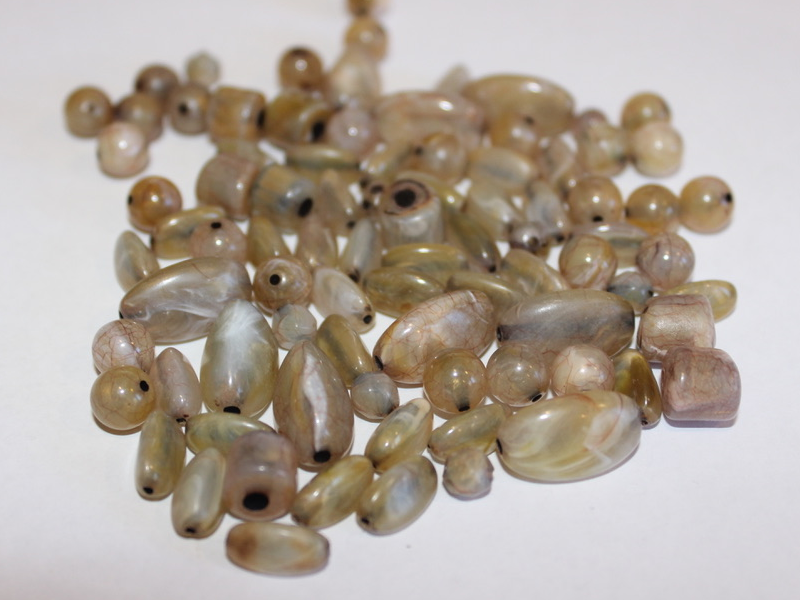
4: A selection of beads. You will need a round bead for the head and a larger bead for the body. I suggest going a bit crazy with your beads and using a mix of sizes and shapes to represent the different body parts.

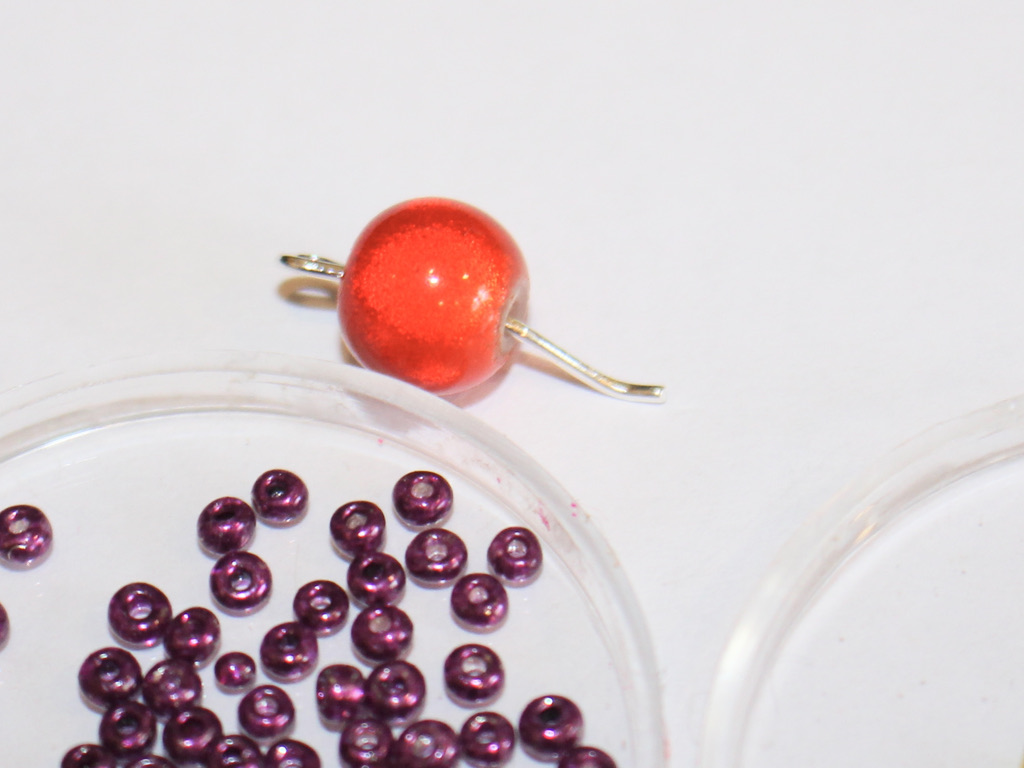
Link to a round orange bead:
Some body bead options:
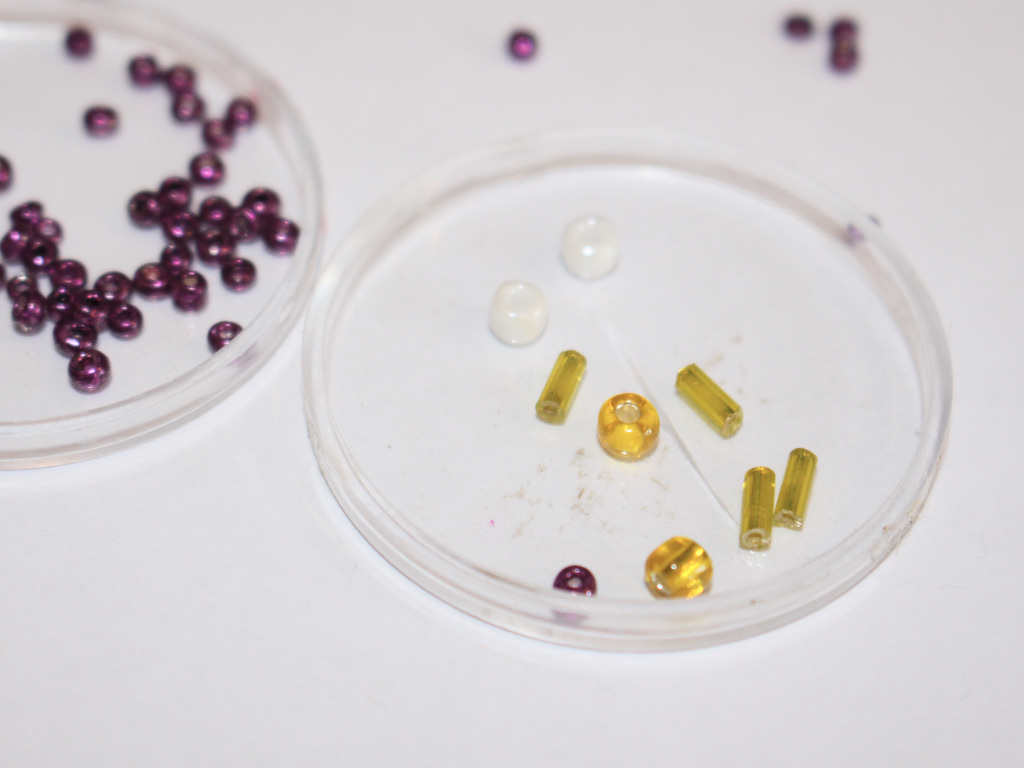
Mixed bead options:
And now here are all the steps to follow to make your bead person charm:
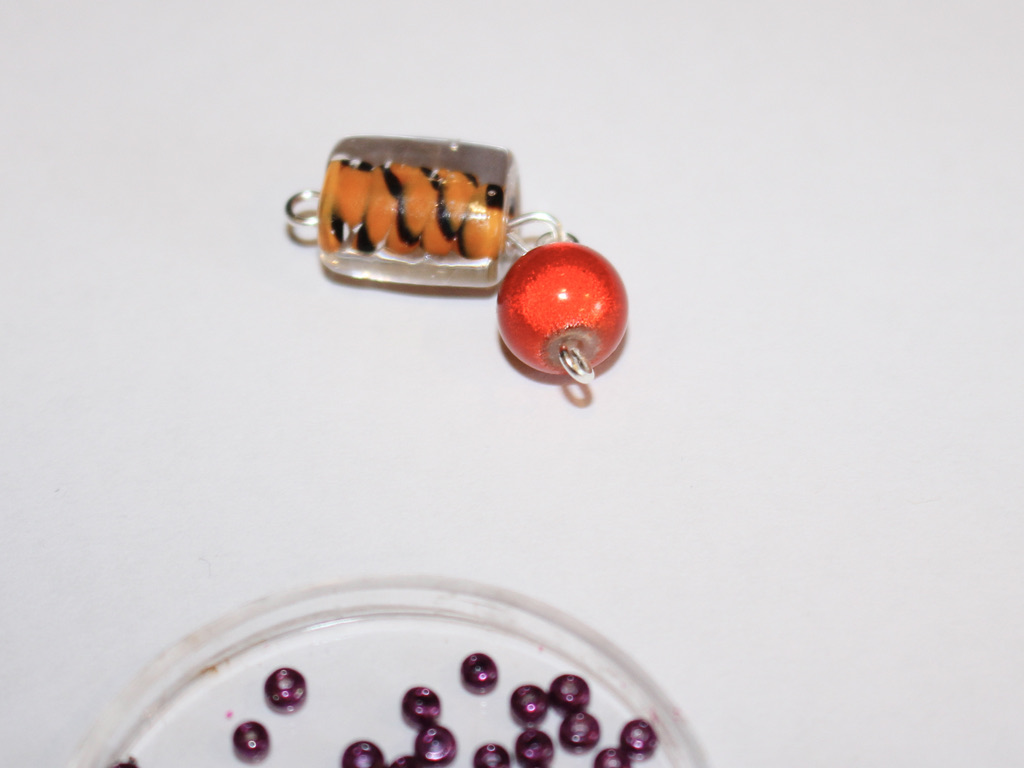
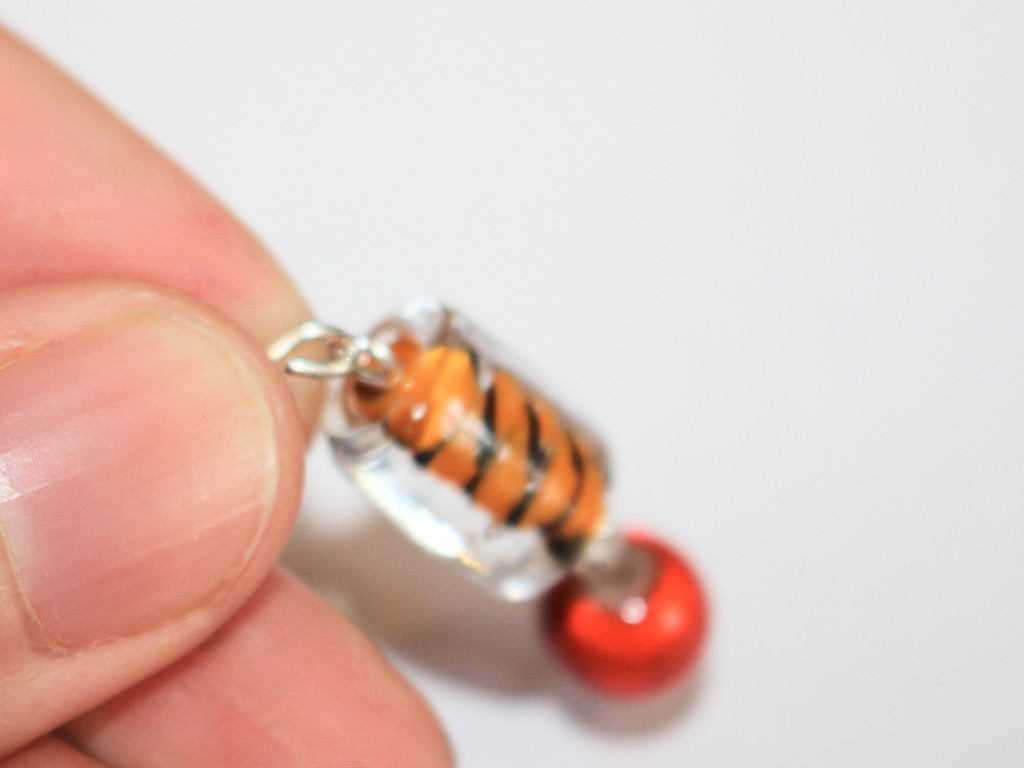
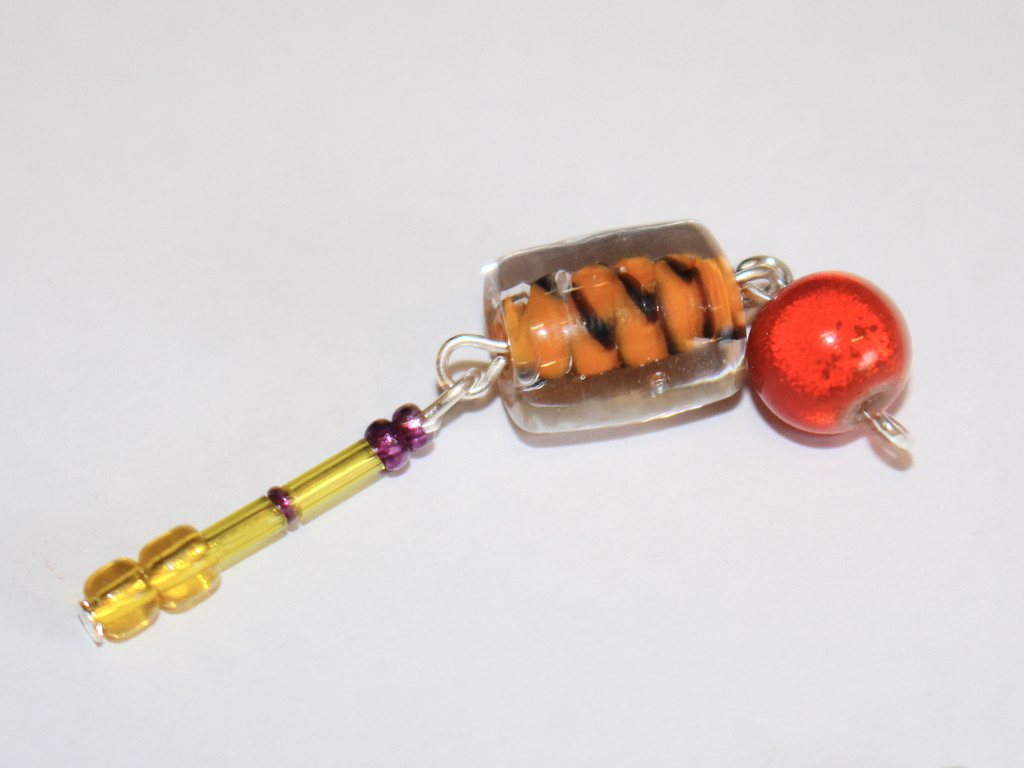
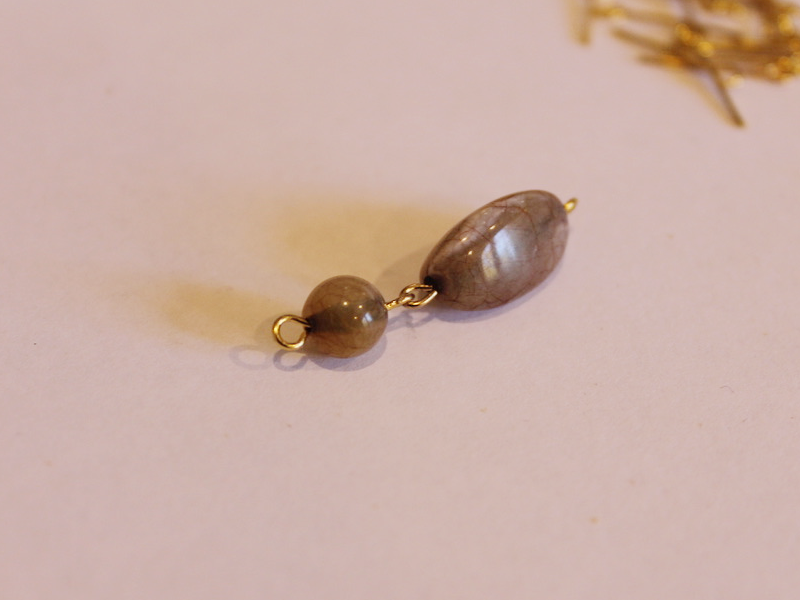
1: Take the shorter eye pin and put the round bead on it.
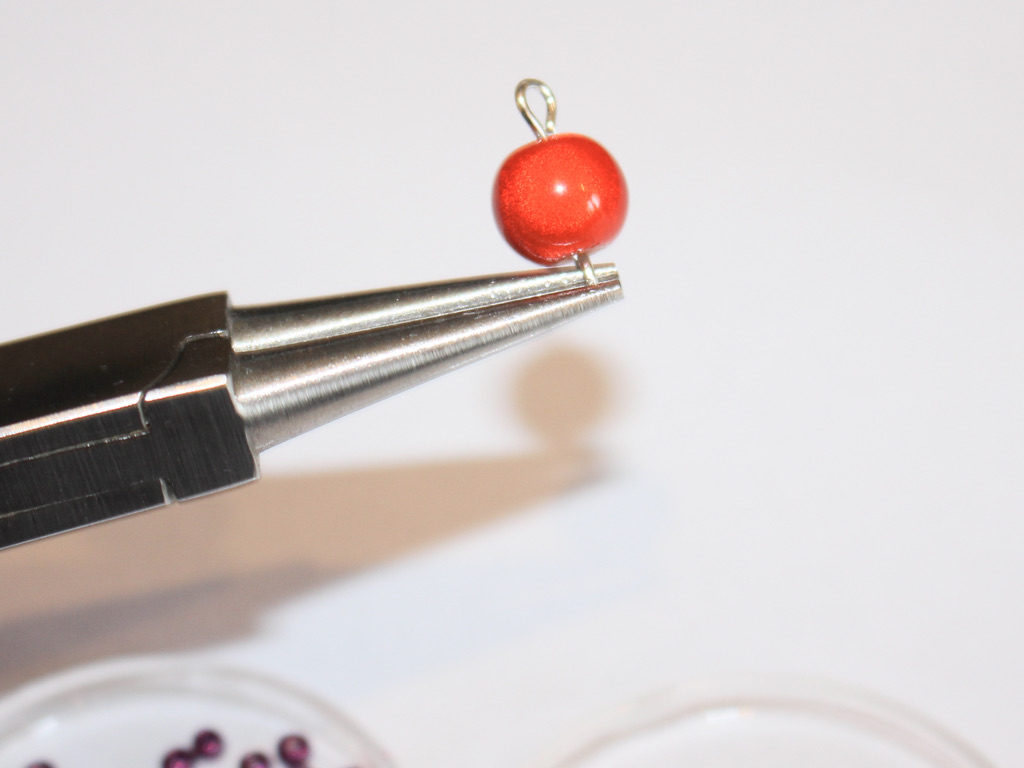
2: Bend the pin to form a right angle with the bead.
3: Create a loop at the end of the bead using the round nose pliers. This will secure the bead onto the pin.
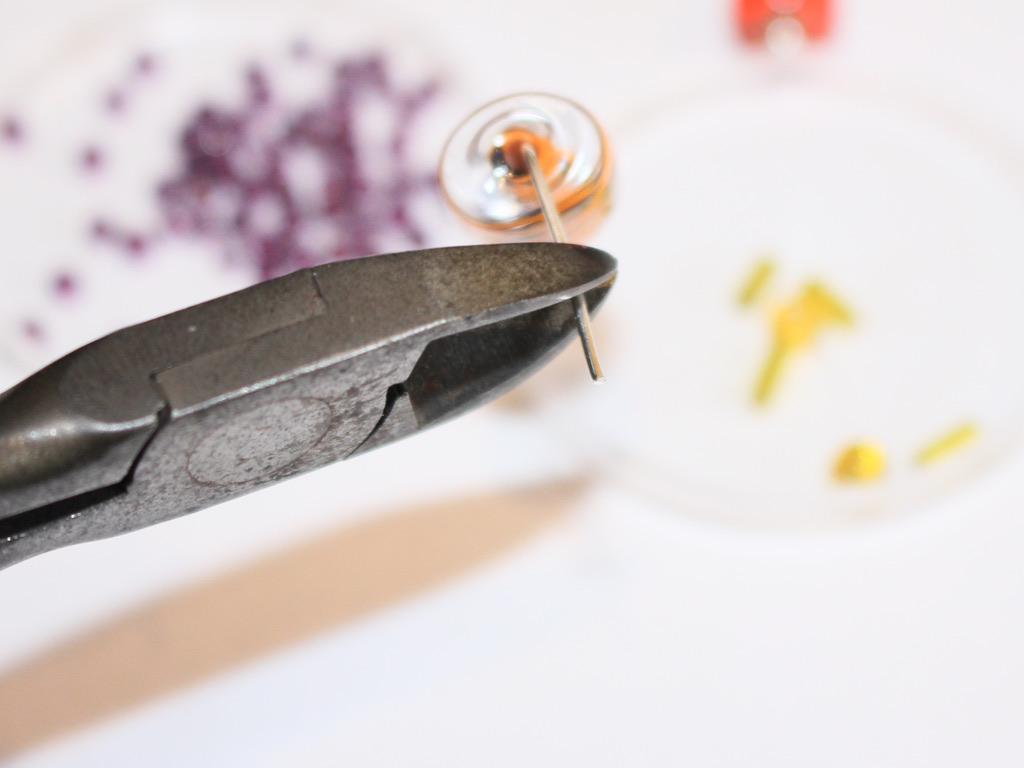
4: Repeat steps 1 and 2 for the larger bead and longer eye pin. I had to trim my pin for this one, to do this, I used my cutting pliers to cut the pin down so that there was about 1cm left of the bent part of the pin.

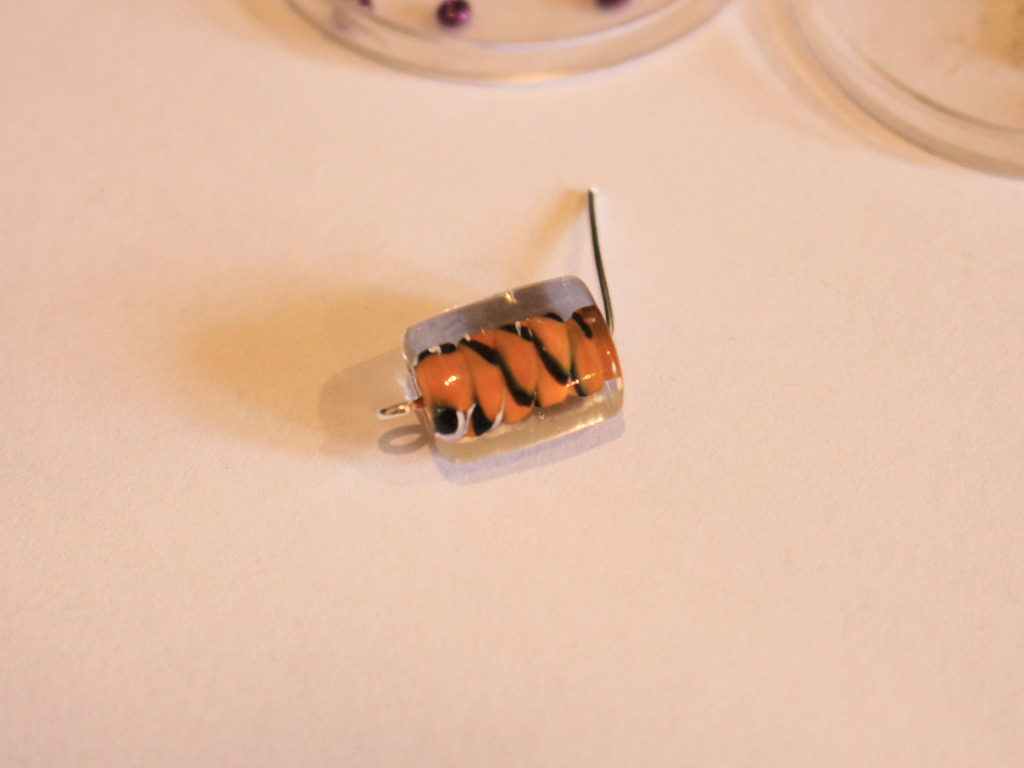
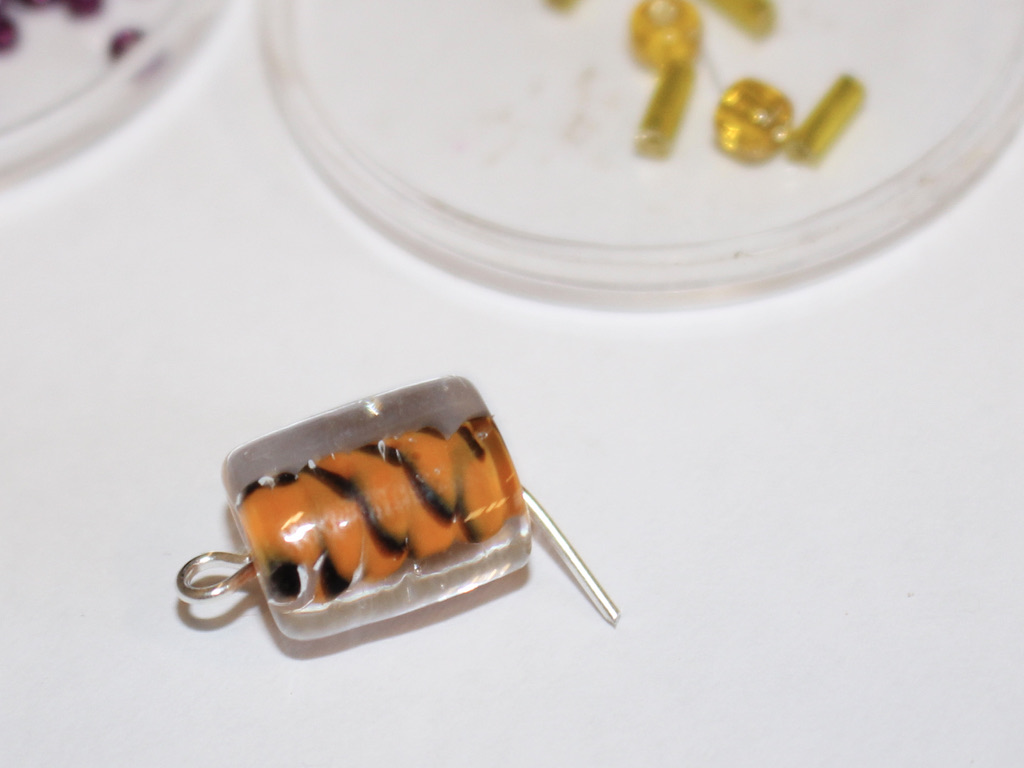
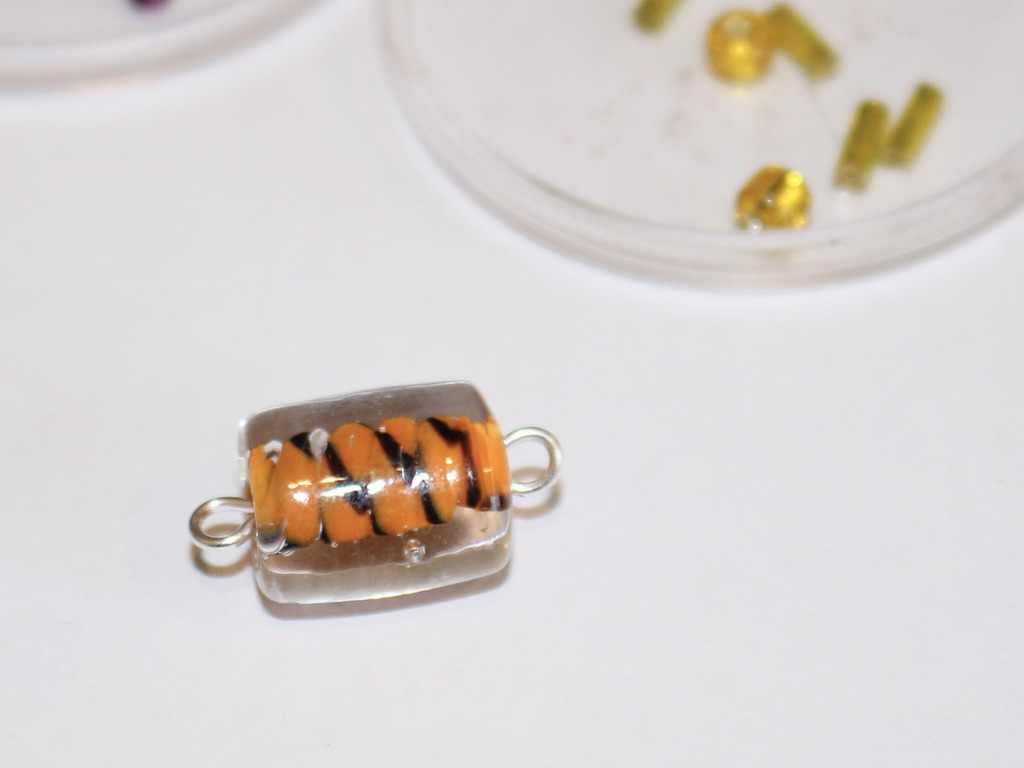
5: Once I trimmed the pin, I looped it to secure the bead in place using my round nose pliers.
6: Now you will need to open one of the bead loops on either the head or body charm to attach the head and body together. Close the loop once you have slid the charms together.

7: Set the head and body aside.
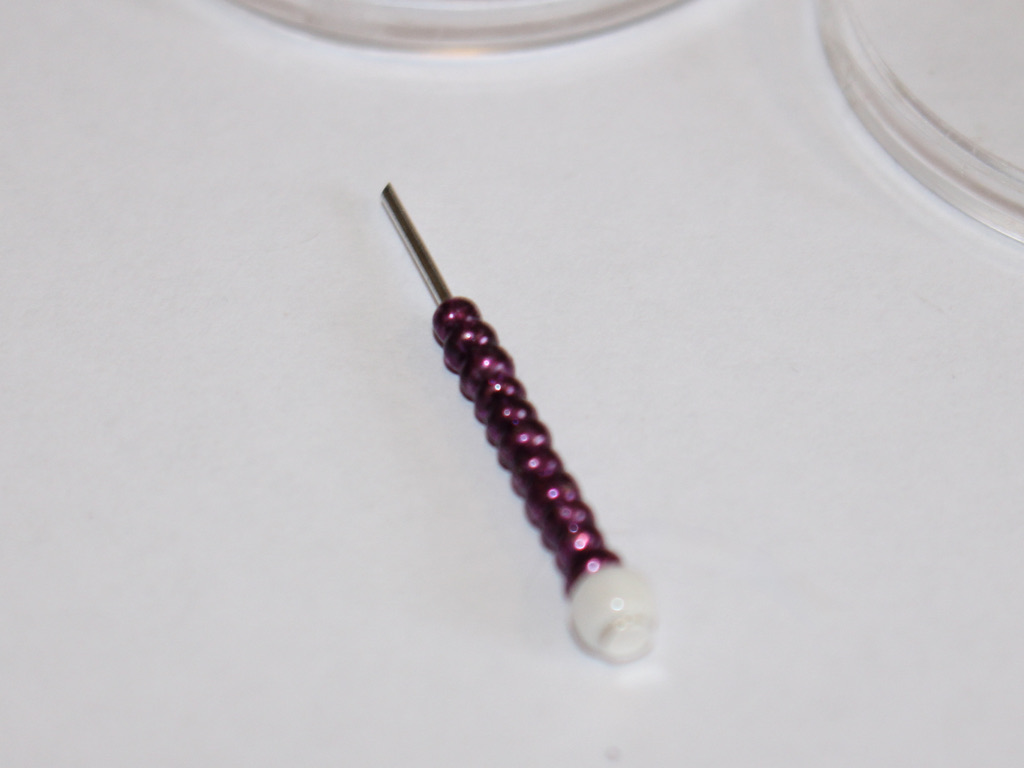
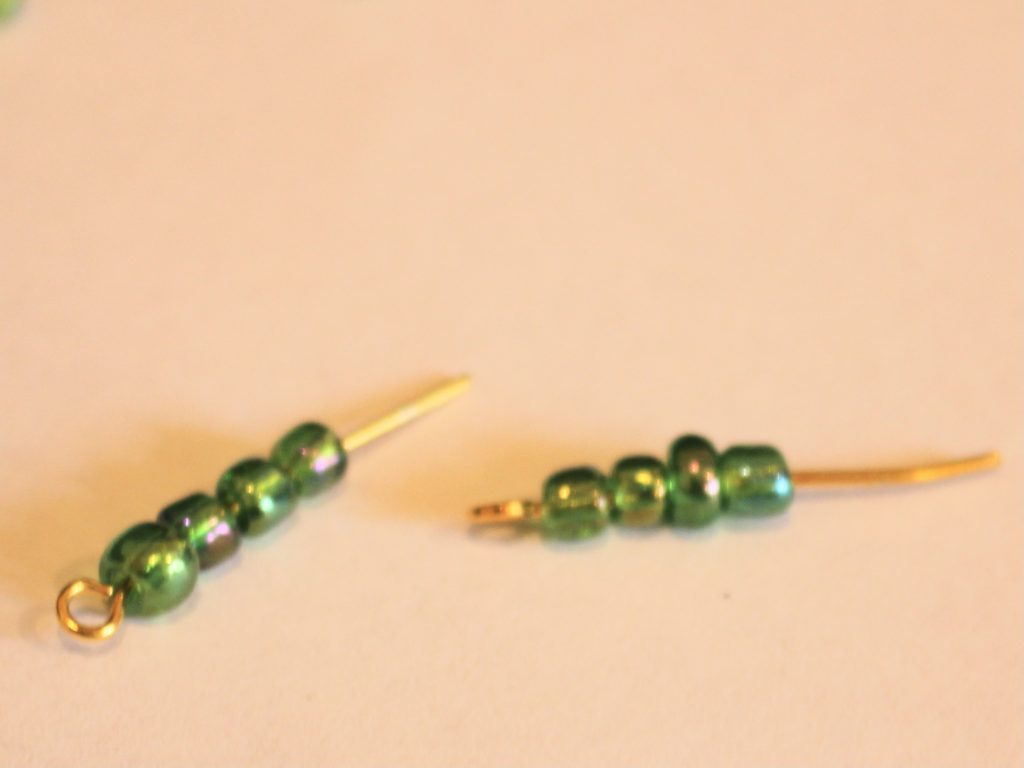
8: Add beads to each of the head pins to form the arms and legs. Get creative with the patterns and beads you choose.
Making the first arm 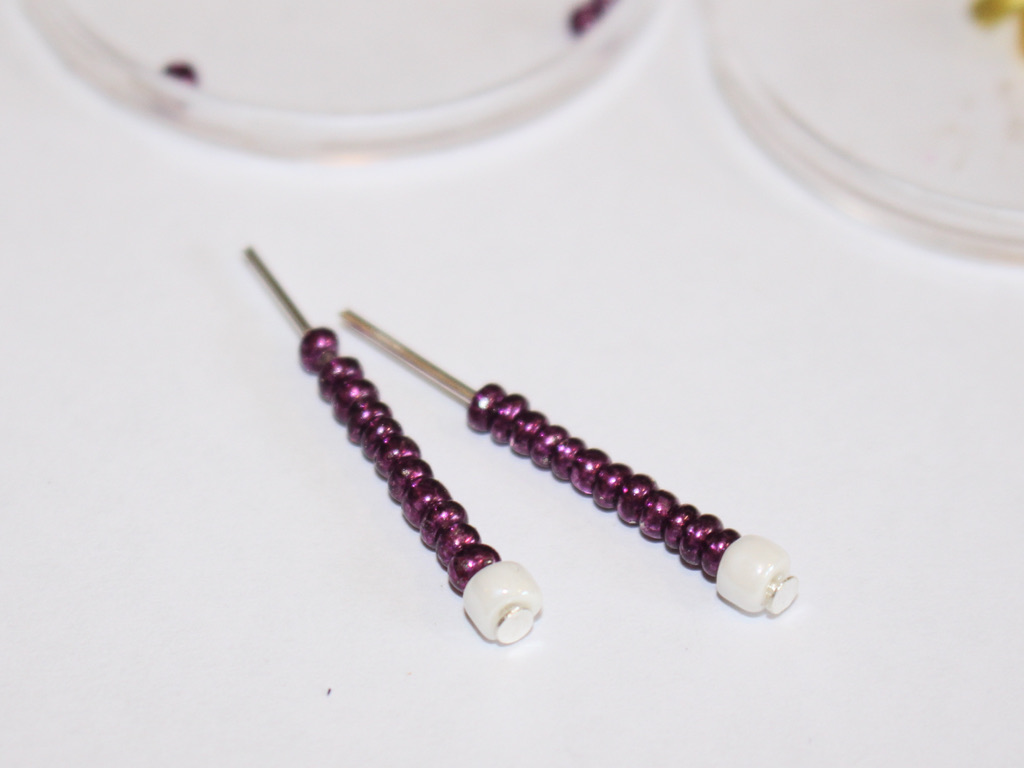
Two beaded arms 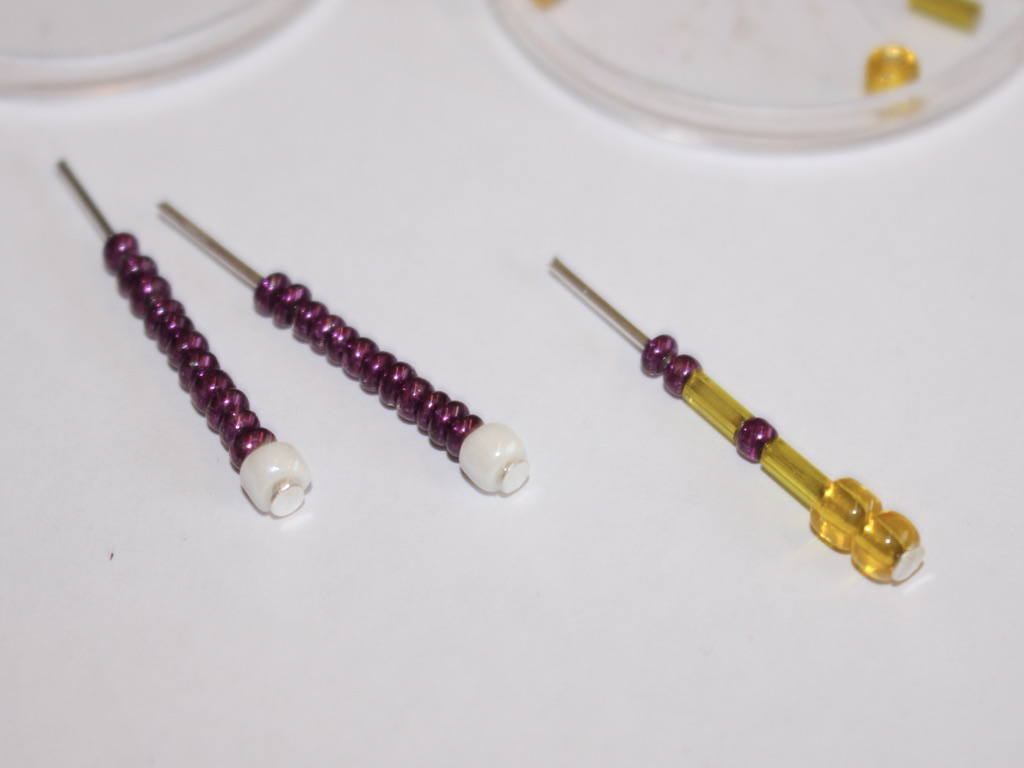
Two arms and one leg 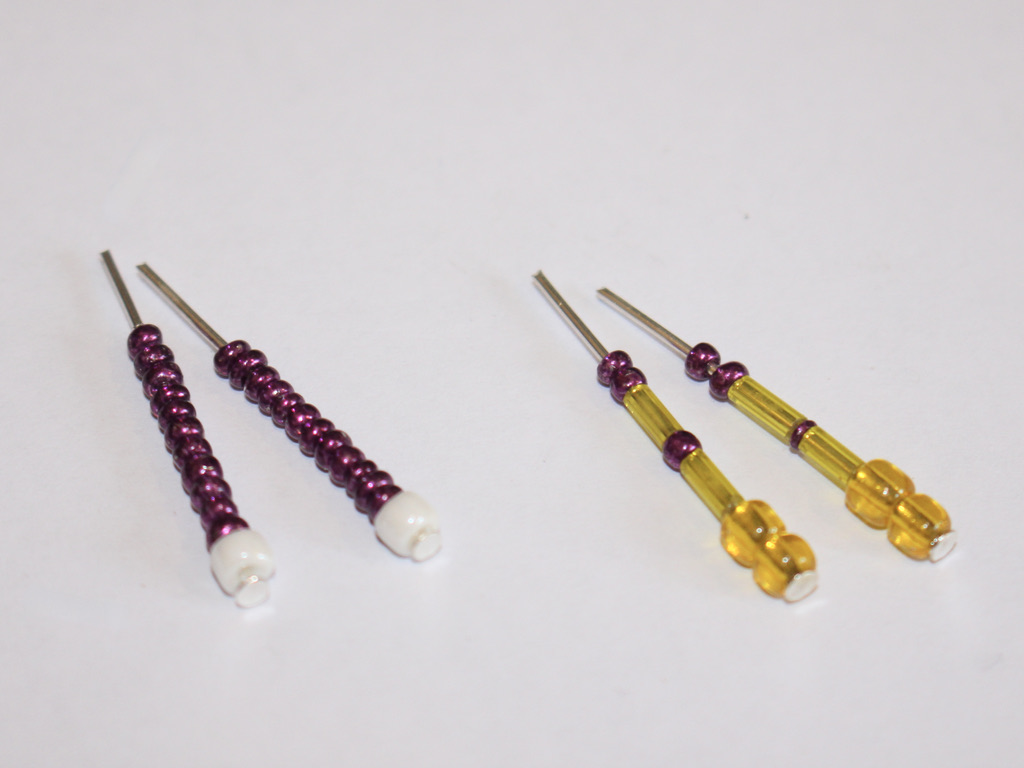
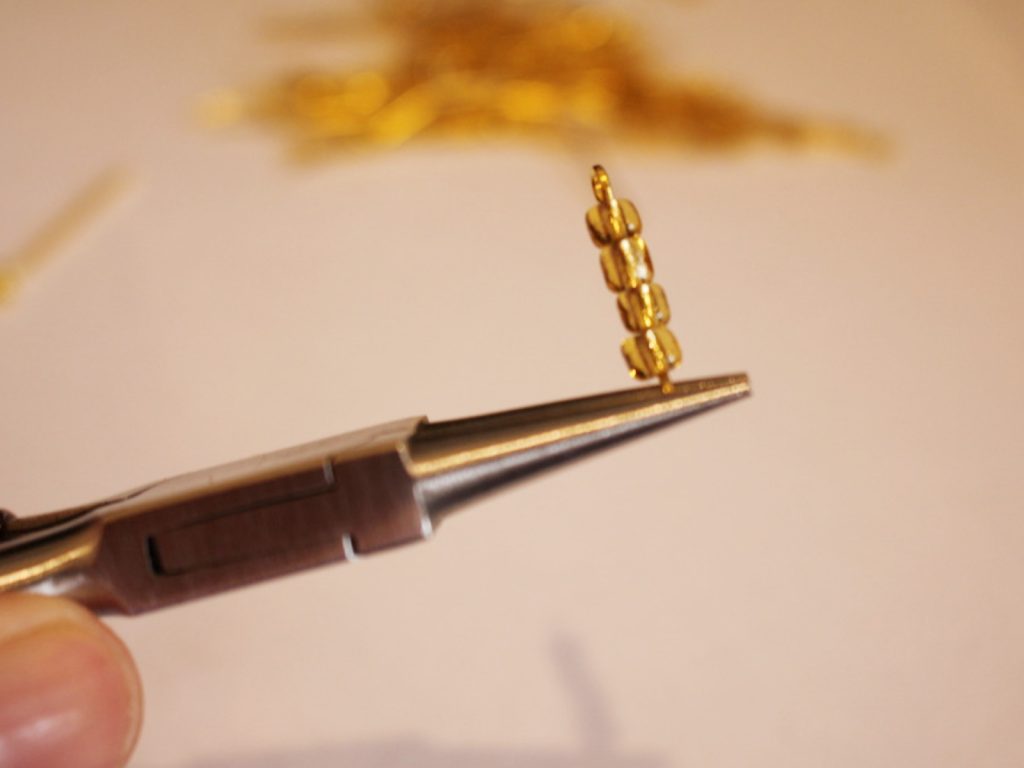
All arms and legs beaded 9: Once your pins are beaded, you can bend the ends to form right angles and create loops at the top to secure the beads.
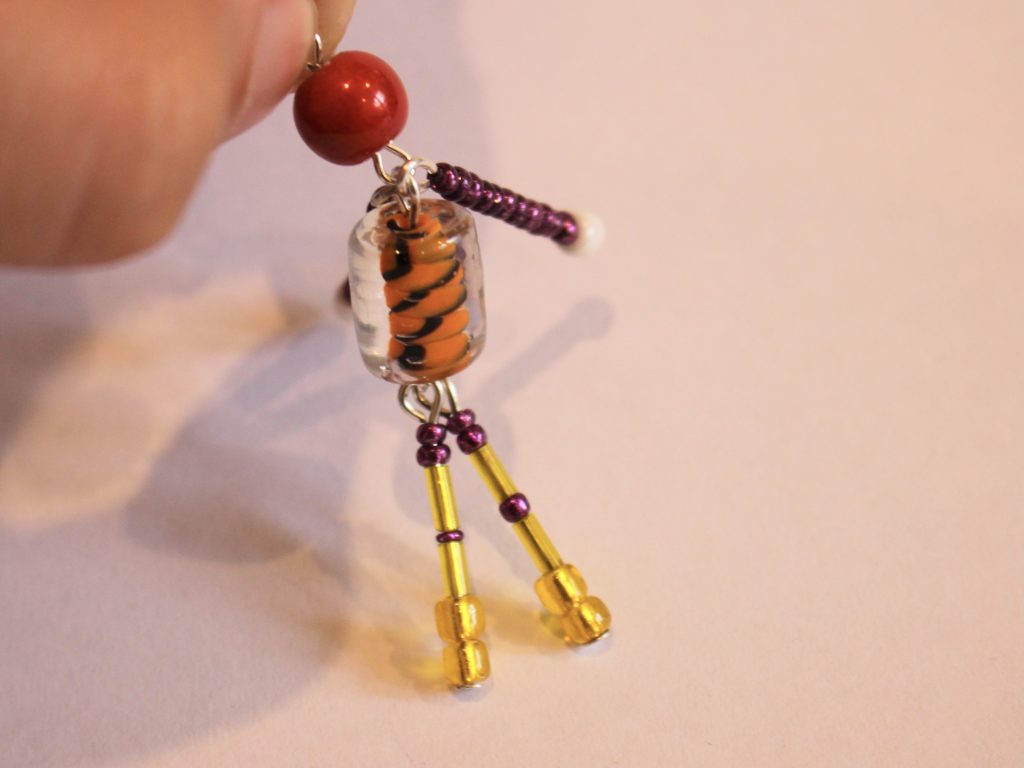
10: Add two of the leg pins to the bottom of the larger bead (the body), do this by slightly opening the loop at the bottom of the body bead and sliding the pins on. Close the loop to secure the legs in place.

11: Add the arms in the same manner to the loop at the top of the body bead. This time you will need to open and close the loops on the end of each arm so that you can attach the pins to either side of the head.

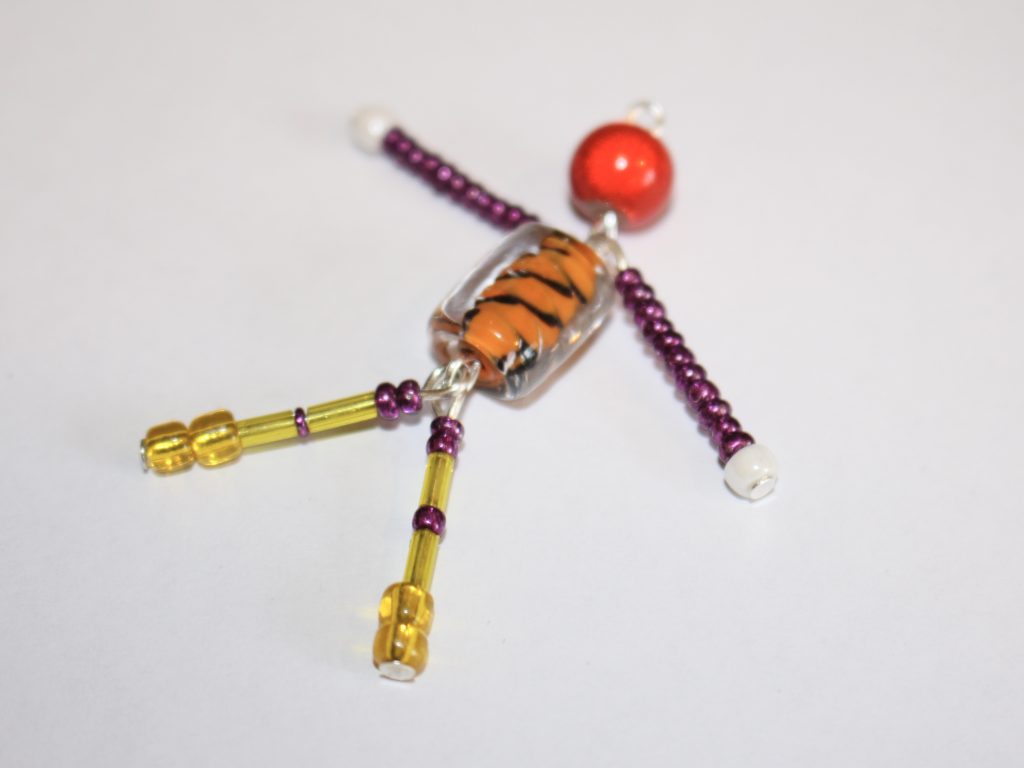
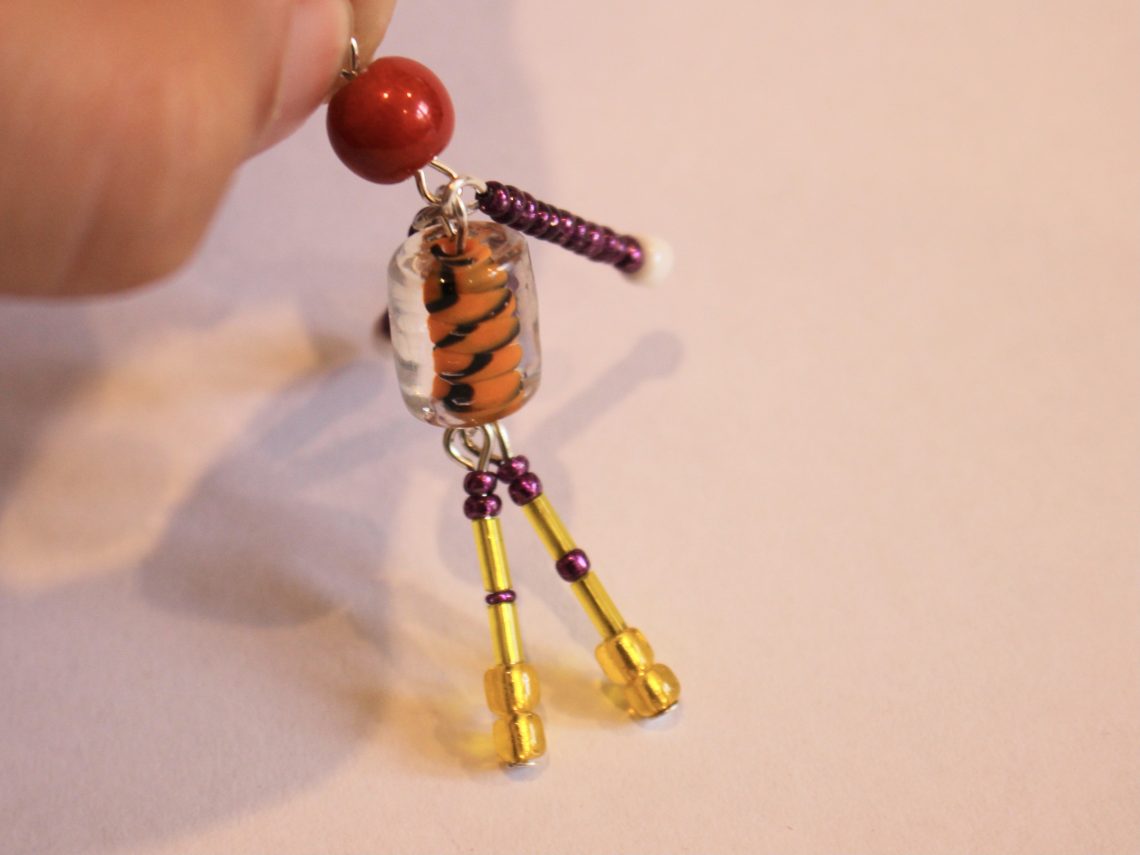
Once all your appendages are attached, your little bead person charm is finished and ready to go! Make another one to wear as a pair of earrings or attach one to a chain to make a cute necklace. Maybe it could also keep you company as a phone charm?!
-
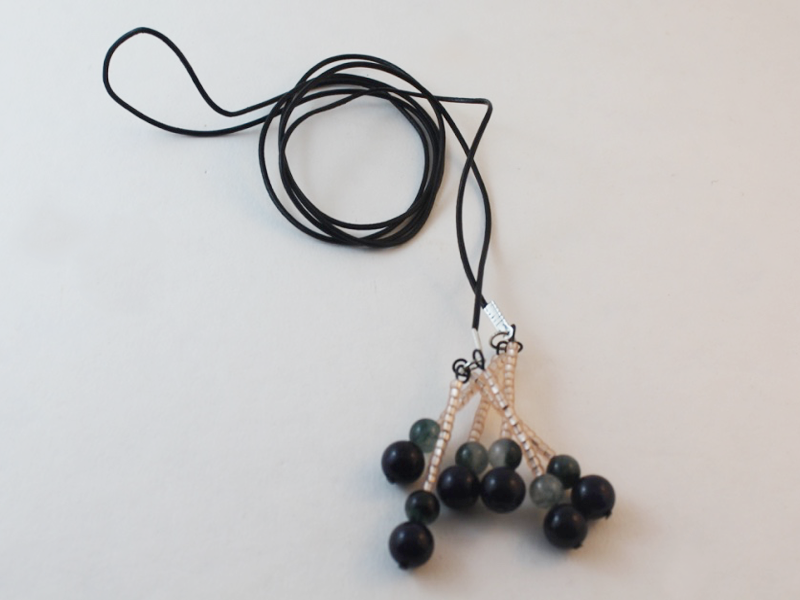
How to make a cute statement necklace with cord!
This cute necklace features a beaded ladder pendant threaded onto a recycled cord necklace. This is a cool way to use recycled materials and make a cool pendant that stands out from the usual jewellery you see! Please note that this tutorial contains affiliate links.
You’ll need these tools and materials to make your cord statement necklace:
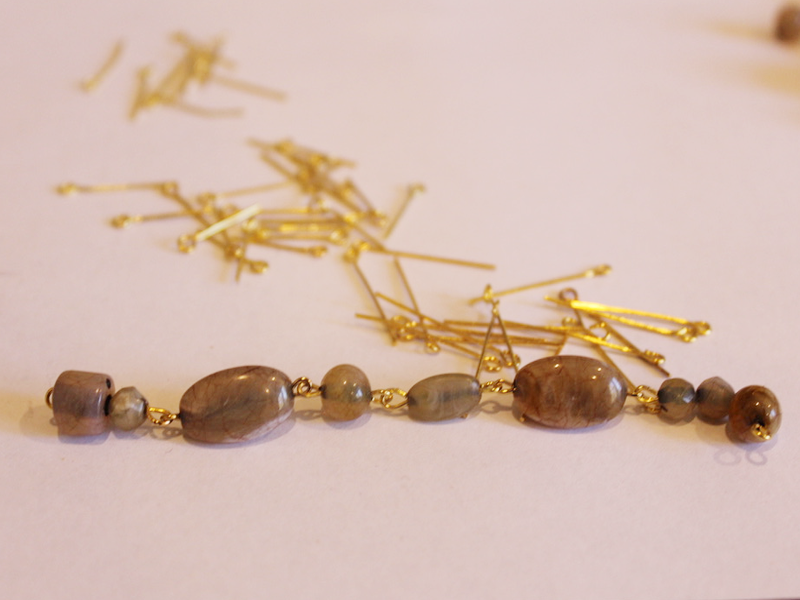
1: Some eye pins. The number depends on how many ‘rungs’ you want to make. I used 10.

2: Two head pins.

3: A piece of cord. I used this one that I had already attached some crimp ends and a clasp to. If you don’t have one already made up, you’ll also need two flat crimp ends, two jump rings and a lobster clasp.

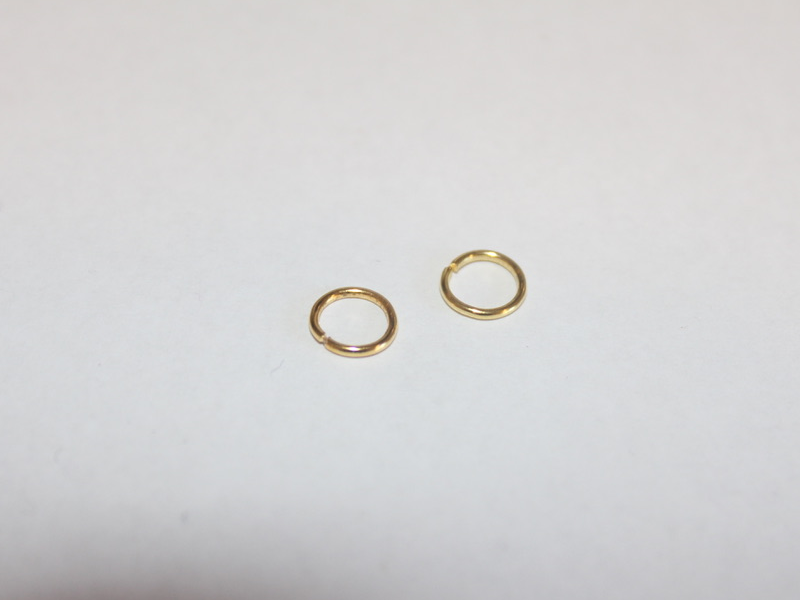
4: A couple of large jump rings.

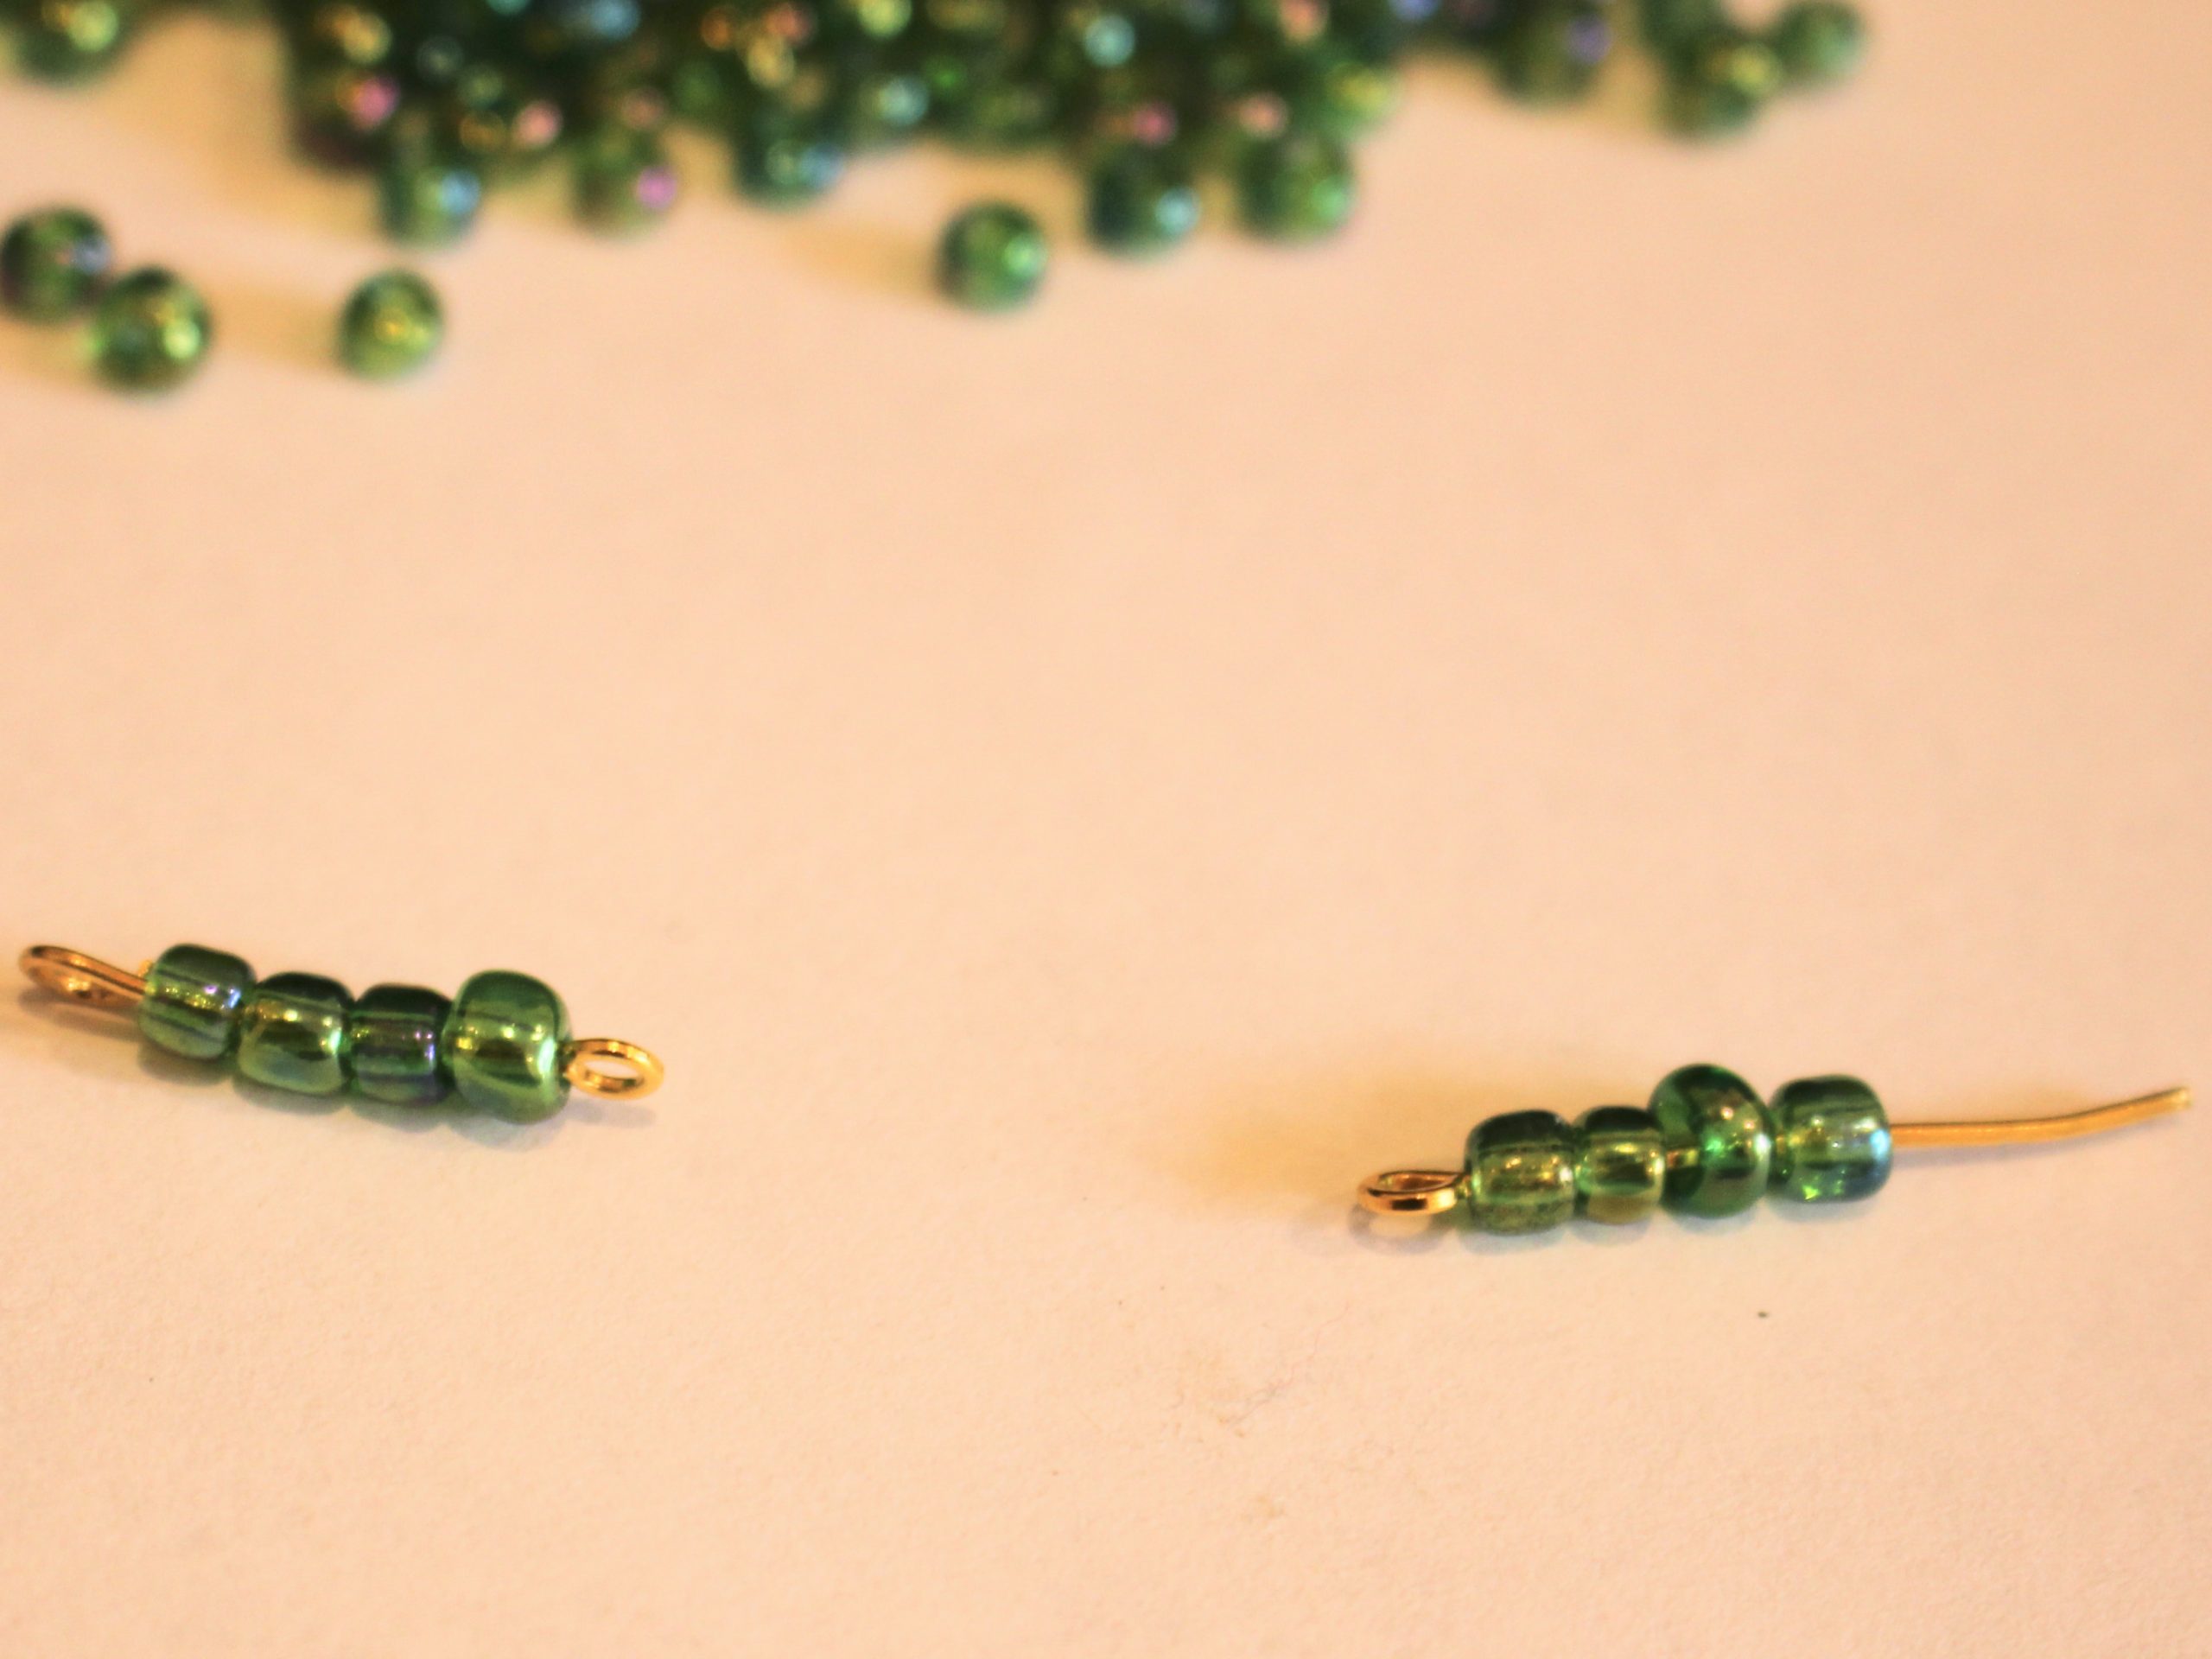
5: Some beads. I used these green e beads and some glass floral beads. I had to use an extra e-bead on one of the charms because the bead hole was bigger than the end of the head pin. You won’t need this extra bead if you’re pins are the right size!


6: Pliers. I used my flat nose and round nose pliers. Keep your cutting pliers on hand just in case.


Follow these steps to make your cord statement necklace:
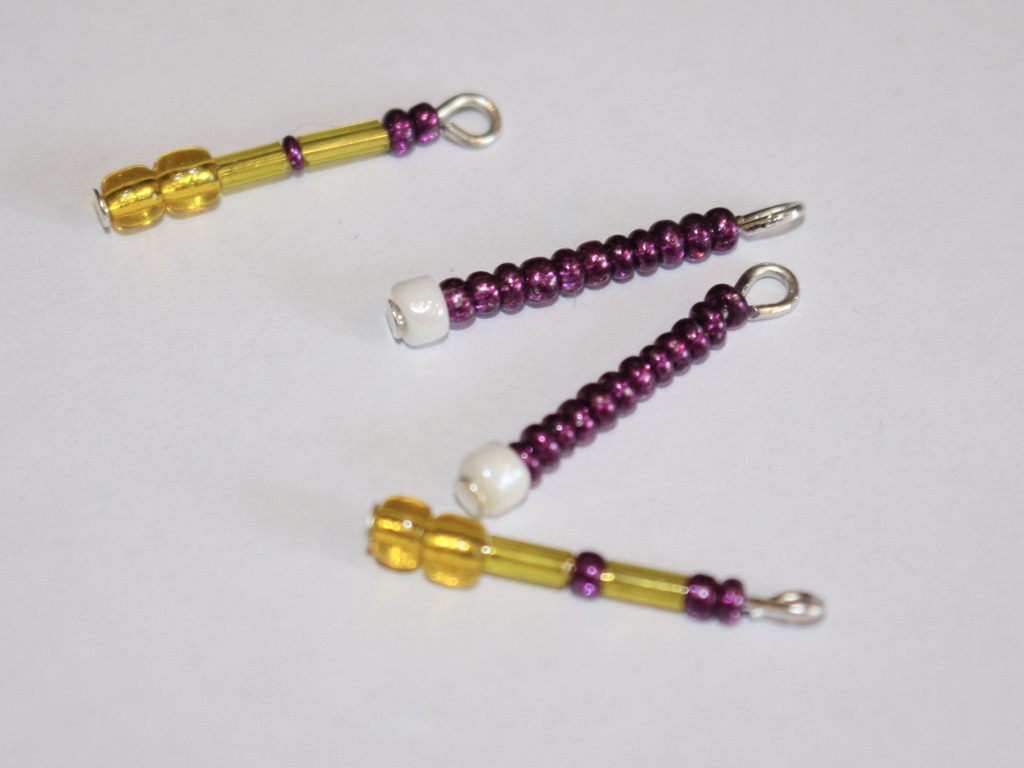
1: Add the glass beads to the head pins.

2: Bend the pins to form a right angle and then loop the tops to secure the beads in place.


3: Set the charms aside.
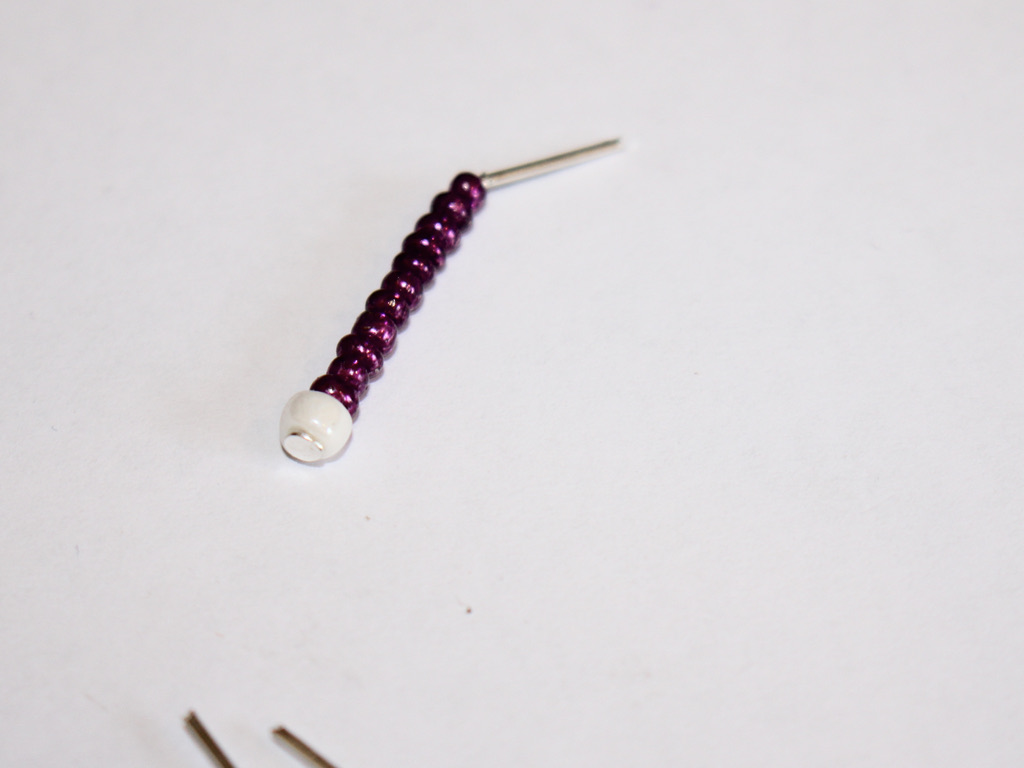
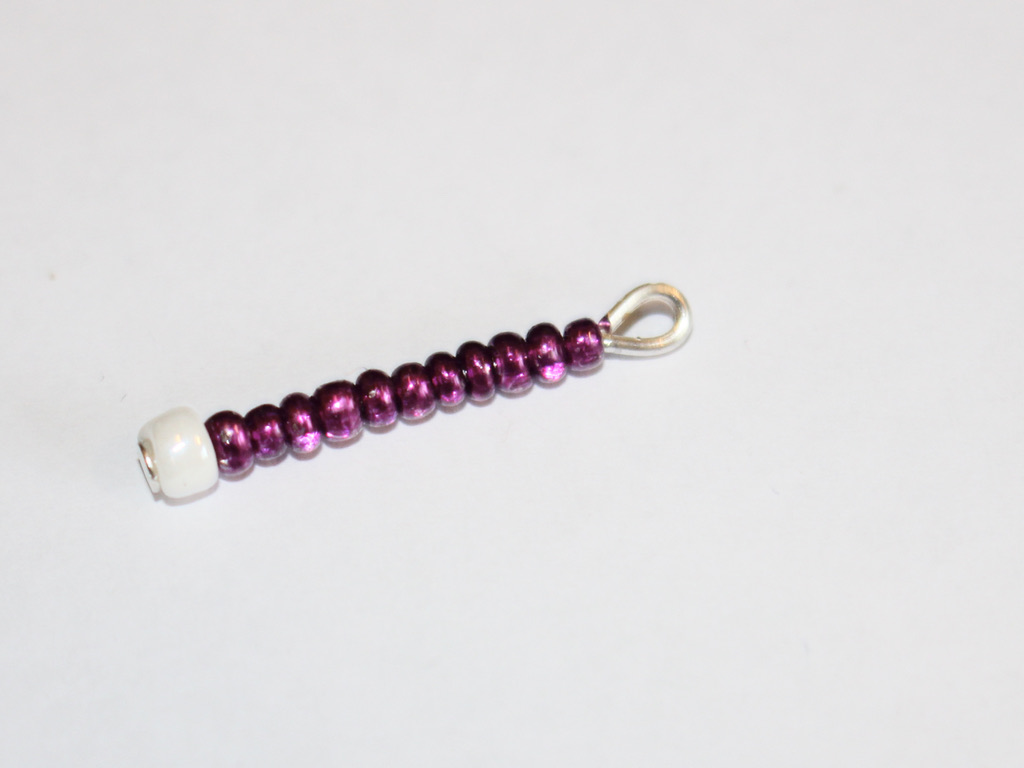
4: Add beads to one of the eye pins, leave about 1cm without beads.

5: Bend the end of the pin to form a loop which will secure the beads in place.


6: Repeat steps 4 and 5 for the rest of the eye pins, so you have ten pins beaded.

7: Attach two of the pins together, do this by slightly opening one of the loops and sliding the other pin through. Close the loop again to secure them together.

8: Repeat step 8 to attach another two pins so that you have a chain of four pins.

9: Take the ends of the chain and attach them together to form a square shape.

10: Attach another three pins together.


11: Attach the three pins to the bottom of the first square you made. This will form the second square.


12: Repeat steps 10 and 11 for the remaining three pins, now you will have a ladder shape with three rungs.


13: Take the charms you made at the start and attach each one to the bottom corners of the ladder.


14: Add a jump ring to each corner of the top of the ladder.


15: Now slide the ladder charm onto the cord necklace.

Now your necklace is finished and ready to wear! So so unique and cute! I think this is a great summer piece perfect for your boho hippie look!


-
How to make a super cute bracelet with beaded diamond shapes!
This is a cute little bracelet that looks great! the beaded diamond bracelet design uses eye pins and beads to form a series of diamond shapes that link together to create a bracelet. This diamond shaped bracelet is eye-catching and fun to put together, perfect for constructing on a quiet afternoon at home.
You’ll need these tools and materials to make your beaded diamond bracelet:
1: Pliers. I used my round nose and flat nose pliers.
2: A bunch of eye pins. I ended up using about 25 pins. You may need more or less depending on your wrist size.

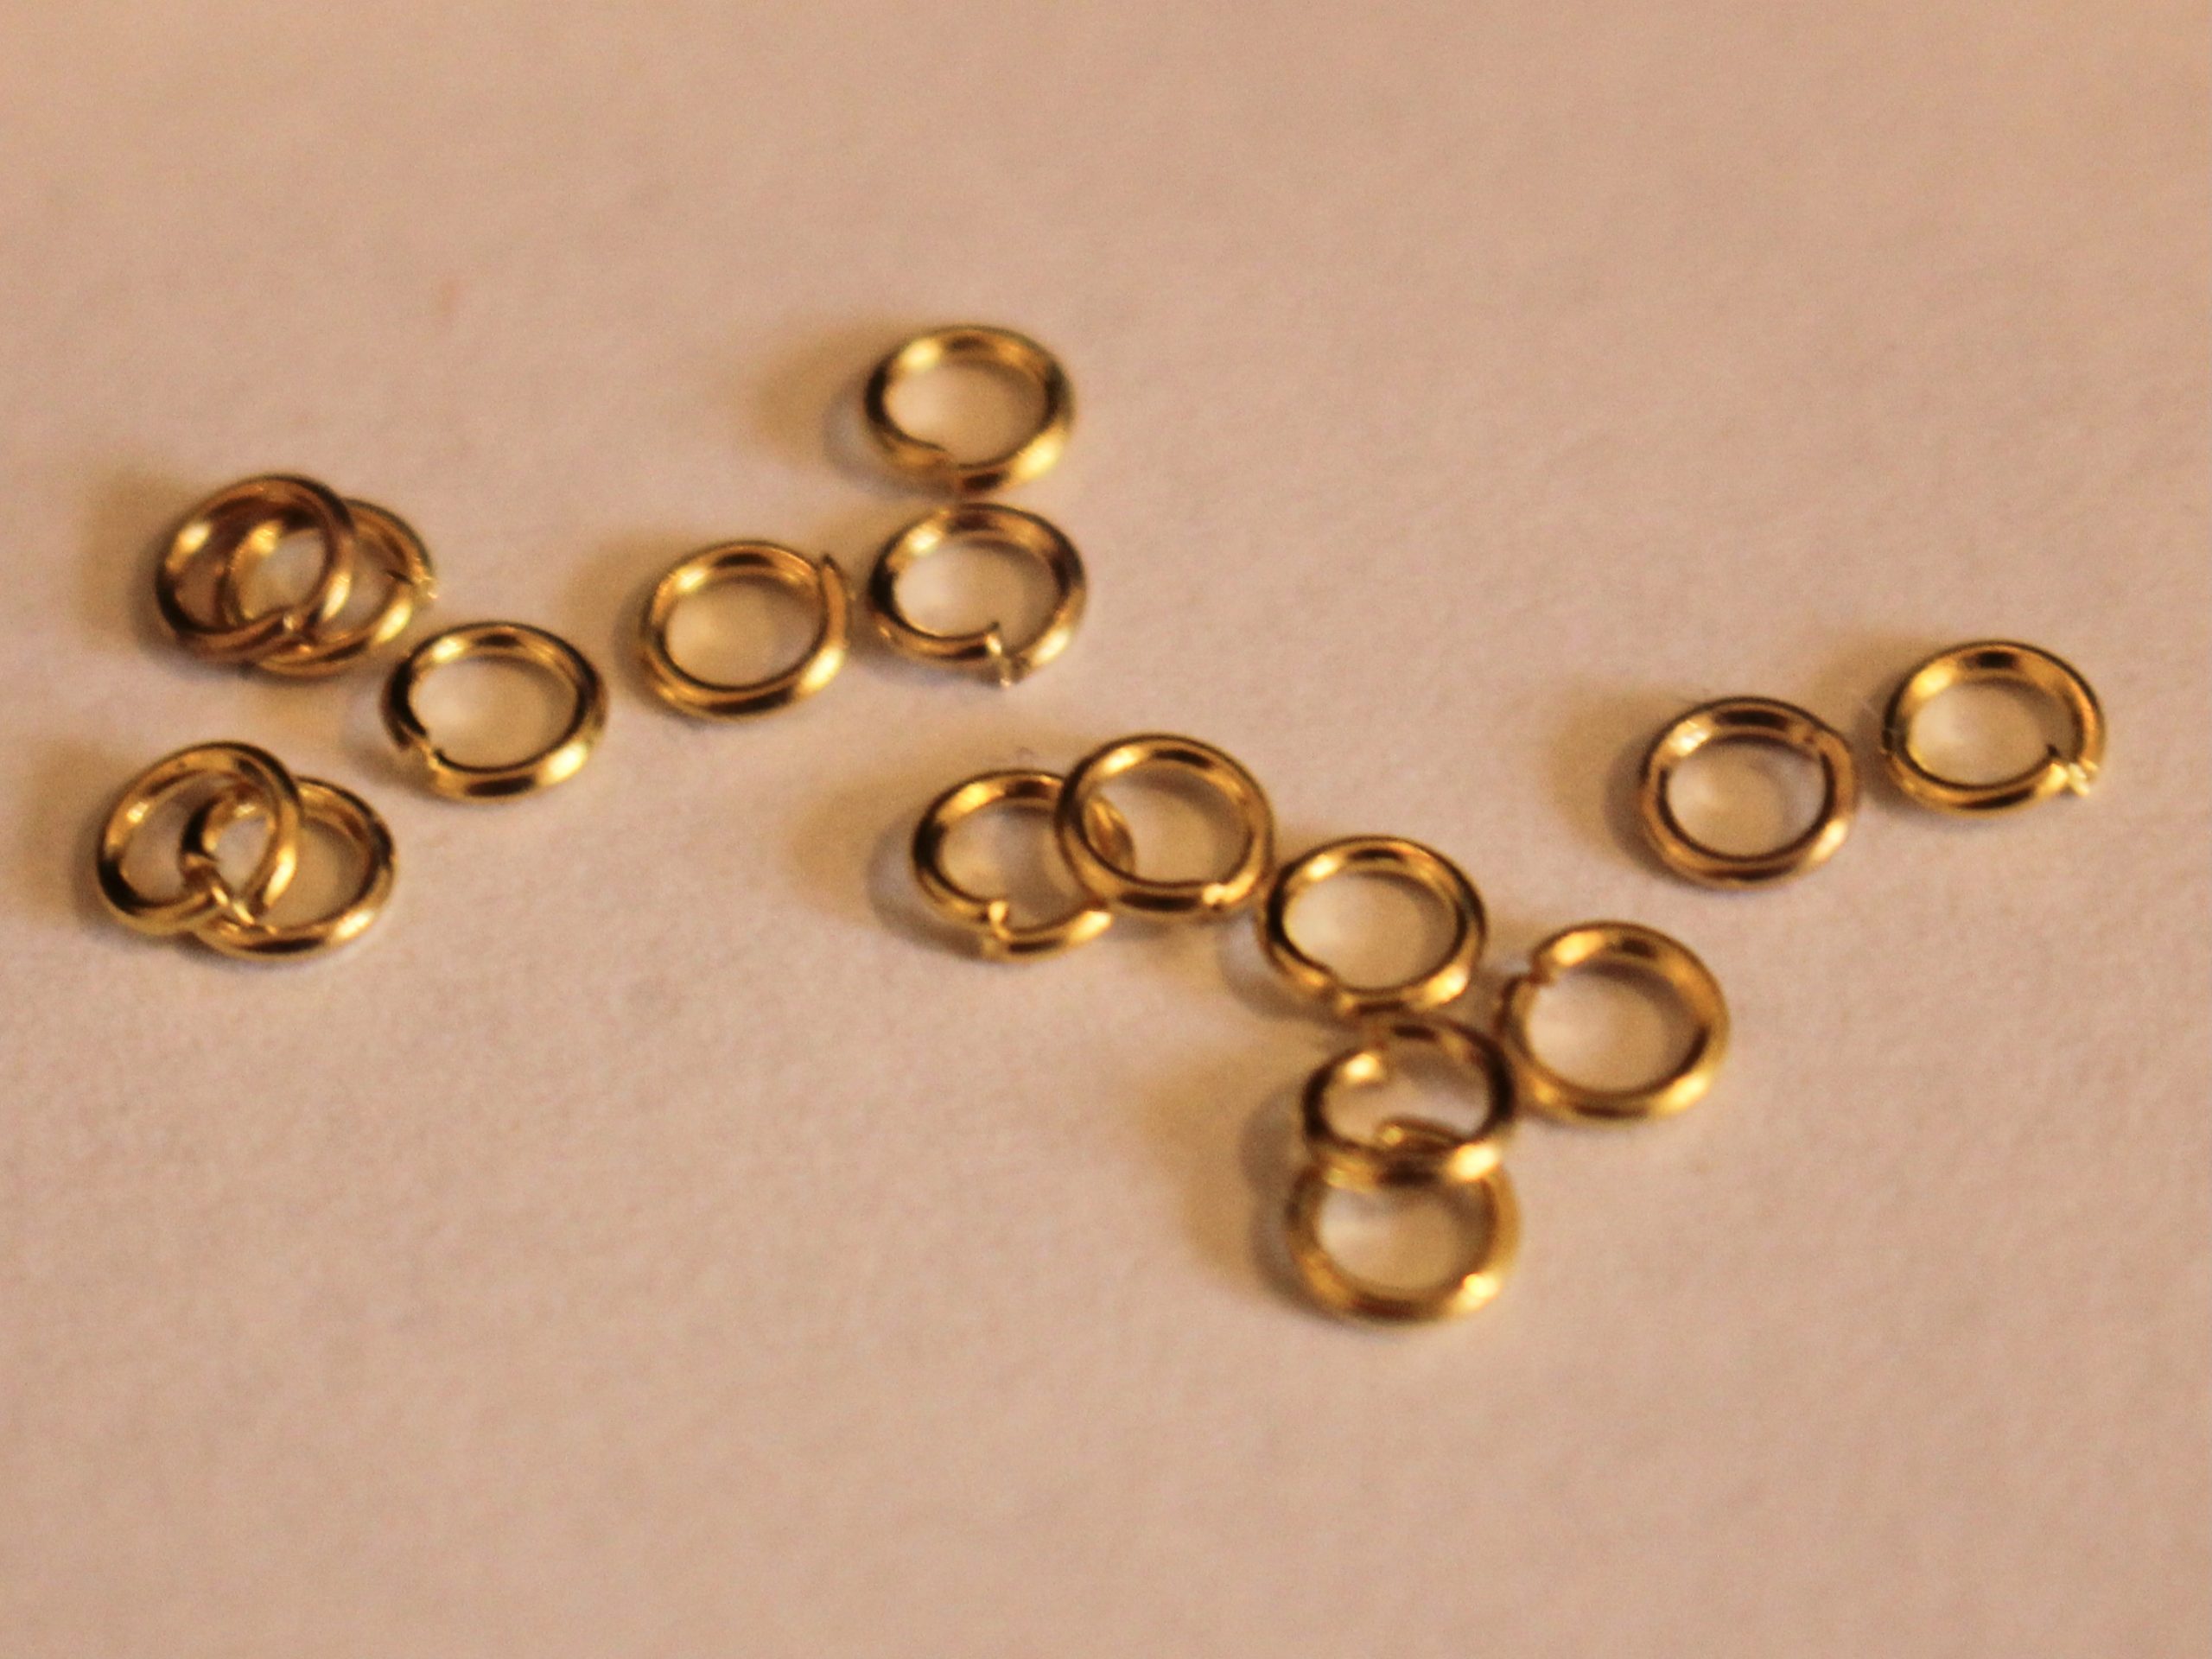
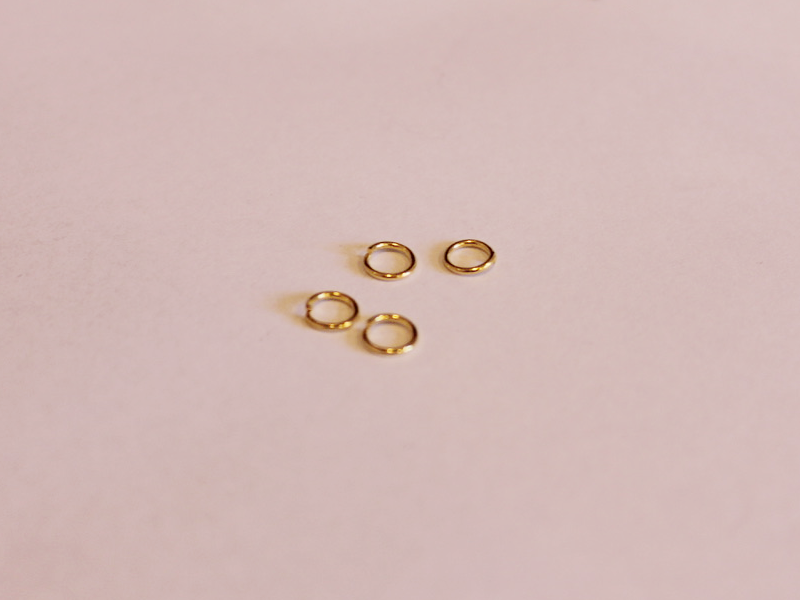
3: Some small jump rings. I used four, you may need more or less depending on the size of the bracelet.

4: Two larger jump rings.

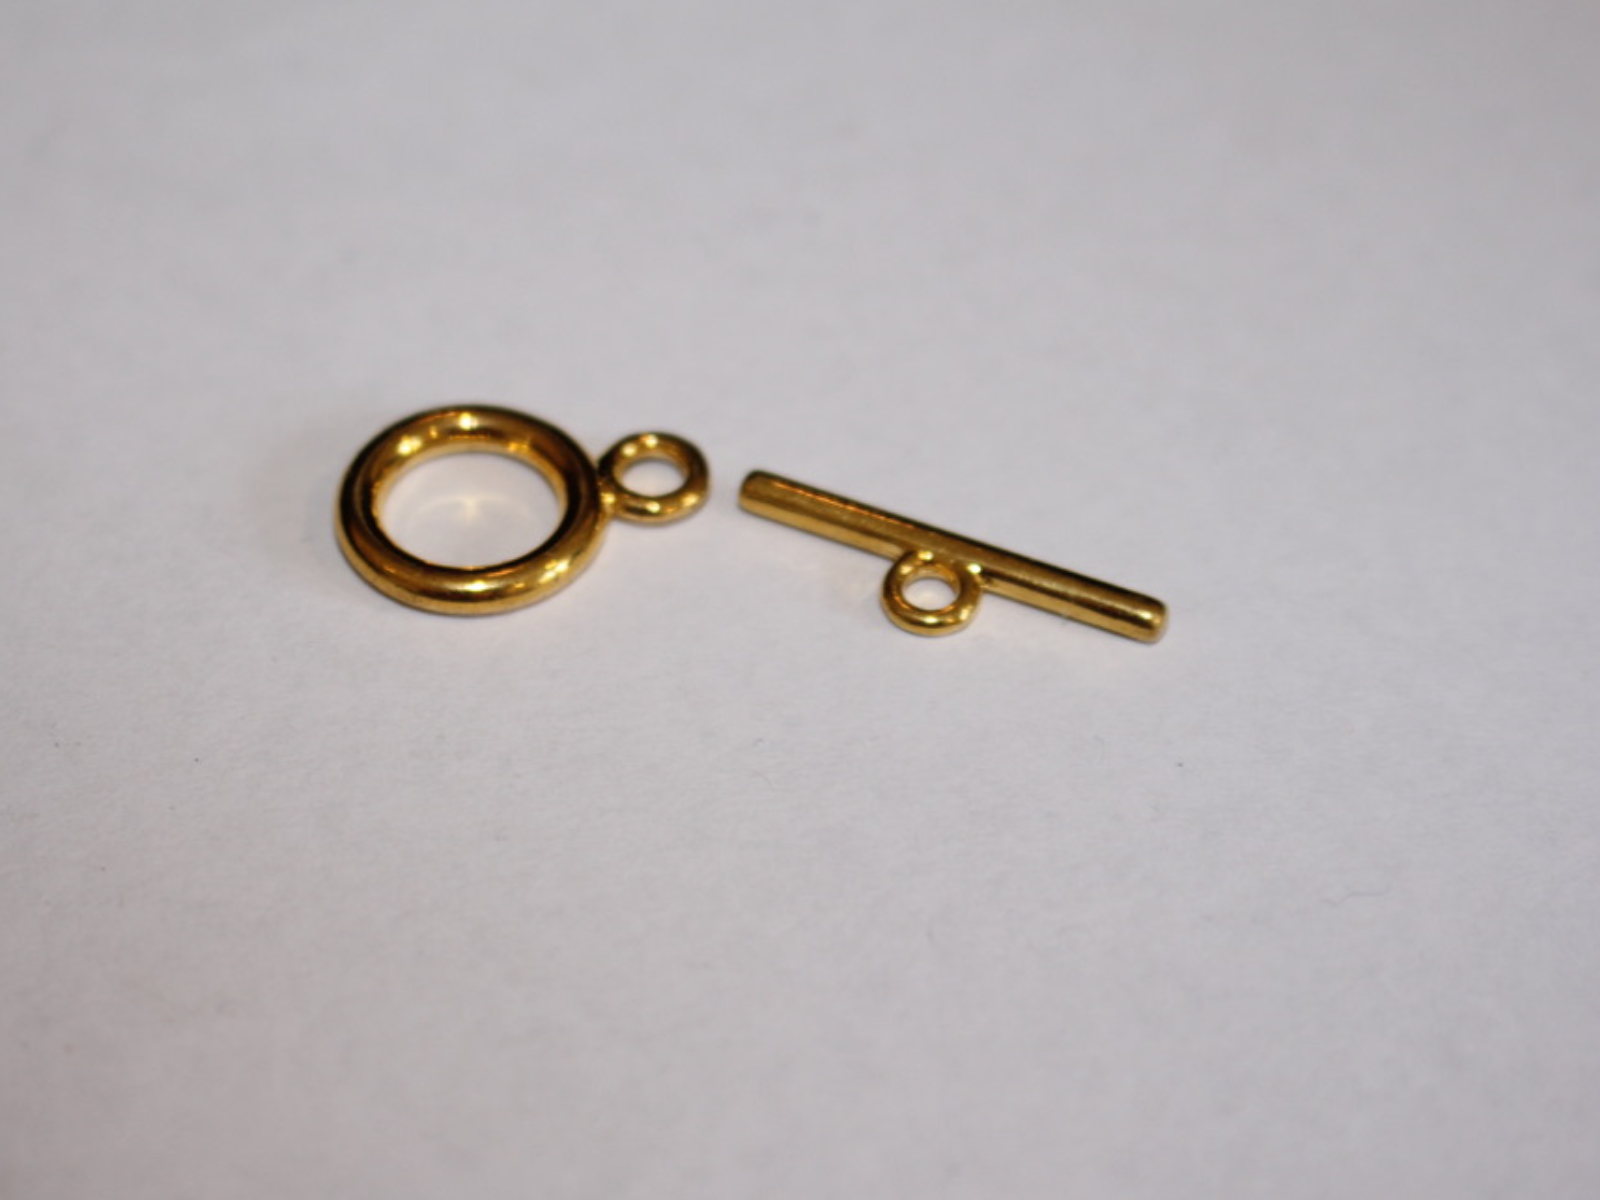
5: A toggle clasp.

6: Beads of your choice. I used these green glass e-beads.

Follow these steps to make your beaded diamond bracelet:
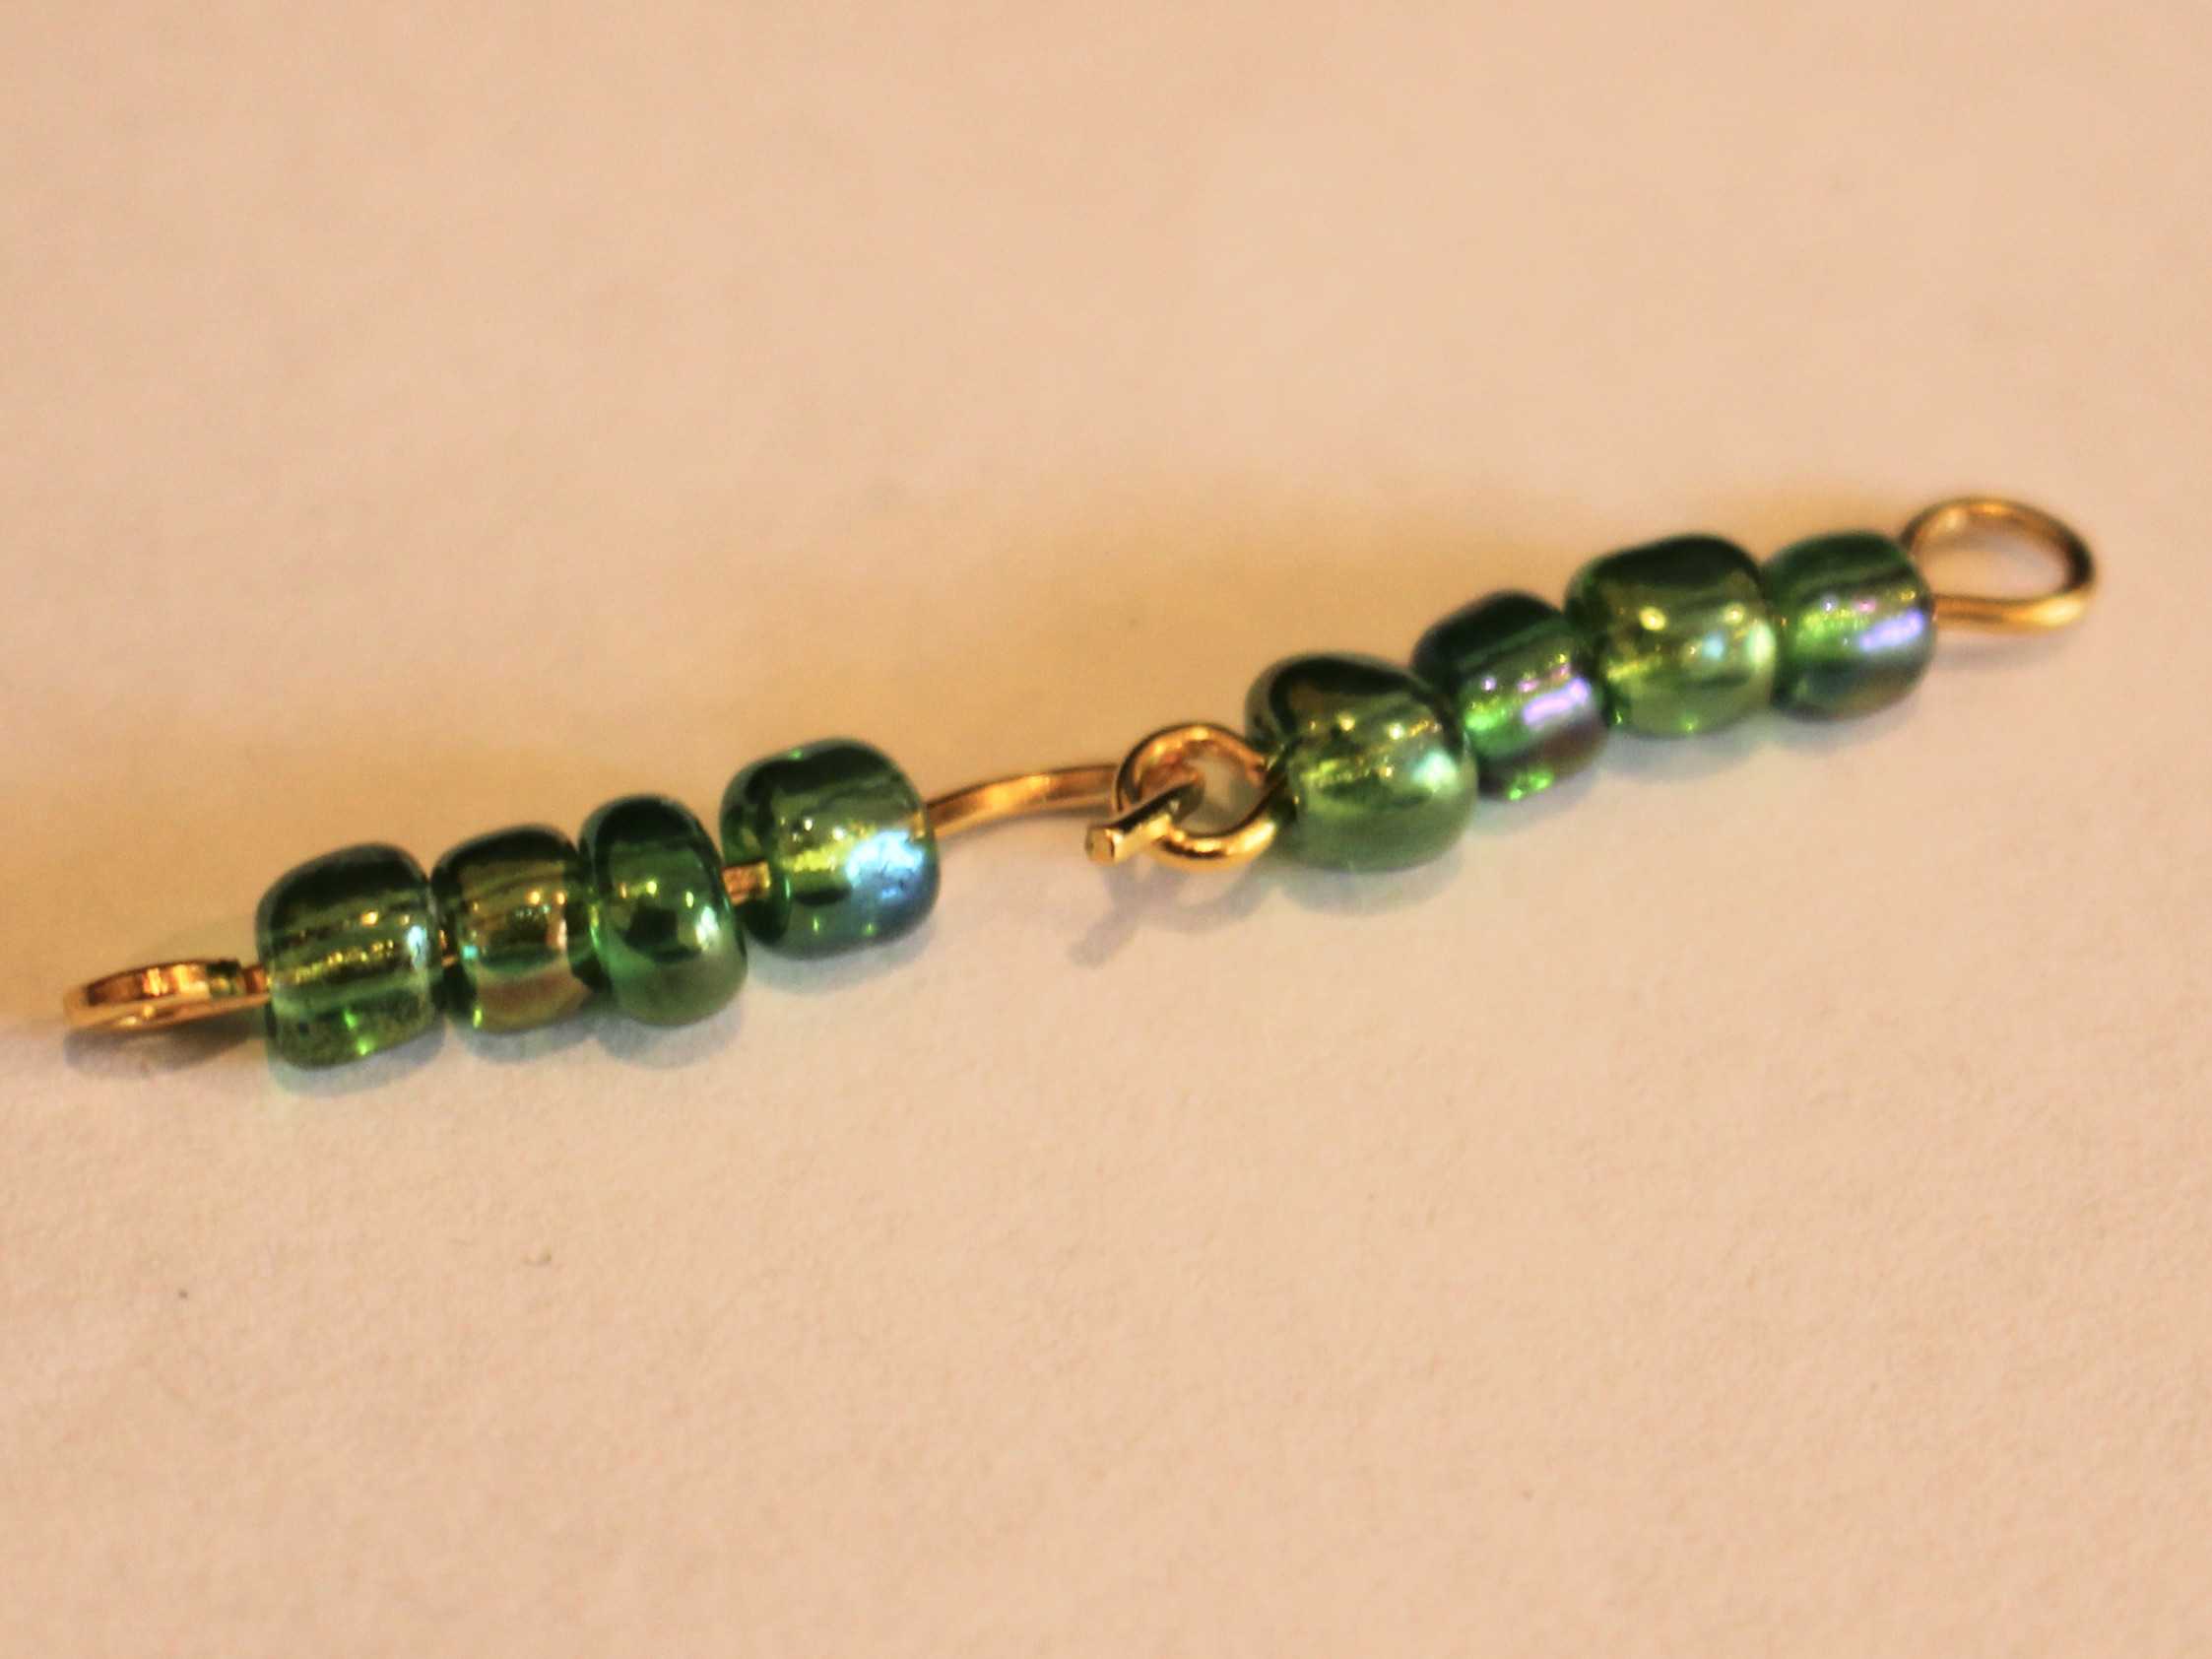
1: Add beads to two of the eye pins.
2: Leave about 1cm without beads.
3: Bend the pins to form an angle with the beaded section.

4: Loop the end of the pins around the round nose pliers to create a loop that secures the beads onto the pins.


5: Link the two pins together.

6: Repeat steps 1-5 three more times so that you have 5 beaded pins.
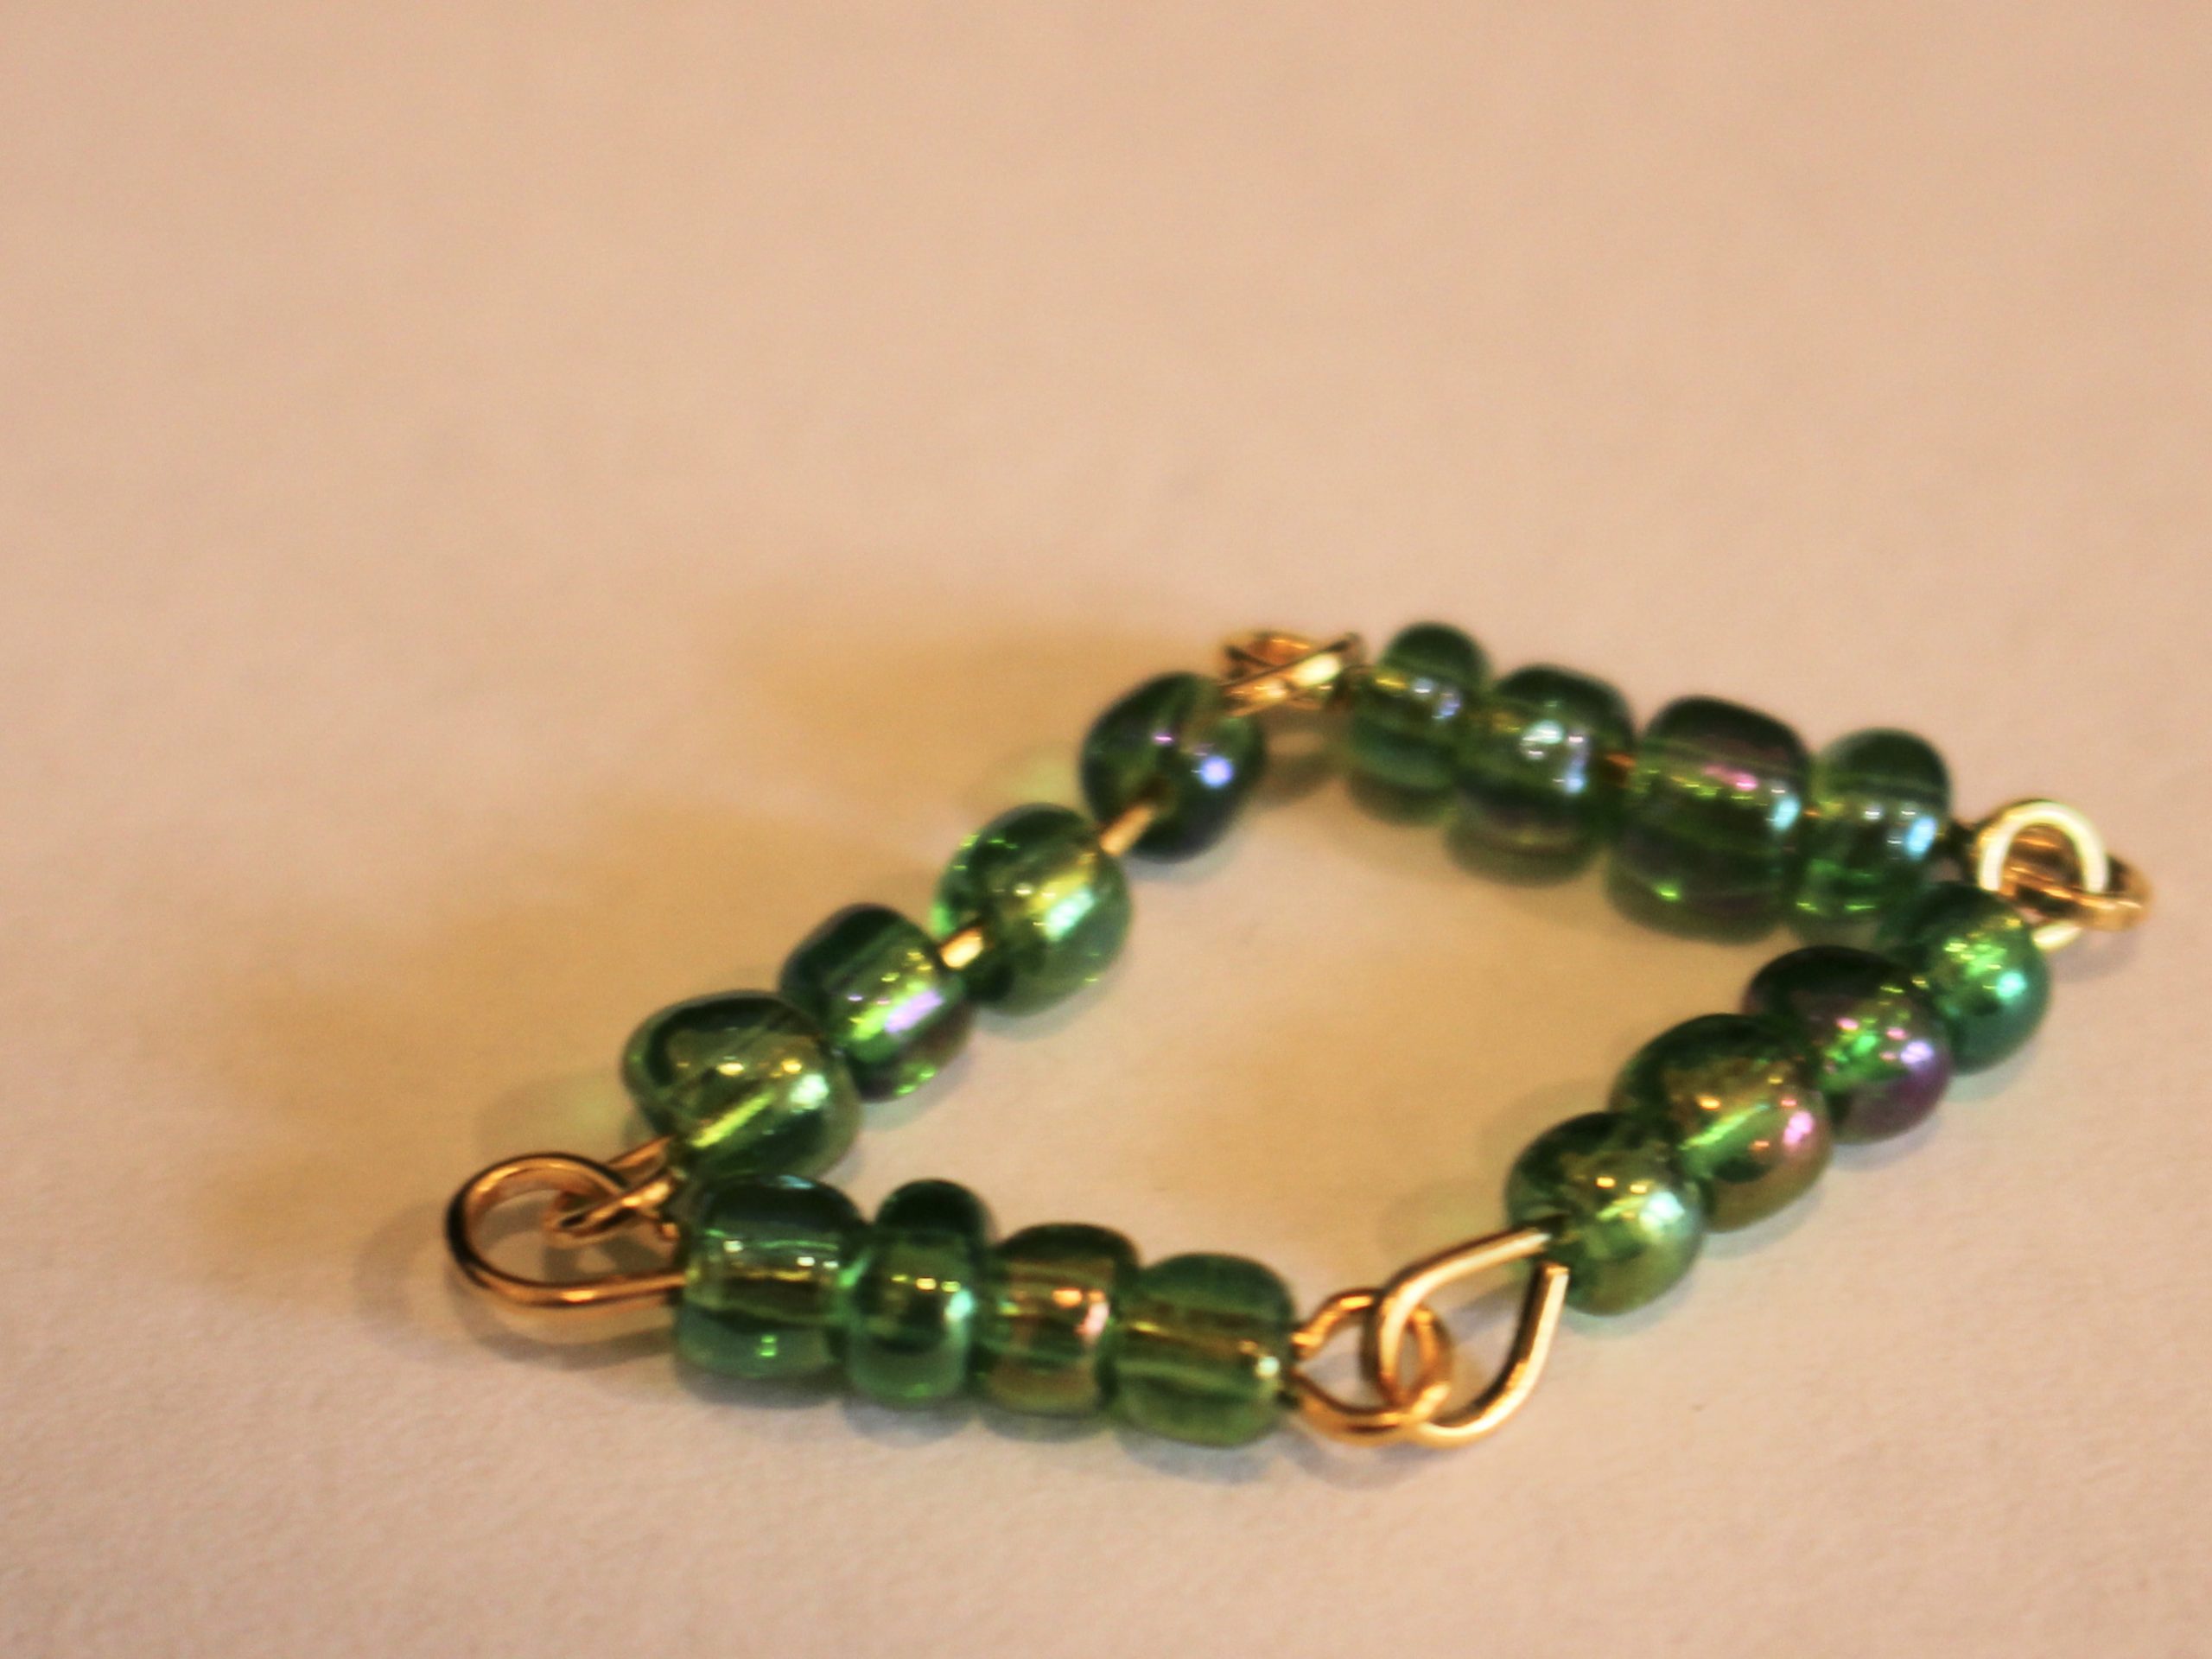
7: Link two more pins to the first two, so you have a square shape.


8: Add the last pin to the middle of the four linked pins so that you have a diamond shape that doesn’t shift around.


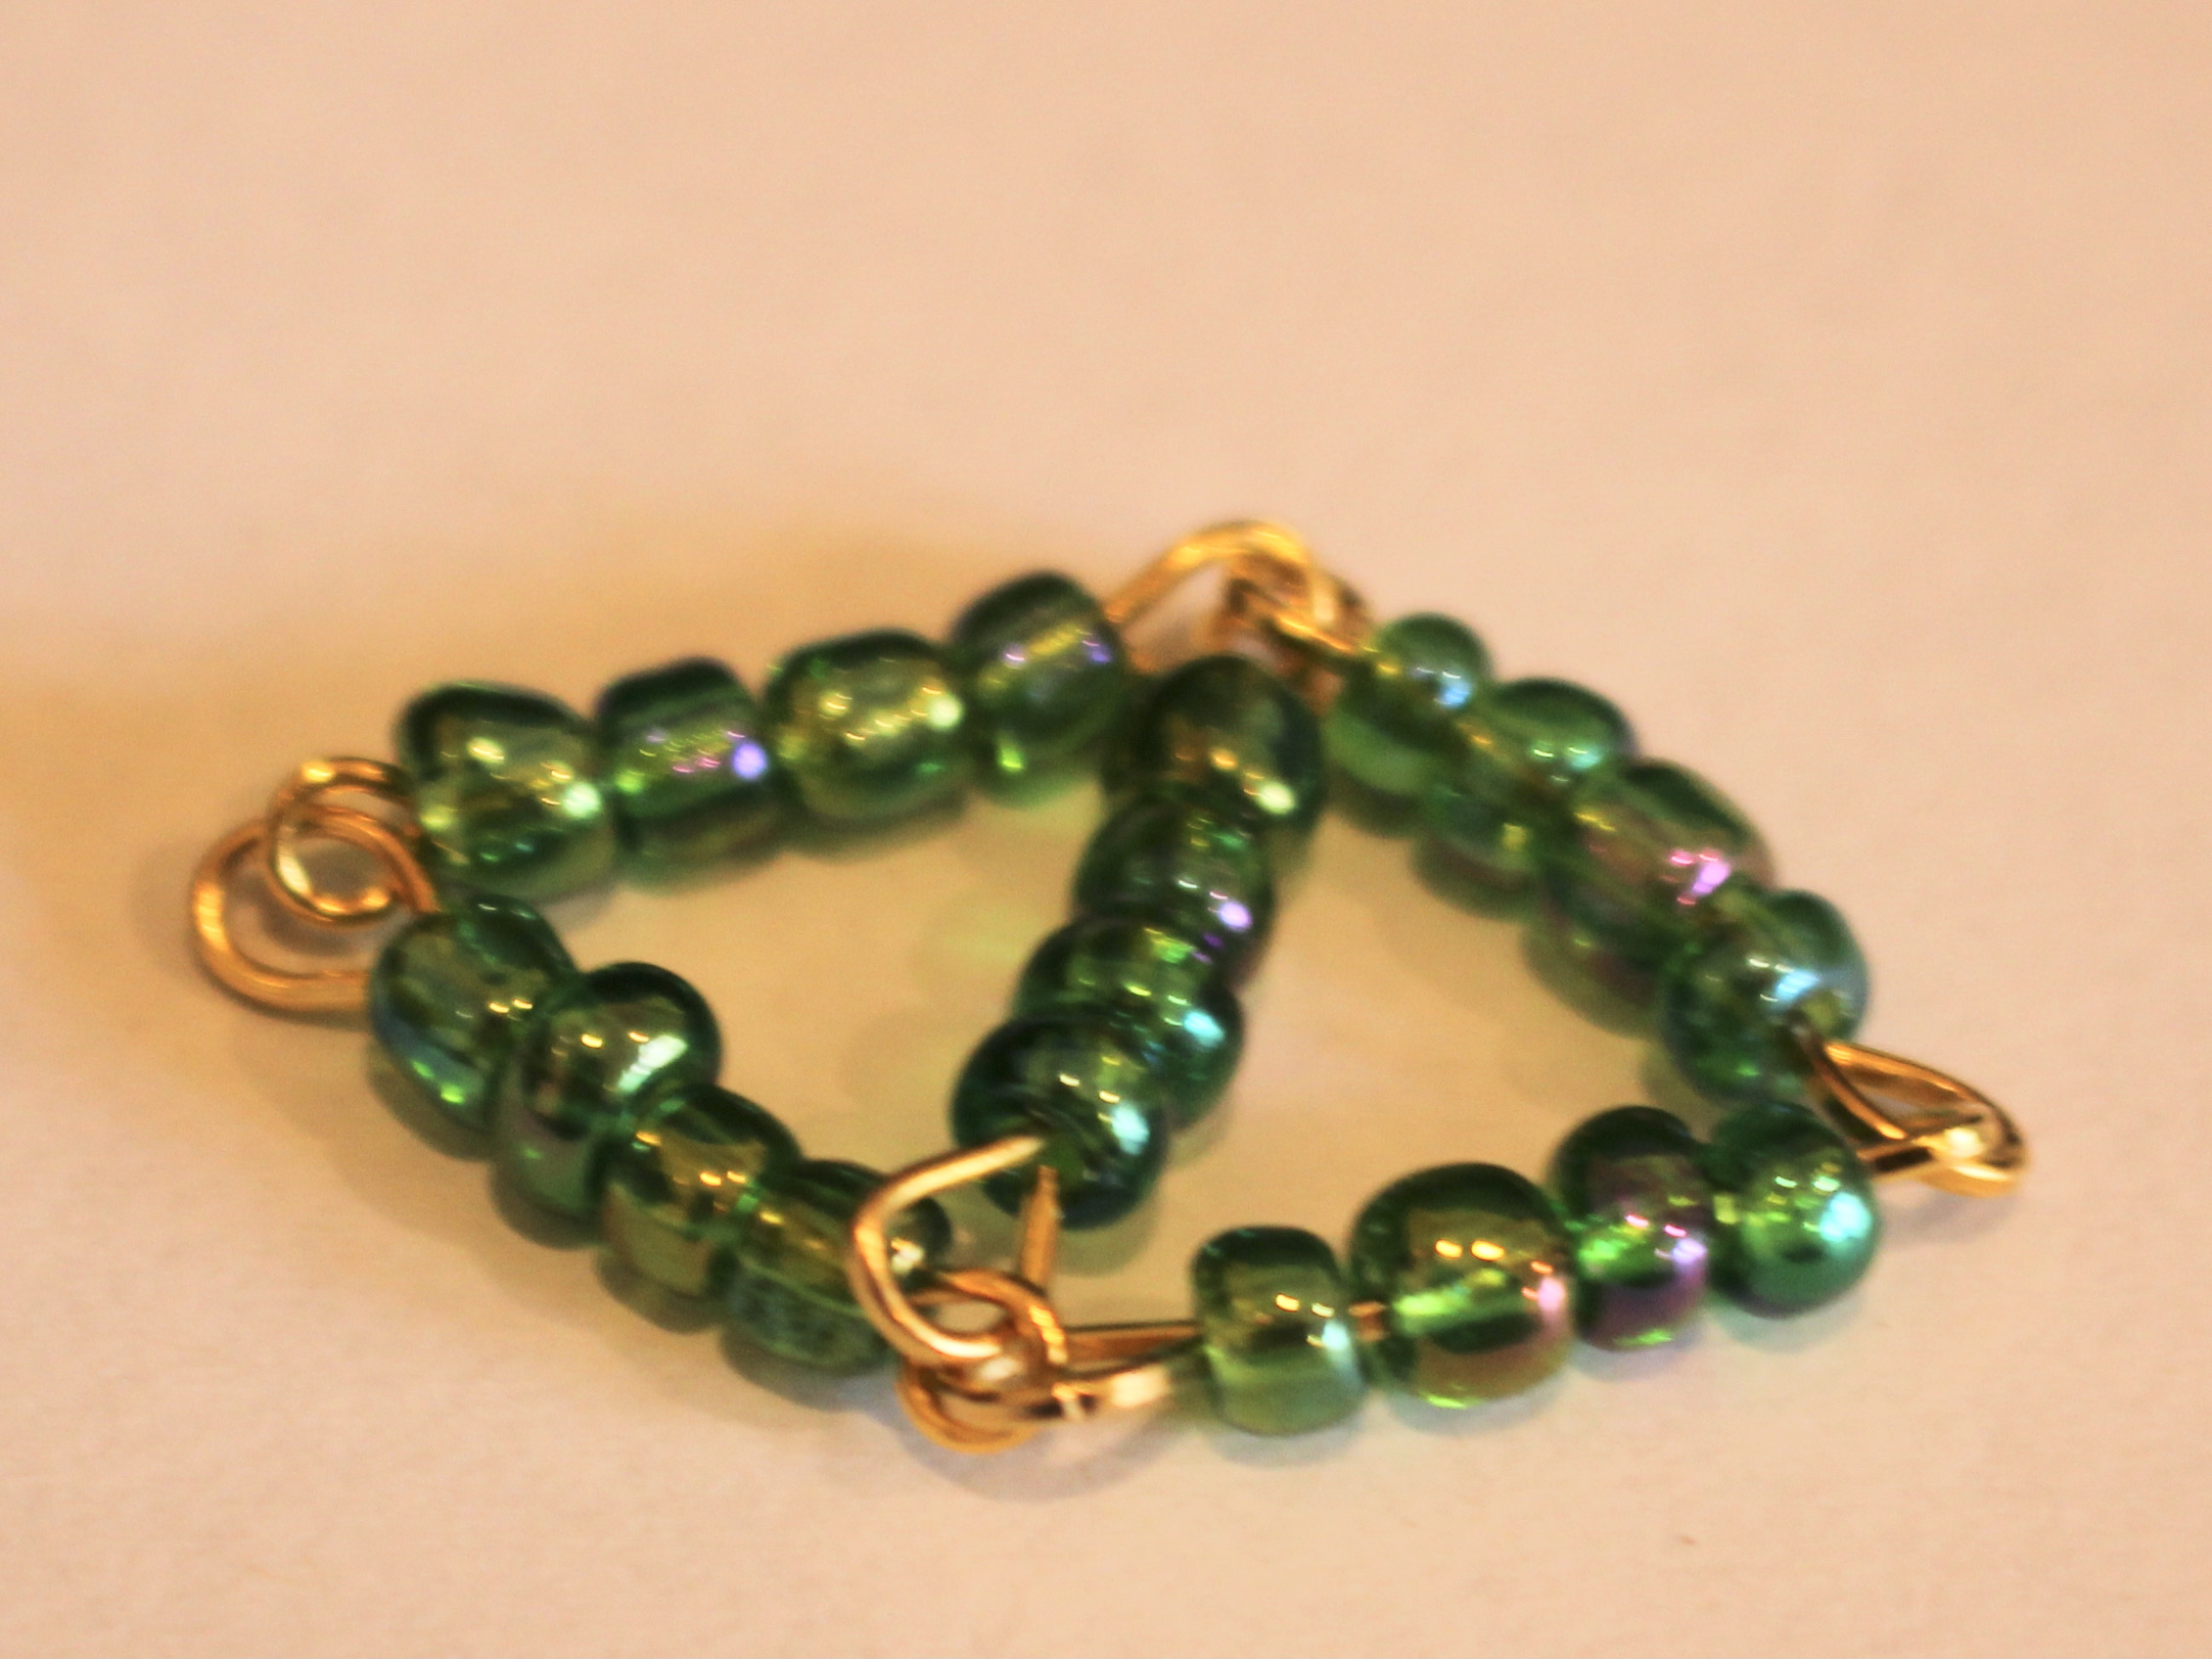
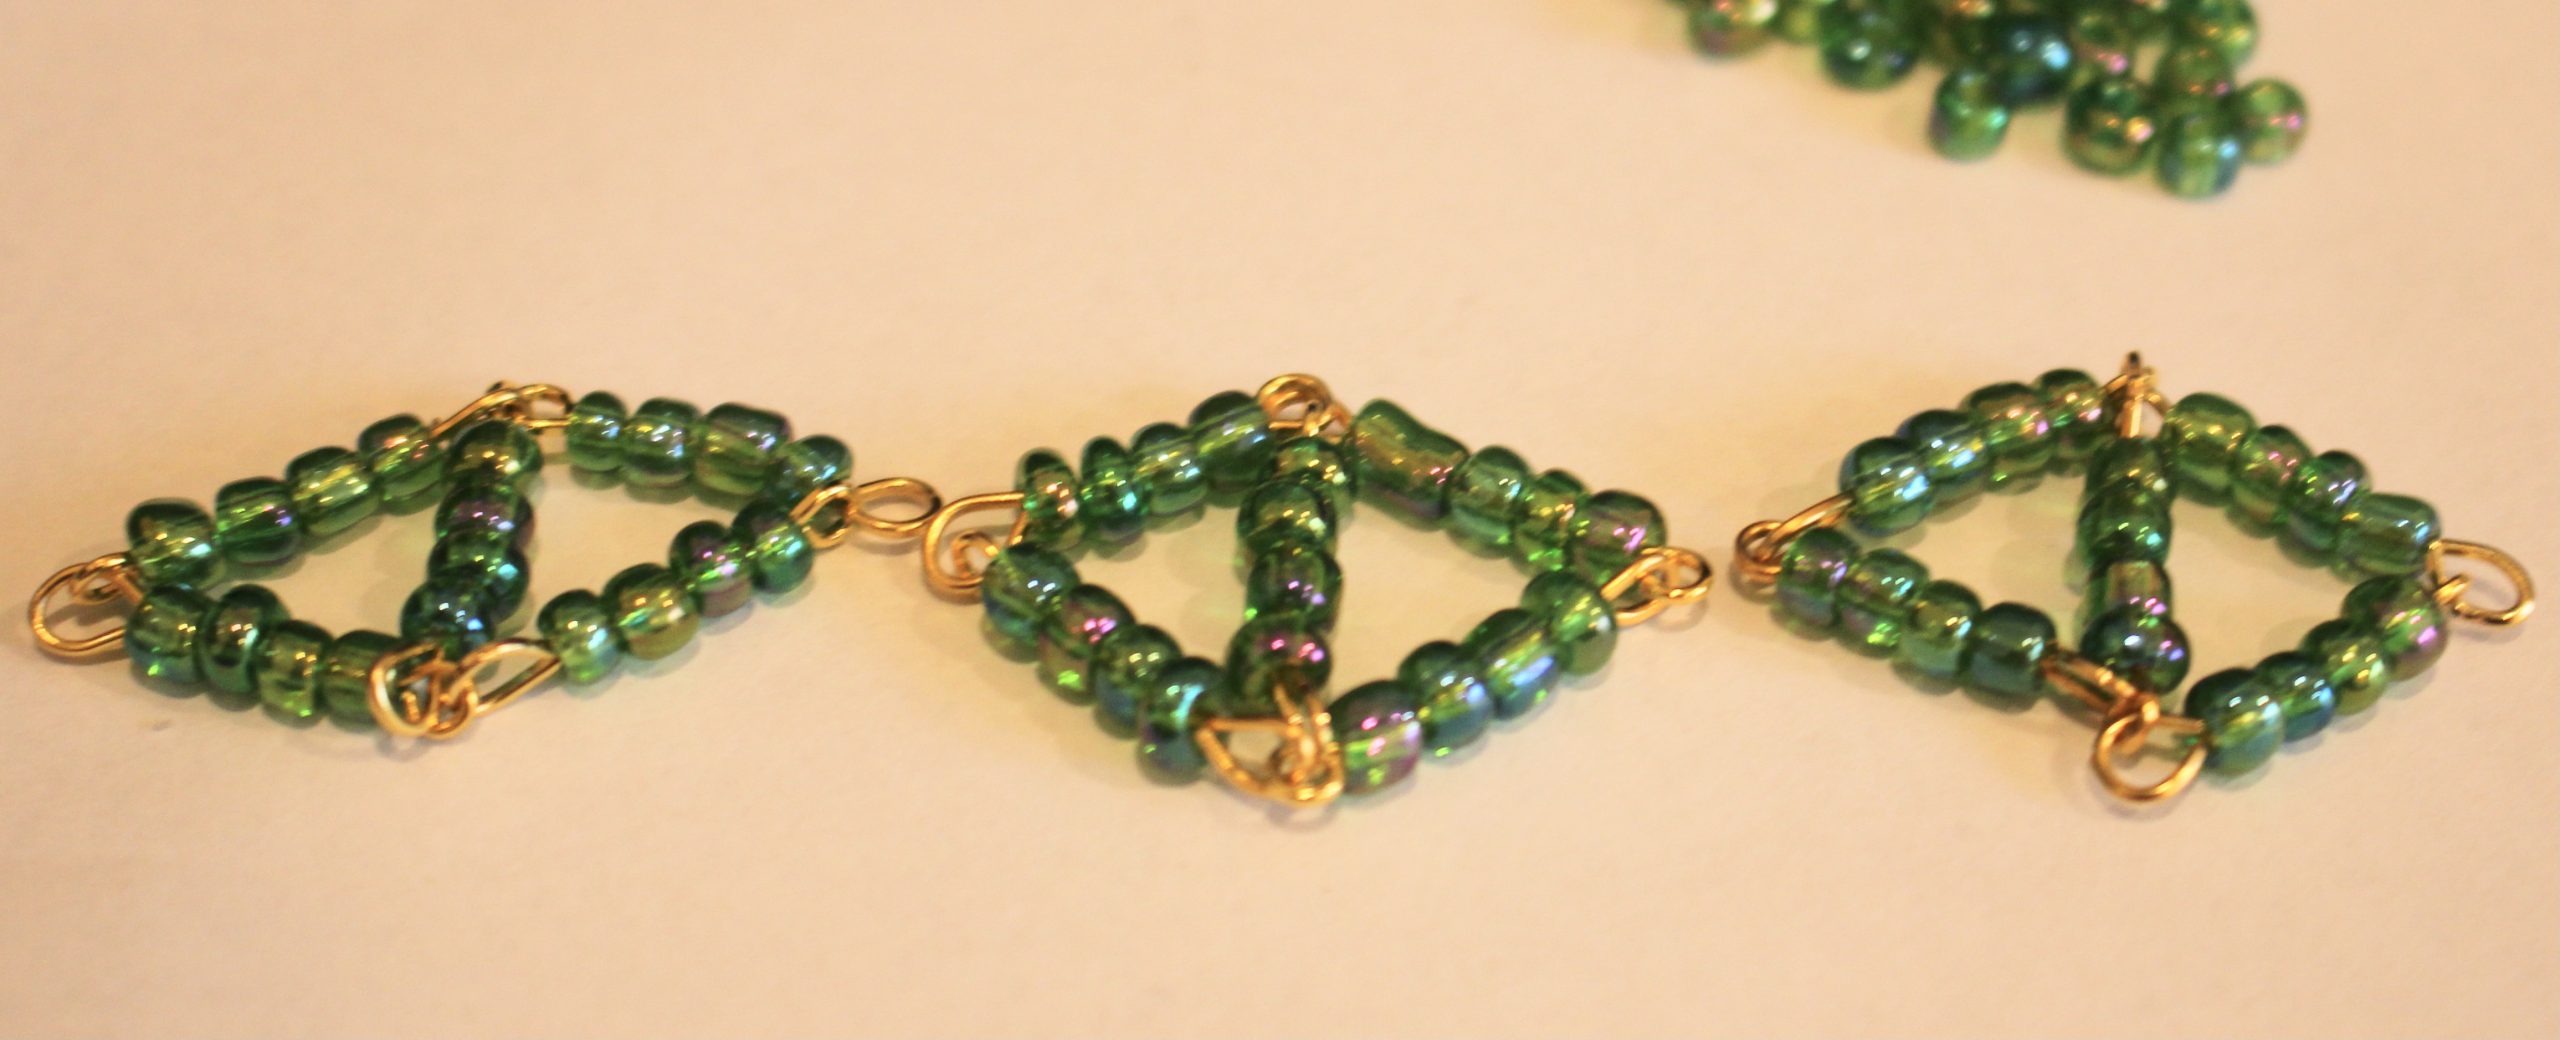
9: Repeat steps 1-8 until you have enough diamond shapes to fit around your wrist. I ended up making 5 diamonds.


10: Attach each of the diamond shapes together with the small jump rings to form a chain.


11: Attach the clasp components to each end of the chain using the larger jump rings, this will finish the design off!


Now your beaded diamond bracelet is finished and ready to wear!


Here is another design you can make using this beaded diamond shape

-
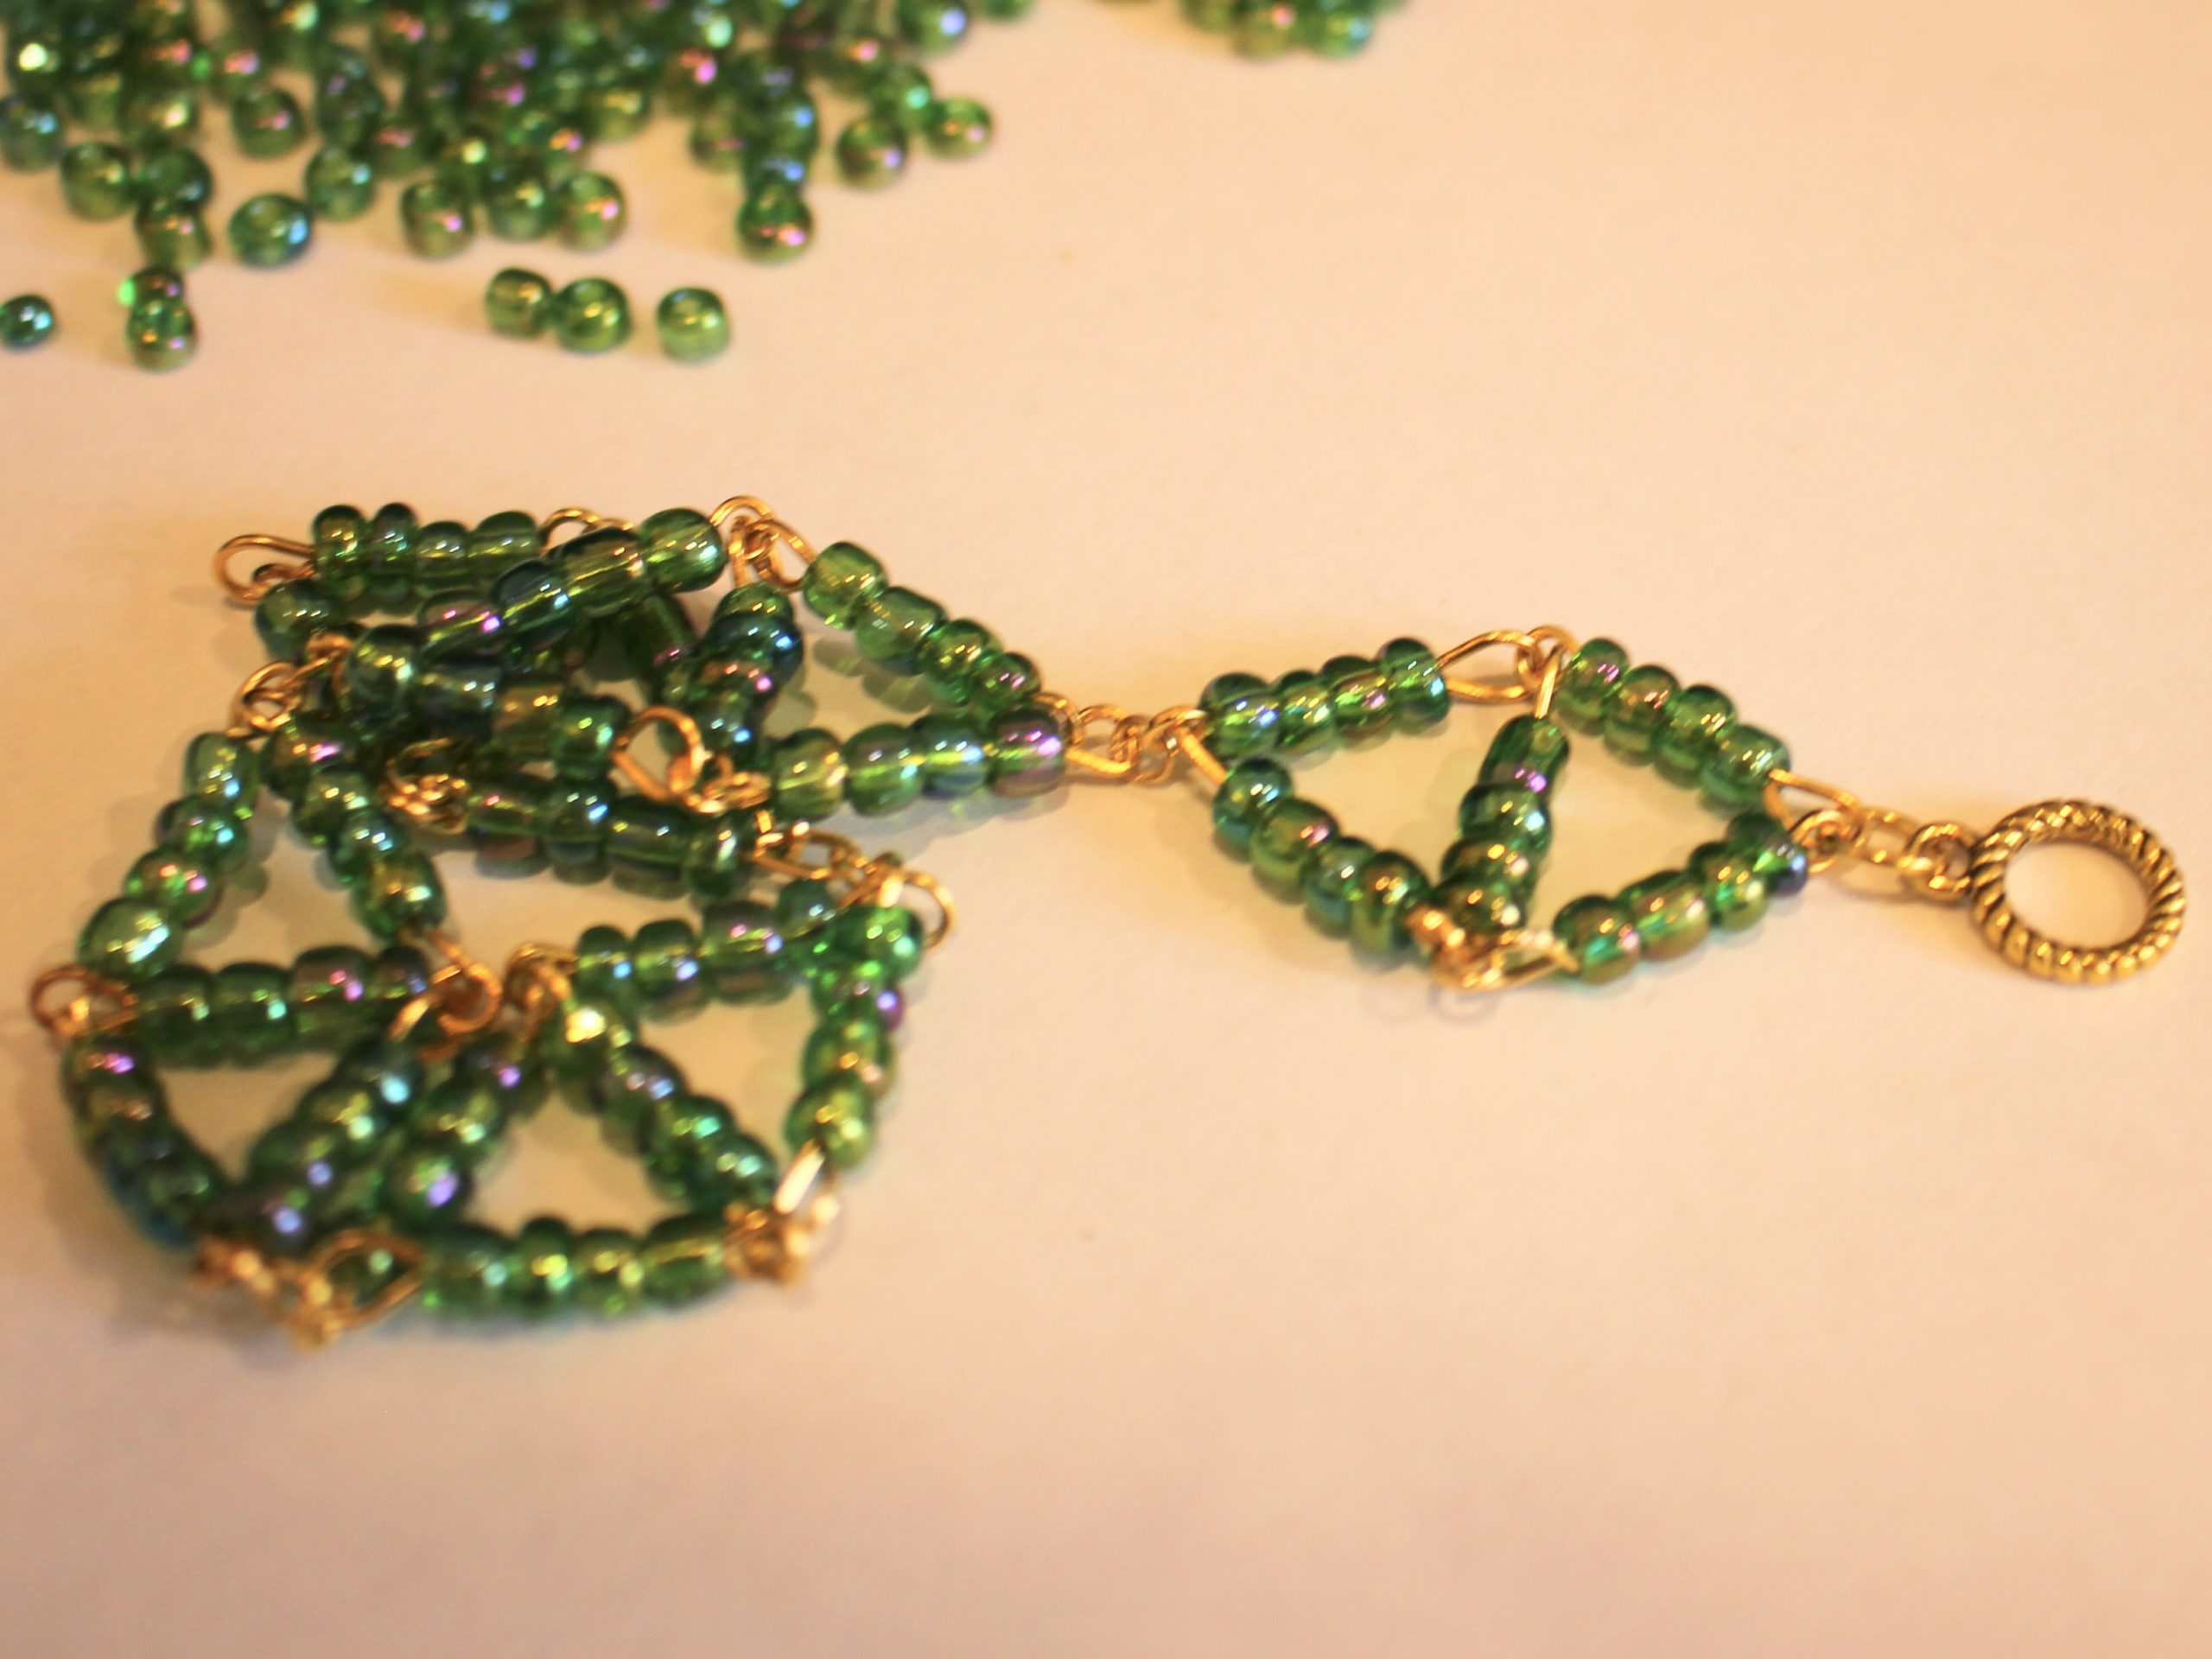
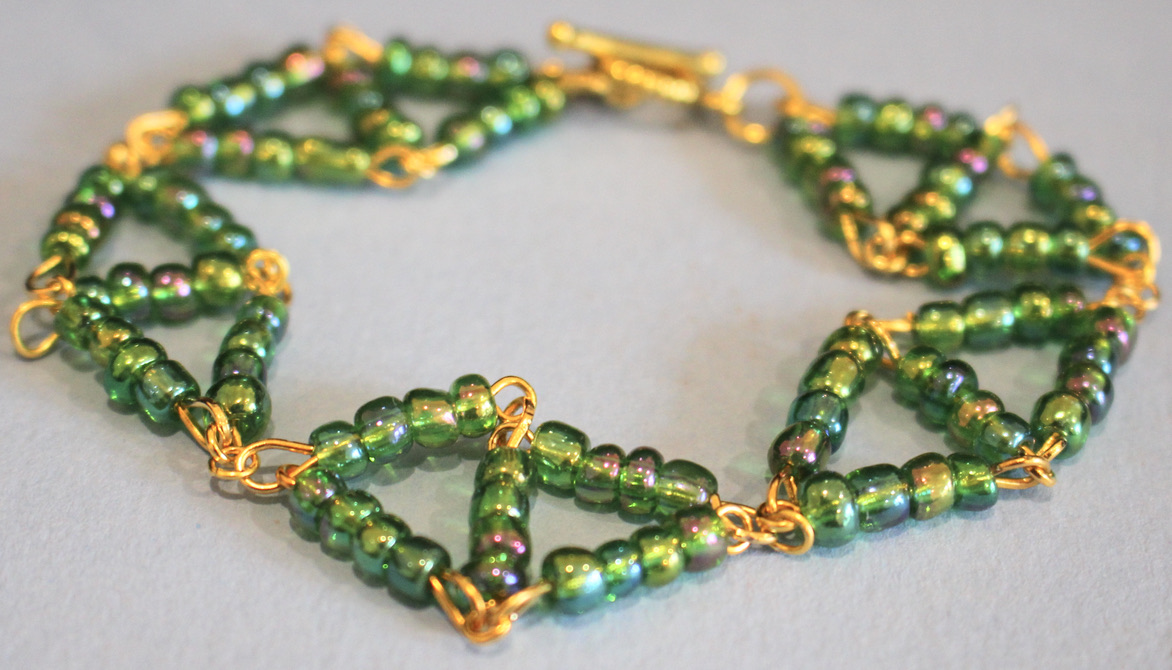
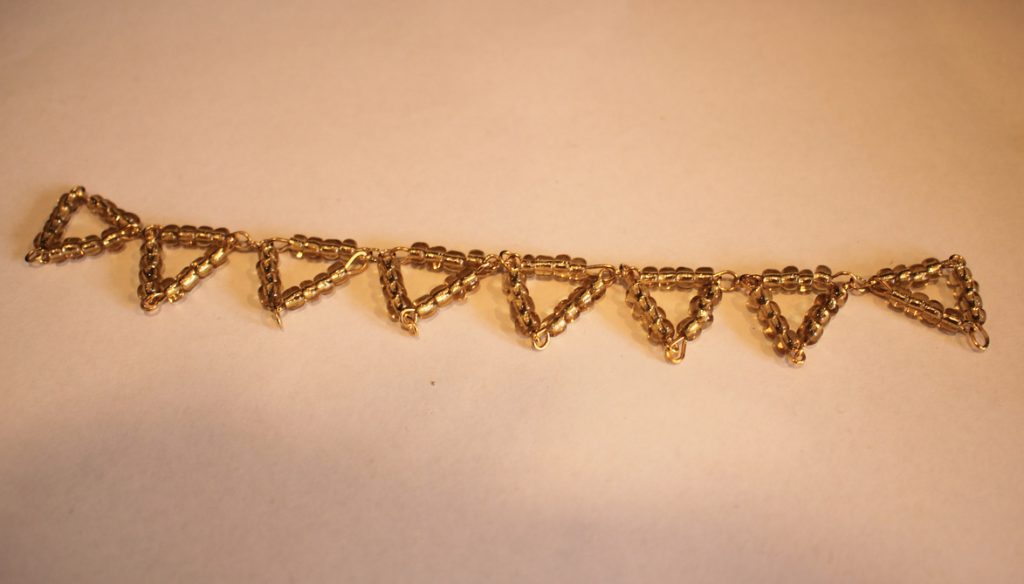
How to make a bunting inspired bracelet by making triangle shapes, so cute!
I was really excited when I came up with this bracelet design! It uses eye pins to make a series of triangles that are linked together to make wrist bunting! I love how there are lots of different ways you can use findings to make unique and sculptural pieces of jewelry. Please note that this tutorial contains affiliate links. This design might look complicated but its actually pretty easy bracelet making!
You’ll need these tools and materials to make this cute triangle bracelet:
1: Pliers. I used round nose pliers and flat nose pliers.
Here are some you can add to your jewelers tool kit:
2: Eye pins. I used a bunch of eye pins all the same length, 24 in total but you may need more or less depending on the size of your bracelet. I used gold tone for this design.
Here are some for your bracelet DIY:
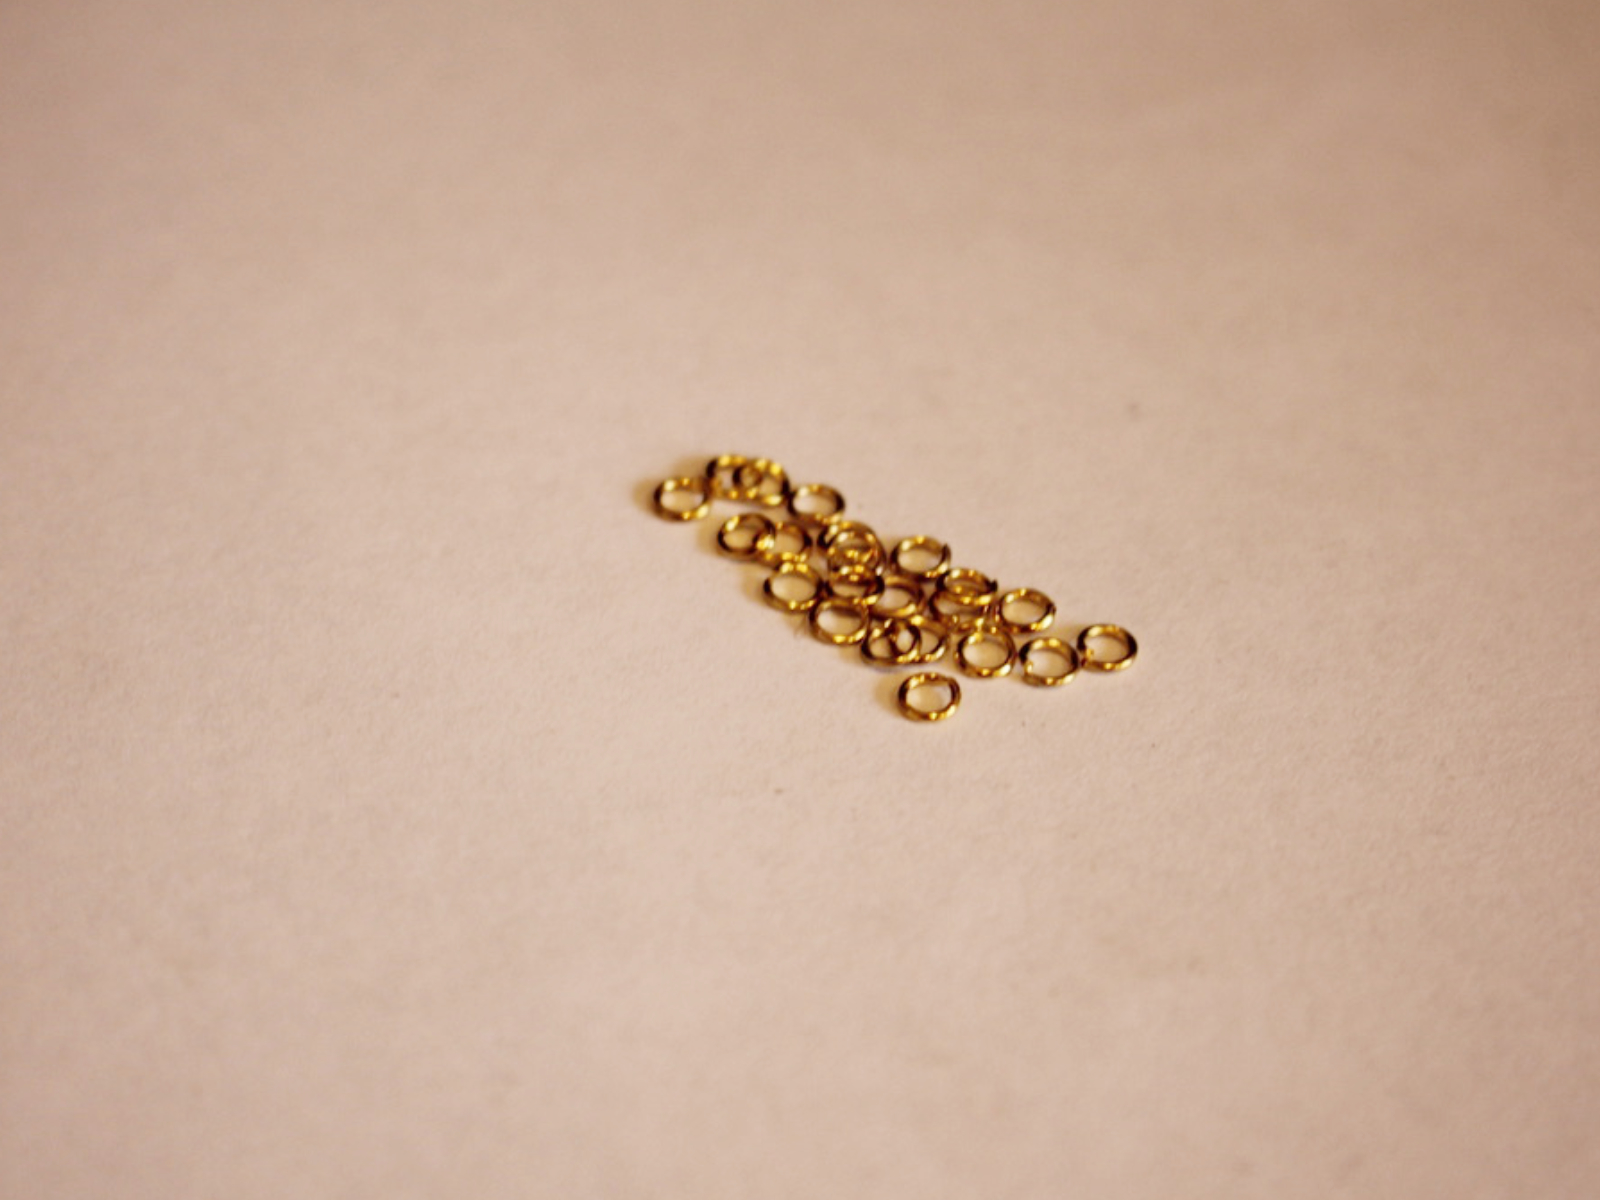
3: Jump rings. I used 7 small jump rings in a gold tone. These were used to attach the triangles together.

4: Two larger jump rings to put the clasp onto the triangle chain.

Here’s a link to some different sized jump rings that you can add to your jewelry kit:
5: A toggle clasp. Mine was gold to match the rest of the hardware I used.

Check out this toggle clasp:
6: Beads. I used some yellow glass e-beads but you could use any colour.

Here are some links to beads you can use in crafting your bracelet:
Follow these steps to make your bunting inspired triangle bracelet:
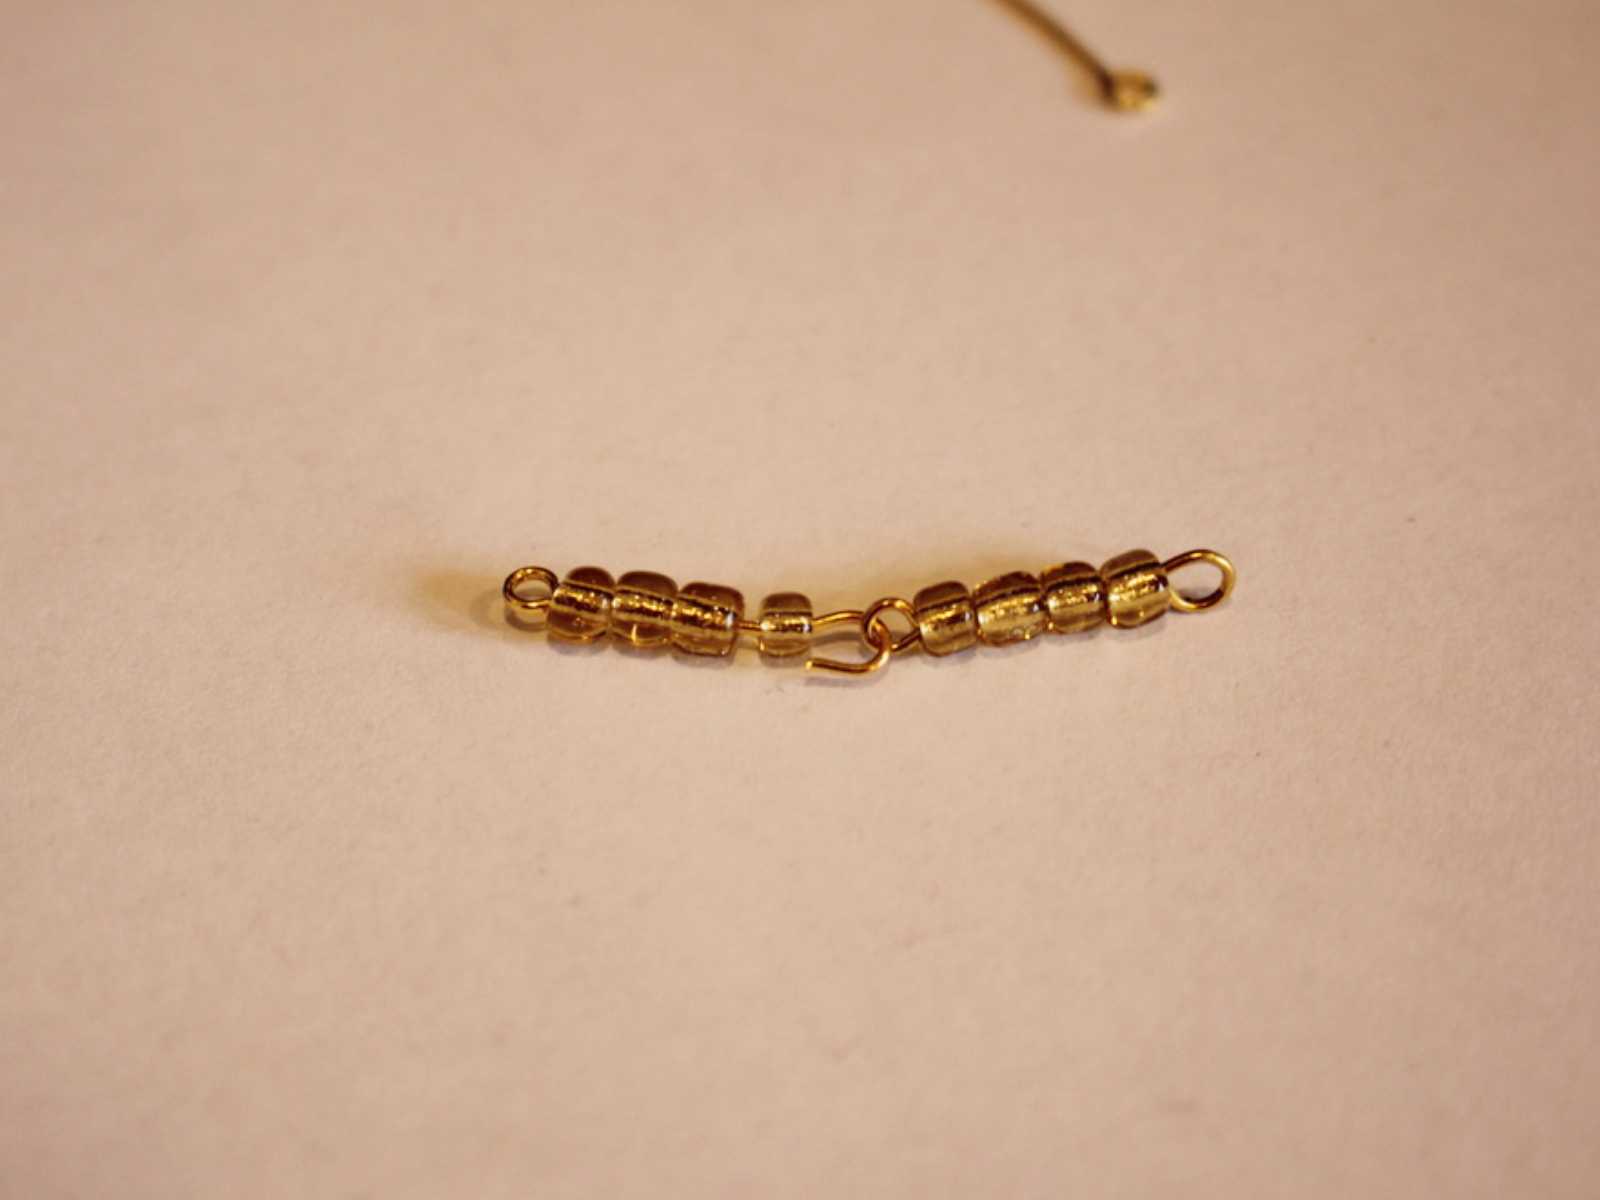
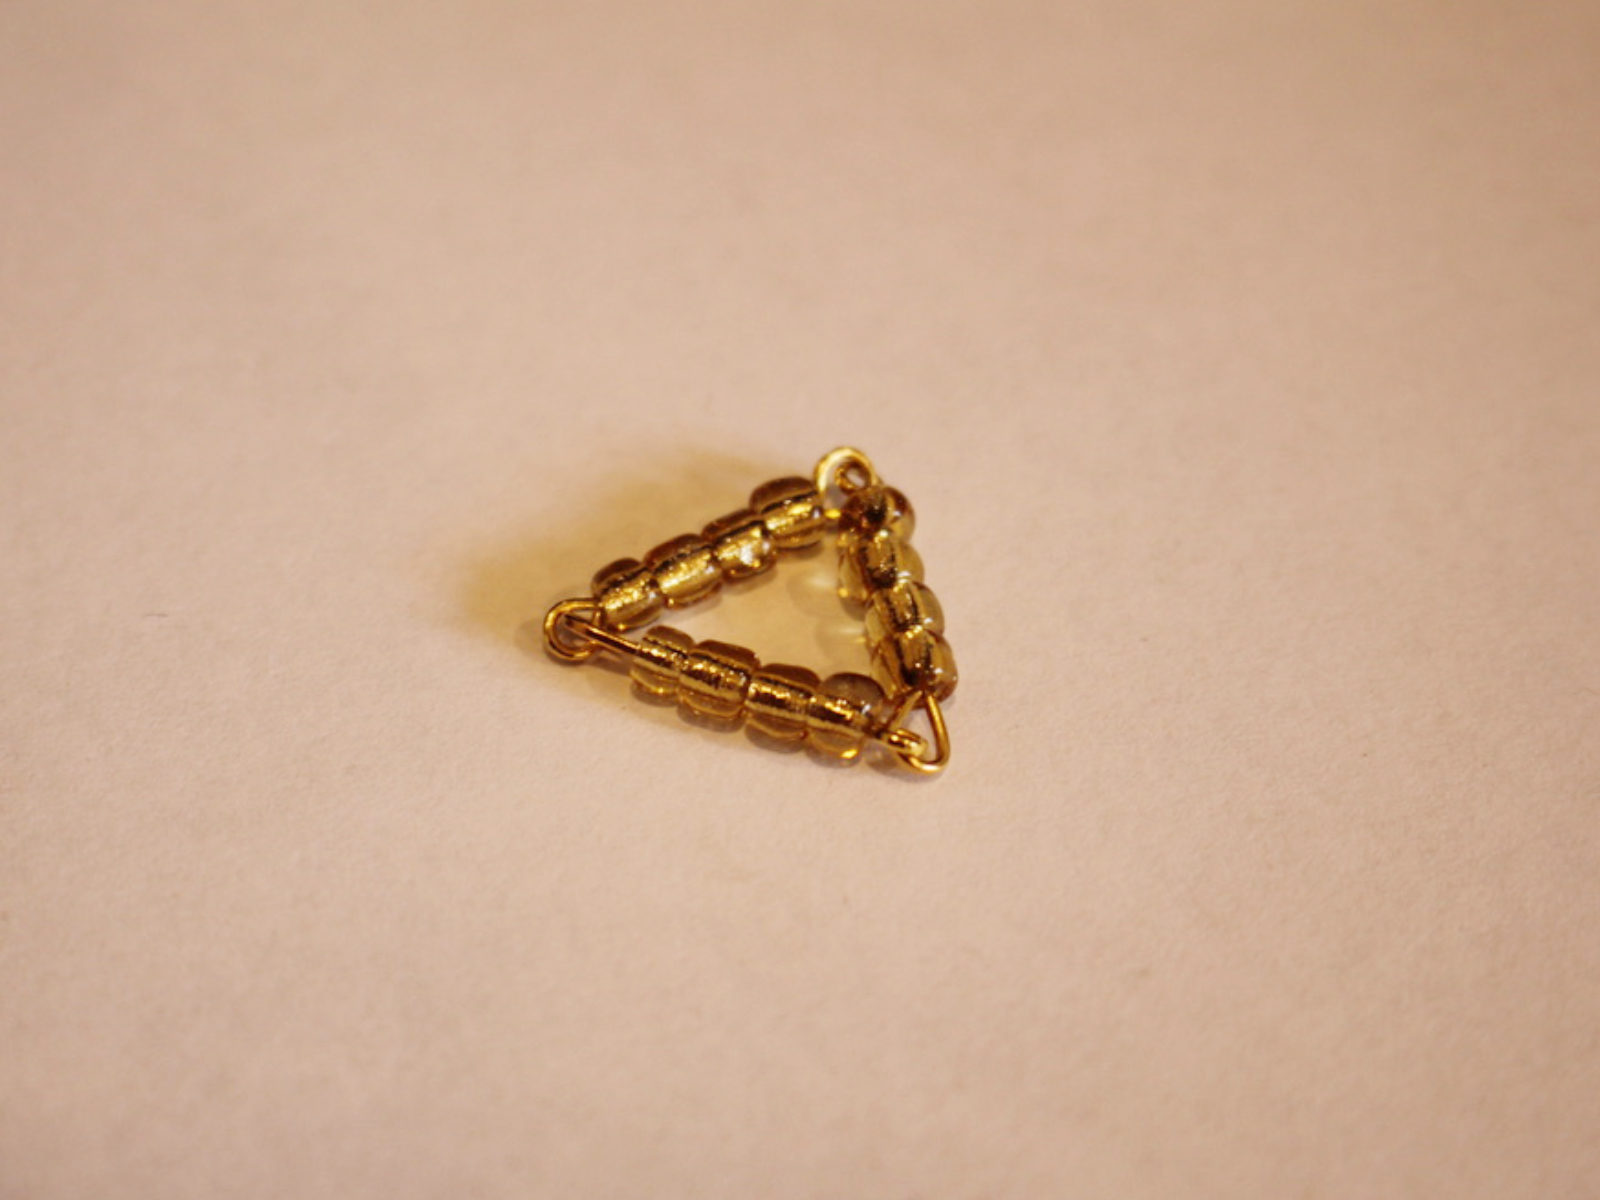
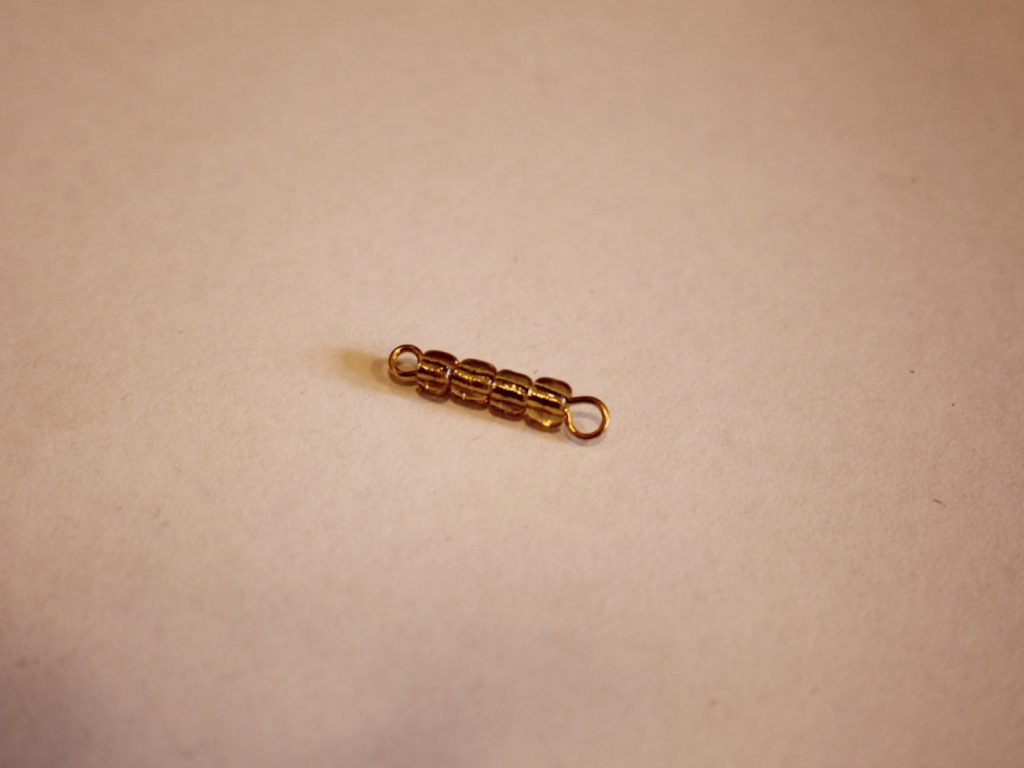
1: Take one of the eye pins and add beads until there is approximately 1cm left without beads.
2: Bend the unbeaded section so that it forms an angle to the beaded section. You can do this with your fingers if your pin is soft enough or use your pliers.

3: Bend the top of the pin around the barrel of your round nose pliers to form a loop.
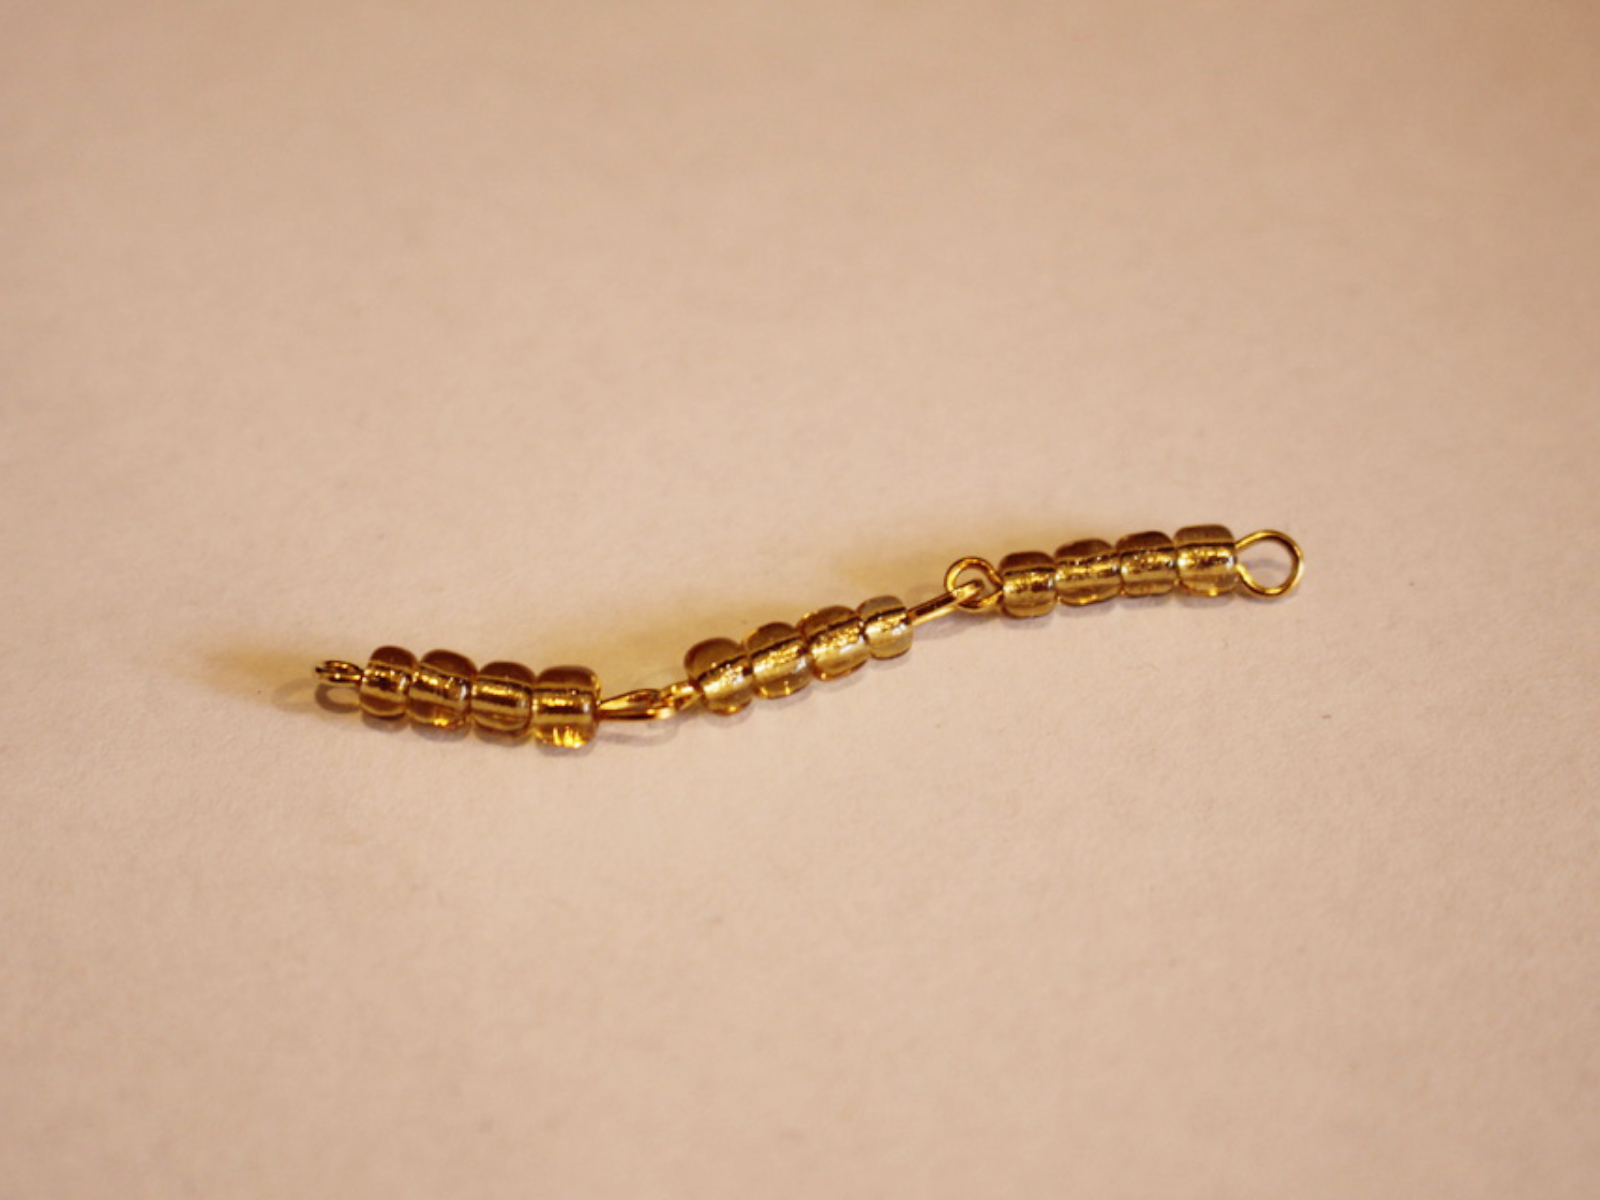
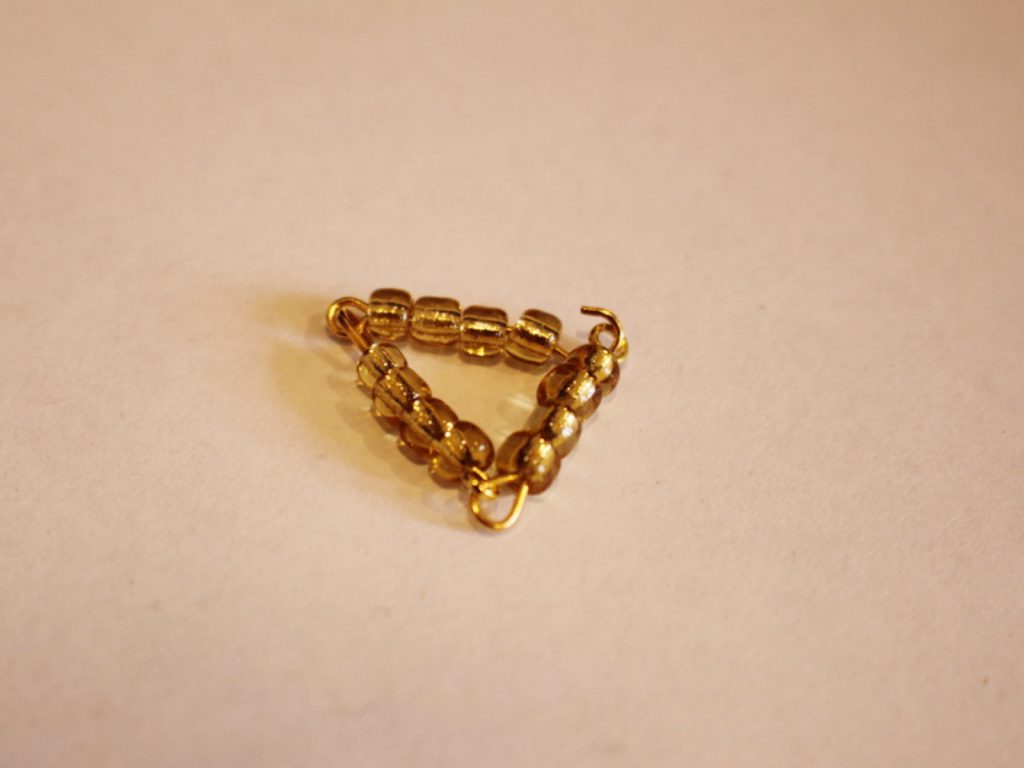
4: Repeat steps 1 to 3 for a second pin. Open one of the loops at the end of a pin and attach it to the first pin you completed. Close the loop to secure the pins together.


5: Repeat steps 1-4 for another pin.

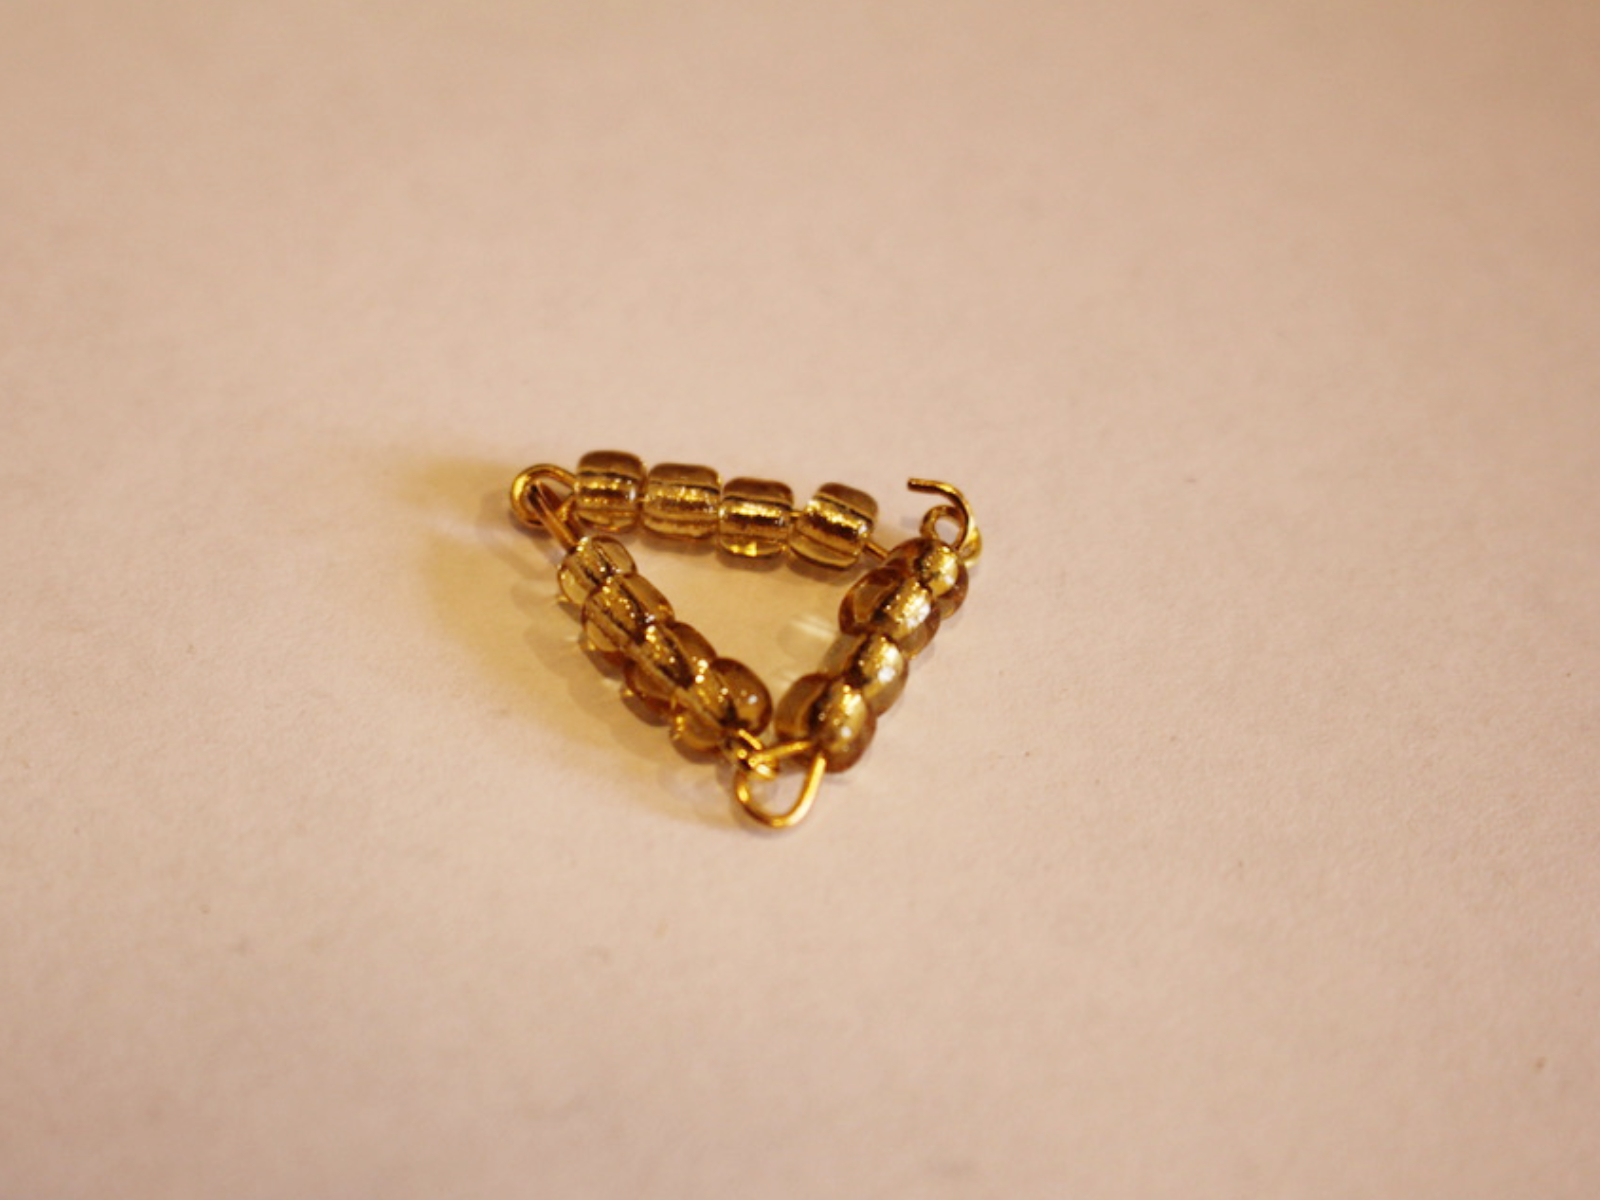
6: Take the chain you just made and open a loop at the end of one of the end pins.
7: Link the two end pins and close the loop to form a triangle shape.

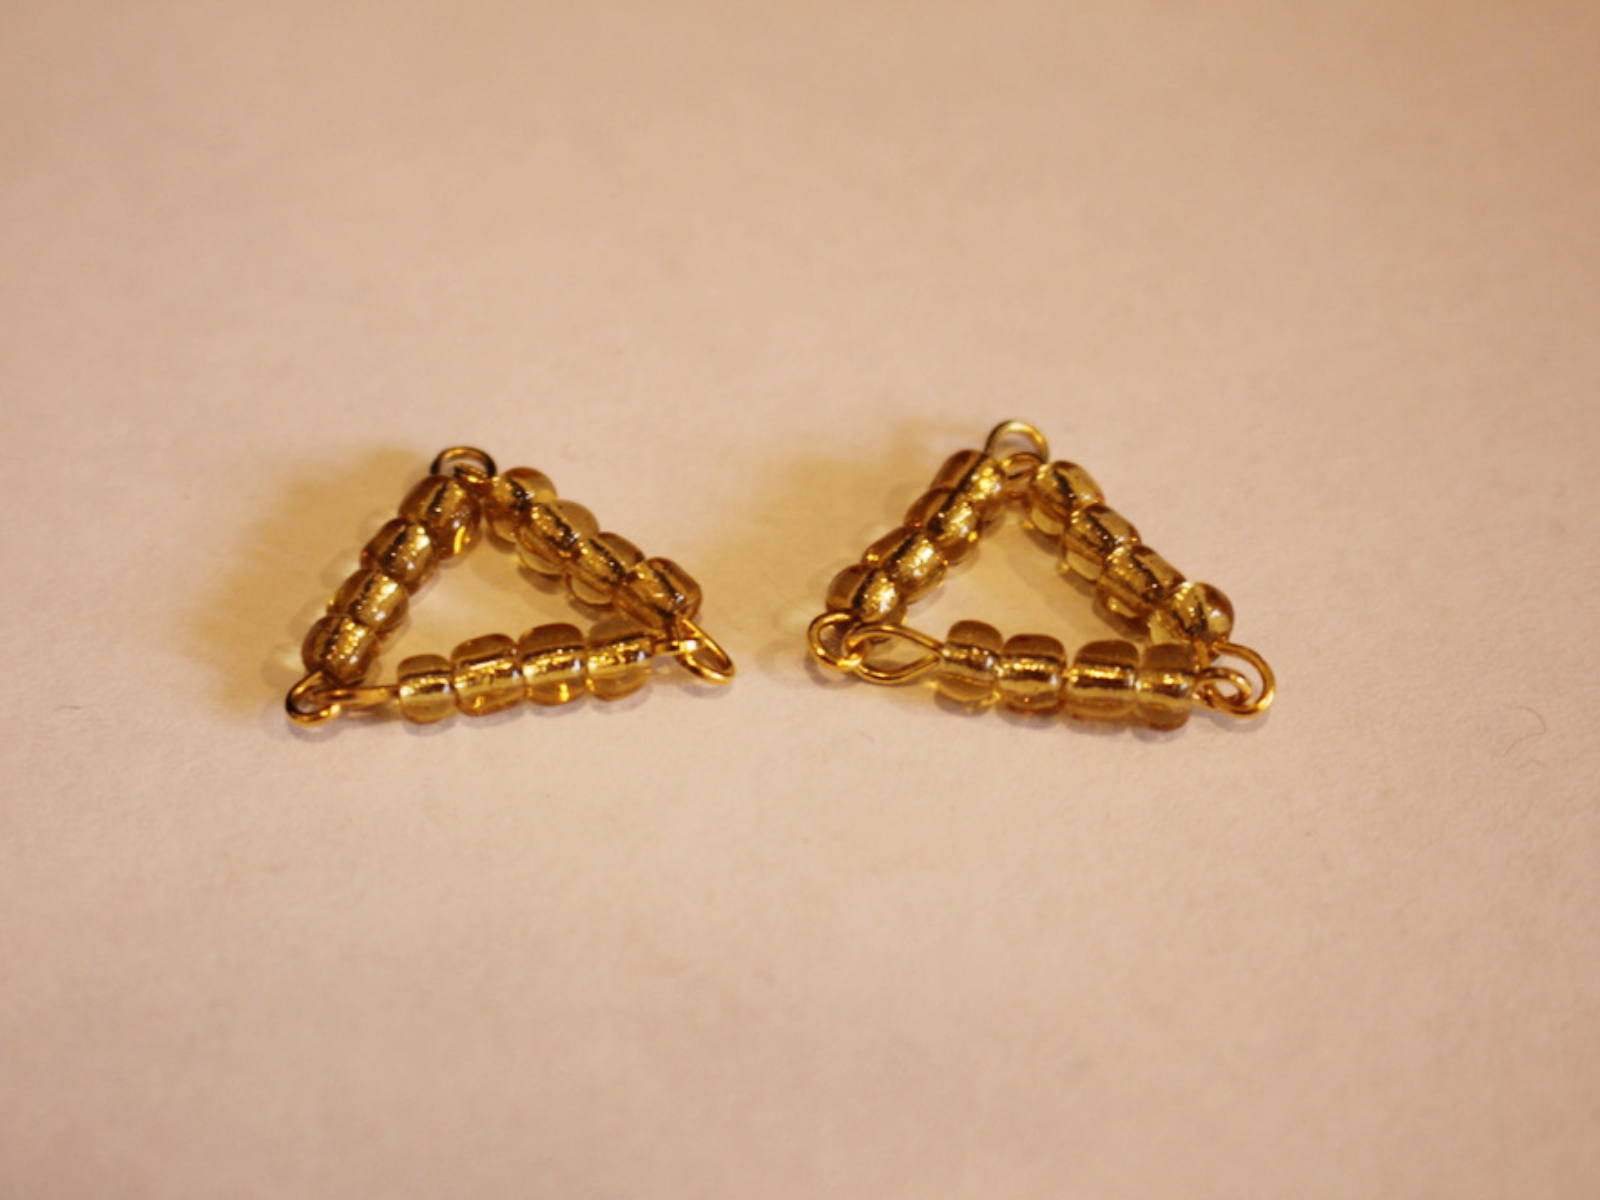
8: Make another triangle as you did in steps 1-7 and attach the two triangles together using one of the small jump rings, this is the start of your triangle chain.

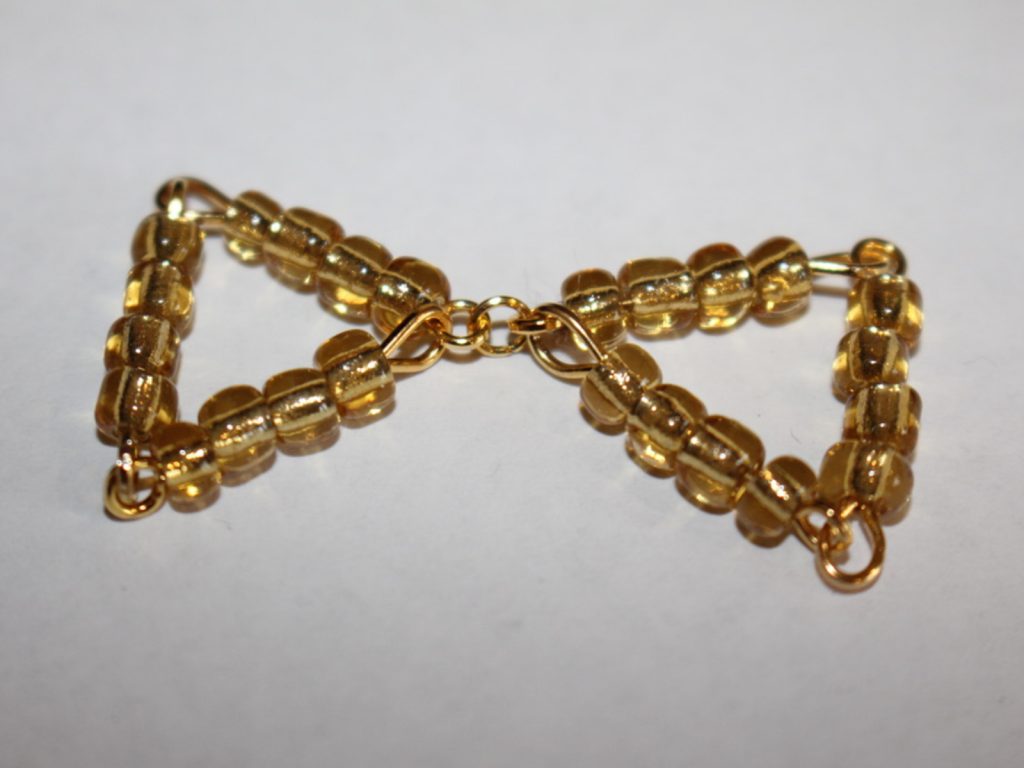
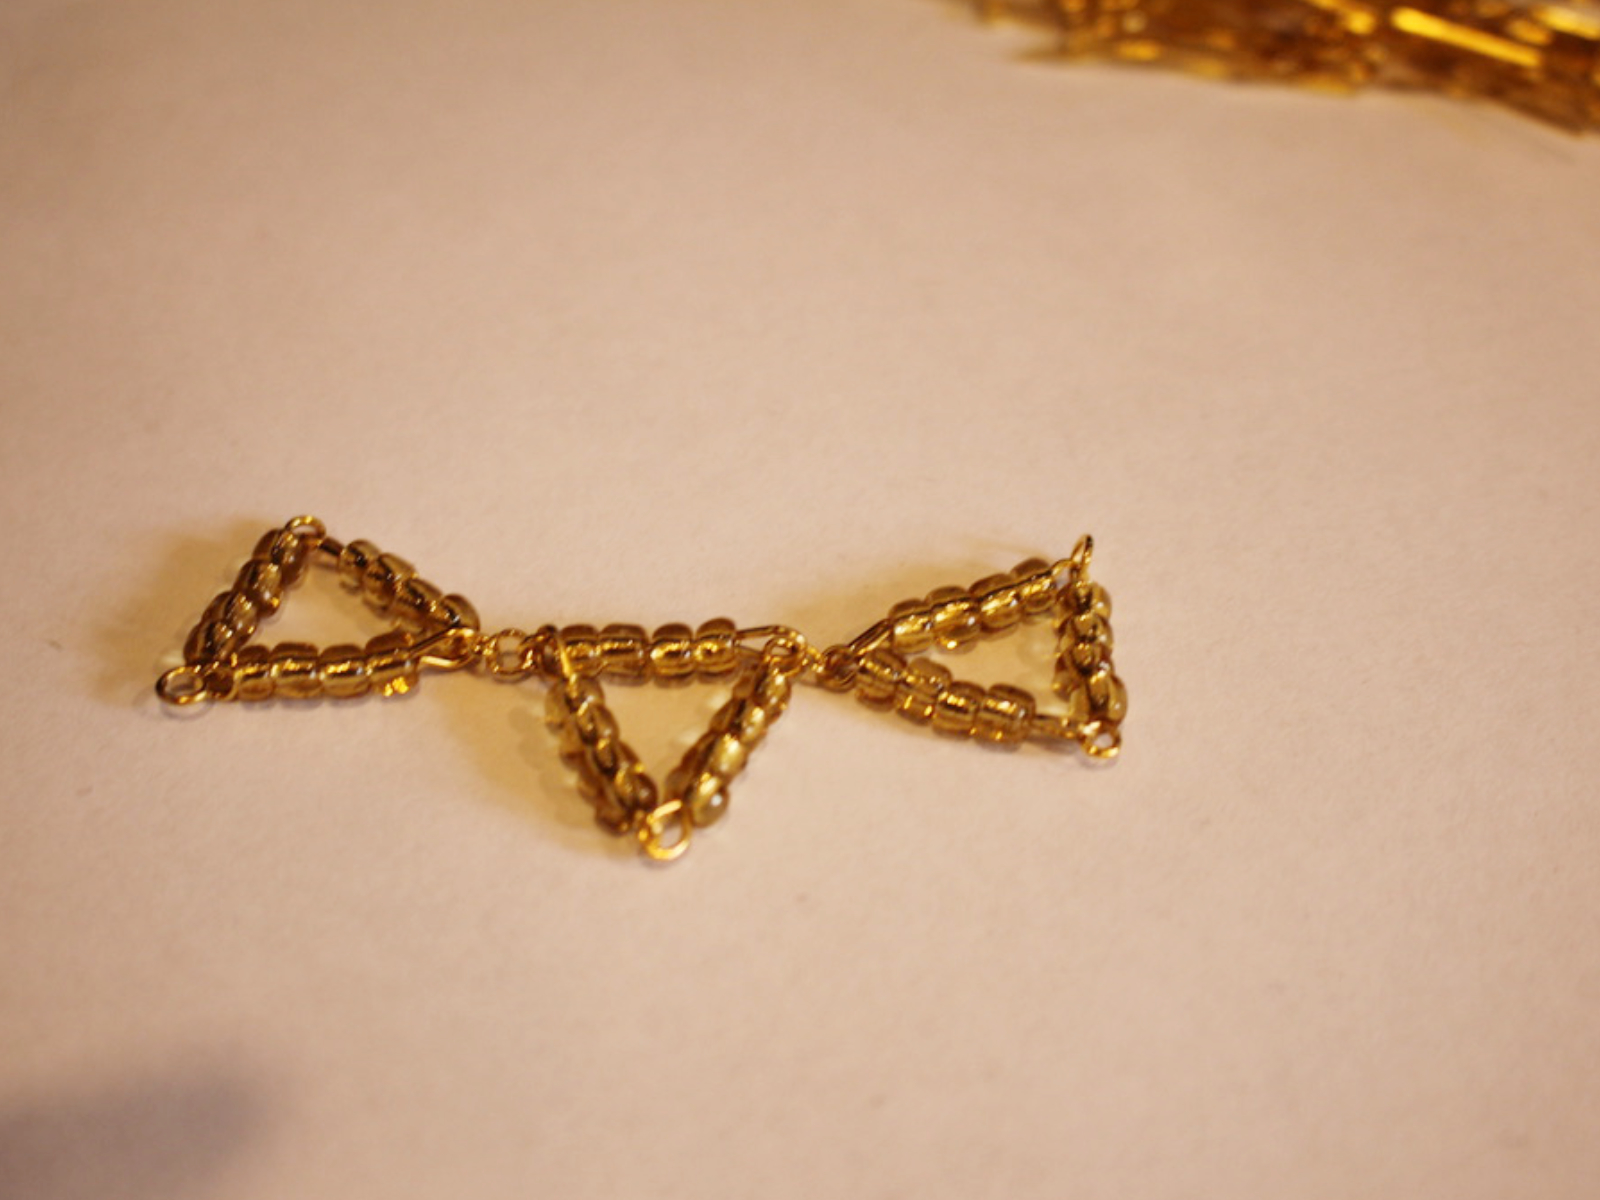
9: Repeat steps 1-8 until you have a triangle chain long enough to fit your wrist. Make it a tiny bit smaller than you need to account for the length of the jump rings and toggle clasp.
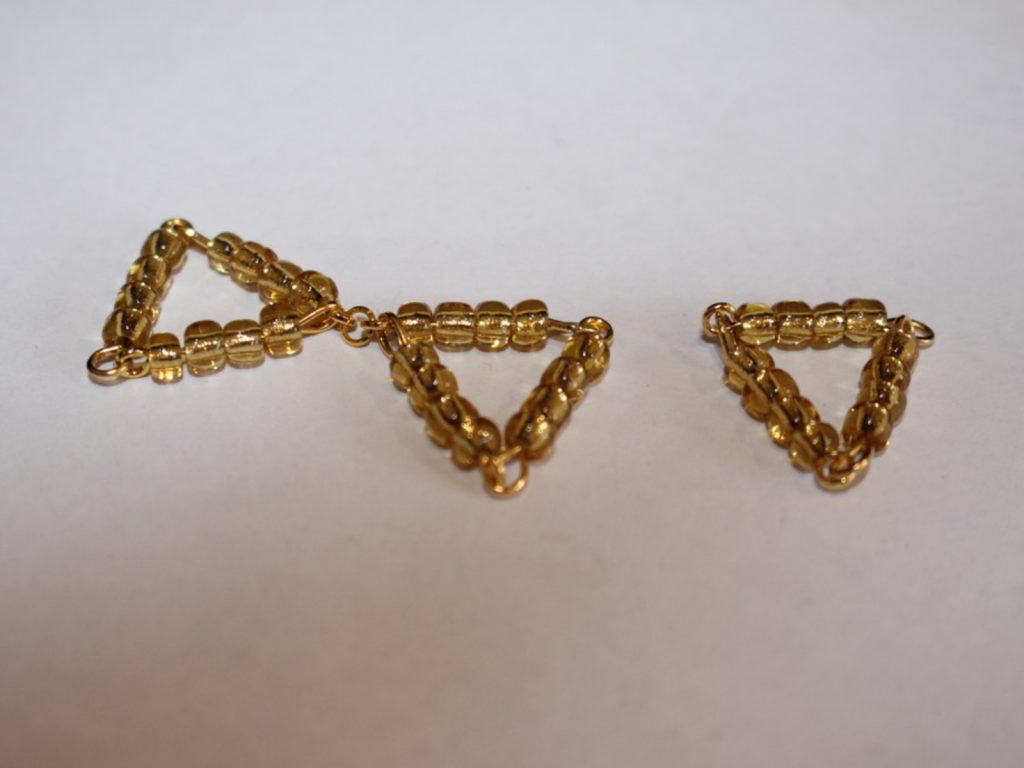

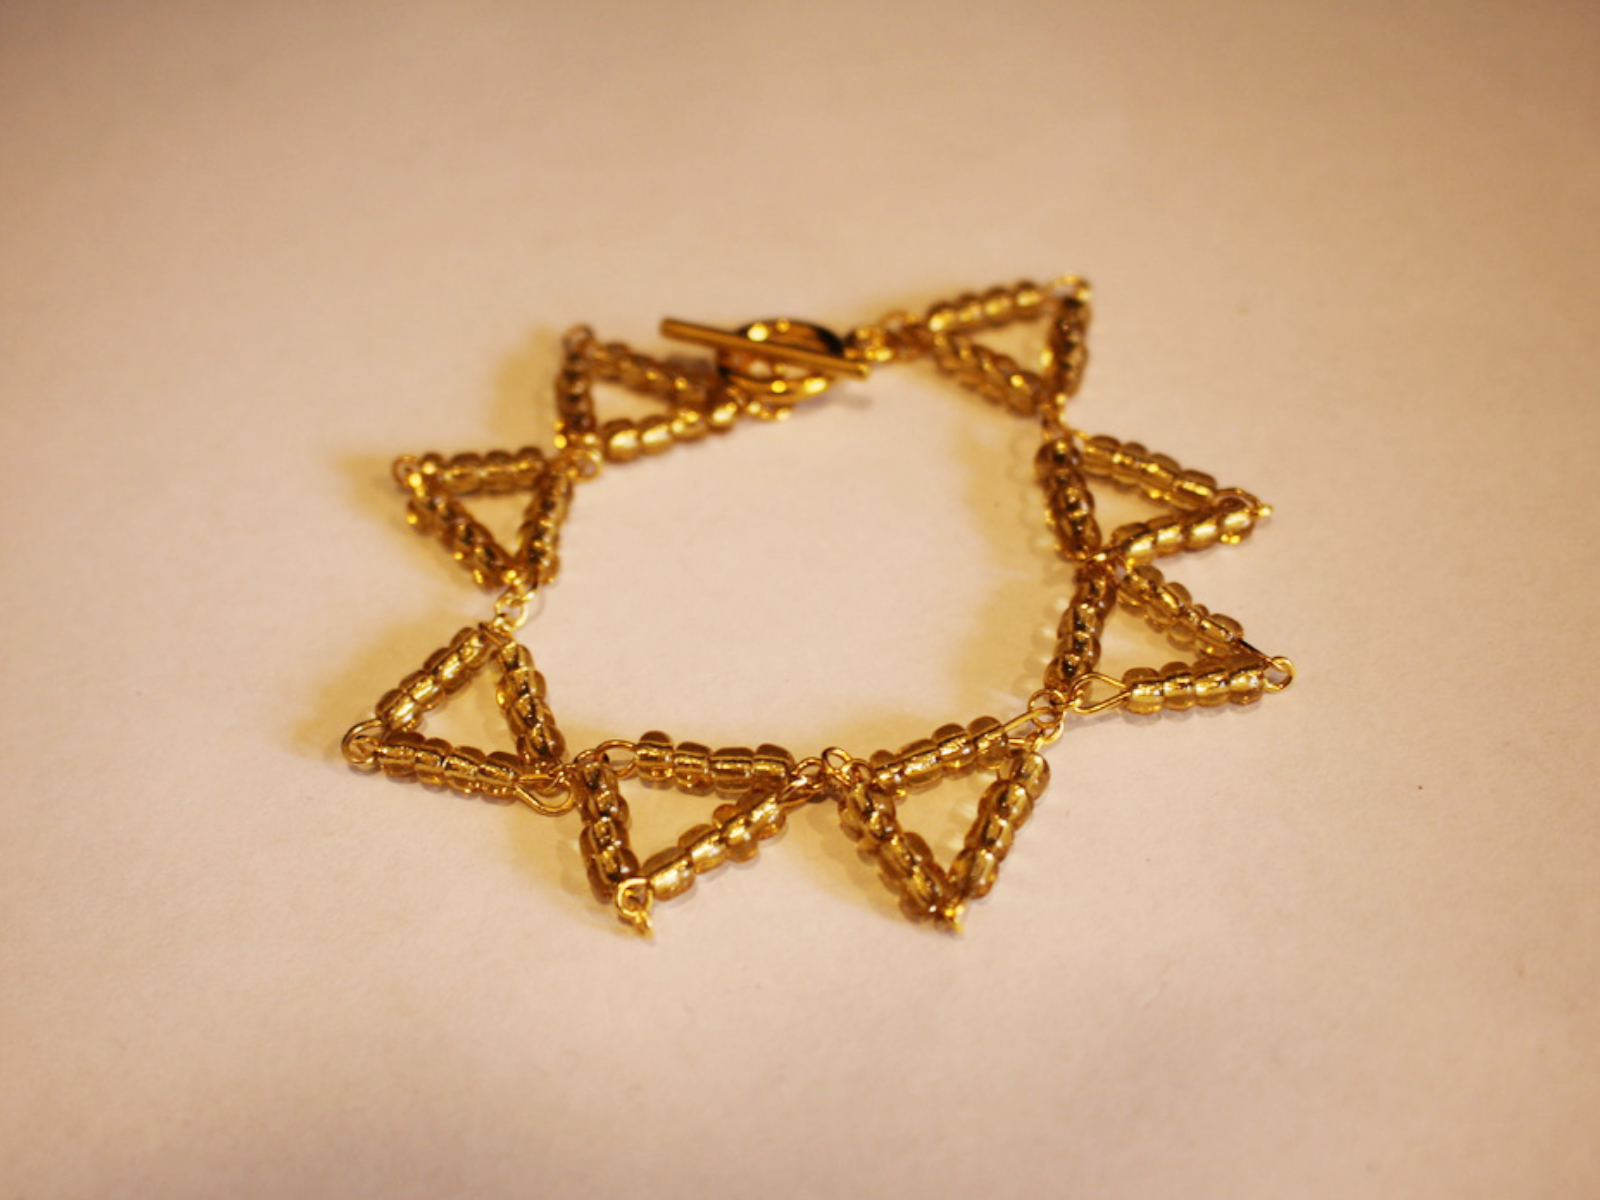
10: Attach the toggle clasp components to each end using the two larger jump rings.


Now your cute triangle bracelet is finished and ready to wear! This bracelet is so fun to fidget with and will look great layered with other gold and silver tone jewellery. What colours will you make yours in?


I think if I make this design again I will bead it with a variety of pastel coloured beads for a cute vapor-wave look. How cute would that look when paired with a fun floral dress in summer?
I hope you have fun making your own adorable triangle bead bracelet! I sure had fun making mine <3
If you liked this tutorial, here are some other’s I have created that use eye pins and beads to form triangle shapes:
- This one uses gravity to form a triangle shaped pair of earrings!
- Follow this video tutorial to make some triangle tassel earrings.
- Here’s a triangle charm lariat.
- A pair of basic triangle earrings made with beaded eye pins.
- A chain and eye pin beaded triangle pendant.
- A triangle necklace made from long metal beads and string.
- Some cute beaded mini triangle earrings.
- A triangle statement pendant.
- Some chain and pin triangle drop earrings.
- Use triangles to make this 3D diamond pendant.
- Triangles form this flat diamond shaped bracelet charm.
I hope you enjoyed this tutorial and have fun finding some other pieces to make at home! Have fun!
-
Here’s how to make a bead chain lariat
Bead chains are pretty cool, and a fun way to use any random beads you have lying around. I recently made this kitschy hodgepodge lariat necklace using the bead chain technique. This tutorial features affiliate links.
Here are the tools and materials you need to make your bead chain lariat:
1: Pliers. I used by round nose and flat nose pliers for this design.
2: An assortment of beads. I used a random assortment of plastic, timber and glass beads.

3: A bunch of eye pins.

4: Two head pins.

5: A lobster clasp.

6: Two medium jump rings.

7: Two smaller jump rings.

Follow these steps to make your bead chain lariat:
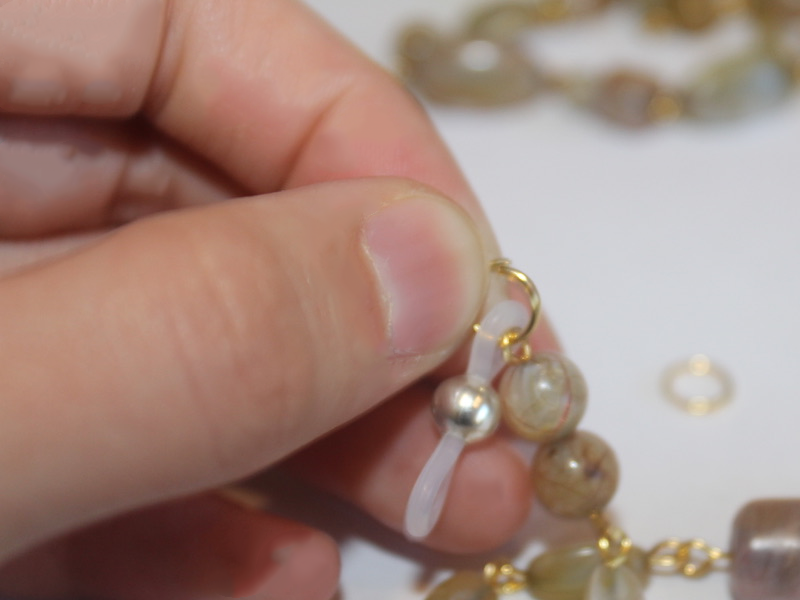
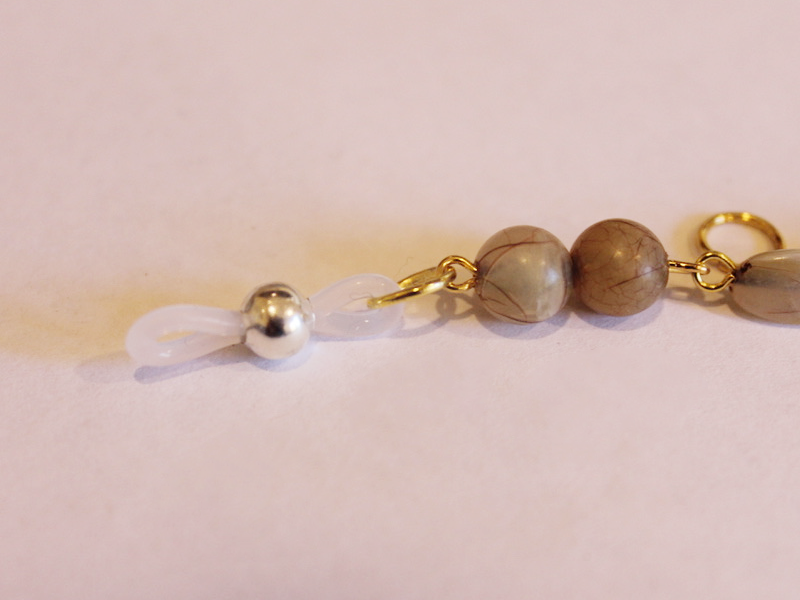
1: Add some feature beads to one of the head pins. I used this silver plastic heart bead and some glass seed beads.

2: Bend the pin at a right angle and use the round nose pliers to form the top into a loop.


3: Set this pin aside.
4: Begin adding beads to the eye pins.

5: Once each pin is beaded, bend the top to form a loop using round nose pliers. This will secure the beads in place.

6: Repeat this step for the other pins, attaching the pins together by opening one of the loops and sliding it through another to form the chain.


7: Once you have a chain long enough to fit your neck, attach the two ends together using one of the larger jump rings.


8: Create a few extra links and attach them to the middle of the necklace, finishing with the first head pin you beaded.


9: Split the top of the chain opposite the lariat chain you just attached.

10: Attach the clasp to the chain using one of the smaller jump rings and add another jump ring to the other side.


11: Bead the other head pin, looping it at the top as you did the others. Attach this pin to the chain behind the clasp using the other larger jump ring.


Now your necklace is finished! So fun!


This tutorial contains affiliate links.
-
How to make a beaded chain ring. This is the cutest idea!
Do you like the look of delicate rings? This chain ring design is fun to make and even more fun to wear! This tutorial contains affiliate links.
You’ll need the following tools and materials to make your beaded chain ring:
1: Pliers. Round nose pliers and flat nose pliers are useful for this DIY.
2: A short piece of chain, make sure you have enough to fit around your ring.

3: An eye pin.

4: A bead. I used this blue wooden flat bead.

Follow these steps to make your cute beaded chain ring:
1: Add the bead to the eye pin.

2: Secure the bead to the pin by looping it around the barrel of the round nose pliers.

3: Attach one side of the newly formed charm to one side of the chain.

4: Wrap the chain around your finger to determine how long to make your chain.

5: Trim the chain to the length you chose.

6: Attach the other end of the chain to the other side of the bead charm.

Now your beaded chain ring is finished! How adorable is this design?


Here is another one I made using a plastic love heart bead.

This tutorial contains affiliate links.
-
Do your barrettes need something more? Make this cute hair clip with a beaded chain feature.
I think that this hairclip design is so cute! It features sparkly charms and an awesome dangling chain that will loop elegantly across your hair.
You will need the following tools and materials to make your beaded chain hairclip:
1: Pliers. You’ll need your flat nose and round nose pliers.
2: A hairclip finding with holes in either side.

3: Two large jump rings.

4: Eye pins, I didn’t use as many as are pictured here.

5: A selection of beads. I used these mixed glass beads.

6: A selection of glue on charms. I used this mix of resin charms and rhinestones. I didn’t use all of these either.

7: Two part epoxy glue. I used Araldite glue.

8: A scrap piece of paper for mixing the glue.

9: A skewer.

Follow these steps to make your sparkling chain hair clip:
1: Add beads to the eye pins and attach them together by forming loops using the round nose pliers.


2: Once your chain is at your preferred length attach it to the hairclip using the two large jump rings.


3: Squeeze out the glue in equal parts and mix it using the skewer.
4: Add the glue to the hairclip using the skewer.

5: Add the charms to the hairclip. Here’s a tip, I used some blue tack to keep the hairclip and charms in place while the glue was drying.


Once your hairclip is dry it is ready to wear! So cute and trendy.

Here is another one I made using shells and some rose quartz beads.

-
Crystals are Classic… here’s how to make a crystal necklace.
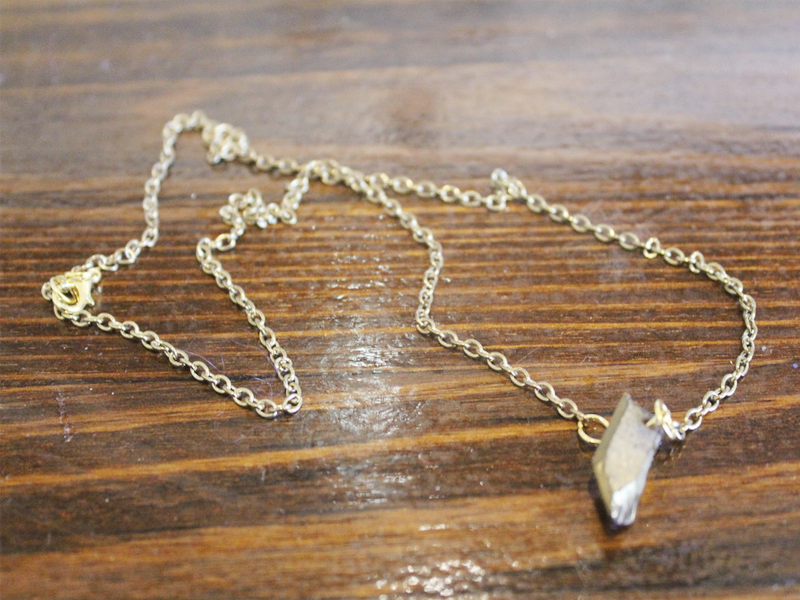
This crystal necklace is a classic piece that you can wear alone or layer with other pieces.
You will need the following tools and materials to make your crystal necklace:
1: Pliers. You will need your round nose pliers, flat nose pliers and cutting pliers.
2: Two pieces of chain long enough to form a necklace.
3: Four jump rings.
4: One eye pin.
5: A lobster clasp.
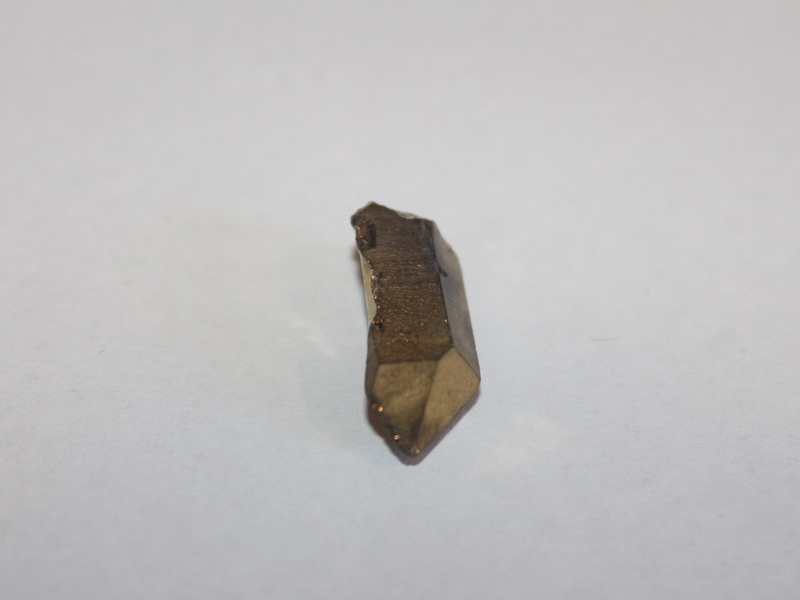
6: A crystal bead. I used this crystal bead with a metallic coating on it.
Follow these steps to make your crystal necklace:
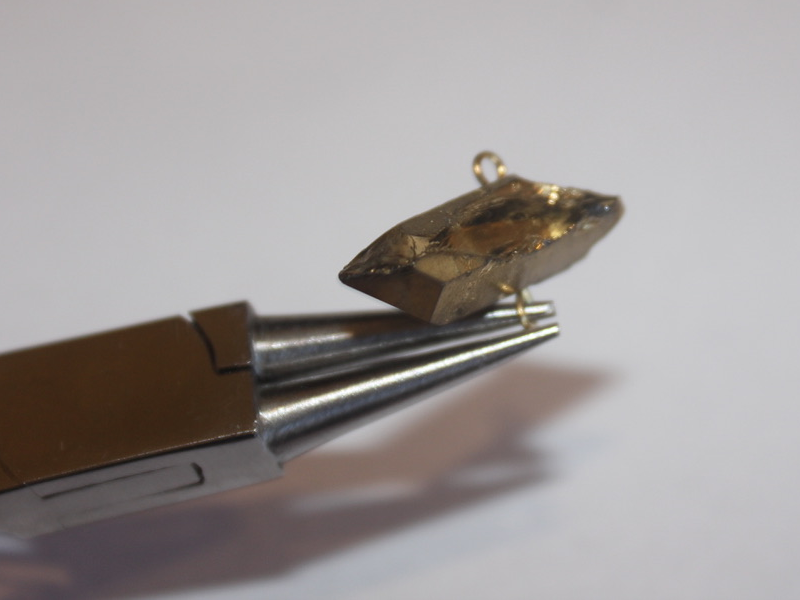
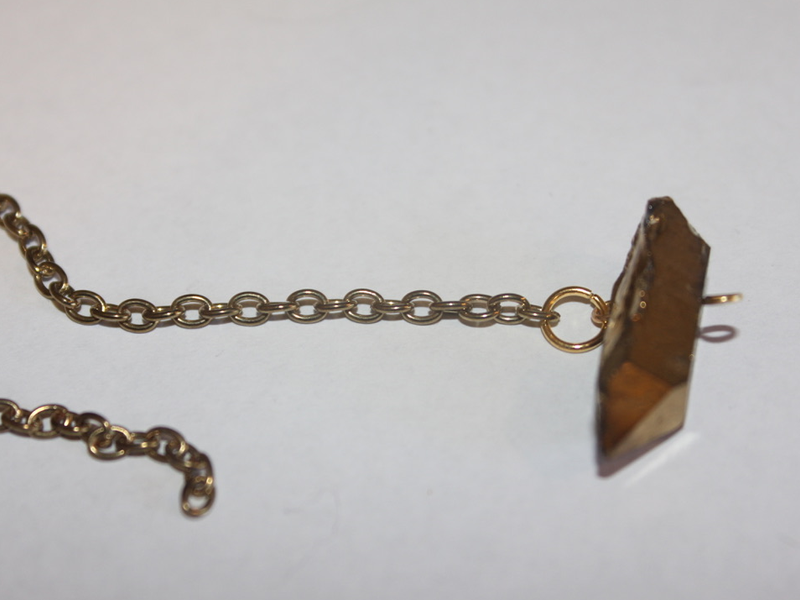
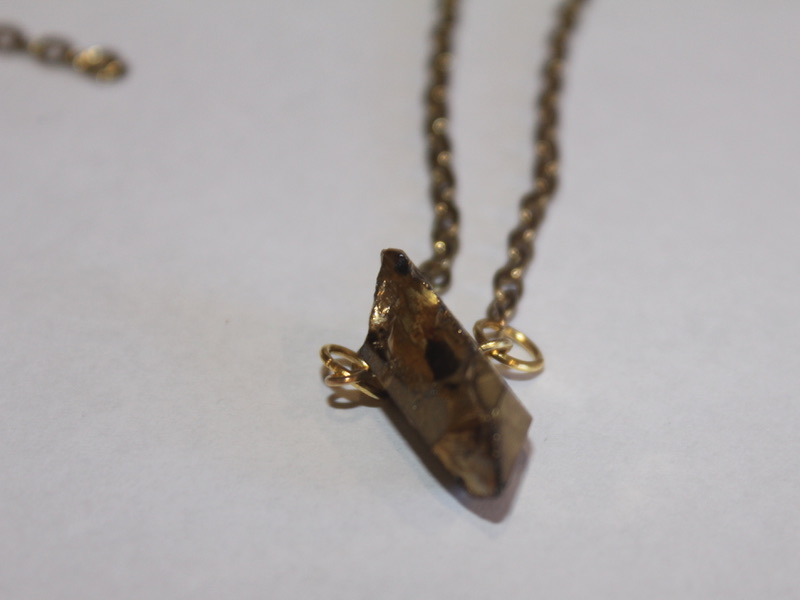
1: Add the bead to the eye pin.
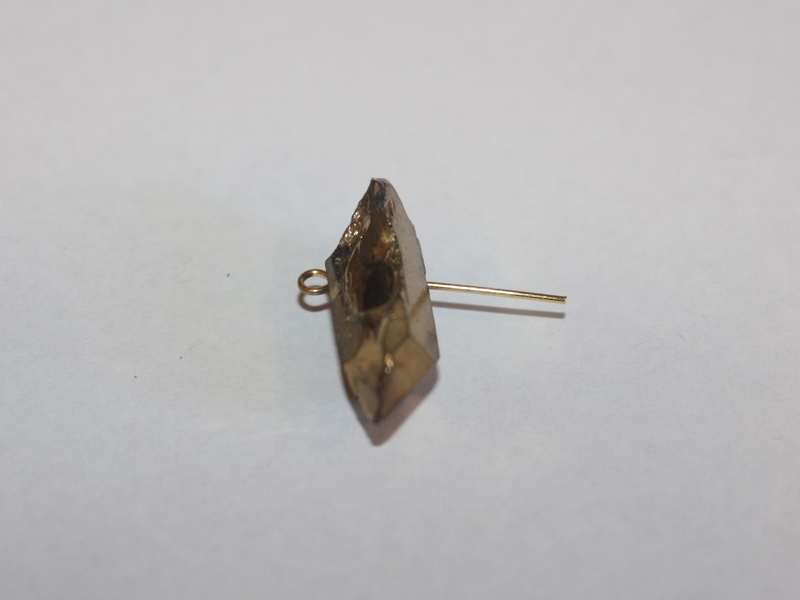
2: Trim the eye pin using the cutting pliers.
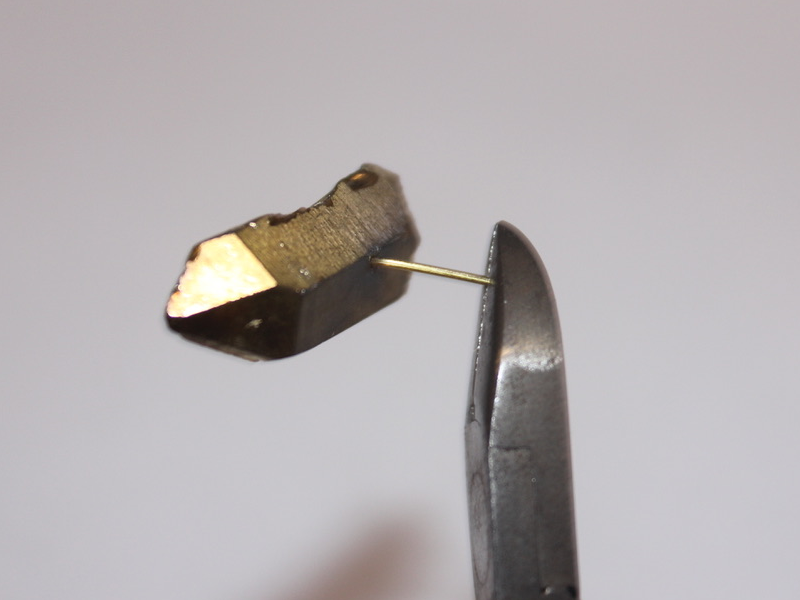
3: Create a loop at the end of the wire using the round nose pliers to secure the crystal bead on to the pin.
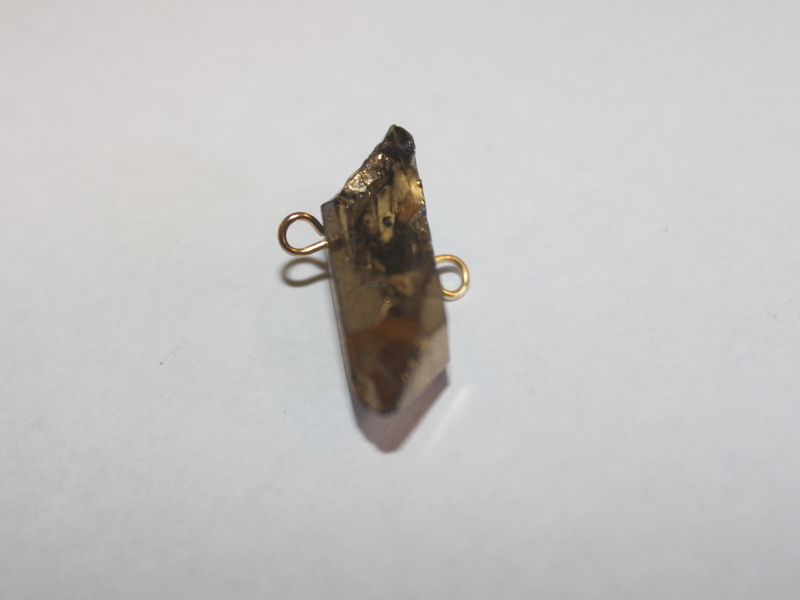
4: Attach one of the chains to one side of the crystal using one of the jump rings.
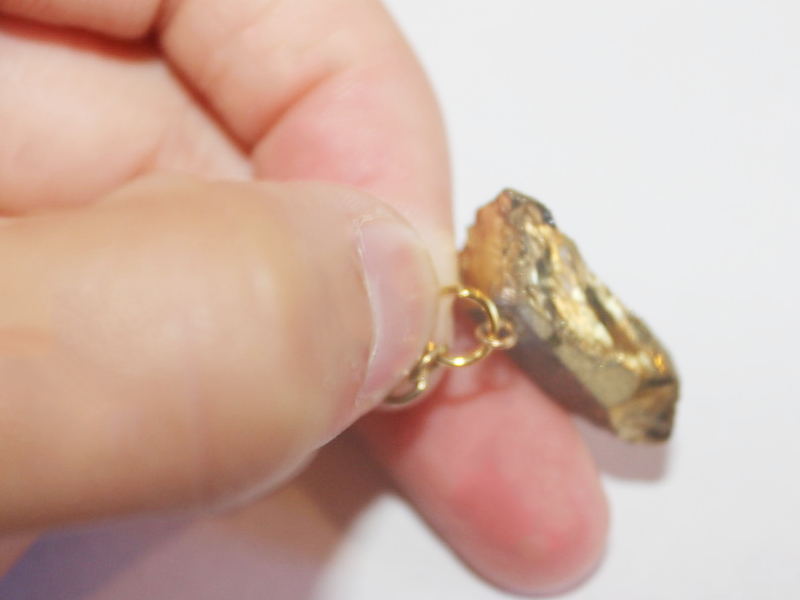
5: Attach the other chain to the other side of the crystal with another jump ring.
6: Add a jump ring to one of the ends of the chains and attach the lobster clasp.
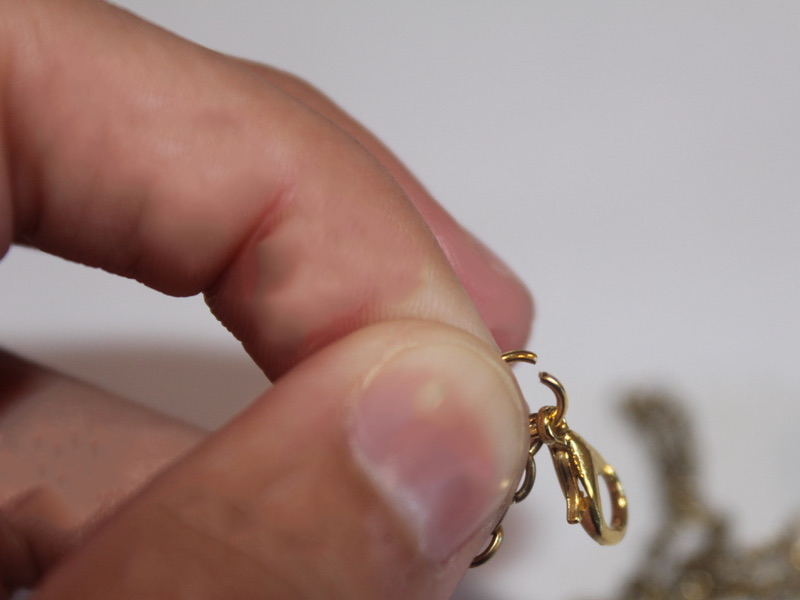
7: Add the other jump ring to the other side of the necklace to finish it off.
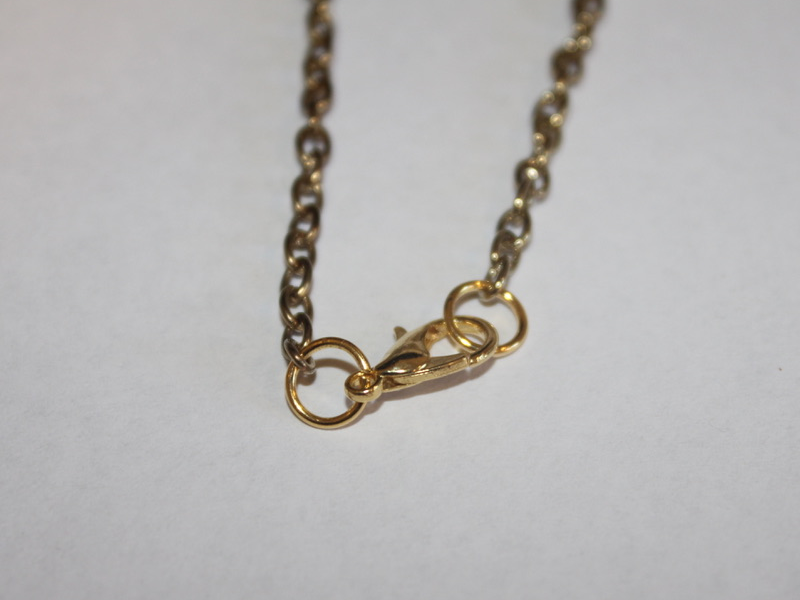
Now your crystal necklace is finished! How will you style yours?

-
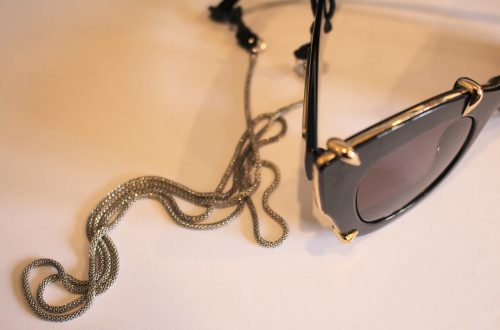
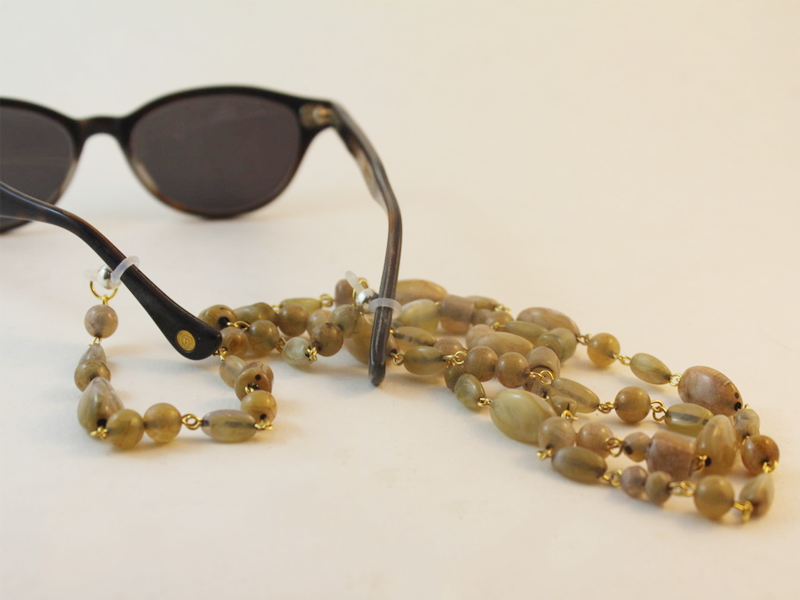
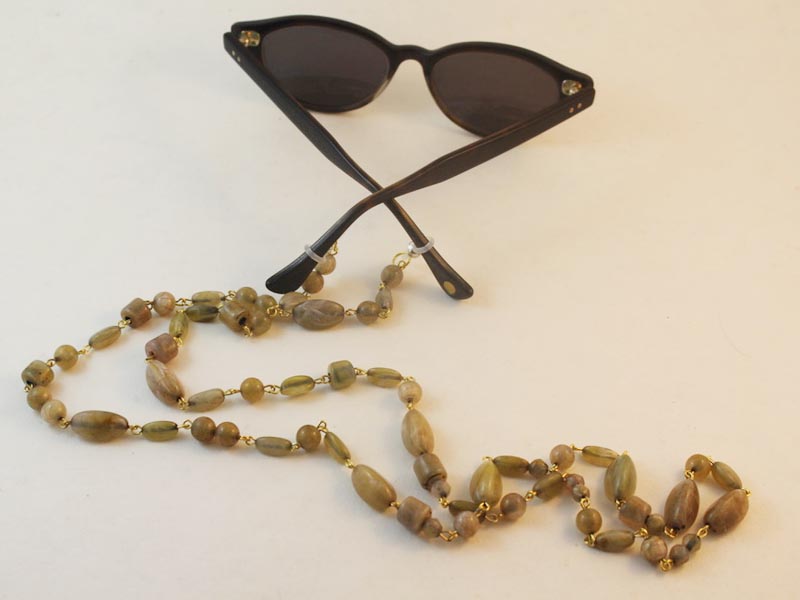
Glasses chains are HOT! Make your own cool sunglass chain holder for summer.

Glasses chains are really hot right now! If our other glasses chain tutorials aren’t for you why not try this one out? Contains affiliate links.
You’ll need the following tools and materials to make your glasses chain:
1: Pliers. You’ll need your flat nose and round nose pliers to make this glasses chain.
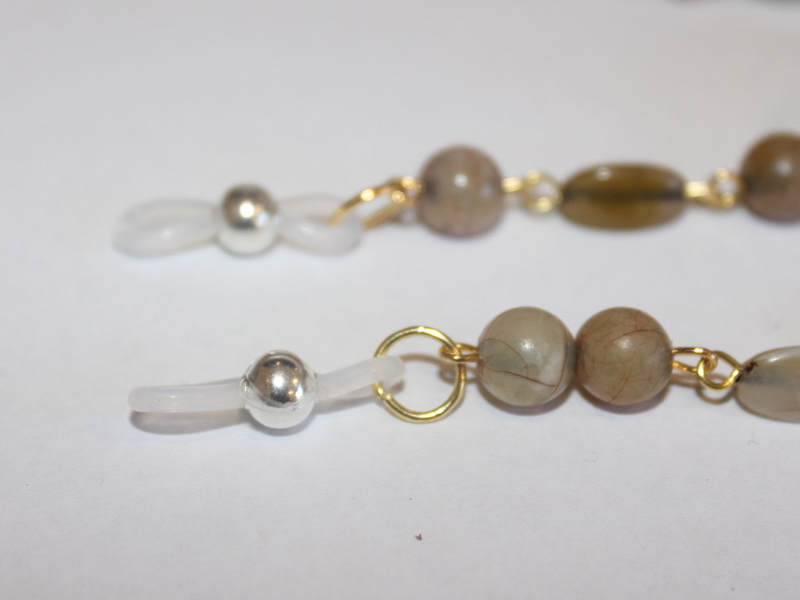
2: Two glasses holder findings.
3: Two large jump rings.
4: Eye pins.
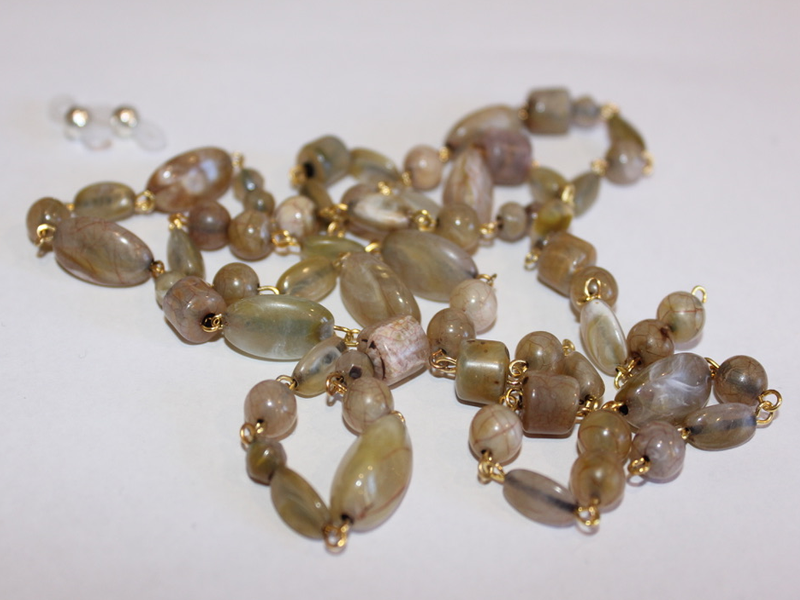
5: Beads. I used these vintage plastic beads recycled from a necklace I inherited.
Follow these steps to make your beaded glasses chain:
1: Add beads to the pins and loops the ends to secure them in place.
2: Start linking the beaded pins to form a chain.
3: Continue making the beaded chain links until your chain is at your desired length.
4: Attach a glasses holder to each end of the chain using the jump rings.
Now your glasses chain is finished and ready to use! Wonderful for keeping your glasses safe during summer activities.
-
These are amazing! Here’s a tutorial to make some beaded fringe earrings.
These beaded fringe earrings look so pretty! Use a variety of glass beads to make your own versions of the design. Contains affiliate links.

You will need the following tools and materials to make your beaded fringe earrings:
1: Pliers. You will need your flat nose pliers and round nose pliers.
2: Sixteen head pins.

3: Two eye pins.

4: Two earring hooks.

5: Beads of your choice. I used some different colored glass beads and four pink plastic beads.


6: Four jump rings.

Follow these steps to make your beaded fringe earrings:
1: Add beads to twelve of the head pins.

2: loop the tops of the pins to keep the beads in place.


3: Add the different colored beads and the pins in a pattern to the eye pin.

4: Add the earring hook halfway along the beaded eye pin.

5: Finish beading the eye pin and create a loop at the other end of the pin to secure the beads and charms in place.


6: Repeat steps 3 to 5 for the second earring.

6: Add the plastic beads to the remaining four head pins.

7: Loop the ends of the four extra charms.

8: Attach the four charms to either end of the top of the earrings to finish them off.


Now your fringe earrings are finished and ready to wear!
I also made a pair using black and white glass beads.

If you like the look of fringe jewelry, check out this beaded fringe necklace.
This tutorial contains affiliate links.