-
How to make a stunning beaded heart pendant with a tassel detail <3
This necklace is so so cute. Transform beads into a pretty heart pendant with beaded tassels. Layer this with some beaded necklaces or wear it on its own. Please note that this tutorial contains affiliate links.
Here are the tools and materials you’ll need to make your beaded heart charm necklace:
1: Pliers. I used my round nose pliers and flat nose pliers.


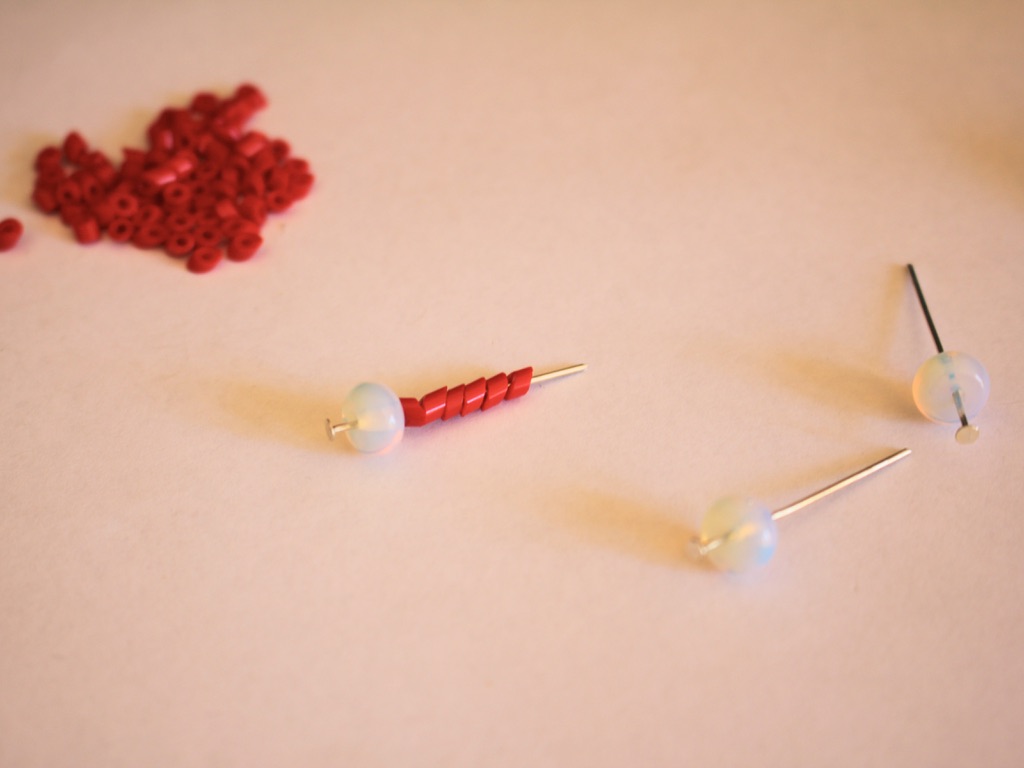
2: Beads. I used a glass heart shaped bead (approximately 2cm long), three opalite disk beads and some vintage red beads.


3: Three head pins.

4: One eye pin long enough to fit your bead on.

5: A jump ring.

6: A necklace chain.

Follow these steps to make your cute little heart charm:
1: Add the heart bead to the eye pin.

2: Bend the top of the eye pin to form a right angle.

3: Curl the top of the pin to form a loop and secure the bead onto the pin and set the heart aside.

4: Place an opalite bead on each of the head pins.

5: Add the smaller beads to each of the pins until each has approximately 1cm left bare.

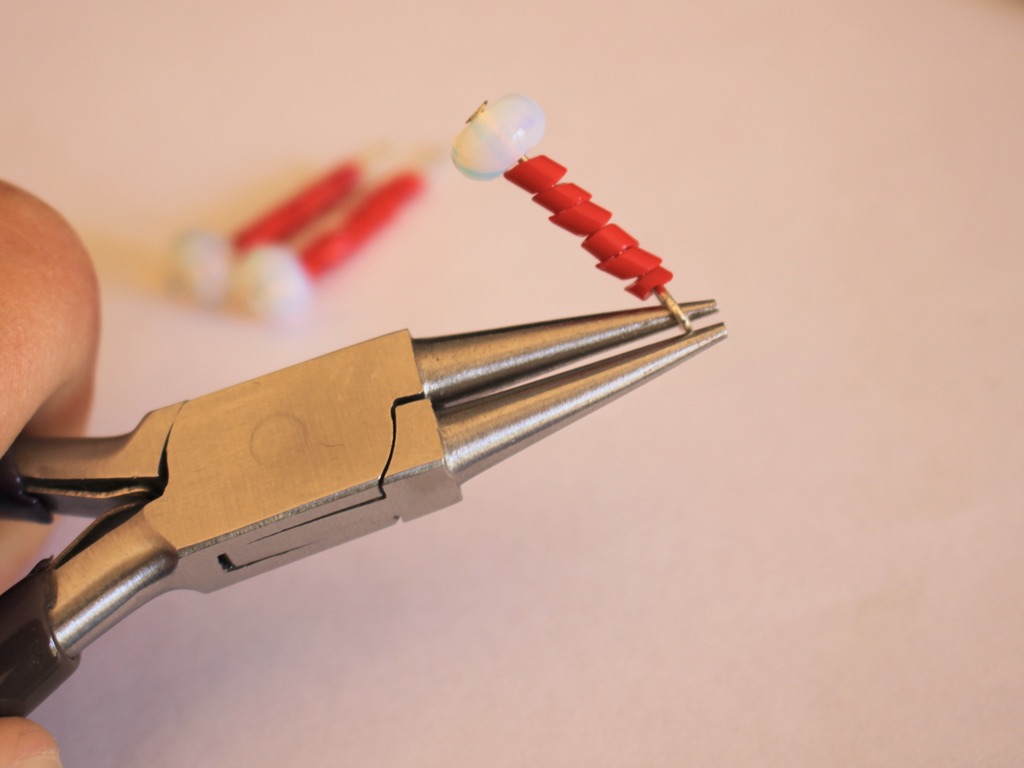
6: Loop the top of each head pin using the round nose pliers to secure the beads in place.


7: Add each of the opalite pins to the jump ring, followed by the heart bead.


8: Close the jump ring to secure the pins together.

9: Add the finished charm to the chain to finish it off.

Now your amazing heart pendant necklace is finished and ready to wear. Super beautiful and sentimental… make one for someone special in your life (maybe that someone special is you!)


If you like this design, here are some other beaded tassel tutorials:
You May Also Like

Need Something New to Hang around your neck? Make this cute V-shaped charm necklace

I keep hearing that chunky chain necklaces are trendy right now… here’s how to make a gold chunky chain necklace that makes a statement.
Can’t Get Enough of the Choker Trend? Here’s Another Cool Choker Design to Add to Your Collection!
-
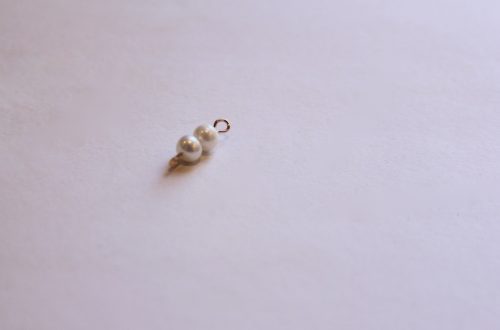
How to make a cute pearl charm out of wire!
Maybe you’ve got some earrings that you want to change up a bit, like a pair of hoops that could use some extra charm… why not make this tiny pearl pendant out of hammered wire?
You’ll need the following tools and materials to make this little charm:
1: Cutting pliers and round nose pliers.

2: A steel block to hammer on.

3: A hammer. I used a normal hammer but a jewelry hammer might be more appropriate 😉

4: A piece of wire. I used some rose gold-filled wire, approximately 3cm long.

5: Pearl beads. I used these two small white pearls.

6: A file or sandpaper for finishing off the ends of the wire.

Here are the steps to follow to make your cute pearl charm:
1: Cut the wire to the length you want it, make sure you leave enough room for hammering and curling the top of the wire.
2: Place the wire on the hammering block.

3: Hammer one end of the wire, flipping it over to make sure both sides are even. Keep hammering until the wire is wide enough to stop your bead from falling off.

4: Place the beads on the wire. They should be stopped from sliding off by the newly hammered end.

5: Bend the wire to form a right angle at the top.

6: Loop the wire using the round nose pliers to secure the beads from sliding off the other end.

7: File or sand the hammered end of the wire to ensure that there are no sharp edges.
Now your charm is finished! What will you decorate with yours?

If you liked this design, here’s another hammered charm tutorial.
Here are some other hammered earring tutorials
- Hammered wire arch earrings with gemstones
- Simple hammered studs
- Hammer texture threader earrings
- Beaded wire threader earrings
This tutorial contains affiliate links.
-
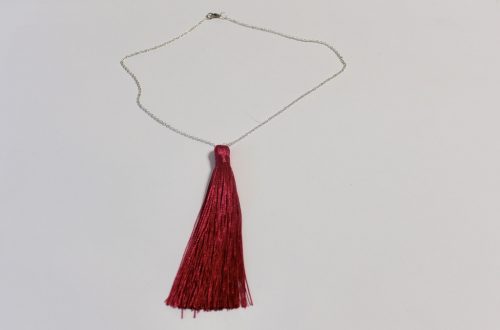
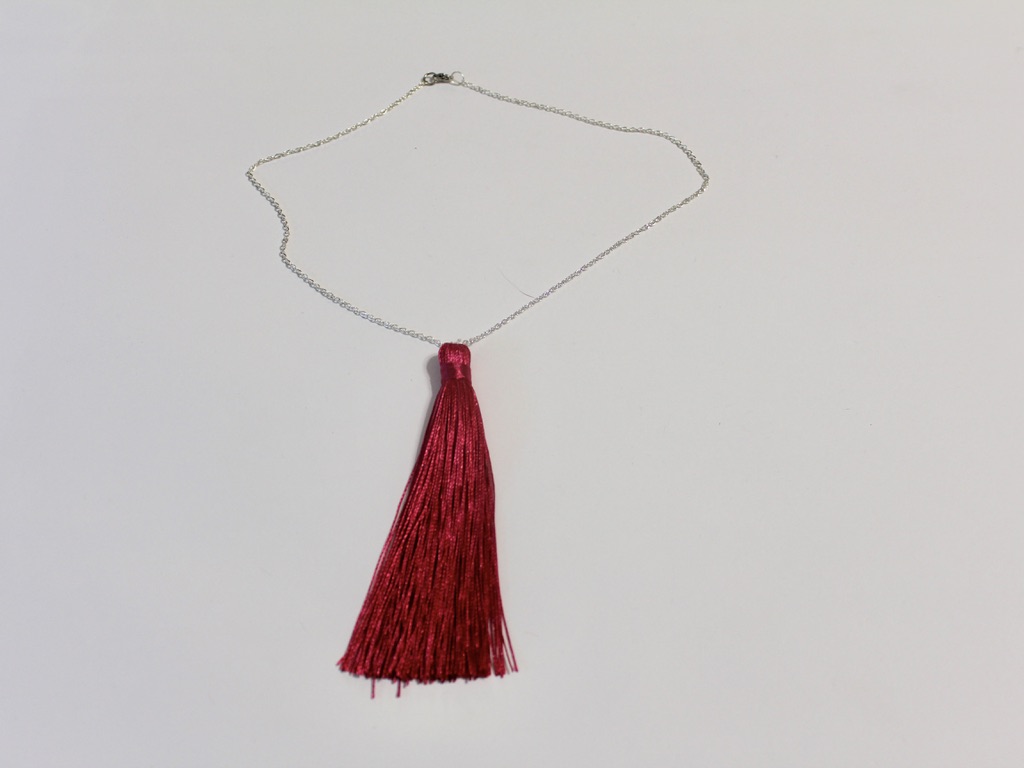
This video will show you how to make a tassel pendant necklace
This tassel pendant tutorial is another one of those simple DIY’s that have MAXIMUM impact! How cute is that dangling tassel? I am super stoked on this design and I hope you enjoy it too. This design is versatile, wear it to spice up all kinds of different outfits.
You’ll need some tools and materials to make this tassel pendant necklace, here are some links so you can find what you need:
1: Jewelry pliers including flat nose pliers, round nose pliers and cutting pliers.
2: A large tassel. I used a hot pink tassel.
3: An eye pin. I used a medium length silver-tone eye pin.
4: One spare bead. I used a yellow glass e-bead but you can use whatever you have lying around.
5: Necklace chain. Here’s a link to a simple silver chain.
6: A hot glue gun with glue. Don’t worry, you won’t need much messy hot glue to make this tassel pendant :).
I hope you enjoy this video tutorial and make yourself some super cute tassel jewelry!
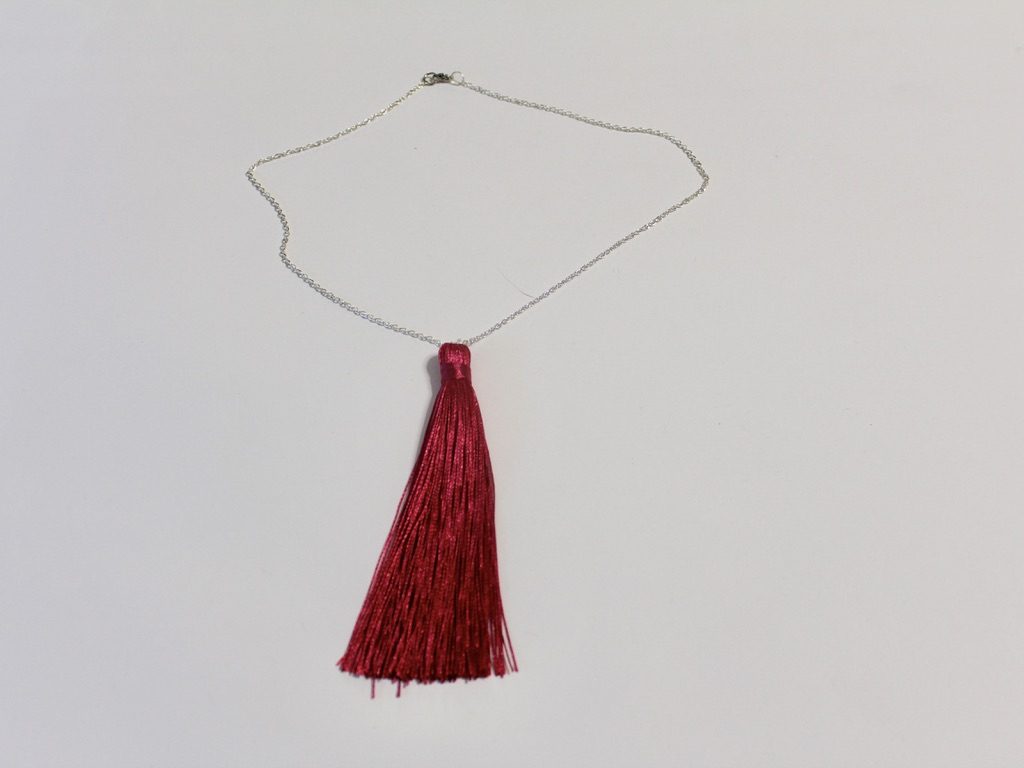
Here’s the finished product! Attach the tassel pendant to a chain for a simple and elegant look.
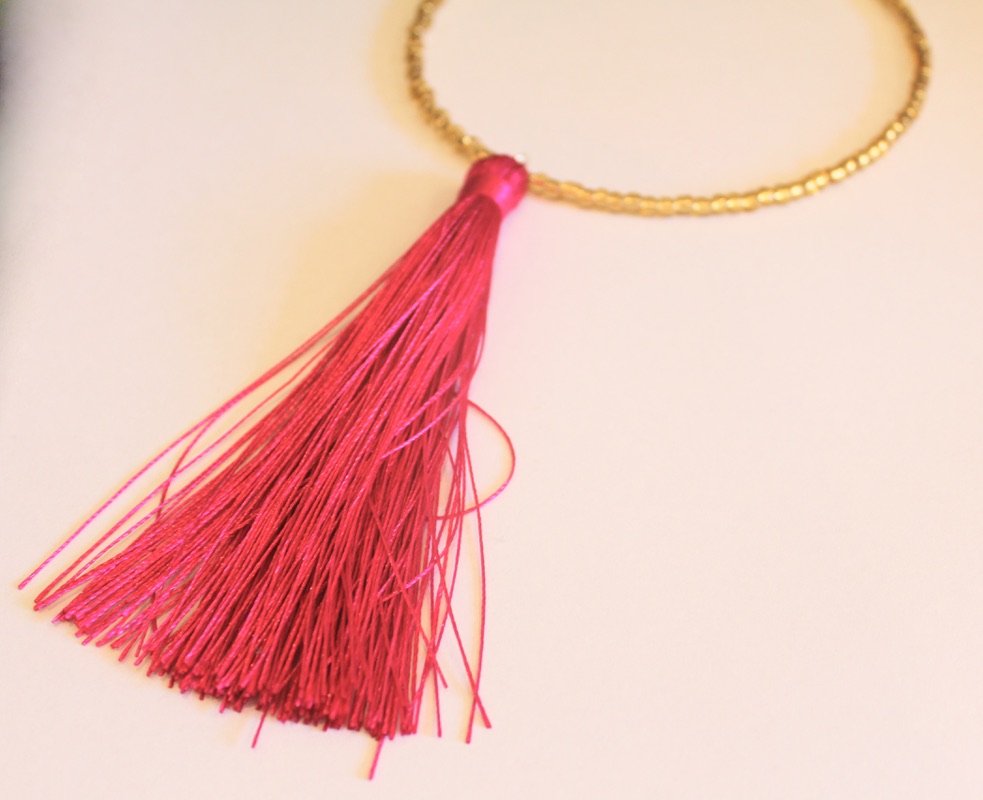
And here is another tassel pendant attached to a yellow beaded memory wire choker. I love this version, especially the combination of yellow and pink. Yellow and pink is such a cheery and high impact color combination. Perfect for adding an extra punch to a blah outfit!
You can buy memory wire and glass beads here to make a choker necklace like the one pictured above:
If you are into tassel jewelry here are some other tutorials:
- Beaded tassel hoop earrings
- Chain tassel necklace
- Tassel and gemstone earrings
- Beaded tassel earrings
- Beaded tassel wrap necklace
- Beaded tassel pendant necklace
This tutorial post contains affiliate links.
-
How to transform an old ring into a pendant.

If you are like me you might have some old costume jewelry lying around that isn’t really your style any more. Instead of throwing it away here’s a way that you can transform an old ring into a wearable pendant.
You will need the following tools and materials to make your pendant:
1: An old ring. I used this ring with a soldered on ring shank.

2: Flat nose pliers for pulling the ring apart.
3: A glue on bail.

4: Araldite glue.

5: A skewer.

6: Scrap paper.

8: A necklace chain.

Follow these steps to transform your old ring into a necklace pendant:
1: Remove the ring shank from the top of the ring, gently pulling it off with your flat nose pliers.


2: If there is excess metal use a file to remove it. I didn’t have to do this for this project.
3: Squeeze out the Araldite glue in equal parts onto the scrap paper.


2: Mix the glue using the skewer.

3: Add the glue to the bail and the back of the ring.


4: Place the bail onto the glued part of the ring and set aside to dry.

5: Add the dry pendant to the necklace to finish it off!
Now your new pendant is ready to wear! Such an easy way to upcycle old jewelry.
-
How to make a beaded teardrop pendant

Here’s how to make a cute beaded teardrop pendant using memory wire. If you’re sick of making chokers with your memory wire coil this is another way to use it!
You will need the following tools and materials to make your teardrop pendant:
1: Pliers. You’ll need your cutting pliers, flat nose pliers and round nose pliers.

2: A piece of memory wire, half of a necklace loop.

3: Beads. I used these mixed glass seed beads.

Follow these steps to make your teardrop pendant:
1: Create a loop at the end of one side of the piece of memory wire.


2: Add the beads to the wire until there is only 1cm left unbeaded.


3: Create a loop at the other end of the wire securing the beads in place.

4: Link the loops together to form the teardrop shape.


Now your pendant is finished you can attach it to a chain or beaded strand of your choice!

Here’s a pair of earrings I made using the same technique. Just add an earring hook to the top of each teardrop instead of a chain!

-
Do You Have Any Special Pieces You Wish You Could Wear as a Pendant? Here’s How You Can…

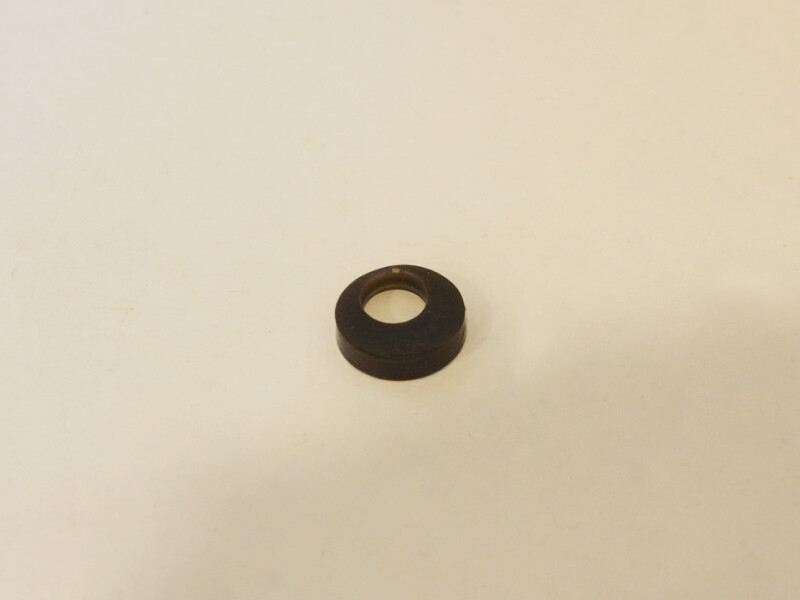
With a glue on bail you can turn almost anything into a pendant. Here’s how to use one!
You will need the following tools and materials to make this pendant:
1: A glue on bail.
2: Araldite glue.
3: A skewer.
4: A scrap piece of paper.

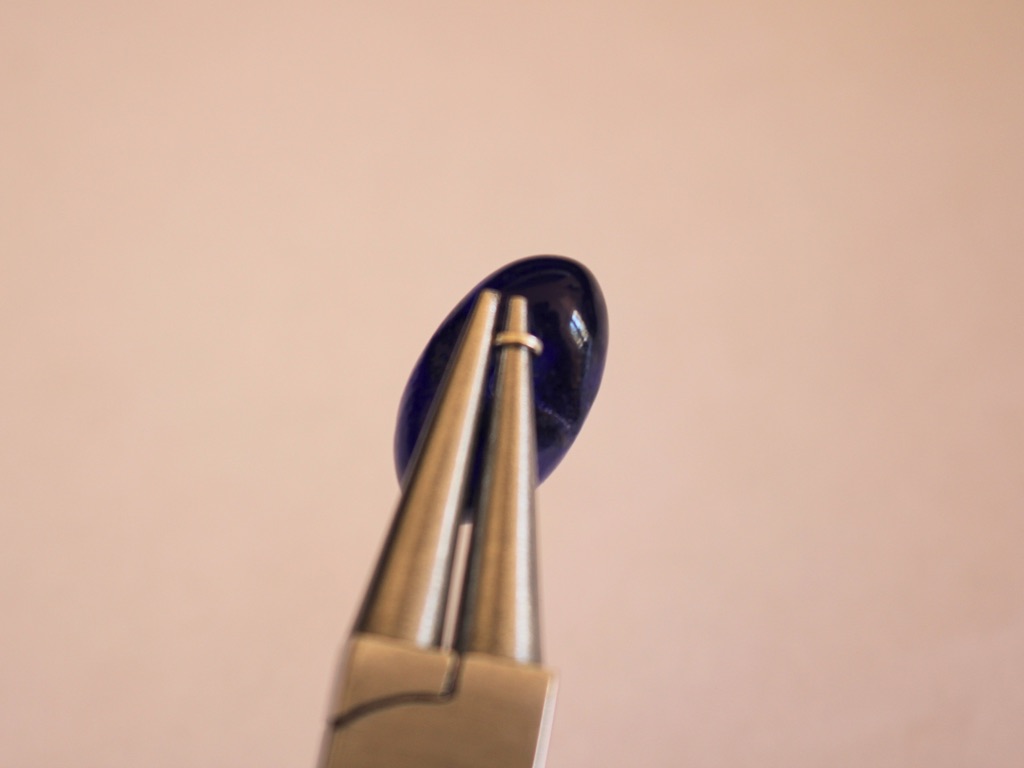
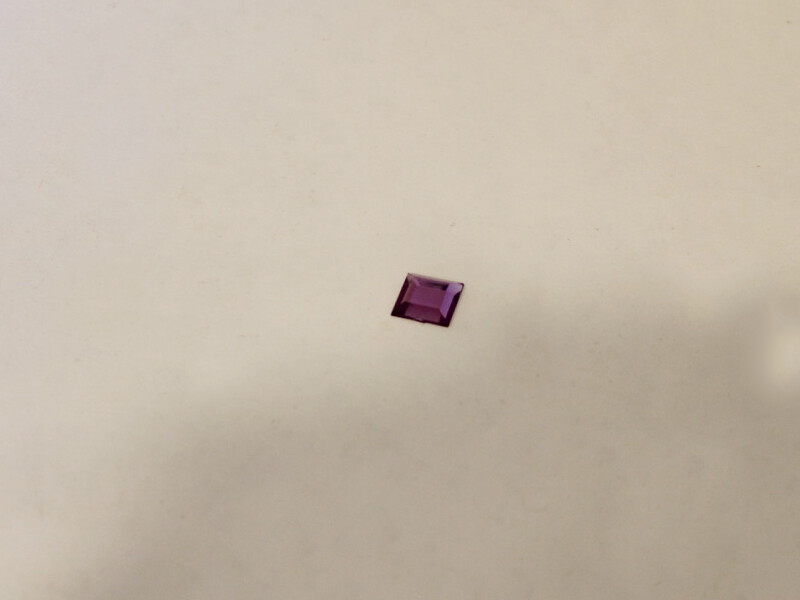
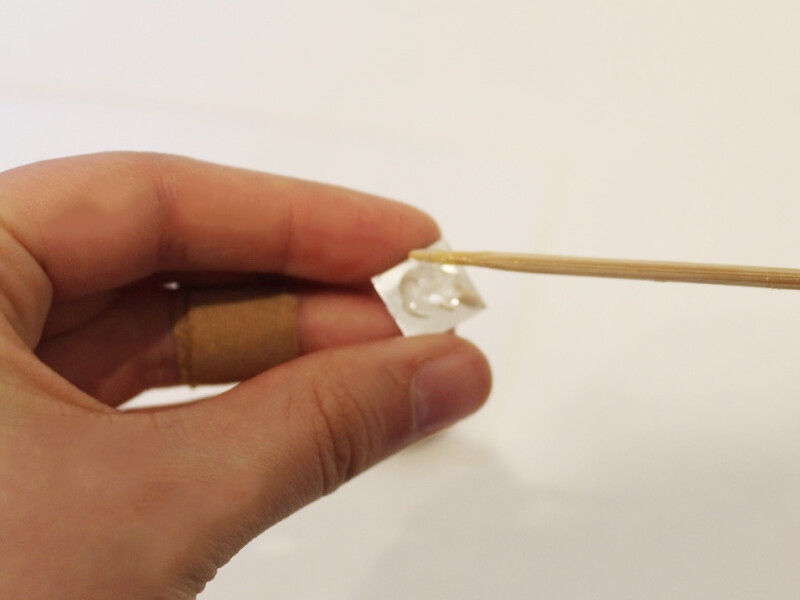
5: A plastic charm/decoration. I used this circular resin piece and a plastic gemstone.
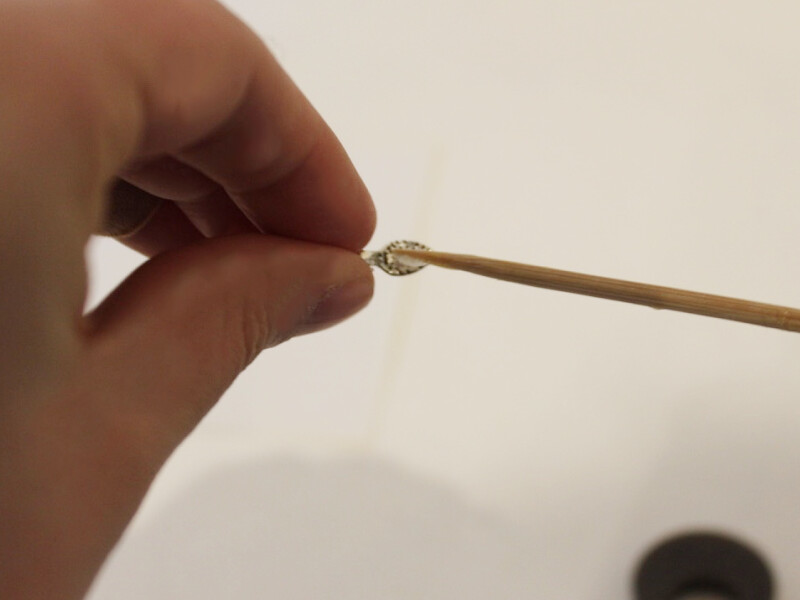
Follow these steps to make your pendant:
1: Squeeze the glue in equal parts onto the piece of scrap paper.
2: Mix the glue using the skewer.
3: Add the glue to the bail and to the back of the charm where you want your bail to sit.
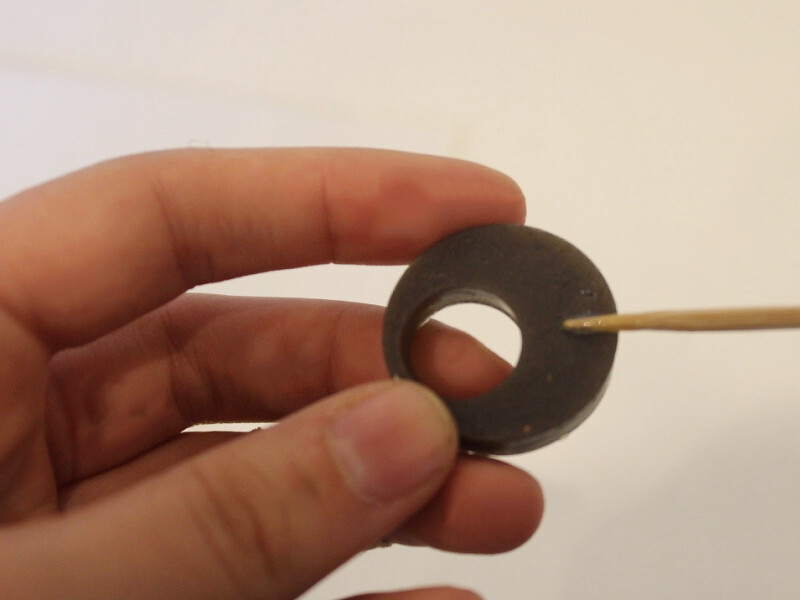
4: Place the bail onto the charm and wait for it to dry.

5: Depending on how long it takes for the bail to dry you might need to mix up some more glue.
6: Add more glue to the back of the plastic gemstone and place it on the front of the other charm.
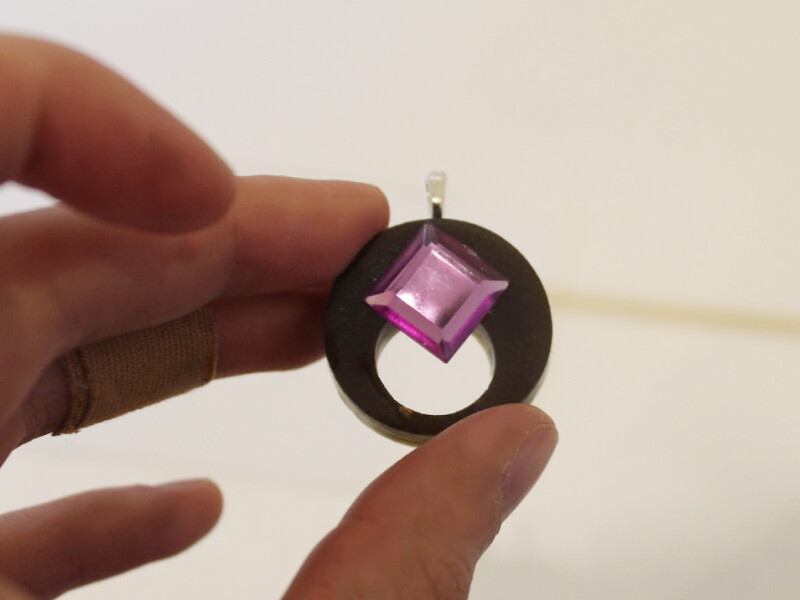
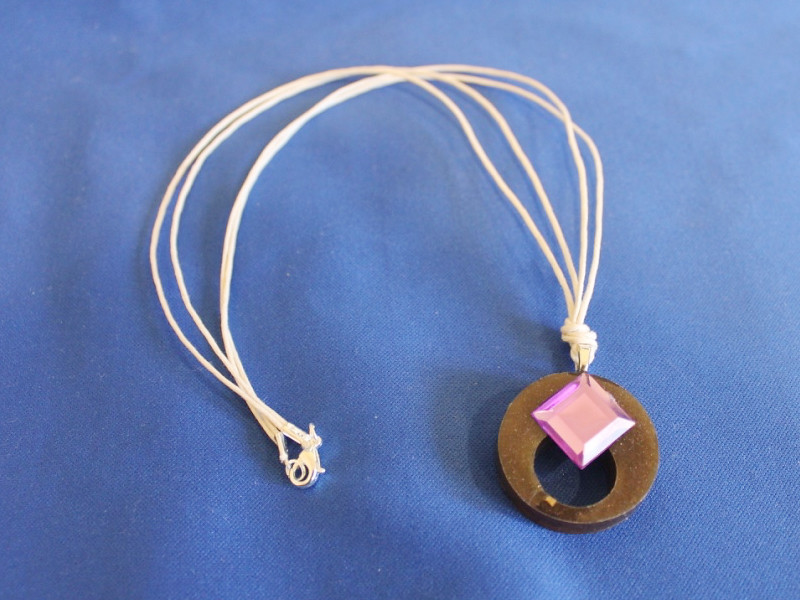
Once the charm is completely dry it is finished and ready to attach to a chain and wear!
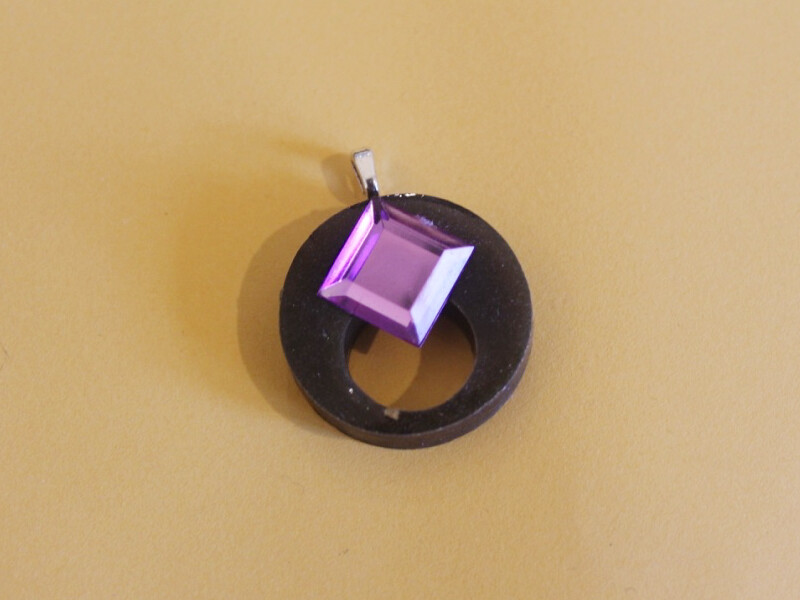
I attached my pendant to some string to wear as a necklace.

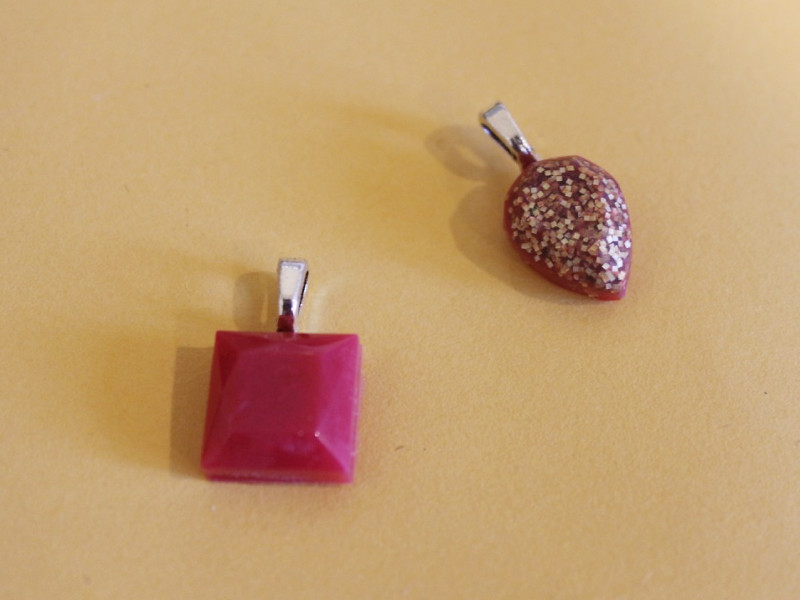
Here is another pendant made from a broken button.
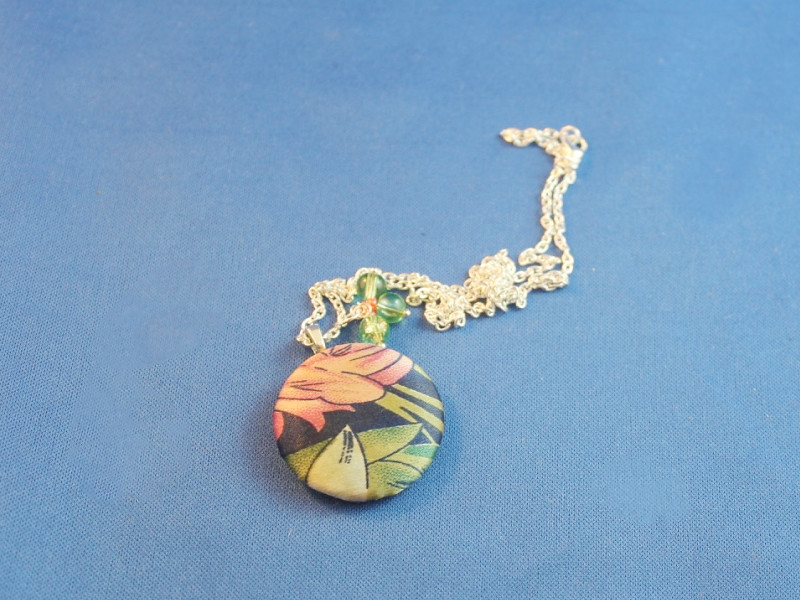
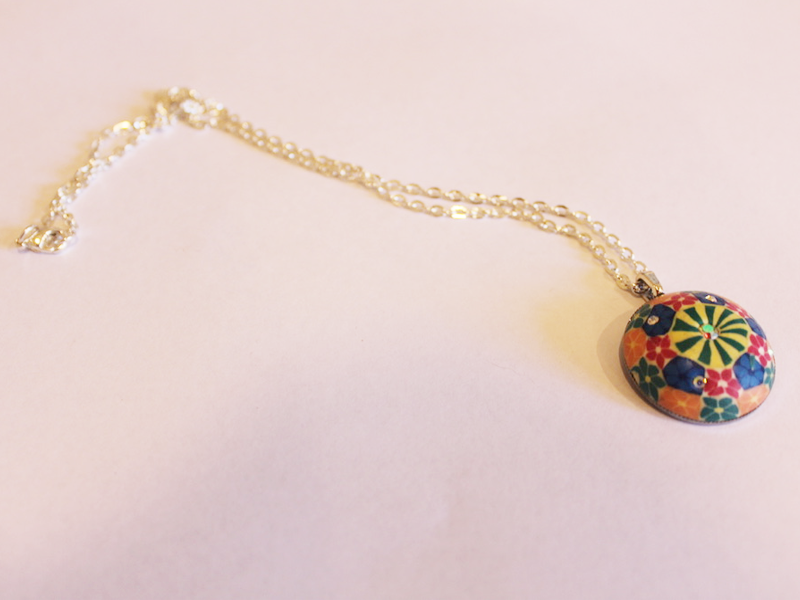
And a couple of small pendants made from resin cabochons
-
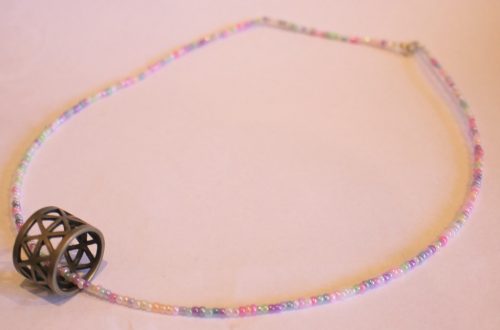
Got some seed beads lying around? Make this amazing diamond shaped pendant!
This diamond-shaped pendant looks great on a necklace, it is a little fiddly to make but well worth it at the end! You’ll be able to use up all your colorful seed beads to make this special pendant.
You will need the following tools and materials to make this pendant:
1: Pliers. You will need your round nose pliers and flat nose pliers.
2: Twelve eye pins.

3: Two small jump rings.

4: Small seed beads. I used these pink and blue seed beads. You can use as many colors as you like.


Follow these steps to make your beaded diamond pendant:
1: Add the seed beads to each of the pins in any pattern you like. I decided to only bead four pins in blue and the rest in pink.


2: Bend each pin at a right angle to the beaded section using your round nose pliers.

3: Create a loop at the end of each pin to secure the beads in place using your round nose pliers.


4: Connect four pins together to make a square.


5: Connect four pins to each corner of the square.


6: Use one of the jump rings to connect the four corner pins in the center forming a pyramid shape.


7: Repeat step five and six for the other side of the pendant.


Once all your pins are connected your charm is complete. Connect it to some chain or some earring hooks and wear it with pride!


Here’s another beaded diamond pendant made with multiple colors attached to a necklace chain.