-
Here’s how to make some crescent moon shaped earrings with wire :)
These earrings look one way when you lay them down… but then when you hang them from your ears they turn into beautiful crescent moons. So cute! Please note that this tutorial contains affiliate links.
Here are the tools and materials you will need to make your own crescent moon earrings:
1: Pliers. I used my cutting pliers, round nose pliers and flat nose pliers.

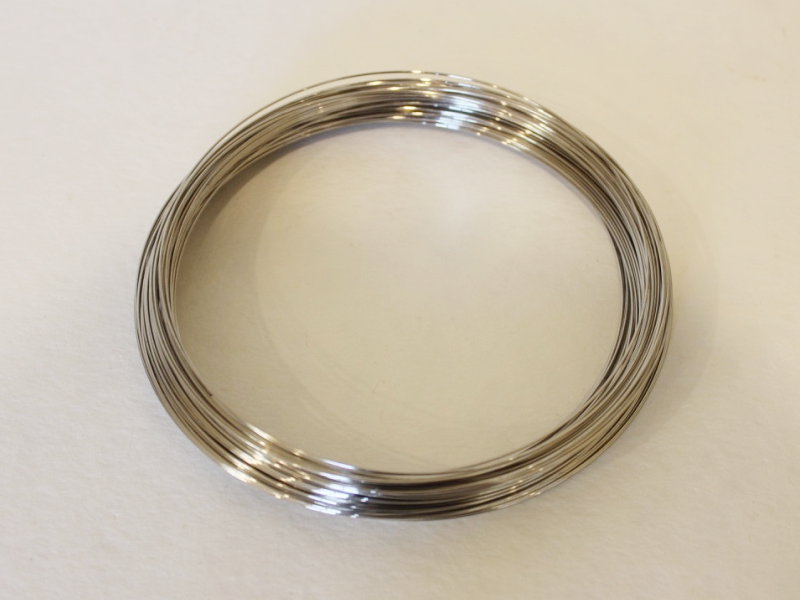
2: Some bracelet length memory wire cut into four half circle lengths.

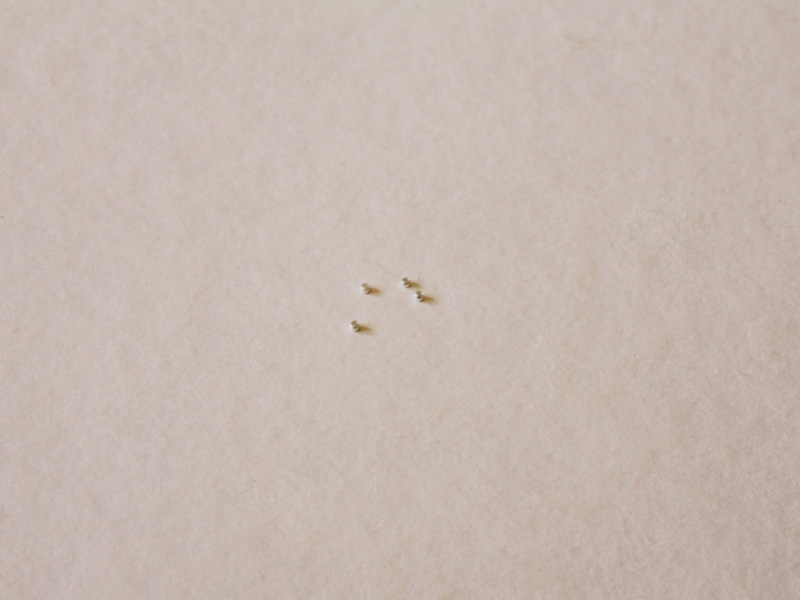
3: Four small jump rings.

4: Two larger jump rings.

5: Six small head pins.

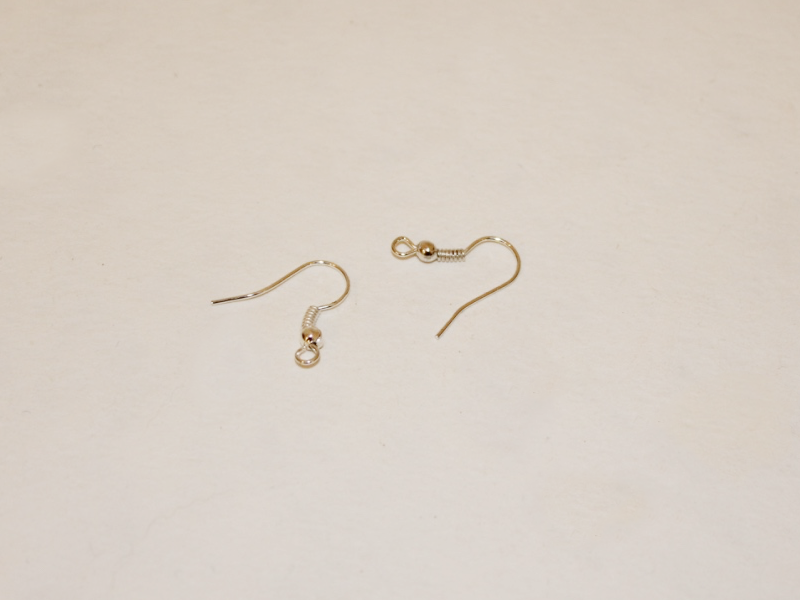
6: Earring hooks.

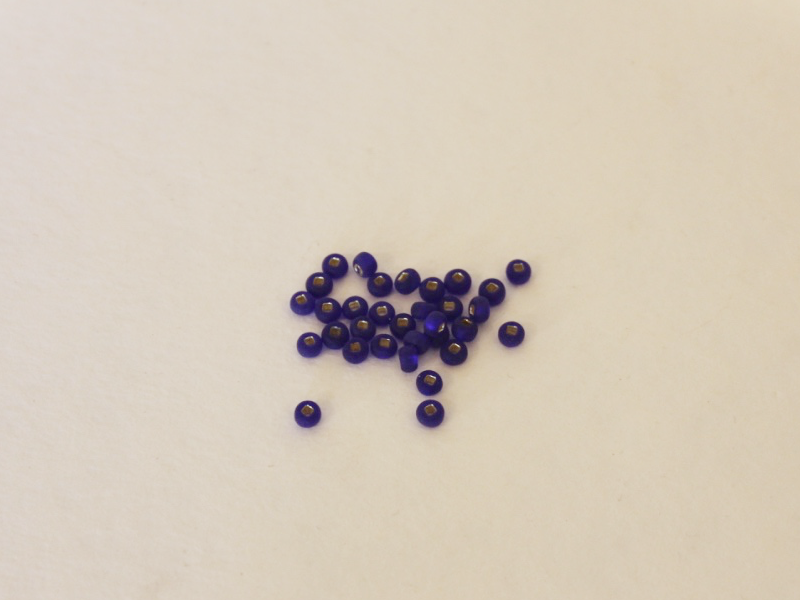
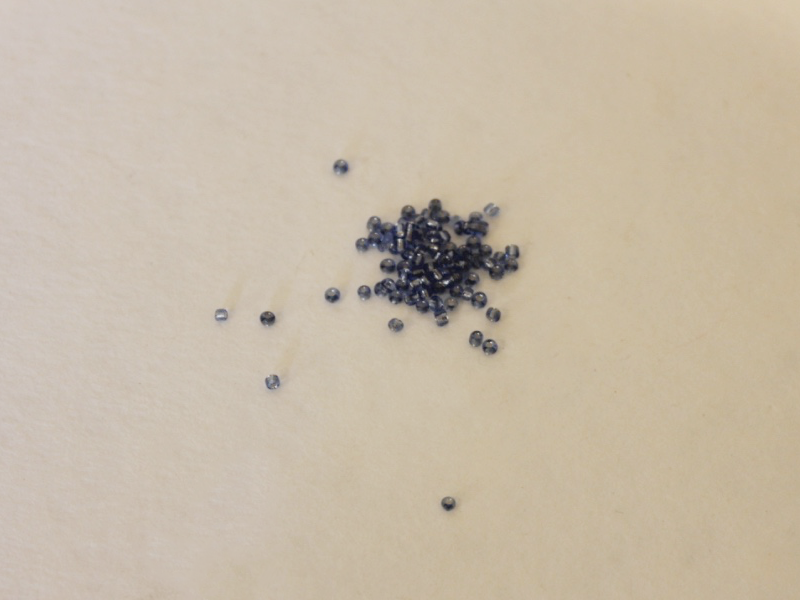
7: Beads. I used mixed glass seed beads and six pink freshwater pearl beads.

https://rover.ebay.com/rover/1/705-53470-19255-0/1?mpre=https%3A%2F%2Fwww.ebay.com.au%2Fitm%2F1kg-SUPER-MIX-Glass-Seed-Bugle-BEADS-Mixed-Assorted-Sizes-Colors-BULK%2F322739925149%3Fhash%3Ditem4b24cc709d%3Ag%3AXHgAAOSw791ZuJjX%26frcectupt%3Dtrue&campid=5338747881&toolid=10001&customid=5338747881 
Follow these steps to make your cute crescent moon earrings:
1: Add each of the pearls to the head pins and curl the tops using your round nose pliers to secure the pearls in place. Once you have made all your pearl charms you can set them aside.


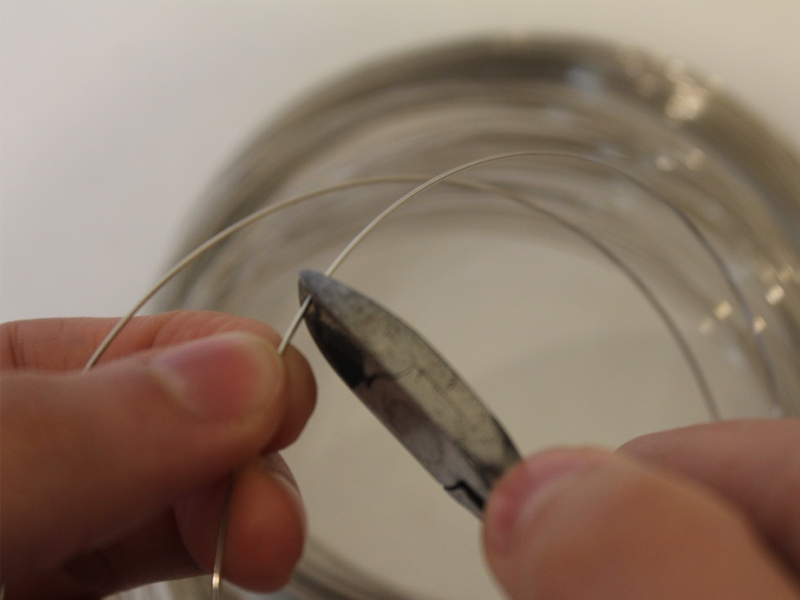
2: Take one of the memory wire pieces and create a loop at one end using the round nose pliers. I curled my wires in towards the inside of the curve.


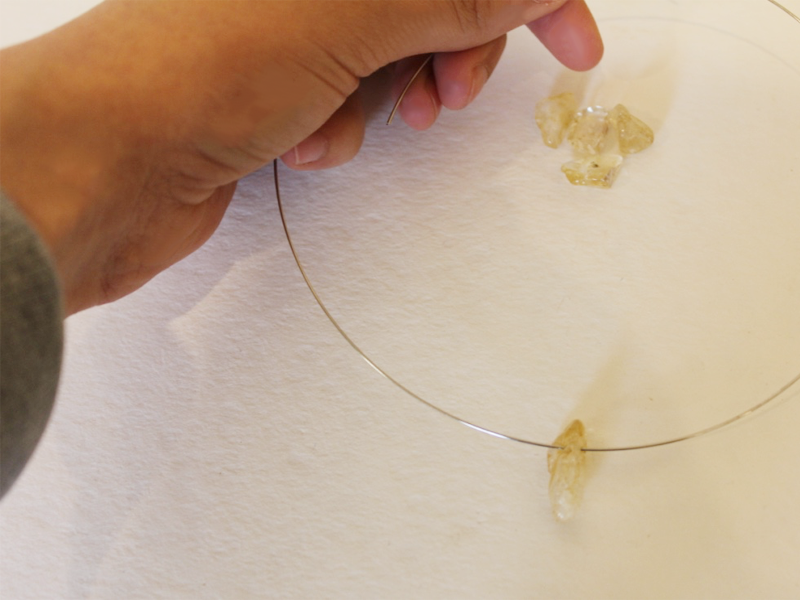
3: Add beads to the wire until there is about 1cm left without beads.


4: Loop the other end of the wire to secure the beads on.

5: Repeat steps 2 to 4 for the remaining three pieces of memory wire.

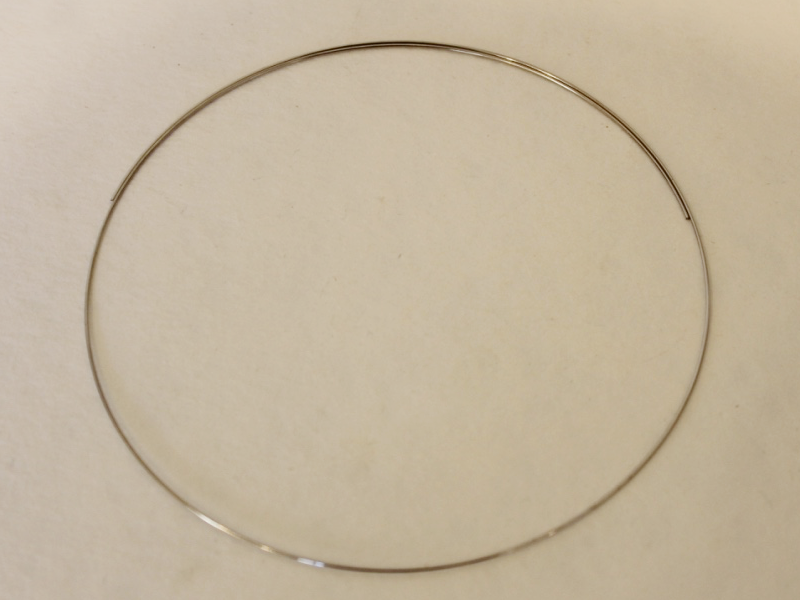
6: Take two of the pieces of memory wire and attach them at one end using one of the small jump rings.

7: Attach the bottom of the memory wire pieces together using another of the small jump rings to form an oval shape.

8: Repeat steps 6 and 7 using the remaining beaded memory wire pieces and small jump rings.

9: Add three of the pearl charms to one of the larger jump rings and attach it to the end of the memory wire ovals. Repeat this for the remaining three pearls and attach them to the other memory wire charm.


10: Add an earring hook to the top of each of the ovals to finish the earrings off.


Now you can hang them from your ears and have some fun!


-
Add a cool feature to your hoop earring designs by using toggle clasps… here’s how!
These earrings use toggle clasps to add an interesting feature to your standard beaded hoop earrings. Make lots of charms to switch them up and mix and match. This tutorial contains affiliate links.
You’ll need these tools and materials to make your toggle clasp hoop earrings:
1: Pliers. I used my cutting pliers, round nose pliers and flat nose pliers.
2: Two pieces of bracelet sized memory wire.

3: Two toggle clasp sets.

4: Four jump rings.

5: A pair of stud earrings with charm loops.

6: Beads. I used these silver lined clear glass beads and some wooden chip beads.


Follow these steps to make your toggle clasp hoop earrings:
1: Create a loop at one end of the memory wire using the round nose pliers.


2: Add beads to the wire in any pattern you choose.


3: When there is approximately 1cm of the wire left unbeaded, create a loop at the other end of the wire and thread it through the initial loop you made to close the beaded hoop.

4: Repeat steps 1-3 for the second hoop.

5: Add the circle parts of the toggle clasps to the top of each hoop, attaching them using two of the jump rings.


6: Add the toggle part of the clasps to each of the post earrings using the remaining jump rings.


7: Now you can attach the hoops to the earrings and wear them out!


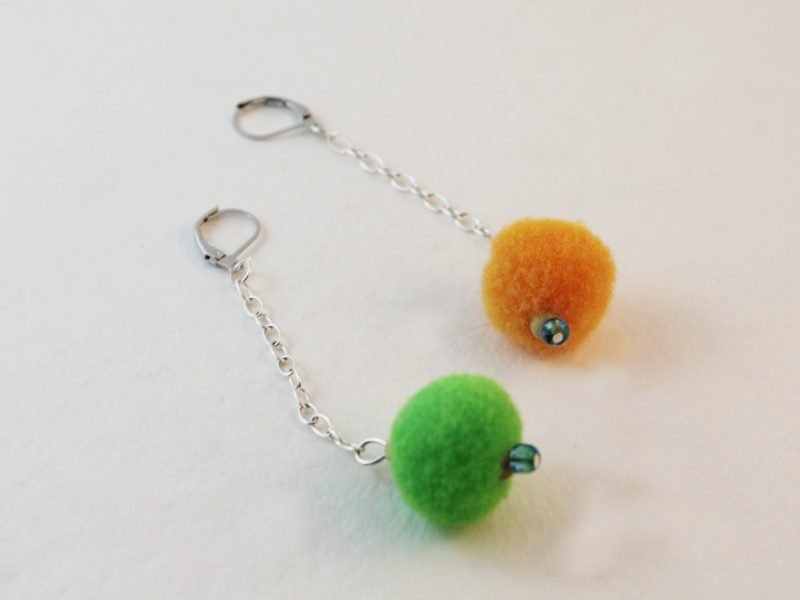
If you like your earrings to be customisable, here’s another charm earring tutorial with clip on charms.
This tutorial contains affiliate links.
-
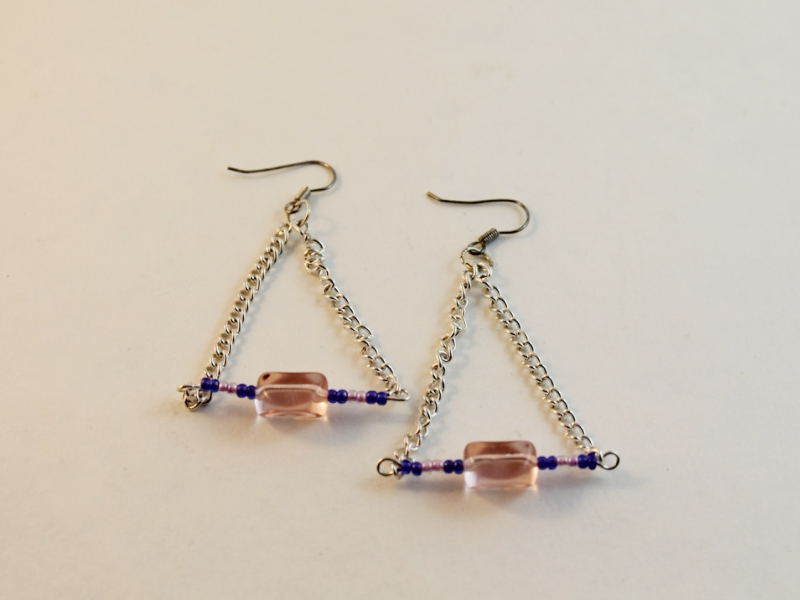
Here’s another way you can use memory wire to make jewelry…
Did you like our D-shaped earrings tutorial? Well here is how you can use a similar technique to make a beaded D-shaped pendant. This design includes a beaded chain accent as well. I really like this design and have made a few versions of it! Maybe you’ve seen some on my Instagram, @hfgjewelsbalmain ?
This tutorial contains affiliate links.
You’ll need these tools and materials to make this D-shaped beaded pendant necklace:
1: Pliers. I used cutting pliers, flat nose pliers and round nose pliers.
2: Half a coil of bracelet length memory wire.

3: One long eye pin.

4: Two pieces of chain.

5: A lobster clasp.

6: Six small eye pins.

7: A couple of jump rings.

8: Beads. I used six shiny blue plastic beads and a selection of pastel-tone glass seed beads.


Now here are all the steps to follow to make your D-shaped beaded pendant:
1: Add the blue beads to each of the small eye pins.


2: Create loops at the top of each pin to secure the beads in place.


3: Attach three of the bead charms together to form a short chain.

4: Repeat for the remaining three charms so that you have two small chains.

5: Set the bead chains aside.
6: Create a loop at one end of the memory wire.


7: Add the beads to the memory wire until there is only 1cm left without beads.


8: Create another loop at the other end of the memory wire to secure the beads on.


9: Add beads to the long eye pin and create a loop at the other end as you did with the memory wire.


10: Attach either end of the long eye pin to the loops at the end of the memory wire to form the D shape.


11: Attach each of the bead chains to either side of the D charm.


12: Attach a piece of chain to each of the bead chains to form the full length necklace chain.


13: Attach a lobster clasp to one side of the necklace using one of the jump rings.


14: Attach the other jump ring to finish the necklace.

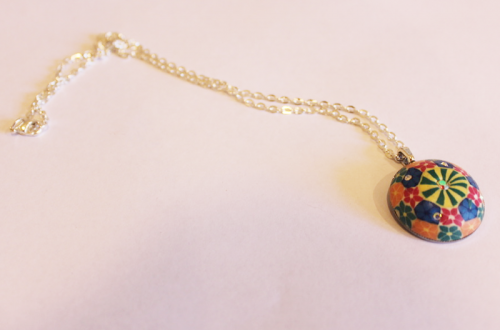
Now it is finished and ready to wear! How will you customise this design?


Here are some other versions I have made:


This tutorial contains affiliate links.
-
Do you need a new ring to cheer up your fingers? This one is fun!
This ring is pretty fun, made with a mixture of different beads threaded onto some ring sized memory wire, this ring is cute, versatile and cheerful. I enjoyed making this one while I was chilling at home. This tutorial
You’ll need these tools and materials to make your own fun memory wire ring:
1: Pliers. I used my round nose pliers, cutting pliers (to cut the memory wire) and flat nose pliers.
2: Ring-sized memory wire. I cut mine to have two full coils.

3: Beads. I used a mixture of feature beads in different materials, two matching beads for the charms and some green glass seed beads.


4: Two small head pins.

5: Two small jump rings.

Here’s the steps to make your cool beaded memory wire coil ring.
1: After cutting your ring wire to your desired length, create a circle at one end using your round nose pliers.


2: Begin adding beads. I added mine in a random pattern alternating between feature beads and green glass beads.


3: Bead the ring until you have approximately 1cm left unbeaded.

4: Coil the end of the wire like you did at the start to form a loop and secure the beads on the wire.


5: Set the ring aside.
6: Add the two matching beads to each of the head pins.

7: Coil the tops of the headpins around the barrel of the round nose pliers to secure the beads in place.


8: Attach each of the bead charms to the end loops of the ring using the small jump rings.


Now your ring is finished! It will stretch to fit larger fingers too which is pretty cool. Will you wear your charms backwards or forwards?


It is great if you can make this design with materials you already have at home, but if you need supplies, this tutorial contains affiliate links.
Here’s another memory wire ring tutorial that uses polymer clay.
-
Need something new in your jewelry box? Make this pair of D-Shaped statement earrings.
These earrings are made using some hard memory wire and some cool statement beads. Dangly and unique, these earrings are worth making.
You’ll need these tools and materials to make these earrings:
1: Pliers. Round nose, flat nose and cutting pliers are useful for this design.
2: Memory wire cut into two half circles.

3: Two long eye pins.

4: Two pieces of chain, not too long.

5: Two earrings. I used these silver charm post earrings.

Here is a fancier pair!
6: Two larger jump rings.

7: Four small jump rings.

AliExpress.com Product – Free Shipping! 1 Box SP Open Jump Rings 3mm-8mm(1500 PCs Assorted) (B08915)8: Beads. I used some green glass e-beads.

9: Two statement beads. I used these silver-tone plastic beads.

Follow these steps to make your D-shaped statement earrings:
1: Use the round nose pliers to make a loop at one end of the memory wire half circle.


2: Add the beads to around halfway on the curve.
3: Add the statement bead to the centre of the curve.

4: Bead the remaining part of the curve with the glass beads again until there is about 1cm left un-beaded.
5: Create a loop at the other end of the memory wire curve using the round nose pliers again.

6: Repeat steps 1 to 5 for the second piece of memory wire.

7: Add beads to the long eye pin and leave 1cm un-beaded at the end. Repeat for both pins.

8: Create a loop at the end of both pins using the round nose pliers.


9: Attach each of the beaded eye pins to the top of each memory wire curve. This will create a tighter curve on each piece of memory wire and form the D shape.


10: Attach the chain to each side of the D shape using the small jump rings. Both D shapes will now have a chain loop attached to them.


11: Add one of the larger jump rings to each of the earring posts.

12: Attach the earrings to the charms by threading the chain through each of the open jump rings. Close the jump rings on the earring posts to secure them together.


Now your earrings are finished and ready to wear!


This tutorial contains affiliate links.
-
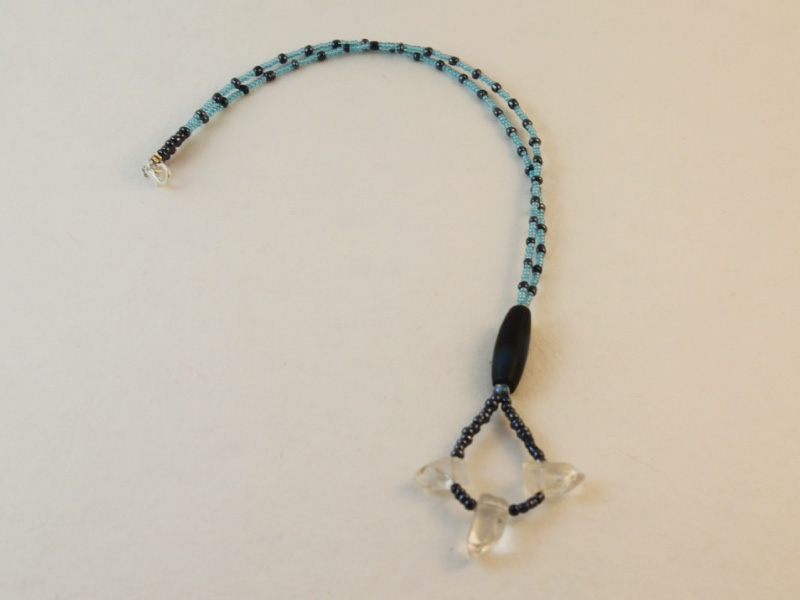
How to make a beaded teardrop pendant

Here’s how to make a cute beaded teardrop pendant using memory wire. If you’re sick of making chokers with your memory wire coil this is another way to use it!
You will need the following tools and materials to make your teardrop pendant:
1: Pliers. You’ll need your cutting pliers, flat nose pliers and round nose pliers.
2: A piece of memory wire, half of a necklace loop.

3: Beads. I used these mixed glass seed beads.

Follow these steps to make your teardrop pendant:
1: Create a loop at the end of one side of the piece of memory wire.


2: Add the beads to the wire until there is only 1cm left unbeaded.


3: Create a loop at the other end of the wire securing the beads in place.

4: Link the loops together to form the teardrop shape.


Now your pendant is finished you can attach it to a chain or beaded strand of your choice!

Here’s a pair of earrings I made using the same technique. Just add an earring hook to the top of each teardrop instead of a chain!

-
How to make a mixed media double strand necklace. Chains and beads for the win!

This necklace is another version of the double strand necklace. One strand is made using glass seed beads, the other with chain and gemstone beads!
You will need the following tools and materials to make your necklace:
1: Pliers. You will need your round nose pliers, flat nose pliers and cutting pliers to make your necklace.
2: A piece of tiger tail wire. Cut yours to your desired length, I made mine shorter than the chain component.

3: Glass seed beads. I used a mix of multi-colored beads.

4: Two pieces of chain.

5: An eye pin.

 AliExpress.com Product – Free Shipping! 300PCs Silver Plated Eye Pins 50×0.7mm(21 gauge) (B01727)
7: A large feature bead. I used this gemstone slice bead.

8: Two medium sized jump rings.

9: A lobster clasp.

10: Four crimp beads.
Follow these steps to make your double strand necklace:
1: Put the gemstone bead onto the eye pin.

2: Bend the pin to form a right angle with the bead.

3: Create a loop using the round nose pliers to secure the bead onto the pin.


4: Add a piece of chain to each side of the eye pin.


5: Set the chain piece aside.

6: Add two crimp beads and a jump ring to the end of the tiger tail wire.


7: Loop the end of the wire around the jump ring and pull it through the crimp beads.

8: Squash the crimp beads using the flat nose pliers.


9: Start adding the beads to the wire. I added my beads in a random order but you can create any pattern you choose.

10: Continue adding beads until your necklace has reached your desired length.

11: Add the other two crimp beads and the remaining jump ring to the wire.

12: Loop the end of the wire around the jump ring and back through the crimp beads, pull the wire tight.


13: Squash the crimps.


14: Trim the excess wire.

Your beaded strand is now finished!

15: Open one of the jump rings and attach one side of the chain. Add the clasp to the open jump ring and then close it to secure the components together.

16: Add the other side of the chain component to the other side of the beaded strand. Once the other side is attached the necklace is finished and ready to wear.


Pretty cool huh?!

-
Hoops are in! Here’s how to make some beaded hoop earrings.
These hoop earrings are as easy to make as they are stunning to wear! I made mine using some pretty yellow glass beads and some bracelet-sized memory wire. contains affiliate links
You will need the following tools and materials to make these earrings:
1: Pliers. You will need your cutting pliers, flat nose pliers and round nose pliers to make these earrings.
2: Two pieces of memory wire cut to the length of a single circle.
https://flic.kr/p/TEfEdz
3: Two earring hooks.
4: Beads of your choice. I used these yellow glass e-beads.
Follow these steps to make your beaded hoop earrings:
1: Create a loop at one end of the memory wire circle using the round nose pliers.


2: Add beads to the memory wire.

3: Continue adding beads until there is approximately 1cm (0.4 inches) left without beads.

4: Create half a loop using the round nose pliers. Hook it around the first loop.


5: Close the second loop using the round nose pliers to secure the ends of the hoop together.

6: Add an earring hook to the top of the hoop and close it to secure it in place.

7: Repeat steps 1 to 6 for the second earring.

How cute are these? What colors will you make your hoops in?
-
Use Memory Wire To Construct A Cool Beaded Collar
Memory wire is a great material. It comes in different sizes so you can make beautiful jewelry without having to fiddle with extra findings.
You will need the following tools and materials to make your memory wire collar necklace.
1: Pliers. You will need your cutting pliers and round nose pliers.


You can get jewelry pliers here:
2: Necklace length memory wire.
3: Beads of your choice. I used these citrine gemstone beads, frosted blue e-beads and blue glass seed beads.

Follow these steps to make your own memory wire necklace:
1: Cut the memory wire to length, make sure there is a bit of overlap on either side so that the necklace will stay on your neck when worn.
2: Begin adding beads. Add the feature beads first so that you can position them in the center of the necklace.
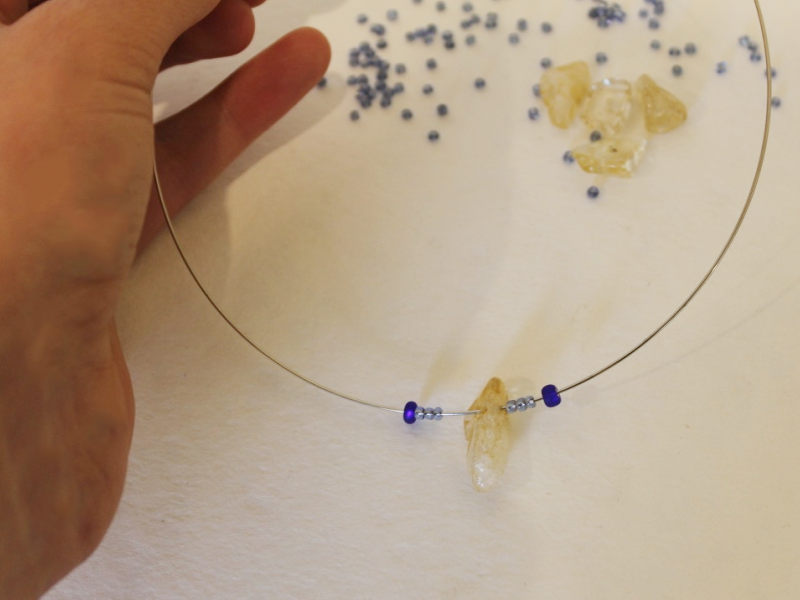
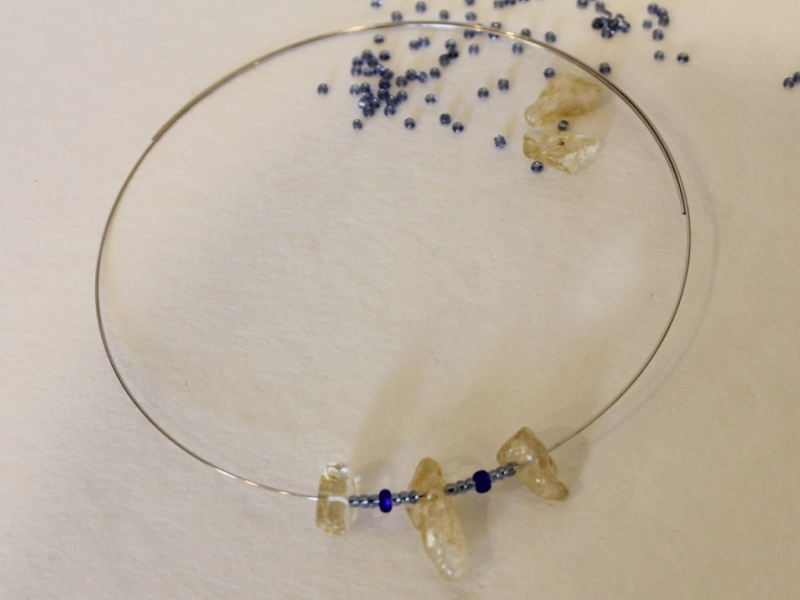
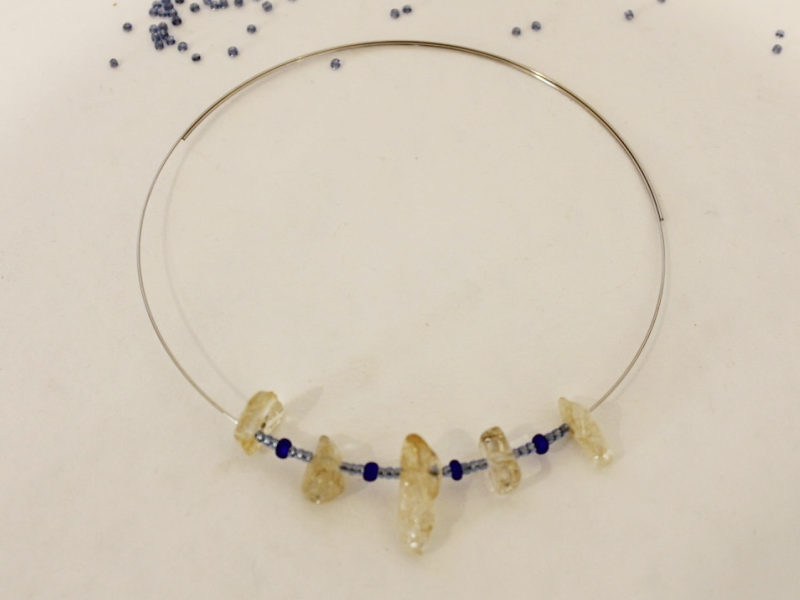
3: Once all the feature beads have been added, continue beading in your desired pattern on one side of the necklace, finishing close to the end of the wire.
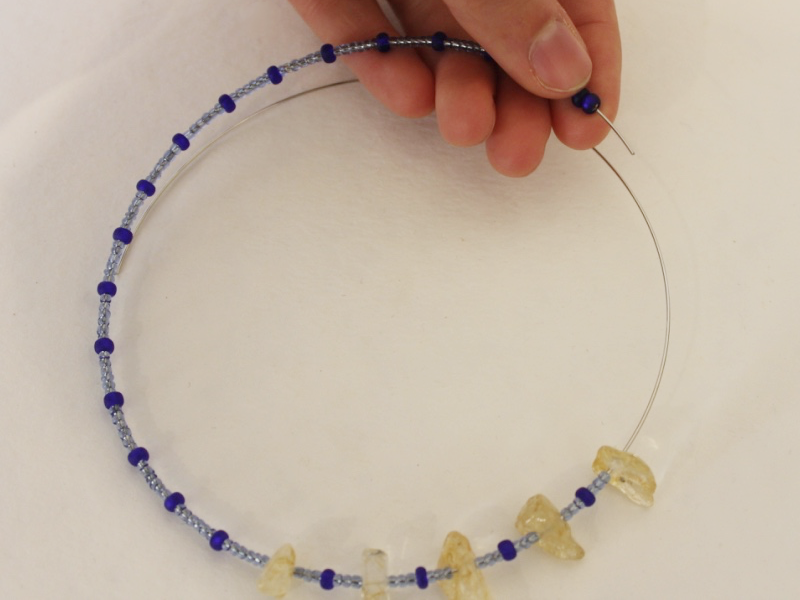
4: Use the round nose pliers to bend the wire at a right angle to the beads.
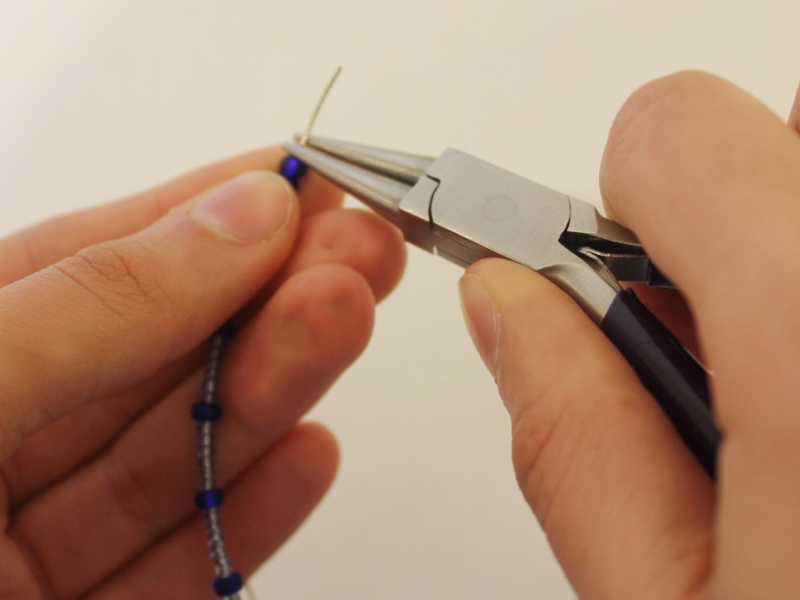
5: Then use the round nose pliers again to create a loop at the end of the necklace and secure the beads in place.

6: repeat steps 3 to 5 on the other side of the necklace.
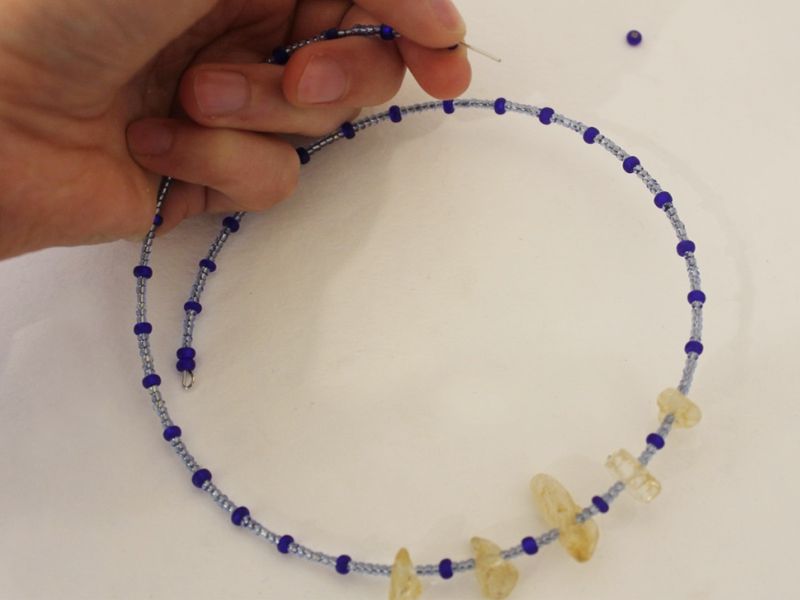
Once the other end of the necklace is secured your collar is complete! Wear it with pride.

Here is another memory wire collar made with amethyst chip beads and yellow e-beads.

-
Make this thin wire ring and give your fingers some delicate bling!

This ring makes use of firm memory wire to create a delicate cocktail ring that is simple to make and a delight to wear.
Follow these steps to make your own delicate thin wire ring:
1: Pliers. You will need your cutting pliers to make this ring.
2: Ring sized memory wire.

3: Araldite glue. I suggest wearing gloves and working in a well ventilated space when gluing.

4: Skewer.

5: A piece of scrap paper.

6: A bead of your choice. I used this handmade polymer clay cube bead.

Follow these steps to make your own elegant thin wire ring:
1: Cut one loop of memory wire using the cutting pliers.

2: Squeeze out some glue and mix it using the skewer on the scrap paper.


3: Add the glue to one side of the opening on the memory wire.

4: Place the glue end into one side of the bead.

5: Add glue to the other side of the ring and place the end into the other side of the bead.
6: Once the wire has been secured in place you may need to add some extra glue to the bead opening to ensure that the ring is secured.

7: Wait for the glue to dry before you wear your ring.

Once the ring is dry it is ready to wear… Looking good!

Here is another ring made with a grey polymer clay bead.