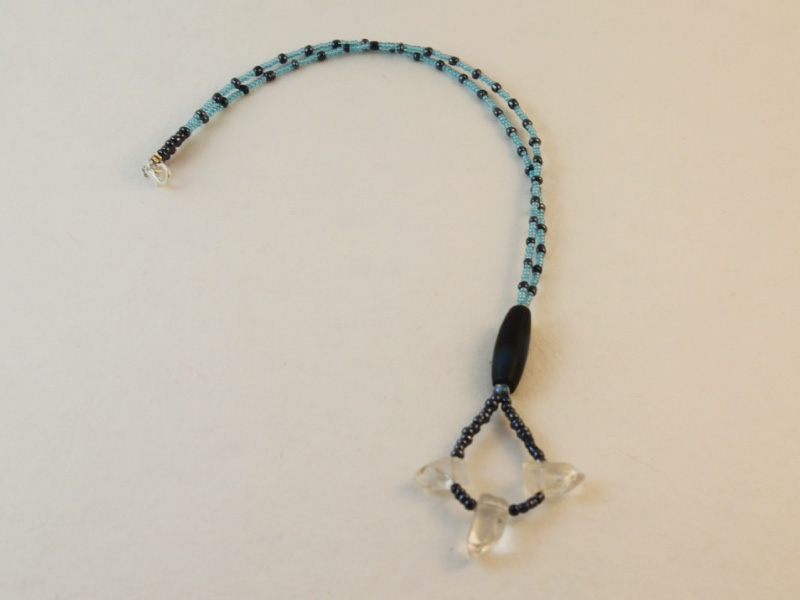
Get loopy! Make this beaded loop necklace
This necklace gives you the effect of a charm without actually adding one. By using some cleverly placed beads this necklace looks fancier than the effort it takes to make it! This technique allows you to experiment with, and show off your exotic and unique beads in a creative manner.
You will need the following tools and materials to make this beaded loop necklace:
1: Pliers. You will need your round nose pliers, flat nose pliers and cutting pliers to make this necklace.

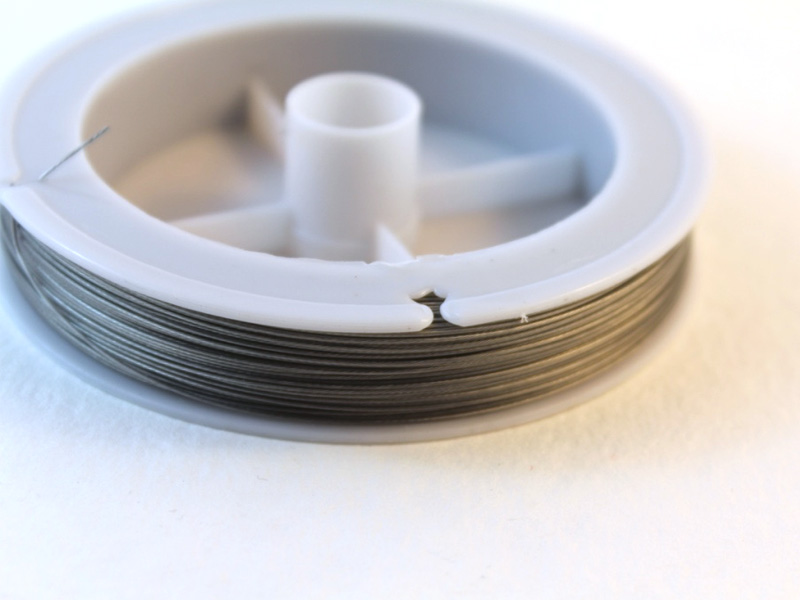
2: Tiger tail wire.
3: One lobster clasp and one jump ring.


4: Four crimp beads.

5: Beads of your choice. Make sure you pick one large bead to hold the loop in place. I used a long blue timber bead as my central bead. You might also want to choose some beads to feature on your loop pendant, I used three quartz beads.


The Steps:
1: Cut a length of tiger tail wire. Make sure it is long enough to fit around with the pendant loop.


2: Begin adding beads to the middle of the necklace. Add enough to form a small loop at the center of the necklace.


3: Once you have enough beads to form your loop, secure it in place by adding a glass e-bead.

4: After adding the e-bead, add your larger centerpiece bead.

5: Add another e-bead after the centerpiece bead.

6: After adding the second e-bead, begin beading one side of the necklace. I used some blue seed beads for the rest of the necklace.


7: Once your beading is complete, add two crimp beads and the lobster clasp.


8: Loop the wire back through the crimp and beads, pulling it tight using the pliers.


9: Squash the crimps using the flat nose pliers. After the crimps have been secured, trim the excess wire using the cutting pliers.


11: Repeat steps 6 to 10, adding a jump ring to the end of the strand instead of a clasp.

12: With both sides finished your necklace is ready to wear. I love this design and I hope that you do too.

DIY Jewelry Hub
Welcome to DIY Jewelry Hub. If you’ve ever wanted to learn how to make your own jewelry this is the place to start! Jewelry is a great way to show off your individuality and style. You’ll be surprised at how easy it is to create your own unique pieces! DIY Jewelry Hub will equip you with all the knowledge and inspiration you need to make your own jewelry.


You May Also Like

Make your jewellery work for you, this necklace is also a bracelet!

Got two bracelets but want a necklace? Here’s how to convert what you’ve got into something new!
