-
Here’s how to add eclectic charms to a chain to make a unique necklace.
I love the look of eclectic charms on a necklace, so I decided to make a tutorial to show you how easy it is to make your own custom charm necklace design. Gather up some gorgeous vintage and new charms and pop them onto a lovely chunky chain.
Please note that this tutorial contains affiliate links for which we may receive a commission.
You’ll need these tools and materials to make your charm necklace:
1: A sterling silver chain with large links for you to attach your charms to.

You can get something similar here:
2: A selection of charms. I used some vintage charms in different materials that I have collected over the years. I also made sure I had matching jump rings made from sterling silver. I used 5 charms but you can add as many as you like.

Here’s something similar to the bird charm:
Shell charm:
Here’s an option, or…
Dolphin Charm:
Here’s a sterling silver version
Bead charm:
Quartz charm:
3: Flat nose and parallel pliers to open and close the jump rings.

You can get a pair here:

Get some parallel pliers here:
Now here are all the steps you need to follow to make your charm necklace:
1: Find the centre of the necklace and place your first charm in the middle. Attach it using your pliers to open the jump ring and then close it around the chain link.


2: Place the second charm a few centimetres (or around an inch) away from the first charm and attach it the same way you did the first charm.

3: Repeat step 2, adding the next charm to the other side of the first charm.

4: Do this again until all your charms have been added in the order you like.


Now your necklace is finished and ready to wear! So cute! I love this design so much.


Here’s what it looks like on!

If you love this, here’s a charm bracelet tutorial you can follow to make something that matches!
-
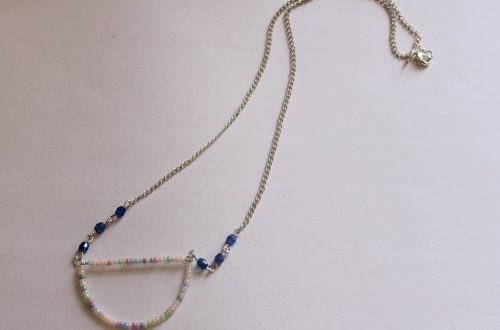
Here’s a letter bead necklace so you can tell everyone how you feel.
This letter bead necklace is a simple design with a big personality. Use letter beads to show something about your mood or personality around your neck. Layer this design with some other pieces to really show off your style. I love this simple necklace DIY! Please note that this tutorial contains affiliate links.
Here are the tools and materials you’ll need to make your letter bead necklace:
1: Pliers. I used my cutting pliers (to cut my chain to length), round nose pliers and flat nose pliers.

2: A piece of chain long enough to fit around your neck. You can make it longer or shorter depending on how long you like your necklaces.

3: Two small jump rings.

4: A lobster clasp.

5: Letter beads. I used two to spell out ‘OK’.

Follow these steps to make your letter bead necklace:
1: Add your beads to the chain to form your chosen word.


2: Add one of the jump rings to one end of the chain by threading it through the last chain link. This can be tricky when your chain links are small like on this chain. I suggest using your smallest size jump ring.

3: Close the jump ring to secure it in place.

4: Add another jump ring to the other side of the chain.

5: Add a lobster clasp to the open jump ring and close it to finish the necklace off.


Now your minimalist but very cool letter bead necklace is ready to wear. Will you wear yours on its own for a big statement, or layer it with other pieces for a more curated look?


-
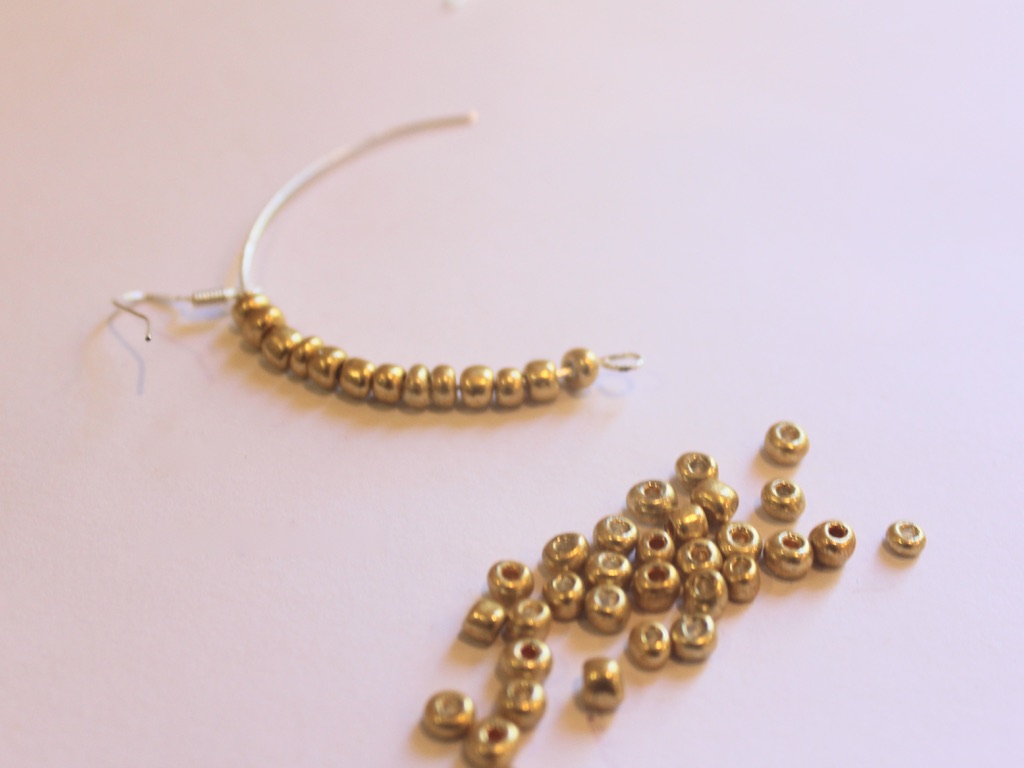
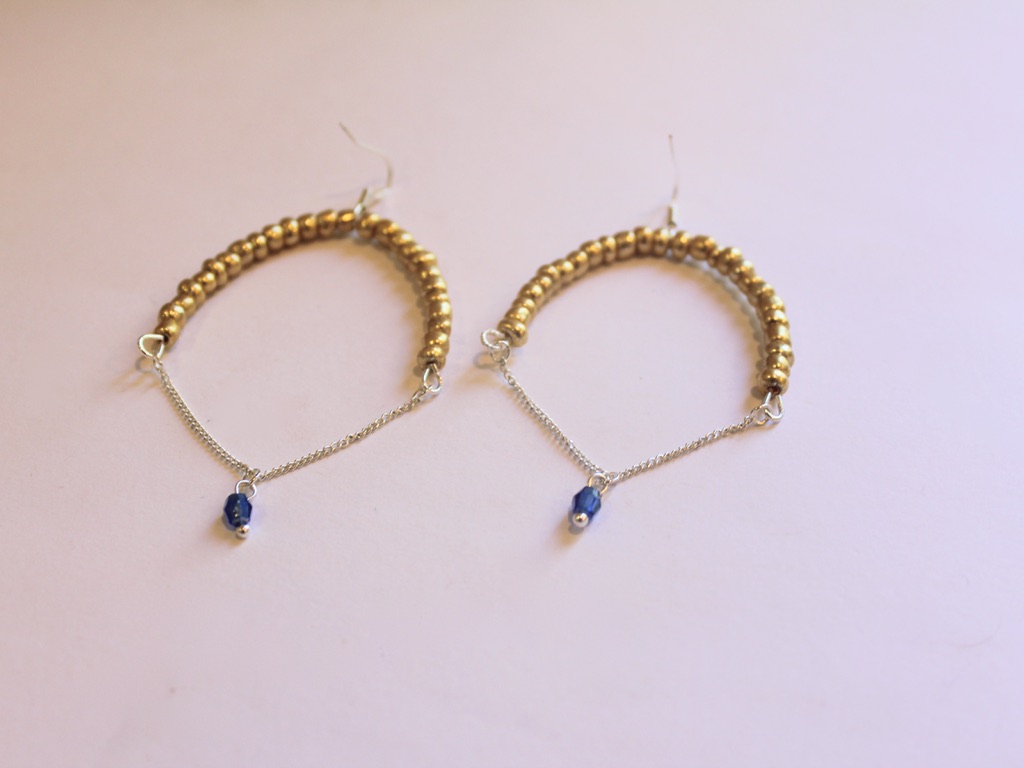
These arched and chain embellished earrings are so cool. Here’s how to make them.
We have made some different arch and chain earrings before, this one flips them around so that the arch sits at the top of the earring leaving the chain to dangle down gently. I really like the way these earrings move when you wear them. This tutorial contains affiliate links.
You’ll need the following tools and materials to make these earrings:
1: Pliers. I used my cutting pliers, round nose pliers and flat nose pliers.
2: Some bracelet length memory wire cut into half circles.

3: Two short pieces of chain.

4: Earring hooks.

5: Six jump rings.


6: Two head pins.

7: Beads. I used gold-tone e-beads and faceted blue plastic beads.


Follow these steps to make your own arch and chain dangle earrings:
1: Create a loop at one end of one of the pieces of memory wire using the round nose pliers.

2: Add beads so that approximately half of the wire is beaded.

3: Add one of the earring hooks.
4: Add more beads to the wire until there is about 1cm left without beads.

5: Curl the end of the wire so that the beads and earring hook are secured in place. I squeezed my wire a bit at this point so that it formed a more narrow arch.

5: Repeat steps 1-5 for the second earring.

6: Add a jump ring to one end of the small chains.

7: Attach the end of the chain to the bottom of the beaded arch.

8: Repeat steps 6 and 7 for the other end of the chain to form a loop.


9: Repeat steps 6 to 8 for the other earring.

10: Add the faceted beads to each of the head pins and loop the tops using the round nose pliers to secure the beads in place.


11: Attach the newly formed bead charms to the chains with the remaining jump rings.

Now your dangling arch earrings are finished and ready to wear! So so cute!
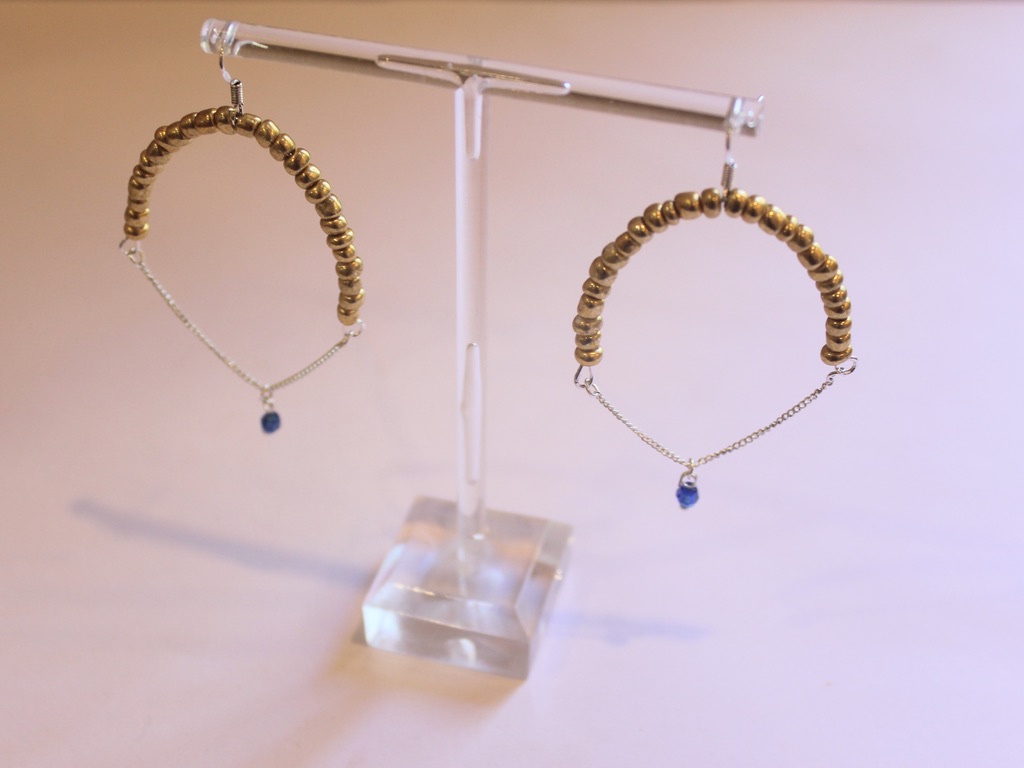
If you like this design here’s a different arch earring tutorial we made a little while ago.
This tutorial contains affiliate links.
-
How to make a beaded chain ring. This is the cutest idea!
Do you like the look of delicate rings? This chain ring design is fun to make and even more fun to wear! This tutorial contains affiliate links.
You’ll need the following tools and materials to make your beaded chain ring:
1: Pliers. Round nose pliers and flat nose pliers are useful for this DIY.


2: A short piece of chain, make sure you have enough to fit around your ring.

3: An eye pin.

4: A bead. I used this blue wooden flat bead.

Follow these steps to make your cute beaded chain ring:
1: Add the bead to the eye pin.

2: Secure the bead to the pin by looping it around the barrel of the round nose pliers.

3: Attach one side of the newly formed charm to one side of the chain.

4: Wrap the chain around your finger to determine how long to make your chain.

5: Trim the chain to the length you chose.

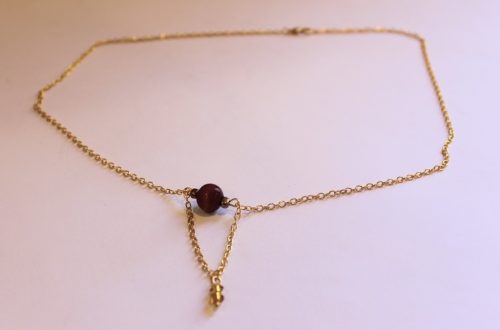
6: Attach the other end of the chain to the other side of the bead charm.

Now your beaded chain ring is finished! How adorable is this design?


Here is another one I made using a plastic love heart bead.

This tutorial contains affiliate links.
-
Anklets are the coolest!!!!! Here’s how to make a simple chain charm anklet.
This anklet is super simple in design, add a cute charm to a plain chain and you’re ready to go! What kind of charms will you put on your DIY anklet? This tutorial contains affiliate links.
You’ll need the following tools and materials to make your simple chain charm anklet:
1: Some pliers. Use your flat nose and round nose pliers.
2: A piece of chain long enough to fit your ankle.

3: Two jump rings.

4: A lobster clasp.

5: Another jump ring.

6: A charm of your choice. I used an enamel peach charm.

Follow these steps to make your simple charm anklet:
1: Add a jump ring to one end of the chain.
2: Add the lobster clasp to the open jump ring. Close the jump ring to keep the clasp in place.


3: Add another jump ring to the other side of the anklet.


4: Add the remaining jump ring to the top of the charm.
5: Attach the charm to the jump ring that attaches the clasp to the chain.

6: Close the charm jump ring to secure the charm in place and finish off your anklet.

Now it is ready to wear! How cute is this little peach charm anklet? I am really into food and fruit themed jewelry at the moment 🙂

This tutorial contains affiliate links.
-
I am loving chunky chain necklaces at the moment, here’s how to do them with a cute twist.

Remember this tutorial? Here’s another version with a soft ribbon twist, Weave some pretty ribbon through your chunky chain chokers for a cute and elegant effect.
You will need the following tools and materials to make this woven chain necklace:
1: Pliers. You’ll need your round nose and flat nose pliers for this project.
2: Some chunky chain at your chosen length. I used some light aluminium chain and made it choker length.

3: Two jump rings.

4: A lobster clasp.

5: Some ribbon. I used this green chiffon ribbon.

6: Scissors to trim the ribbon.

Follow these steps to make your woven chain necklace:
1: Thread the ribbon through the second link of the chain so that there is one long end and one short end.

2: Thread the long end through the chain links.

3: Continue threading the ribbon until you reach part way down the chain.
4: Fold the ribbon back and start threading it over the portion you have already threaded and continue until you get back to the short end of the ribbon.


5: Tie the ends of the ribbon into a bow.


6: Trim the excess ribbon.

7: Add one of the jump rings to one end of the chain and attach the lobster clasp.


8: Add the other jump ring to the other end of the chain to finish the necklace off.

Now your woven chunky chain necklace is ready to wear!
Other chunky chain tutorials:
- How to make a knotted chunky chain bracelet
- All the steps to make an adjustable chunky chain belt
- A simple chunky chain necklace
- A super simple chunky chain waist chain
Note: This article contains affiliate links
-
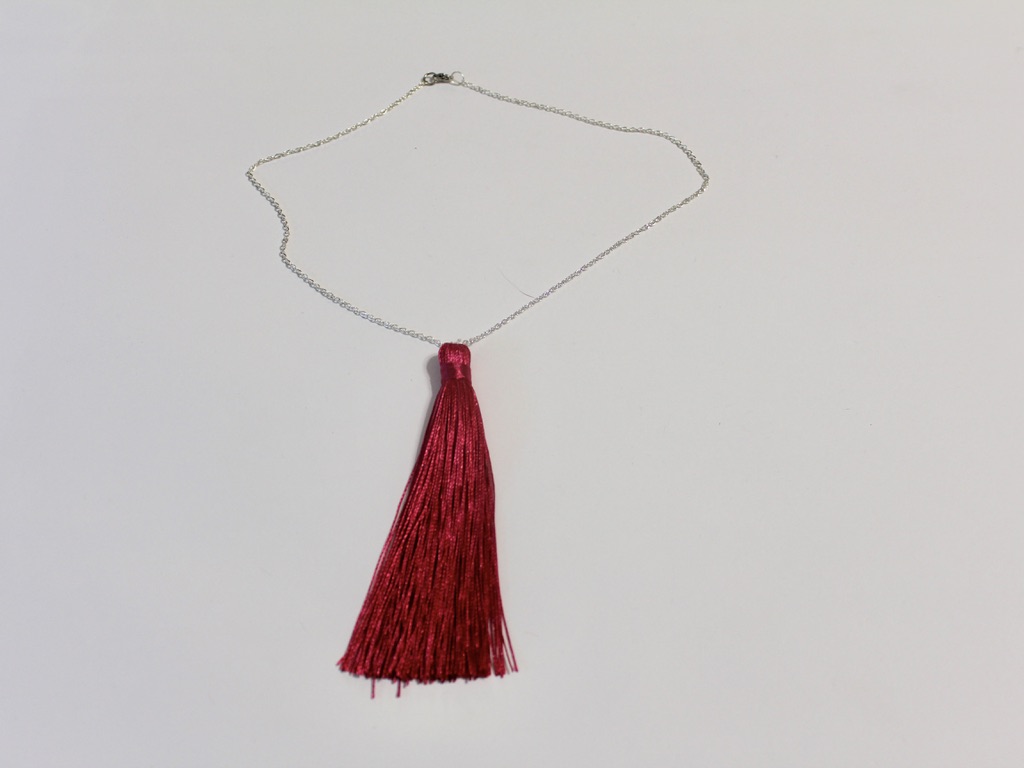
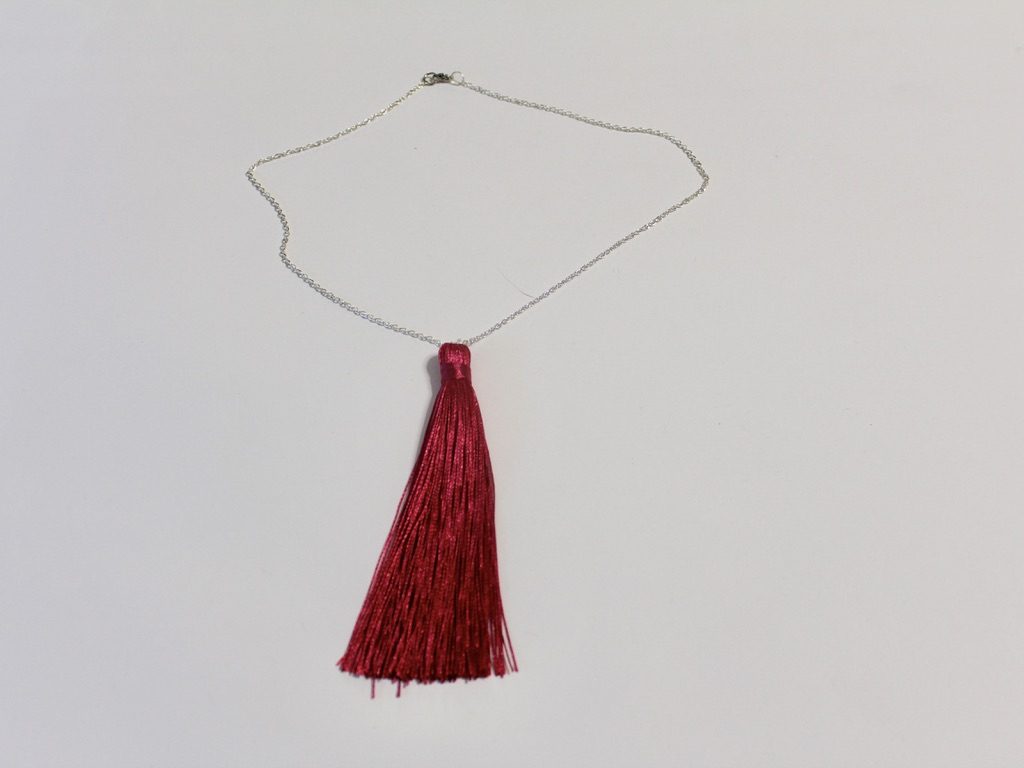
This video will show you how to make a tassel pendant necklace
This tassel pendant tutorial is another one of those simple DIY’s that have MAXIMUM impact! How cute is that dangling tassel? I am super stoked on this design and I hope you enjoy it too. This design is versatile, wear it to spice up all kinds of different outfits.
You’ll need some tools and materials to make this tassel pendant necklace, here are some links so you can find what you need:
1: Jewelry pliers including flat nose pliers, round nose pliers and cutting pliers.
2: A large tassel. I used a hot pink tassel.
3: An eye pin. I used a medium length silver-tone eye pin.
4: One spare bead. I used a yellow glass e-bead but you can use whatever you have lying around.
5: Necklace chain. Here’s a link to a simple silver chain.
6: A hot glue gun with glue. Don’t worry, you won’t need much messy hot glue to make this tassel pendant :).
I hope you enjoy this video tutorial and make yourself some super cute tassel jewelry!
Here’s the finished product! Attach the tassel pendant to a chain for a simple and elegant look.
And here is another tassel pendant attached to a yellow beaded memory wire choker. I love this version, especially the combination of yellow and pink. Yellow and pink is such a cheery and high impact color combination. Perfect for adding an extra punch to a blah outfit!
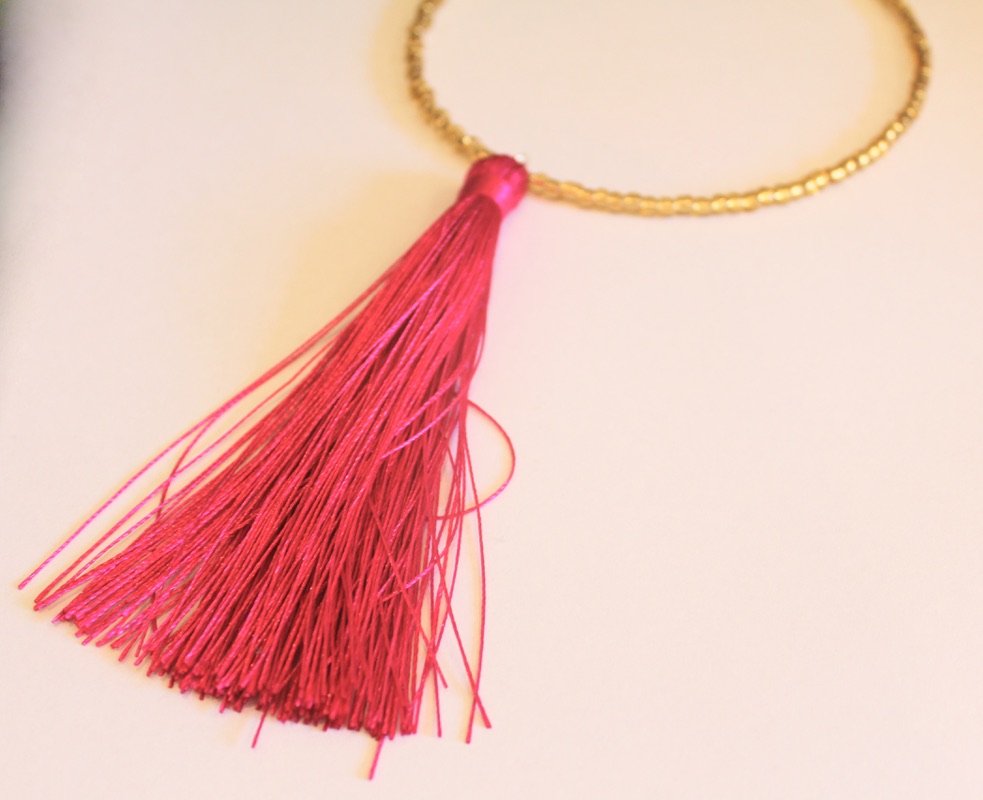
You can buy memory wire and glass beads here to make a choker necklace like the one pictured above:
If you are into tassel jewelry here are some other tutorials:
- Beaded tassel hoop earrings
- Chain tassel necklace
- Tassel and gemstone earrings
- Beaded tassel earrings
- Beaded tassel wrap necklace
- Beaded tassel pendant necklace
This tutorial post contains affiliate links.
-
Chunky chains are taking over. Here’s a DIY to get you in on the trend.

Apparently chunky chains are taking over from dainty delicate jewelry. Getting in on this cool new trend is super easy… here’s how to make your own chunky chain necklace.
You will need the following tools and materials to make your chunky chain necklace:
1: Pliers. You’ll need your round nose and flat nose pliers.
2: A chunky chain long in a length of your choice. I used this lightweight silver chain and made it choker length (fitting closely around the neck).

3: Two jump rings.

4: A lobster clasp.

Follow these steps to make your chunky chain necklace:
1: Add one of the jump rings to one end of the chain. Close it to secure it in place.


2: Add the other jump ring to the other end of the necklace.

3: Add the lobster clasp to the open jump ring.

4: Close the jump ring to secure the clasp in place and finish your necklace.

IT IS THAT SIMPLE! Now your chunky chain necklace is ready to wear!

-
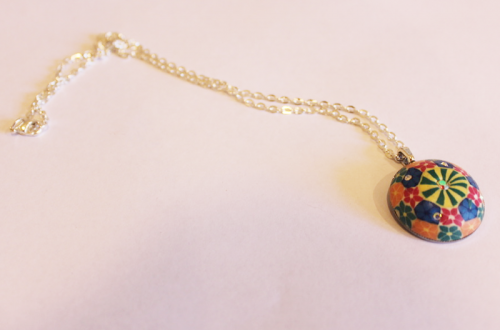
How to transform an old ring into a pendant.

If you are like me you might have some old costume jewelry lying around that isn’t really your style any more. Instead of throwing it away here’s a way that you can transform an old ring into a wearable pendant.
You will need the following tools and materials to make your pendant:
1: An old ring. I used this ring with a soldered on ring shank.

2: Flat nose pliers for pulling the ring apart.
3: A glue on bail.

4: Araldite glue.

5: A skewer.

6: Scrap paper.

8: A necklace chain.

Follow these steps to transform your old ring into a necklace pendant:
1: Remove the ring shank from the top of the ring, gently pulling it off with your flat nose pliers.


2: If there is excess metal use a file to remove it. I didn’t have to do this for this project.
3: Squeeze out the Araldite glue in equal parts onto the scrap paper.


2: Mix the glue using the skewer.

3: Add the glue to the bail and the back of the ring.


4: Place the bail onto the glued part of the ring and set aside to dry.

5: Add the dry pendant to the necklace to finish it off!
Now your new pendant is ready to wear! Such an easy way to upcycle old jewelry.
-
If you had a secret diary this lock and key tutorial is perfect for you!
For some reason I had a lock and key from my childhood diary lying around, so I decided to turn it into something nostalgic and wearable! This tutorial contains affiliate links.

You will need the following tools and materials to make your lock and key jewelry set:
1: Pliers. You will need your flat nose pliers and round nose pliers.
2: Two small pieces of chain.

3: One long piece of chain long enough to form a necklace.

4: Six jump rings.

5: A lobster clasp.

6: Two charm connector earrings.

7: Two keys and a lock. I used these ones from an old lockable diary.


Follow these steps to make your lock and key jewelry set:
1: Add a key to the end of each small piece of chain, securing them using two of the jump rings.


2: Add an earring finding to the top of the small pieces of chain using another two jump rings.


3: Now your earrings are finished, set them aside and start on the necklace!
4: Add the lock to the long piece of chain.

5: Add a jump ring to one side of the chain.
6: Add the lobster clasp to the open jump ring and close the ring to secure the clasp in place.

7: Add the other jump ring to the other side of the necklace chain to finish the necklace.
Now your lock and key set is finished and ready to wear! So cute!