
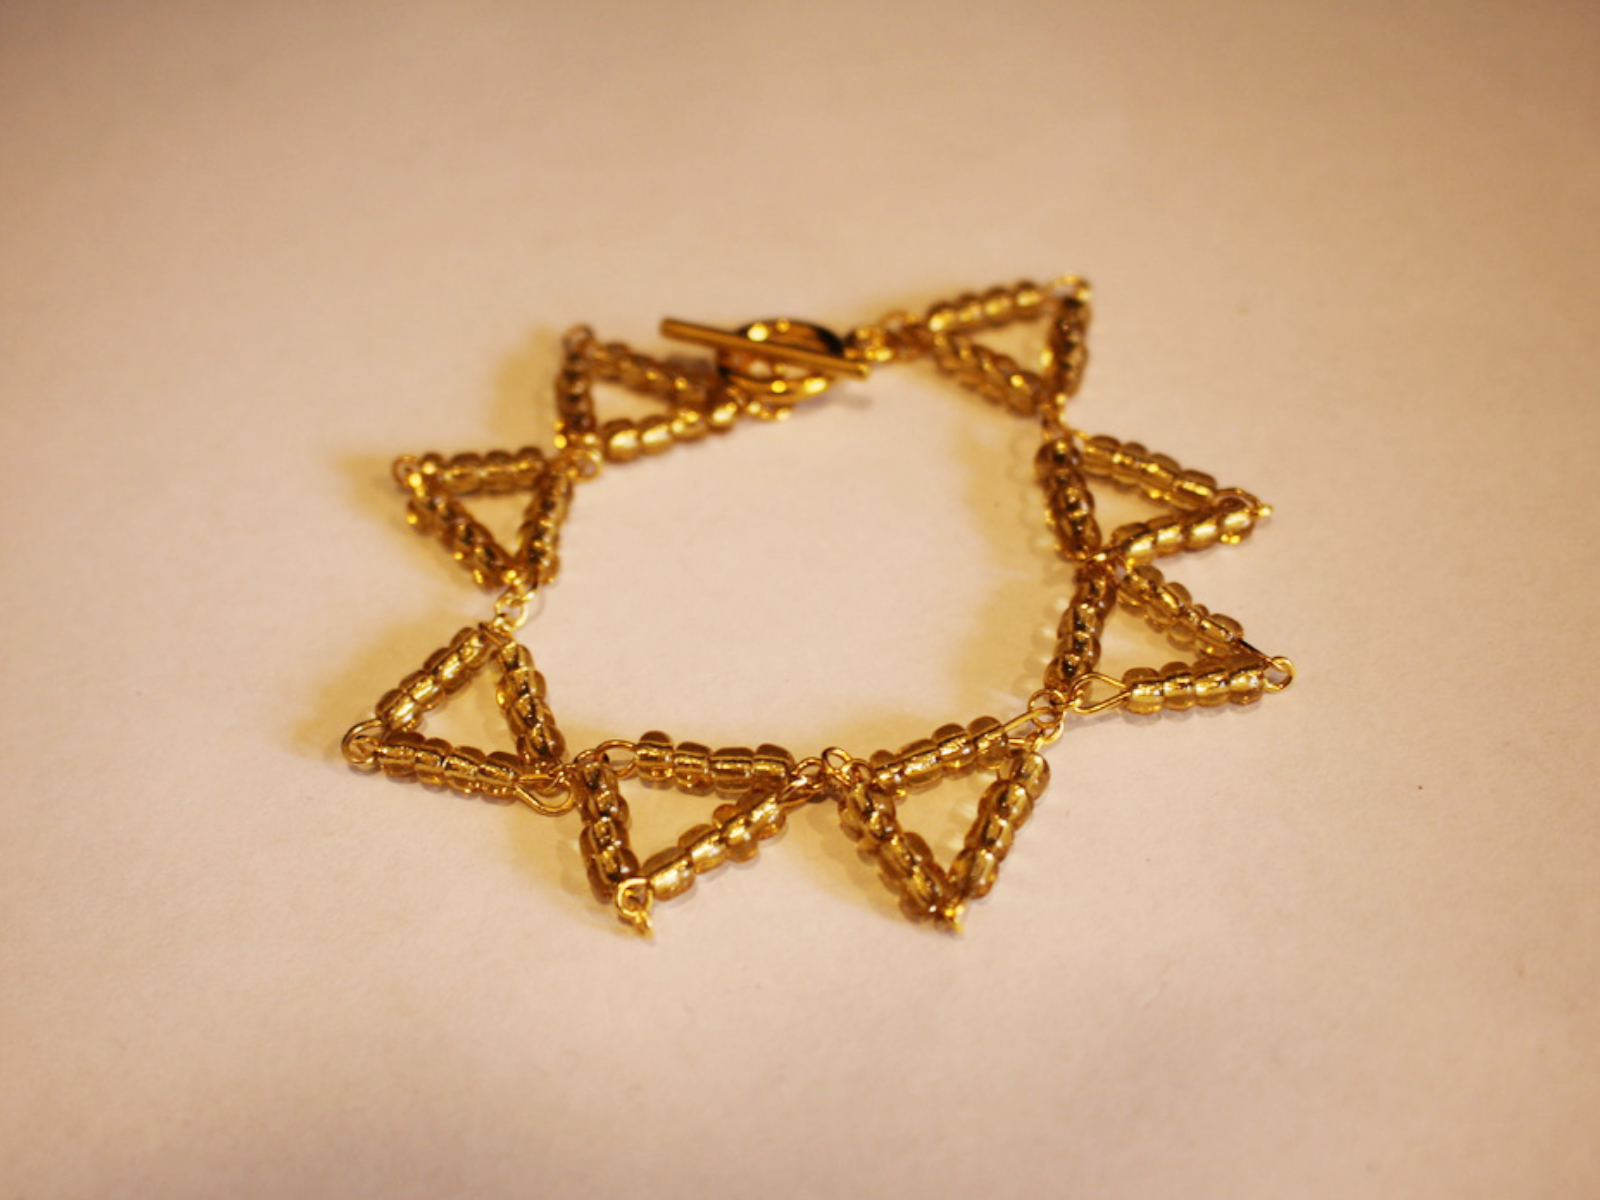
How to make a bunting inspired bracelet by making triangle shapes, so cute!
I was really excited when I came up with this bracelet design! It uses eye pins to make a series of triangles that are linked together to make wrist bunting! I love how there are lots of different ways you can use findings to make unique and sculptural pieces of jewelry. Please note that this tutorial contains affiliate links. This design might look complicated but its actually pretty easy bracelet making!
You’ll need these tools and materials to make this cute triangle bracelet:
1: Pliers. I used round nose pliers and flat nose pliers.


Here are some you can add to your jewelers tool kit:
2: Eye pins. I used a bunch of eye pins all the same length, 24 in total but you may need more or less depending on the size of your bracelet. I used gold tone for this design.

Here are some for your bracelet DIY:
3: Jump rings. I used 7 small jump rings in a gold tone. These were used to attach the triangles together.
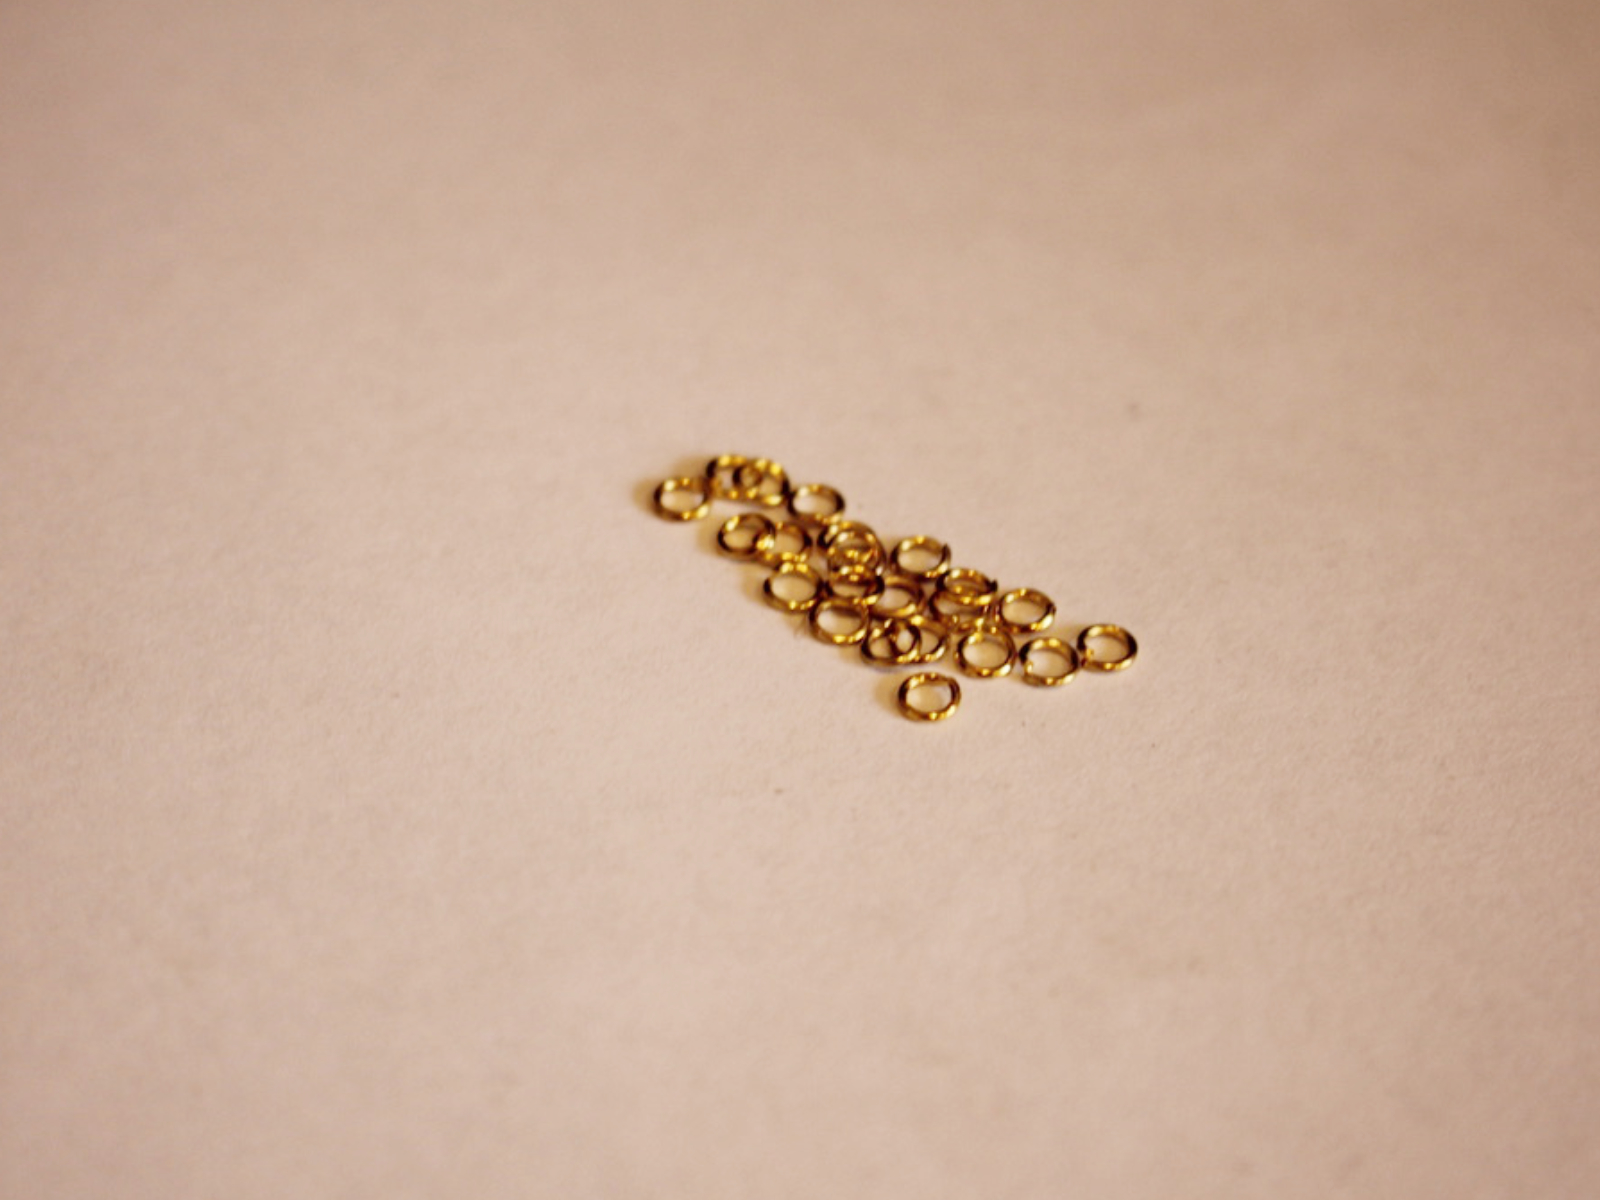
4: Two larger jump rings to put the clasp onto the triangle chain.

Here’s a link to some different sized jump rings that you can add to your jewelry kit:
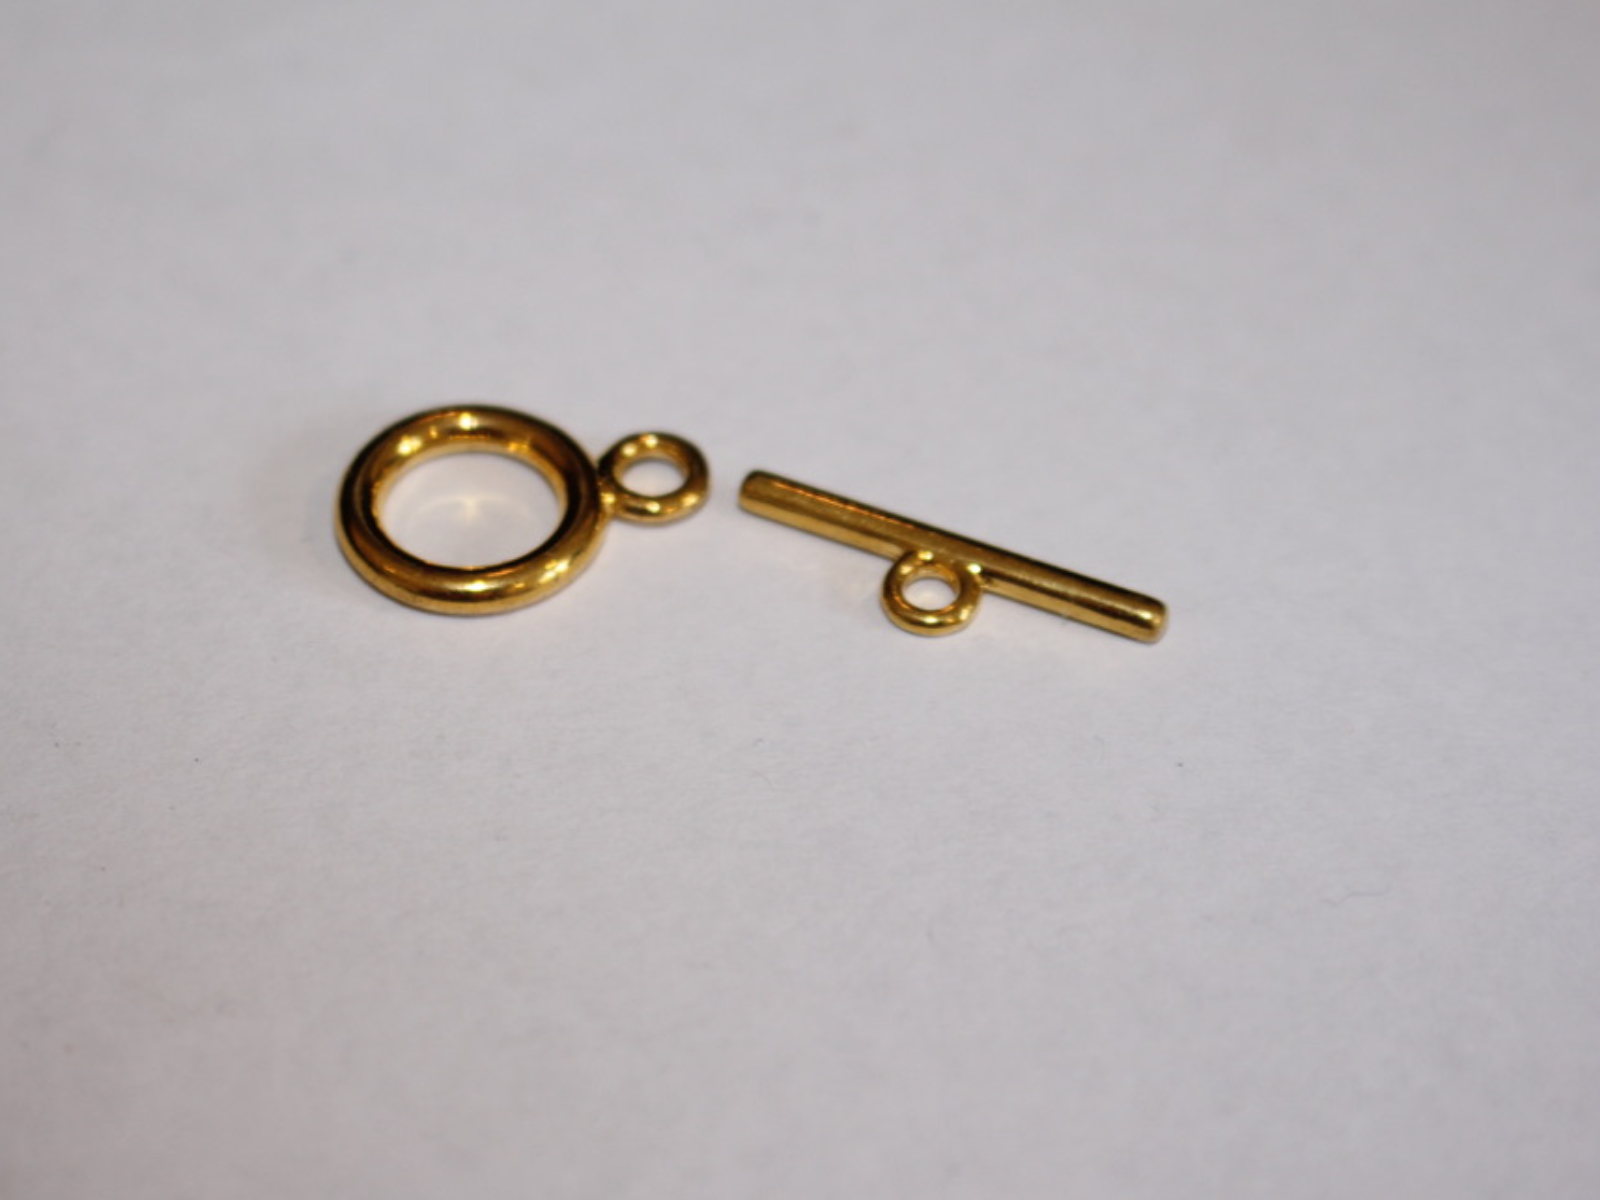
5: A toggle clasp. Mine was gold to match the rest of the hardware I used.
Check out this toggle clasp:
6: Beads. I used some yellow glass e-beads but you could use any colour.

Here are some links to beads you can use in crafting your bracelet:
Follow these steps to make your bunting inspired triangle bracelet:
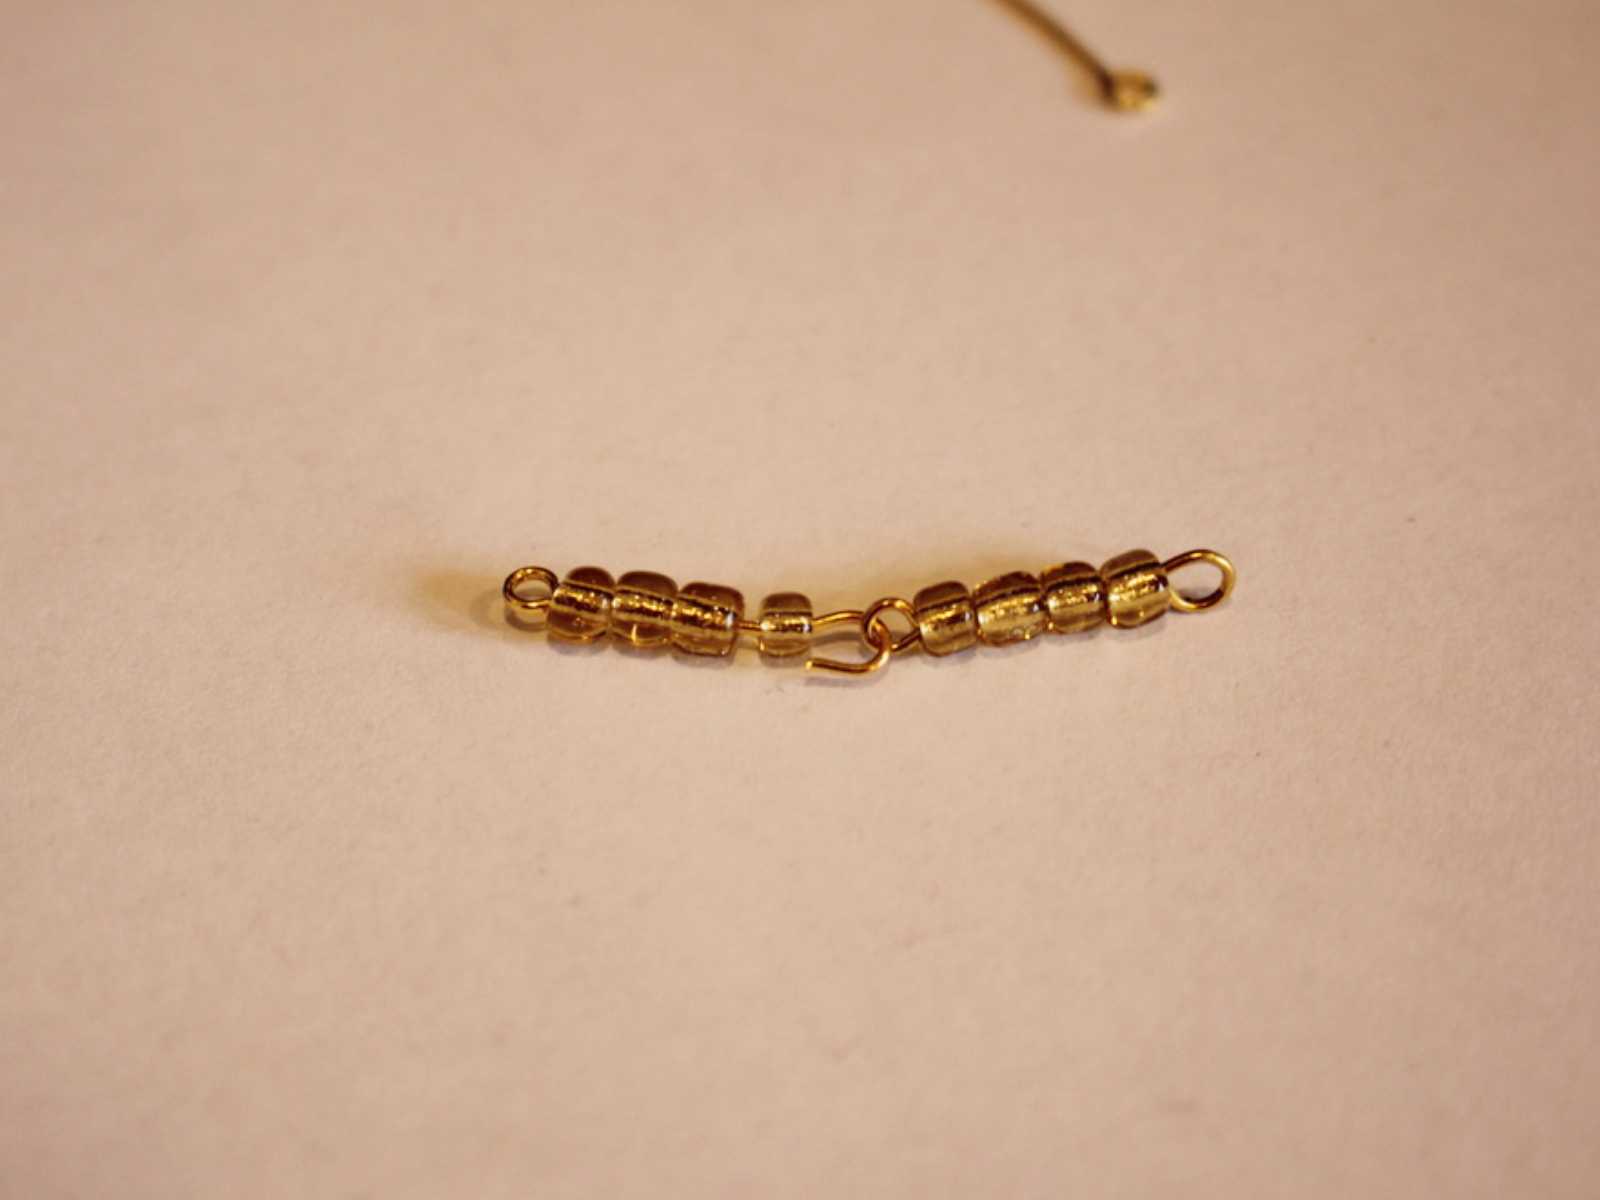
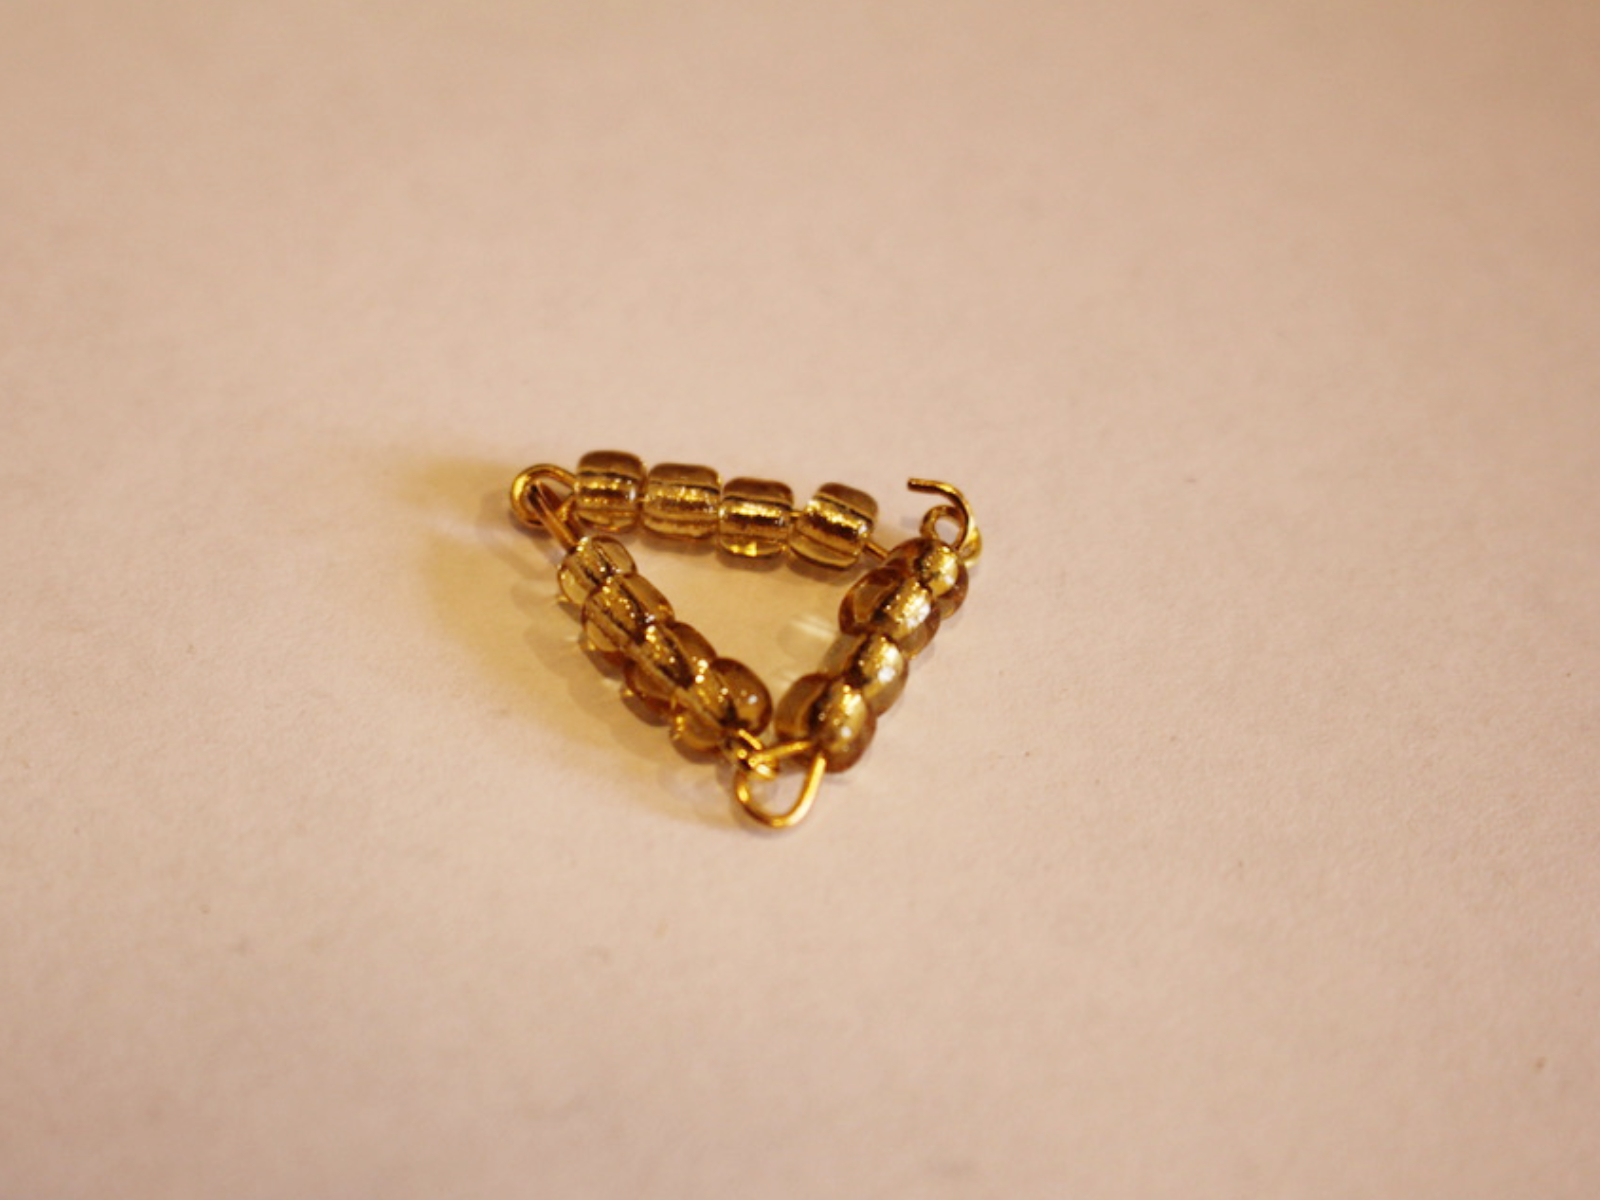
1: Take one of the eye pins and add beads until there is approximately 1cm left without beads.

2: Bend the unbeaded section so that it forms an angle to the beaded section. You can do this with your fingers if your pin is soft enough or use your pliers.

3: Bend the top of the pin around the barrel of your round nose pliers to form a loop.


4: Repeat steps 1 to 3 for a second pin. Open one of the loops at the end of a pin and attach it to the first pin you completed. Close the loop to secure the pins together.

5: Repeat steps 1-4 for another pin.
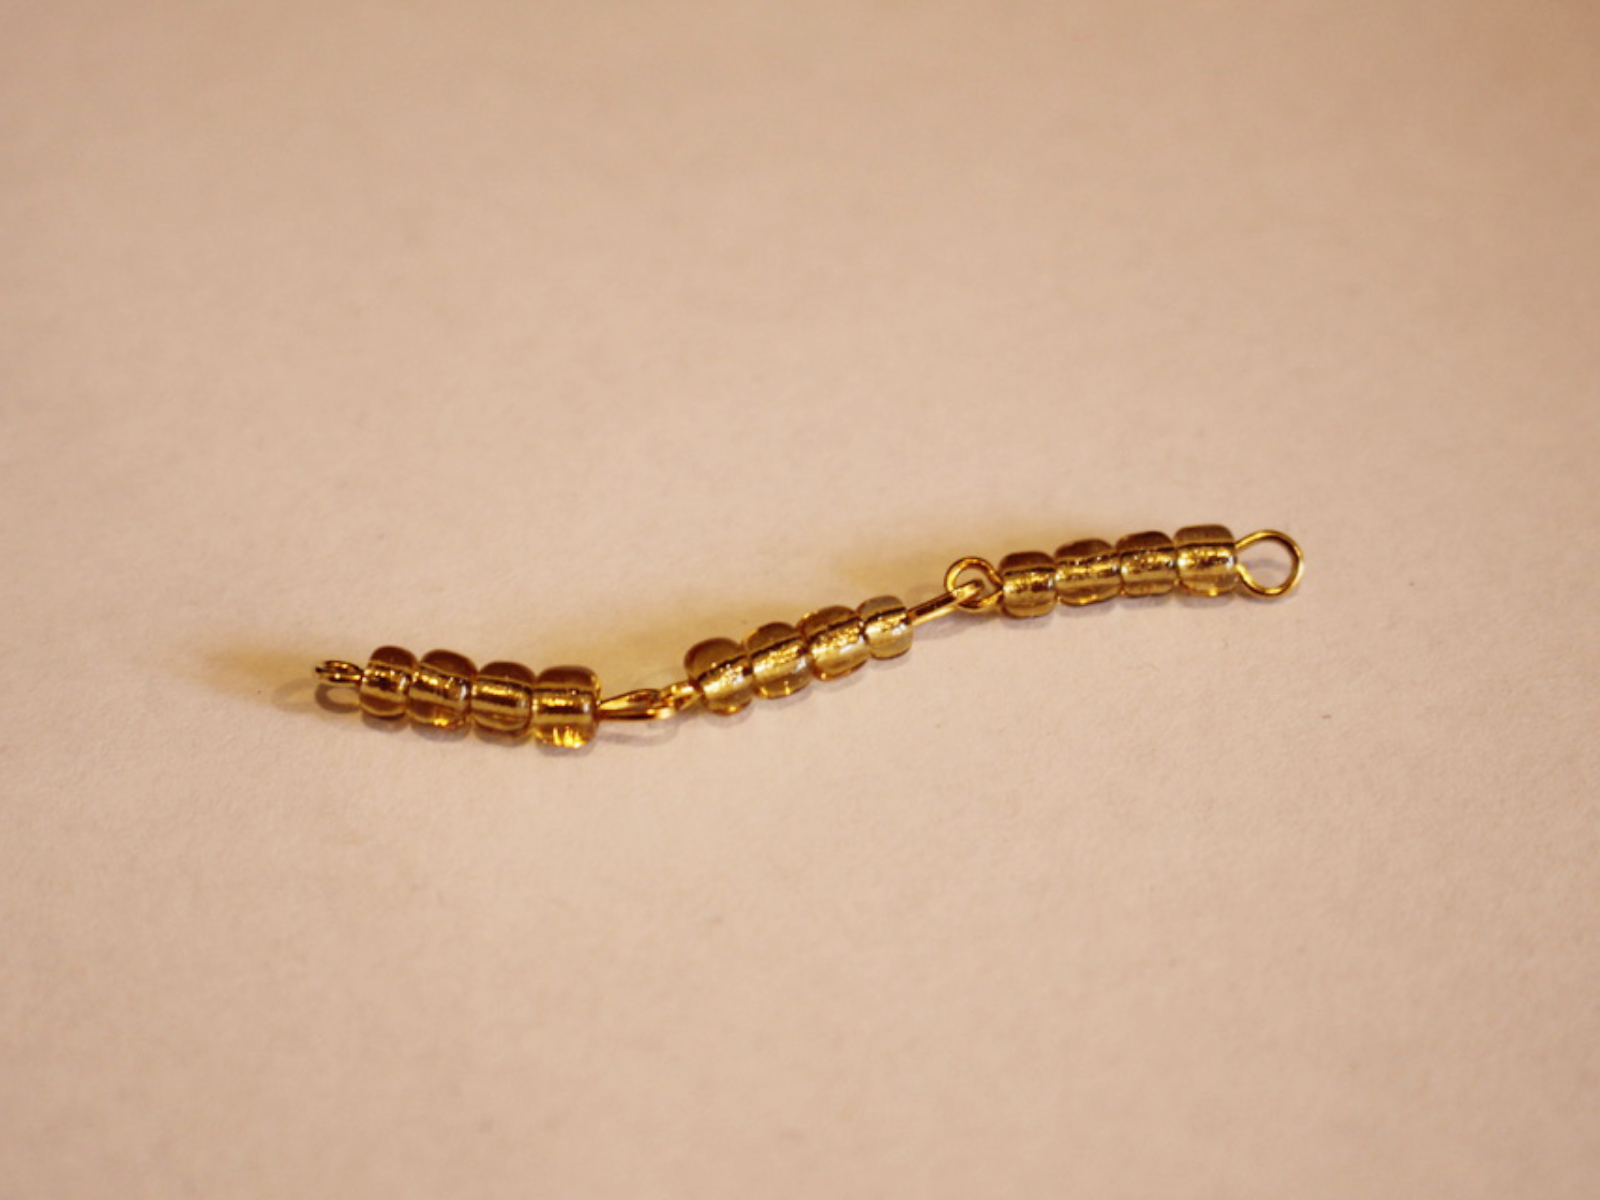
6: Take the chain you just made and open a loop at the end of one of the end pins.
7: Link the two end pins and close the loop to form a triangle shape.
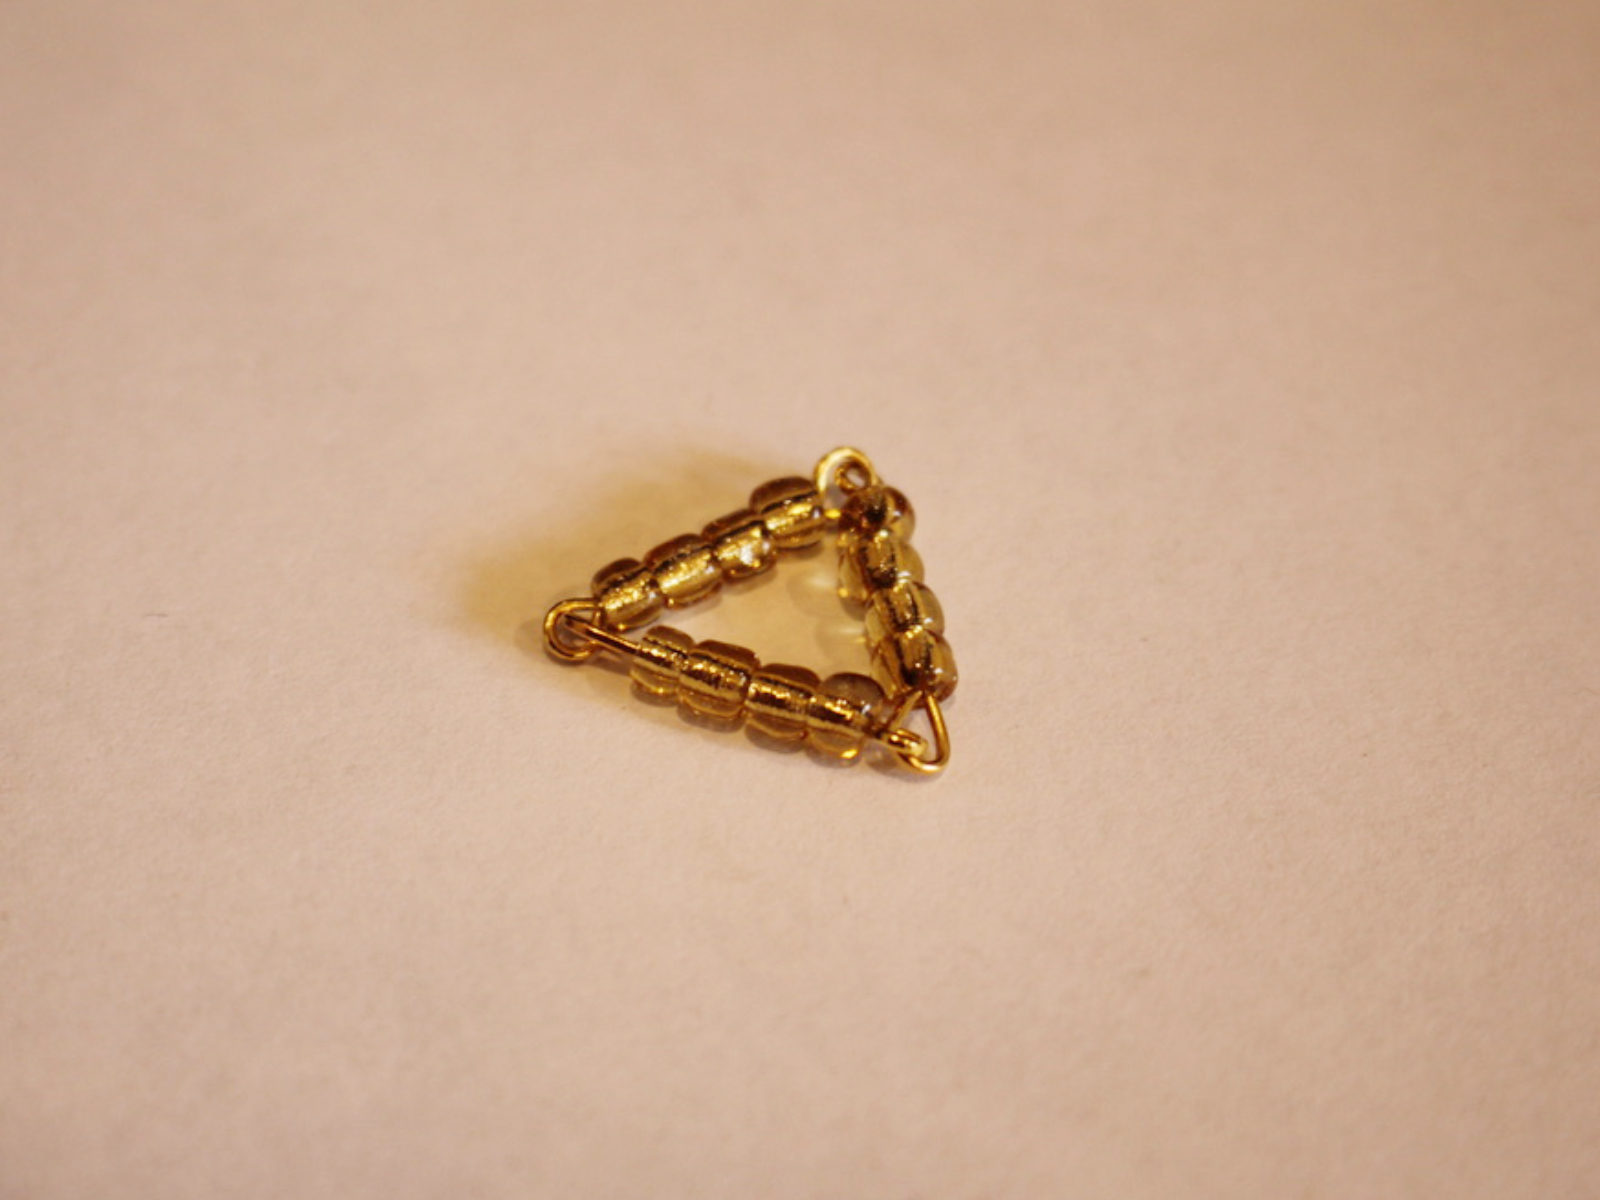
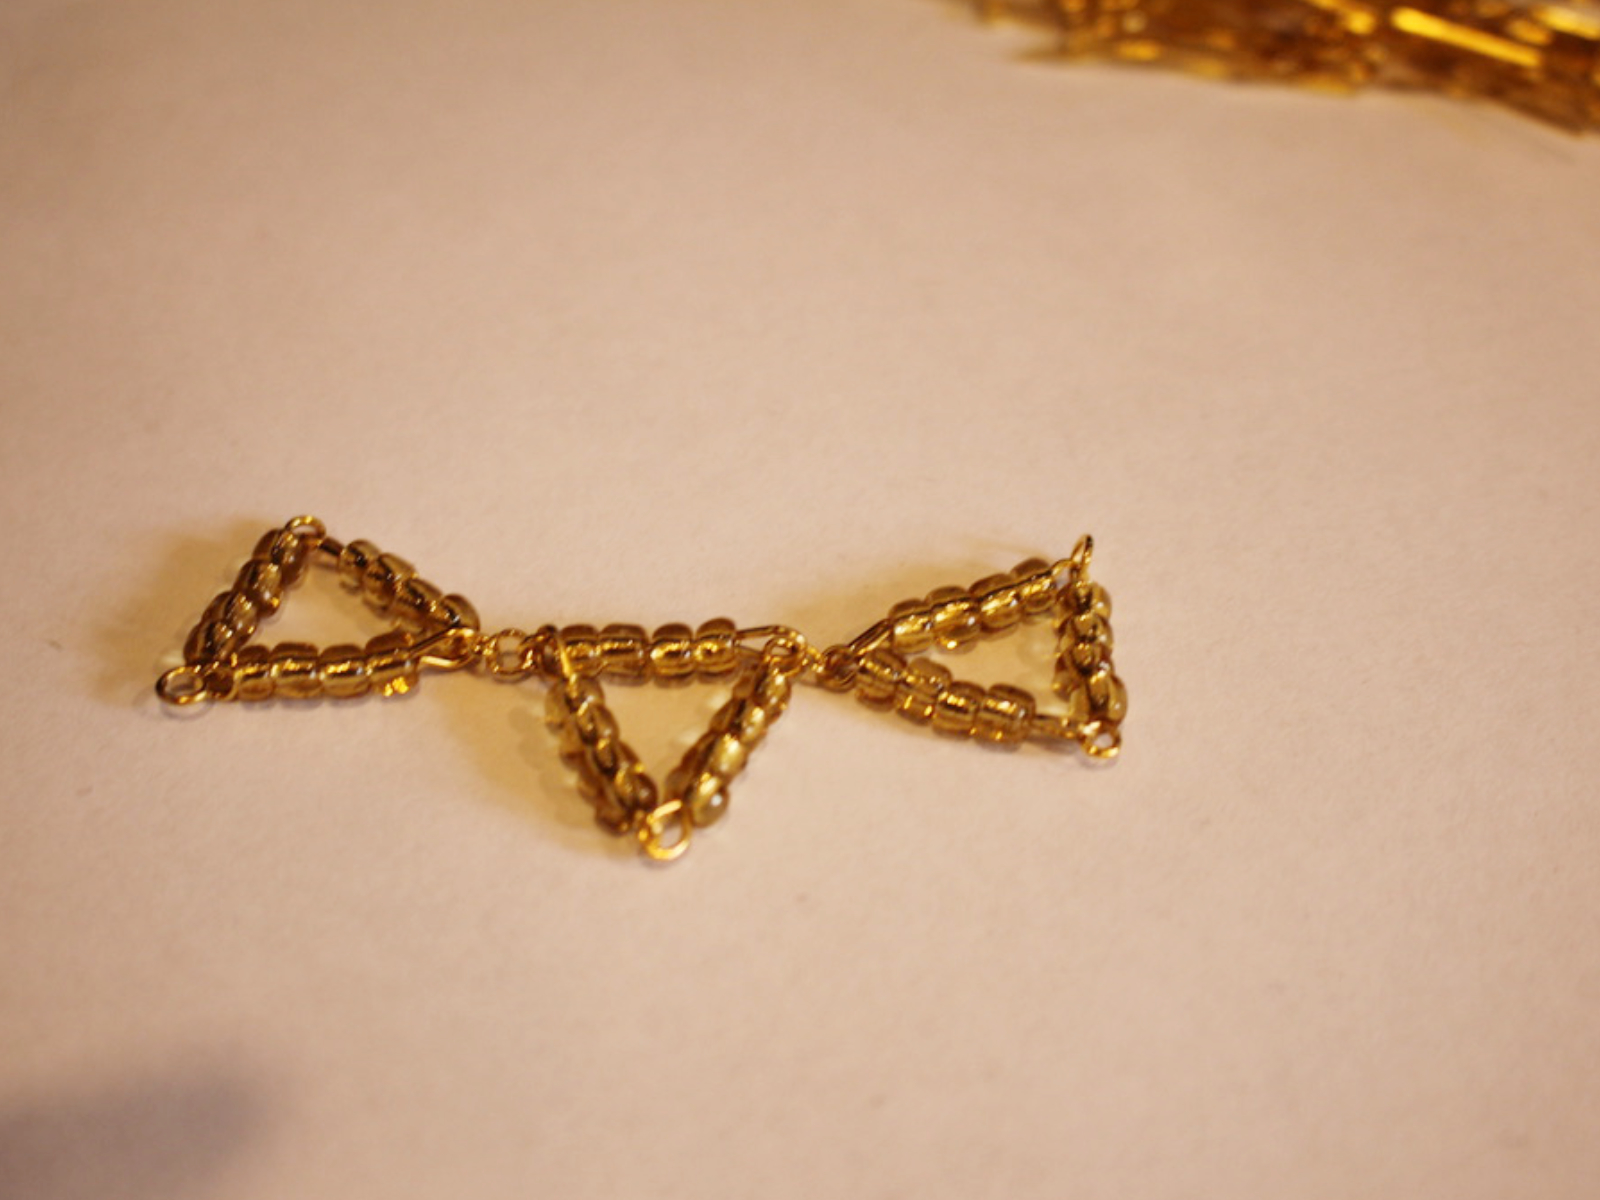
8: Make another triangle as you did in steps 1-7 and attach the two triangles together using one of the small jump rings, this is the start of your triangle chain.
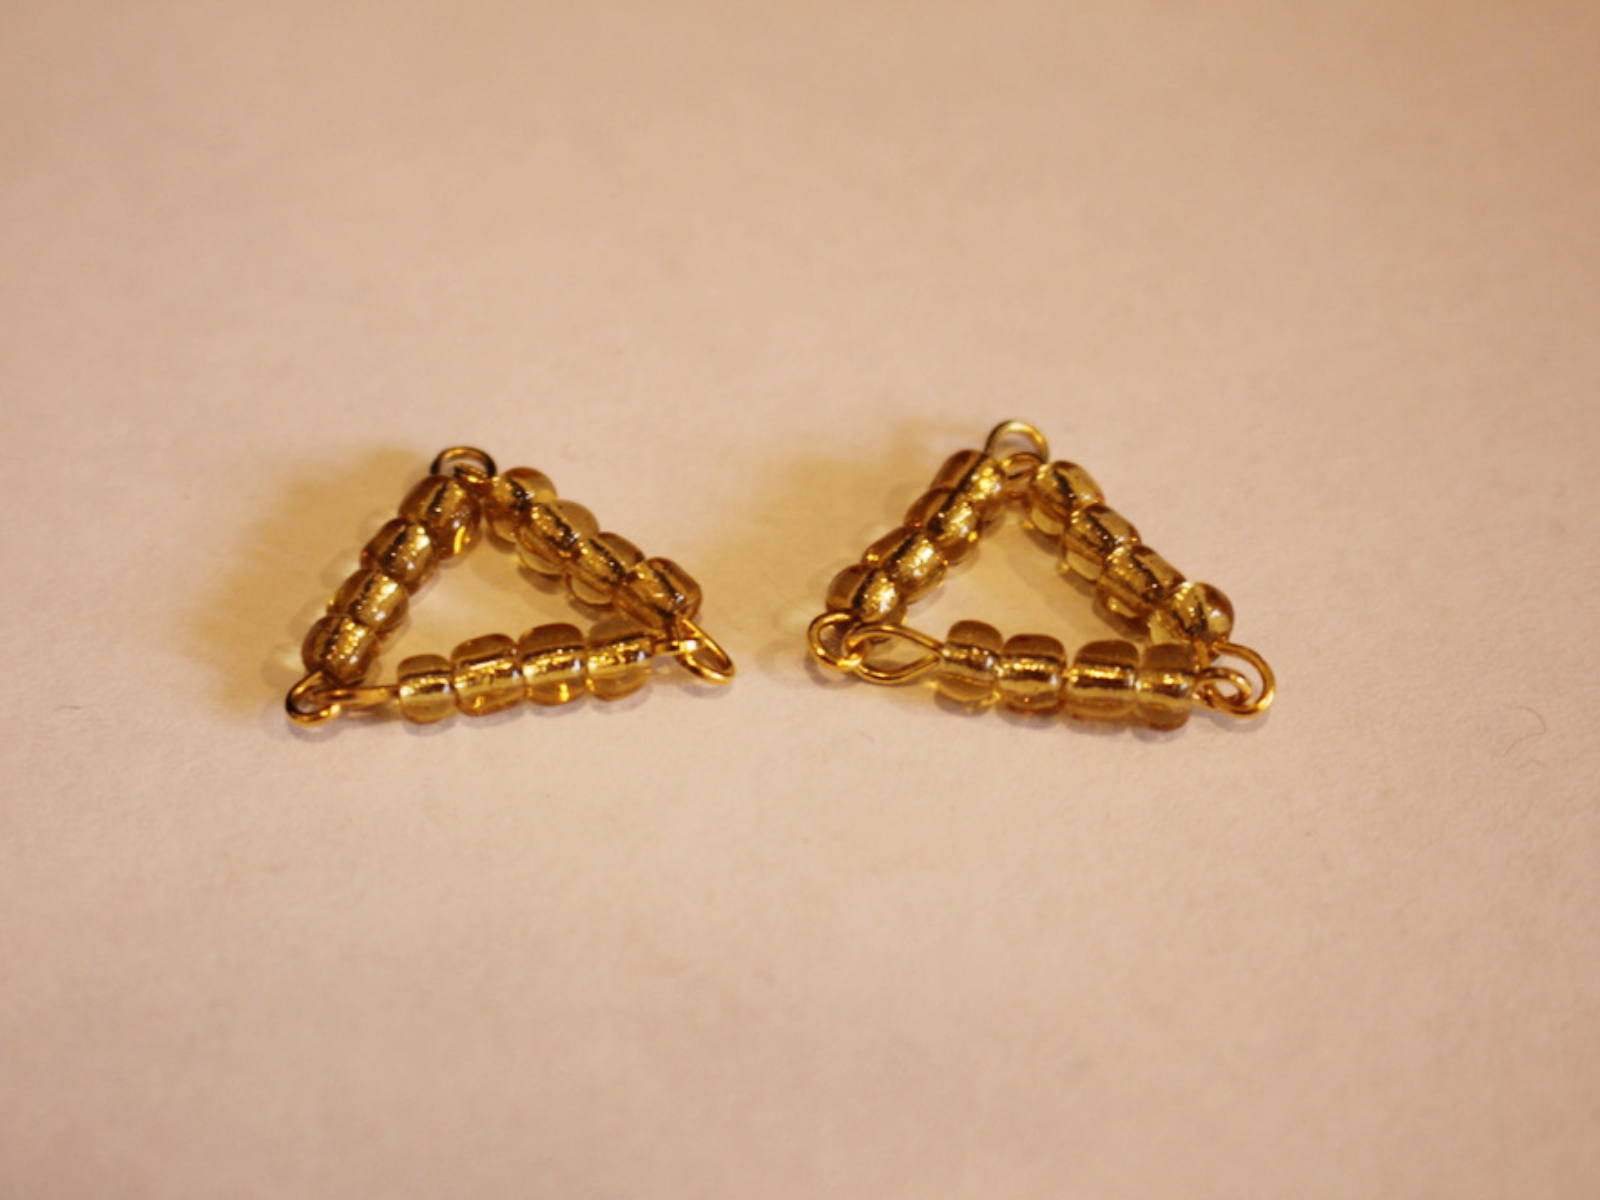

9: Repeat steps 1-8 until you have a triangle chain long enough to fit your wrist. Make it a tiny bit smaller than you need to account for the length of the jump rings and toggle clasp.


10: Attach the toggle clasp components to each end using the two larger jump rings.


Now your cute triangle bracelet is finished and ready to wear! This bracelet is so fun to fidget with and will look great layered with other gold and silver tone jewellery. What colours will you make yours in?

I think if I make this design again I will bead it with a variety of pastel coloured beads for a cute vapor-wave look. How cute would that look when paired with a fun floral dress in summer?
I hope you have fun making your own adorable triangle bead bracelet! I sure had fun making mine <3
If you liked this tutorial, here are some other’s I have created that use eye pins and beads to form triangle shapes:
- This one uses gravity to form a triangle shaped pair of earrings!
- Follow this video tutorial to make some triangle tassel earrings.
- Here’s a triangle charm lariat.
- A pair of basic triangle earrings made with beaded eye pins.
- A chain and eye pin beaded triangle pendant.
- A triangle necklace made from long metal beads and string.
- Some cute beaded mini triangle earrings.
- A triangle statement pendant.
- Some chain and pin triangle drop earrings.
- Use triangles to make this 3D diamond pendant.
- Triangles form this flat diamond shaped bracelet charm.
I hope you enjoyed this tutorial and have fun finding some other pieces to make at home! Have fun!
DIY Jewelry Hub
Welcome to DIY Jewelry Hub. If you’ve ever wanted to learn how to make your own jewelry this is the place to start! Jewelry is a great way to show off your individuality and style. You’ll be surprised at how easy it is to create your own unique pieces! DIY Jewelry Hub will equip you with all the knowledge and inspiration you need to make your own jewelry.


You May Also Like

Fling this stunner around your wrist. Here’s how to make a ladder bracelet!

How to Make a Bracelet Using Memory Wire. No Findings Required!
