-
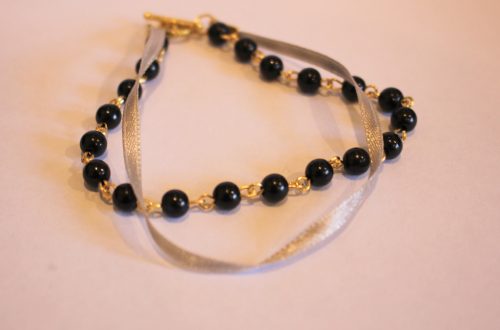
Make a beaded chain bracelet… this is my new fave!
This beaded chain bracelet is my new favorite thing, I’ve been making all kinds of accessories with this technique.

You will need the following tools and materials to make your beaded chain bracelet:
1: Pliers. You’ll need flat nose pliers, round nose pliers. You might need your cutting pliers depending on the length of your eye pins.

2: Some eye pins.

3: Some beads. I used these glass beads.

4: A toggle clasp.

5: Two jump rings.

Follow these steps to make your bead chain bracelet:
1: Add beads to the eye pins.

3: Create a loop at the end of each pin to secure the beads in place.


4: Start linking the pins together to form a chain.


5: Attach the toggle clasp components to either end of the chain using the jump rings.


Now your bracelet is finished!
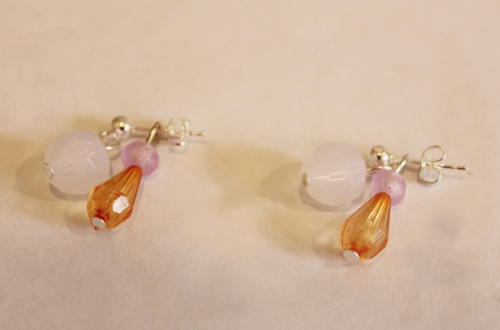
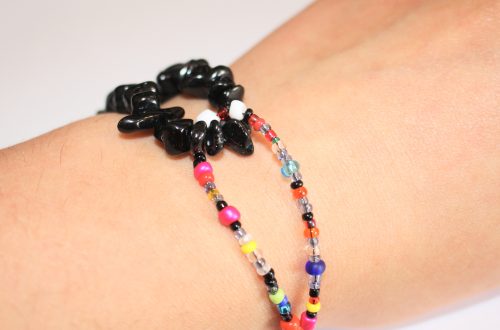
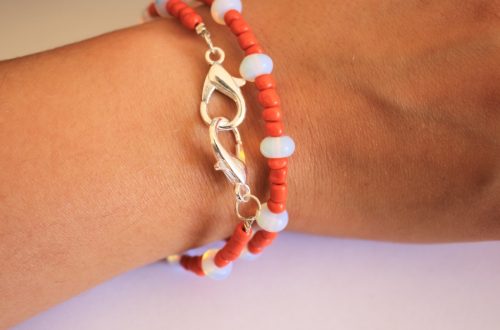
Here are some other pieces I made with different beads.


-
These are amazing! Here’s a tutorial to make some beaded fringe earrings.
These beaded fringe earrings look so pretty! Use a variety of glass beads to make your own versions of the design. Contains affiliate links.

You will need the following tools and materials to make your beaded fringe earrings:
1: Pliers. You will need your flat nose pliers and round nose pliers.


2: Sixteen head pins.

3: Two eye pins.

4: Two earring hooks.

5: Beads of your choice. I used some different colored glass beads and four pink plastic beads.


6: Four jump rings.

Follow these steps to make your beaded fringe earrings:
1: Add beads to twelve of the head pins.

2: loop the tops of the pins to keep the beads in place.


3: Add the different colored beads and the pins in a pattern to the eye pin.

4: Add the earring hook halfway along the beaded eye pin.

5: Finish beading the eye pin and create a loop at the other end of the pin to secure the beads and charms in place.


6: Repeat steps 3 to 5 for the second earring.

6: Add the plastic beads to the remaining four head pins.

7: Loop the ends of the four extra charms.

8: Attach the four charms to either end of the top of the earrings to finish them off.


Now your fringe earrings are finished and ready to wear!
I also made a pair using black and white glass beads.

If you like the look of fringe jewelry, check out this beaded fringe necklace.
This tutorial contains affiliate links.
-
Here’s another way to upcycle broken headphones… into a necklace!

Remember the upcycled bracelet tutorial? Here’s another idea for how you can recycle broken headphones… turn them into a stylish necklace!
You will need the following tools and materials to make your headphone necklace:
1: Pliers. You’ll need cutting, flat nose and round nose pliers.
2: A charm. I used this old vintage earring charm.

3: Two crimp ends.

4: Two jump rings.

5: A lobster clasp.

6: A pair of broken headphones. I used these Sony headphones that don’t work any more.

Follow these steps to make your headphones into a necklace:
1: Clip the headphones so that you have a length that fits around your neck. I used the part between the ear bud and the split.


2: Add the charm to the cord.

3: Add a crimp end to either side of the cord, folding it in place using the flat nose pliers.


4: Add the lobster clasp to one side of the necklace using one of the jump rings.

5: Add the remaining jump ring to the other side of the necklace to finish it.
Now your upcycled headphone necklace is finished and ready to wear!
You May Also Like

I keep hearing that chunky chain necklaces are trendy right now… here’s how to make a gold chunky chain necklace that makes a statement.

If you had a secret diary this lock and key tutorial is perfect for you!

Use Special Charms and Some Awesome beads to make this stunning necklace.
-
How to upcycle your old broken headphones into a bracelet!

I have a load of broken headphones, if you’re like me and don’t want to chuck them in the bin, here’s a way to upcycle them… turn them into a beaded finger-knit bracelet. Contains affiliate links.
You will need the following tools and materials to make your headphone bracelet:
1: Pliers. You’ll need cutting pliers, round nose pliers and flat nose pliers.
2: A pair of broken headphones. I used these broken apple headphones.

3: Some beads with large holes. I used these yellow plastic heart beads.

4: Two crimp ends.

5: Two jump rings.

6: A toggle clasp.

Follow these steps to make your headphone bracelet:
1: Clip the headphones so that you have one long thread.

2: Create a slip knot at one end of the headphone cord.

3: Put the knot around your finger and loop it again right next to the first loop. If you need a refresher on how to finger knit check out this video tutorial.

4: Pull the first loop over the second one and off your finger.
5: Add a bead to the next loop and repeat steps 3 and 4.

6: Continue this until your finger knitting is long enough to fit your wrist.
7: Knot the end of the finger knitting to secure it.

8: Add a crimp end to both ends of the headphone cord.


9: Attach the toggle clasp using the jump rings.


Now your upcycled headphone bracelet is ready to wear!

https://flic.kr/p/RqQsqF
-
Here’s How to make some Hoop Earrings with String and some pretty beads!

If you’re sick of the now ubiquitous shiny gold or silver hoop, here’s something a little different for you. These earrings are made using some synthetic string accented with some hardware. Affiliate links included in this post.
You will need the following tools and materials to make these earrings:
1: Pliers. You will need your round nose pliers, cutting pliers and flat nose pliers.
2: Two pieces of string, I measured mine by wrapping it once around my index finger. Cut the string using scissors or cutting pliers.

3: Four leather crimp ends.


5: Two larger jump rings.

6: Two earring hooks.

7: Six head pins.

8: Six beads of your choice. I used these plastic faceted beads in pink and green.

Follow these steps to make your cord hoop earrings:
1: Add a bead to each of the head pins.

2: Curl the top of each pin using the round nose pliers to secure the bead in place.


3: Add three bead charms to each of the smaller jump rings. Close the jump rings to secure the charms together.


4: Add the beaded charms to each piece of cord.


5: Add a crimp end to both ends of each cord. Secure the crimps in place by squashing each side around the cord using the flat nose pliers.


5: Attach the ends of the cord together using the larger jump rings. Close each ring to secure each piece of cord into a loop.


6: Add an earring hook to the jump ring at the top of each earring to finish them off.


Now they’re finished and ready to wear! What do you think of these hoop alternatives?