-
How to make some pearl earring jackets to add some elegance to your stud earrings
I love a stud earring, but sometimes I feel like I need some extra elegance in my outfit… in comes, the earring jacket. This simple and elegant pearl earring jacket can be added to any of your studs to turn them into stunning drop earrings. A versatile way to make your existing earring collection work even harder. Please note that this tutorial contains affiliate links for which we may receive a commission.
You’ll need the following tools and materials to make your own pearl earring jackets.
1: Two pieces of 0.8mm sterling silver wire cut to length. I made mine about 5cm long. You can make yours longer or shorter depending on how dramatic you want your look!

You can get some here:
2: Two pearl beads (or any other statement bead of your choice).

You can get some here:
3: A pair of earrings. I used the earrings I made in this tutorial.

If you aren’t up for making your own, you can get some here:
4: A hammer.

If you don’t have an ordinary hammer at home, you can get a jewelry hammer here:
5: A steel hammering block.

You can get one here:
6: Flat nose or Parallel pliers.

You can get some flat nose pliers here:

You can get some here:
7: Round nose pliers.

You can get some here:
8: A file and sandpaper.

You can get a file here:
Follow these steps to make your pearl earring jackets.
1: File the ends of the wire to smooth them out, then use sandpaper to make sure they aren’t too sharp.

2: Put the wires on the hammering block and hammer the ends flat. Make the ends wide enough to stop the bead from sliding off.


3: Use the flat nose or parallel pliers to gently straighten the wire if it is curved like mine. You can achieve this by gently squeezing the wire between the jaws of the pliers.


4: Add the pearl beads to each of the wires.

5: Create a right angle on the ends of the wires using the flat nose or parallel pliers.


6: Curl this bent portion of the wire into a loop using the round nose pliers.


7: Once each earring jacket has been looped, they are ready to attach to your earrings, do this by sliding the studs through your piercings and then adding the jacket to the post at the back before adding the earring backs.
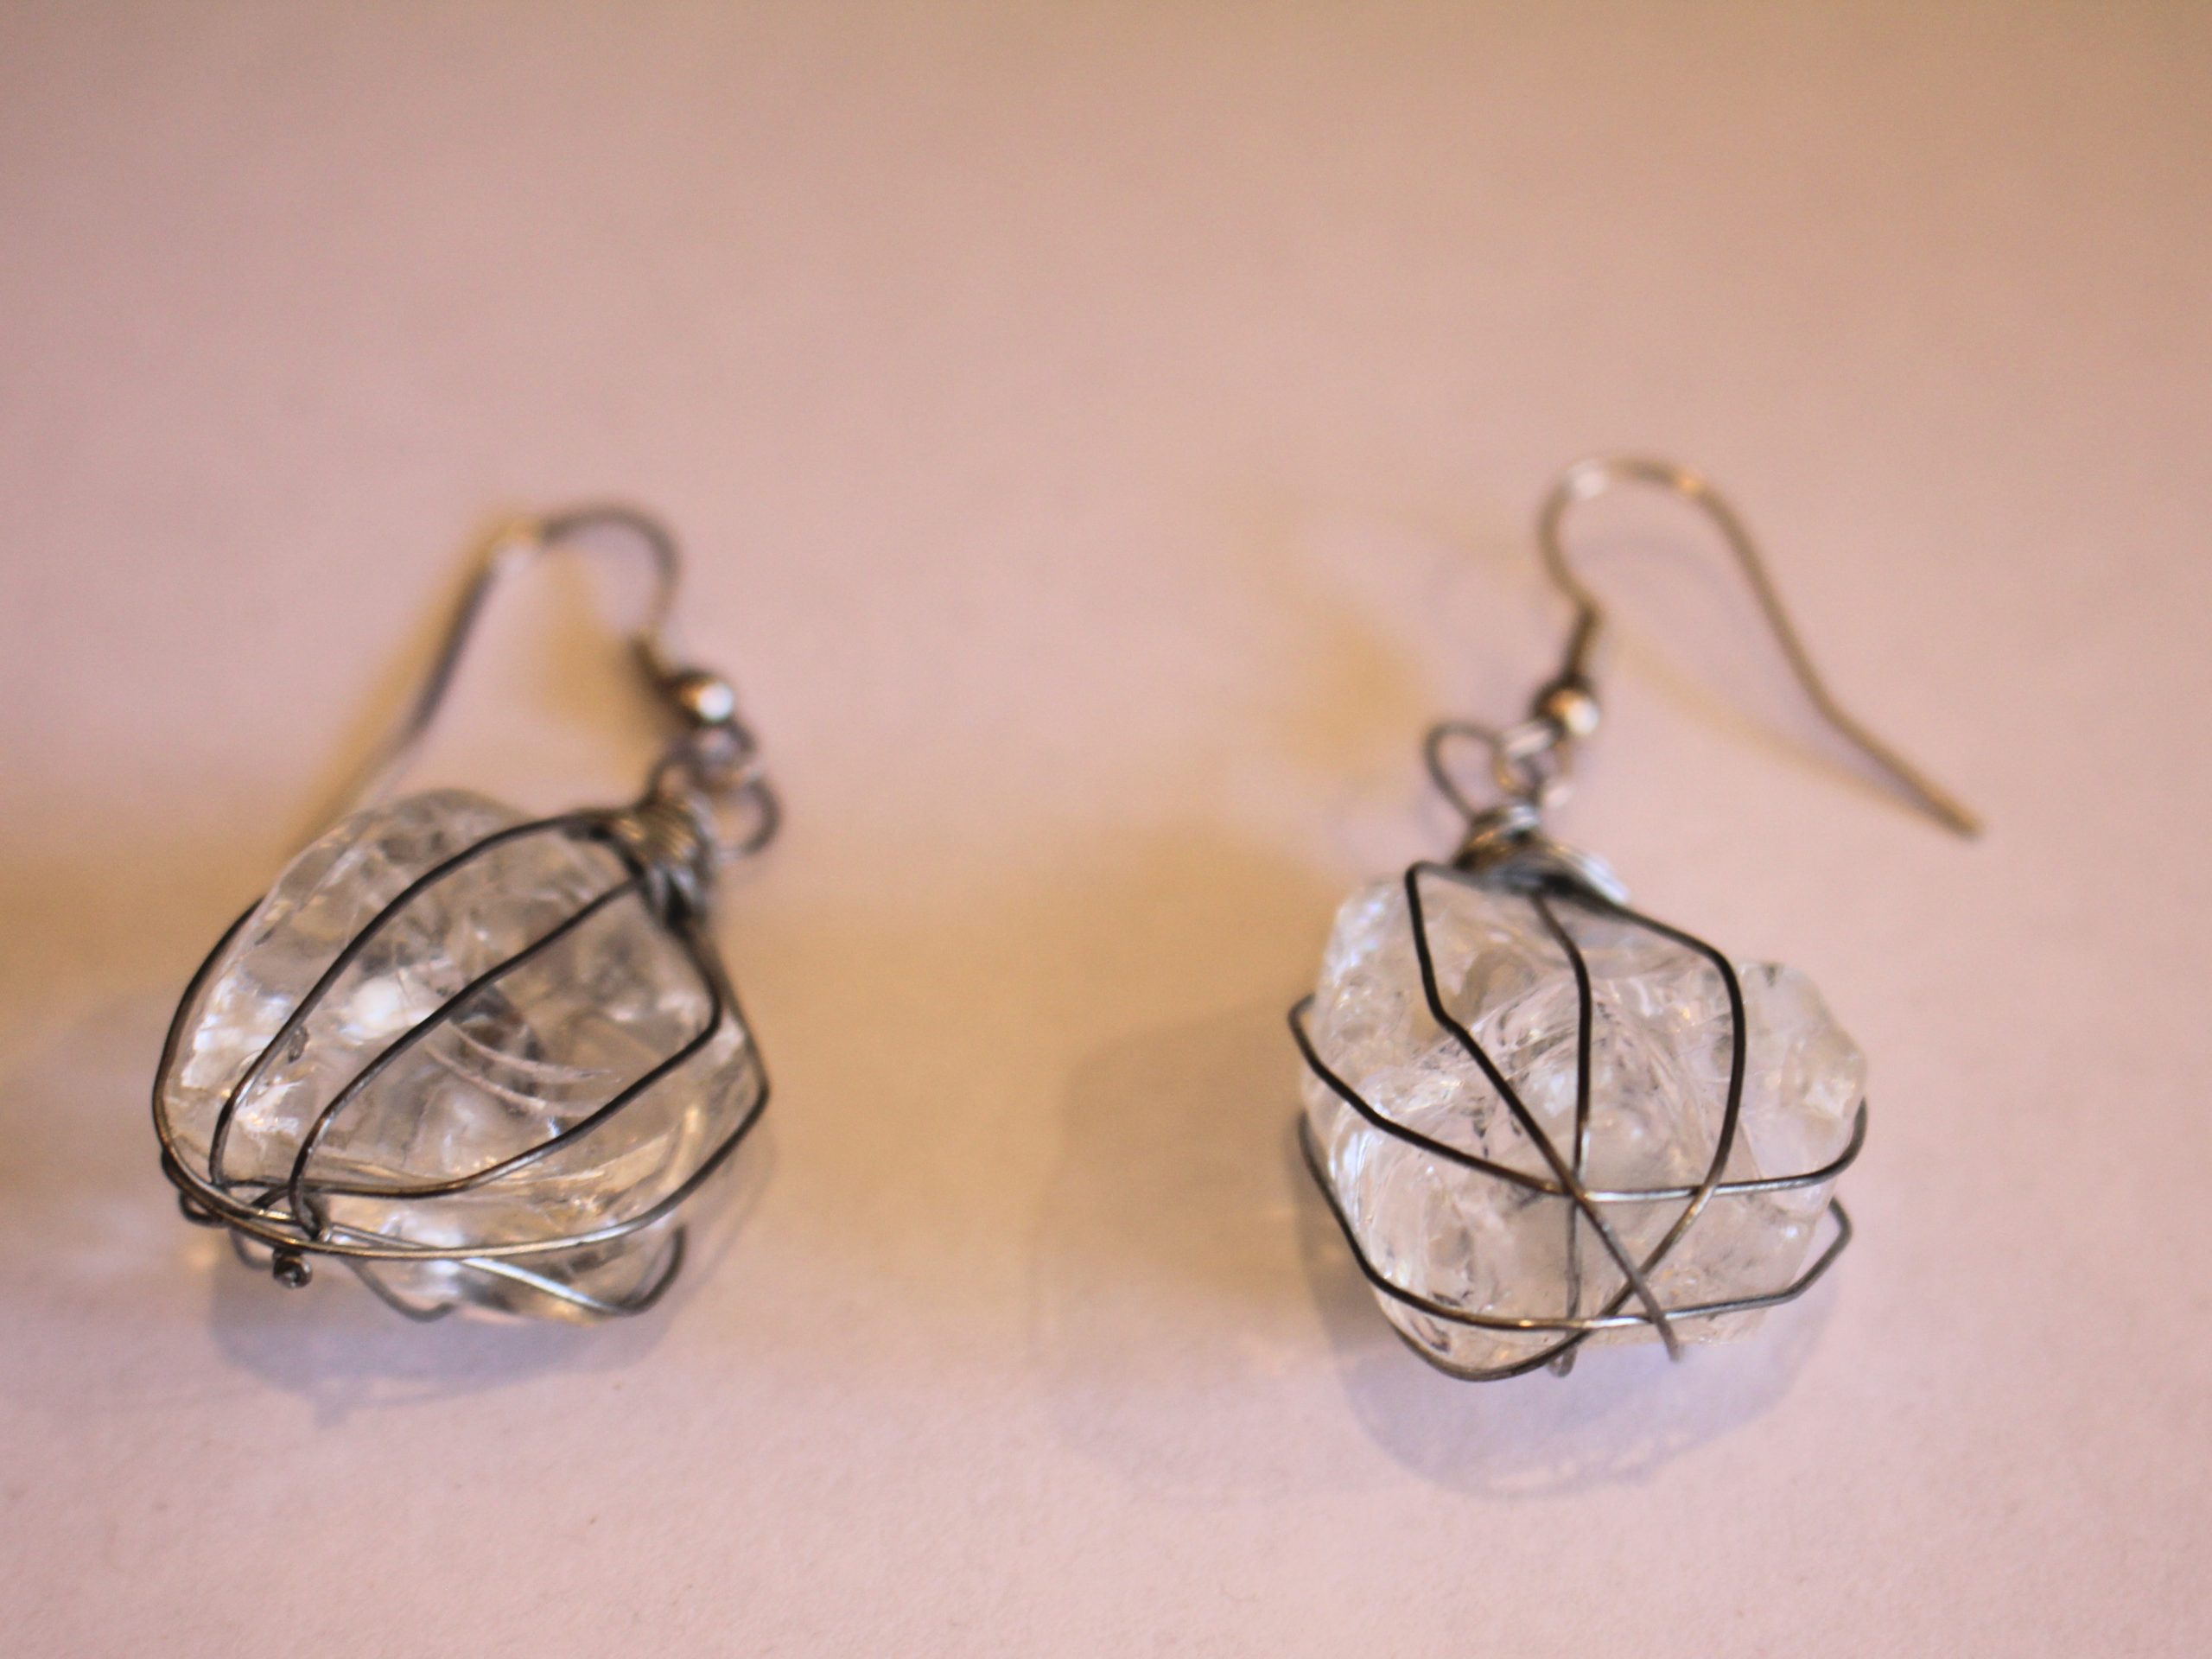
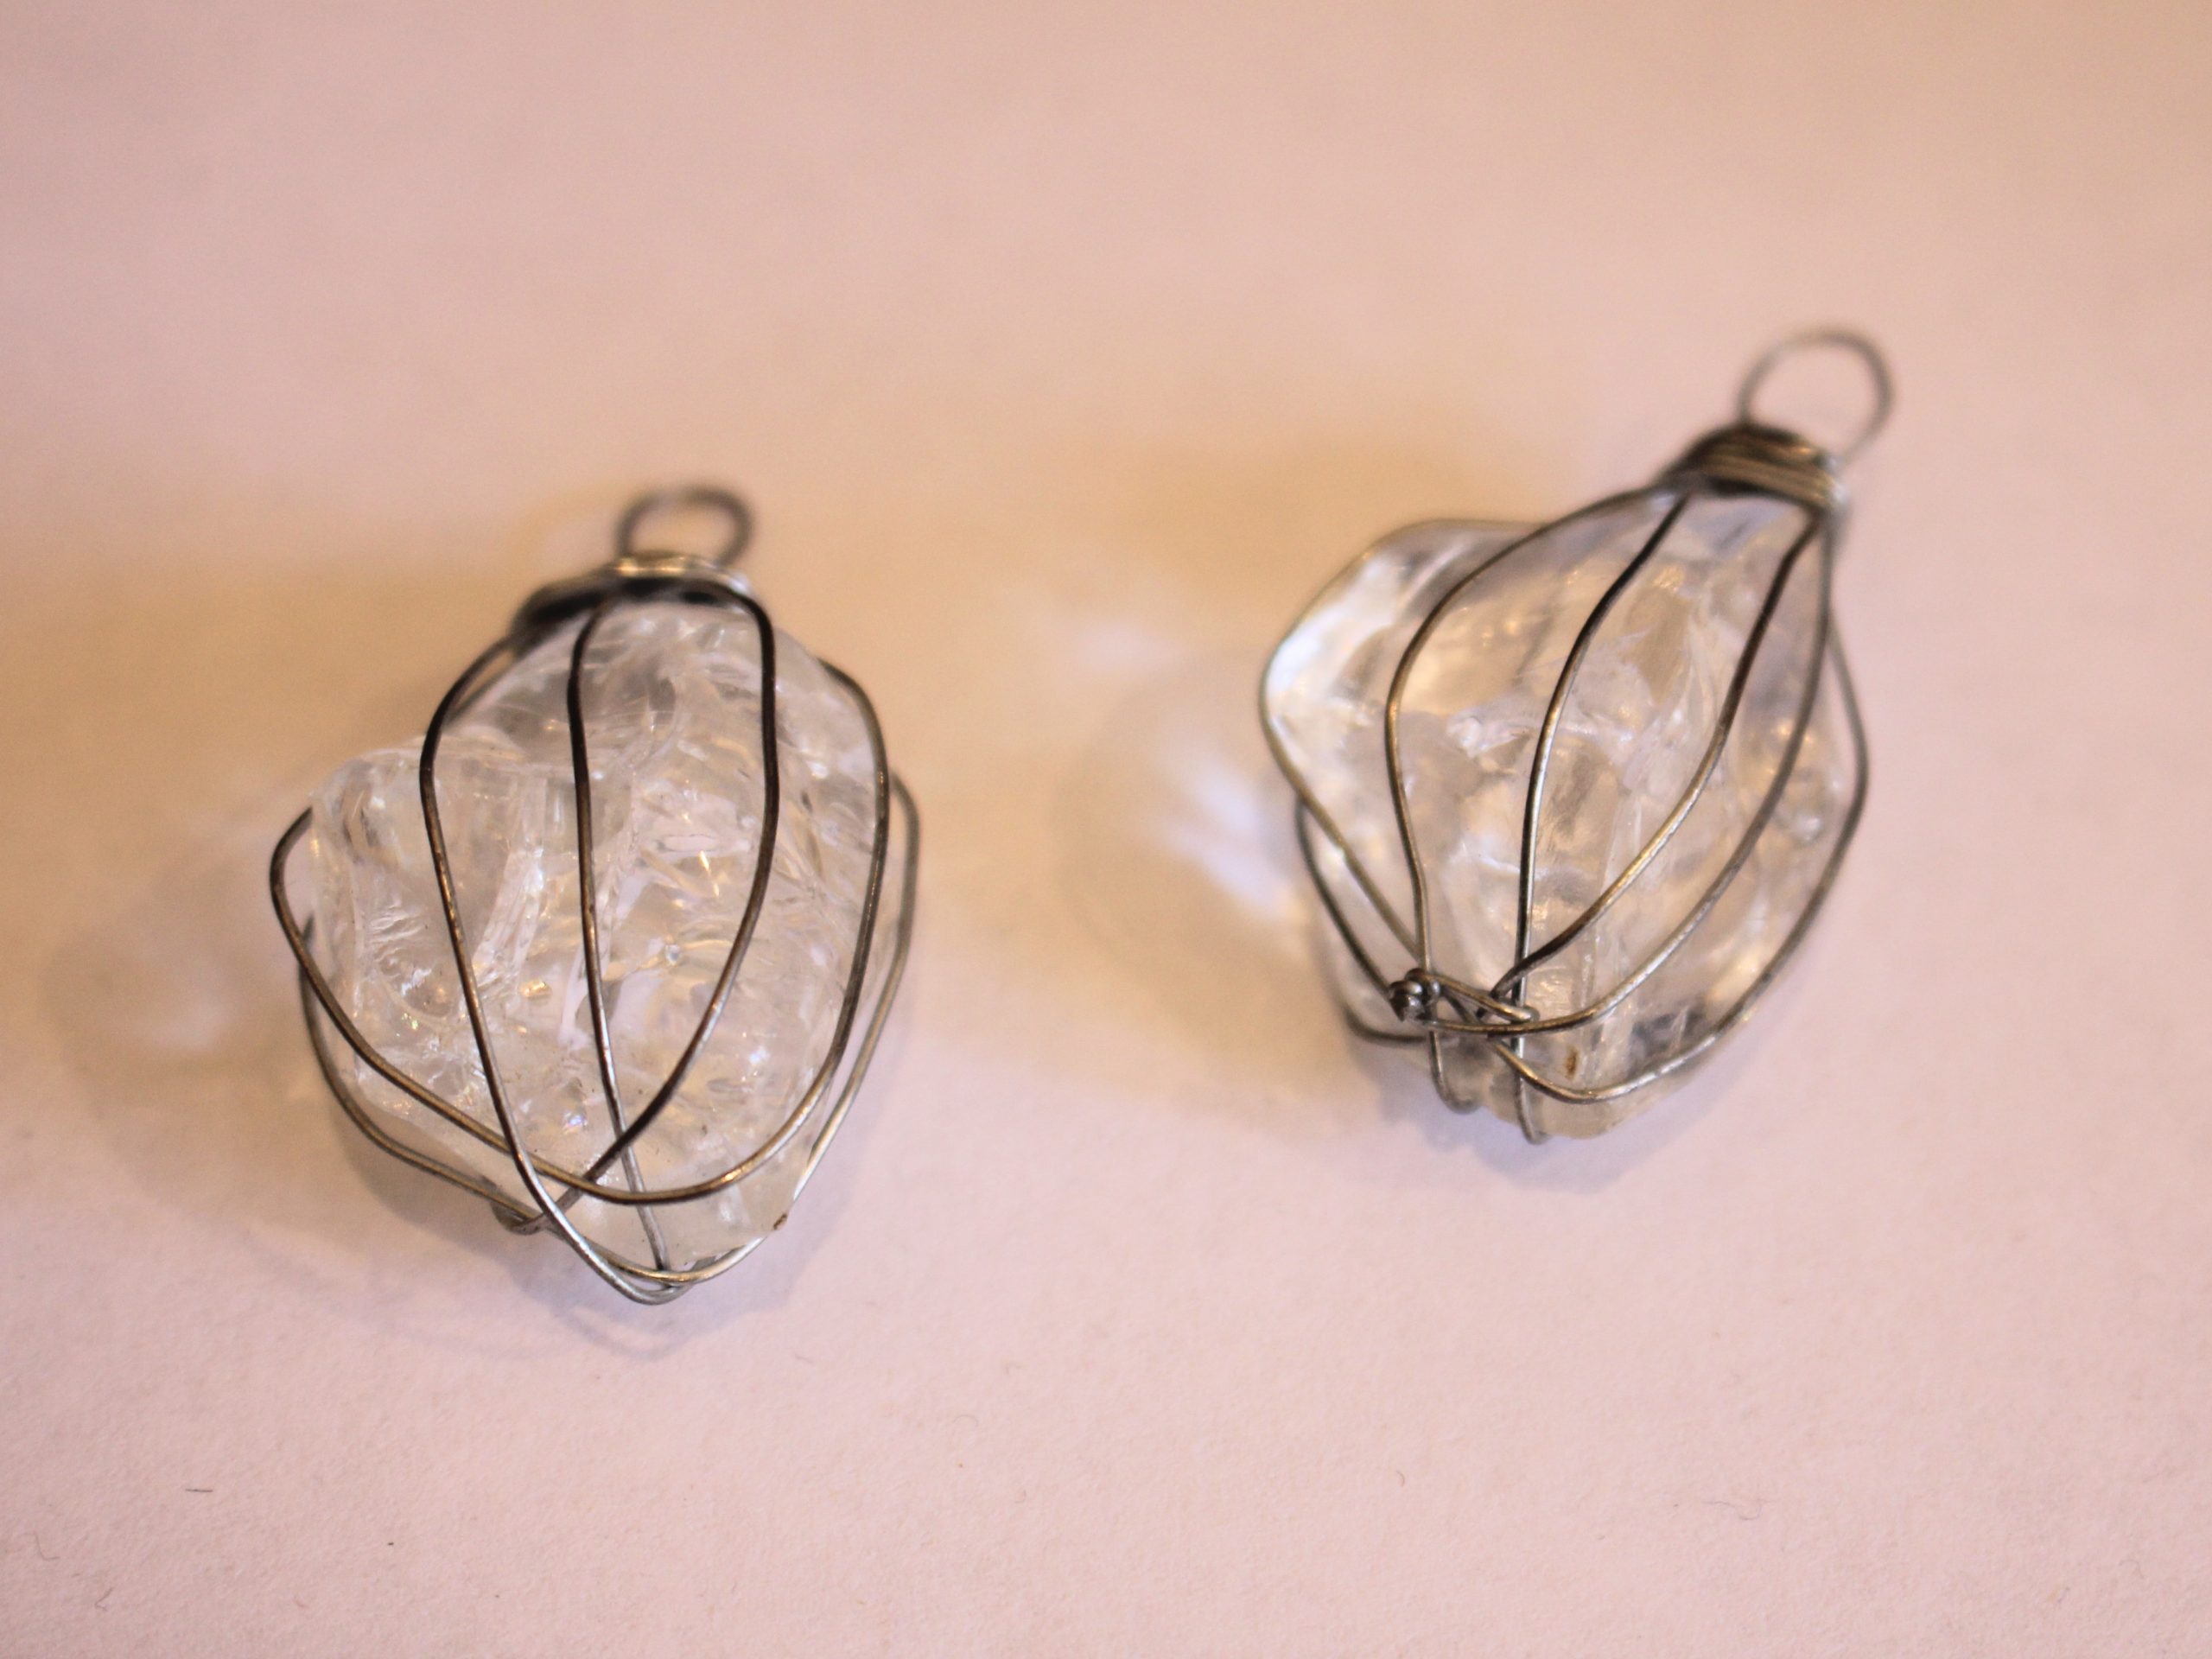
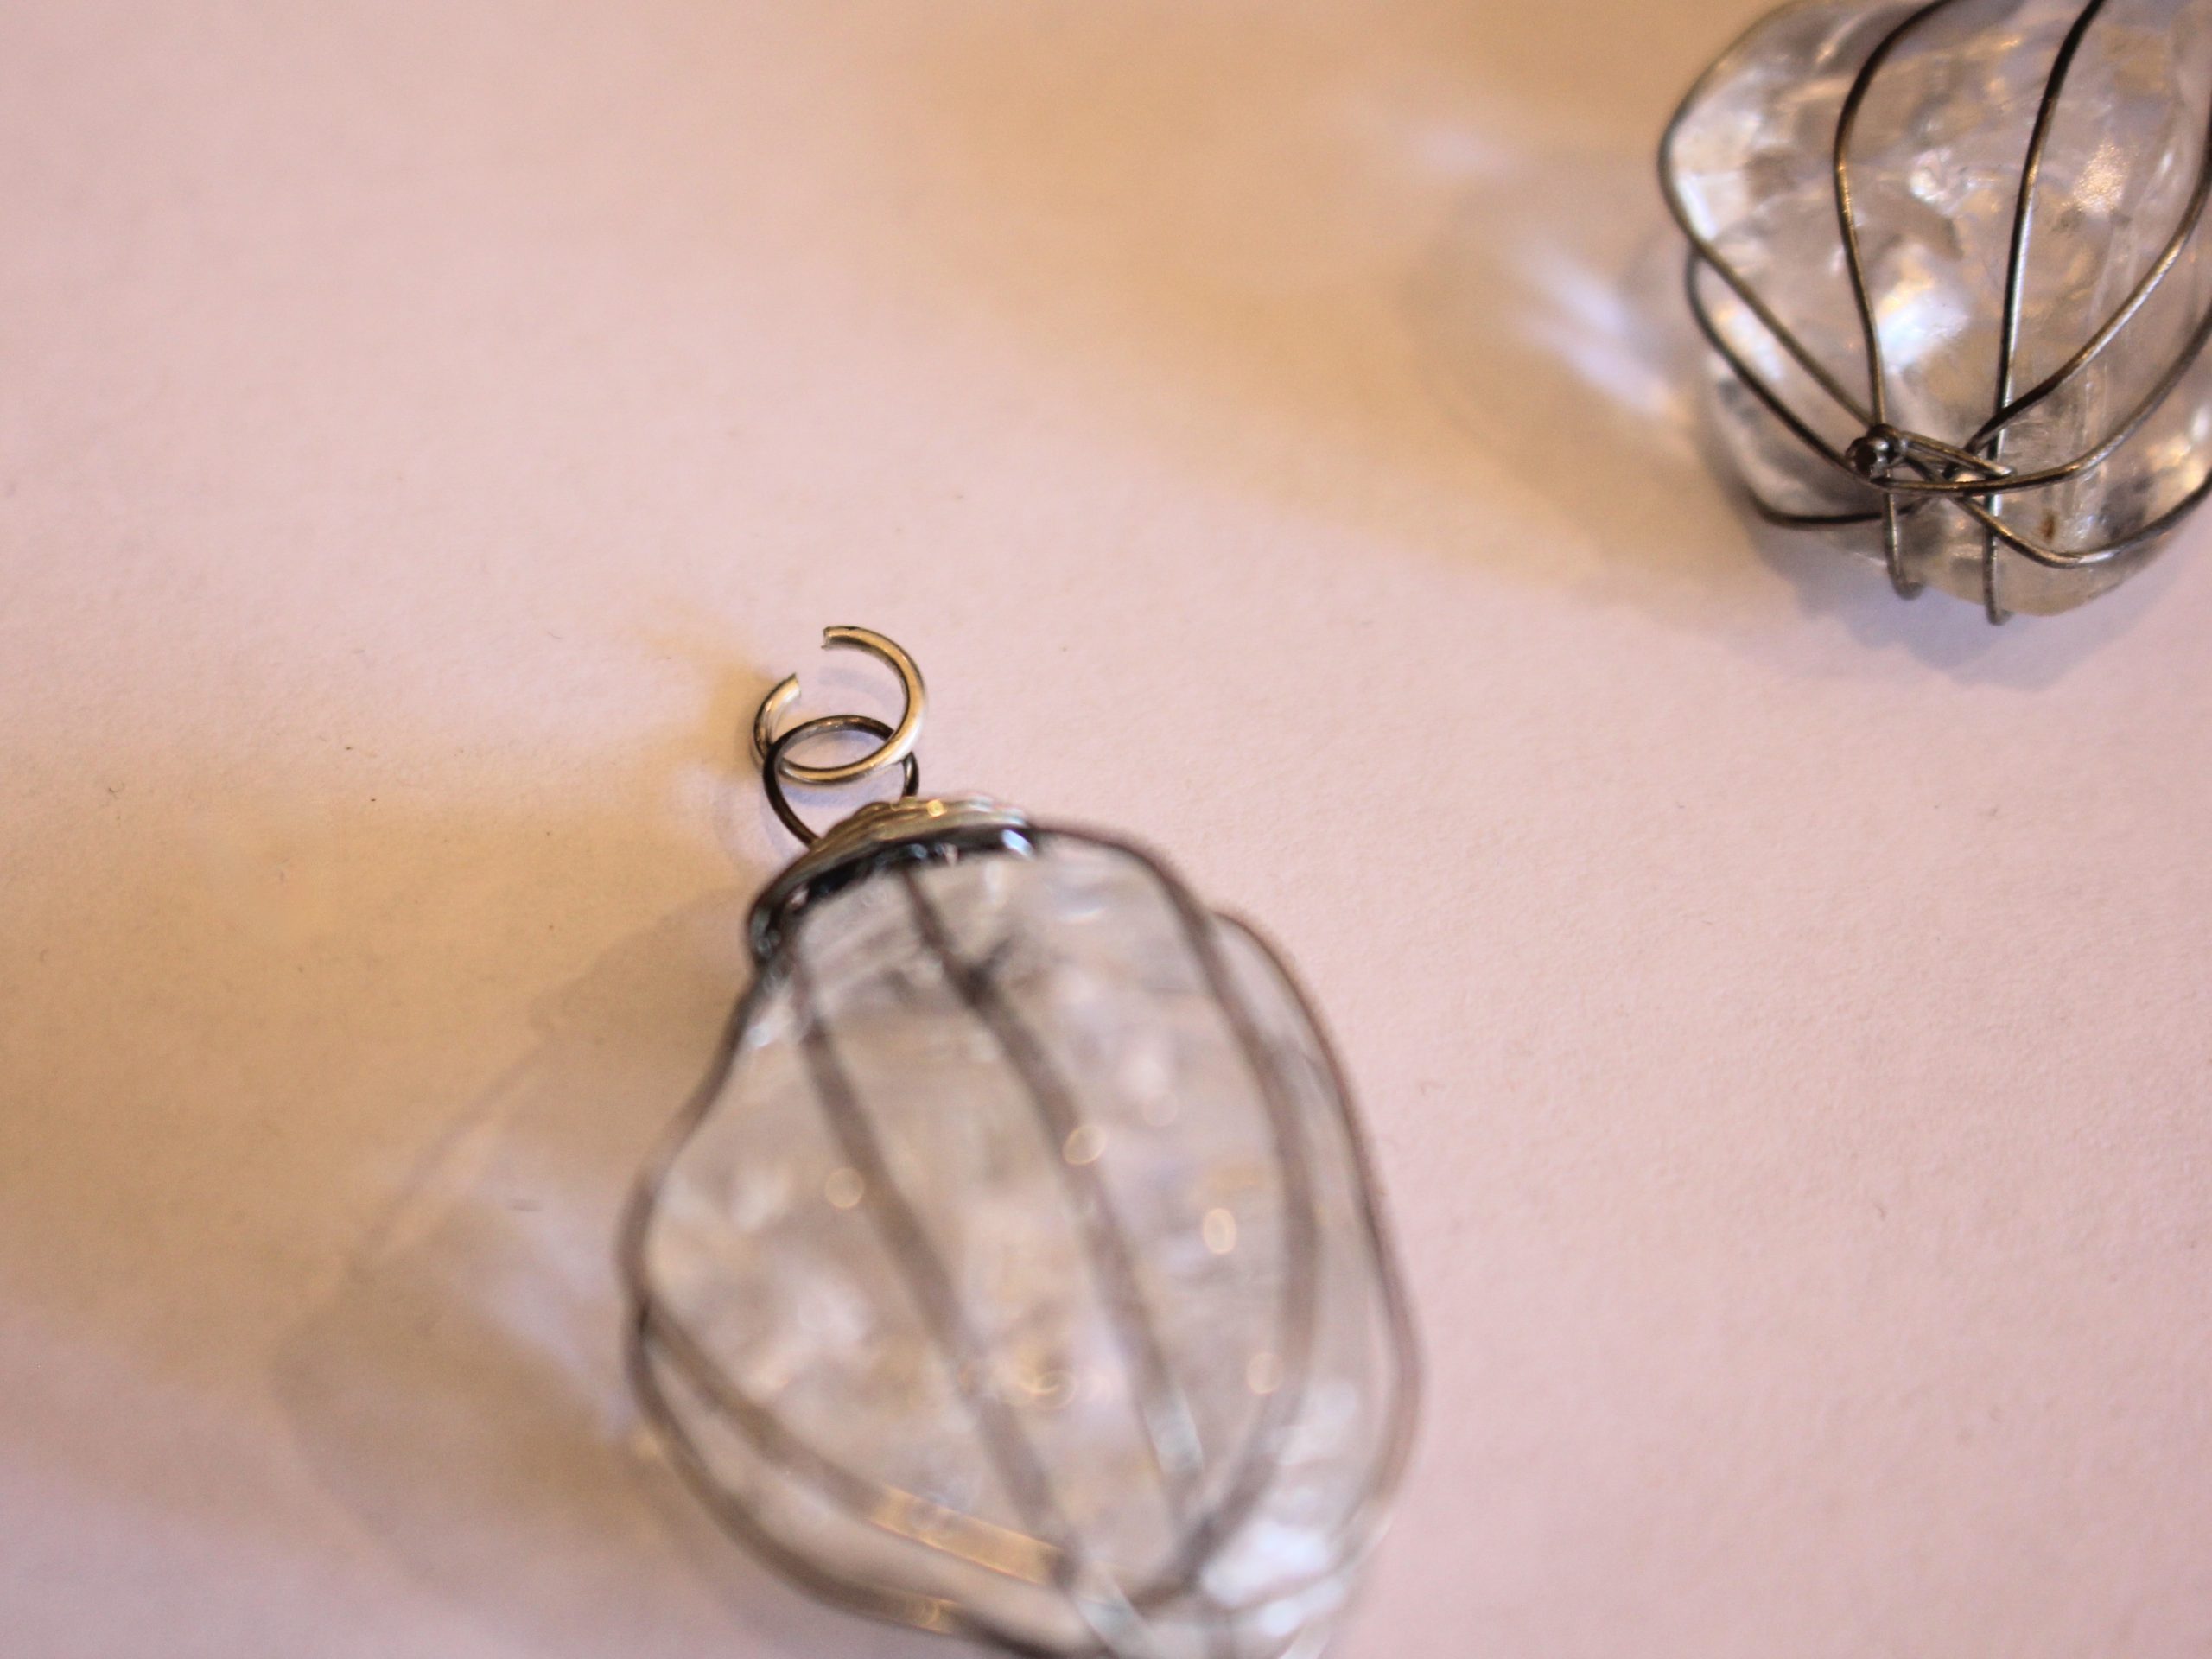
Here’s how the finished earring jackets look with the pearl studs! How cool?!


If you like this tutorial, here are some other earring jacket tutorials you can follow:
-
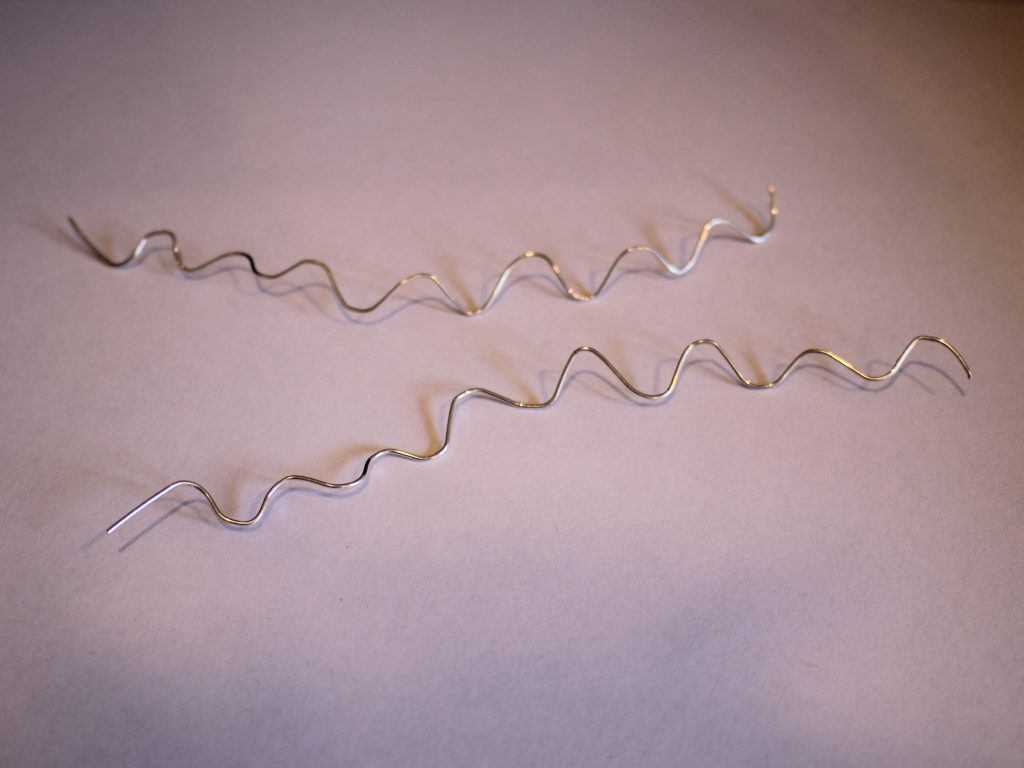
Want a new pair of hoops? Here’s how to turn two pieces of wire into a unique pair of wiggle hoop earrings.
Want to work with metal but don’t want to invest in all the equipment? Then this tutorial is for you! Follow along to make a unique pair of wiggle hoop earrings using pliers and some wire. I love how simple but stunning this tutorial is. Please note that this tutorial contains affiliate links from which we may receive a small commission.
You’ll need the following tools and materials to make your wiggle hoop earrings:
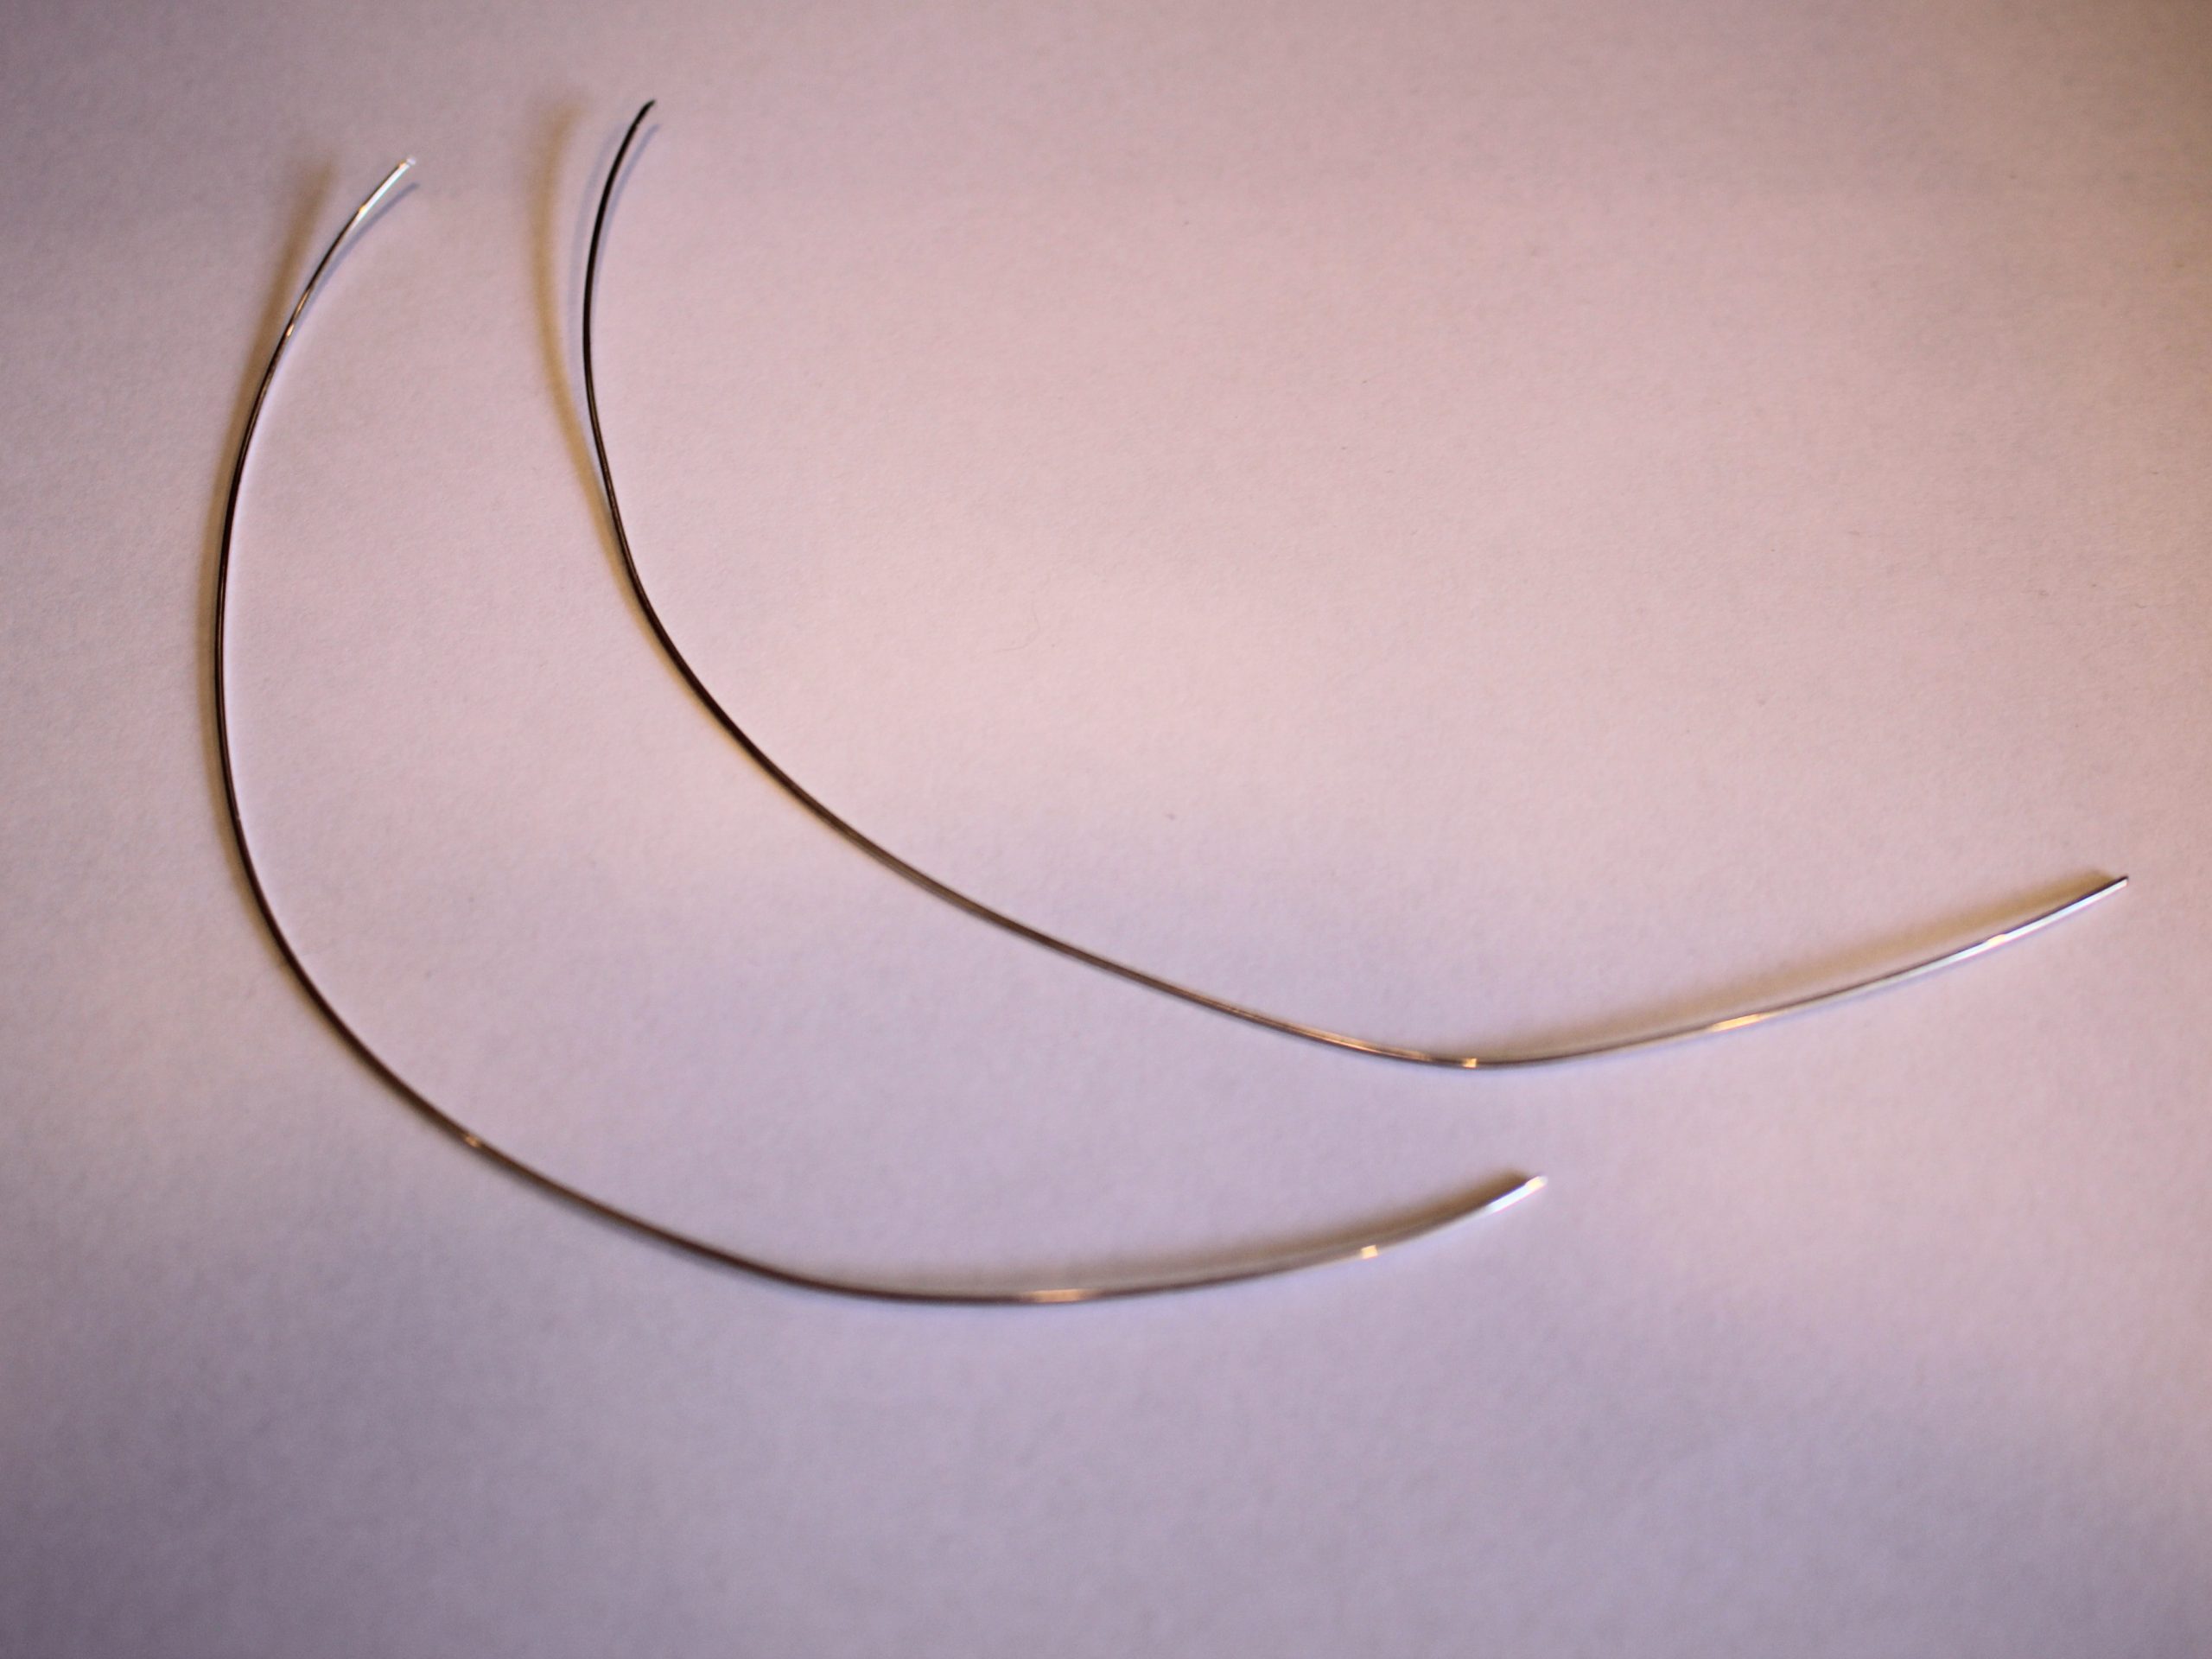
1: Two pieces of wire, I used 0.8mm diameter sterling silver and cut mine to be about 18cm long each.

You can get silver wire here:
If you’re feeling fancy, you can get solid gold wire here:
2: A jewellery file or emery paper to ensure that the ends of the wire aren’t too sharp.
You can get a jewellery file here:

I have my emery paper attached to a stick for more control. You can get some here:
3: Half round-Flat pliers. These pliers have a half-round side and a flat side to make curves.

You can get a pair here:
4: Round-flat pliers.

You can get a pair here:
5: Parallel pliers.
You can get some here:
6: A bangle mandrel or something else that is the right diameter so you can shape your earrings into a circle.

You can get one here:
7: Butterfly backs.

You can get butterfly backs here:
8: A nylon or leather hammer for shaping the earrings against the mandrel (Don’t use this if you are shaping your earrings around something breakable).

You can get a hammer here:
9: Sticky tape. I used plastic tape but masking tape would likely be more suitable.
You can get masking tape here:
Follow these steps to make your own pair of hoop earrings:
1: File the ends of the wire so that they are flat and have no sharp edges.

2: If you have emery paper, sand the ends as well to further break down any sharp ends.
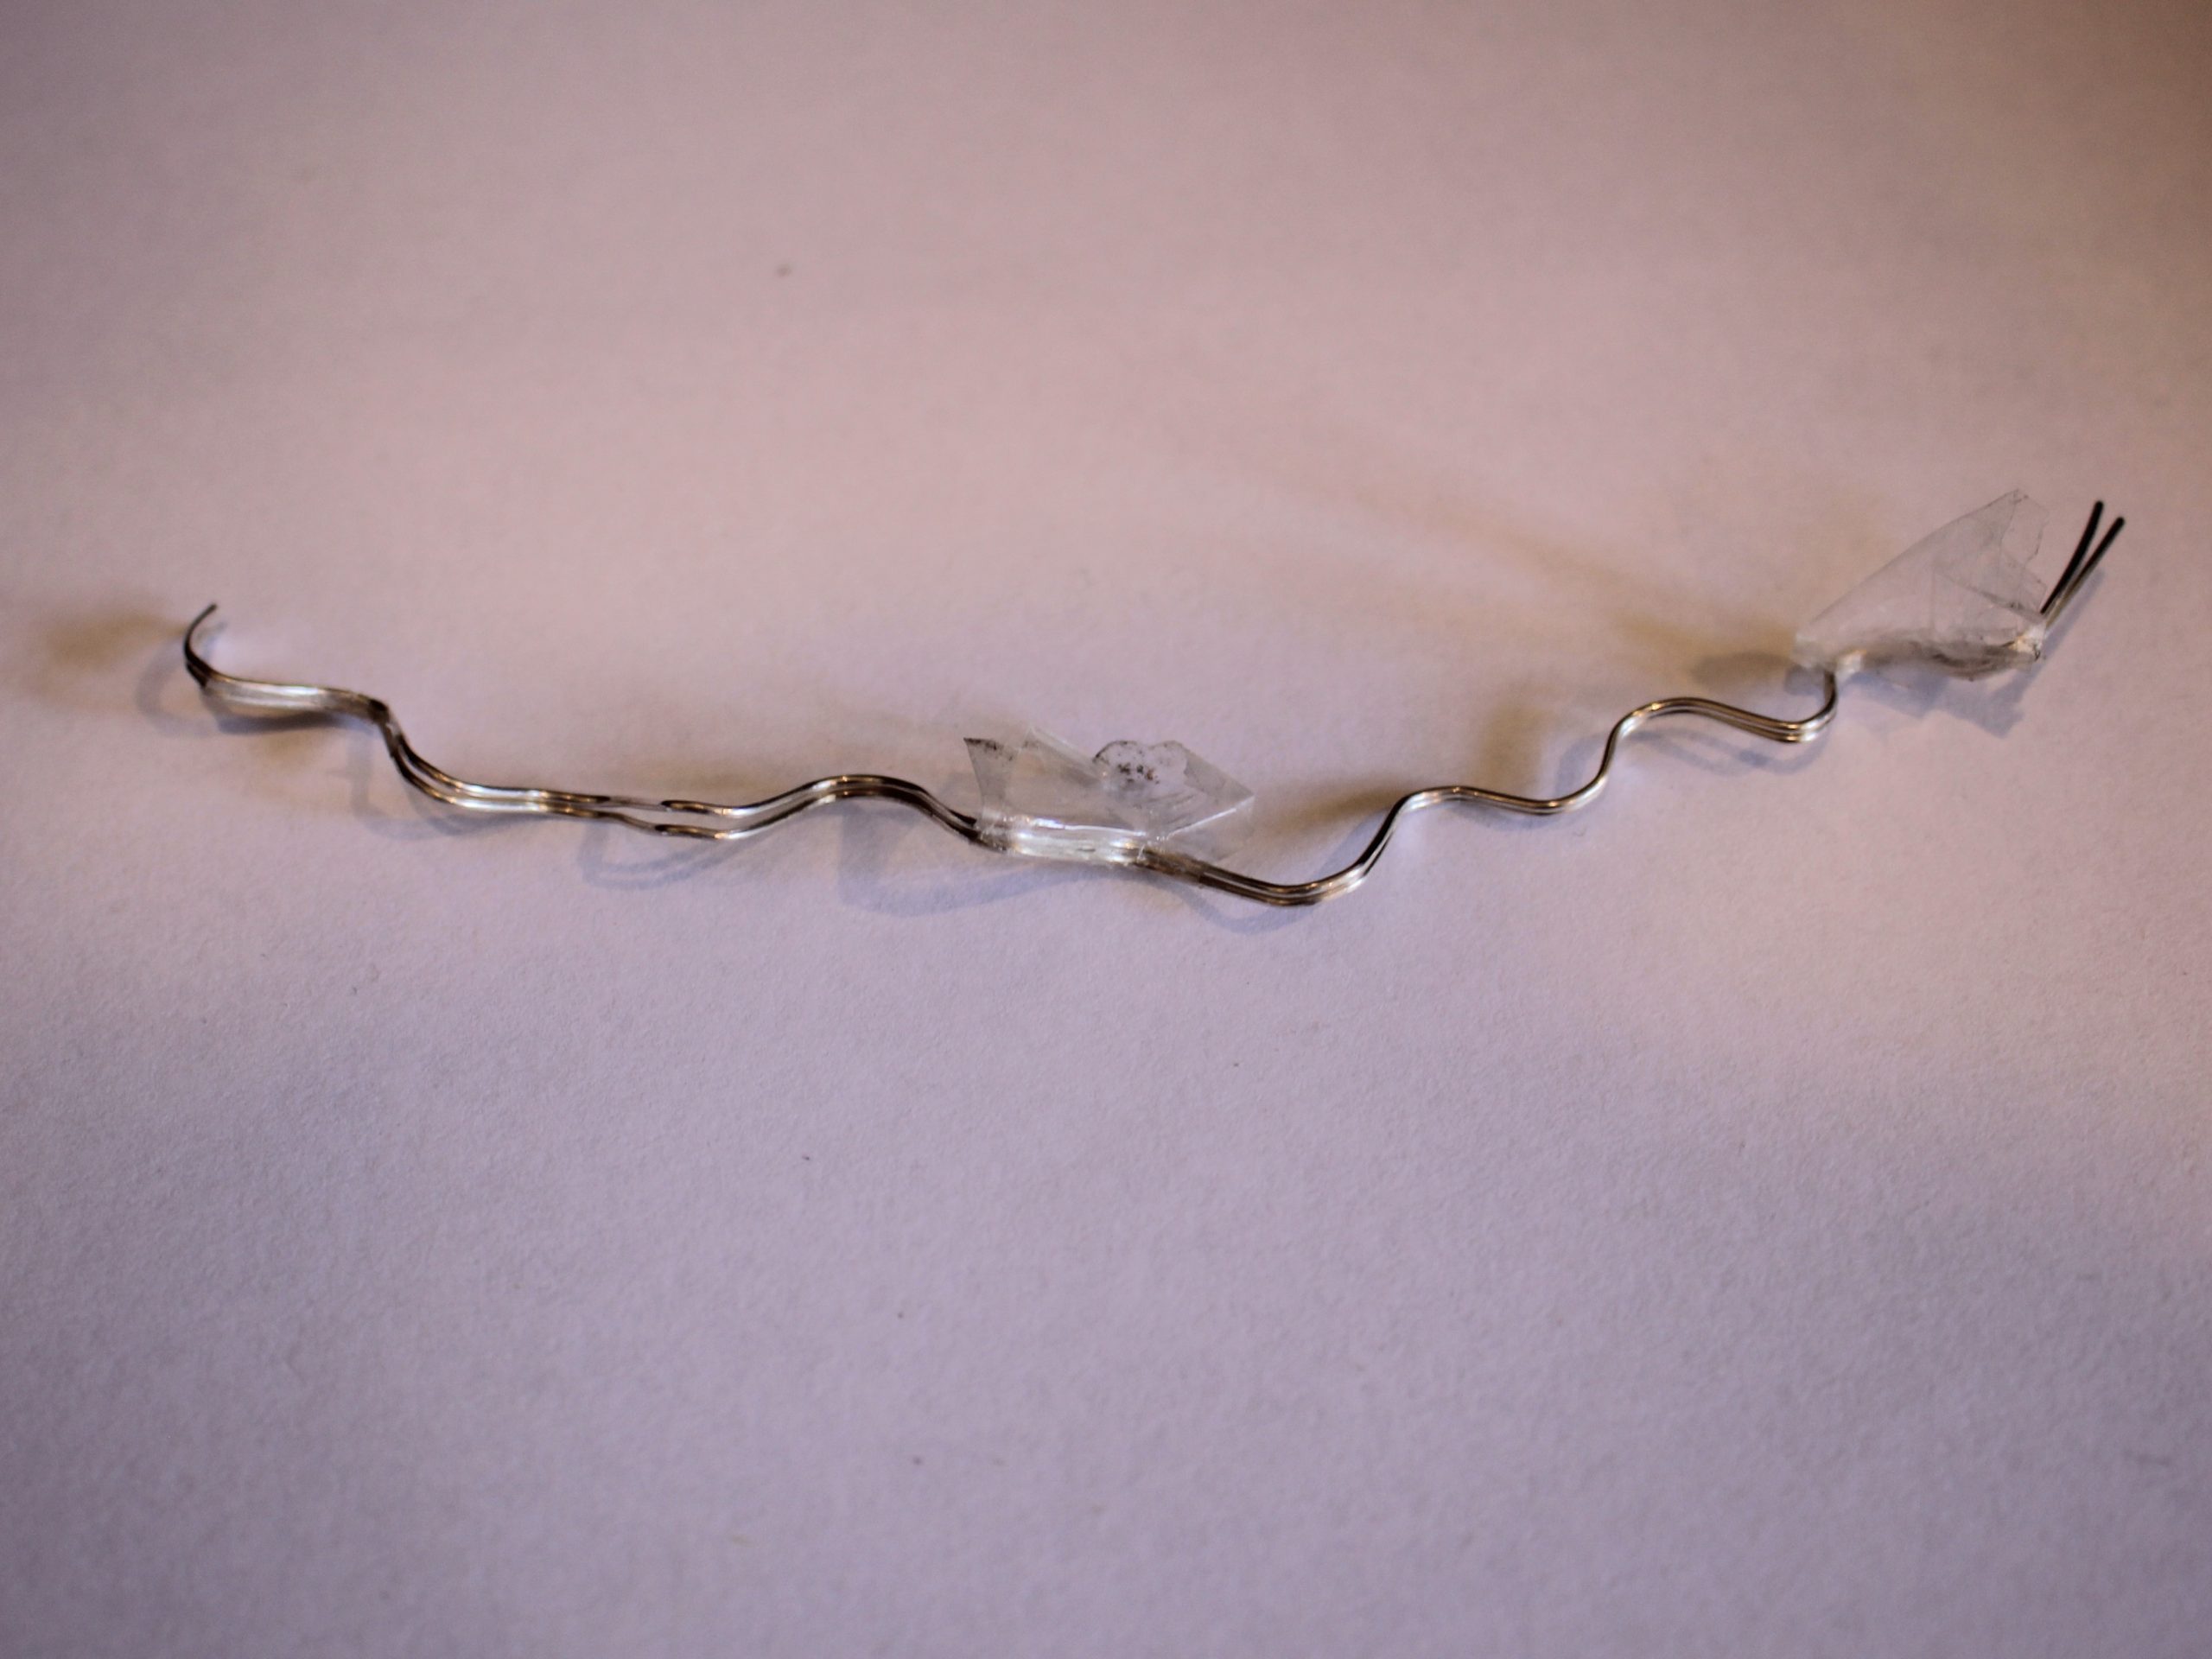
3: Tape the two pieces of wire together.

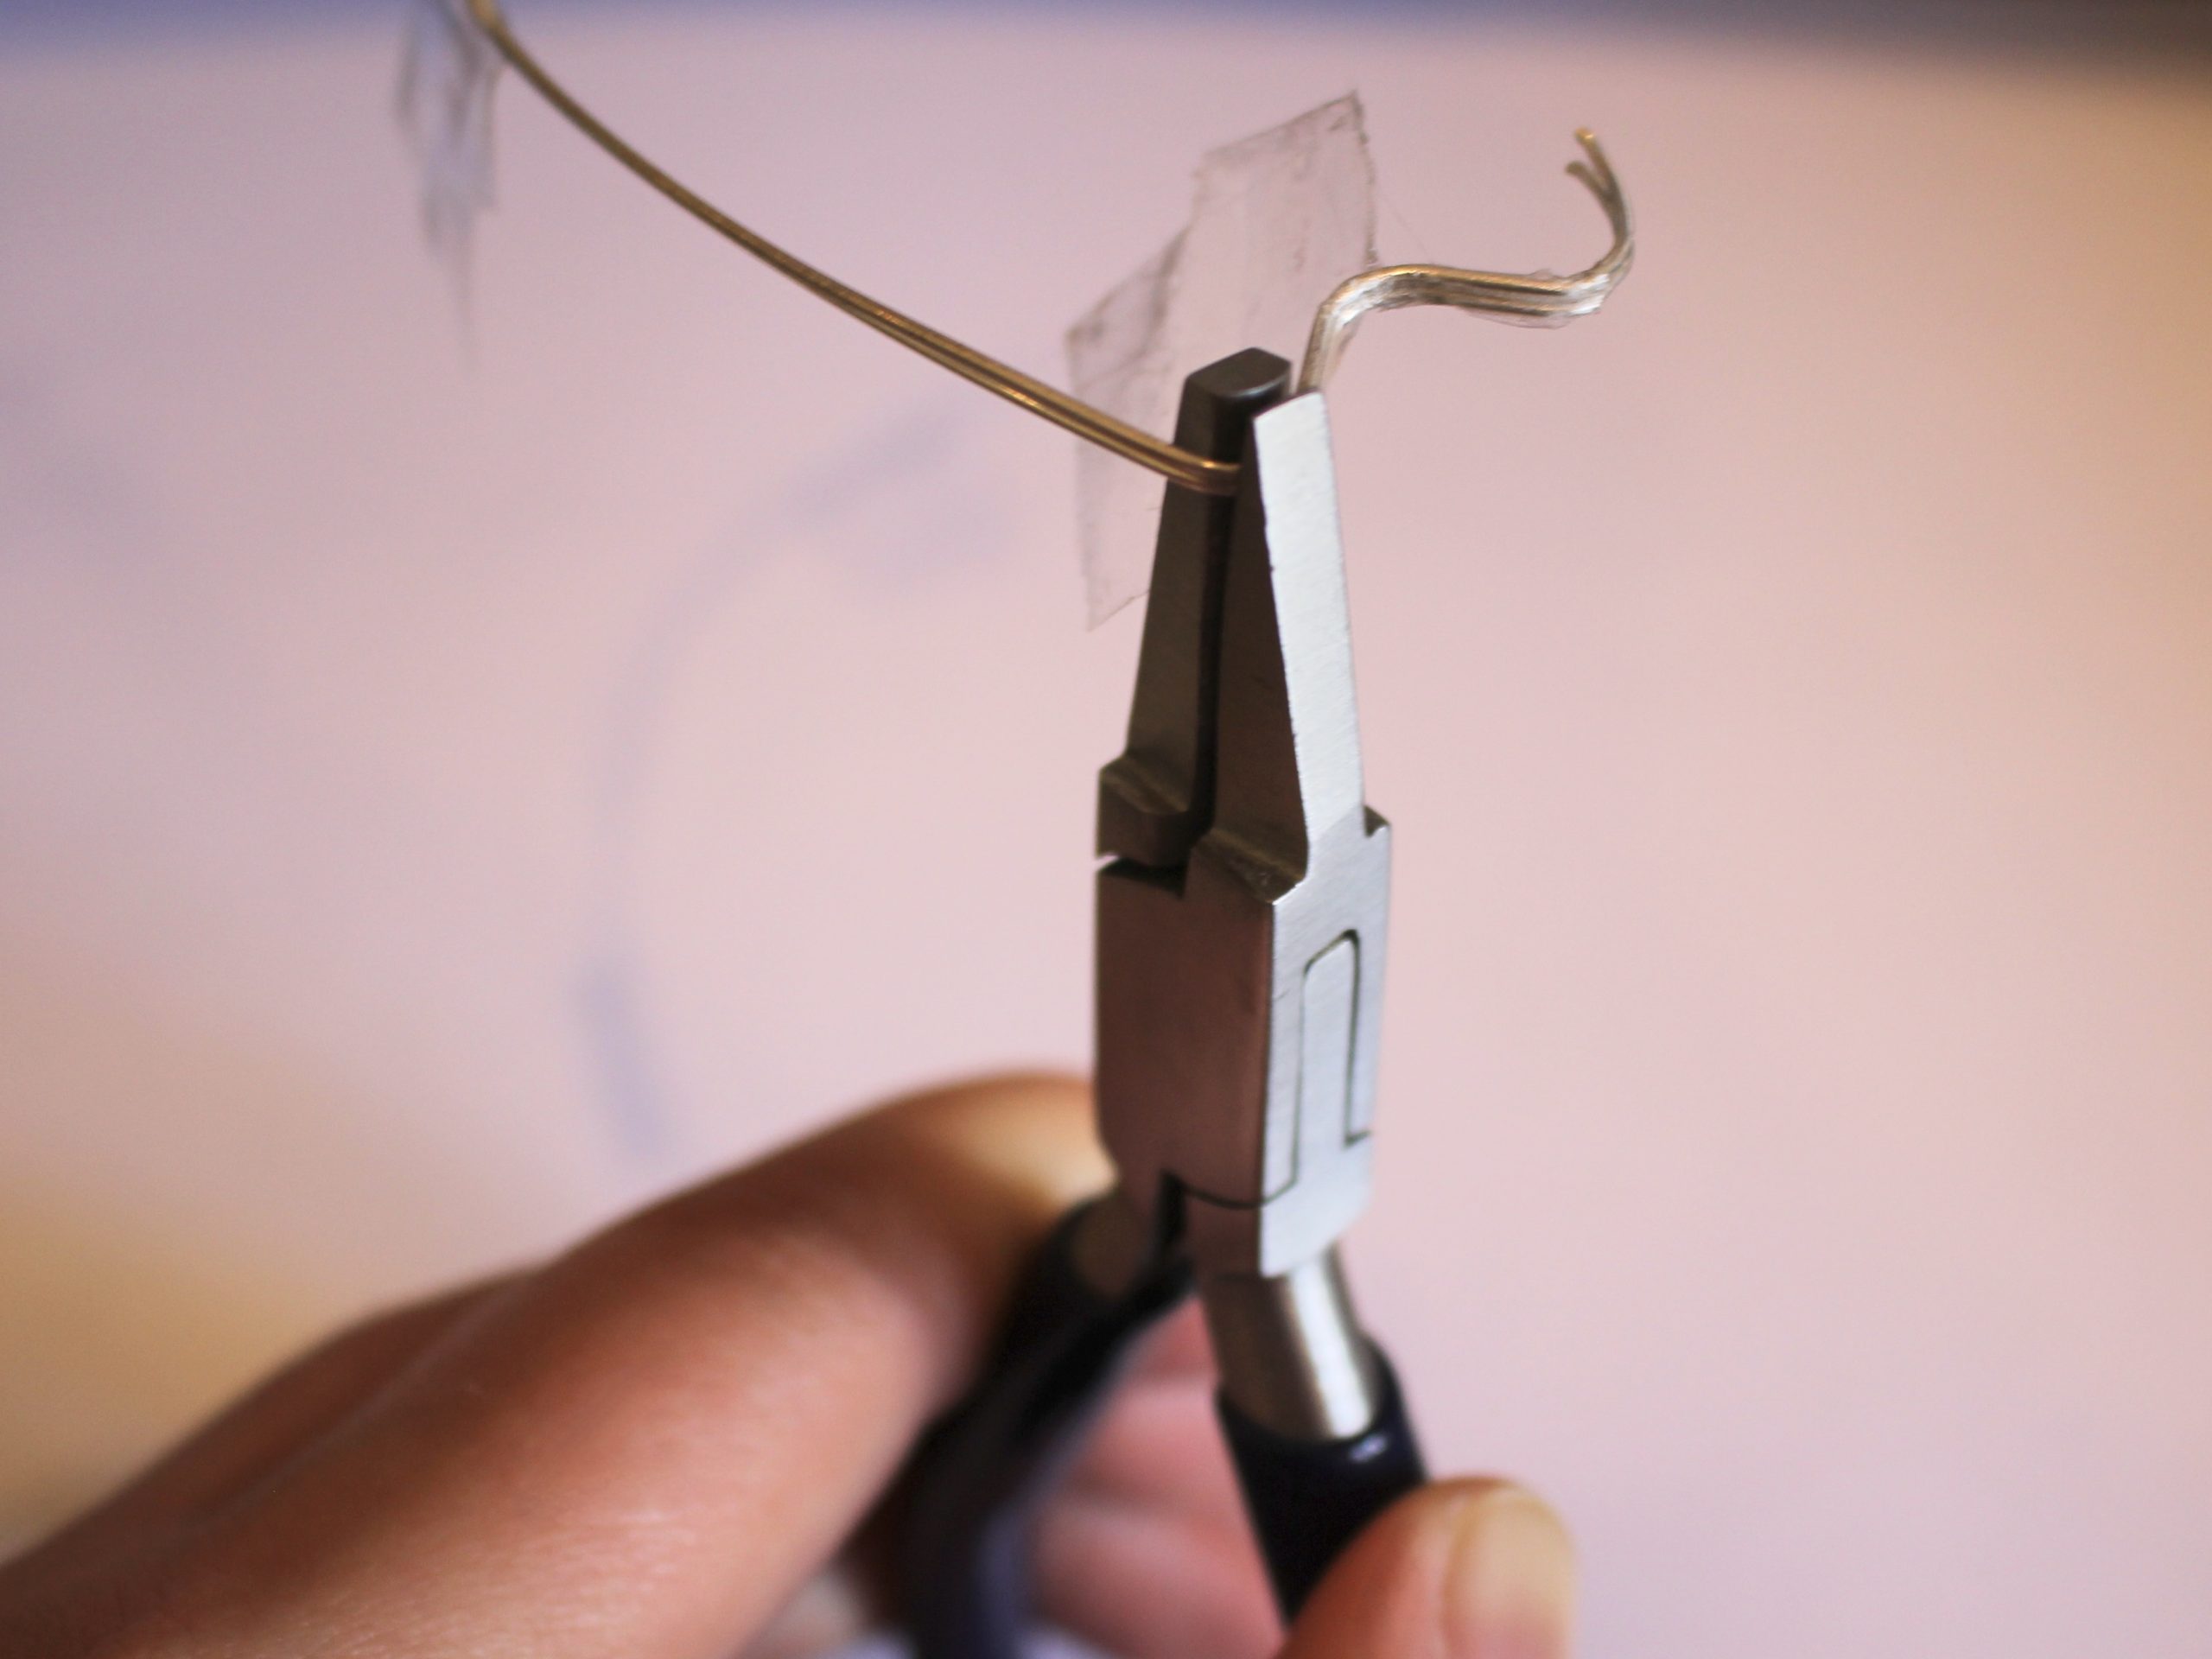
4: Take your half round-flat pliers and create the first bend at the end of the wire by clamping the wire into the jaws of the pliers and pressing them together.

5: Flip the pliers around and place them on the other side of the wire and repeat step 4 to make a curve in the wire in the opposite direction.

6: Repeat steps 4 and 5 until your pieces of wire are formed into a squiggle shape, but leave about 1cm at the end for the earring post.


7: Remove the tape and separate the wires.
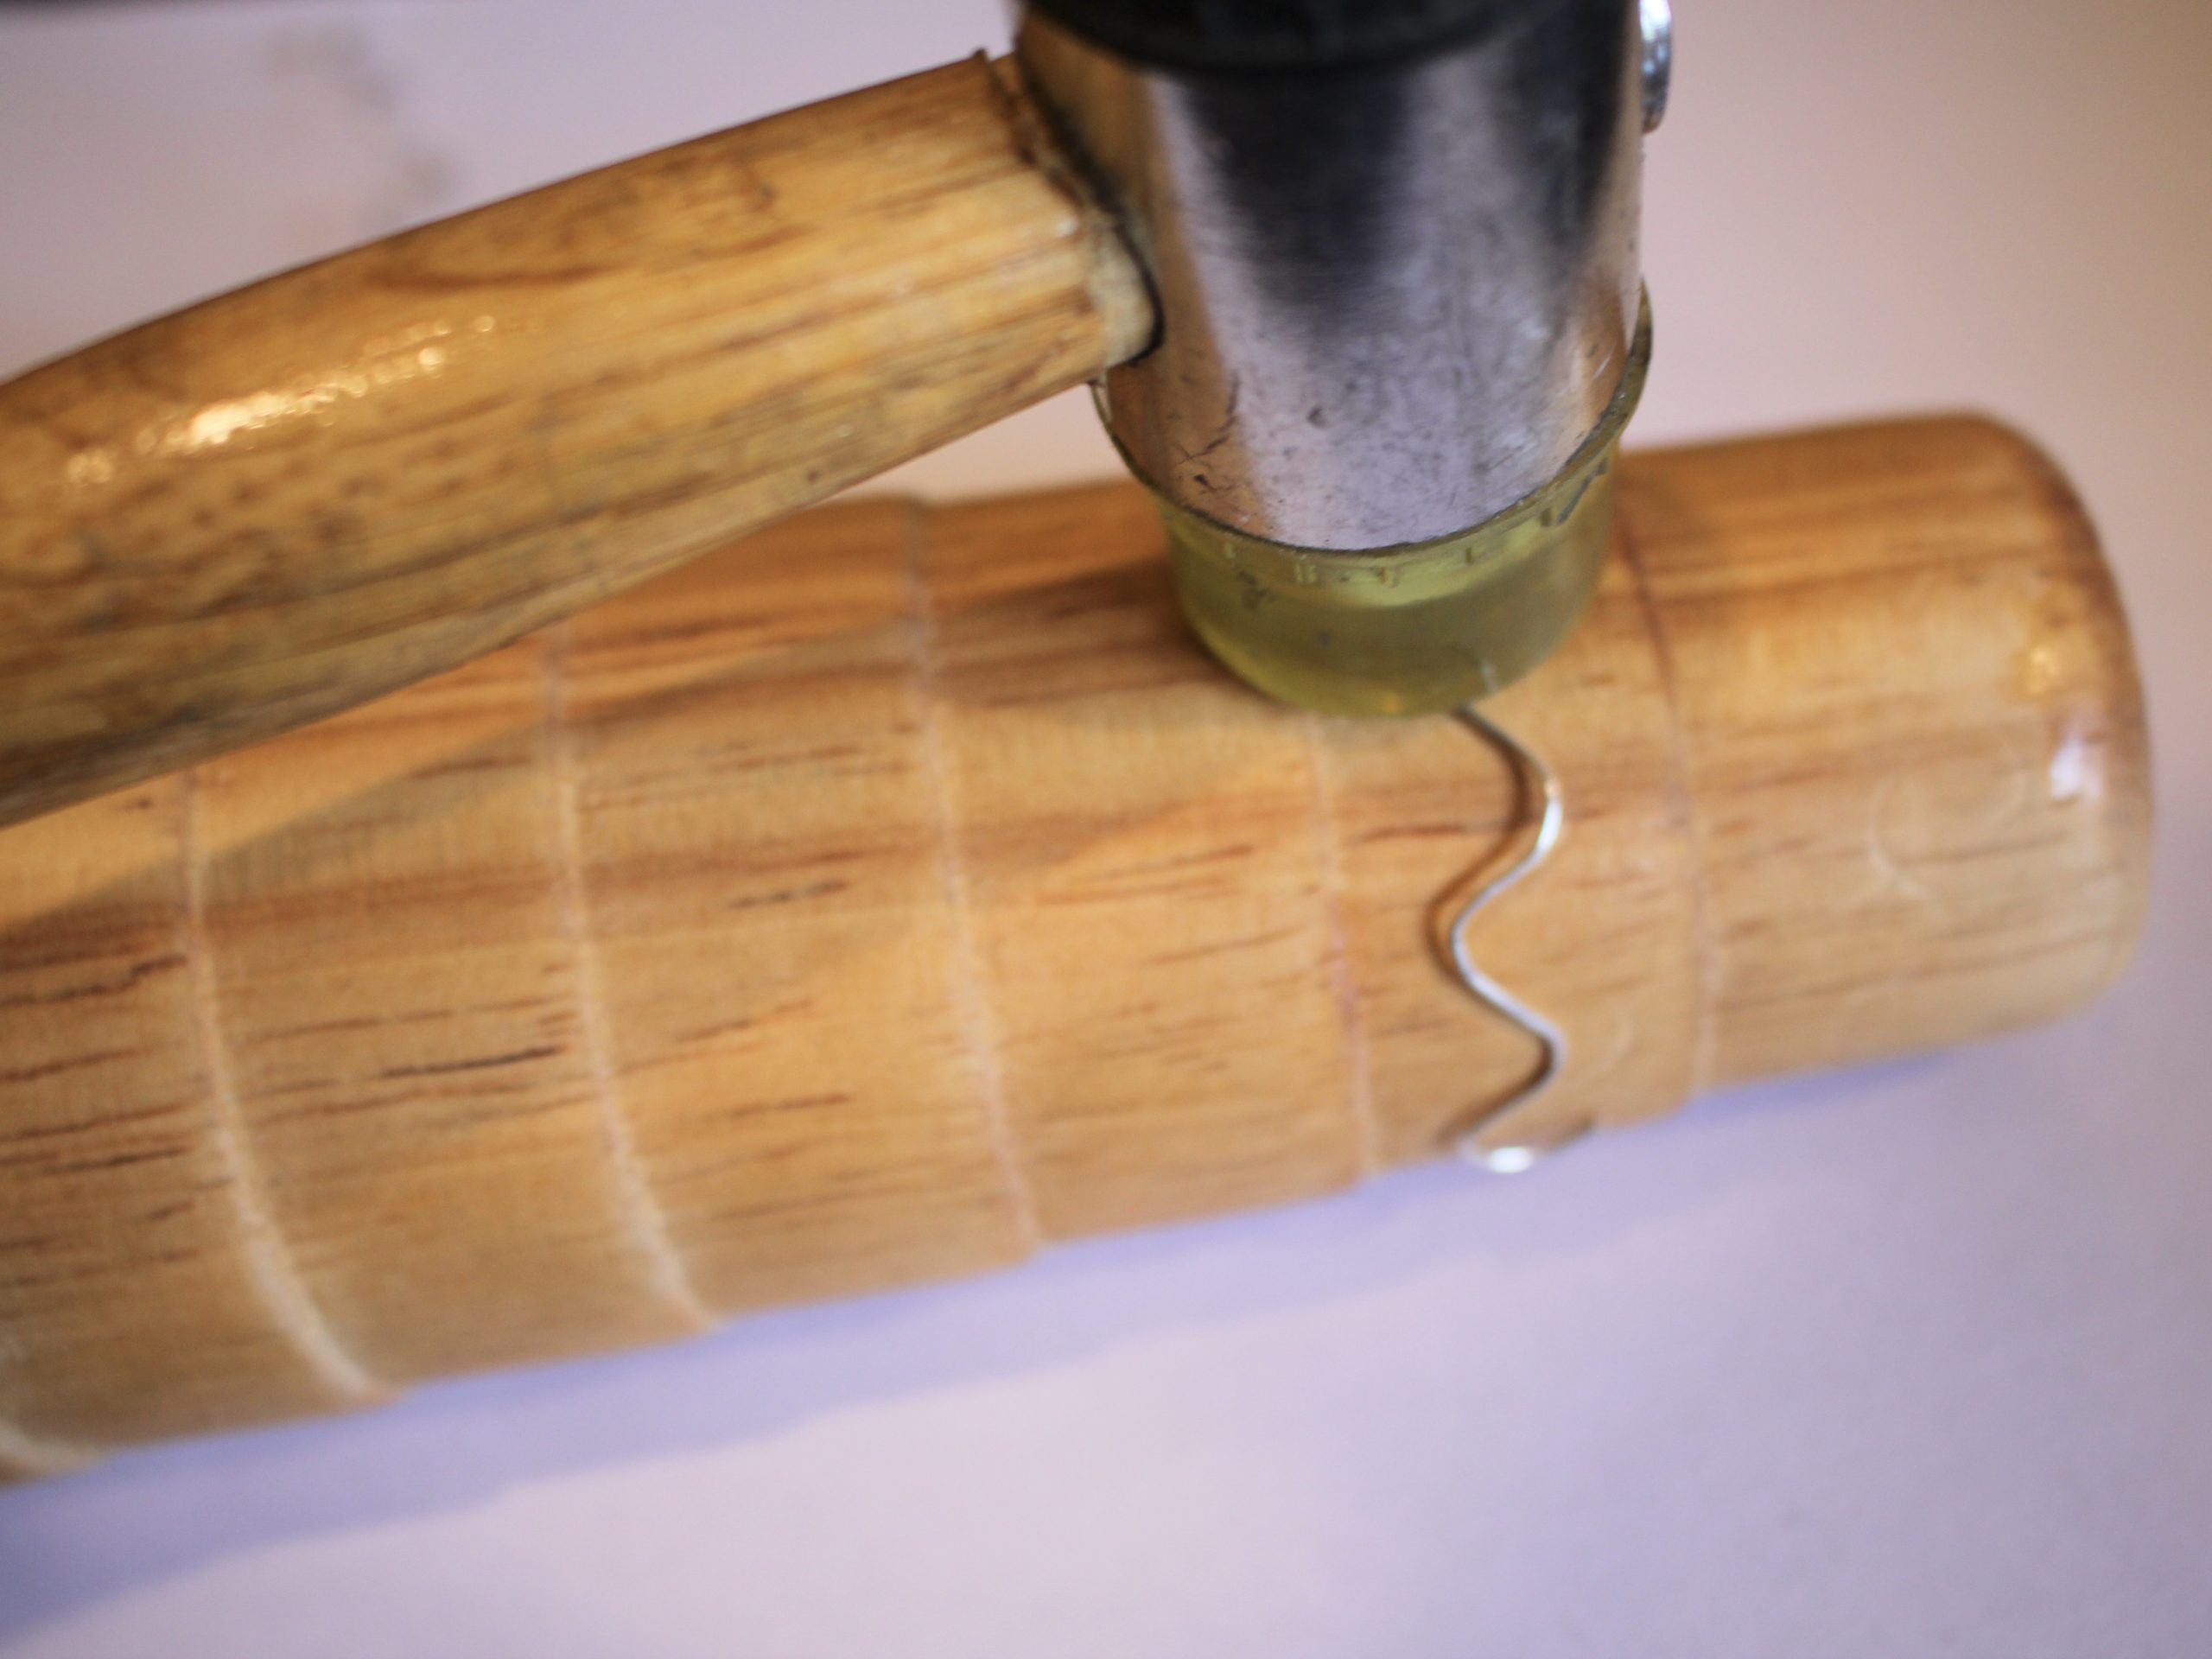
8: Wrap the wire around the bracelet mandrel to form it into the earring shape. Use the nylon hammer to hammer it into shape. Repeat this for both of the earrings.


9: You can further adjust the shape of the earrings by pressing the half round-flat pliers around the earring, making sure to match the curve of the pliers with the inner curve of the earrings. Doing this will add more tension to your earrings to help them hold their shape.
10: When you are happy with the shape of your hoops, Take the round flat pliers and push the straight ends of the wire around so they sit sideways.


11: Then take your parallel pliers and use them to adjust the straight ends of each earring so that they are centered in the middle of the wiggle to sit evenly in your ears.


12: Once you have adjusted the ends, your earrings are finished and ready to wear. Pop the butterfly backs on to secure them on your lobes.

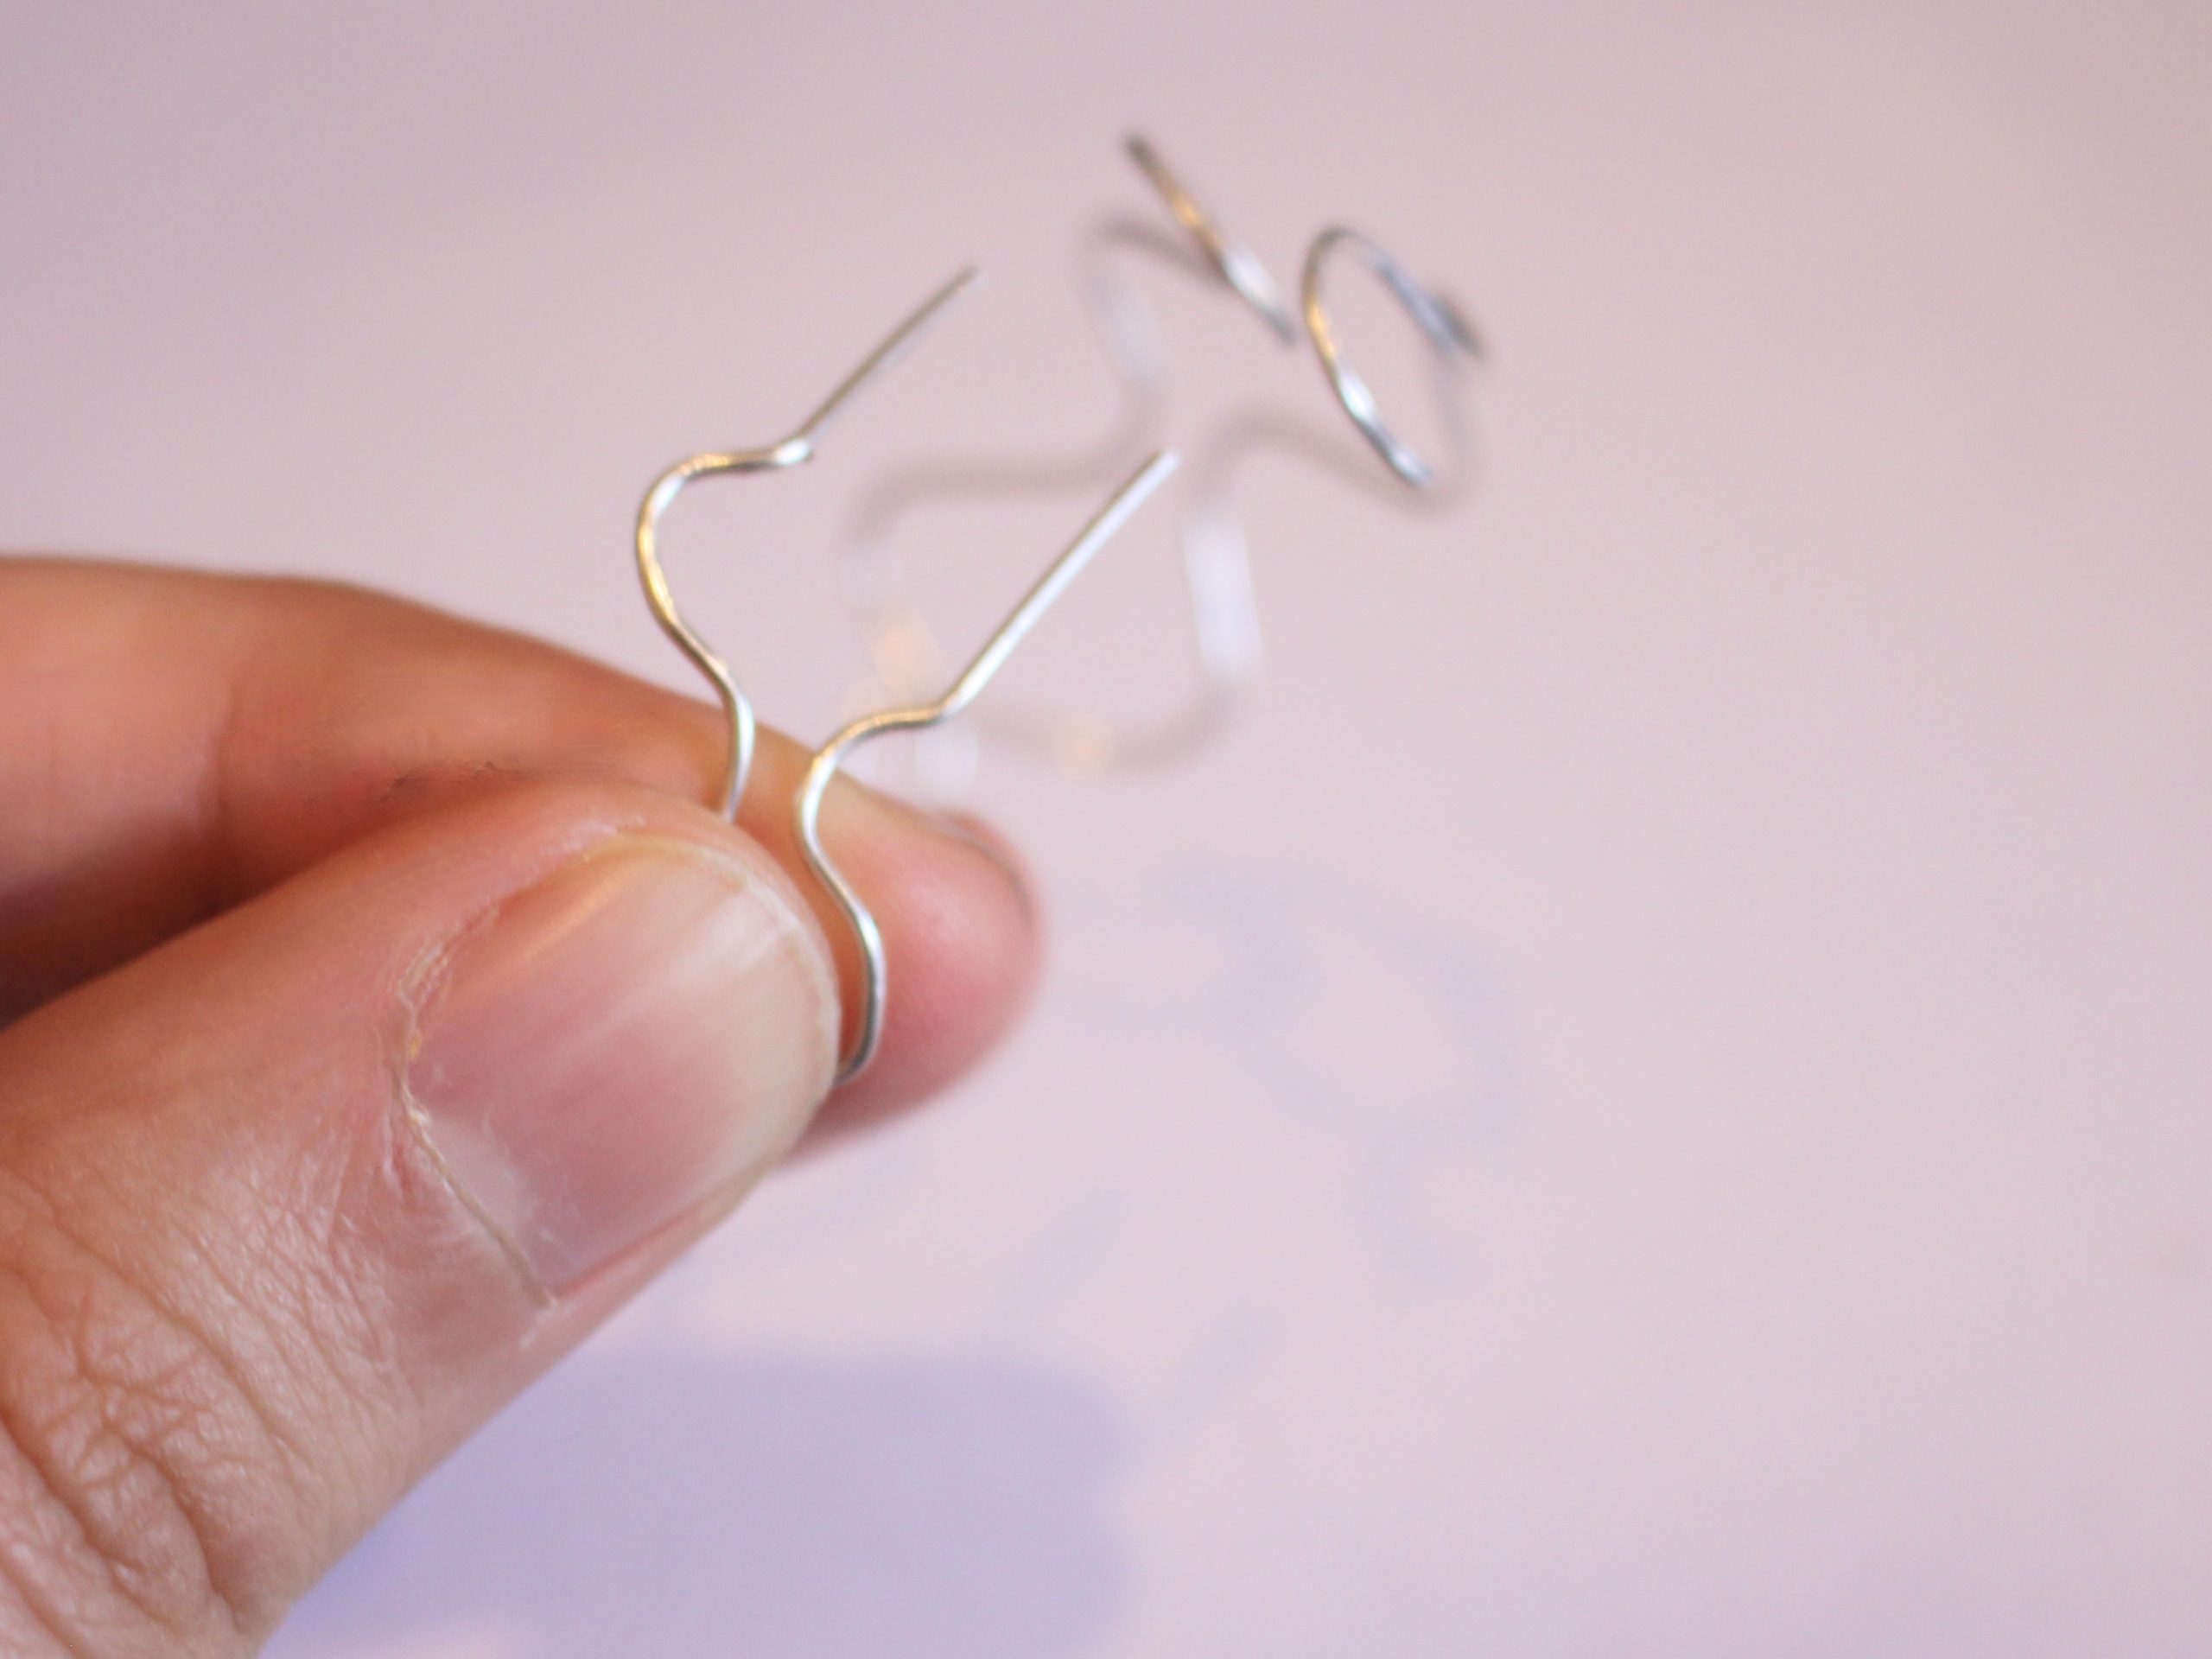
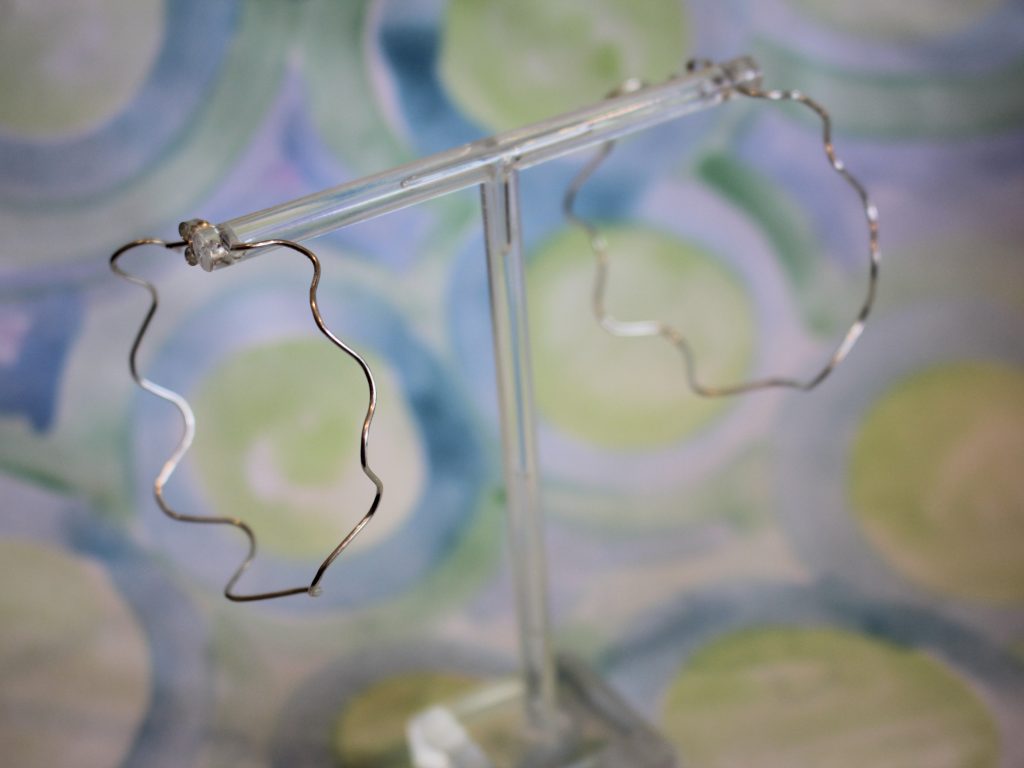
Here’s how the finished product looks! How will you style yours?


-
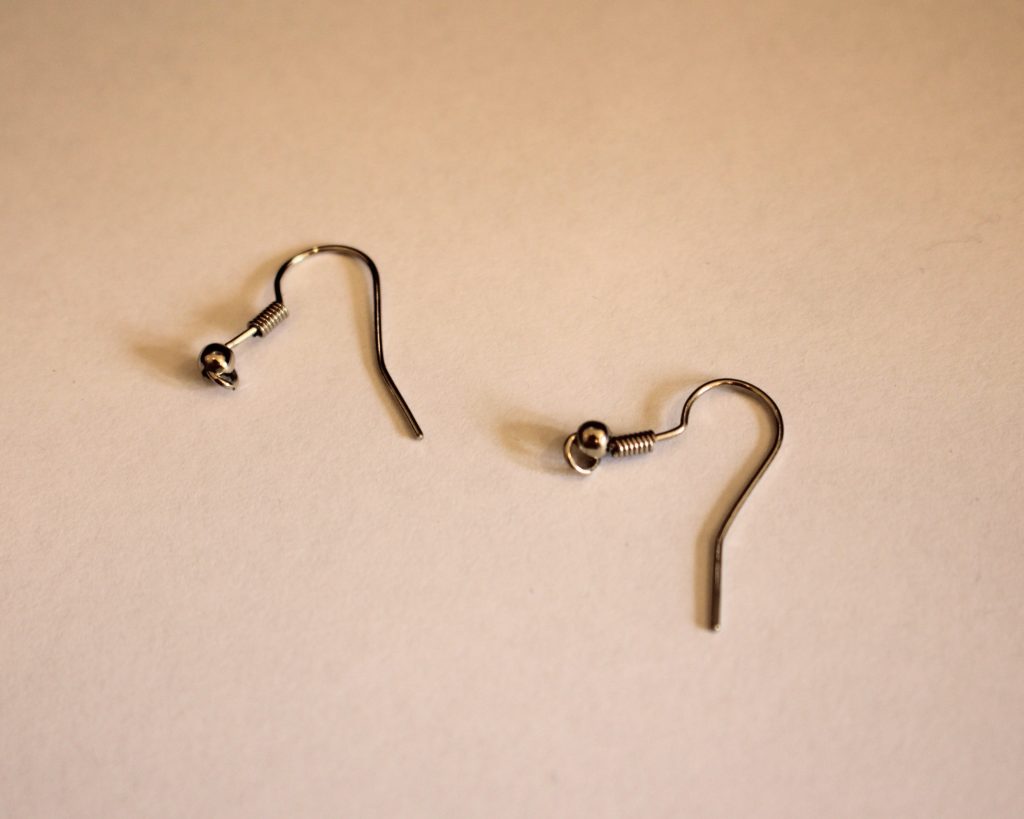
Got a pair of dangly earrings you aren’t quite in love with? This tutorial shows you how you can swap earring hooks for studs.
I like dramatic earrings, but I don’t love the look of hook earrings, so I prefer my dangly earrings to have stud tops. If you’re like me, the following tutorial will show you how you can swap hooks for studs in a few easy steps. Please note that this tutorial contains affiliate links that may earn this website a commission.
You will need the following tools and materials to transform your hook earrings into dangly studs:
1: A pair of dangly earrings that have hooks. I used these earrings that were given to me as a gift.

You can use any earrings you like that have earring hooks, but here are some similar to the pair pictured:
2: A pair of stud earrings with a hole or jump ring attached to them. Make sure you have earring backs as well.

These are handmade studs, but you can get something similar here:
3: A pair of jump rings.

4: Pliers. I used my flat nose and needle nose pliers.
Follow these steps to transform your dangly earrings:
1: Take a pair of pliers and open up the ring at the bottom of the earring hook on one of your earrings.

2: Remove the hook.

3: Repeat this for the second earring.

4: Take one of the jump rings and add it to the loop at the top of one of the earring charms.

4: Slide the jump ring through the hole at the bottom of the stud earring finding.

5: Close the jump ring using the pliers. Now you will have transformed one of your earrings.

6: Repeat steps four to five for the second earring.

Now you can use your old earring hooks for a new design and you have transformed your drab earrings into something more your style!


-
Knitted Style: Craft Chic Bow Earrings with Our Easy Tutorial!
Do you love bows? This tutorial shows you how to make some gorgeous bow earrings using two pieces of knitted i-cord and some earring hooks! Simple but adorable and sweet. Is this the perfect winter earring?
Please note that this tutorial contains affiliate links.
You will need the following tools and materials to make these earrings:
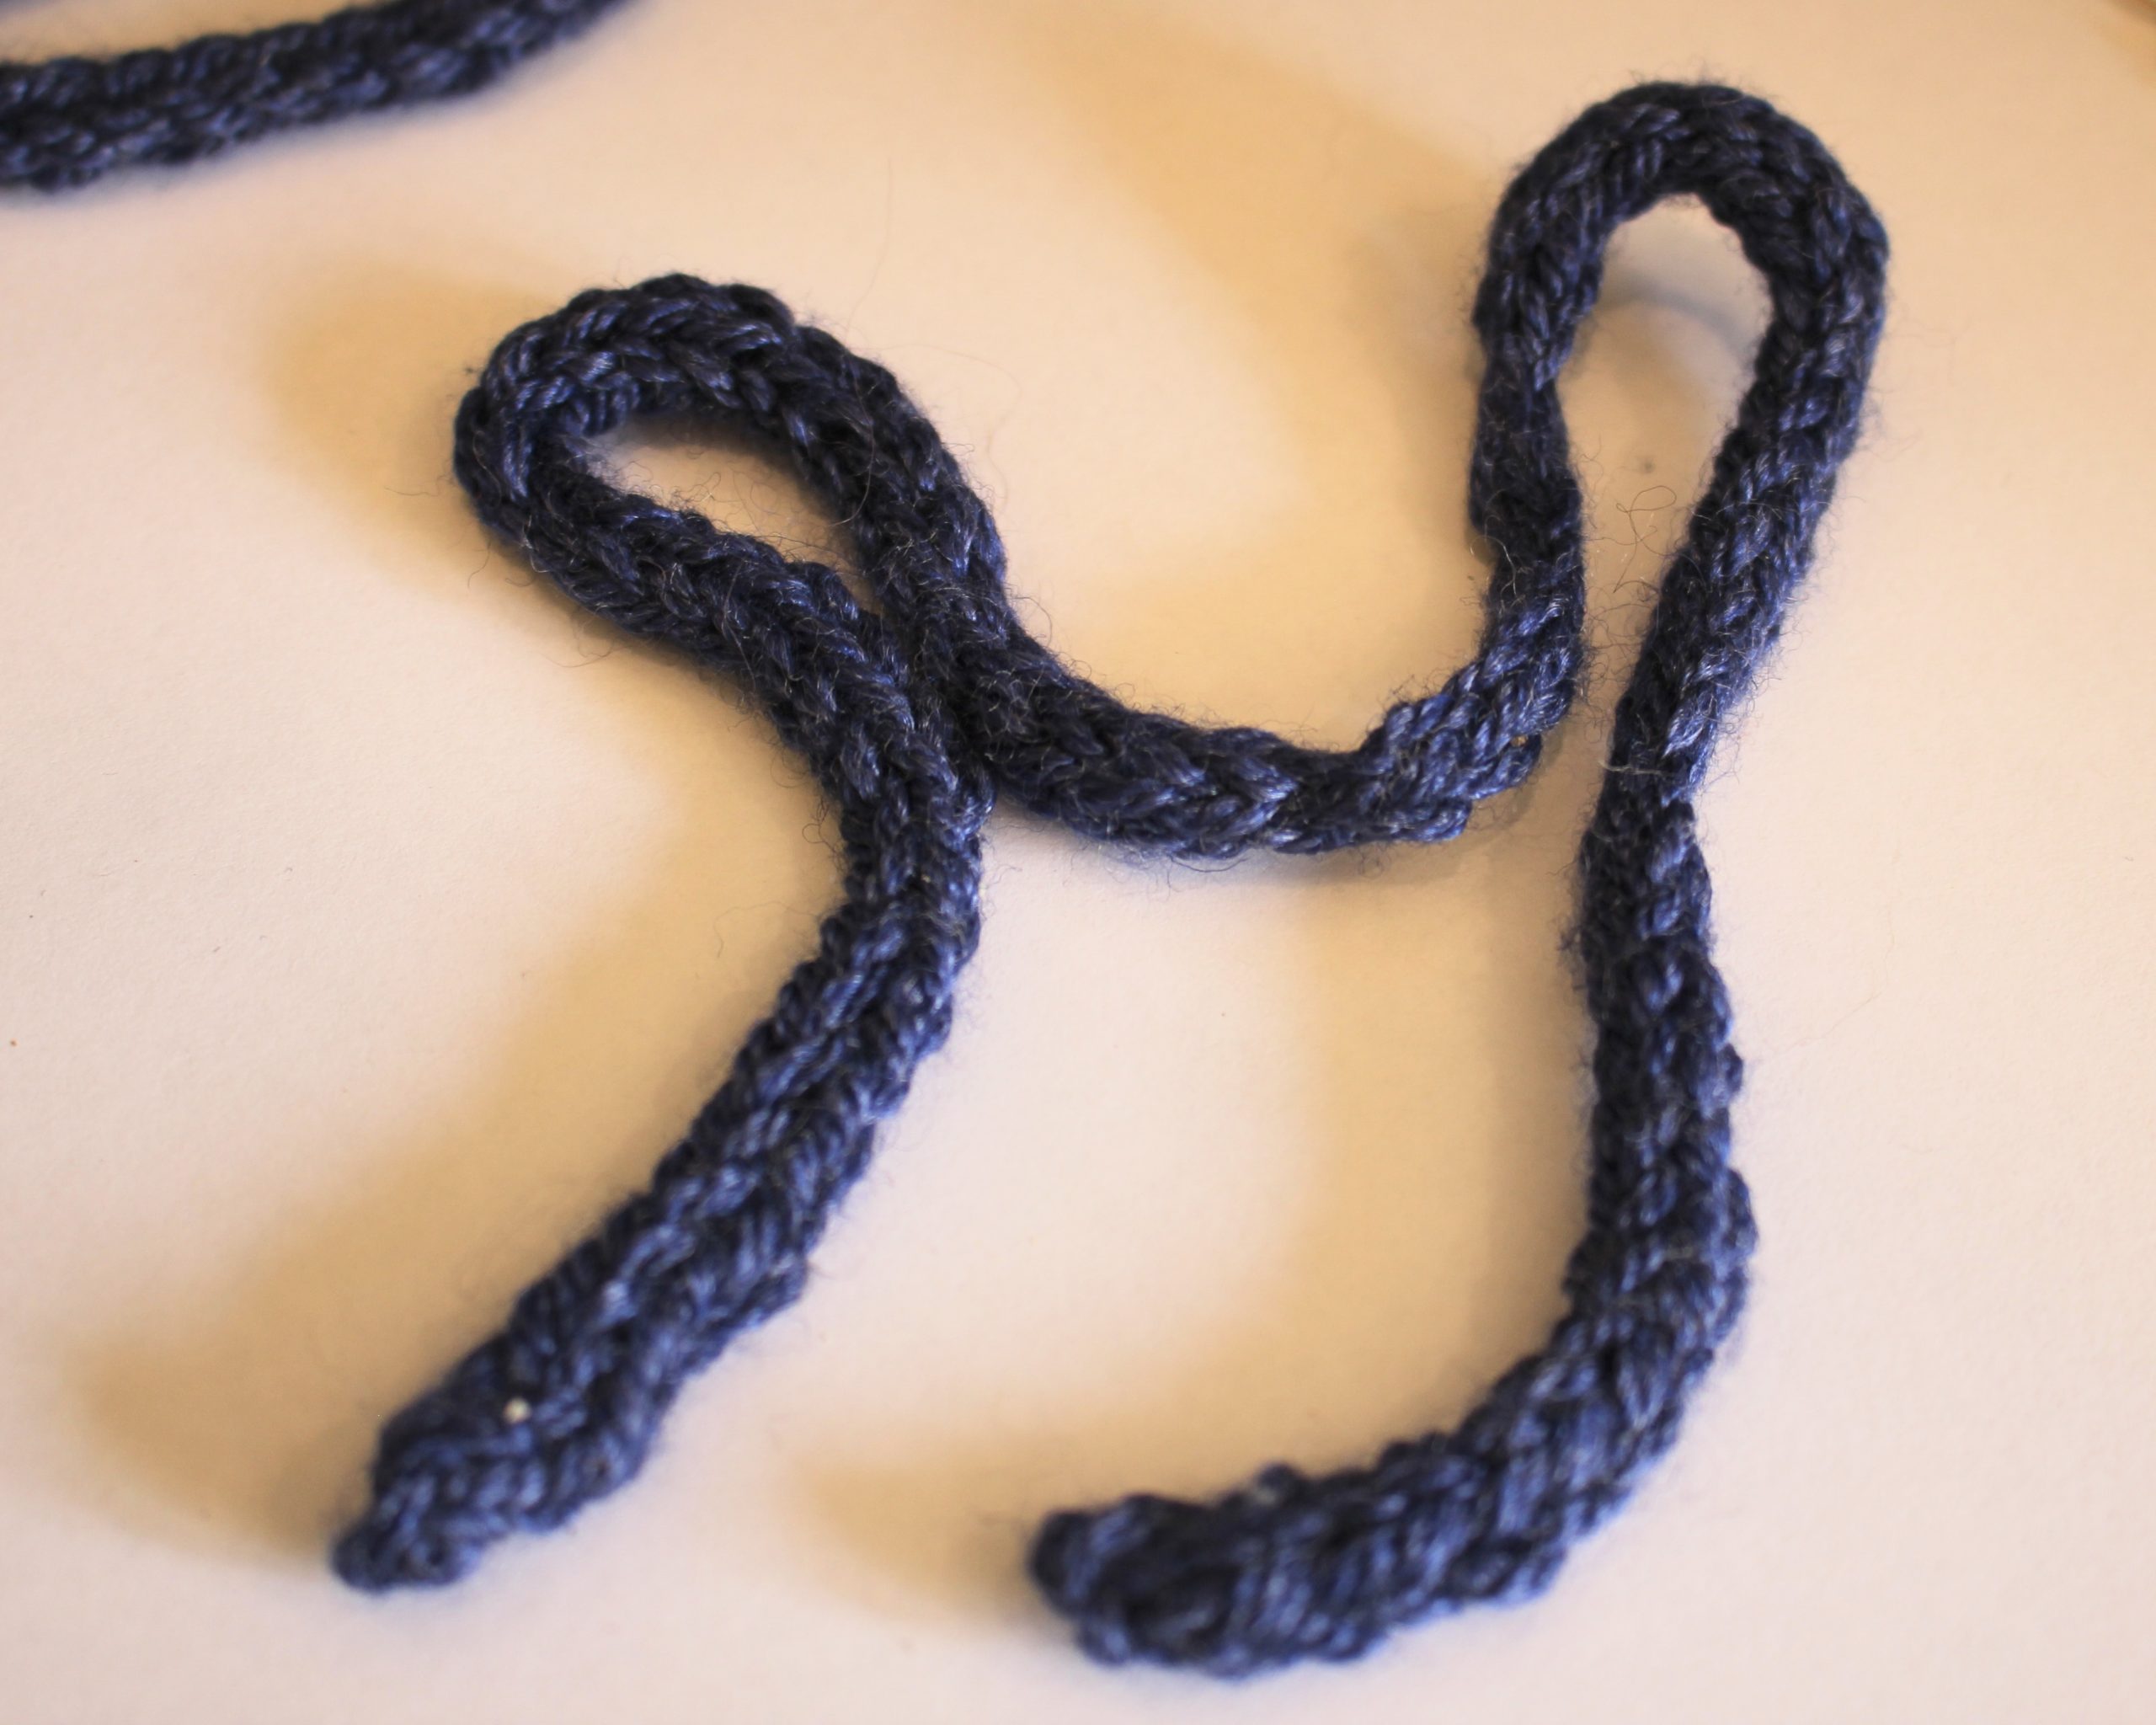
1: Two knitted i-cords about 30cm long. I used blue cords.

If you don’t want to make your own, you can get pre-made i-cord here:
If you want to make your own, you can get some similar blue yarn here:
This video shows you how to make them.
2: A pair of earring hooks.
You can get some sterling silver earring hooks here:
3: A pair of pliers for opening and closing the loops at the bottom of each earring hook.
You can get some pliers here:
Follow these steps to make your earrings:
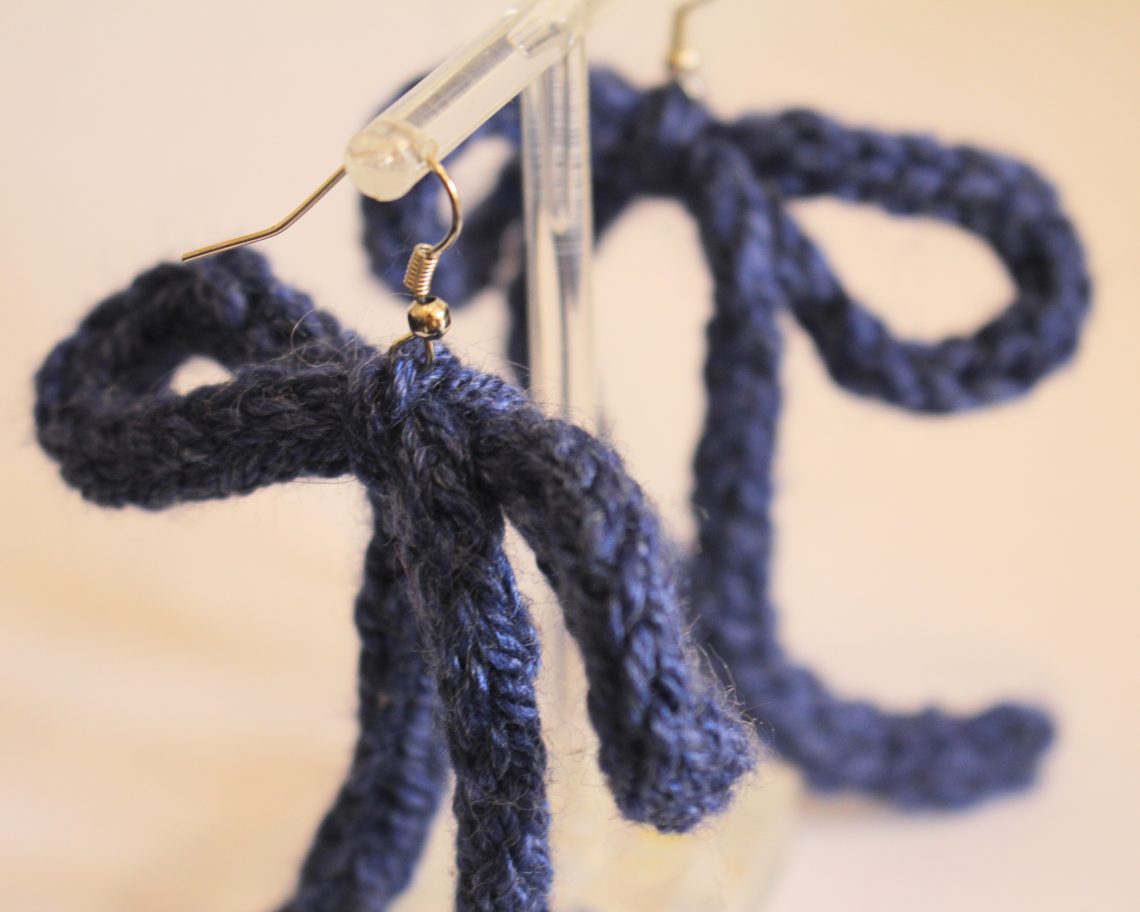
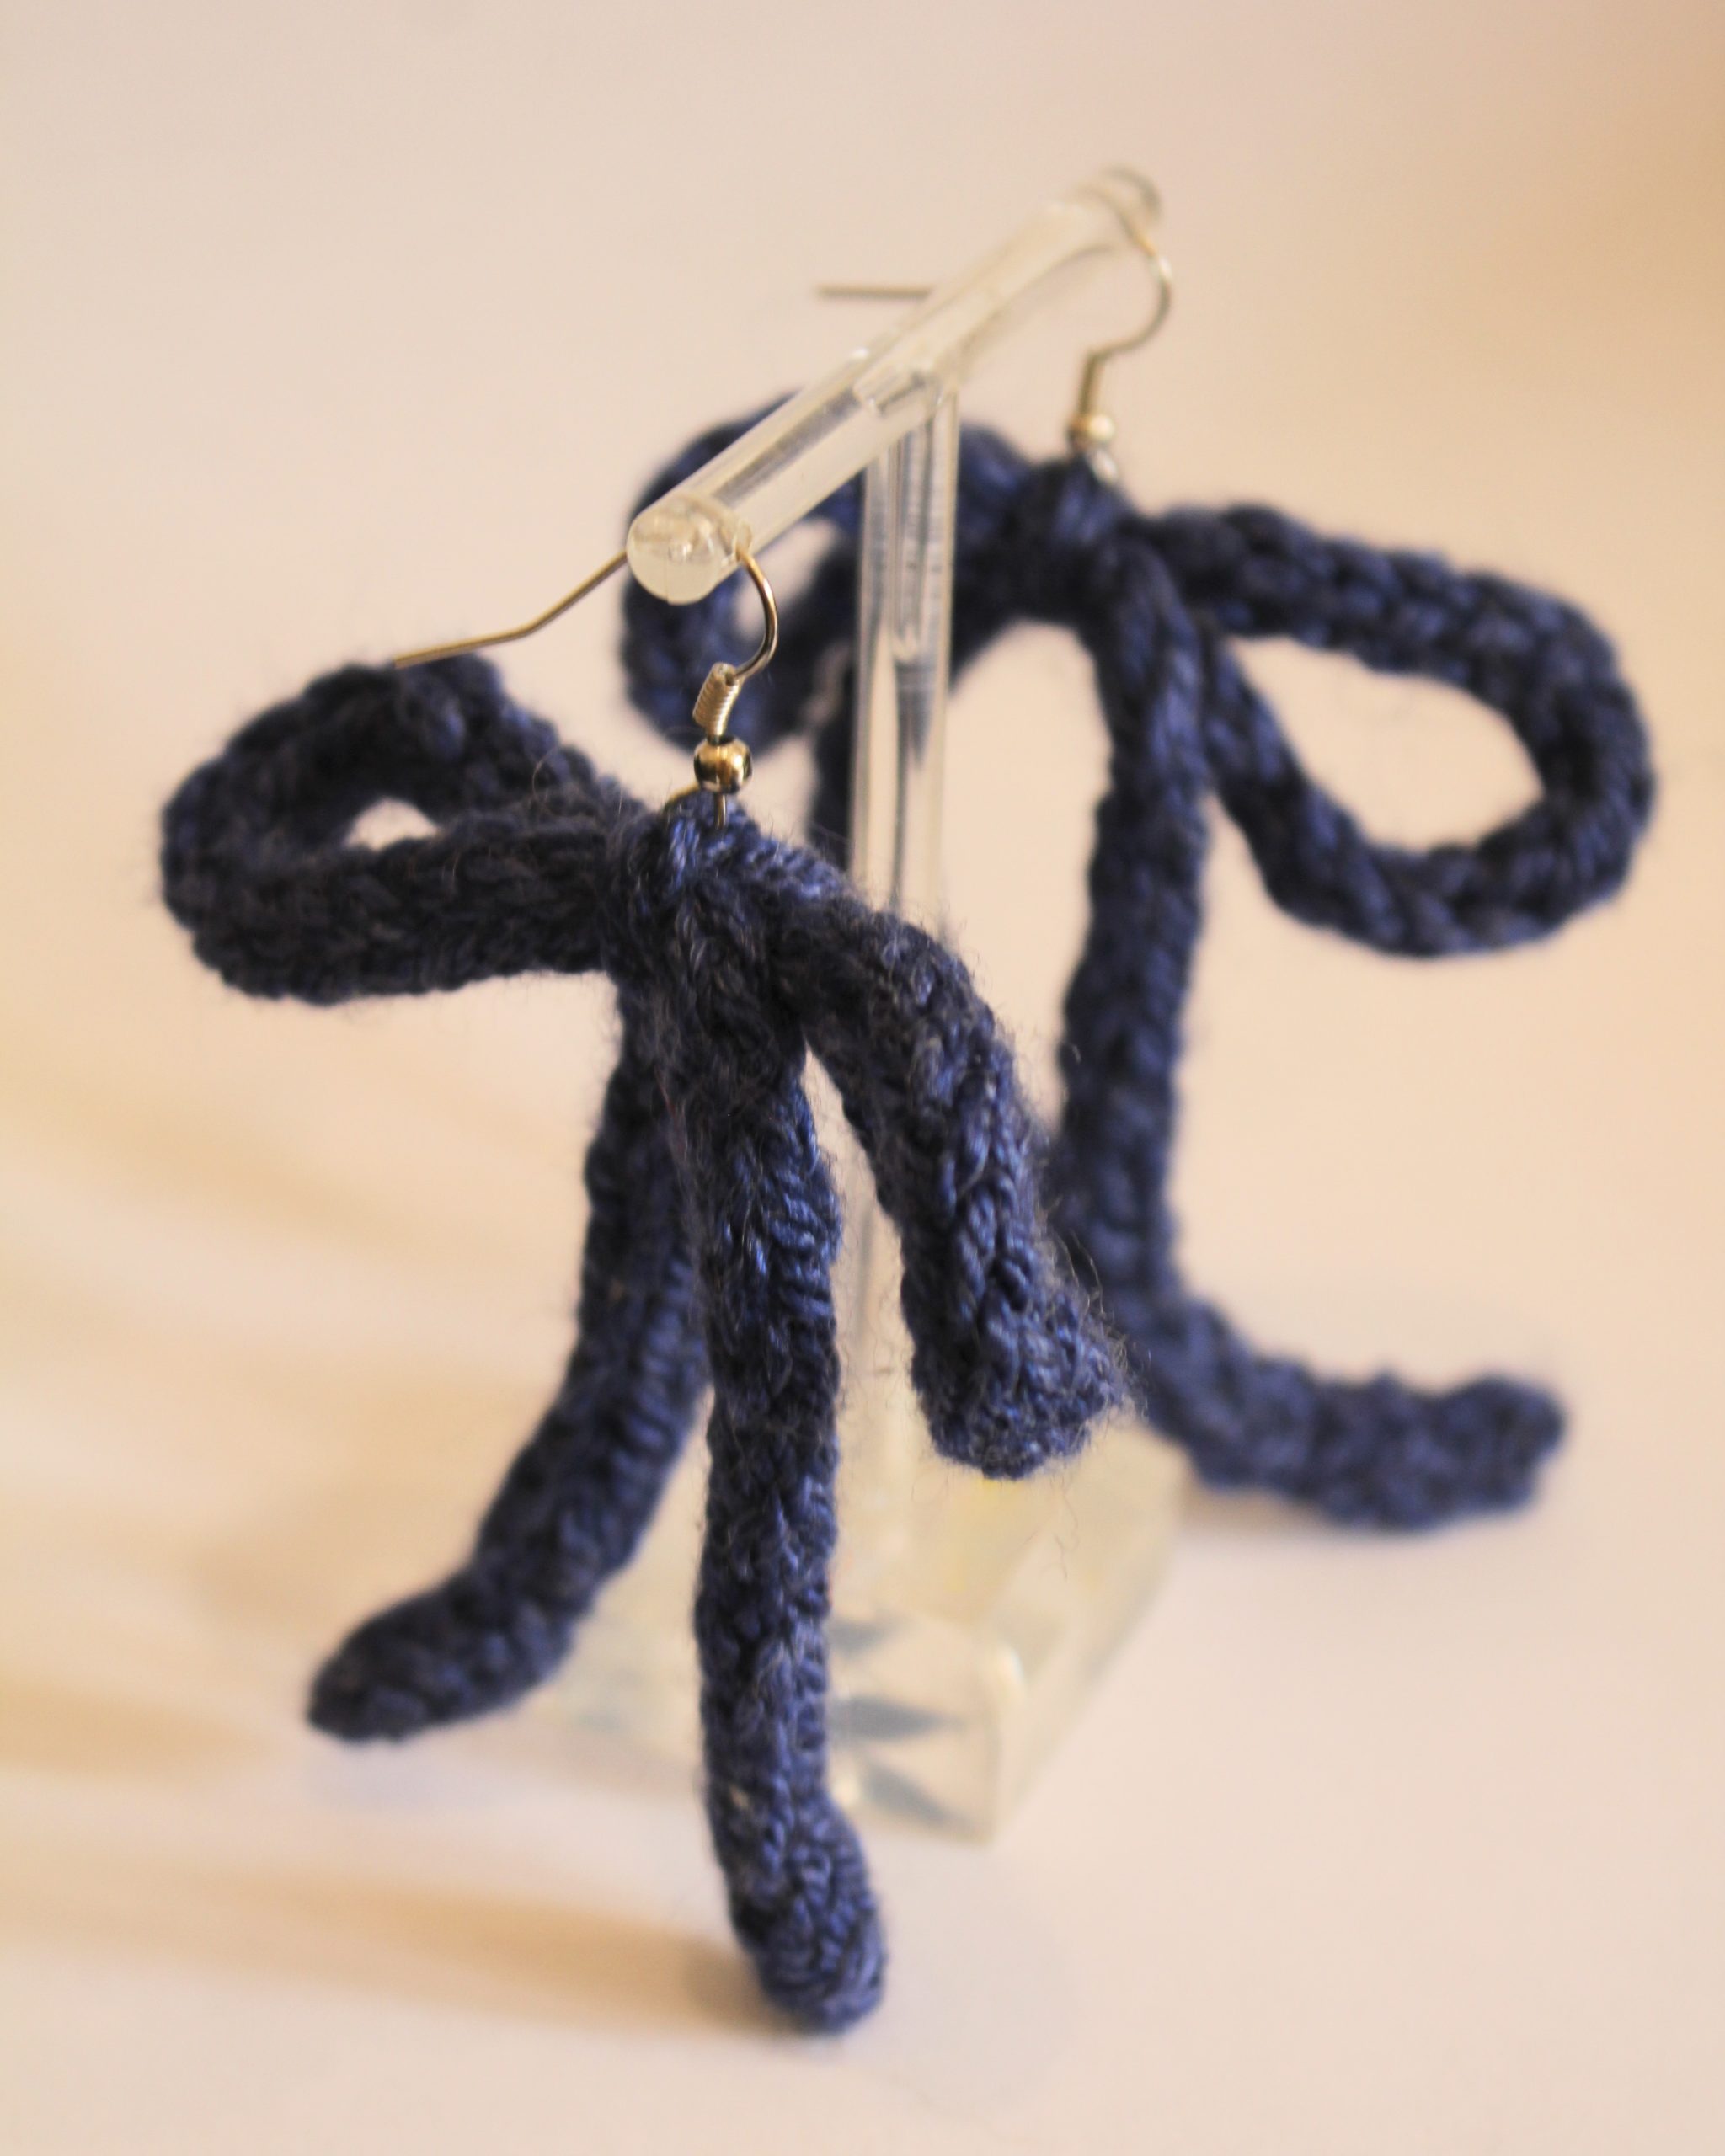
1: Form one of the cords into an M shape.

2: Take the two loops of the M and tie them around each other to form a bow.

3: Adjust the bow to the size you like.
4: Repeat for the second i-cord.

5: Take one of the earrings and push the open ring into the top of the bow so that some of the fibre strands are looped into it.

6: Close the loop using the pliers.

7: Repeat steps 5 and 6 for the second bow.

Now your have a pair of adorable dangly bow earrings! So sweet!


-
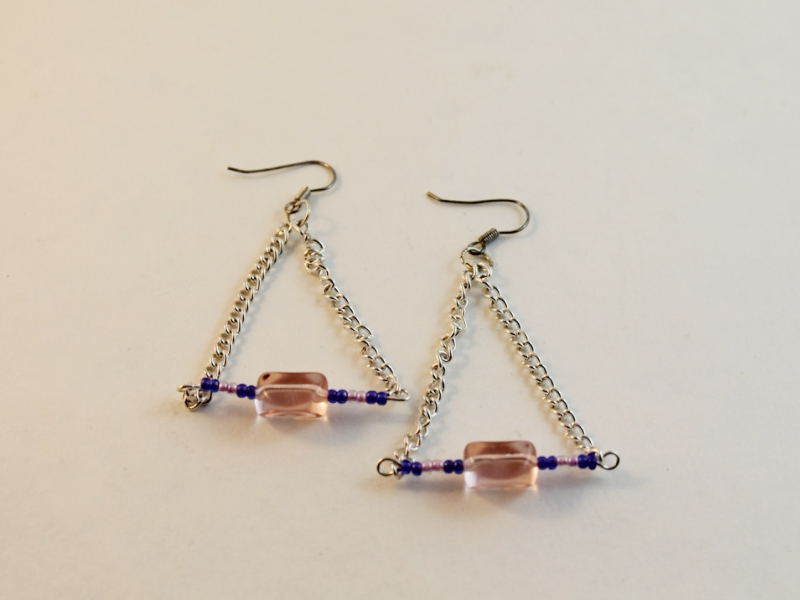
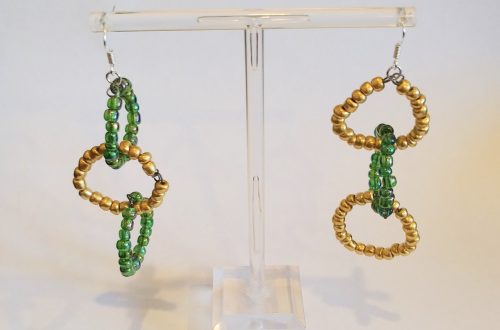
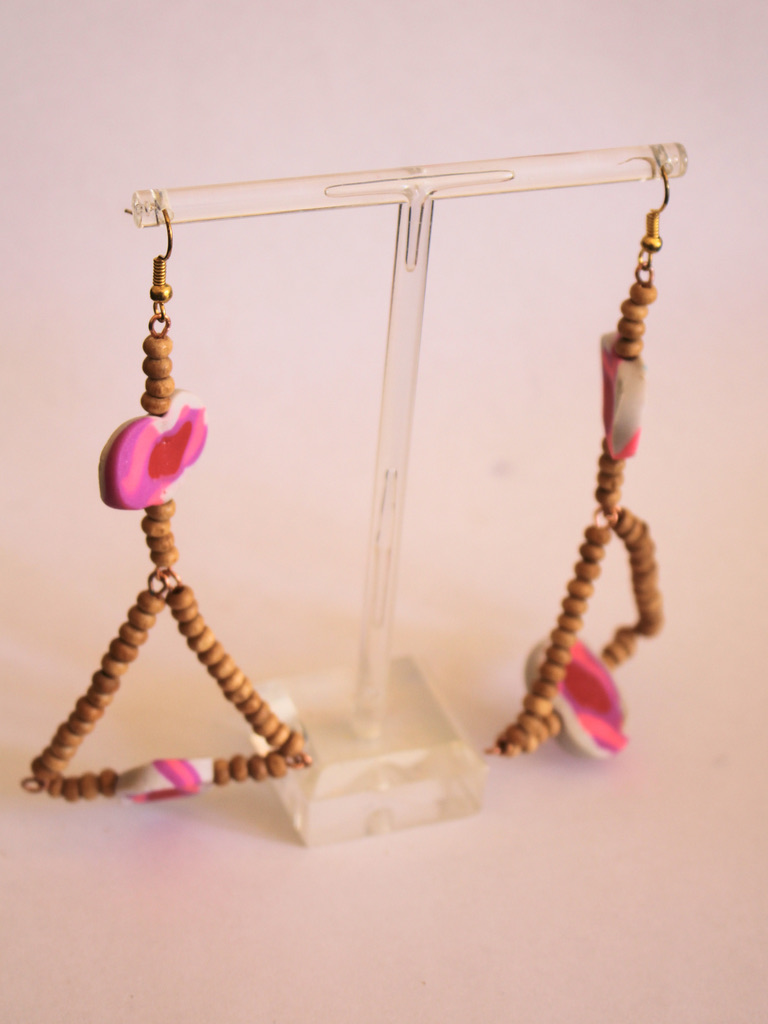
How to make a pair of triangle statement earrings!
Here’s how to make a cute pair of statement earrings, these are such a fun design that pack a bold punch with their size and colours. Please note that this tutorial contains affiliate links.
You’ll need these tools and materials to make these earrings:
1: Eight pieces of wire all the same length. I used 0.8mm copper wire.

Here’s a pre-made eye pin option if you don’t feel like making them yourself: https://tidd.ly/3WCad6D
2: Four statement beads. I used these polymer clay beads I made. Here’s a polymer clay bead tutorial for you.

3: Some accent beads. I used these timber beads.

4: A pair of earring hooks. If you don’t have any, you can find tutorials that show you how to make your own here, here and here.

5: Some flat nose pliers and round nose pliers. You will also need your cutting pliers if you are not using pre-made eye pins.

Follow these steps to make your amazing triangle statement earrings:
1: Bend the end of each wire to form a right angle using the flat nose pliers.


2: Loop the end of each wire using round nose pliers.

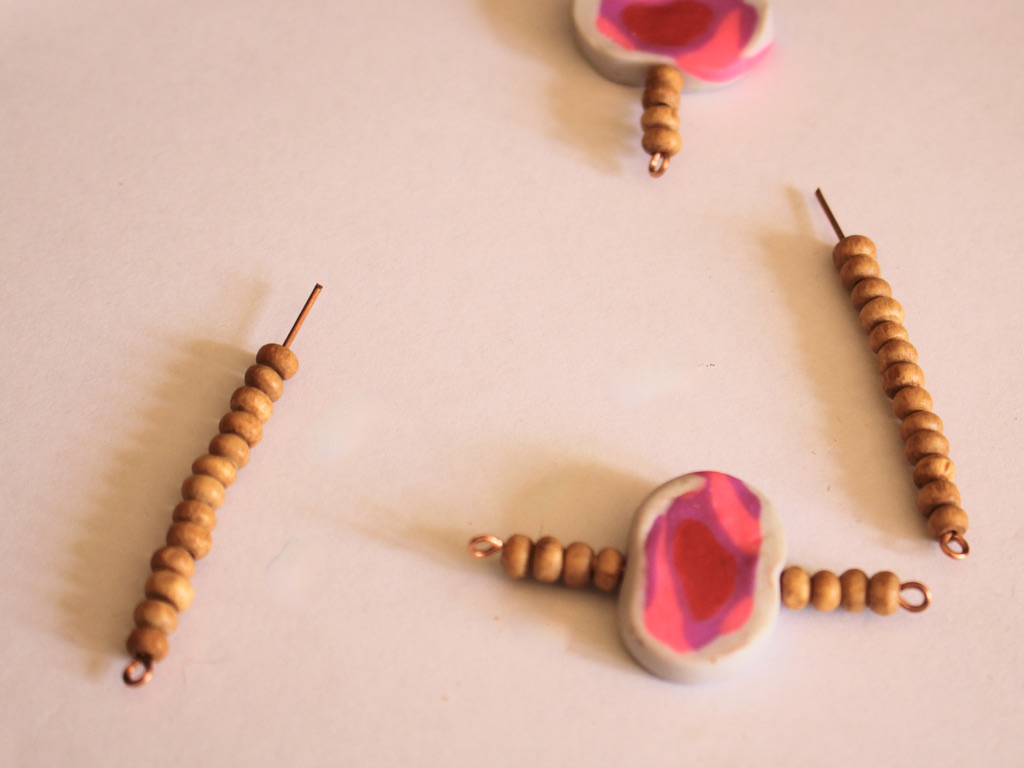
3: Add beads to two of the wires, these will form the bottom of your triangles. I added some statement beads to each of these wires.

4: Bend the ends of the beaded wires to form another right angle.


5: Loop the end of the wire using the round nose pliers. This will secure the beads in place.
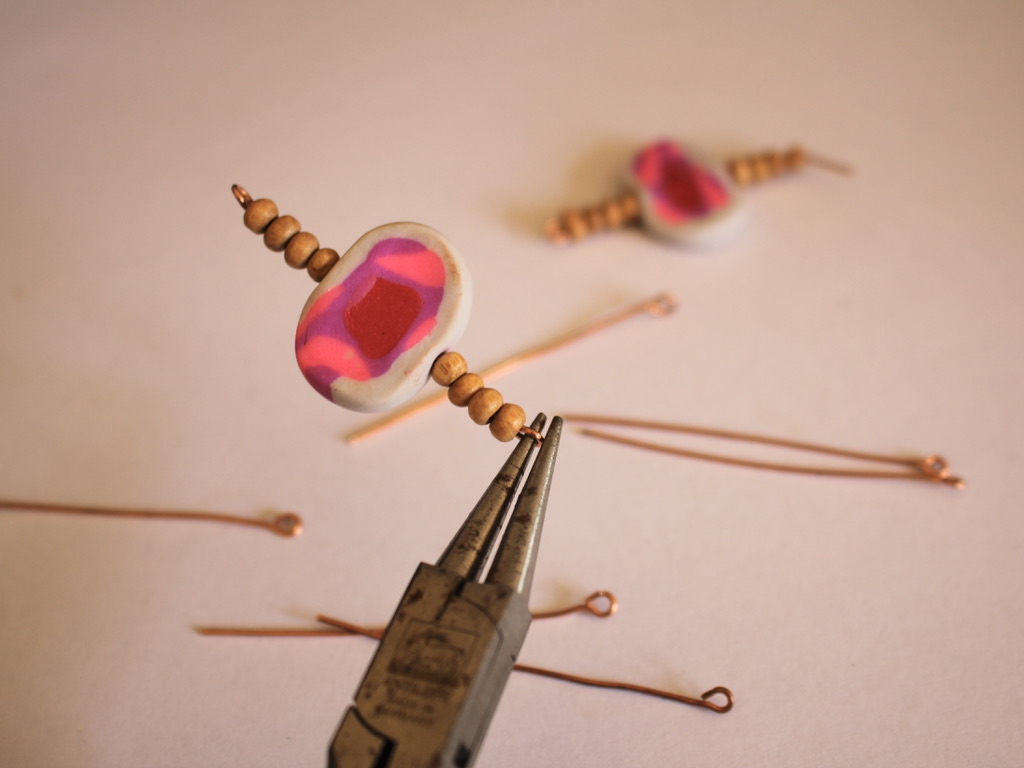

6: Repeat steps 3-5 for two more of the pins, these will be used to attach the triangles to the earring hooks.

7: Add your accent beads to the four remaining wires to create four solid beaded pins, secure the beads in place as you did in steps 4 and 5.


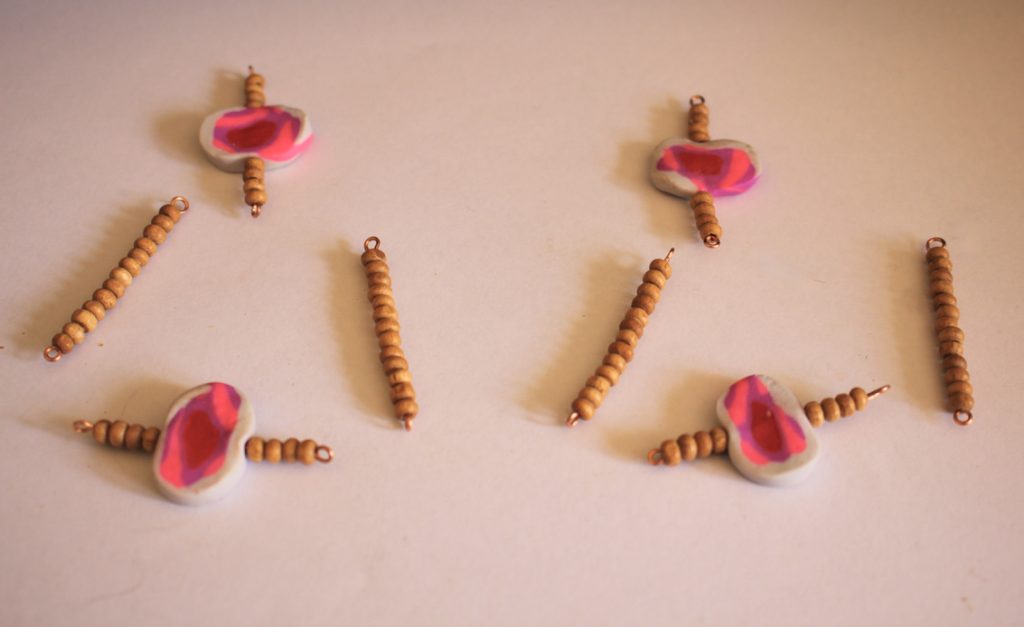
8: Now it is time to start assembling your earrings, Add one of the solid beaded wires to one of the accent beaded wires.
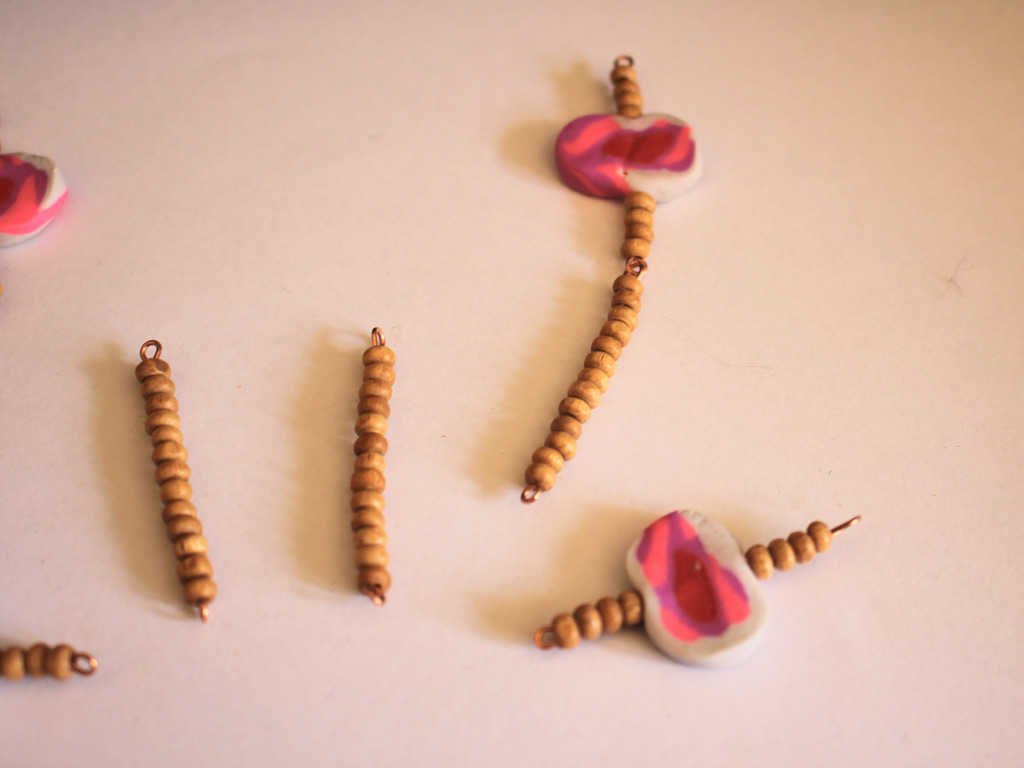
9: Add a second solid beaded wire to the first accent beaded wire, so you have one statement beaded wire with two solid beaded wires attached.
10: Add a second statement beaded wire to the earring, attaching each end to each of the solid beaded wires to form a triangle shape.


11: Repeat steps 8 to 10 for the second earring.

12: Attach each of the earring hooks to the triangle forms. Once both earring hooks are attached your earrings are finished and ready to wear out! How will you style yours?


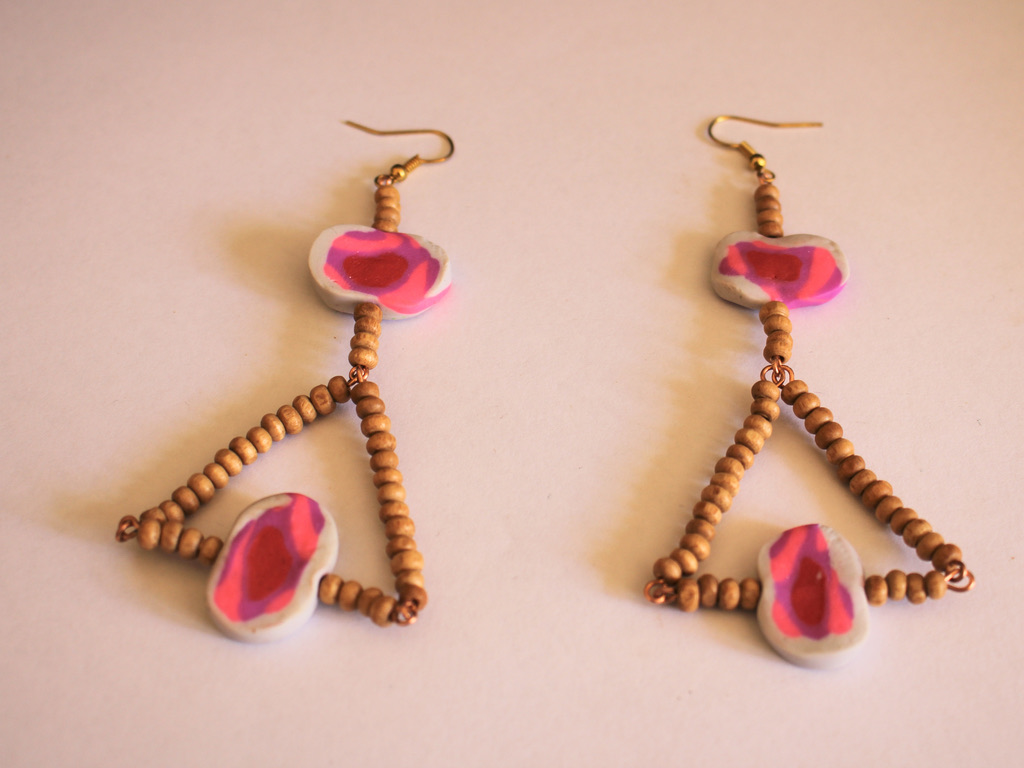
Here are the finished earrings!

-
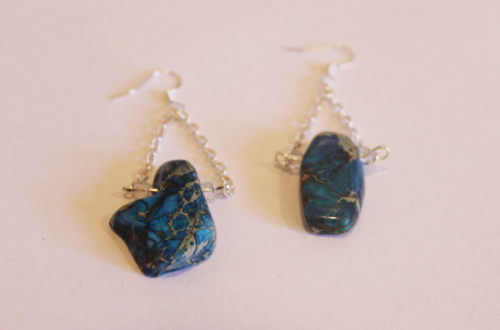
How to make some gorgeous chain earrings from scratch!
Have you ever wanted to make your own chain? This lovely earring tutorial shows you how to make your own simple chains from scratch and turn them into a stunning pair of earrings. Please note that this tutorial contains affiliate links for which the website might receive a commission.
You’ll need the following tools and materials:
1: Two earring posts with charm connectors on them. I used sterling silver ball post findings.
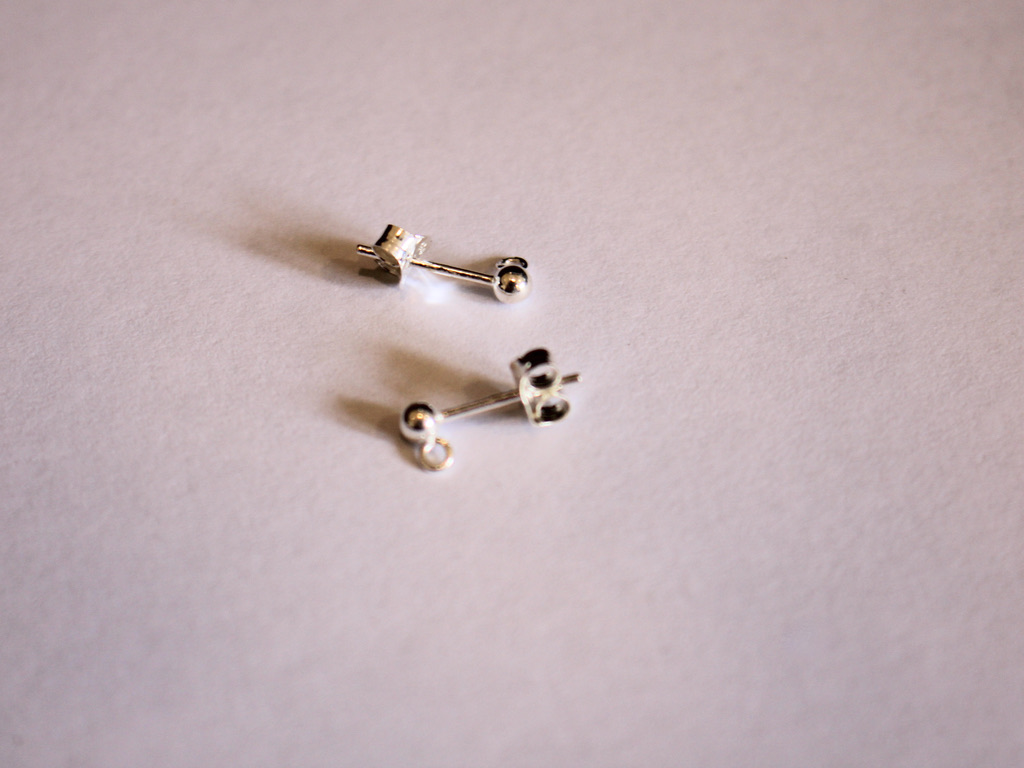
2: Two large jump rings. I used sterling silver.

3: Sixteen smaller jump rings. Mine were made from sterling silver.

4: A pair of drilled gemstone beads. You want beads that are drilled through the top rather than the middle like a typical bead. I used some greenstone disk beads.

5: Pliers. I used my flat nose and parallel pliers to open and close all the jump rings.
Follow these steps to make your gorgeous chain drop earrings:
1: Add one of the large jump rings to each of the beads, use your pliers to open and close them making sure to get the ends close together so that your bead doesn’t fall off.


This picture shows one jump ring in place and the other attached to the bead but not yet closed. 
Both of the beads with closed jump rings in place 2: Start adding some of the smaller jump rings together to form a chain. Do this by sliding a jump ring though a closed one, then closing the next one using your flat nosed pliers. You can see this in the pictures where I join two jump rings together. Create 2 chains that are 8 jump rings long, one for each earring.


The full chain formed with one jump ring left open at the end ready to attach to the bead. 3: Attach the chain to the jump ring attached to the bead, closing it carefully with pliers.


4: Attach the chain to the earring post by opening one of the jump rings at sliding it onto the charm connector, close the jump ring again to secure it.


5: Repeat steps 3 and 4 for the second earring to finish them off.

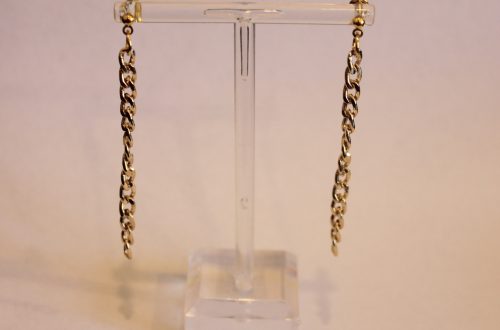
Now you have a gorgeous pair of earrings featuring a handmade chain detail. How special is that? Below are some pictures of the finished product!


-
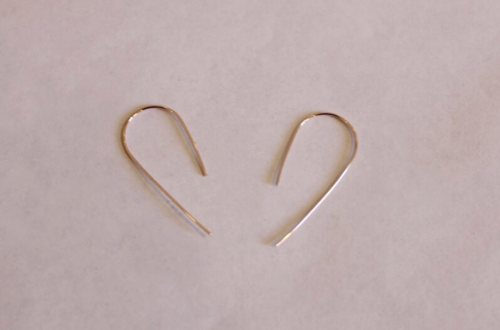
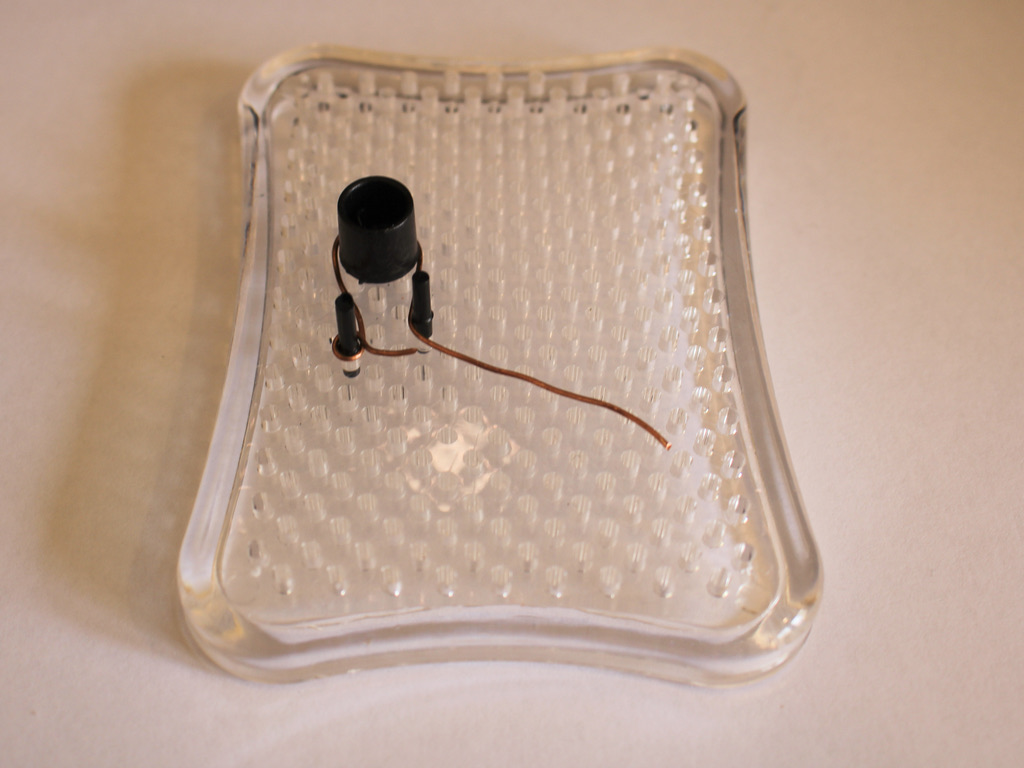
Here’s how to make your own Shepard hook earring findings using a wig-a-ma-jig!
I’ve already shown you how to make your own earring findings, here and here. But I haven’t shown you a way to make more traditional earring hooks from scratch. These simple Shepard hook earrings findings are made using some 0.8mm thick wire and a special contraption designed for wire-work called a ‘Wig-a-ma-jig’! Please note that this tutorial contains affiliate links.
You’ll need the following tools and materials to make your Shepard hook earring findings:
1: Some cutting pliers to cut your wire to length and trim any excess.
2: A pair of flat nose pliers to do some extra shaping to your earring hooks if required.
3: A Wig-a-ma-jig tool with pegs to create the shape for your earring hooks.

4: A needle file for smoothing the ends of your earrings, some sandpaper can be useful for getting a smooth finish as well.

5: Some wire. I used some copper wire in this demonstration but I suggest using sterling silver wire as it is a more suitable material for sensitive piercings. I used two pieces of copper wire about 0.8mm in diameter and about 8-10cm long. You will have some excess at the end that you will need to trim.

Follow these steps to make your earring hooks:
1: Arrange the Wig-a-ma-jig pins in the following formation, this will form the shape of your earring. The first peg is the bottom loop of the earring hook, the large top peg forms the arch of the earring and the last peg helps make the ‘kick’ at the end of the earring where it goes through your piercing.
2: Place the wire between the first two pegs as indicated in the picture below.

3: Take the long end of the wire and shape it around the large peg to form an arch

4: Loop the short end of the wire around the first smaller peg to form a circle shape, there will be some overlap at the end of the wire.
5: Kink the end of the wire underneath the last peg, there will be a lot of excess wire that will be trimmed later. You can see this pictured in the image above.
6: Take the wire shape off of the pegs. Do this carefully so as not to bend it out of the shape you just made.

7: Use the cutting pliers to trim the excess wire from the end of the earring and the loop overlap.


8: File the ends you just trimmed so they are smooth and won’t poke anyone wearing your earrings.

9: Repeat steps 2-8 for the second earring ensuring that the match.

Here’s my second earring on the jig 

Once I had both earrings made, I did some small adjustments on them using my flat nose pliers to make sure they sat flat and were a nice shape, once I was happy with how they looked, these new earring findings were ready to use in a new earring creation! Below is a picture of the finished set of earring hooks.

Making your own jewellery findings is a great way to elevate your jewelry designs and have them feel even more unique and special. What will you attach to your hand made Shepard hook earring findings?
-
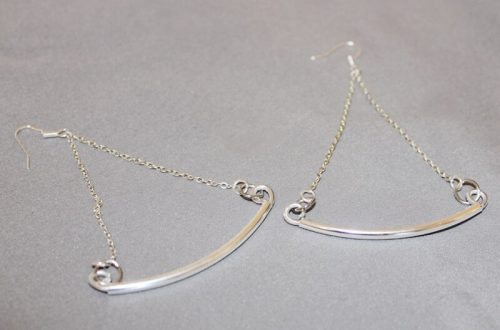
Do you love simple earrings made from fine materials? Here’s how to make a pair of hammer detail threader earrings!
I find it very satisfying to make my own jewellery using precious metals! This tutorial shows you how to turn some sterling silver wire into a gorgeous pair of threader earrings with a hammered detail at the front! This tutorial will outline all the tools you’ll need to make your earrings, as well as all the steps to follow to create your own special pair. Please note that this tutorial contains affiliate links.
You’ll need these tools and materials to make these earrings:
1: Two pieces of silver wire, each about 5cm long.

2: A steel hammering block.

3: A hammer. I used a jewellery hammer, but if you don’t have one, you can make use of a small household hammer.

4: Some cutting pliers to cut the wire to length.
5: Your flat nose pliers to straighten out the wire.
6: A pen or something round to use to shape your earrings.

7: A piece of sticky tape.
8: A file or sandpaper to smooth the ends of the wire. I used both to make sure my earrings weren’t too sharp.

Follow these steps to make your wire threader earrings with a hammer detail:
1: If your wire has any kinks, straighten the pieces out by gently squeezing them with your flat nose pliers. In this instance, it is better to use flat nose pliers that don’t have any texture on them.

2: Check that your pieces of wire are the same length. Trim accordingly to make sure they are equal using your cutting pliers.
3: Hold the wires on the steel block and hammer the ends until you have a texture you like.


Here are the hammered wires, the hammering is quite subtle. 4: Take the hammered wires, holding them together so that they are equal, and tape them to the pen or other round thing you are using to make the earring shape.

5: Gently bend the wires around the pen to form a curved arch shape.

6: Remove the tape and take the earrings off the pen. You can shape the earrings a bit more by squeezing the ends together gently.
7: File the ends of the earrings with the file and sandpaper to make sure that there are no sharp ends.

The earrings before the ends are filed and sanded. 
The earrings after filing and sanding. Now your earrings are complete and ready to wear! So cute! Here are some pics of the final product 🙂


-
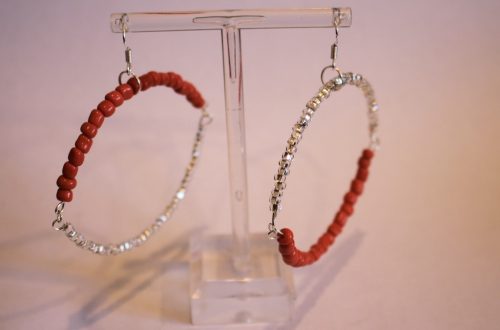
Here’s how to add some cute beads to your handmade hoop earrings!
So I recently showed you how to make your own metal hoop earrings at home, but if those are too plain for you, here’s a quick tutorial that shows you how to add some beads to your home made hoops. Please note that this tutorial contains affiliate links.
You’ll need these tools and materials to make your beaded hoop earrings:
1: A pair of wire hoop earrings, you can follow this tutorial to make your own.

If you don’t feel like making your own, here’s a pair you can purchase: https://amzn.to/35q33gN
2: A pair of flat nose pliers.

3: Some beads. I used these vintage glass beads.

Follow these steps to add beads to your hoop earrings:
1: Take one of the hoops and unhook the ends.

2: You’ll need to slightly straighten the kinked end to allow the beads to pass over. Do this gently using your flat nose pliers.
3: Add the beads.

4: Bend the end of the hoop back to its original position to keep from falling off the hoop and to allow the earring to close again.
5: Repeat steps 1-4 for the second earring.


Now your handmade metal hoop earrings are officially beaded!
-
Want to make your own hoop earrings out of wire? Here’s how you can do it!
It can be so satisfying to make your own jewellery out of metal, but you might wonder how you can do it without all the tools and fire… well I’ve got an answer for you… here’s how you can make some metal hoop earrings out of wire and a few tools, no fire or expensive tools required! Please note that this tutorial contains affiliate links.
You’ll need these tools and materials for your pair of metal hoop earrings:
1: Two pieces of wire, mine were about 12cm long (I used rose gold-filled wire). The longer the wire is, the bigger your hoops will be. It is helpful to note that longer pieces of wire are easier to work with than shorter pieces.

2: A pair of round flat pliers.

3: A pair of round nose pliers.
4: Cutting pliers to cut your wire to length.
5: Flat nose pliers.
6: A ring mandrel or something round that you can use to form the earring shape.

7: A file.
Follow these steps to make your special metal hoop earrings:
1: File both ends of each piece of wire so that it is flat and smooth, this will make it nicer to put through your ear.


Here is an example of what the filed ends will look like. 2: Take one of the wires and bend one end to form a right angle using the flat round pliers. I used the edge of the flat side to measure out how much to bend.

3: Repeat step 2 for the second wire.

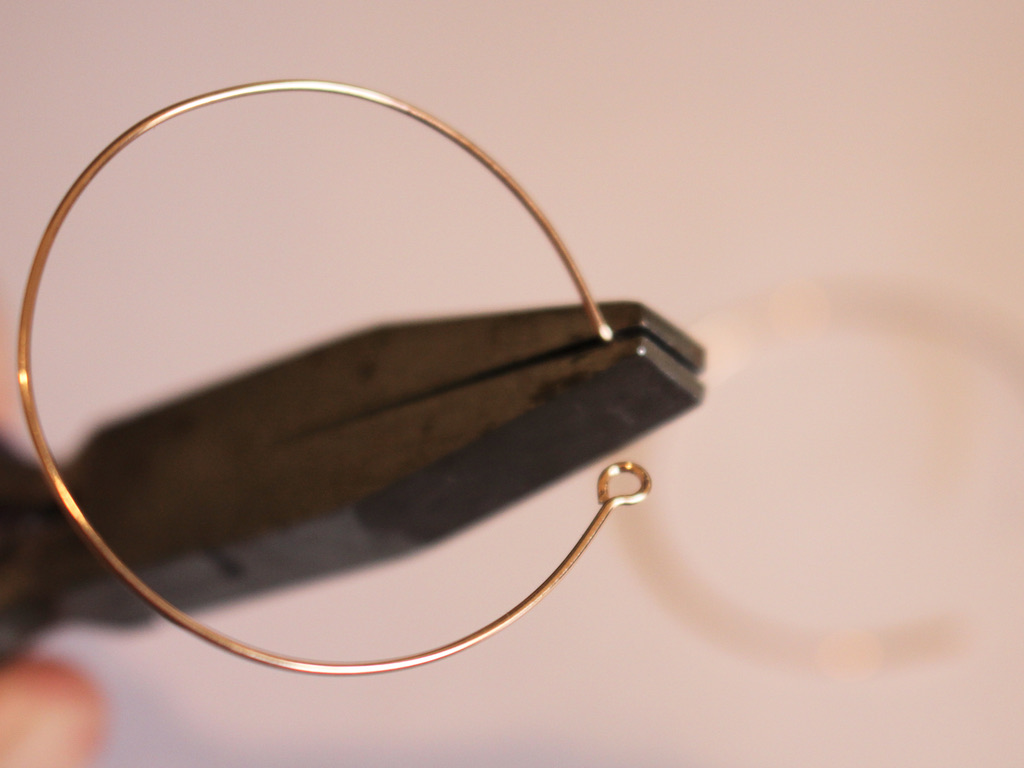
4: Using the round nose pliers, turn the short bent end of each wire into a loop.


5: Take each wire and wrap it around the ring mandrel or round item to form the hoop shape. Press gently around with your fingers or tap lightly with a plastic or leather hammer to get the shape you like. Because my mandrel was a bit small for the length of wire I used, I pulled it gently and let the wire flex back to make a bigger hoop.

Note: pulling the wire tight around the mandrel like this helps give it tension and hold the hoop shape. 
6: Add a small kink to the non-looped end of each earring using flat nose pliers. This will allow the ends to hook into the loops of the hoop.
Now your hoop earrings are finished! How lovely is it that you can make your own precious metal jewellery at home?!

Here are some more tutorials that show you how to make metal wire jewelry without needing a jeweller’s torch: