-
How to make some pearl earring jackets to add some elegance to your stud earrings
I love a stud earring, but sometimes I feel like I need some extra elegance in my outfit… in comes, the earring jacket. This simple and elegant pearl earring jacket can be added to any of your studs to turn them into stunning drop earrings. A versatile way to make your existing earring collection work even harder. Please note that this tutorial contains affiliate links for which we may receive a commission.
You’ll need the following tools and materials to make your own pearl earring jackets.
1: Two pieces of 0.8mm sterling silver wire cut to length. I made mine about 5cm long. You can make yours longer or shorter depending on how dramatic you want your look!

You can get some here:
2: Two pearl beads (or any other statement bead of your choice).

You can get some here:
3: A pair of earrings. I used the earrings I made in this tutorial.

If you aren’t up for making your own, you can get some here:
4: A hammer.

If you don’t have an ordinary hammer at home, you can get a jewelry hammer here:
5: A steel hammering block.

You can get one here:
6: Flat nose or Parallel pliers.

You can get some flat nose pliers here:

You can get some here:
7: Round nose pliers.

You can get some here:
8: A file and sandpaper.

You can get a file here:
Follow these steps to make your pearl earring jackets.
1: File the ends of the wire to smooth them out, then use sandpaper to make sure they aren’t too sharp.

2: Put the wires on the hammering block and hammer the ends flat. Make the ends wide enough to stop the bead from sliding off.


3: Use the flat nose or parallel pliers to gently straighten the wire if it is curved like mine. You can achieve this by gently squeezing the wire between the jaws of the pliers.


4: Add the pearl beads to each of the wires.

5: Create a right angle on the ends of the wires using the flat nose or parallel pliers.


6: Curl this bent portion of the wire into a loop using the round nose pliers.


7: Once each earring jacket has been looped, they are ready to attach to your earrings, do this by sliding the studs through your piercings and then adding the jacket to the post at the back before adding the earring backs.
Here’s how the finished earring jackets look with the pearl studs! How cool?!


If you like this tutorial, here are some other earring jacket tutorials you can follow:
-
Do you love the look of knit accessories? Why not try knitting your own bangle?
I’ve previously written an i-cord knitted bracelet tutorial, and this one is kind of similar, but the special twist here is the addition of a wire to give the knit structure so it wears more like a bangle than a bracelet! This simple tutorial requires some basic knitting skills, but I think the results are worth it. Please note that this tutorial contains affiliate links.
You’ll need the following tools and materials to make your knitted bangle:
1: Yarn. I used two leftover yarns, a sliver sparkly mohair and a pink boucle style yarn.

Hot pink yarn:
Sparkly black yarn:
2: A piece of wire. I used some recycled copper wire.

3: Pliers. I used my cutting pliers, flat nose pliers and round nose pliers.

4: Scissors.

5: A darning needle.

6: Two double pointed knitting needles. I used some 8mm needles to give myself a chunky i-cord. The width of your i-cord will depend on the size of your yarn and your needles. I recommend using a thick yarn and needles for a bold bangle. Alternatively, if you don’t like knitting, you can use an i-cord knitting machine.

Alternatively, you can try an i-cord knitting machine
Follow these steps to make your own amazing knitted bangle:
1: Hold the two yarns together.

2: Create a slip knot and add it to the needle, pull the yarn to tighten it around the needle.


3: Cast on two more stitches. After casting on the three stitches, slide them to the other end of the needle and begin knitting the first stitch. Knit the next two stitches. This will start to form a tube. You can see this process a bit in this video.
4: After finishing the first row, slide the stitches to the other end of the needle and repeat the knit pattern you did in step 3.

5: Once you have your desired length, it is time to cast off. To cast off, knit the first stitch onto the second needle, then knit the second stitch, after you slide it onto the next needle, take the first stitch and pull it over the second one, you will now have one stitch on each needle. Repeat this again until you only have one stitch left on the second needle.
6: Leaving the final stitch on the needle, trim the end of the yarn leaving a tail.

7: Remove the needle and then thread the tail through the loop and pull it tight. Now your cast off is complete.


8: Take the wire and start pushing it into the middle of the i-cord.


9: Create a loop on one end of the wire.


9: Form the wire into a large circle shape, this will be the form of your bangle.

10: Trim the excess wire using your cutting pliers, leaving a little excess on the end to allow for the loop.

11: Put the second end through the loop you made at the first end, then loop them together using your round nose pliers.


12: Push the knitted i-cord tube around to cover the loops you made. and then tie the two ends together using the tails you left.

13: Use the needle to weave the tails in and further cover the wire. Trim any excess yarn.


Now your knit bangle is finished and ready to wear! How cute is this design? I love it. I’m planning to make a whole stack to add some fun colourful accessories to my wardrobe.


Here are some other fibre focused jewelry tutorials you can follow:
-
How to make a pair of triangle statement earrings!
Here’s how to make a cute pair of statement earrings, these are such a fun design that pack a bold punch with their size and colours. Please note that this tutorial contains affiliate links.
You’ll need these tools and materials to make these earrings:
1: Eight pieces of wire all the same length. I used 0.8mm copper wire.

Here’s a pre-made eye pin option if you don’t feel like making them yourself: https://tidd.ly/3WCad6D
2: Four statement beads. I used these polymer clay beads I made. Here’s a polymer clay bead tutorial for you.

3: Some accent beads. I used these timber beads.

4: A pair of earring hooks. If you don’t have any, you can find tutorials that show you how to make your own here, here and here.

5: Some flat nose pliers and round nose pliers. You will also need your cutting pliers if you are not using pre-made eye pins.

Follow these steps to make your amazing triangle statement earrings:
1: Bend the end of each wire to form a right angle using the flat nose pliers.


2: Loop the end of each wire using round nose pliers.

3: Add beads to two of the wires, these will form the bottom of your triangles. I added some statement beads to each of these wires.

4: Bend the ends of the beaded wires to form another right angle.


5: Loop the end of the wire using the round nose pliers. This will secure the beads in place.
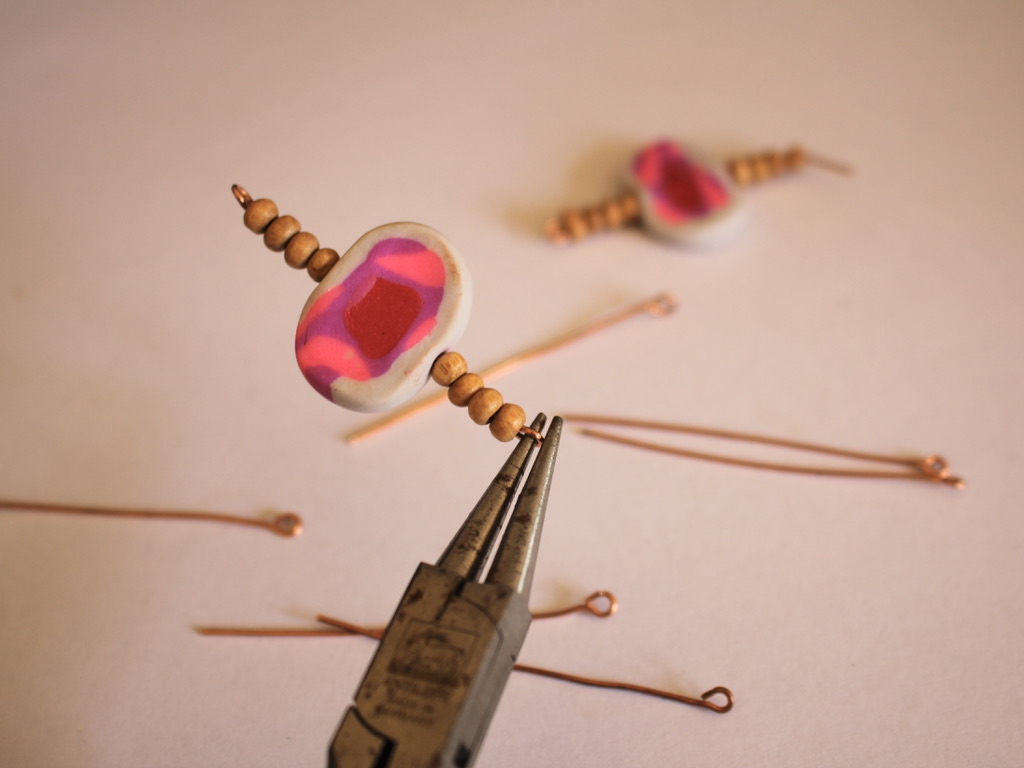

6: Repeat steps 3-5 for two more of the pins, these will be used to attach the triangles to the earring hooks.

7: Add your accent beads to the four remaining wires to create four solid beaded pins, secure the beads in place as you did in steps 4 and 5.

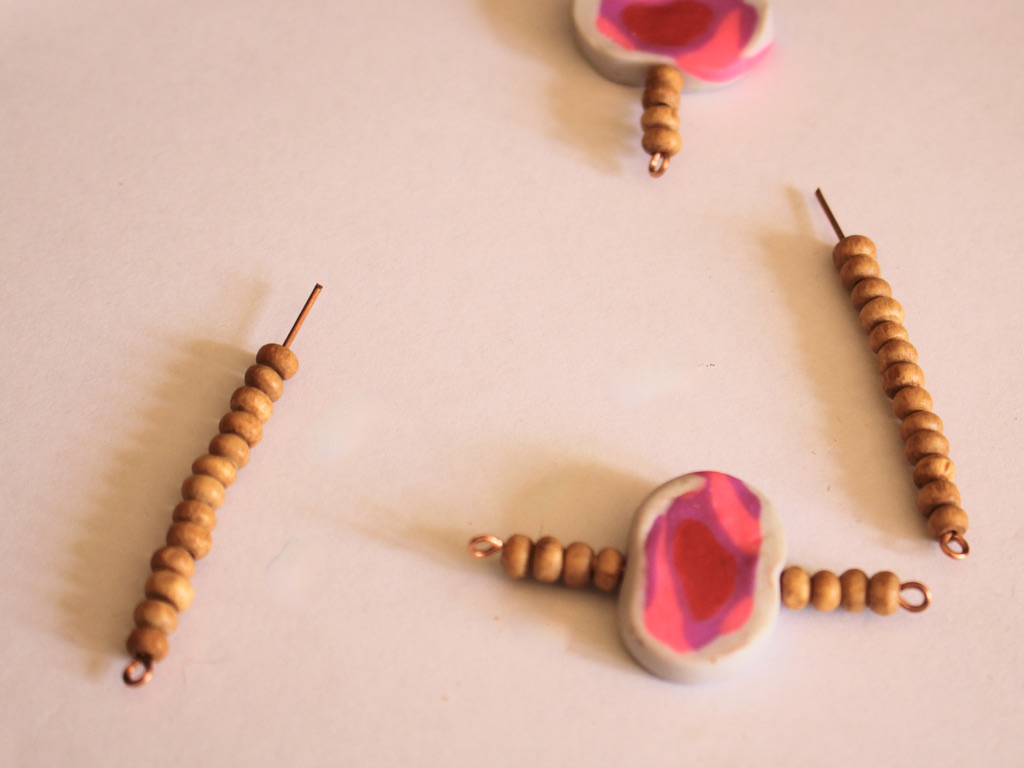


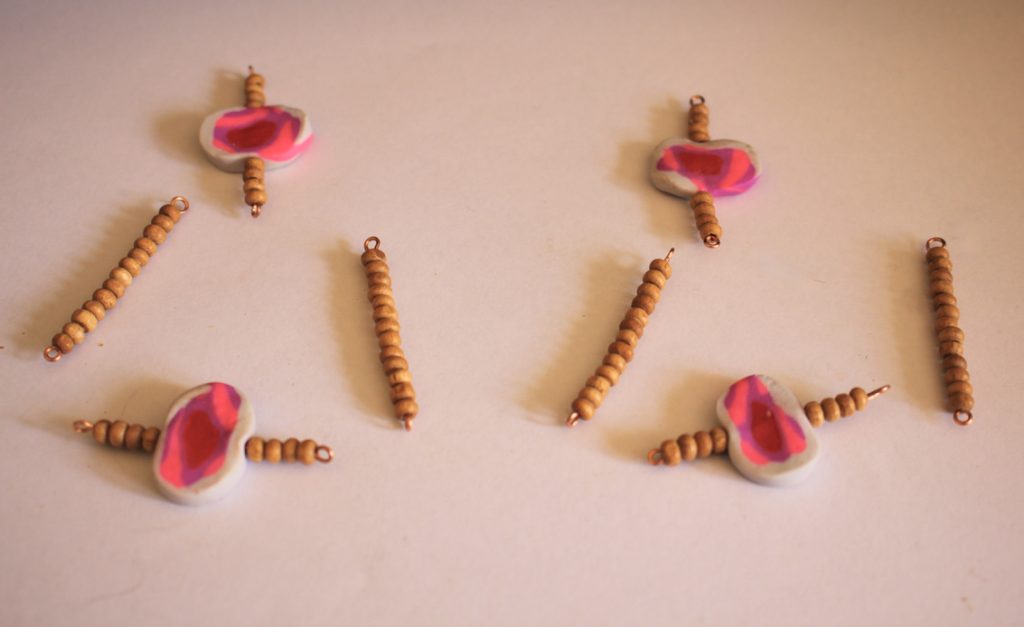
8: Now it is time to start assembling your earrings, Add one of the solid beaded wires to one of the accent beaded wires.
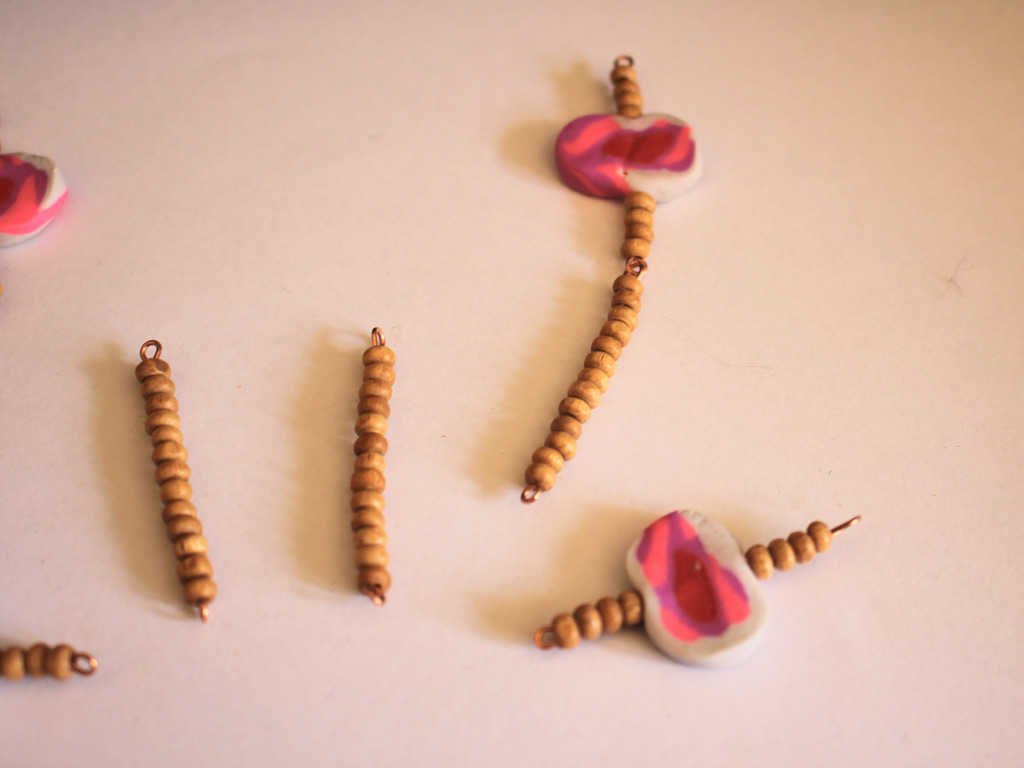
9: Add a second solid beaded wire to the first accent beaded wire, so you have one statement beaded wire with two solid beaded wires attached.
10: Add a second statement beaded wire to the earring, attaching each end to each of the solid beaded wires to form a triangle shape.


11: Repeat steps 8 to 10 for the second earring.

12: Attach each of the earring hooks to the triangle forms. Once both earring hooks are attached your earrings are finished and ready to wear out! How will you style yours?


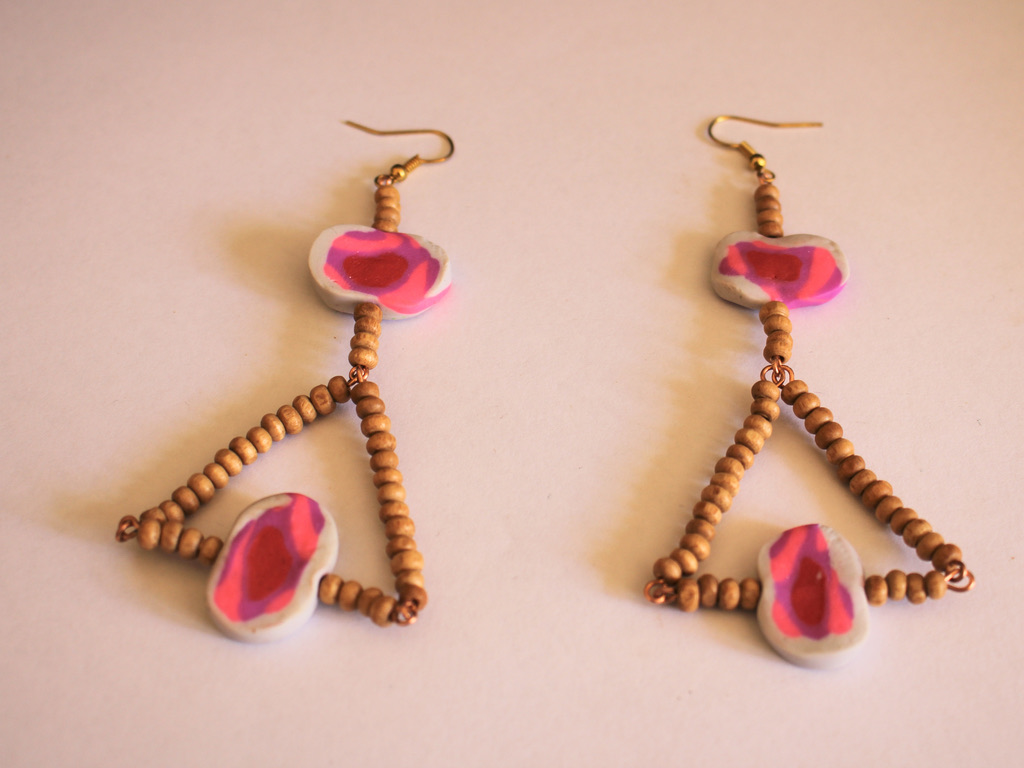
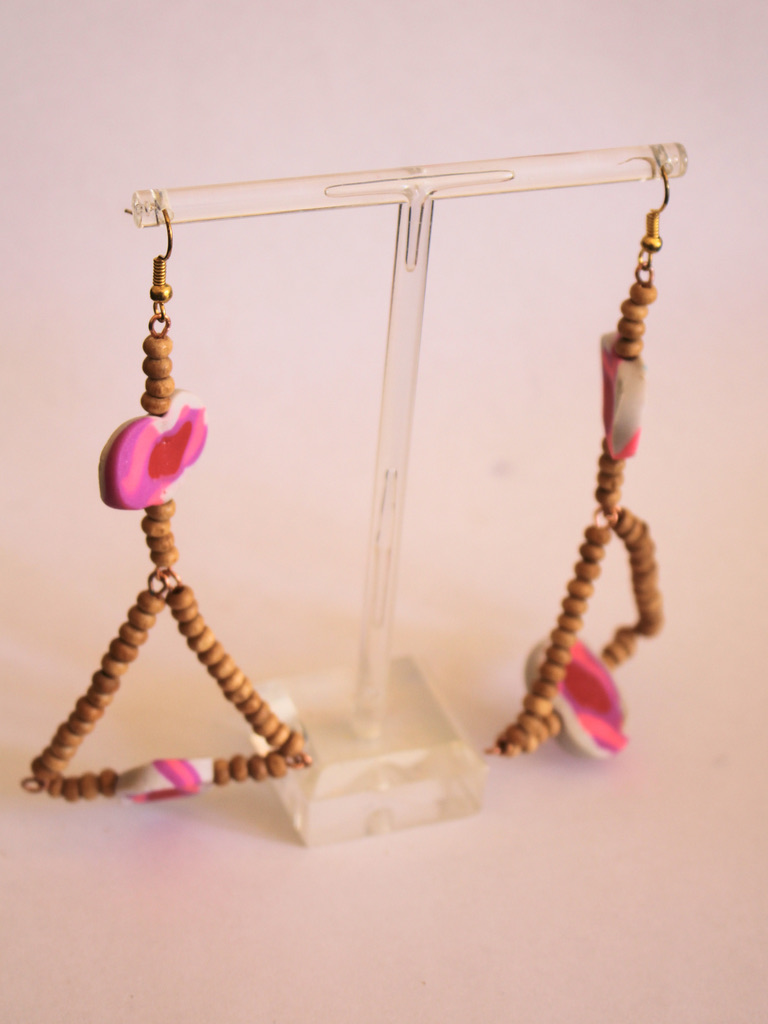
Here are the finished earrings!

-
Here’s a fun one to make! Here’s how to make a beaded wiggle bracelet.
This design is a little tricky to make but it looks amazing! Using some chain, tiger tail wire and beads, you can create an interesting, almost sculptural, bracelet to wear. Please note that this tutorial contains affiliate links.
You’ll need these tools and materials to make this bracelet:
1: Some tiger-tail wire, I used about 1m of wire to make mine. I suggest cutting off slightly more than you need so you don’t run out.

2: A piece of chain that is bracelet length. I used a piece recycled from an old project that I took apart.

3: Two jump rings.

4: Four crimp beads.

5: A clasp.

6: Beads. I used these gold glass beads.

6: Your jewelry pliers. I used my cutting pliers, round nose and flat nose pliers.
Follow these steps to make your own wiggle bracelet:
1: Add two crimp beads and a jump ring to one end of the wire.

2: Loop the end of the wire around the jump ring and back through the crimps.

3: Squash the crimp beads using the flat nose pliers.

4: Attach the wire to the chain using the jump ring.


5: Add some beads to the wire. I added 6 beads.

6: Thread the end of the wire through a link in the chain, I threaded mine through the 7th link of the chain. You want the distance between links to be shorter than the length of each beaded section in order to make an arch shape.


7: Repeat steps 5 and 6, adding another 6 beads and threading it through another link on the opposite side of the chain, 7 links away from the first loop.


8: Keep beading and looping the wire until the chain is early complete, with just one loop to go.

9: Add the second jump ring to the end of the chain.

10: Add the last 6 beads and two crimp beads.

11: Loop the end of the tiger tail wire around the jump ring at the end and back through the crimps and end beads.
12: Squash the crimp beads.

13: Trim the excess wire.


14: Add the clasp to one end of the bracelet to finish it off! Now your fun wiggle bracelet is finished.


Here’s what the wiggle bracelet looks like when it’s being worn!


-
Flowers are so pretty! Here’s how to make a beaded flower choker…
I’ve already shown you how to make a cute daisy chain necklace, but here’s a way to add a bit of edge to your floral bead designs… a daisy chain choker necklace! This tutorial gives you all the steps to follow to make a beaded choker necklace using glass seed beads and tiger tail wire. Please note that this tutorial contains affiliate links.
You’ll need these tools and materials to make your beaded flower choker:
1: Pliers. I used my cutting, round nose and flat nose pliers.
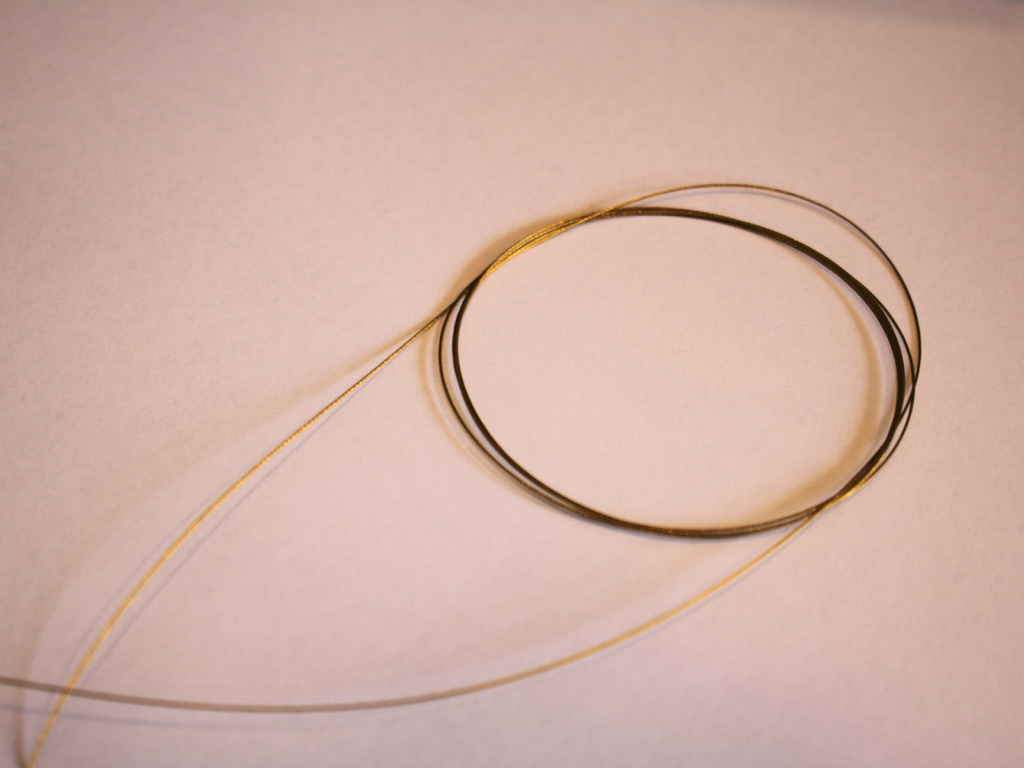
2: Tiger tail wire, because of the looping to create the flowers, you need a bit extra than the intended length. I cut about 1.5m of wire and had some leftover that I will use in another design.
3: A clasp and jump ring.

4: Crimp beads.
5: Beads. I used some recycled red seed beads for the flowers and some green and purple seed beads for the rest of the choker.


Green seed beads:
Purple seed beads:
Follow these steps to make your cute flower choker necklace:
1: Add two crimps to the end of the wire.

2: Add the clasp to the wire and fold it around and back through the crimps.

3: Squash the crimp beads using the flat nose pliers.


4: Add the green beads to the wire. I added 10 beads but you can add more or less depending on the pattern you want to make.

5: Add 6 red beads (or whatever colour you chose for your flowers) to the wire.

6: Take the end of the wire and thread it through the first red bead.

7: Pull the wire tight to create a circle shape with the beads. Make sure you shift the beads down as you tighten the wire so that the circle sits closely to the green beads.

8: Add a single bead to the wire in your third colour, this will be the middle of the bead.
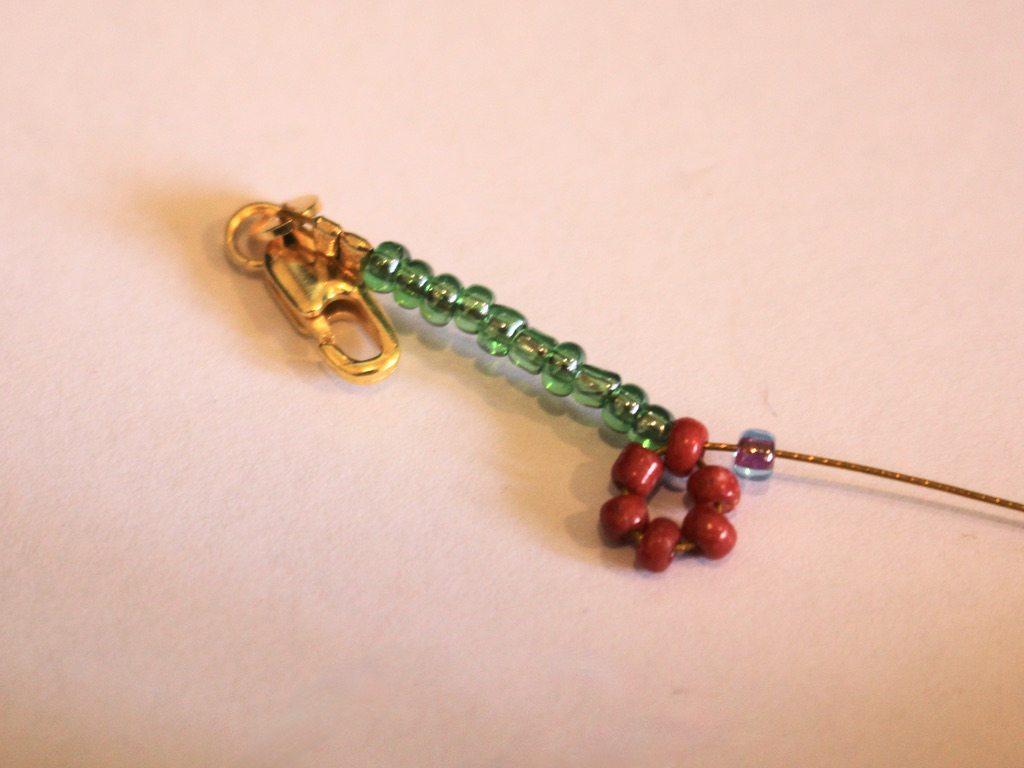
9: Place the bead in the middle of the flower and then thread the end of the wire through one of the flower beads to secure the middle bead in place. Now you have your first flower.

10: Repeat steps 4 to 9 until you have a length that fits closely around your neck to make a choker.


11: Add the second set of crimp beads and a jump ring to the wire.

12: Loop the wire around the jump ring and back through the crimps and the beads at the end of the necklace, pulling the wire tight.

13: Squash the crimps using the flat nose pliers.

14: Trim the excess wire.

Now your floral choker is finished and ready to wear! How cute! What colours will you use in yours?
Here’s what it looks like on!

Here are some other beaded flower tutorials you can try:
-
Here’s how to make a sweet daisy chain necklace using tiger tail wire!
Daisy chains are a classic beaded jewellery technique, and they look amazing! Here’s how to make one using some tiger tail wire and a selection of glass beads. Please note that this tutorial contains affiliate links.
You’ll need these tools and materials to make this daisy chain necklace:
1: A length of tiger tail wire, you’ll need quite a lot as the daisy chain technique uses some extra wire. I cut mine about 4x the length I wanted for my necklace, approximately 1.5m long. I suggest using your best guess rather than taking an exact measurement.

2: Some beads. I used a variety of glass beads including recycled orange e-beads, some gold tone beads and some blue seed beads.

Blue seed beads: https://amzn.to/3S8agp8
3: Four crimp beads.
4: A clasp and jump ring. I used a gold-filled parrot clasp.
5: Pliers. I used cutting pliers, round nose pliers and cutting pliers to finish my necklace.
Follow these steps to make your beaded daisy chain necklace:
1: Add two crimp beads and the clasp to the end of the wire.


2: Fold the wire around the clasp and back through the crimps.

3: Squash the crimp beads to secure the clasp to the end of the wire.


4: Begin adding beads. I made mine a pattern of blue beads and orange flowers so started by adding 15 blue seed beads.

5: Add six beads for your first flower.
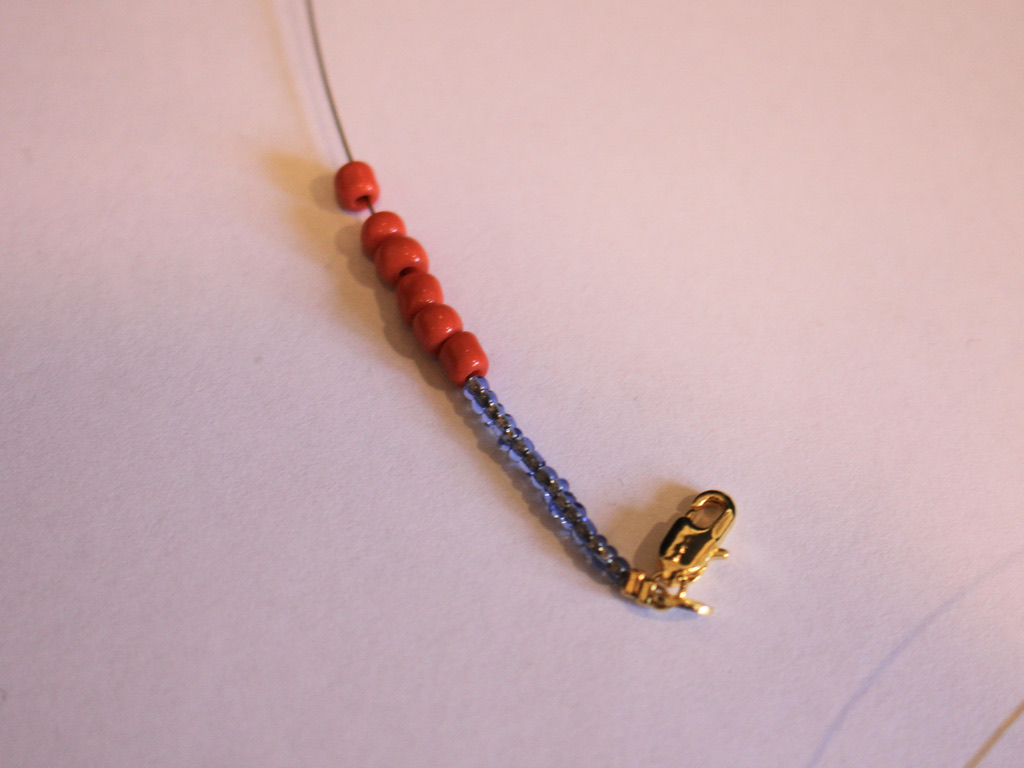
6: Take the end of the wire and thread it through the first flower bead to form a circle shape.


7: Pull the wire tight and add another bead to make the centre of the flower, I used my gold e-bead.

8: Put the bead in the middle of the circle and then thread the end of the wire though a flower bead directly opposite the first one you threaded it through to make the flower. This will keep the middle bead in place at the centre of the flower.


9: Repeat steps 4 to 8 to create a pattern of beads and flowers until you have a length you like and that is comfortable for a necklace.


10: Once you have reached your desired length, add the remaining crimp beads to the wire.


11: Add the jump ring to the end of the wire as well.
12: Loop the wire around the jump ring and back through the crimps and beads at the end, then pull the wire tight.

13: Squash the crimps using the flat nose pliers.

14: Trim the excess wire using your cutting pliers.

Now your necklace is finished and ready to wear! Whats colours will you make yours in?


If you love making flowers out of beads, here are some more floral tutorials for you.
-
Here’s how you can make your own sterling silver earring hooks that are embellished with gorgeous beads!
I love using pre-made earring hooks, but sometimes I want to add some additional luxe to my earring designs, so I make my own one-of-a-kind earring hooks that are embellished with some special beads. Follow along if you want to learn how to make your own, unique earring hooks out of sterling silver wire. Please note that this tutorial contains affiliate links.
You’ll need the following tools and materials to make this pair of earring hooks:
1: Two pieces of sterling silver wire, about 0.8mm in diameter and 7cm long each. (cut the wire with your cutting pliers).

2: A pair of parallel flat nose pliers, or ordinary flat nose pliers. The parallel pliers makes it easier to grip both earrings at once when you are shaping them.
3: A file and some sandpaper.
Find files here:
Find sandpaper here:
4: Two beads. I used some agate gemstone beads.

5: A pair of round flat pliers for forming the loop at the end of the earring hooks. It is also handy to keep your round nose pliers around as well.

Follow these steps to make your own bespoke earring hooks featuring a beaded embellishment:
1: File the ends of the wires so they are no longer sharp, use the sandpaper afterwards to soften the ends.

2: Use the round flat nose pliers or flat nose pliers to bend the end of each piece of wire to form an angle.


3: Create a loop using the bent part of the wire as a guide. You want to make a loop at the end of each piece of wire.


4: Add a bead to each of the wires

5: Grip each wire between the mouth of the parallel flat nose pliers and bend them at the same points, so they sit at equal lengths. Bending the wire will mean that the bead won’t come off (but be warned, seed bead sized beads can still slide around the corners of this design, the bigger the bead, the less likely it is to fall off your earring hook).


6: Once you have bent your earrings, you can adjust them slightly to form the square top to your liking using your fingers and pliers.
Now your earring hooks are done! They’re ready for some cute dangly charms!

Here’s what they look like with some brass triangle charms on them.


And here are some similar designs I have made using this earring hook technique. These ones feature patinated copper charms, you can learn to patina copper here.


This fun pair of earrings features a rainbow of seed beads and an adorable mushroom charm, you can purchase them here.

-
How to make a beaded necklace with a cool knot detail!
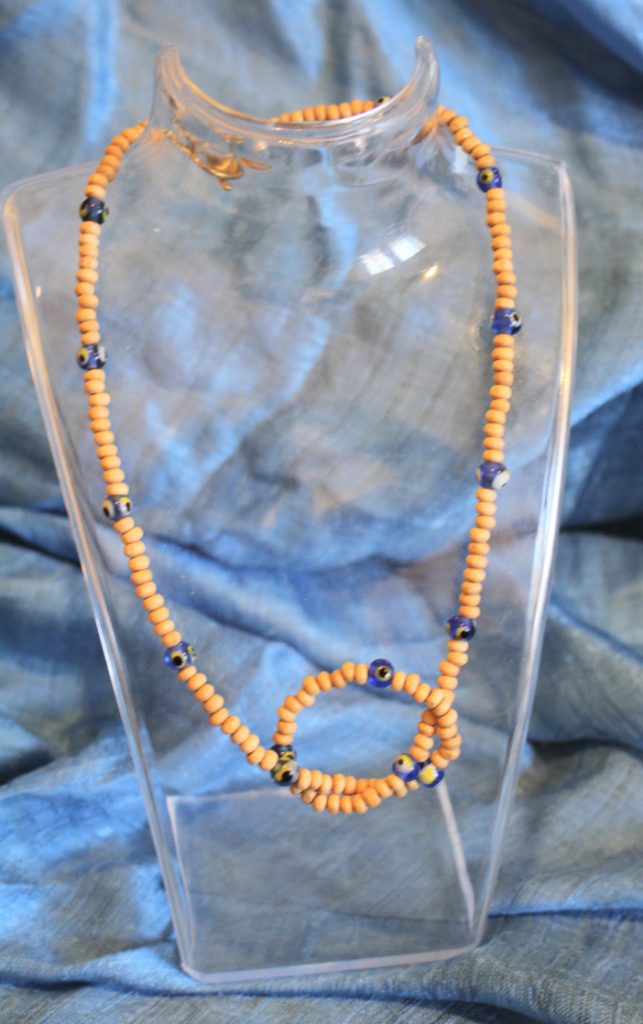
This necklace is simple but super cute! It is a twist on a basic tiger-tail beaded necklace, but instead of a single strand, the necklace has a loose knot in the middle for added interest. This is a simple but high-impact design that you can whip up in an afternoon. Please note that this tutorial contains affiliate links.
You’ll need the following tools and materials to make your necklace:
1: Some tiger tail wire, cut a length long enough to fit loosely around your neck plus an extra 20cm (7.8 inches).

2: Four small crimp beads.

3: A toggle clasp.

4: Two small jump rings.

5: Your set of pliers including cutting pliers, round nose and flat nose pliers.
6: A selection of beads. I used some timber beads and some glass evil eye-style beads.

Evil eye beads here:
Timber beads here:
Follow these steps to make your beaded knot detail necklace.
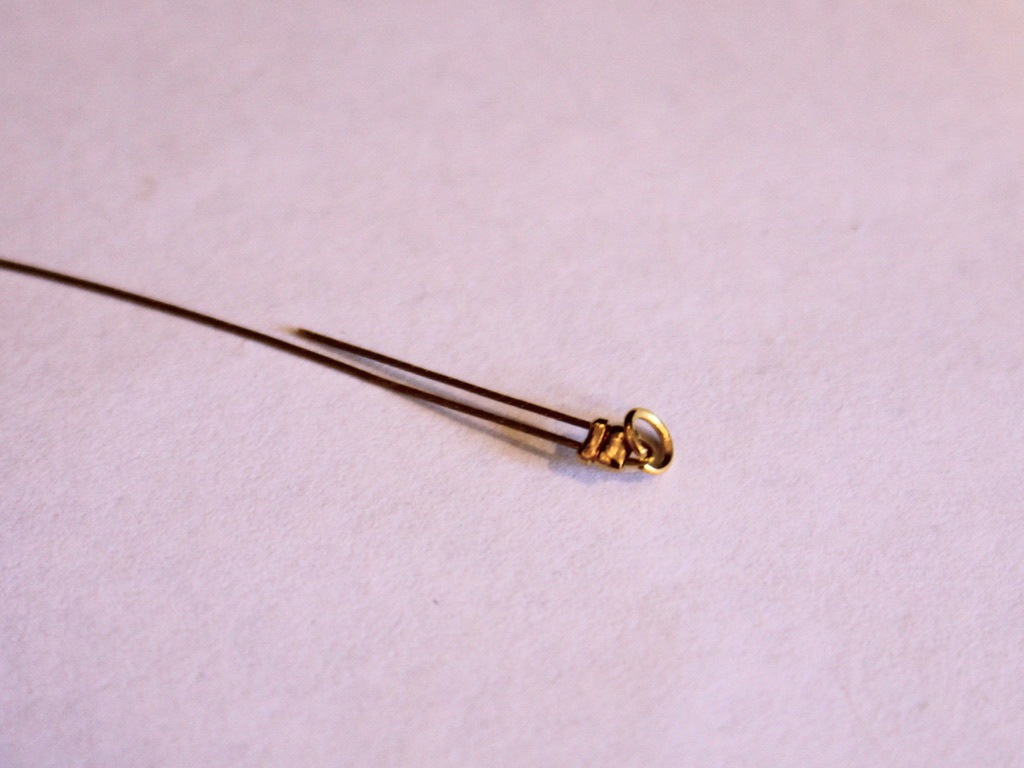
1: Add two crimp beads and a jump ring to the end of the tiger tail wire.

4: Fold the end of the wire around the jump ring and back through the crimp beads.

5: Squash the crimp beads using the flat nose pliers.

6: Add beads to the wire in your choice of pattern. Continue adding until you have a length you like (remember to make it a bit longer than usual because the knot will reduce the length a little).


7: Once you have your necklace fully beaded, add the second set of crimp beads and the remaining jump ring to the end of the wire.


8: Loop the end of the wire around the jump ring and back through the crimps and the first few beads at the end of the necklace.
9: Pull the wire tight.

10: Squash the crimp beads using the flat nose pliers.


11: Trim the excess wire using the cutting pliers.

12: Carefully tie a knot in the beaded strand, paying attention to get it close to the middle and being careful to not pull too tightly, you want the knot to be quite open.

13: Attach the clasp to either end of the necklace using the jump rings. Make sure to close the jump rings closely so that the clasps stay in place.


Now your necklace is finished and ready to wear! What funky beads will you use to make yours?

If you like this tutorial, here’s a link to a double strand version.
-
Here’s how to make some statement beaded earrings. These babies are special!
Do you love statement earrings? These statement earrings feature some gorgeous beads and some clever wire work to make a cute pair of bold earrings to wear on your next outing. Please note that this tutorial contains affiliate links.
You’ll need these tools and materials to make these earrings:
1: Two pieces of tiger tail wire about 20cm long.

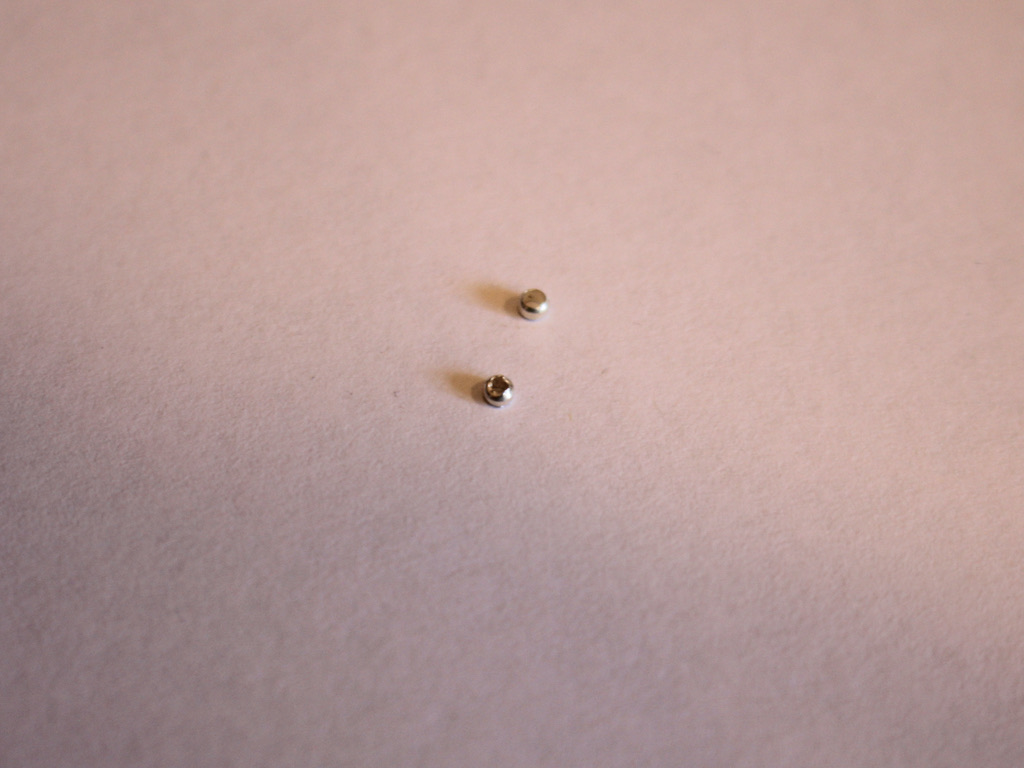
2: Two crimp beads.
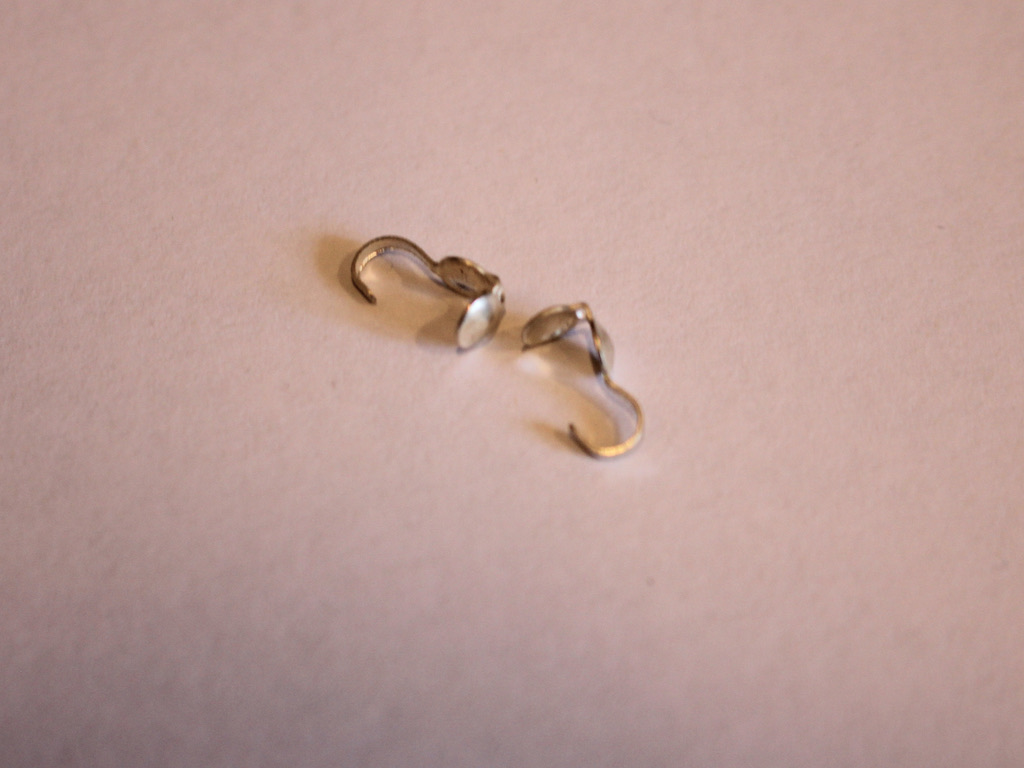
3: Two crimp cover ends.
4: A pair of earring hooks.

5: Pliers. I used my flat nose, cutting and round nose pliers.
6: Beads. I used some resin cube beads, some handmade polymer clay beads (tutorial for these here), and some timber beads.


Follow these steps to make your statement earrings:
1: Add one of the cube beads to the middle of the wire.
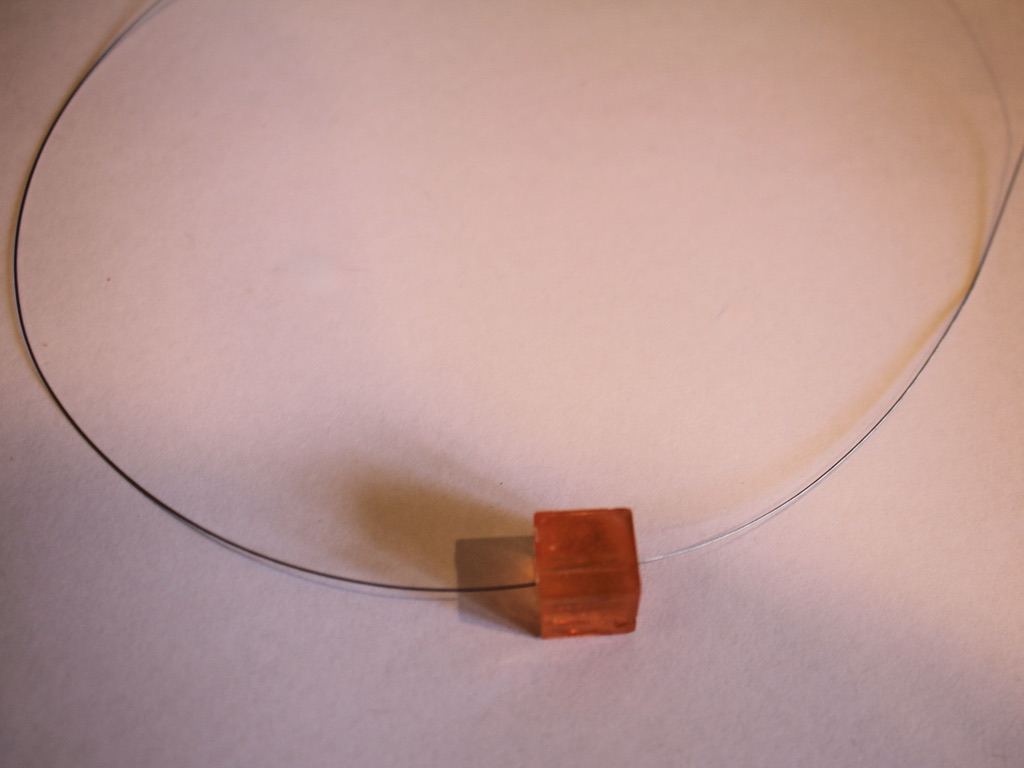
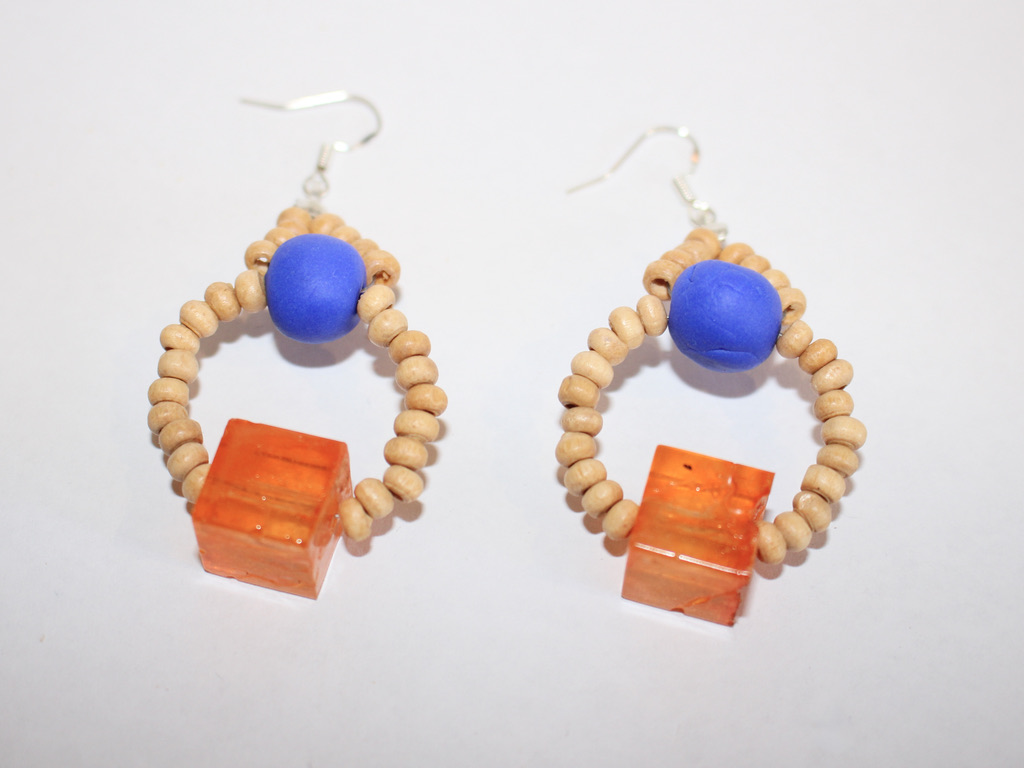
2: Add the smaller timber beads either side of the cube bead, I added 10 to each side, but you can add more or less depending on the size of the beads you are using. You’ll want to get a circle about 2.5cm in diameter.

3: Add one of the polymer clay beads to one side of the wire.
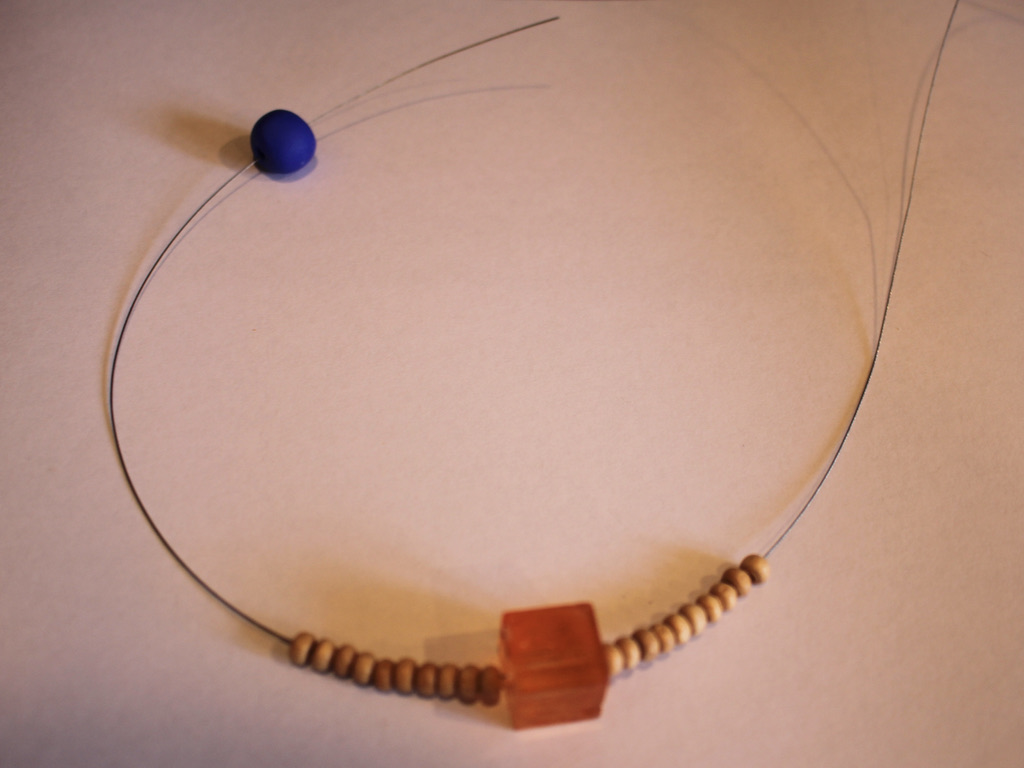
4: Thread the other side of the wire through the polymer clay bead to create a loop.


5: Add another four beads to each end of the wire.

6: Add the crimp cover to the two wires held together.
7: Keeping the crimp cover open, add a crimp bead to the wire.
8: Squash the crimp bead using flat nose pliers.

9: Trim the excess wire.


10: Squash the crimp cover around the crimp bead using the flat nose pliers.

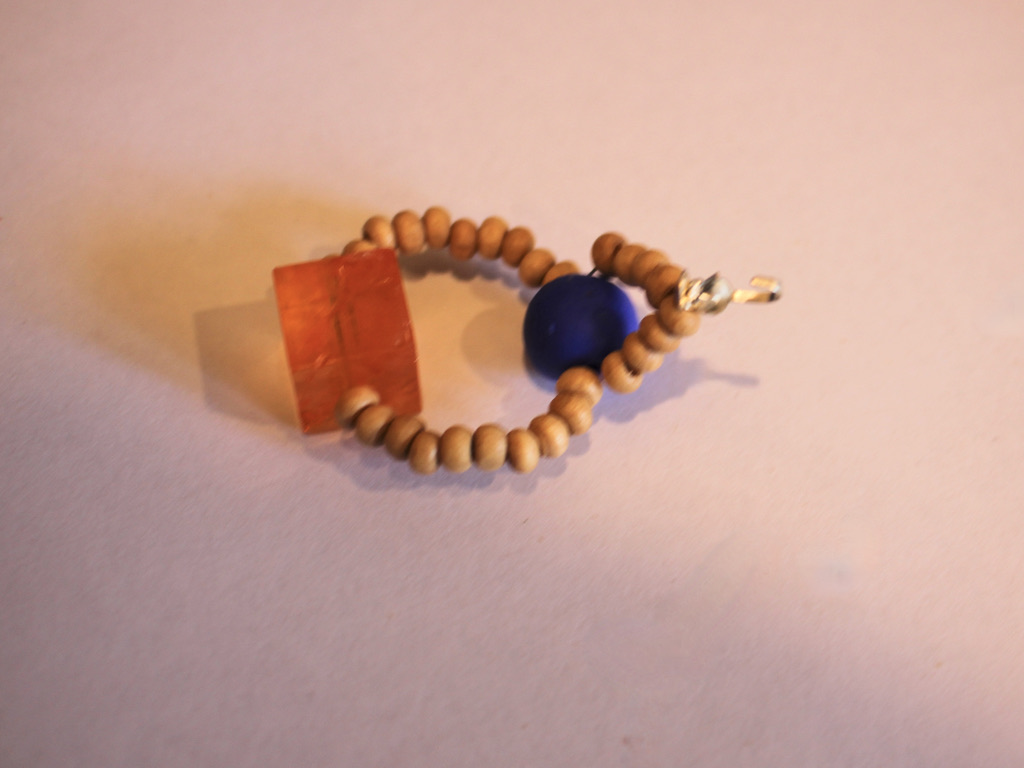
11: Use the wire at the end of the crimp cover to create a loop, thread on an earring hook and close it to secure the earring to the beaded design.
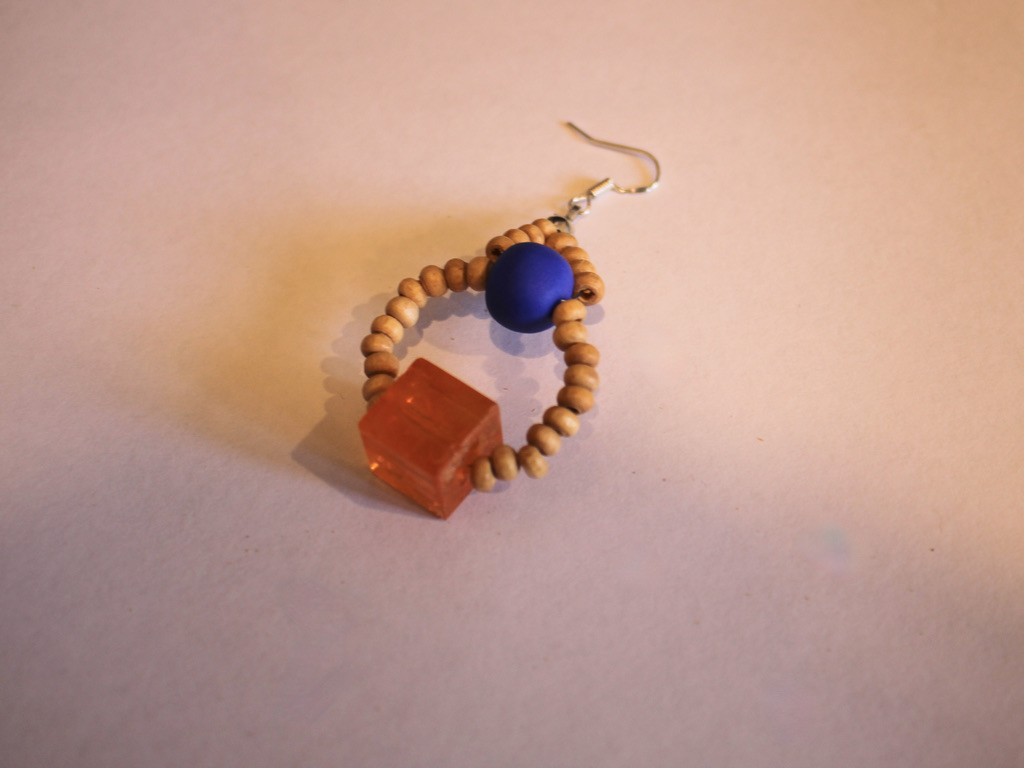
12: Repeat steps 1-11 for the second earring.
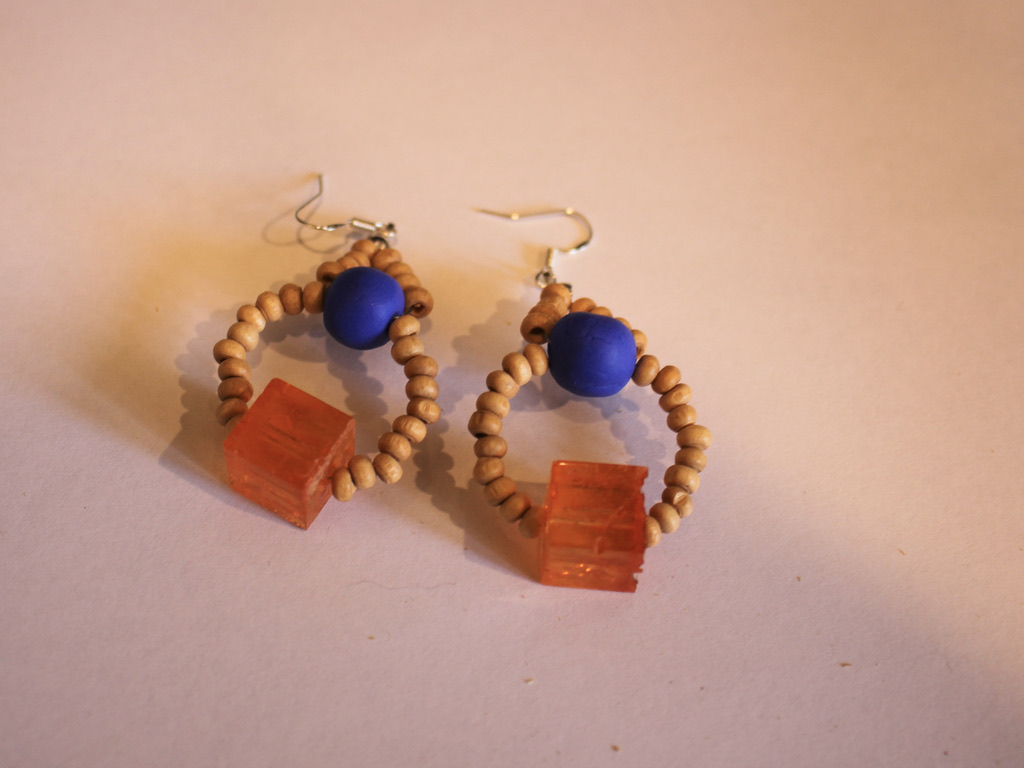
Now your beaded statement earrings are complete and ready to wear!


-
Here’s how to take apart your beaded jewellery so you can reuse the materials.
Do you have a beaded necklace or bracelet that you don’t like anymore? Here’s a video tutorial that shows you how to take that piece apart so that you can re-use the beads, the wire and most of the findings! Knowing how to take apart jewelry you don’t want anymore is a way to both save money and be a bit more eco friendly! Please note that this tutorial contains affiliate links.
You’ll need the following tools and materials to take apart your jewels:
1: A piece of jewellery you don’t want anymore. I took apart a beaded anklet.

2: A pair of cutting pliers.
3: A bowl to put your beads in so they don’t fly everywhere.
4: A pair of flat nose or round nose pliers for opening jump rings.
Watch this video to see all the steps:
Will you take apart your old creations, or maybe some vintage jewels you found at a market or online?