-
Got some beaded bracelets that aren’t doing it for you? Why not turn them into a necklace?
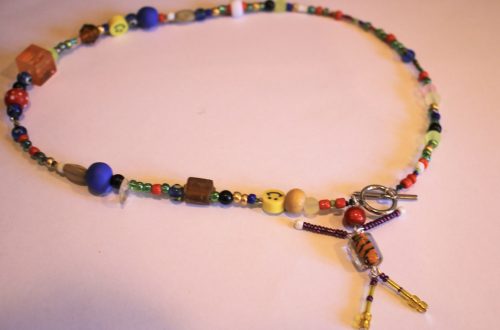
I bought these lovely ceramic beaded bracelets from a market in Japan recently. Unfortunately, I’m not a massive fan of stretch bracelets, so I decided to take them apart and turn them into a single, playful choker necklace. This is a super easy DIY and can be a great way to repurpose jewelry that isn’t quite working for you anymore.
Please note that this tutorial contains affiliate links for which we may receive a commission.
You’ll need the following tools and materials to make your necklace.
1: Two or more bracelets that you don’t want to wear anymore.

You can get something similar here:
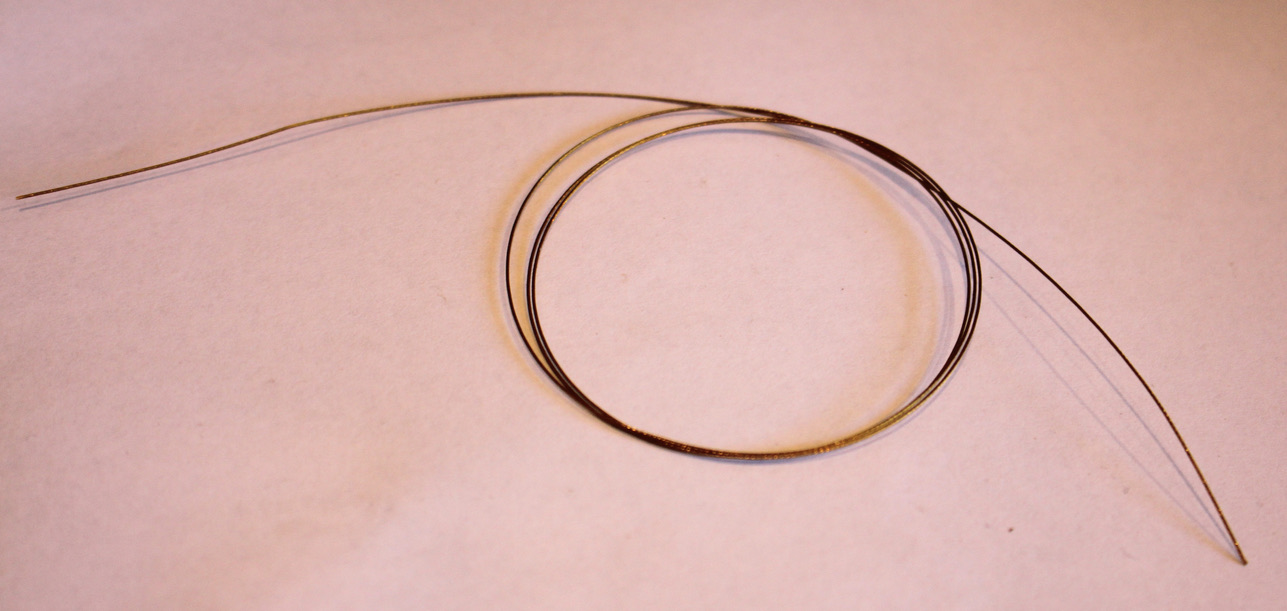
2: Some tiger tail wire.

You can get some here:
3: Four crimp beads.

You can get crimp beads here:
4: A clasp.

You can get a sterling silver bolt ring clasp here:
5: Two jump rings

You can get sterling silver jump rings here:
6: Cutting pliers to cut your bracelets and the wire.

You can get a pair here:
7: Flat nose pliers or parallel pliers. I used my parallel pliers but it doesn’t really matter for this project.

You can get flat-nose pliers here:

You can get parallel pliers here:
Follow these steps to transform your bracelets into a necklace.
1: Cut one of the bracelets open to release the beads. You might want to leave them on the thread so you can maintain their original order, or you can pull them all off and work from a small tray if you want to create a new bead design.

2: Cut the tiger tail wire to your desired length, adding some extra centimetres/inches so that you have enough wire to secure the ends.

3: Add two crimp beads to the end of the wire.

4: Add a jump ring to the end of the wire.

5: Wrap the end of the wire through the jump ring and back into the crimp beads.

6: Squash the crimp beads using flat nose pliers to secure the jump ring.

7: Begin adding beads until you have finished the first bracelet.

8: Cut the second bracelet and add the rest of the beads. Repeat this if you have additional bracelets you want to use.

9: Once your necklace is fully beaded, add another two crimp beads and the second jump ring.


10: Wrap the end of the wire around the end of the jump ring and back through the crimps and the first bead.

11: Squash the crimps using flat nose pliers.

12: Trim the excess wire using cutting pliers.

13: Add the clasp, securing it closed with flat nose pliers.


14: Now your necklace is finished and ready to wear! What a fun way to repurpose jewelry that isn’t serving you anymore?!

-
Tips to elevate your handmade pieces!
I love jewelry, I love looking at it, I love making it, and I love wearing it. But there are some parts of jewelry that I don’t love. I can’t stand it when a piece is uncomfortable and scratchy to wear, and I also can’t stand poorly constructed jewelry that looks like it will fall apart after two wears, so I thought it would be fun to share with you some things to look out for so that you always make strong, comfortable jewels that you will enjoy for years to come.
Here are my tips for making long-lasting, professional looking and comfortable jewelry:
1: Make sure you tuck away the ends of the tiger-tail wire. I usually achieve this by running the wire through a few of the beads at each end of my beaded designs so that it doesn’t poke out. You can also use a crimp cover which covers any sharp ends of the wire. You can see some examples below.

Look at the ends of this beaded strand, the ends of the wire are hidden under the beads. Follow the tutorial for this necklace here. 
The crimp cover on this earring charm protects you from being scratched by the wire. Tutorial for these earrings here. 2: Avoid using elastic in your designs. Elastic might be easy to put on and take off (and in some cases, is the only appropriate option in terms of accessibility). Unfortunately, this accessibility comes with a trade off, elastic tends to wear out quickly, and you can find your beautiful bracelet scattered all over the floor at the most inopportune moment. I suggest making your beaded jewels with nylon beading thread or tiger-tail wire for a longer life span. I’ve got a post about the pros and cons of different beading materials here.

Here’s a bracelet I found a while ago that was made from elastic. Unfortunately it had broken and been lost to its original owner! 
I’m yet to experience any of my tiger-tail beaded pieces breaking on me, I suggest choosing it if you are looking for durability in your designs. Full tutorial here. 3: Pull your wire tight at each end of your beaded pieces. I’ve noticed with the trend towards beaded jewelry in recent years, beaded tiger-tail necklaces are being sold with large loops at each end. This loose loop can catch on things and lead to breakages. I also personally think it looks sloppy and makes your work seem less polished.

I think this anklet with tightly finished ends looks a lot neater than a loosely looped wire. You can follow the steps to make your own anklet here. 
Don’t leave big loops like this on your jewelry pieces, they can catch on things and don’t look as polished. 4: Try to use precious metals! I spent a long time making jewelry using findings made from base metals. While these materials are cheaper and great for when you’re starting out, I think investing in fine metals such as sterling silver, is a great way to elevate your designs and make them seem more polished and professional.

A sterling silver clasp elevates this beaded bracelet. You can see the tutorial for this bracelet here. 
Sterling silver wire goes a long way! Some silver wire can be transformed into many sleek, minimalist jewellery designs with minimal effort. Tutorial to make these here. Here are some sterling silver materials you can buy and use in your designs:
5: I don’t always follow my own advice, but when you are making beaded pieces with pearls, it can pay to spend some extra time knotting your beading thread between each pearl. This technique not only protects the pearls, it also stops you from losing them all in the case of a breakage! I have’t made a pearl knotting tutorial yet, but I think there will be one on the way soon so keep an eye out.

This pearl bracelet features individually knotted pearls. So there you have it, a few tips and tricks to elevate your jewelry making to that next level! Please note that this post contains affiliate links.
-
Here’s how to make a sweet daisy chain necklace using tiger tail wire!
Daisy chains are a classic beaded jewellery technique, and they look amazing! Here’s how to make one using some tiger tail wire and a selection of glass beads. Please note that this tutorial contains affiliate links.
You’ll need these tools and materials to make this daisy chain necklace:
1: A length of tiger tail wire, you’ll need quite a lot as the daisy chain technique uses some extra wire. I cut mine about 4x the length I wanted for my necklace, approximately 1.5m long. I suggest using your best guess rather than taking an exact measurement.

2: Some beads. I used a variety of glass beads including recycled orange e-beads, some gold tone beads and some blue seed beads.

Blue seed beads: https://amzn.to/3S8agp8
3: Four crimp beads.

4: A clasp and jump ring. I used a gold-filled parrot clasp.

5: Pliers. I used cutting pliers, round nose pliers and cutting pliers to finish my necklace.

Follow these steps to make your beaded daisy chain necklace:
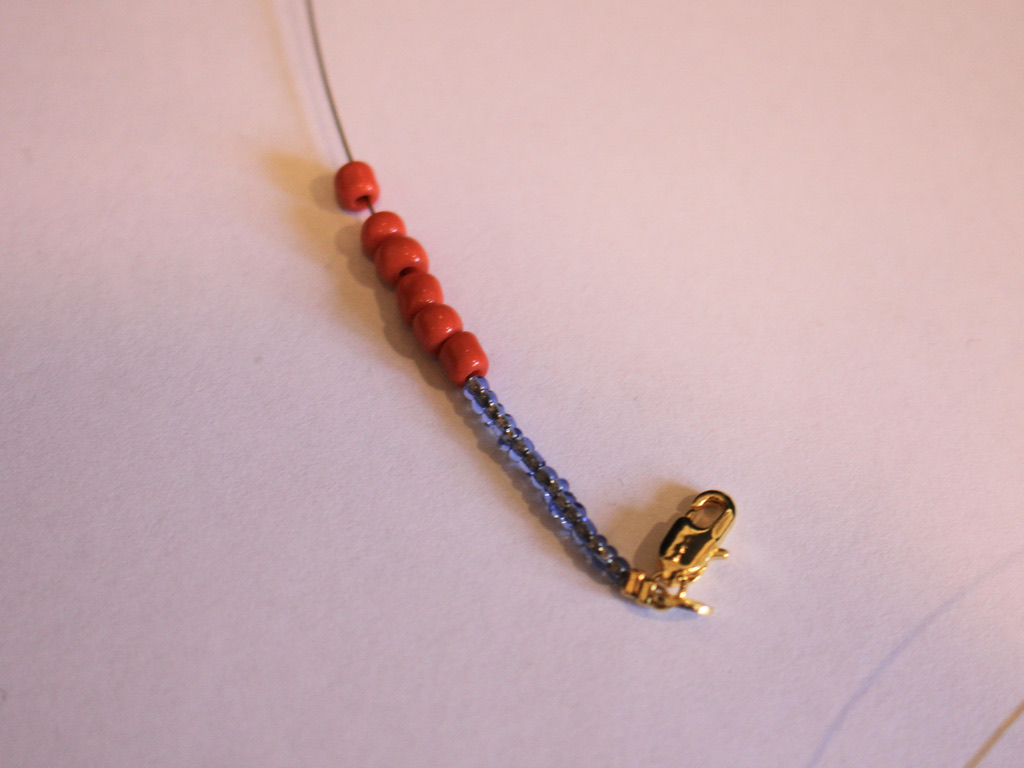
1: Add two crimp beads and the clasp to the end of the wire.


2: Fold the wire around the clasp and back through the crimps.

3: Squash the crimp beads to secure the clasp to the end of the wire.


4: Begin adding beads. I made mine a pattern of blue beads and orange flowers so started by adding 15 blue seed beads.

5: Add six beads for your first flower.
6: Take the end of the wire and thread it through the first flower bead to form a circle shape.


7: Pull the wire tight and add another bead to make the centre of the flower, I used my gold e-bead.

8: Put the bead in the middle of the circle and then thread the end of the wire though a flower bead directly opposite the first one you threaded it through to make the flower. This will keep the middle bead in place at the centre of the flower.


9: Repeat steps 4 to 8 to create a pattern of beads and flowers until you have a length you like and that is comfortable for a necklace.


10: Once you have reached your desired length, add the remaining crimp beads to the wire.


11: Add the jump ring to the end of the wire as well.
12: Loop the wire around the jump ring and back through the crimps and beads at the end, then pull the wire tight.

13: Squash the crimps using the flat nose pliers.

14: Trim the excess wire using your cutting pliers.

Now your necklace is finished and ready to wear! Whats colours will you make yours in?


If you love making flowers out of beads, here are some more floral tutorials for you.
-
How to make a beaded necklace with a cool knot detail!
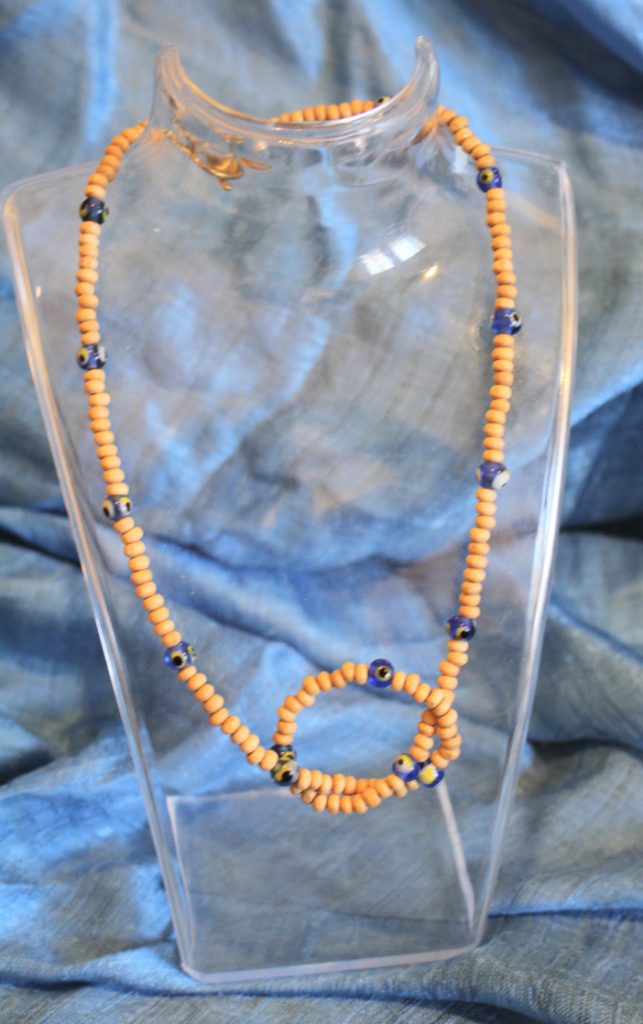
This necklace is simple but super cute! It is a twist on a basic tiger-tail beaded necklace, but instead of a single strand, the necklace has a loose knot in the middle for added interest. This is a simple but high-impact design that you can whip up in an afternoon. Please note that this tutorial contains affiliate links.
You’ll need the following tools and materials to make your necklace:
1: Some tiger tail wire, cut a length long enough to fit loosely around your neck plus an extra 20cm (7.8 inches).

2: Four small crimp beads.

3: A toggle clasp.

4: Two small jump rings.

5: Your set of pliers including cutting pliers, round nose and flat nose pliers.
6: A selection of beads. I used some timber beads and some glass evil eye-style beads.

Evil eye beads here:
Timber beads here:
Follow these steps to make your beaded knot detail necklace.
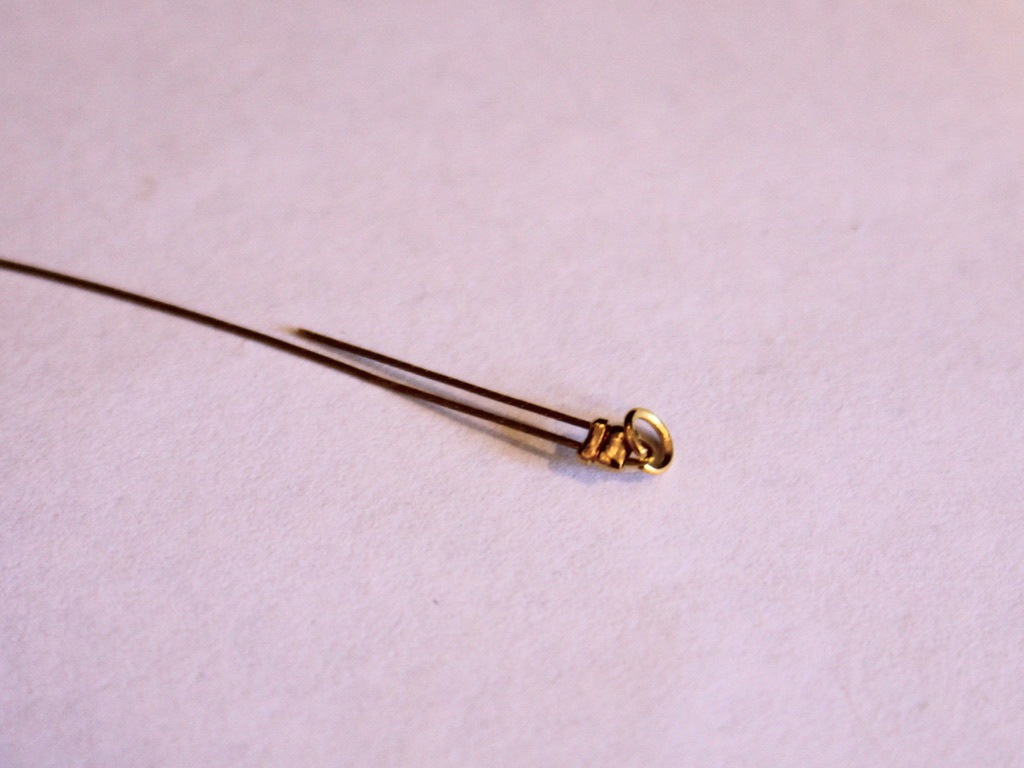
1: Add two crimp beads and a jump ring to the end of the tiger tail wire.

4: Fold the end of the wire around the jump ring and back through the crimp beads.

5: Squash the crimp beads using the flat nose pliers.

6: Add beads to the wire in your choice of pattern. Continue adding until you have a length you like (remember to make it a bit longer than usual because the knot will reduce the length a little).


7: Once you have your necklace fully beaded, add the second set of crimp beads and the remaining jump ring to the end of the wire.


8: Loop the end of the wire around the jump ring and back through the crimps and the first few beads at the end of the necklace.
9: Pull the wire tight.

10: Squash the crimp beads using the flat nose pliers.


11: Trim the excess wire using the cutting pliers.
12: Carefully tie a knot in the beaded strand, paying attention to get it close to the middle and being careful to not pull too tightly, you want the knot to be quite open.

13: Attach the clasp to either end of the necklace using the jump rings. Make sure to close the jump rings closely so that the clasps stay in place.


Now your necklace is finished and ready to wear! What funky beads will you use to make yours?

If you like this tutorial, here’s a link to a double strand version.
-
How to make a smiley good vibes necklace!
This necklace has been designed to give you some good vibes, it features a yellow polymer clay smiley bead and a black tourmaline for good feelings! Black tourmaline is believed to be a gemstone that protects people against negative energies. So by that logic, this necklace will save you from negative vibes and send a smile to people around you! Please note that this tutorial contains affiliate links.
You’ll need these tools and materials to make your good vibes necklace:
1: A chain necklace thin enough to fit the bead.

2: Pliers to remove and replace the end of the chain.


3: A smiley face polymer clay bead.

4: A black tourmaline bead.

5: A large jump ring.

Here’s how to put your necklace for positivity together:
1: Remove the jump ring or tag at the end of the necklace using your pliers.

2: Slide the bead onto the chain.

3: Add the tourmaline bead onto the jump ring.

4: Close the jump ring using your pliers.

5: Add the tourmaline charm to the necklace.

6: Replace the jump ring or tag to the end of the chain to finish the necklace off.


Now your super cute smiley good vibes necklace is finished and ready to wear!


-
How to make a beaded necklace with cute little bead charms!
This is a cute little piece that looks great layered with chains! Use some fun gemstone beads to add some pizazz to your design. Please note that this tutorial contains affiliate links.
You’ll need these tools and materials to make this necklace:
1: Some tiger tail wire long enough to fit around your neck, plus some extra.

2: A set of pliers. I used my cutting pliers (left), flat nose pliers (right) and round nose pliers (middle).
3: Some glass beads. I used these green glass e-beads.

4: Some statement beads. I used 5 stone beads.

5: Four crimp beads.

6: Two jump rings.

7: Five head pins.

8: A lobster clasp.

Follow these steps to make your beaded charm necklace:
1: Add each of the statement beads to each of the head pins.

2: Curl the tops of each pin using the round nose pliers. This will keep the bead in place.


3: Set the charms aside.
4: Put two of the crimp beads onto the tiger tail wire.

5: Add one of the jump rings.
6: Loop the wire around the jump ring and back through the crimp beads. Pull the wire tight.

7: Squash the crimp beads using the flat nose pliers.


8: Begin adding beads to the wire.

9: Bead until you get to a length you like, before the middle of the wire.

10: Add the first bead charm from the set you made earlier.

11: Add some more glass beads and then add another bead charm.

12: Continue adding charms in your chosen pattern until they are all in place.


13: And now you can add the glass beads until your necklace is at the right length and is beaded evenly so that the bead charms are at the bottom.


14: Add the second pair of crimp beads and the jump ring.

15: Loop the wire around the jump ring and back through the crimps and the last few beads on the strand.

16: You should now pull the wire tight and squash the crimps with the flat nose pliers.


17: Now you can trim the excess wire with cutting pliers.

18: Open one of the jump rings and attach the lobster clasp. Close the ring to secure the clasp in place.


So now your necklace is finished and ready to wear! So so cute. What necklaces will you layer yours with?


Or maybe you’ll wear it as a statement on its own?!


-
Here’s a letter bead necklace so you can tell everyone how you feel.
This letter bead necklace is a simple design with a big personality. Use letter beads to show something about your mood or personality around your neck. Layer this design with some other pieces to really show off your style. I love this simple necklace DIY! Please note that this tutorial contains affiliate links.
Here are the tools and materials you’ll need to make your letter bead necklace:
1: Pliers. I used my cutting pliers (to cut my chain to length), round nose pliers and flat nose pliers.
2: A piece of chain long enough to fit around your neck. You can make it longer or shorter depending on how long you like your necklaces.

3: Two small jump rings.

4: A lobster clasp.

5: Letter beads. I used two to spell out ‘OK’.

Follow these steps to make your letter bead necklace:
1: Add your beads to the chain to form your chosen word.


2: Add one of the jump rings to one end of the chain by threading it through the last chain link. This can be tricky when your chain links are small like on this chain. I suggest using your smallest size jump ring.

3: Close the jump ring to secure it in place.

4: Add another jump ring to the other side of the chain.

5: Add a lobster clasp to the open jump ring and close it to finish the necklace off.


Now your minimalist but very cool letter bead necklace is ready to wear. Will you wear yours on its own for a big statement, or layer it with other pieces for a more curated look?


-
Here’s how to make an adorable lariat with mini heart beads.
This necklace is so so cute! It features a lariat design with three cute yellow glass hearts that dangle at the end. This lariat is so fun and great to layer with other delicate pieces. Please note that this tutorial contains affiliate links.
You’ll need the following tools and materials to make this triple heart lariat:
1: Pliers. I used my flat nose pliers and round nose pliers for this design.
2: Three pieces of chain, two that add up to be long enough to fit around your neck and one small piece around 6cm long. I used this silver rolo chain.


3: Three small jump rings.

4: A lobster clasp.

5: Three small glass heart beads. I used these yellow floral glass beads.

6: Two eye pins.

7: One head pin.

Follow these steps to make your love heart lariat:
1: Add one of the jump rings to one side of one of the long pieces of chain.

2: Add the lobster clasp to this jump ring.

3: Close the jump ring to secure the clasp in place.

4: Add another jump ring to the second long piece of chain. Close it to secure it onto the chain.

5: Clip the two pieces of chain together.

6: Join the other ends of the necklace using the last jump ring and slide on the smaller chain before closing the jump rings.


7: Set the lariat aside.
8: Add a bead to each of the eye pins and the head pin.

9: Bend each pin to form a right angle and then curl the top into a loop using the round nose pliers.


10: Attach the three charms together to form a chain.


11: Attach the three hearts to the bottom of the lariat chain, close the top loop to secure the beads in place.

Now your triple love heart lariat is finished and ready to wear! So cute and fun!


Here are some other lariat necklace tutorials you can follow, we’ve got a few designs you can make:
- A bead chain lariat.
- A chain lariat that uses a double hole bead as a feature.
- A bead strand necklace with a chain lariat feature.
- A chunky curb chain lariat.
- A lariat with a beaded circle detail.
- A beaded triangle detail lariat.
- A clip on charm that turns any necklace into a lariat.
- A cute pearl lariat.
- A leather wrap lariat.
- A chunky chain belt that can also double as a lariat necklace.
-
Need a new necklace? Look no further than this tutorial!
Here’s a new necklace you can make and customise to your liking. It uses memory wire and chain to make a layered effect for extra visual interest.
Here’s what you need to make this necklace:
1: Pliers. I used my cutting pliers, round nose pliers and flat nose pliers.
2: Two half circle pieces of necklace length memory wire.

3: Two pieces of chain that, when measured together, are long enough to fit around your neck.

4: Six jump rings.

5: A lobster clasp.

6: Beads. I used yellow glass beads.

Follow these steps to make your necklace:
1: Curl one end of one of the pieces of memory wire using the round nose pliers to form a loop.


2: Add beads to the wire until there is approximately 1cm left unbeaded.


3: Curl the other end of the wire using the round nose pliers again to secure the beads in place.

4: Repeat steps 1 to 3 for the second piece of memory wire.

5: Attach the two pieces of memory wire together using two of the jump rings.


6: Attach one of the pieces of chain to one side of the memory wire arches using another of the jump rings.

7: Repeat step six for the other side of the necklace attaching the second piece of chain.

8: Attach the lobster clasp to one side of the necklace using one of the remaining two jump rings.

9: Attach the last jump ring to the other side of the necklace to finish it off.

Now your new necklace is ready to wear!


-
Got a ring that doesn’t fit anymore? Turn it into a fun pendant!
I popped this ring on the other day… and it got stuck on my finger! After panicking a little I managed to get it off and decided it needed a new life as a pendant rather than a ring. Here’s how to transform your too small ring into a cool necklace pendant…
This tutorial contains affiliate links.
You’ll need the following tools and materials:
1: A ring that doesn’t fit you anymore. I used this steel ring.

Here’s something similar:
2: Pliers. I used my cutting pliers, round nose pliers and flat nose pliers.
3: Some tiger tail wire, long enough to make a necklace.

4: Four crimp beads.

5: Two small jump rings.

6: A lobster clasp.

7: Beads. I used this mix of pastel glass seed beads. I also used six larger beads to fit over the folded tiger tail wire.


Follow these steps to make your ring pendant necklace:
1: Add two of the crimp beads and a jump ring to one end of the tiger tail wire.


2: Loop the end of the wire around the jump ring and back through the crimp beads, pull the wire tight.

3: Squash the crimp beads using the flat nose pliers.


4: Bead the wire in any pattern you wish. I beaded mine randomly with no particular pattern.


5: Once you have your necklace at the length you want it, add the remaining crimp beads and jump ring.

6: Loop the end of the wire around the second jump ring and back through the crimp beads and the last few glass beads, pull it tight.

7: Squash the crimps using the flat nose pliers and then trim the excess tiger tail wire using the cutting pliers.


8: Add the ring to the strand.

9: Attach a lobster clasp to one of the end jump rings to finish it off.

Now your ring pendant necklace is finished and ready to wear!


Here’s another idea, pop your rings onto a chain. Here’s one I made with two brass rings on a silver-tone chain.

Here are some other ways to use rings in your jewellery:
- How to turn a ring into the central feature of a choker necklace
- Here’s how to turn a costume ring into a different kind of pendant
This tutorial contains affiliate links.