-
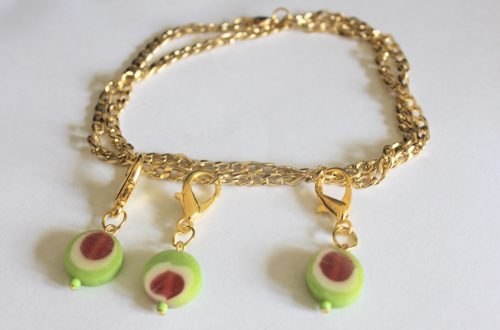
Here’s a fun one to make! Here’s how to make a beaded wiggle bracelet.
This design is a little tricky to make but it looks amazing! Using some chain, tiger tail wire and beads, you can create an interesting, almost sculptural, bracelet to wear. Please note that this tutorial contains affiliate links.
You’ll need these tools and materials to make this bracelet:
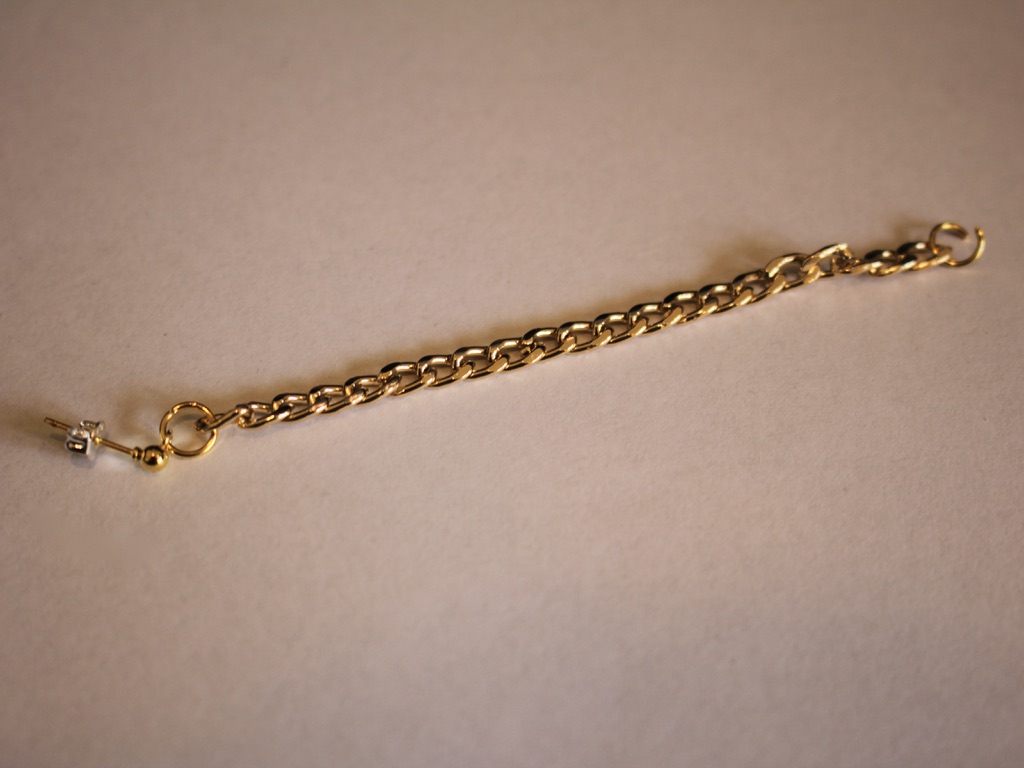
1: Some tiger-tail wire, I used about 1m of wire to make mine. I suggest cutting off slightly more than you need so you don’t run out.

2: A piece of chain that is bracelet length. I used a piece recycled from an old project that I took apart.

3: Two jump rings.

4: Four crimp beads.

5: A clasp.

6: Beads. I used these gold glass beads.

6: Your jewelry pliers. I used my cutting pliers, round nose and flat nose pliers.

Follow these steps to make your own wiggle bracelet:
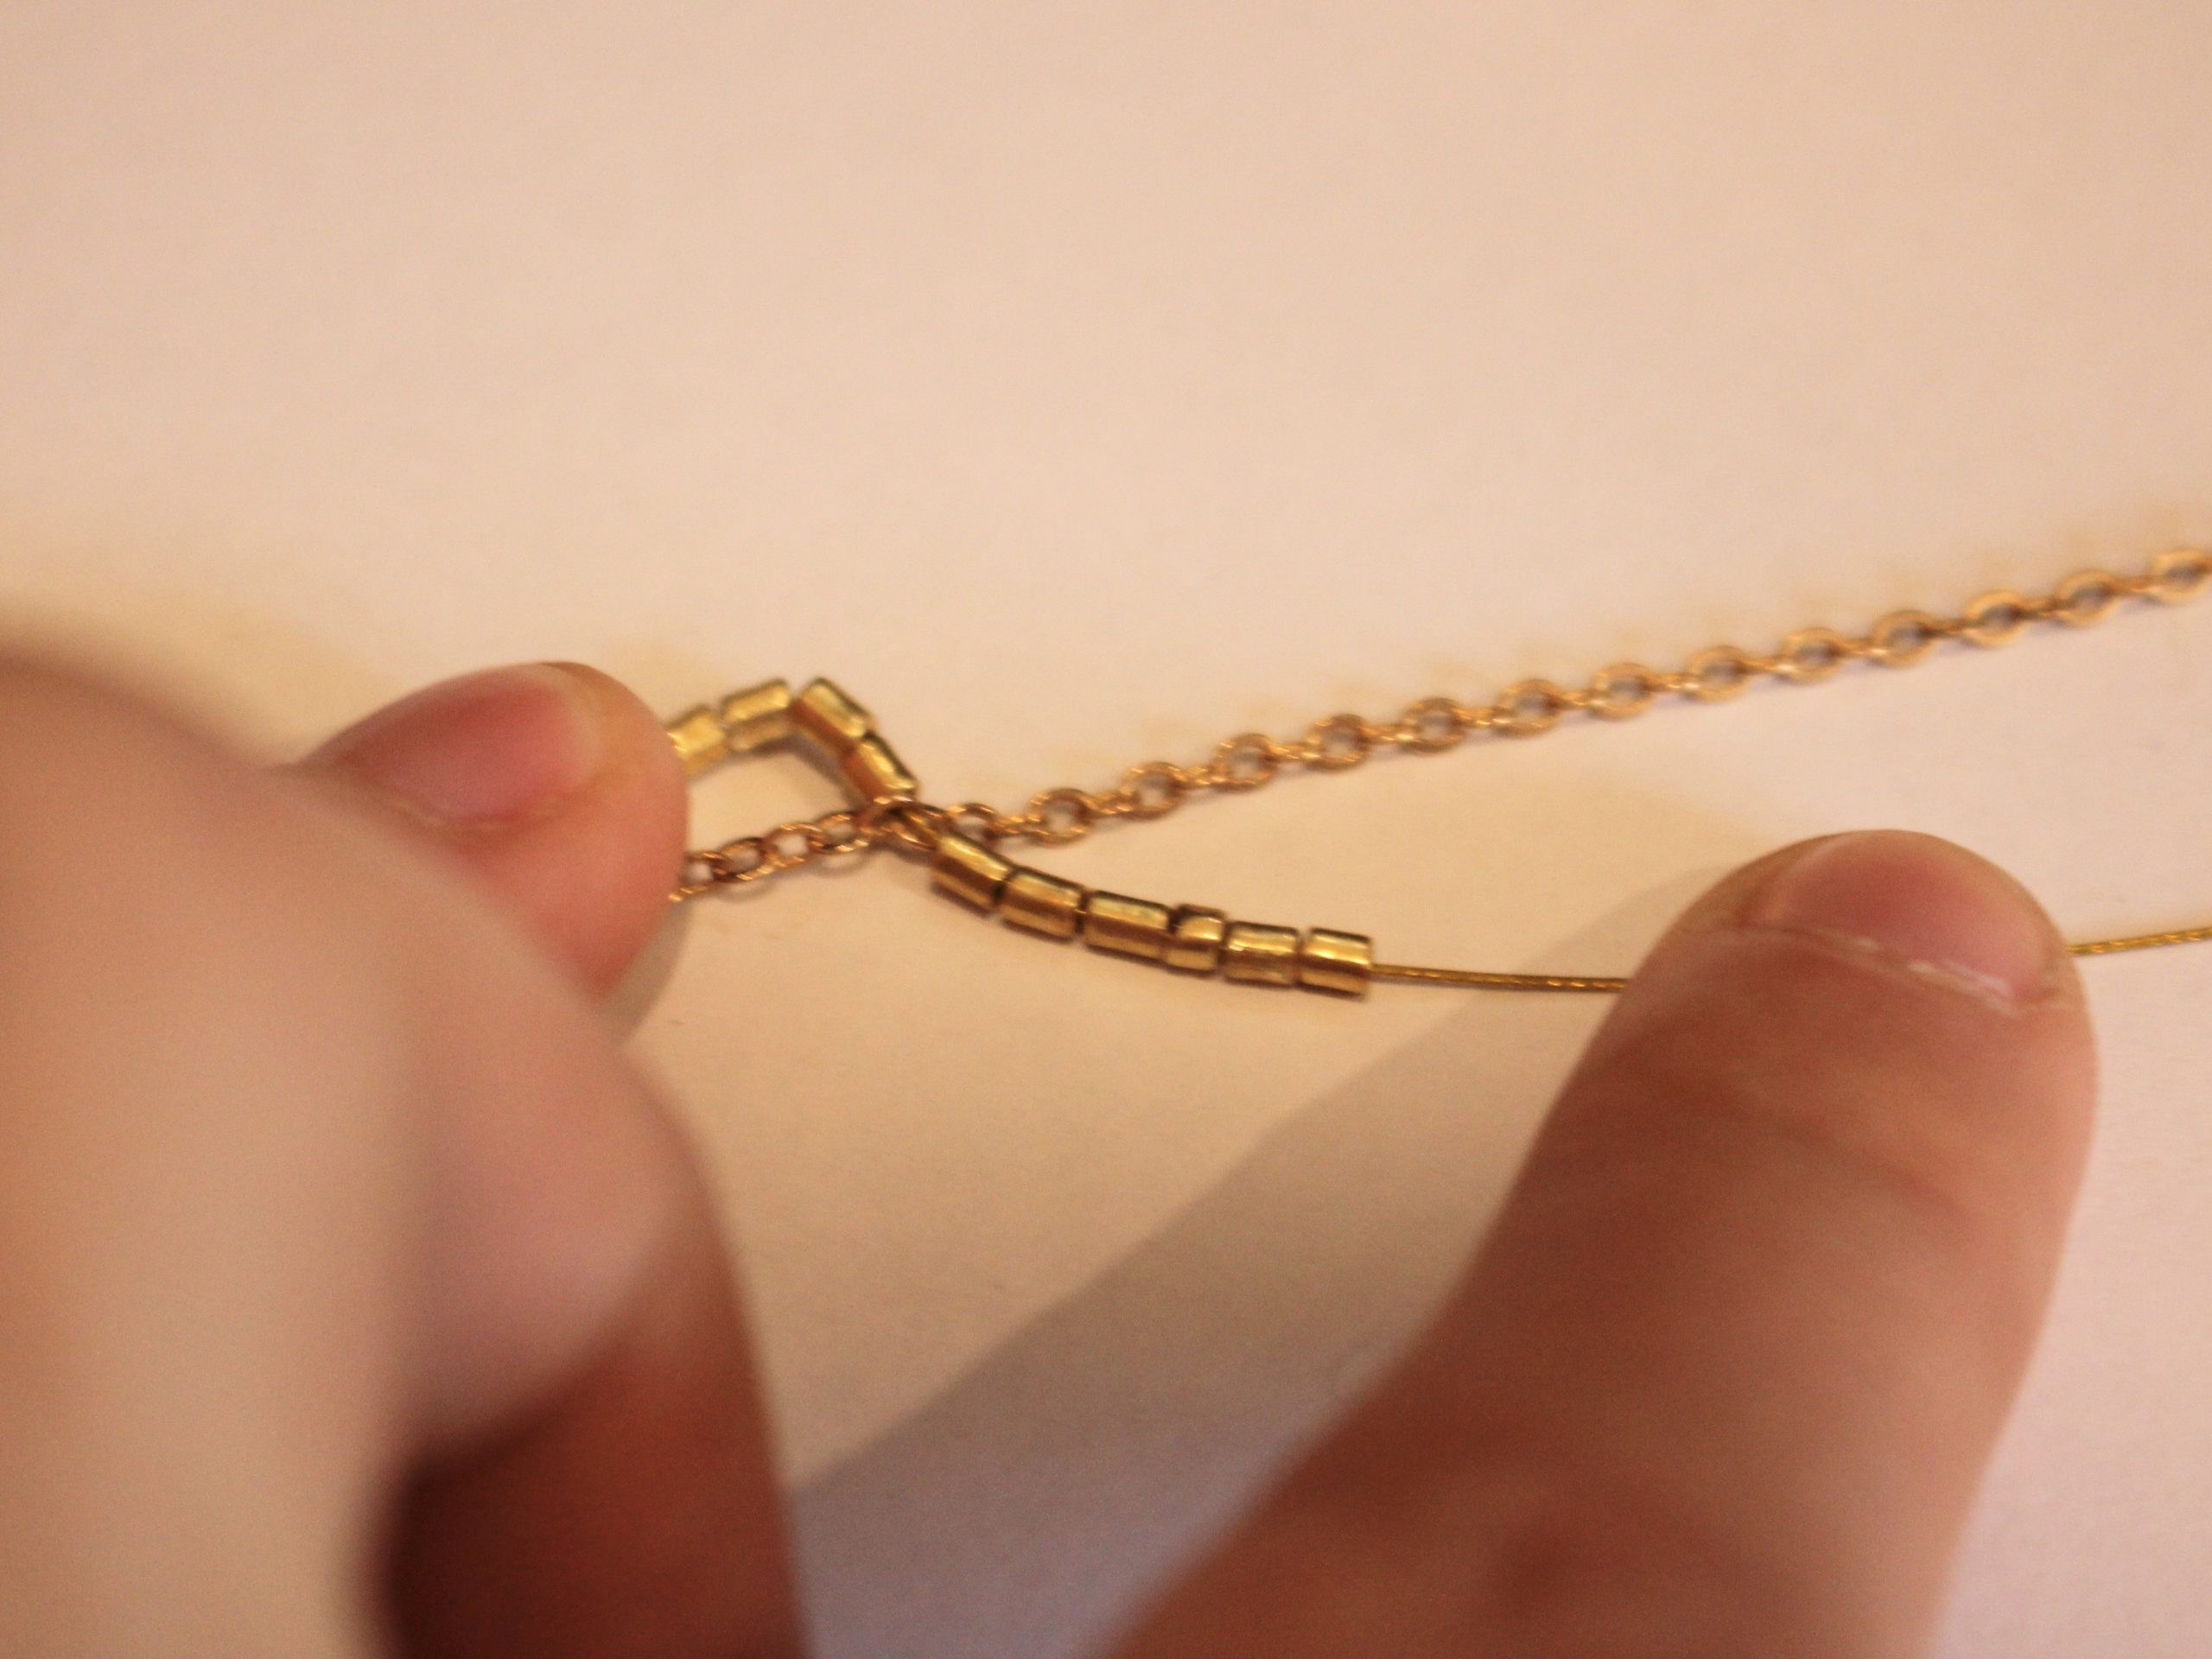
1: Add two crimp beads and a jump ring to one end of the wire.

2: Loop the end of the wire around the jump ring and back through the crimps.

3: Squash the crimp beads using the flat nose pliers.

4: Attach the wire to the chain using the jump ring.


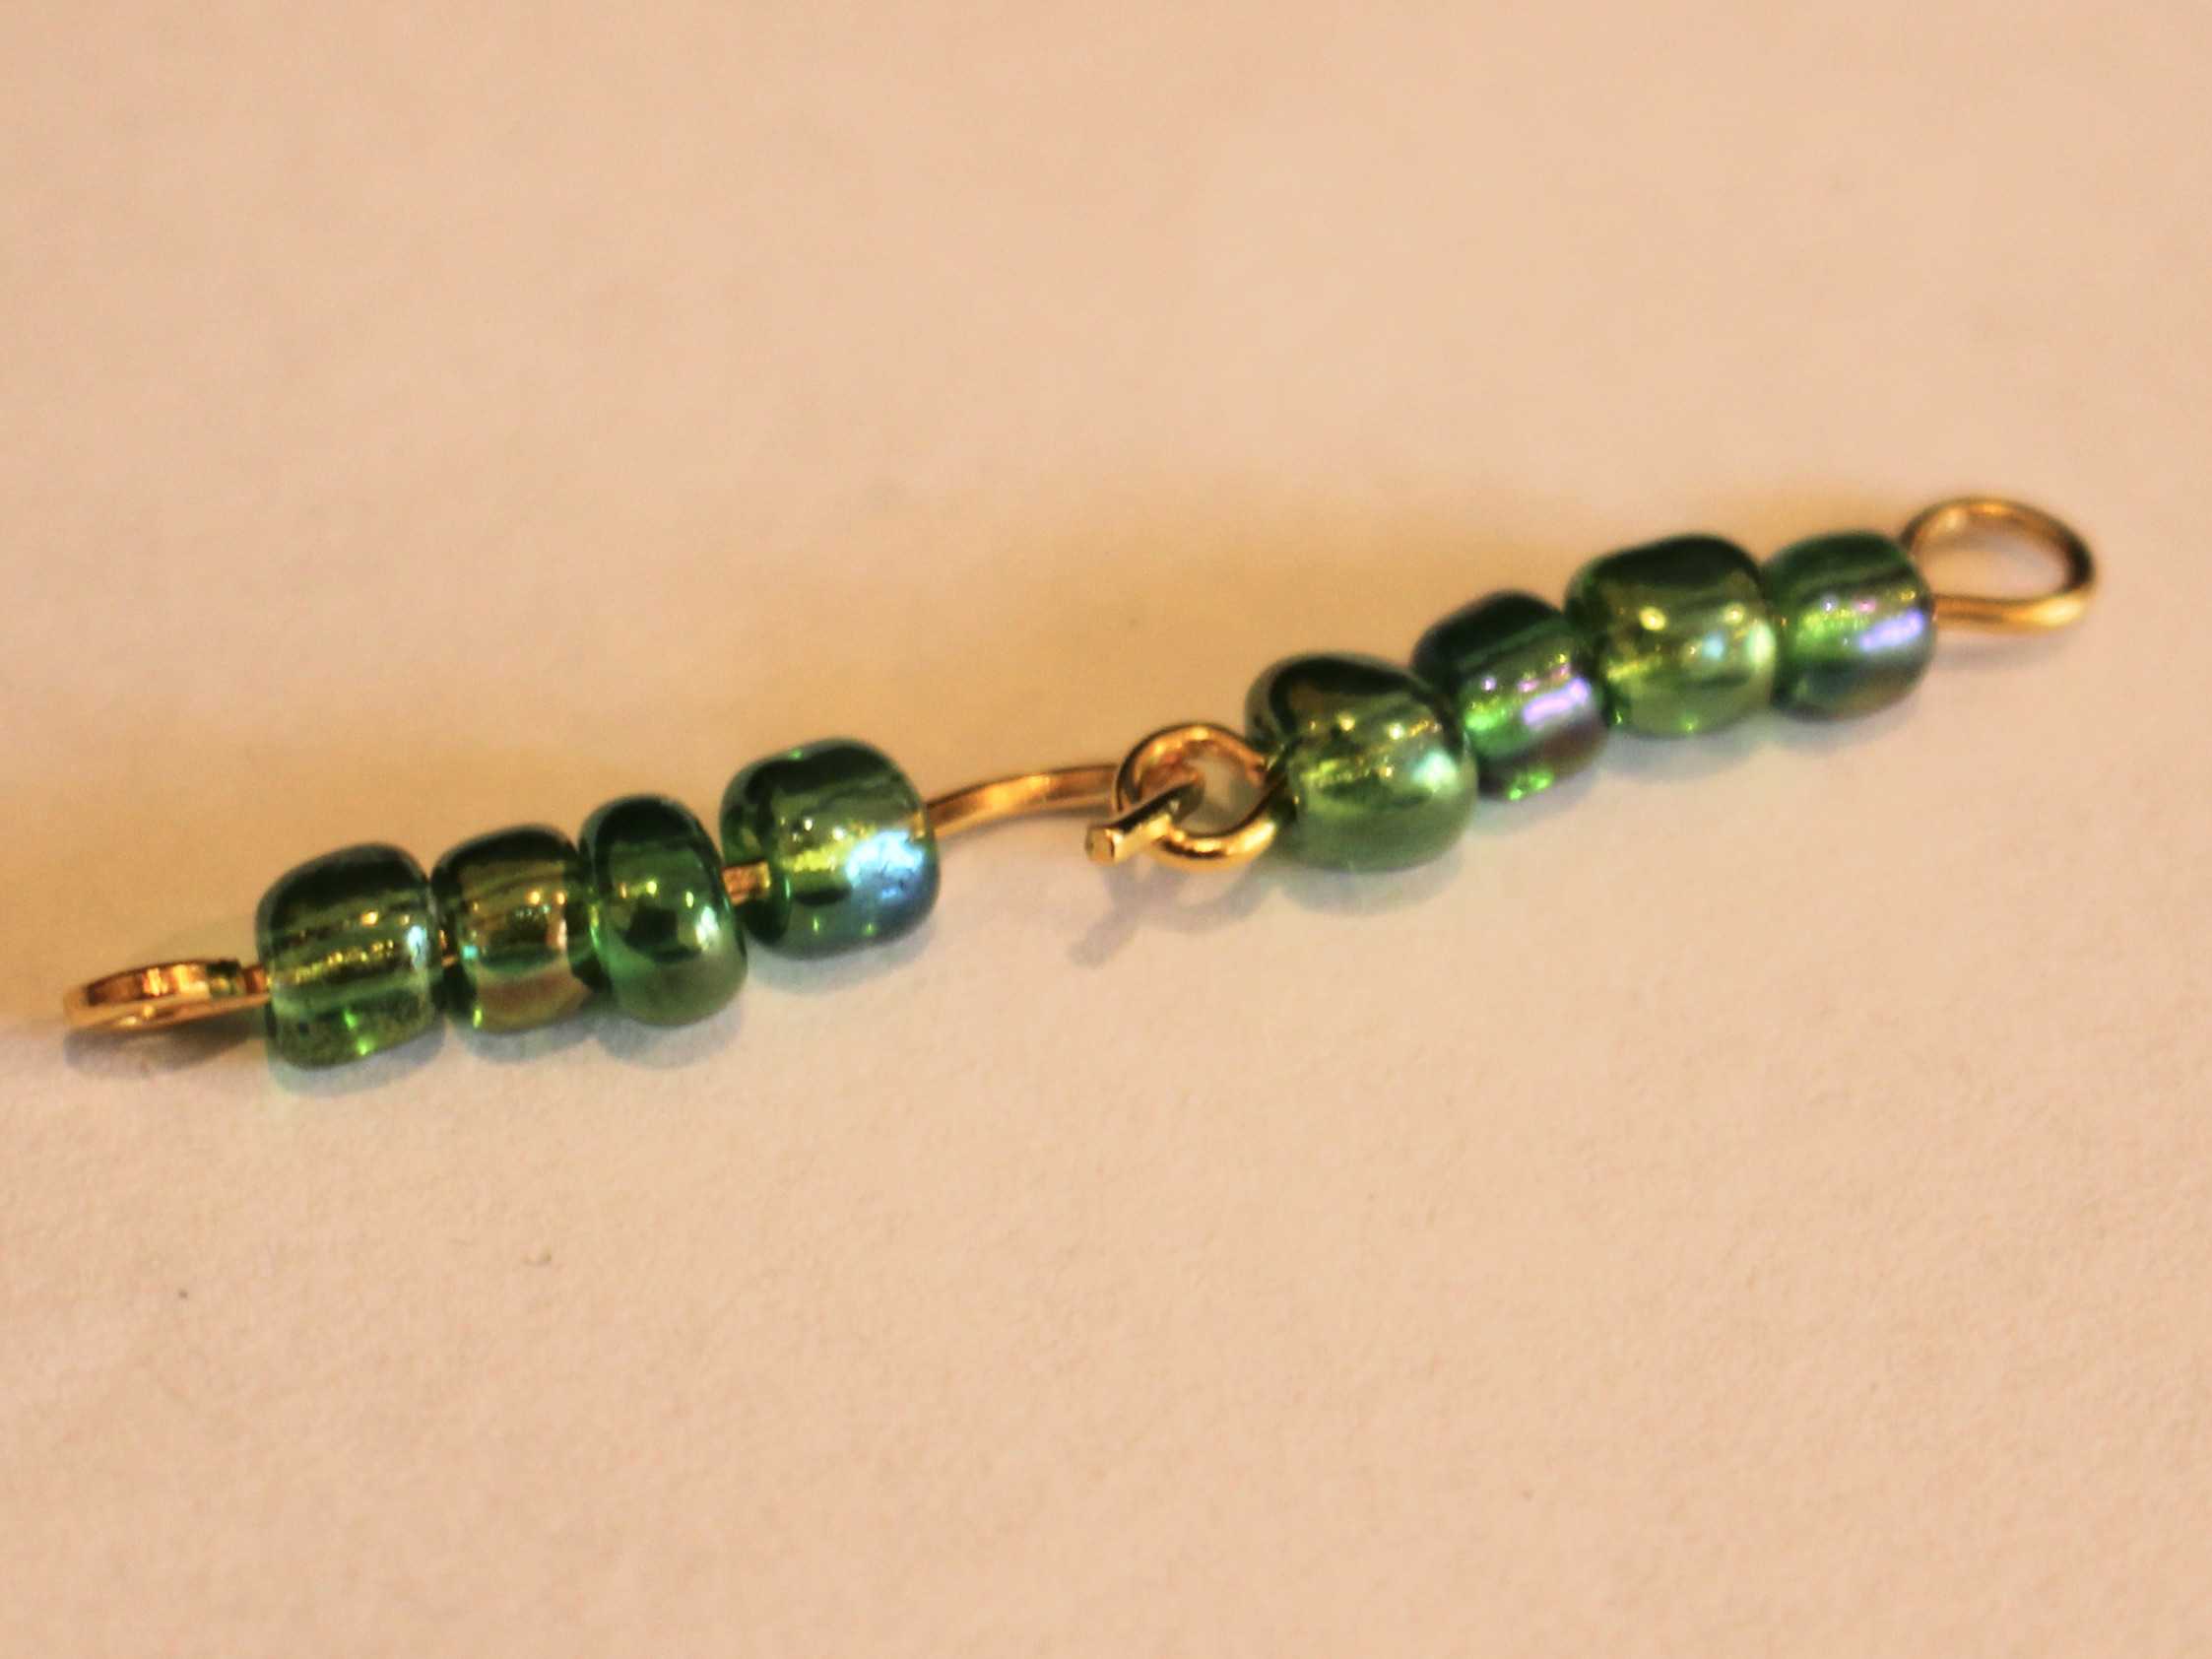
5: Add some beads to the wire. I added 6 beads.

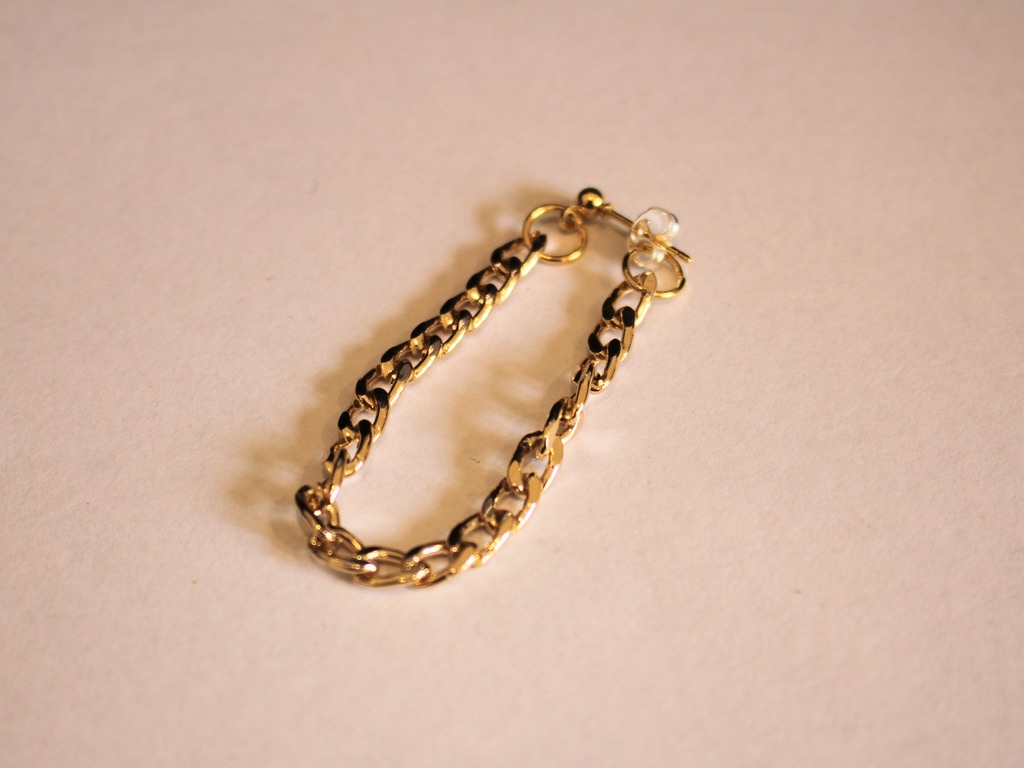
6: Thread the end of the wire through a link in the chain, I threaded mine through the 7th link of the chain. You want the distance between links to be shorter than the length of each beaded section in order to make an arch shape.


7: Repeat steps 5 and 6, adding another 6 beads and threading it through another link on the opposite side of the chain, 7 links away from the first loop.


8: Keep beading and looping the wire until the chain is early complete, with just one loop to go.

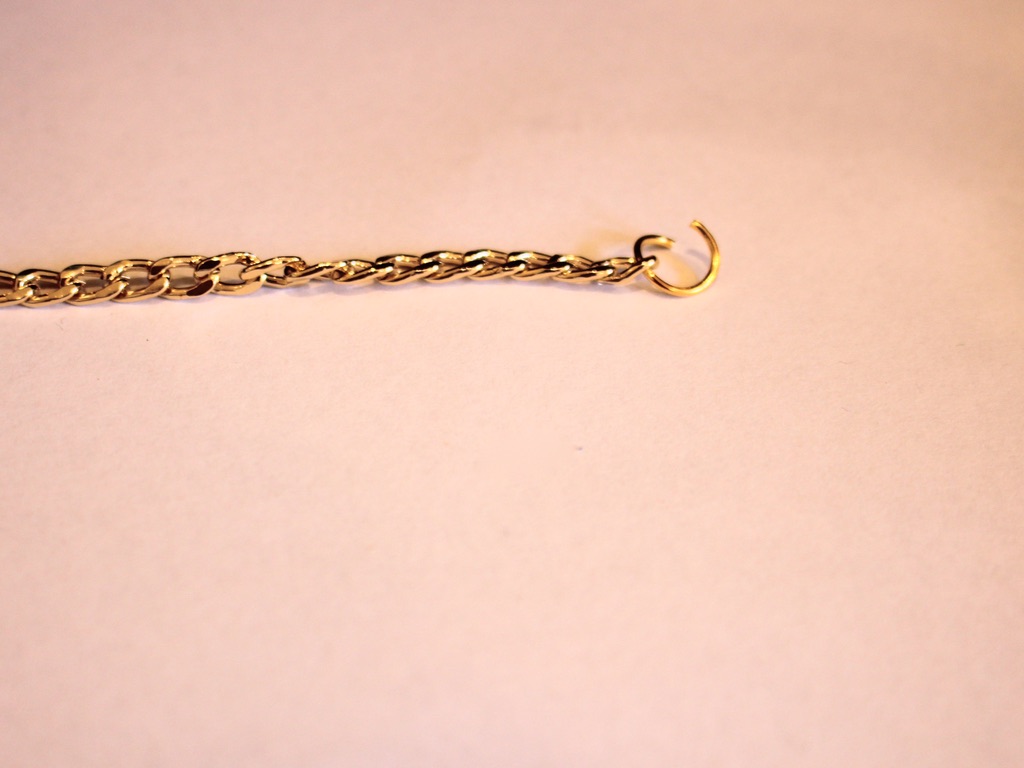
9: Add the second jump ring to the end of the chain.

10: Add the last 6 beads and two crimp beads.

11: Loop the end of the tiger tail wire around the jump ring at the end and back through the crimps and end beads.
12: Squash the crimp beads.

13: Trim the excess wire.


14: Add the clasp to one end of the bracelet to finish it off! Now your fun wiggle bracelet is finished.


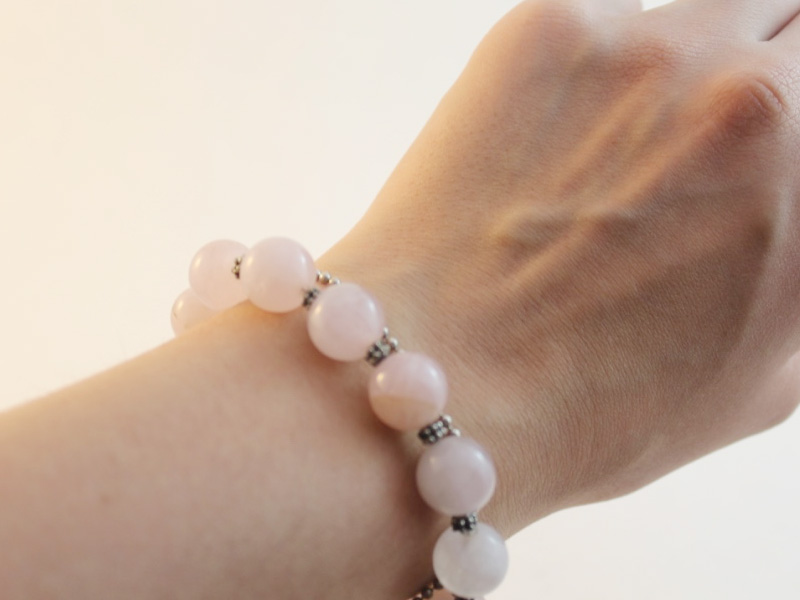
Here’s what the wiggle bracelet looks like when it’s being worn!


-
How to make a letter bead chain bracelet!
Sometimes you need to be a bit subtle about how you communicate your feelings. So instead of saying it out loud, or showing it in your body language, why not show how you feel with your jewelry? Here are all the steps you can follow to make a cute letter bead bracelet that says a word on it. Mine says ‘grumpy’ because that’s how I feel a lot of the time ;). Please note that this tutorial contains affiliate links.
You’ll need these tools and materials to make your letter bead chain bracelet:
1: A bunch of eye pins. The number you need depends on the length of your bracelet.

2: Two jump rings.

3: A lobster clasp.

4: Letter beads that make up the word you want to spell. Mine spells G-R-U-M-P-Y.

5: Other beads. I used some black plastic beads recycled from an old necklace. The number of extra beads you need will depend on the length of your word.

6: A small jump ring.

7: A charm. I used this plastic banana charm and drew a little smile on it with permanent marker.

Follow these steps to make your own letter chain bracelet:
1: Add a letter bead to one of the eye pins.

2: Bend the eye pin to form an angle.

3: Bend the top of the pin over to form a loop that secures the bead onto the pin. Use your round nose pliers to do this.

4: Repeat steps 1 to 3 for the other letter beads until your whole word is on pins.

5: Attach each of the letter bead pins together to form a chain.


6: Set the letter chain aside and start making the side chains.
7: Add your other beads to the pins the same way you did for the letter beads. Make two chains so that the whole piece is long enough to wrap around your wrist. Make each chain an even length so that your word sits in the middle.


8: Add a lobster clasp to one end of the bracelet using one of the jump rings.


9: Add the other jump ring to the other side of the bracelet.

10: To finish the bracelet off, attach your charm using the small jump ring.


Now your bracelet is finished and ready to wear! So cute!


Here are some other letter bead tutorials you can follow:
-
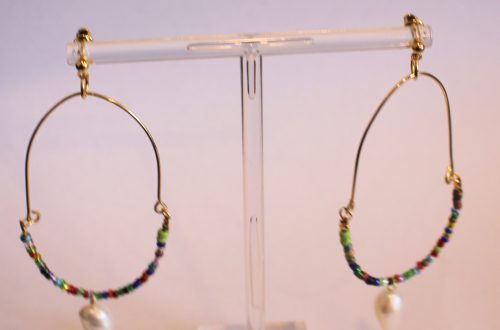
How to add cute charms to a pair of hoop earrings… these charm hoops are perfect!
This is a simple DIY that looks really cute! Update a pair of hoops with some adorable glass star beads that dangle from the centre. I really like how these hoops show off the cutest little stars. As an added bonus, these are really simple to put together, giving you that instant gratification hit! Please note that this tutorial contains affiliate links.
You’ll need the following tools and materials to make your charm hoops:
1: Pliers. I used my round nose pliers.

2: A pair of hoop earrings. I used these gold-tone hoops with lever backs.

3: A pair of head pins.

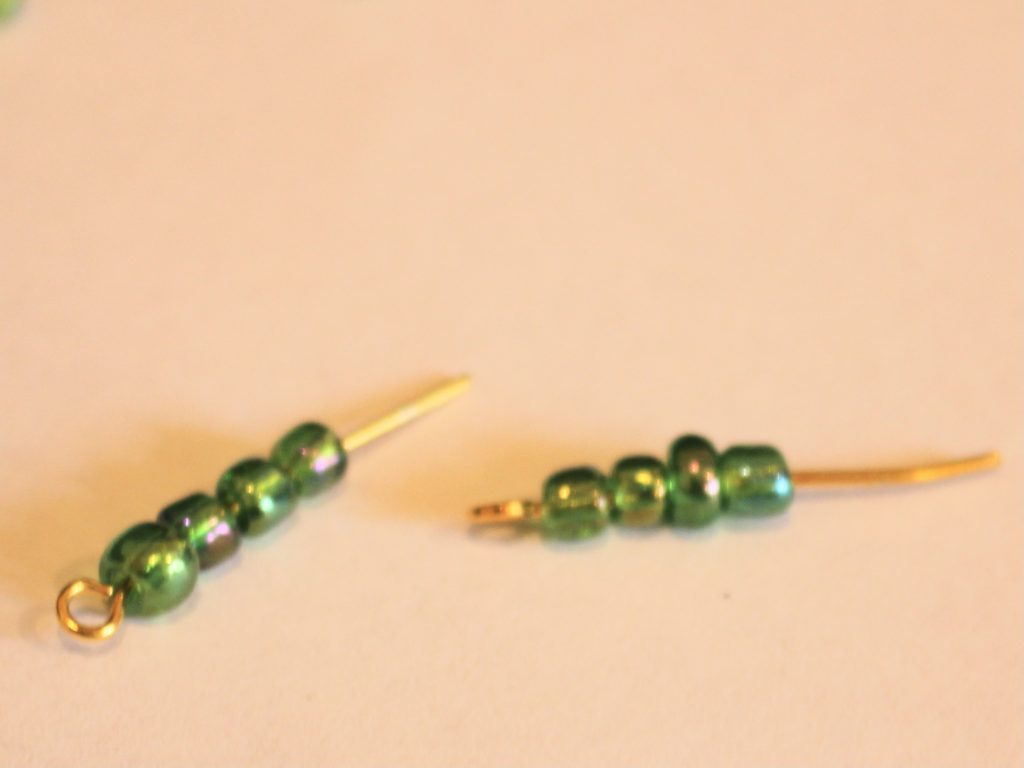
4: A couple of beads, I used these green star beads.

Follow these steps to make your charm hoop earrings:
1: Add each of the beads to each of the pins.

2: Bend the pins around the barrel of the round nose pliers to form a loop.


3: Slide each of the charms onto the hoops to finish off the earrings!


Now they’re ready to wear! How cute are these little charm hoops? I love them!


Here are some other charm hoop earrings you can make:
-
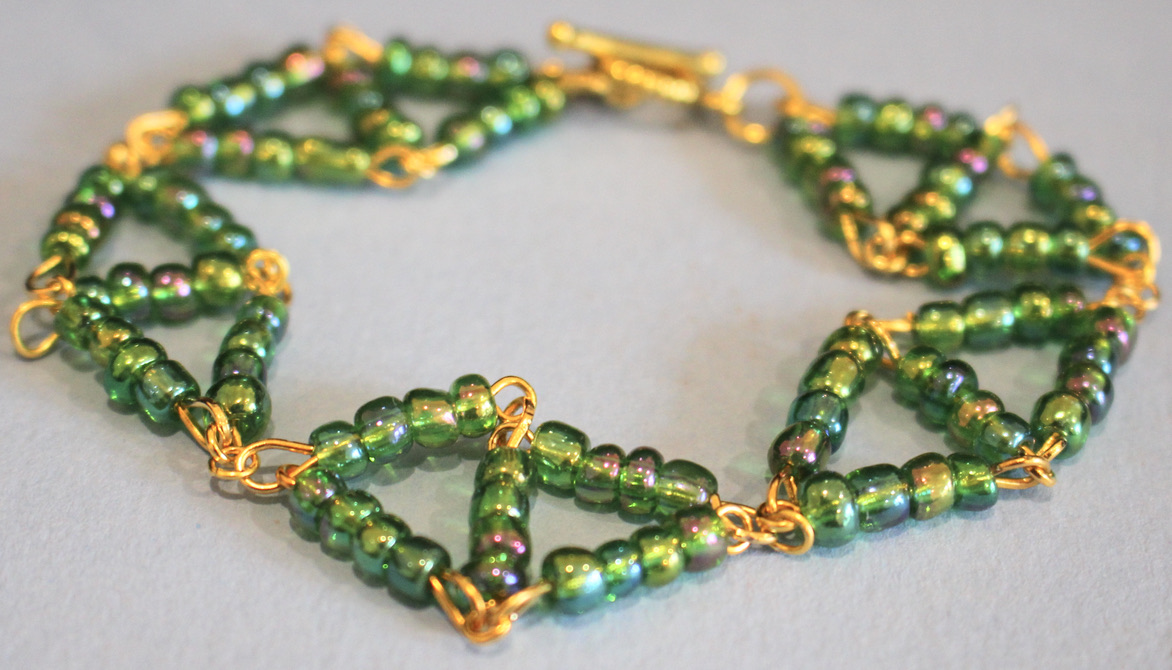
How to make a super cute bracelet with beaded diamond shapes!
This is a cute little bracelet that looks great! the beaded diamond bracelet design uses eye pins and beads to form a series of diamond shapes that link together to create a bracelet. This diamond shaped bracelet is eye-catching and fun to put together, perfect for constructing on a quiet afternoon at home.
You’ll need these tools and materials to make your beaded diamond bracelet:
1: Pliers. I used my round nose and flat nose pliers.

2: A bunch of eye pins. I ended up using about 25 pins. You may need more or less depending on your wrist size.

3: Some small jump rings. I used four, you may need more or less depending on the size of the bracelet.

4: Two larger jump rings.

5: A toggle clasp.

6: Beads of your choice. I used these green glass e-beads.

Follow these steps to make your beaded diamond bracelet:
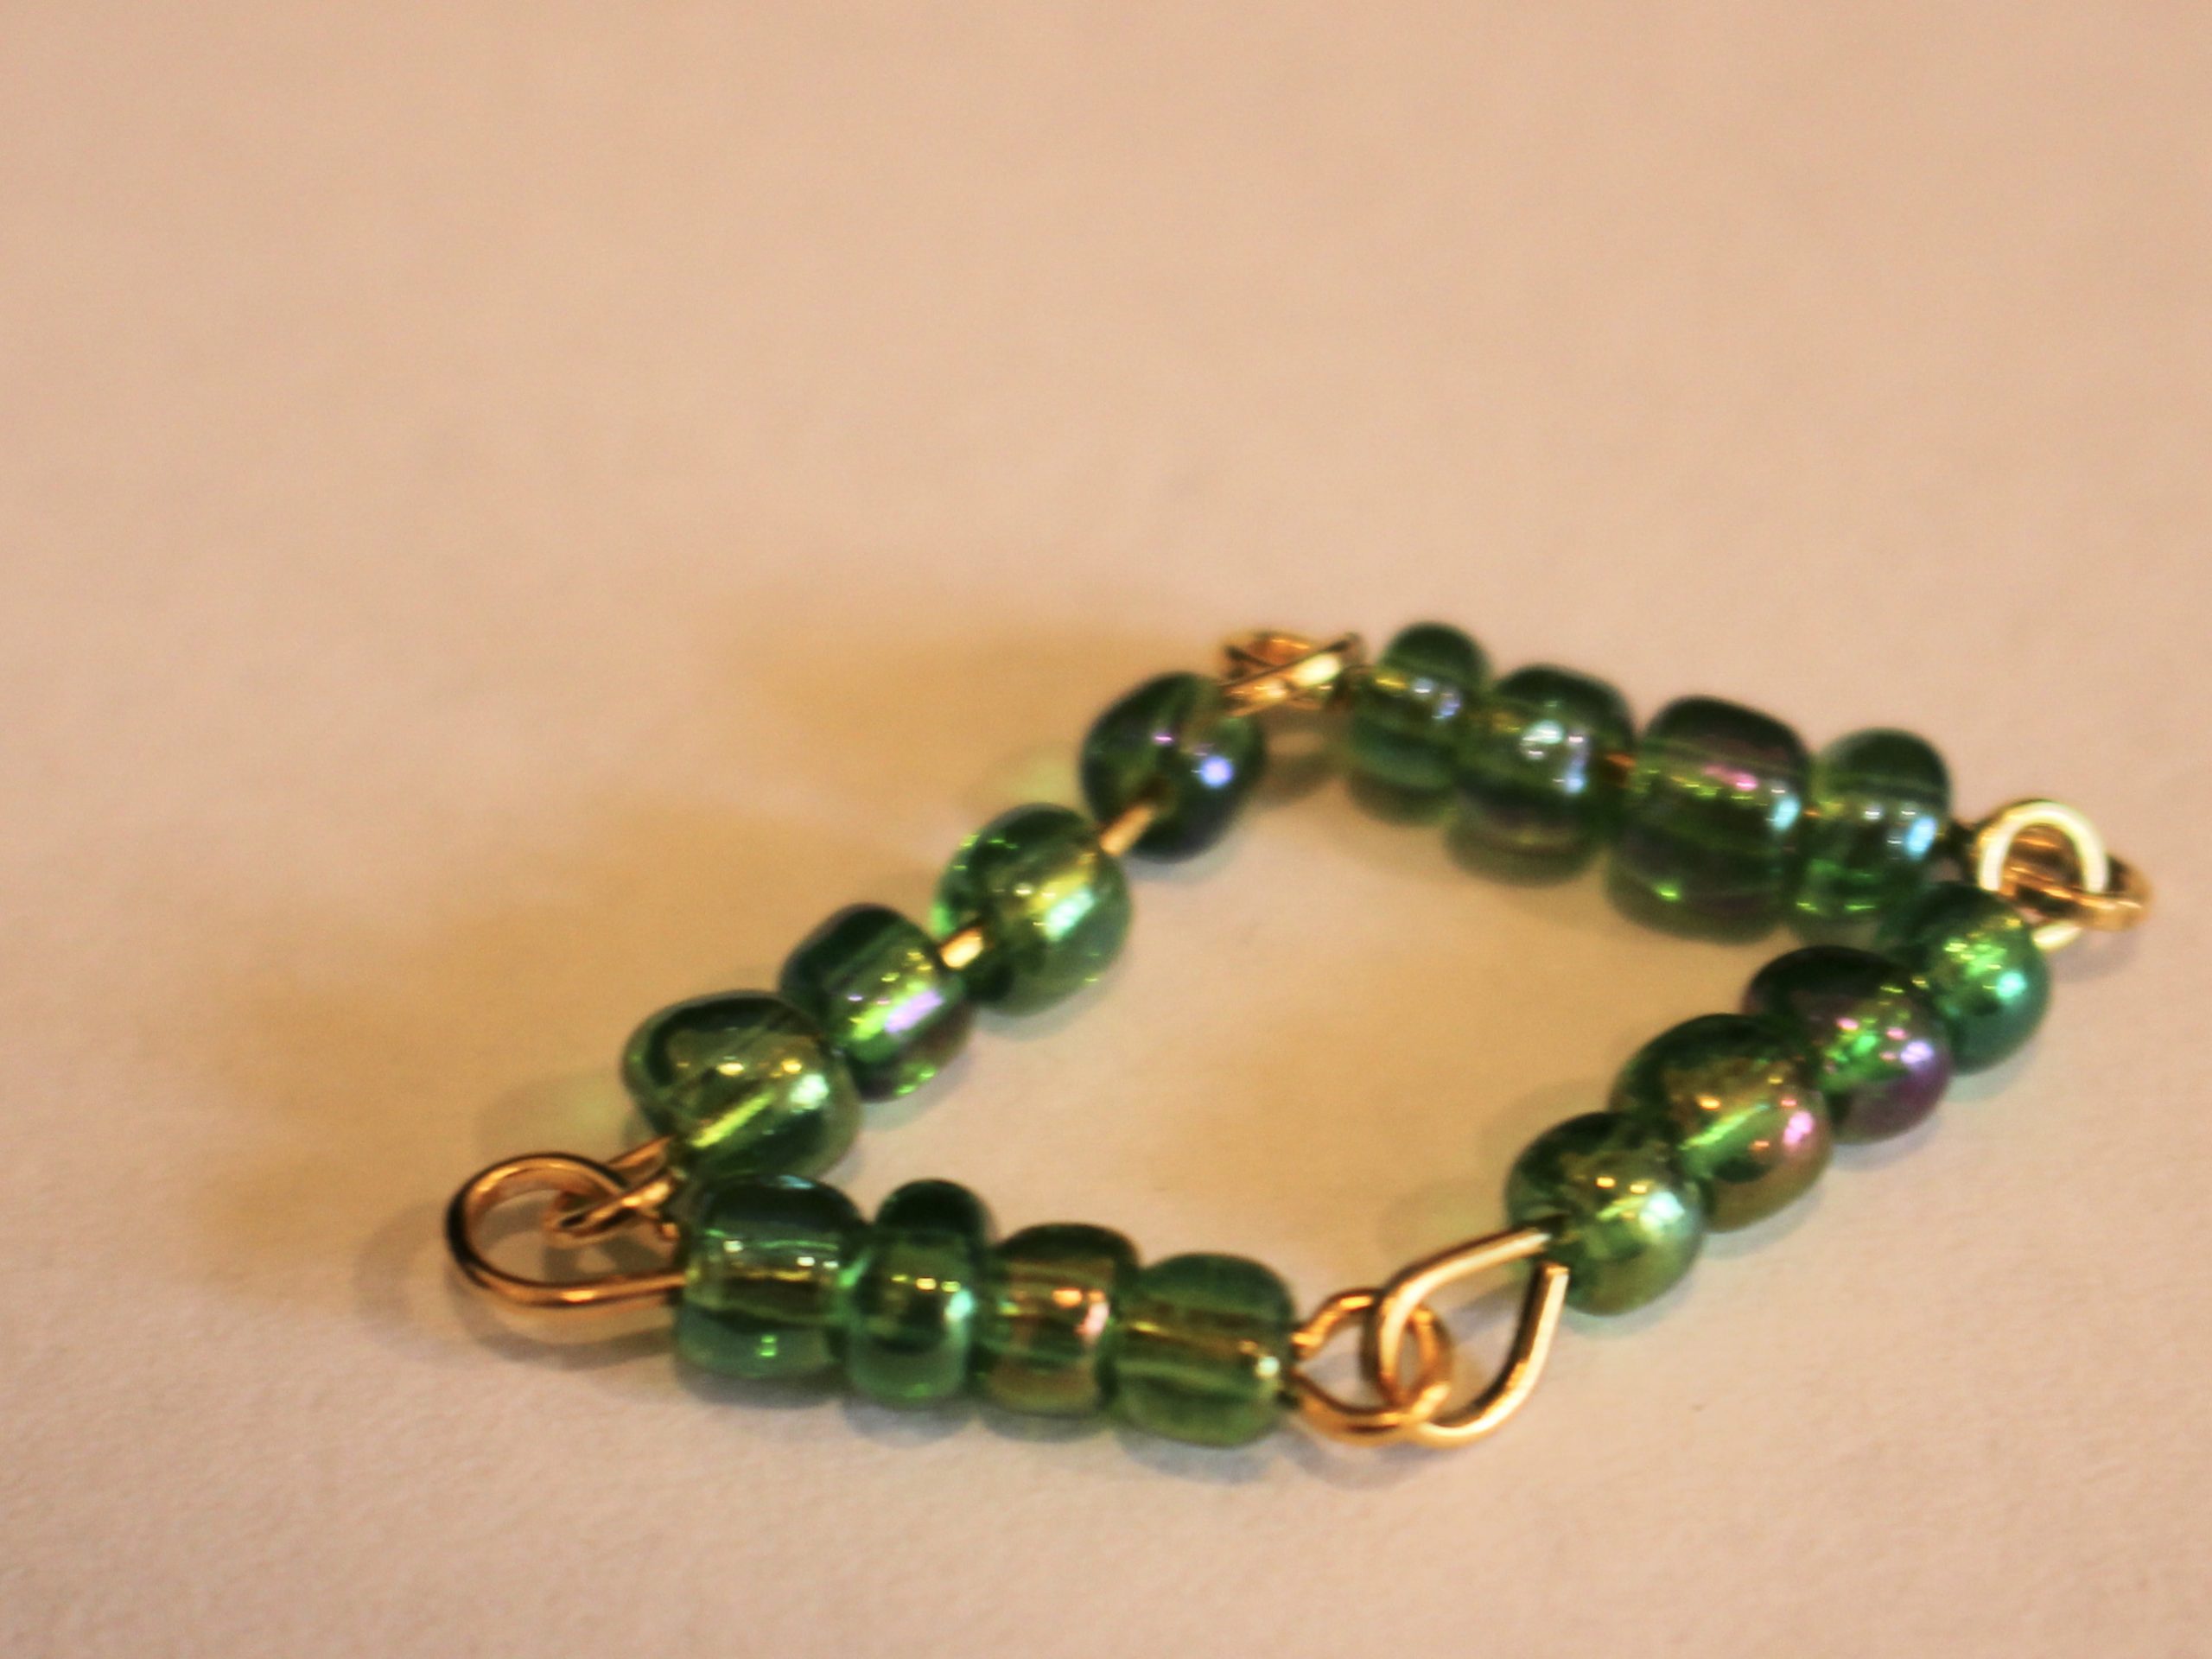
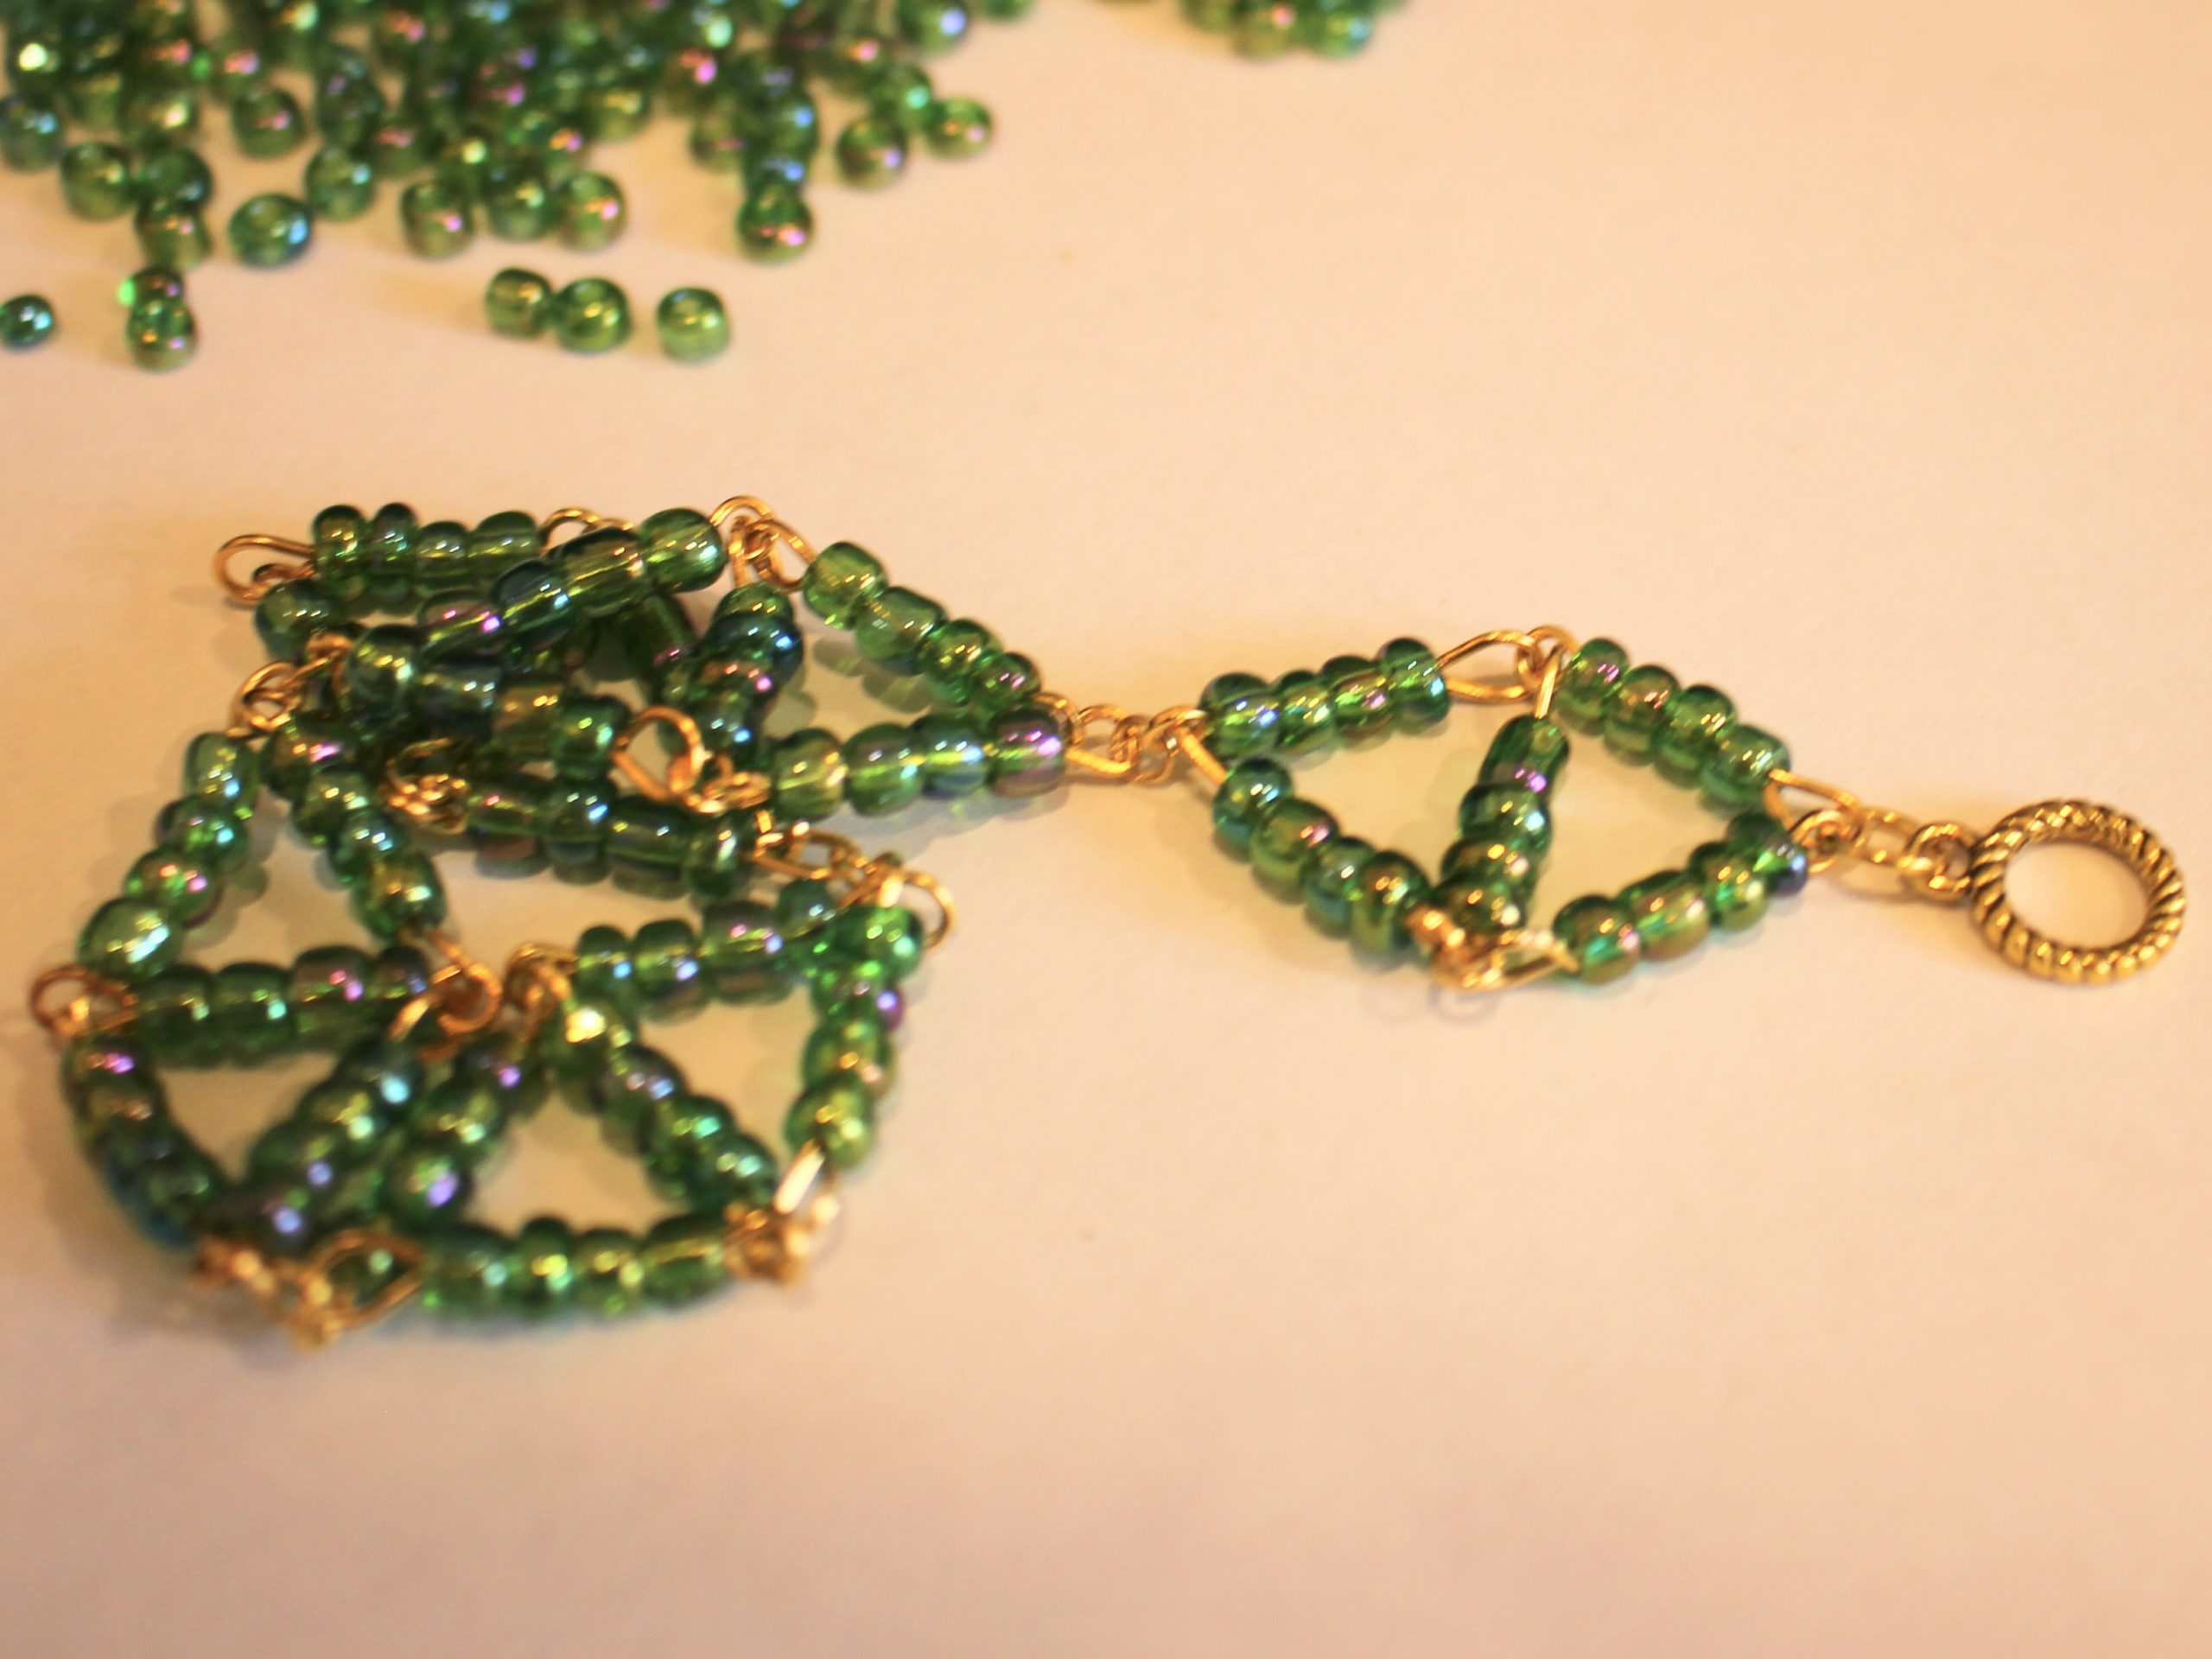
1: Add beads to two of the eye pins.
2: Leave about 1cm without beads.
3: Bend the pins to form an angle with the beaded section.

4: Loop the end of the pins around the round nose pliers to create a loop that secures the beads onto the pins.


5: Link the two pins together.

6: Repeat steps 1-5 three more times so that you have 5 beaded pins.
7: Link two more pins to the first two, so you have a square shape.


8: Add the last pin to the middle of the four linked pins so that you have a diamond shape that doesn’t shift around.


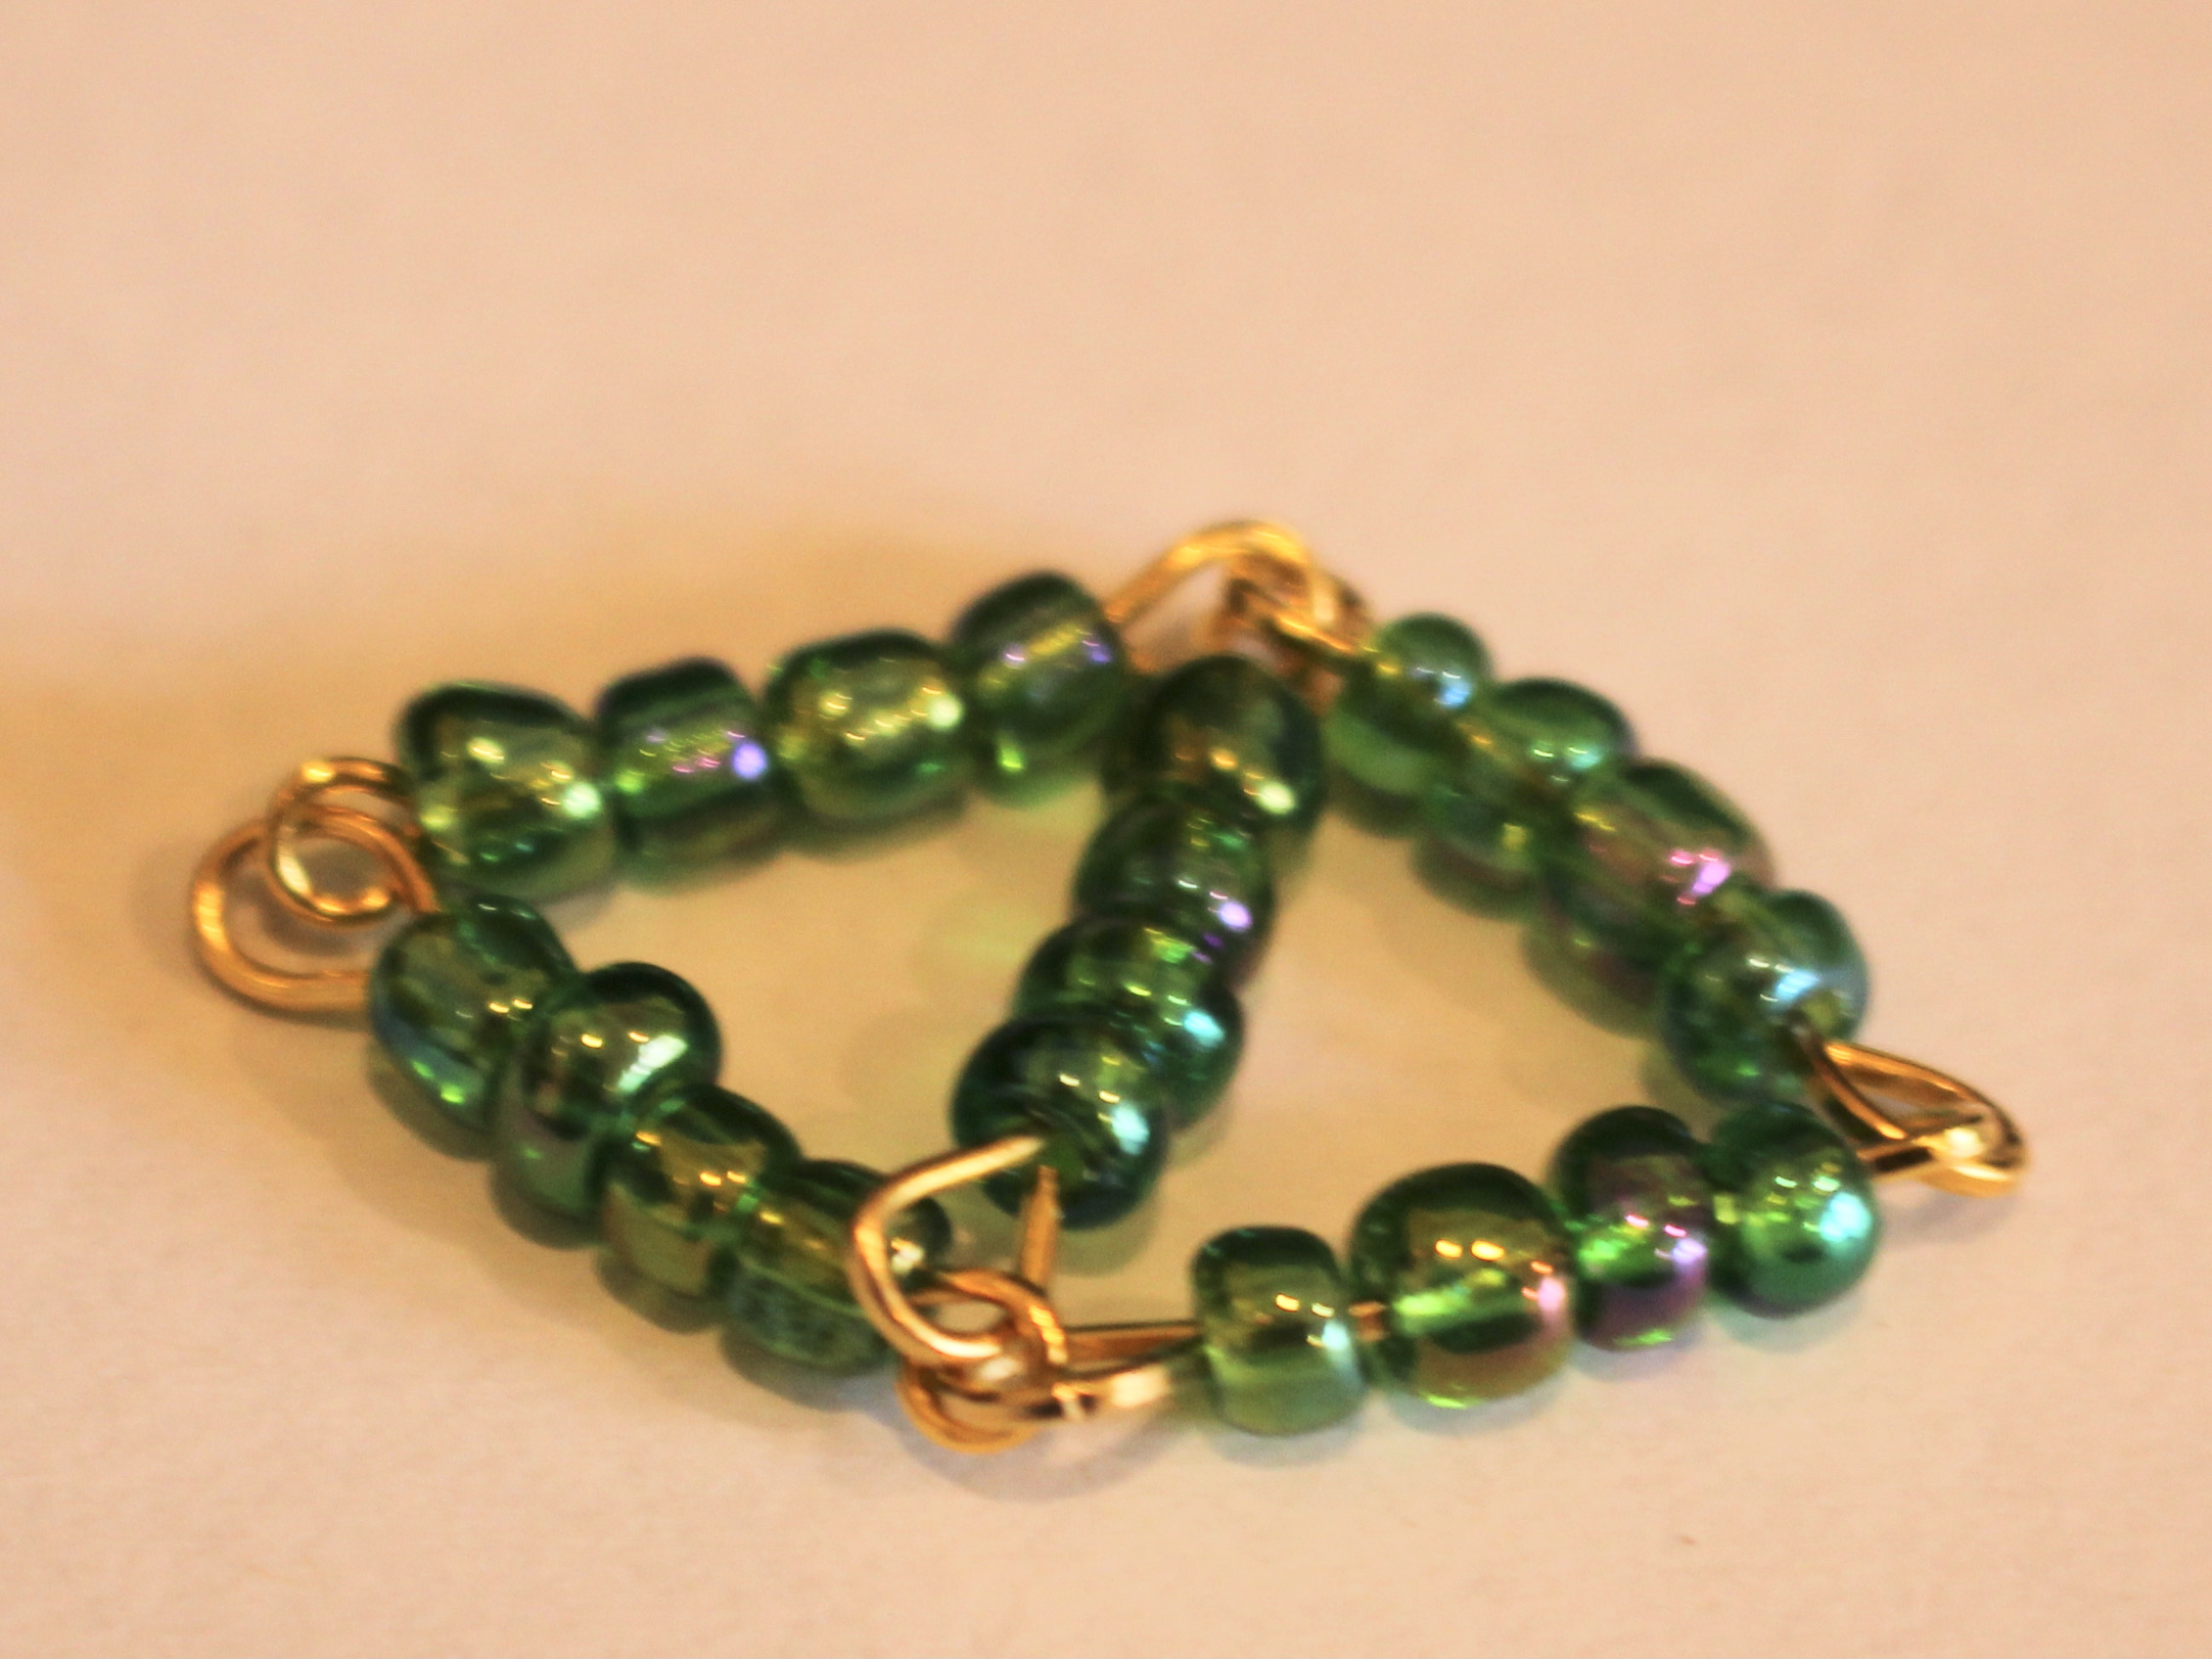
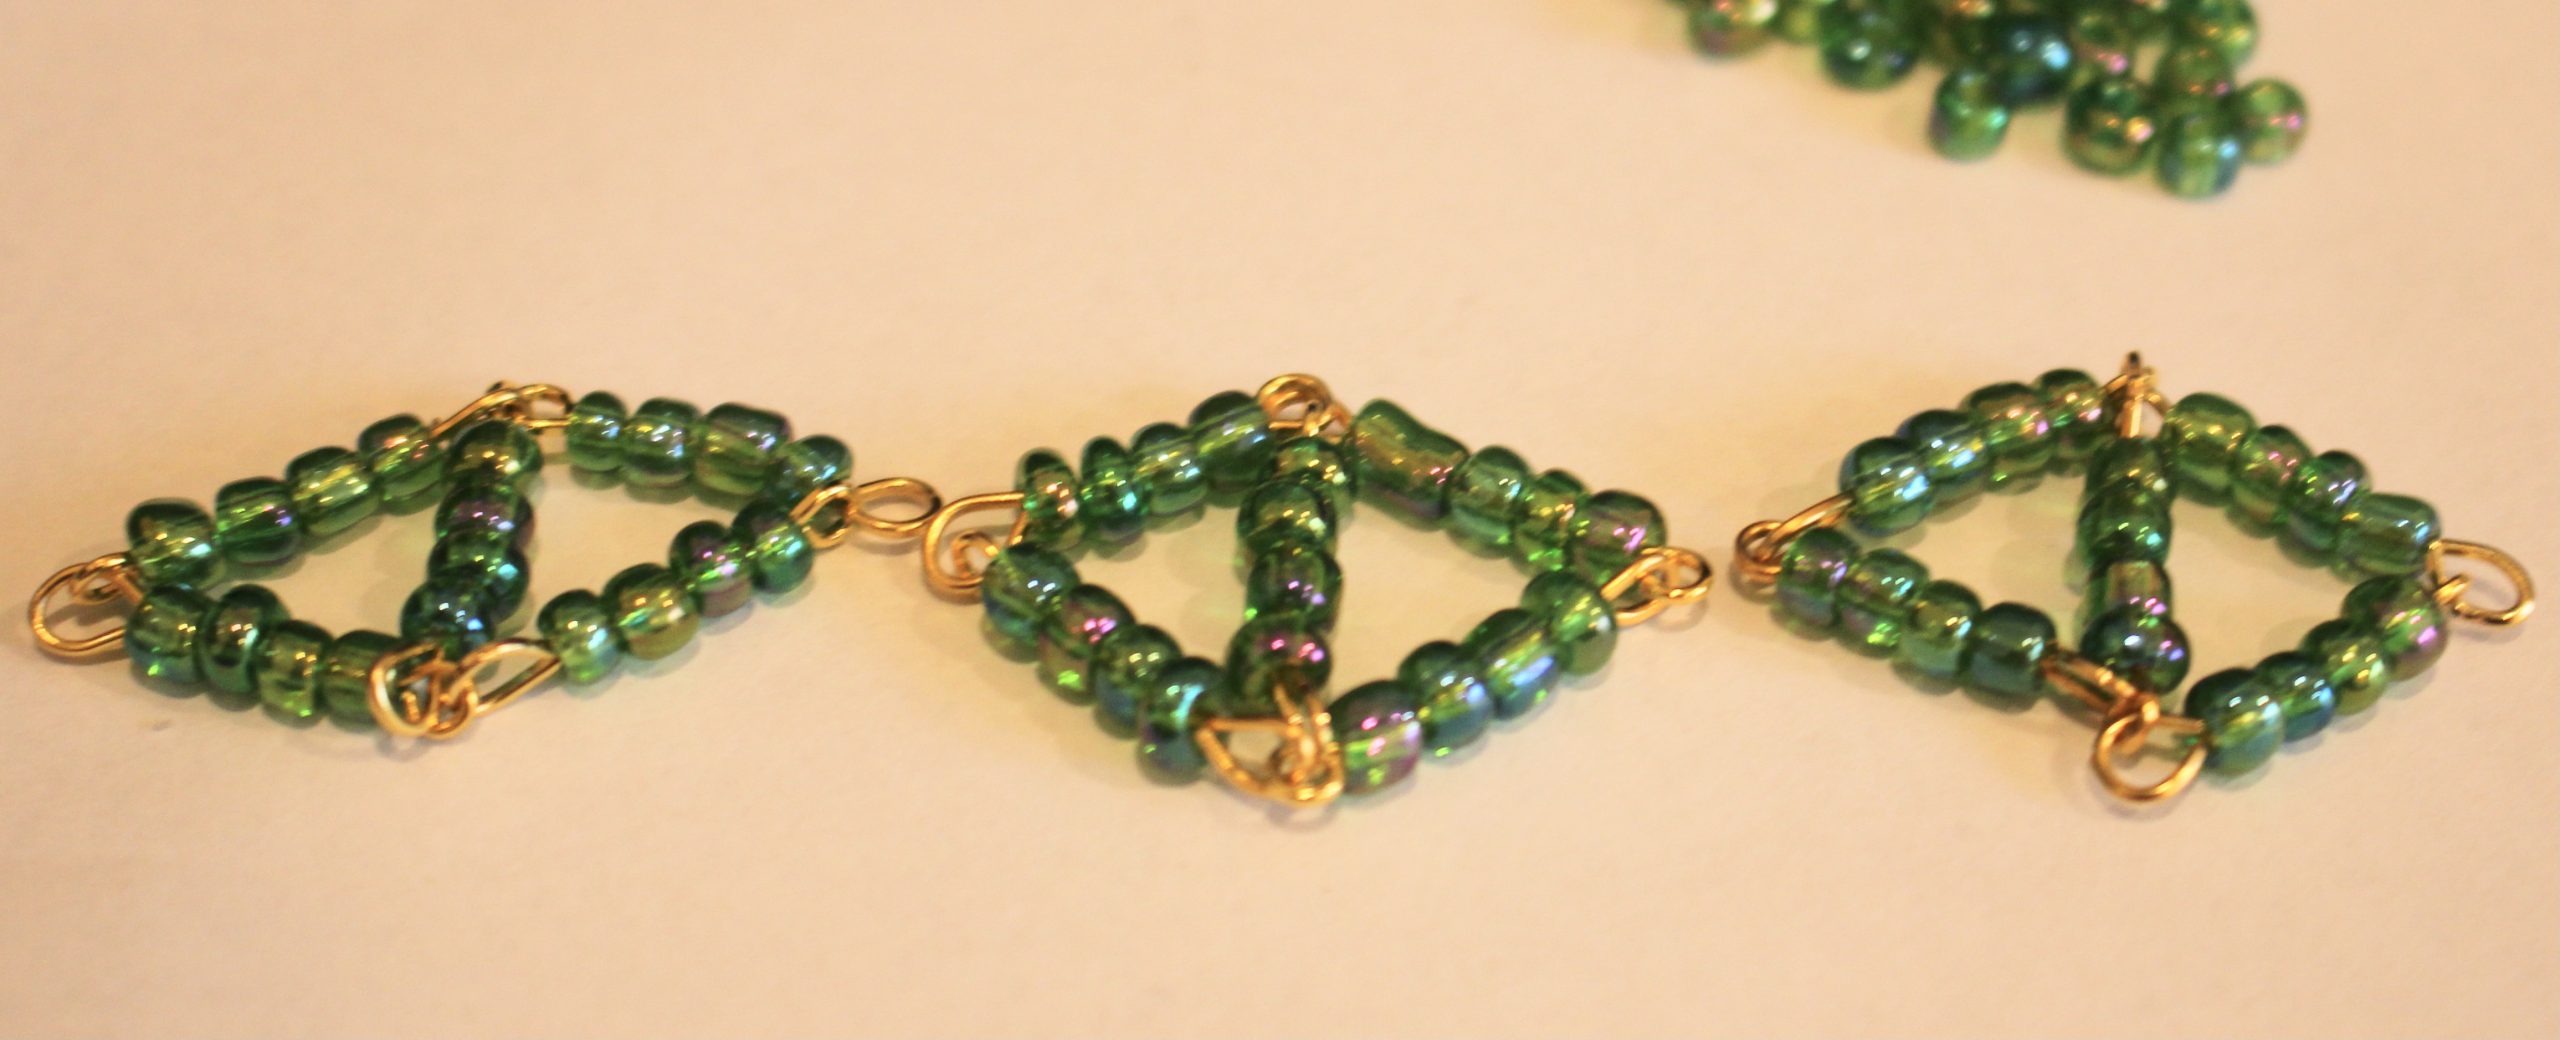
9: Repeat steps 1-8 until you have enough diamond shapes to fit around your wrist. I ended up making 5 diamonds.


10: Attach each of the diamond shapes together with the small jump rings to form a chain.


11: Attach the clasp components to each end of the chain using the larger jump rings, this will finish the design off!


Now your beaded diamond bracelet is finished and ready to wear!


Here is another design you can make using this beaded diamond shape

-
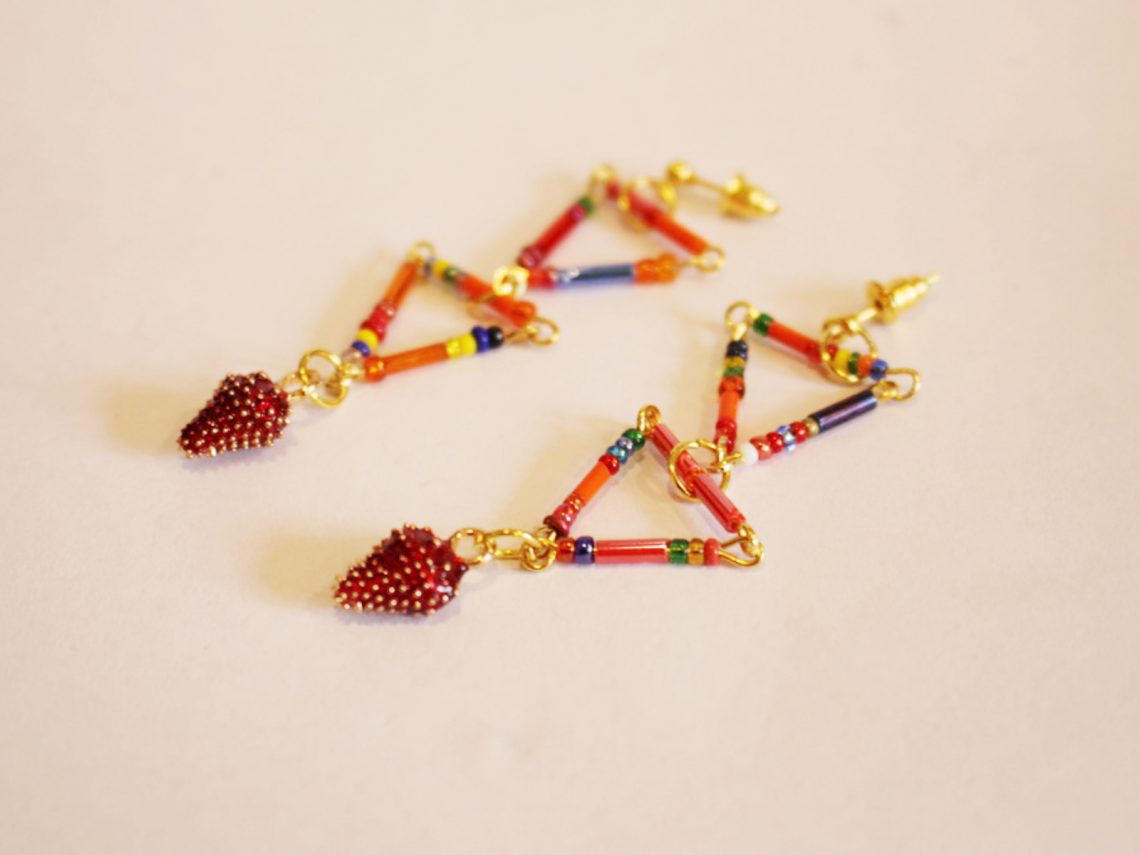
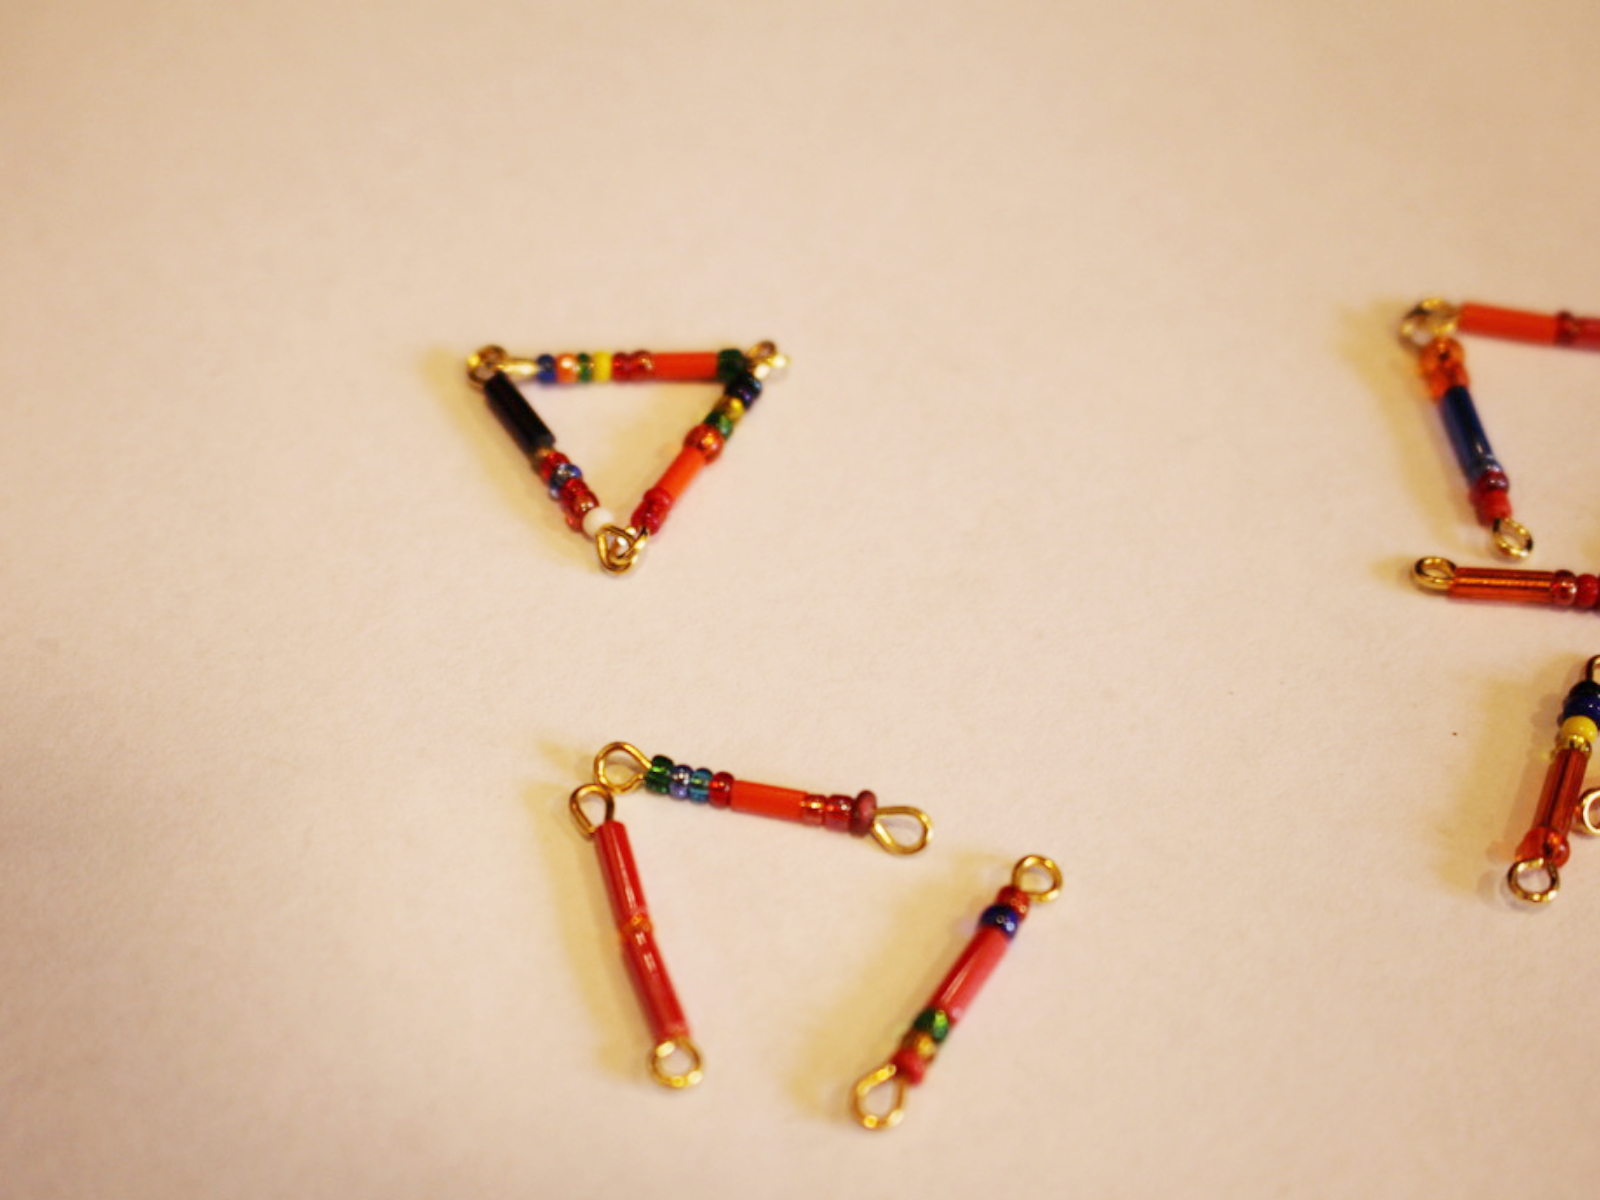
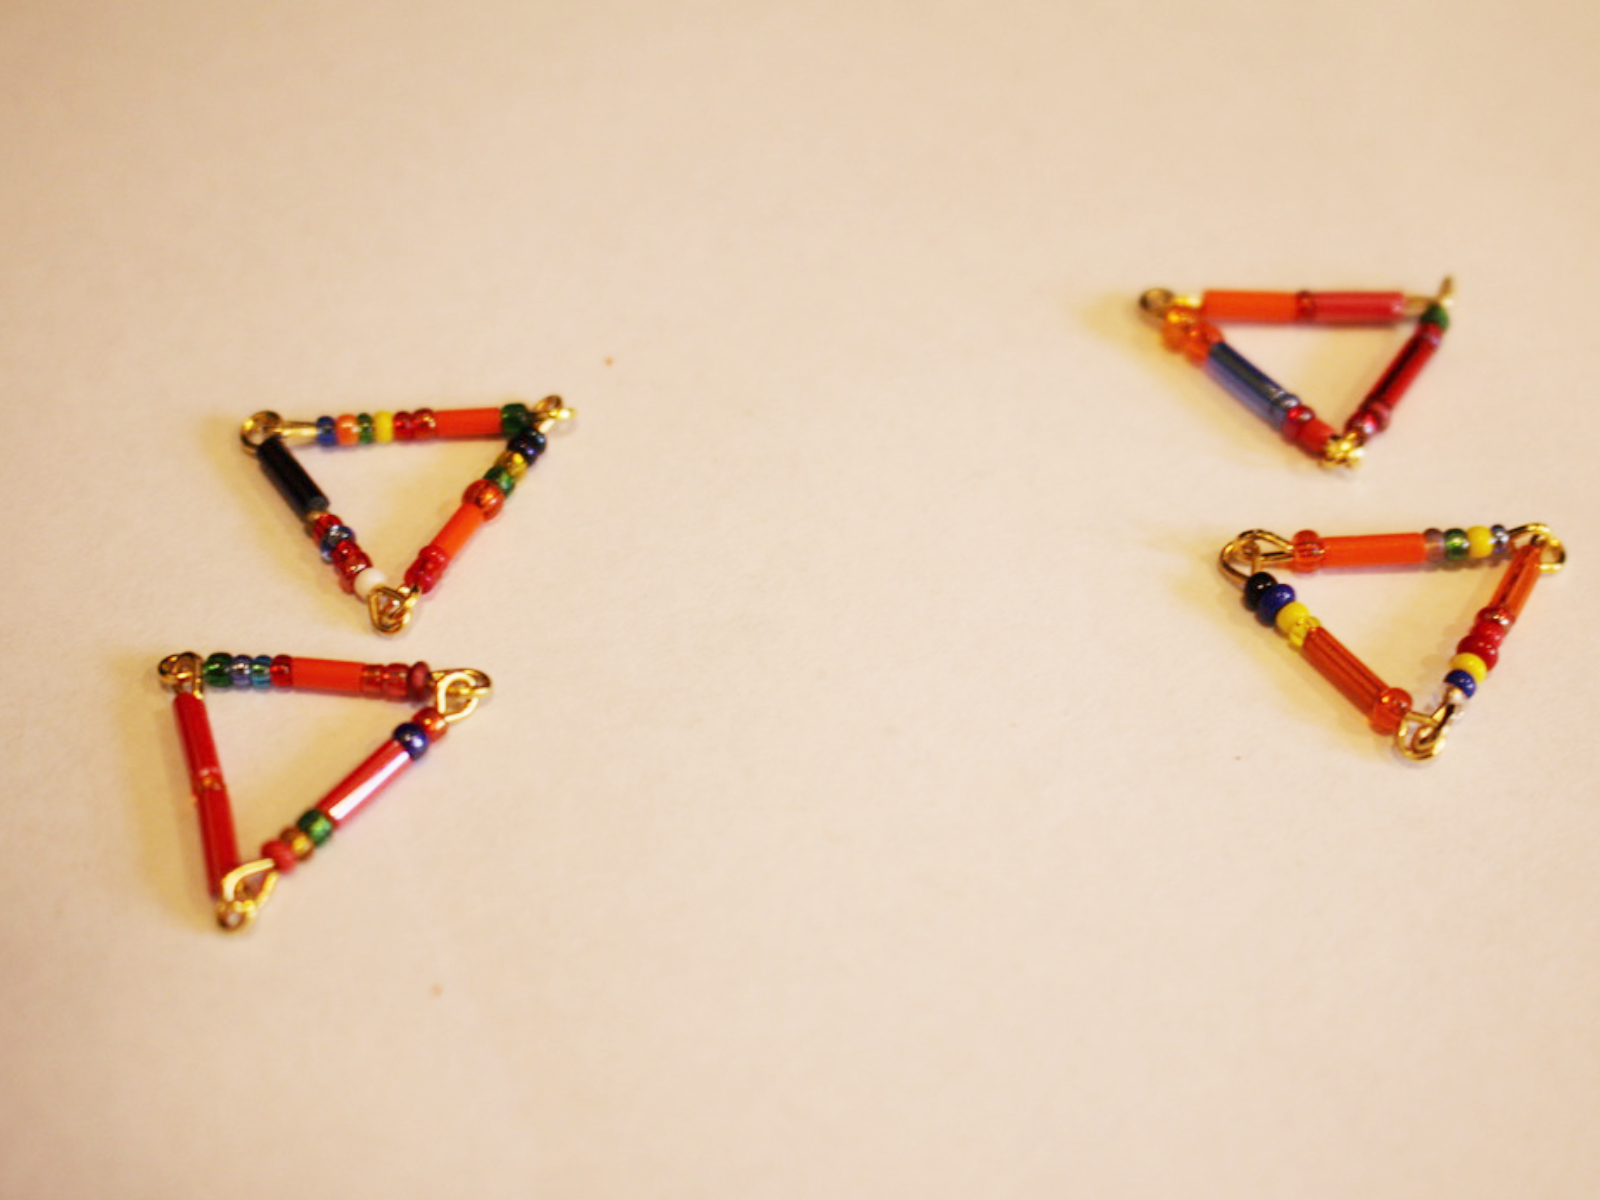
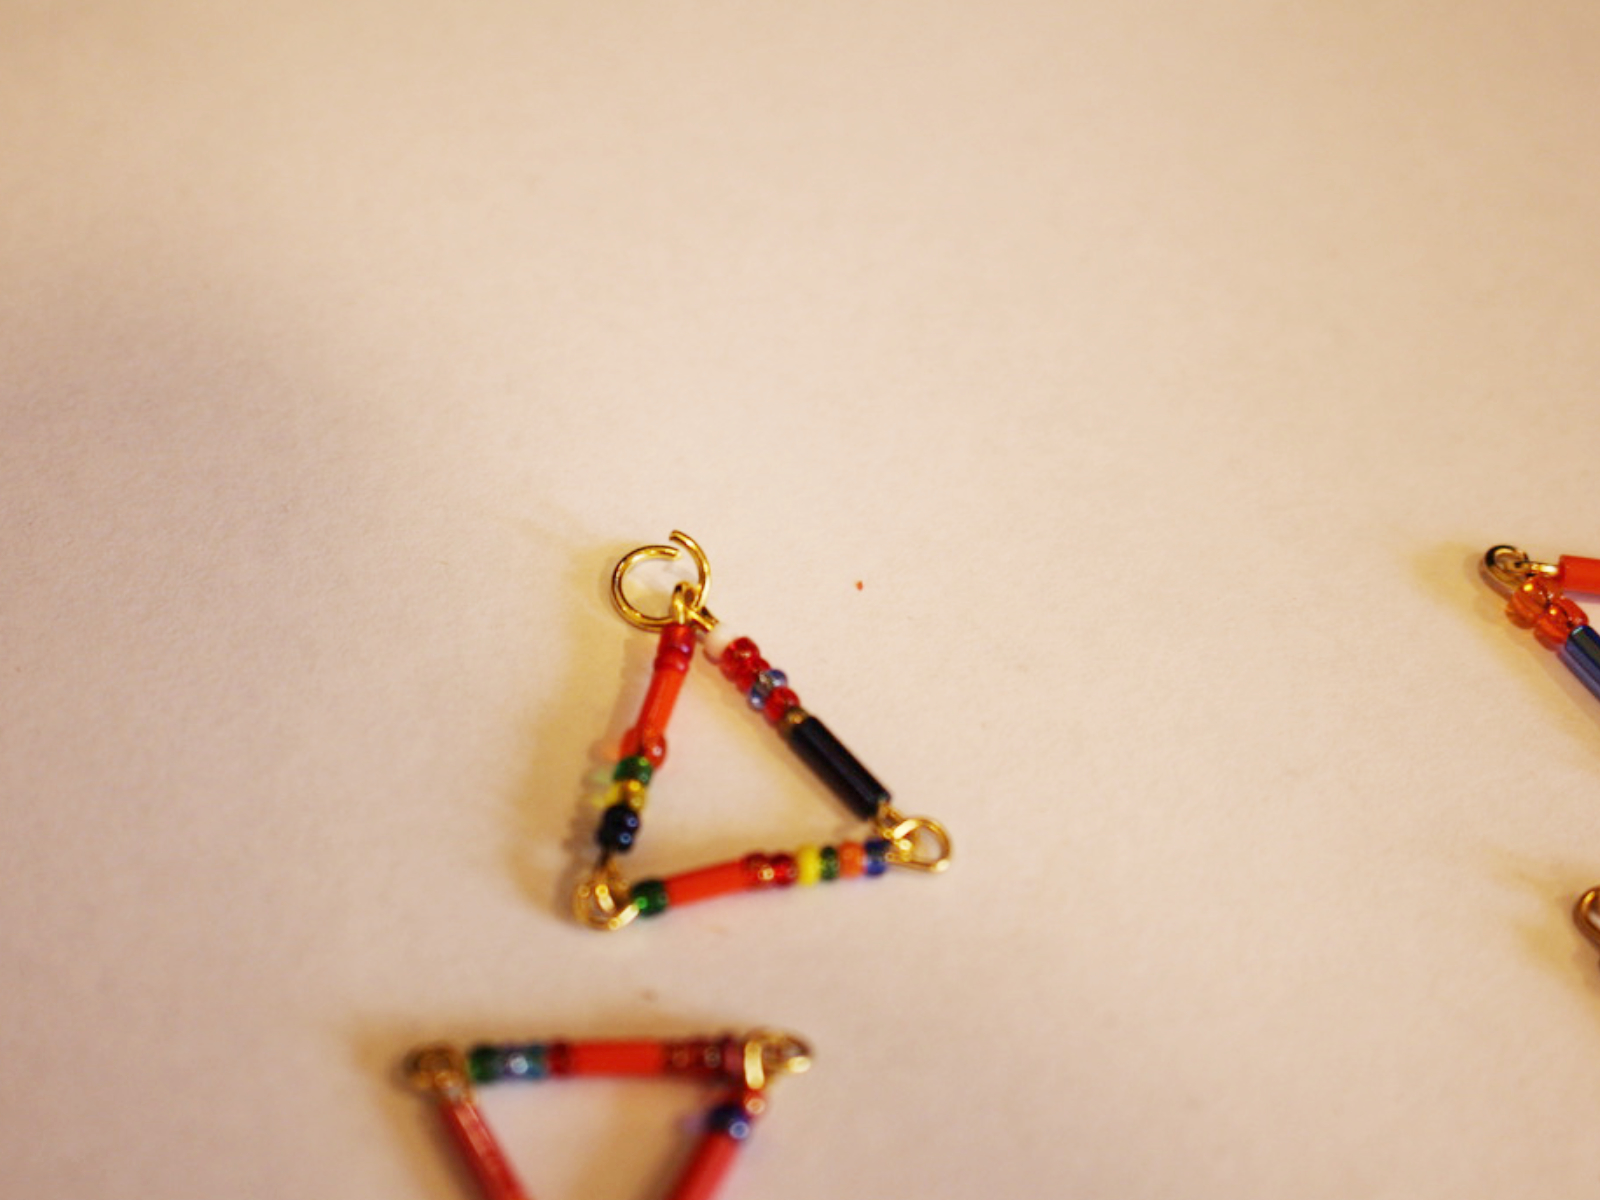
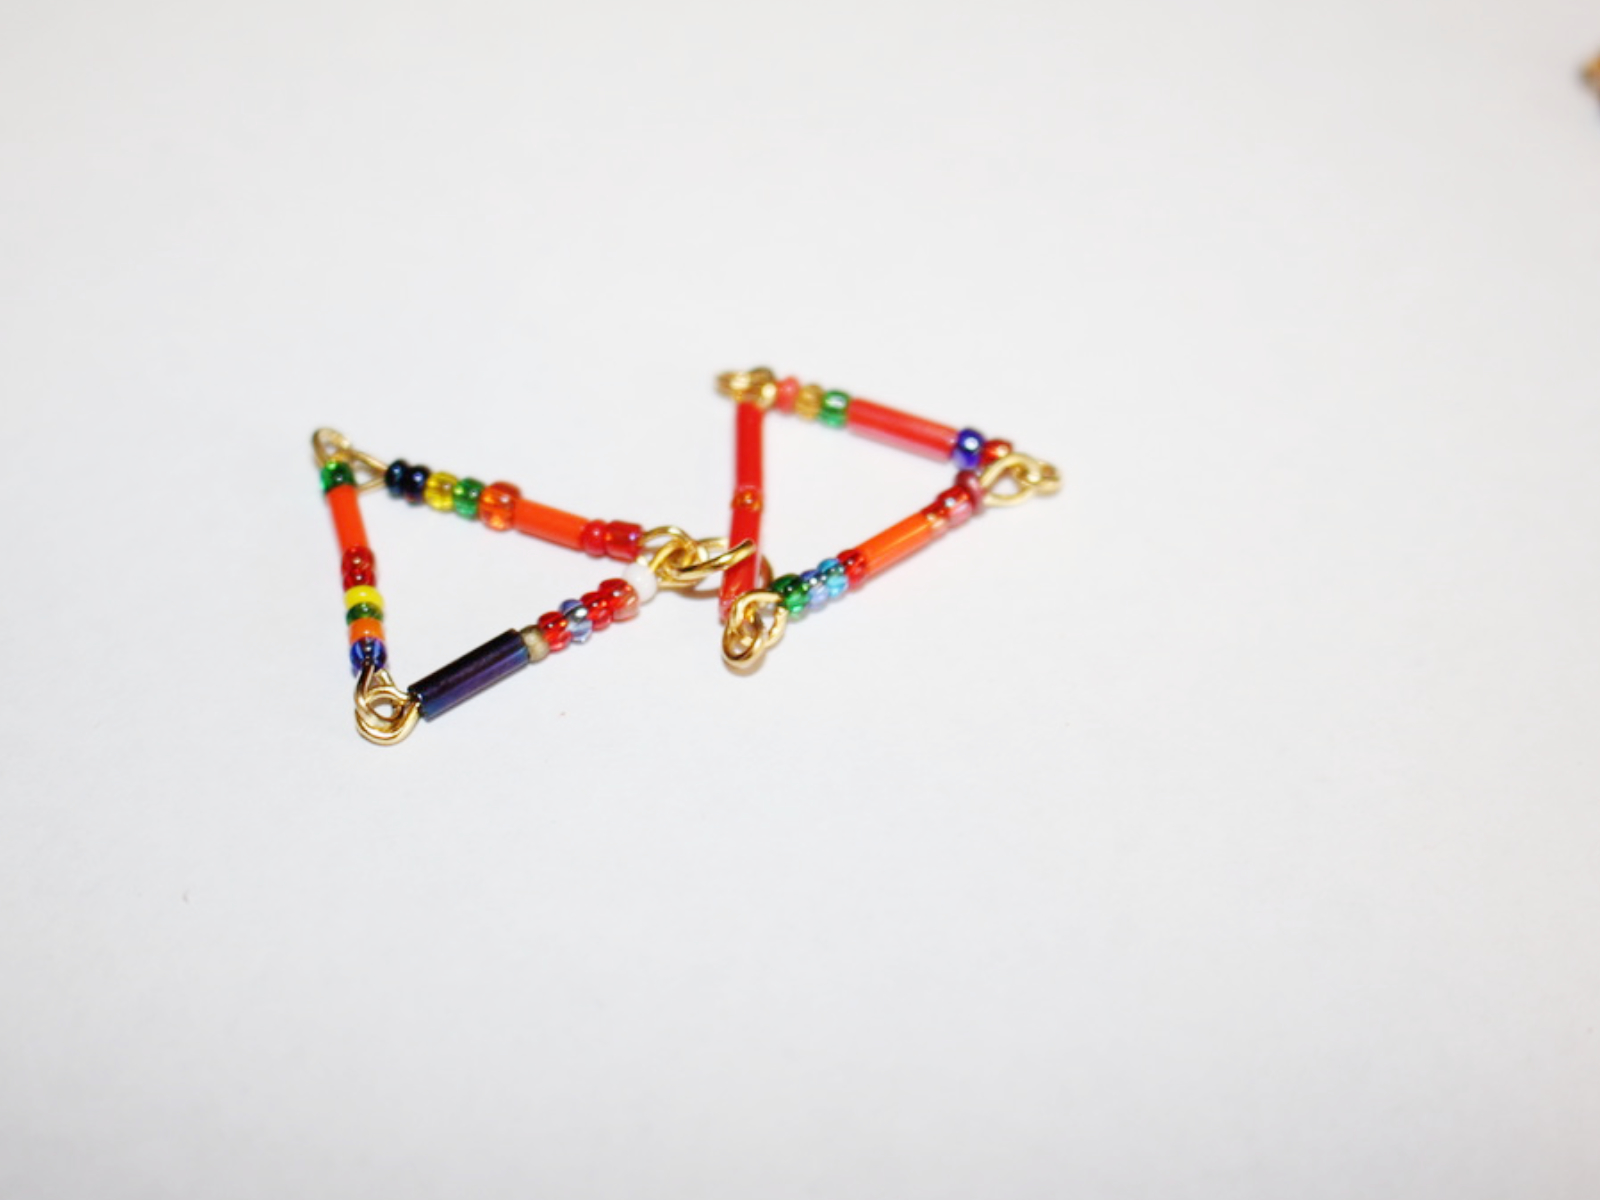
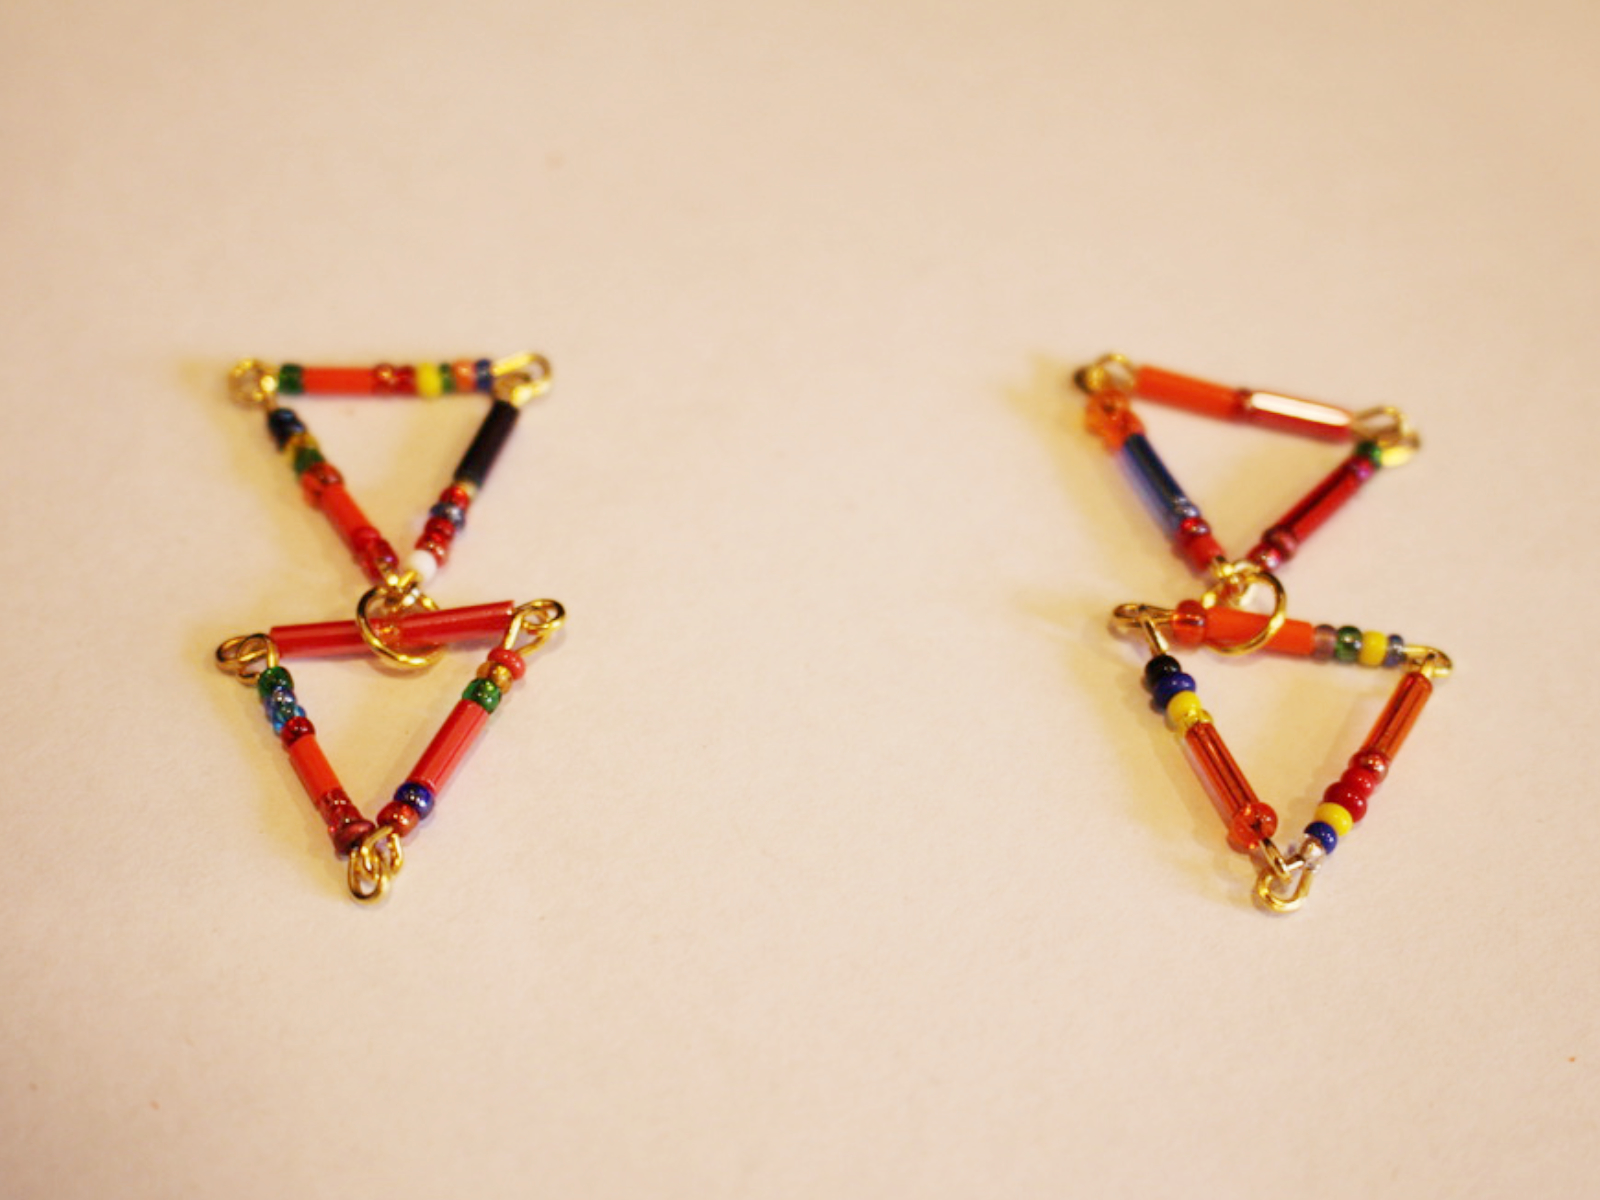
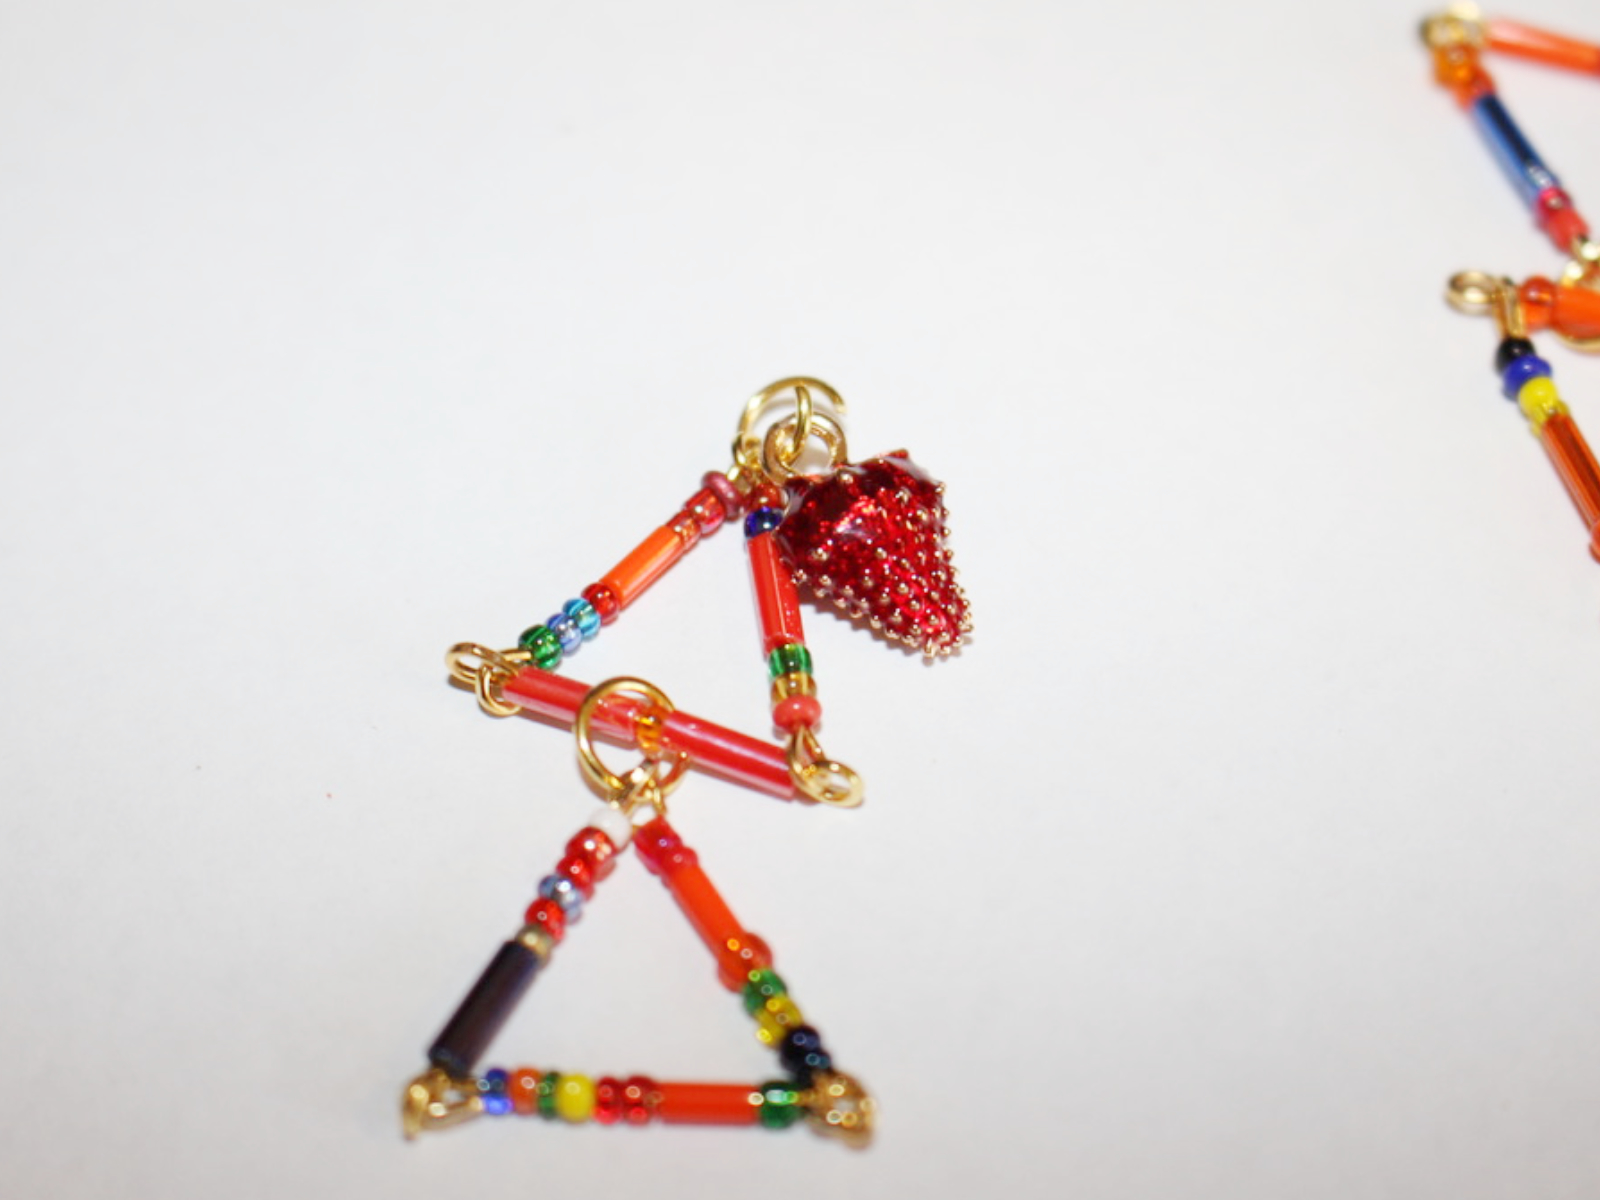
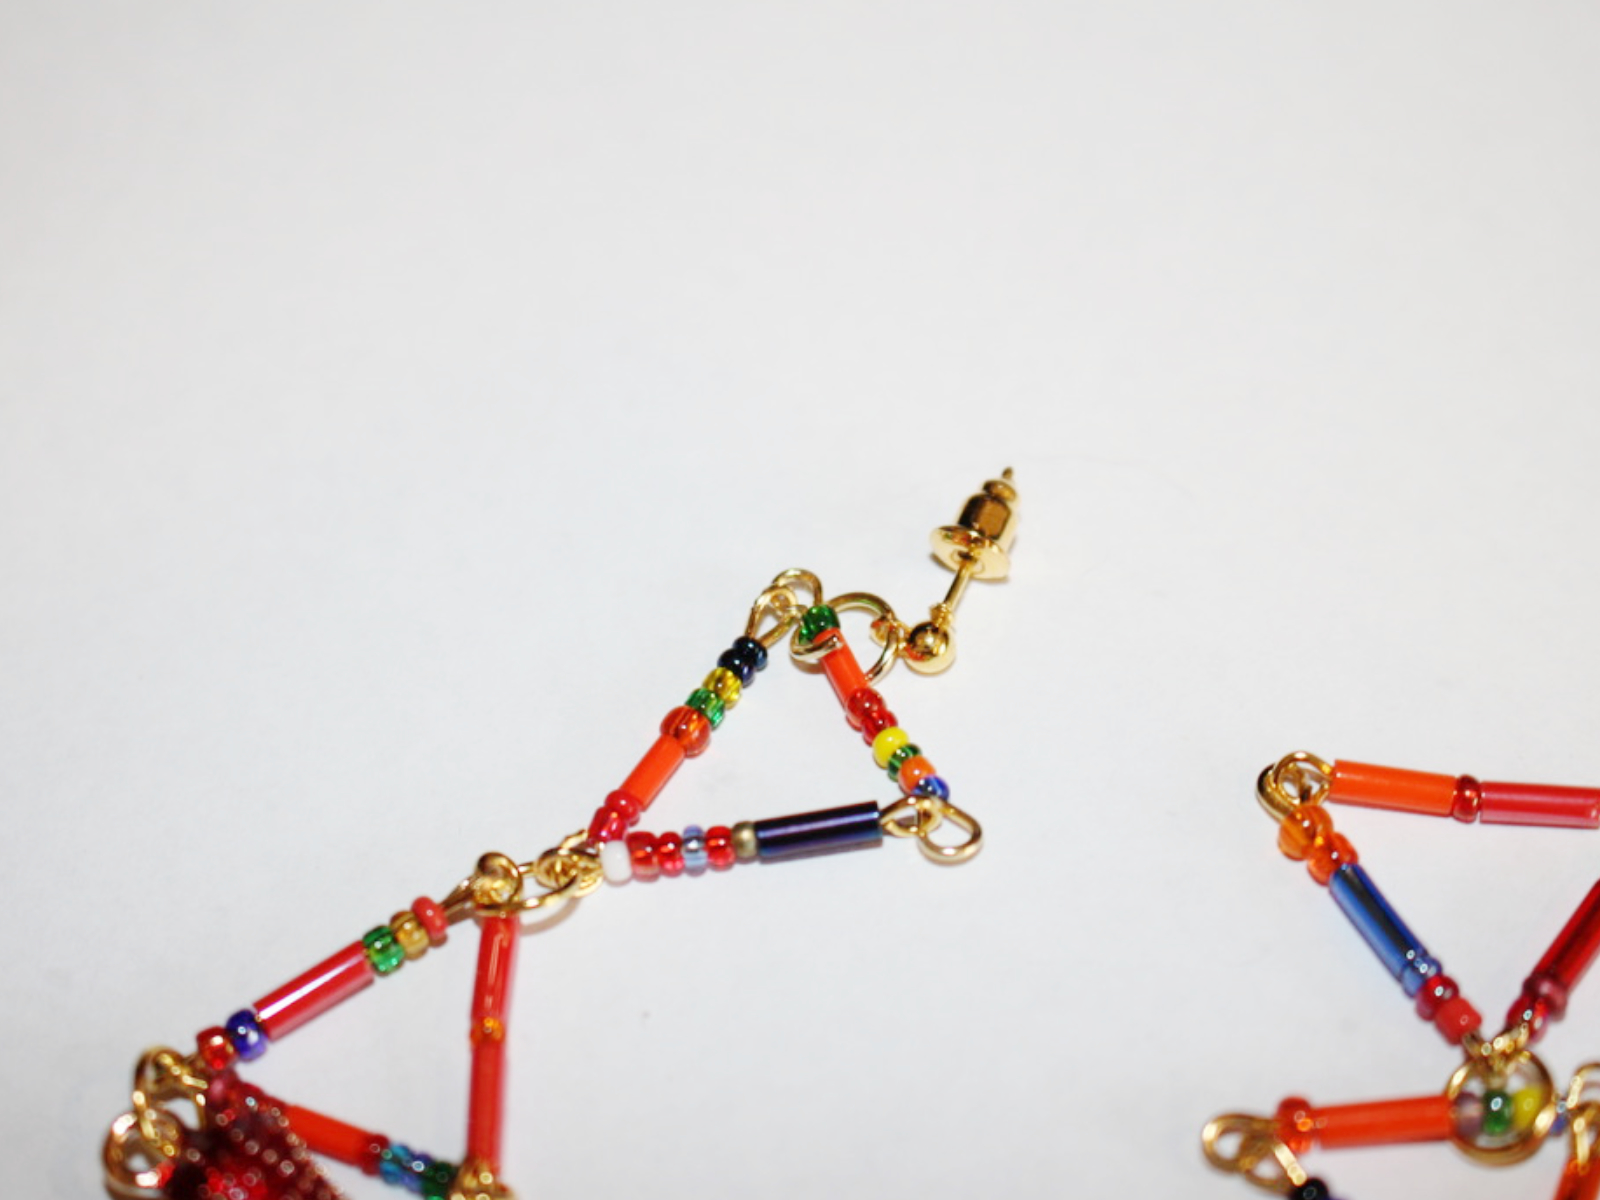
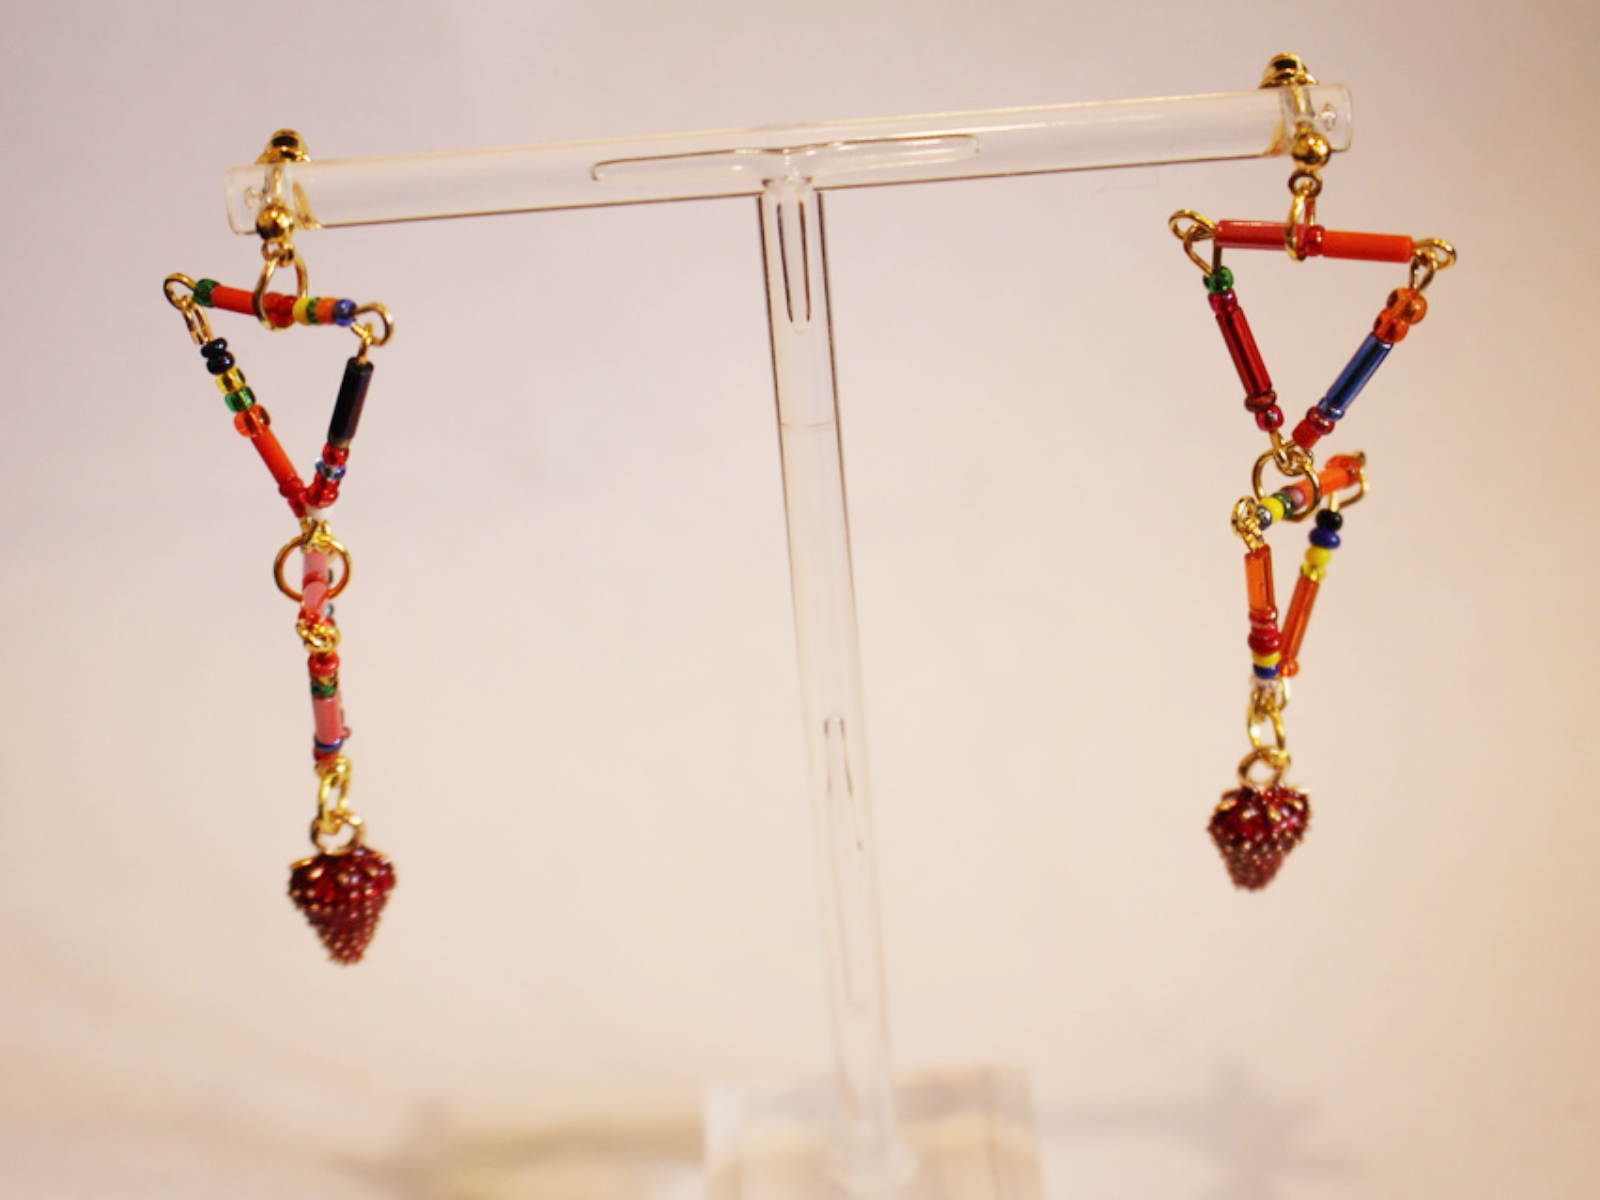
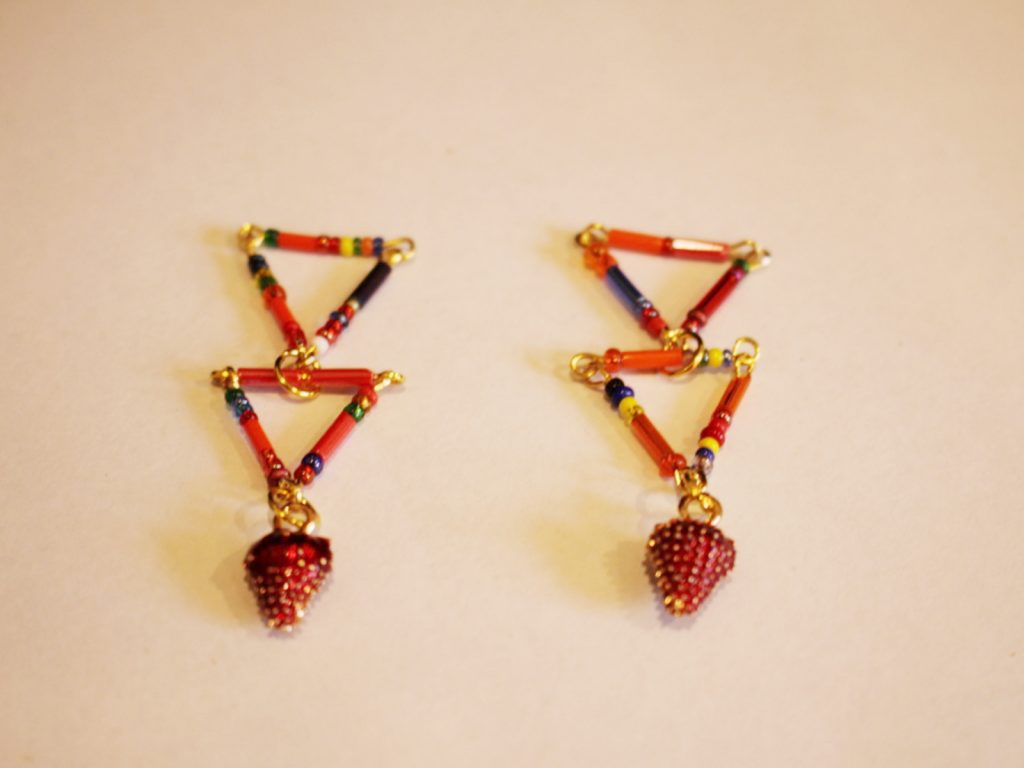
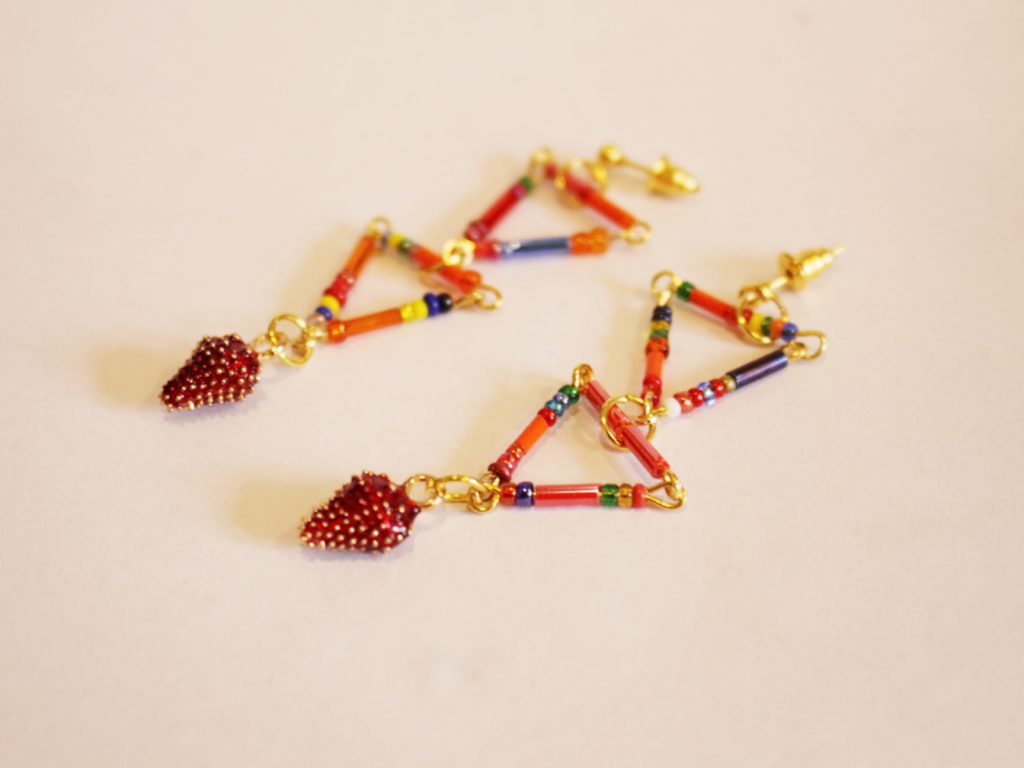
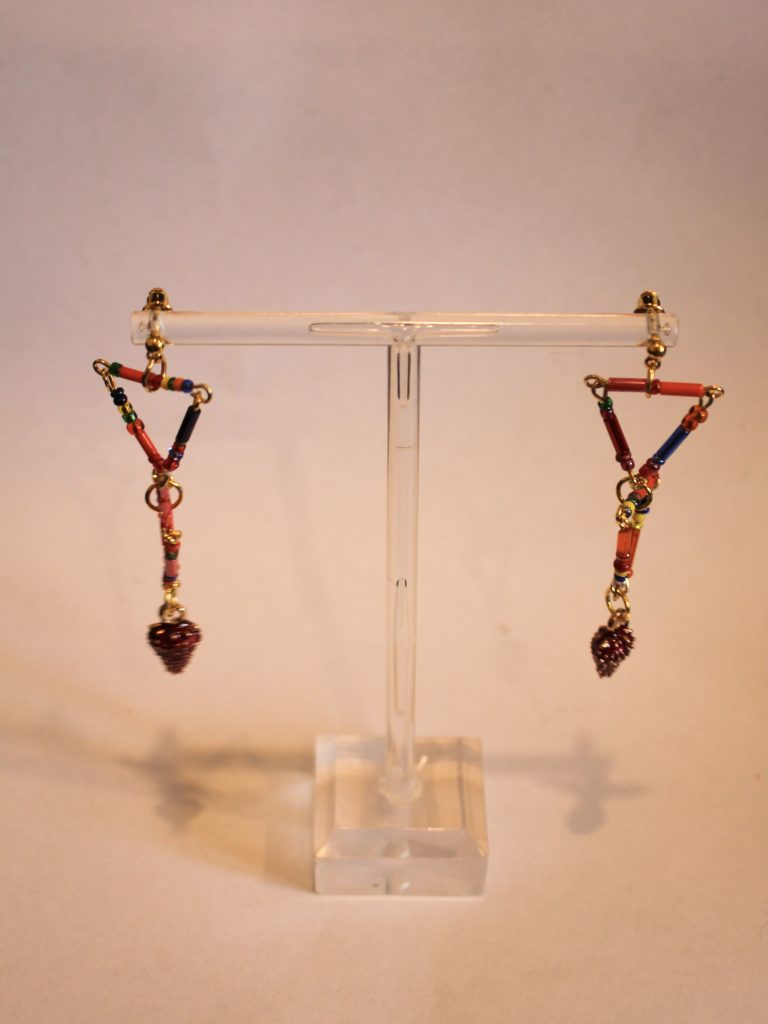
How to make some dangly triangle earrings with cute strawberry charms!
These earrings are pretty fun! They are constructed from eye pins to form some dynamic triangle charms, and as an added bonus, there’s a cute gold-tone and enamel strawberry charm dangling from the bottom of each earring. This pair of triangle strawberry earrings is perfect for framing your face with some fun colour and they’re pretty simple to make.
Please note that this tutorial contains affiliate links.
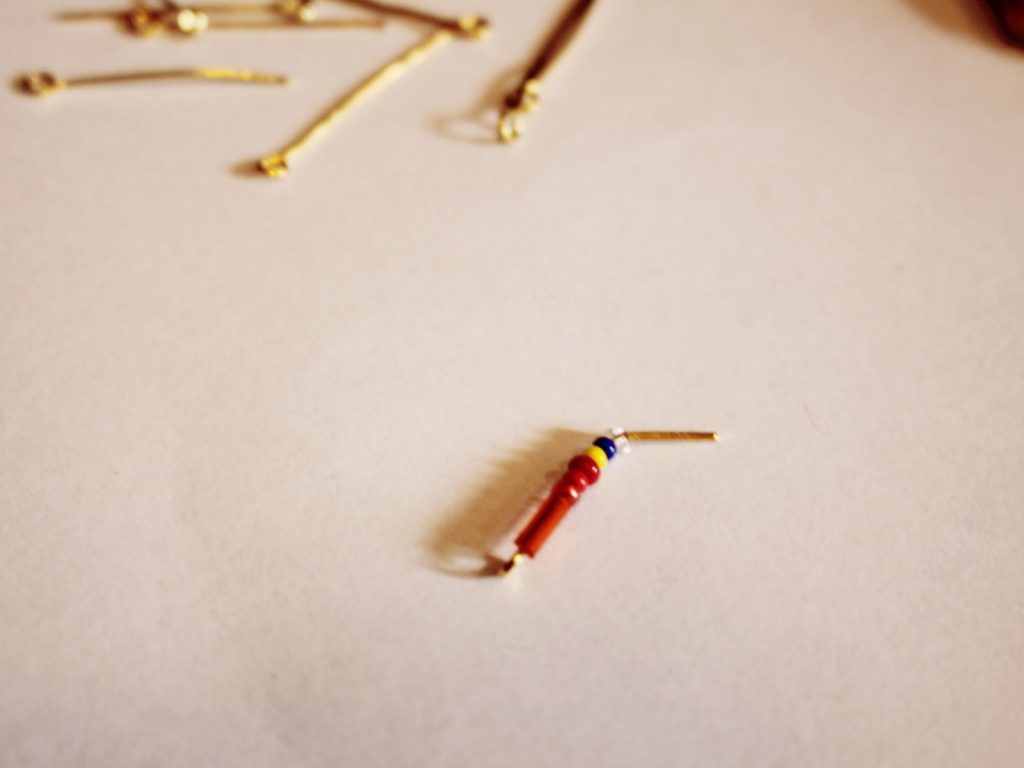
Here are the tools and materials you’ll need to make your earrings:
1: Pliers. I used my round nose and flat nose pliers for this design. Keep your cutting pliers on hand just in case!
2: Twelve (12) eye pins. I used gold-tone ones.

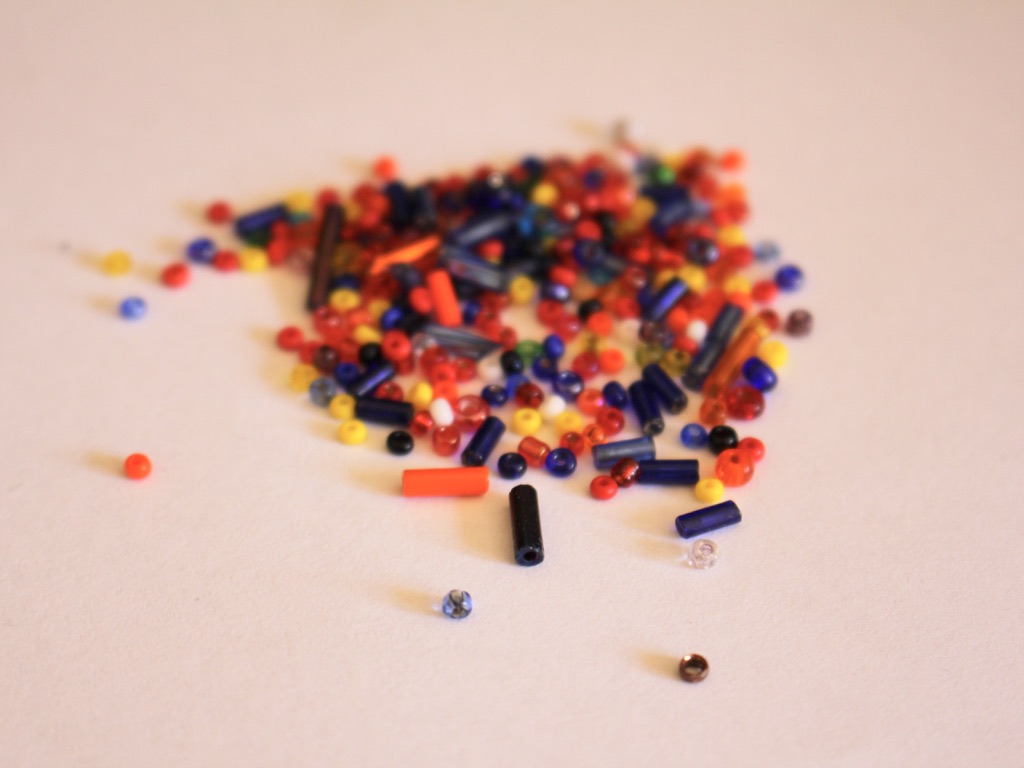
3: Beads. I used mixed seed and bugle beads made from glass.
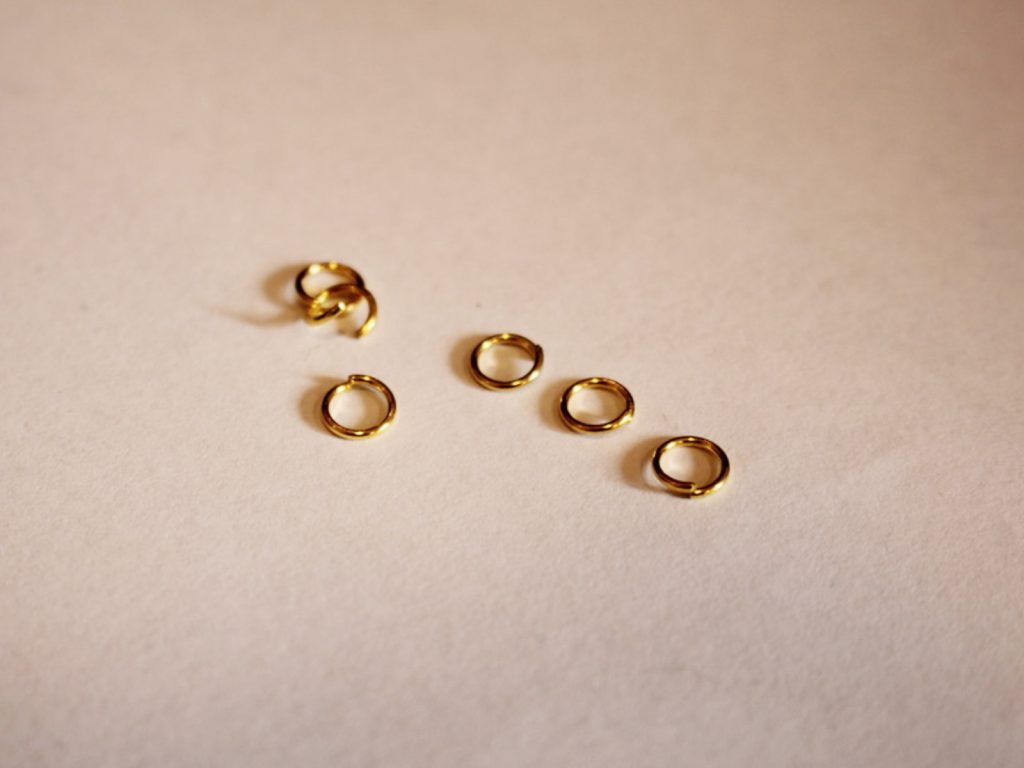
4: Six (6) jump rings. I used gold-tone to match my eye pins and other findings.
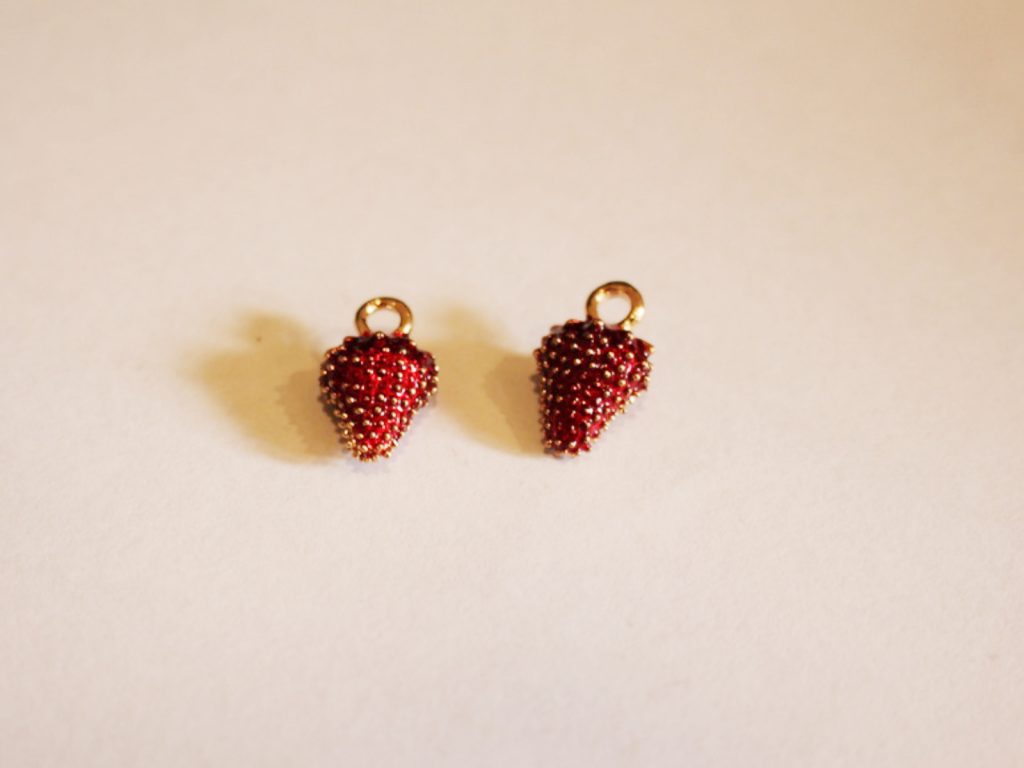
5: Two (2) strawberry charms.
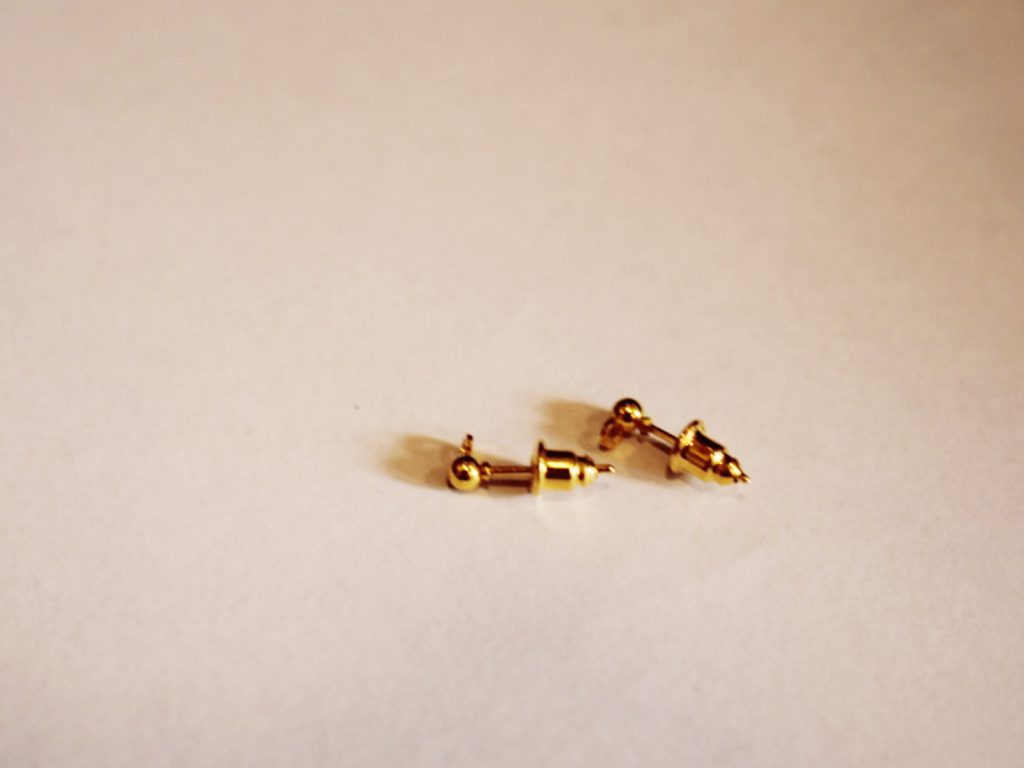
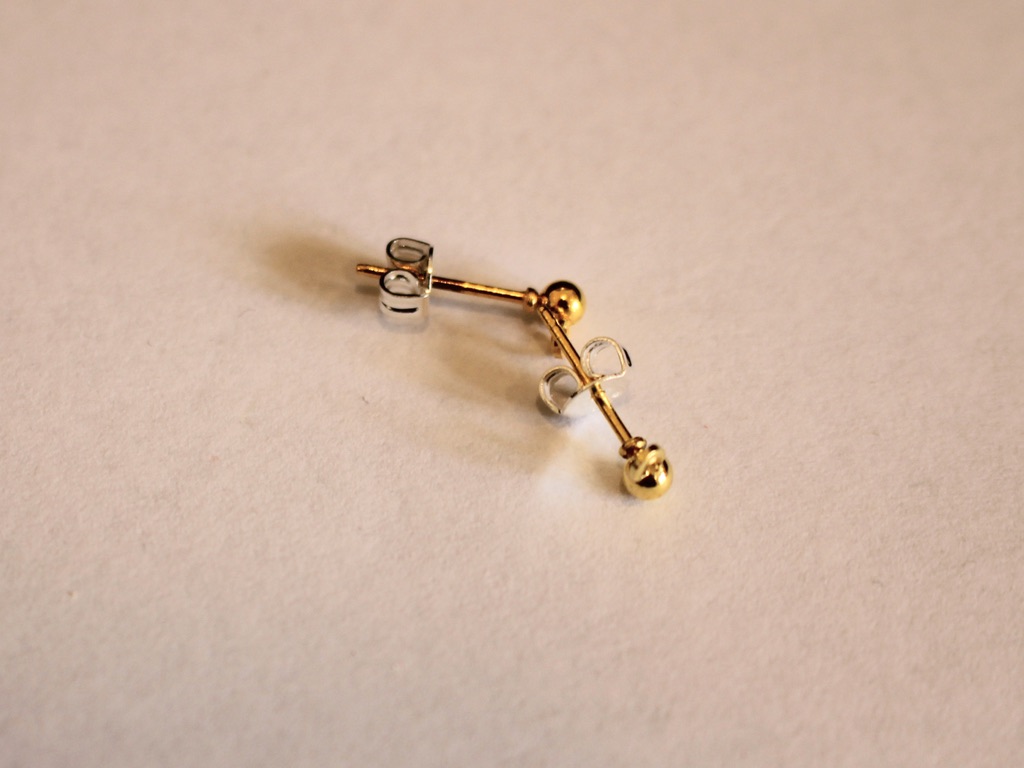
6: Two (2) post earring findings.
Now here are all the steps to follow to make your triangle and strawberry dangle earrings:
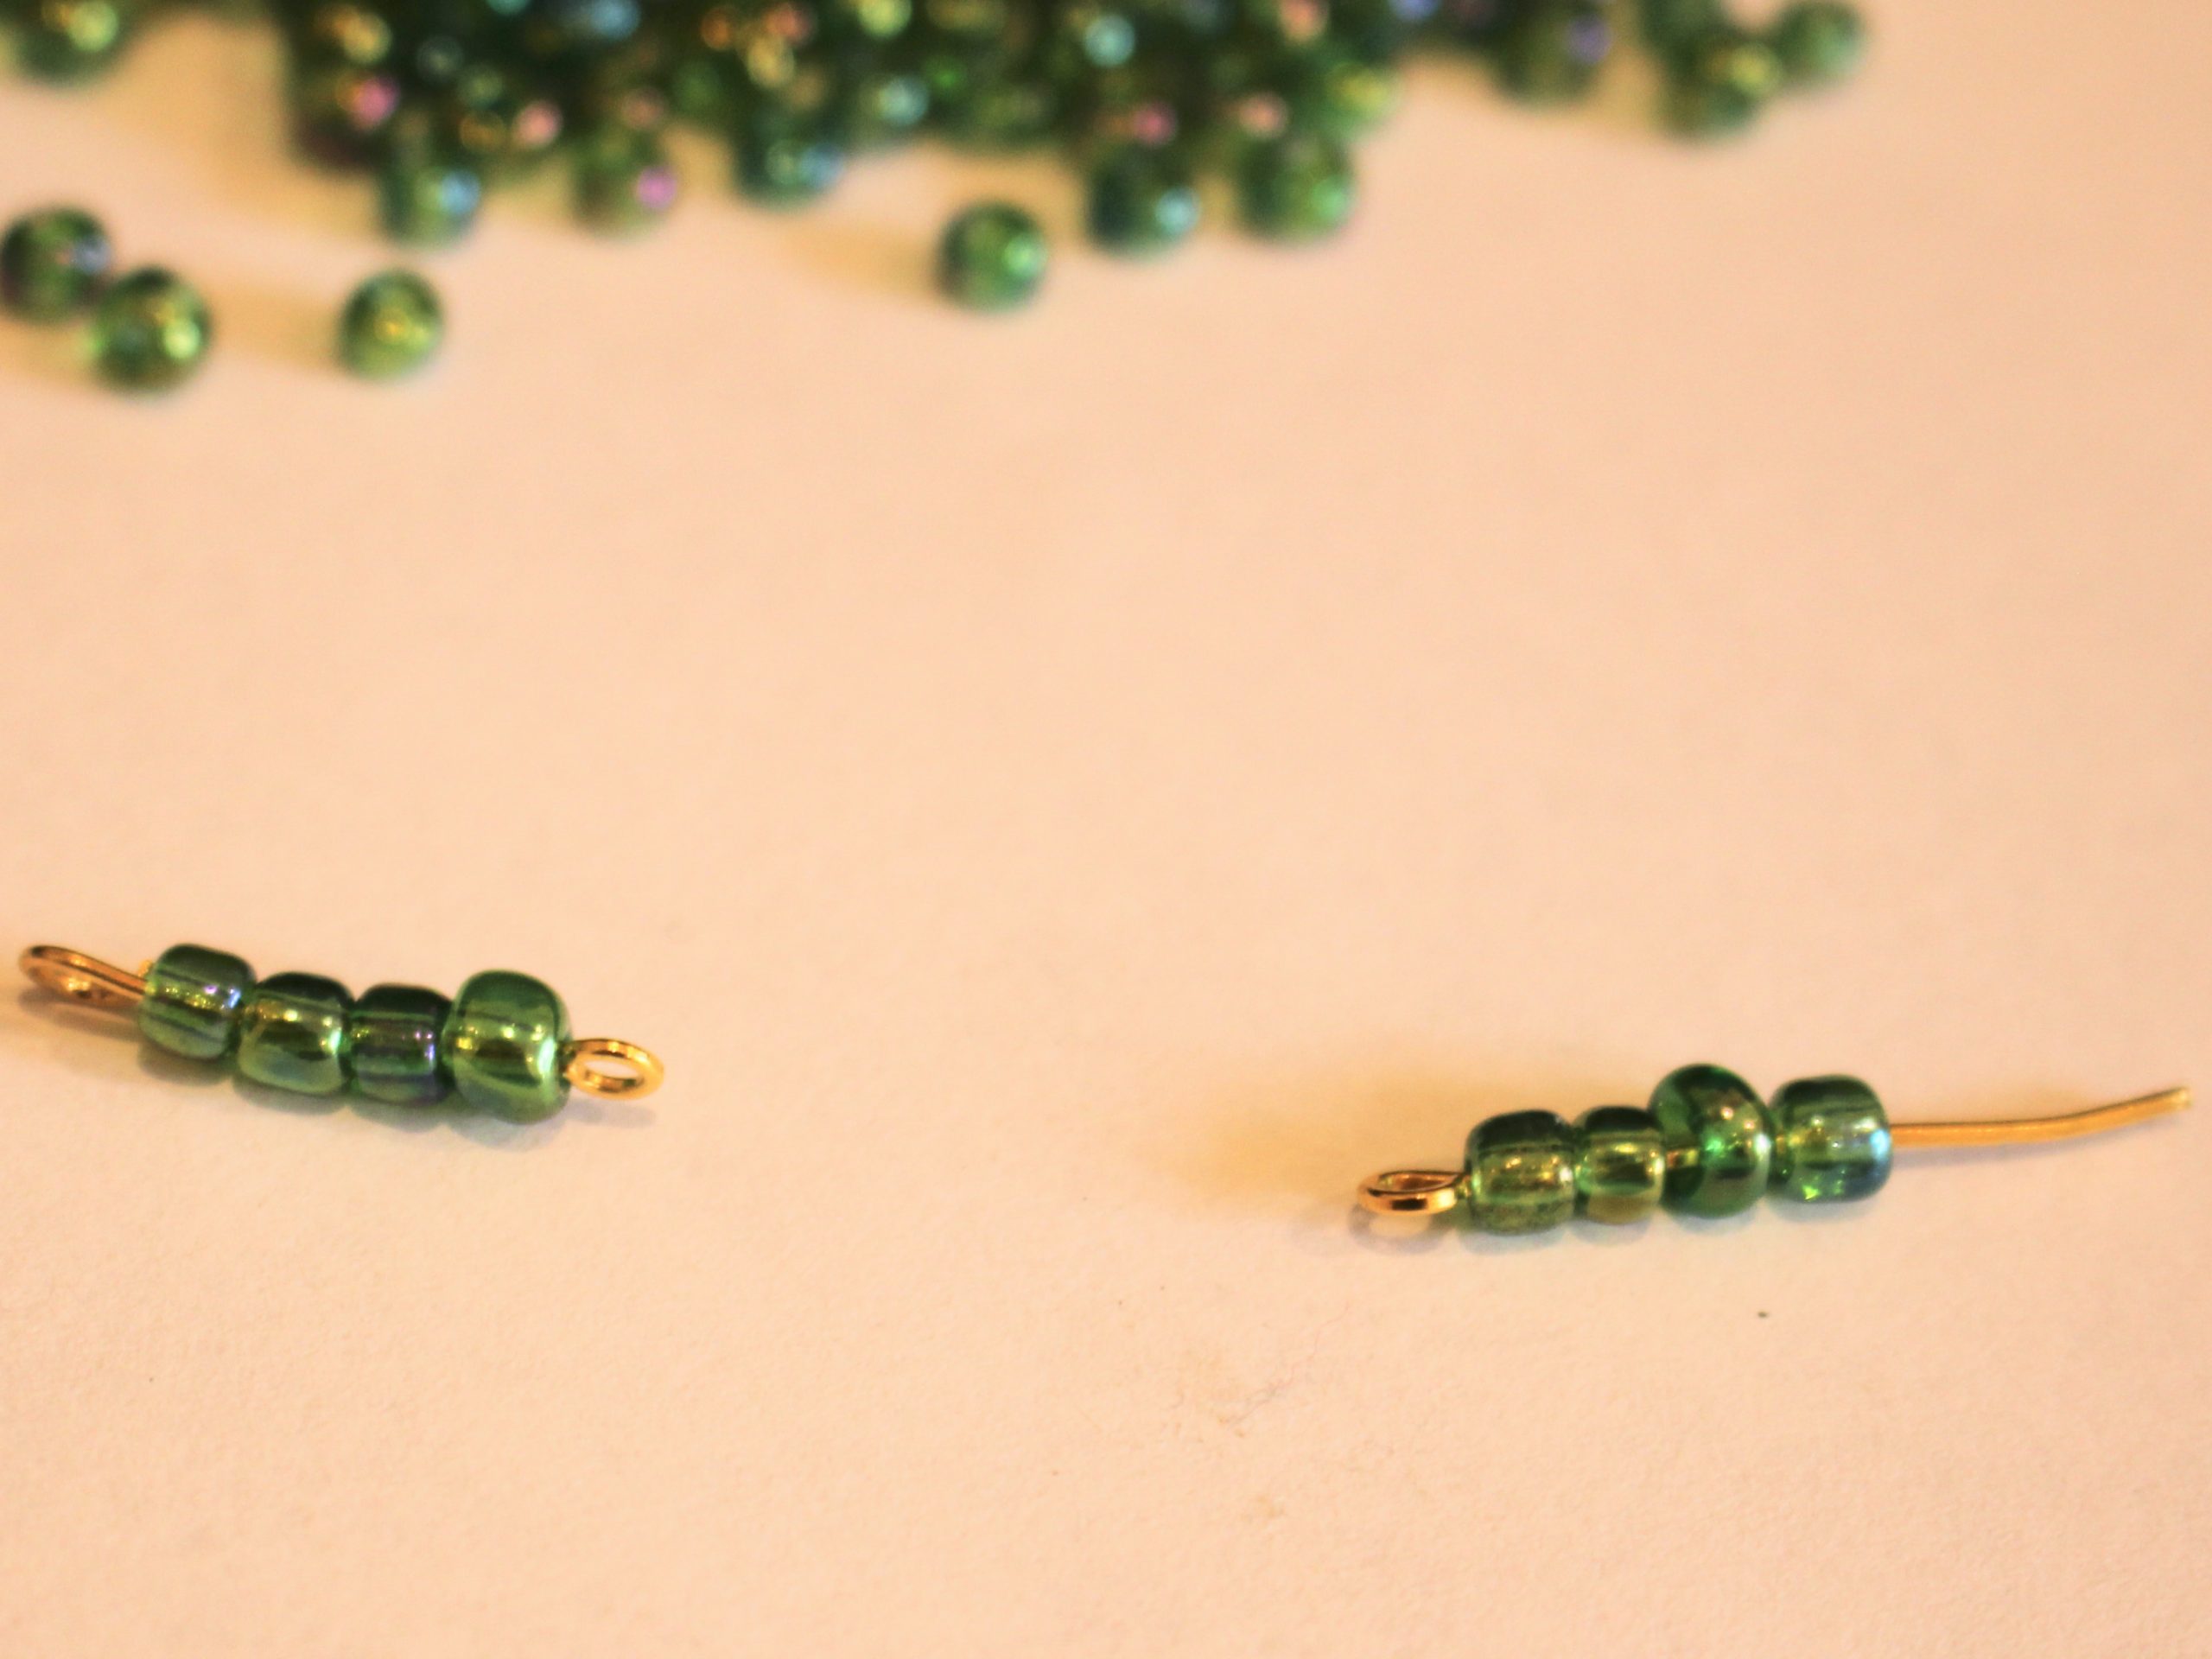
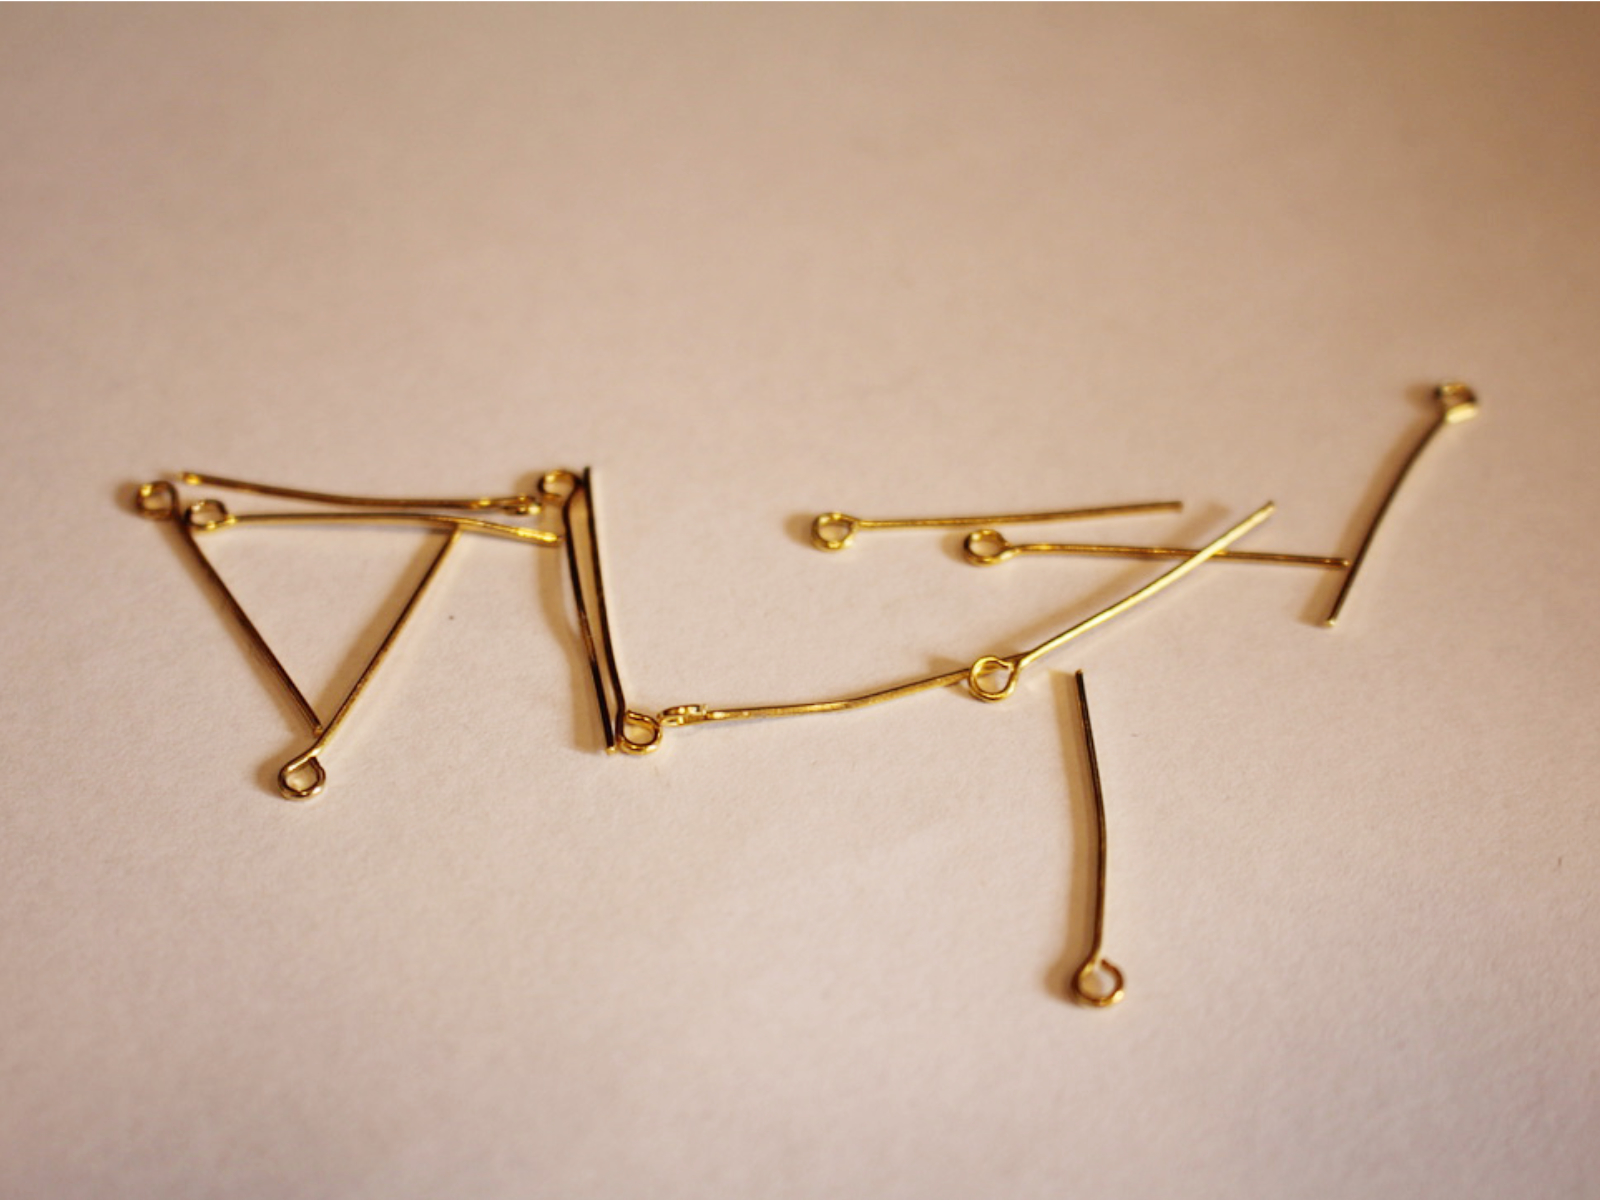
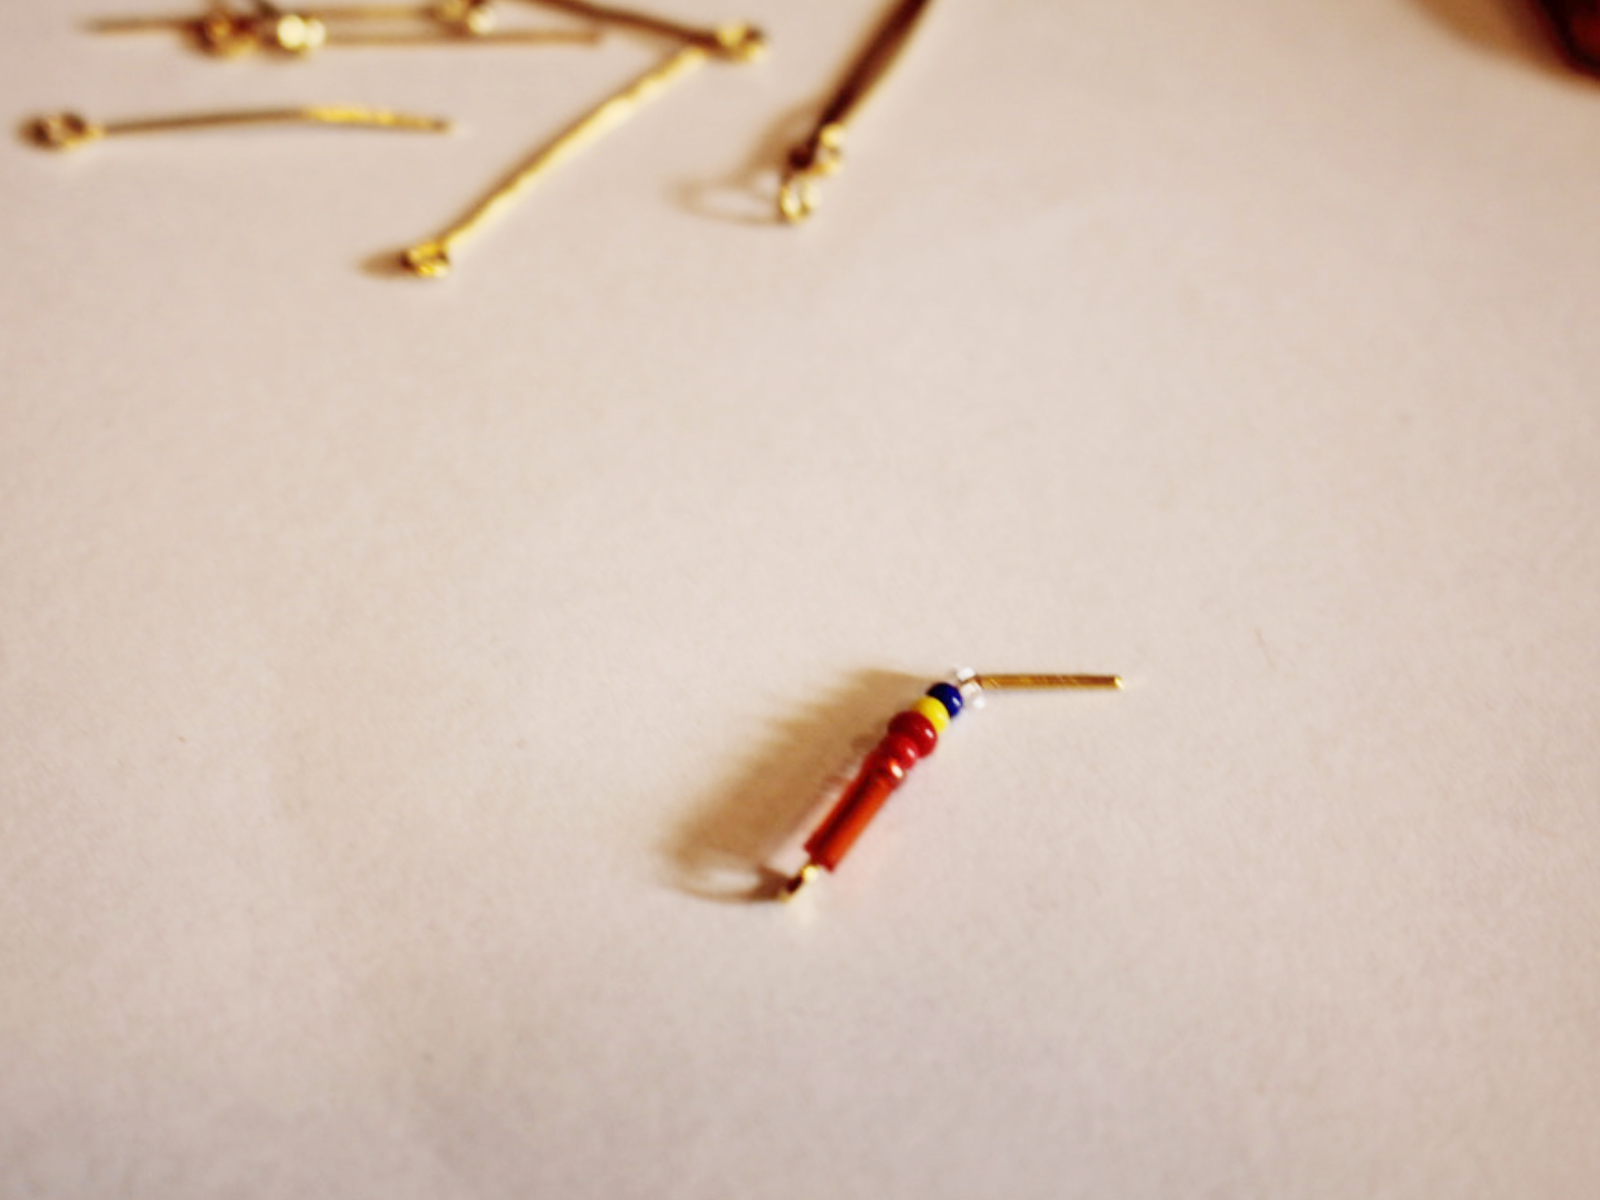
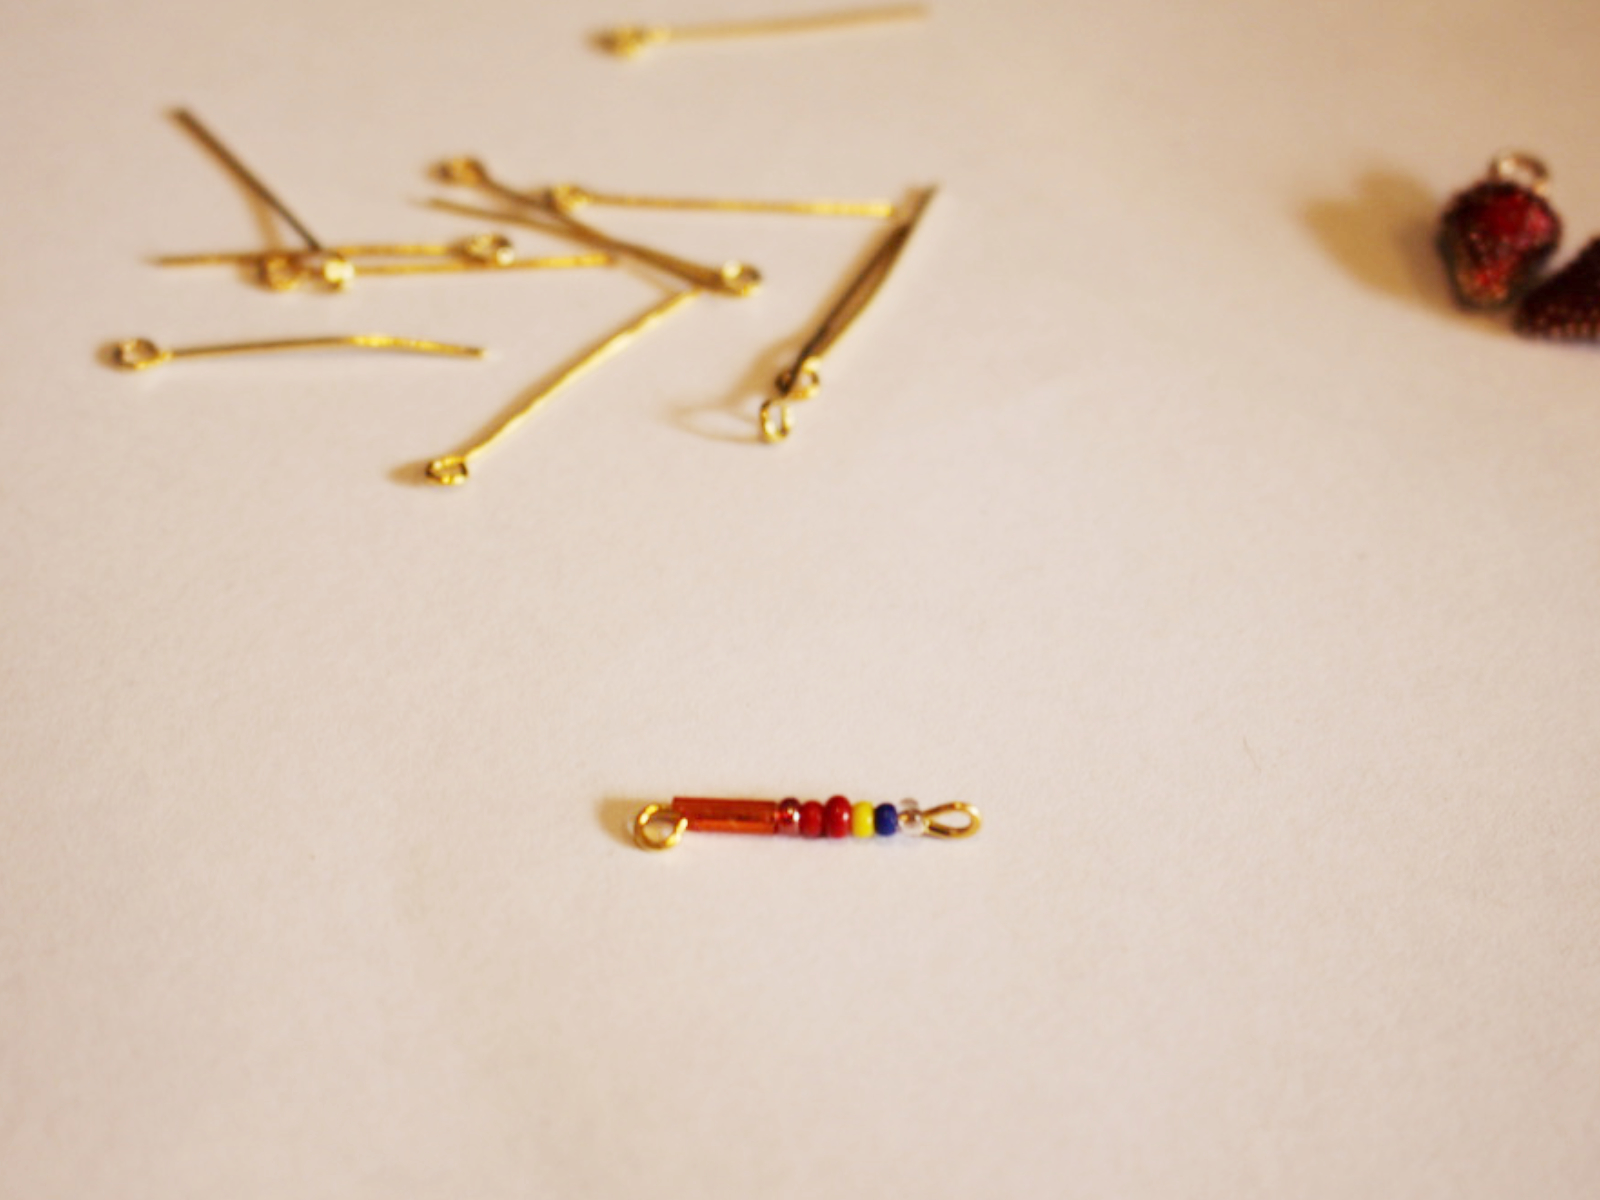
1: Add beads to one of the eye pins. Leave approximately 0.8-1cm without beads, this is the section that you will bend into a loop.
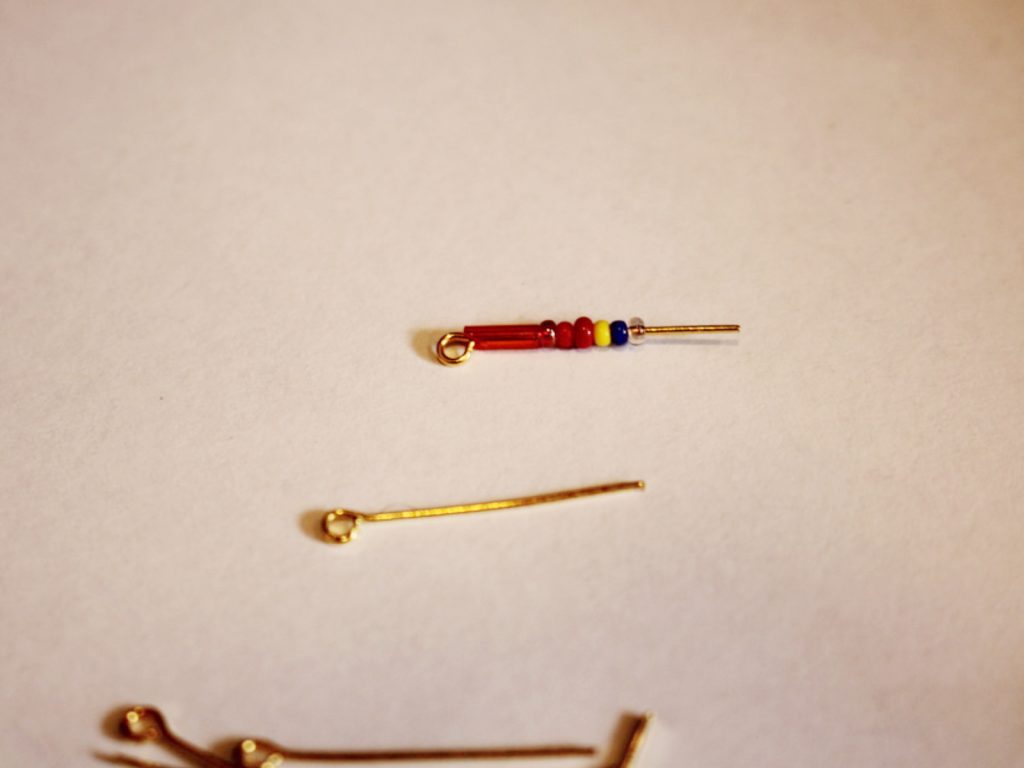
2: Using round nose pliers, bend the pin to form an angle.
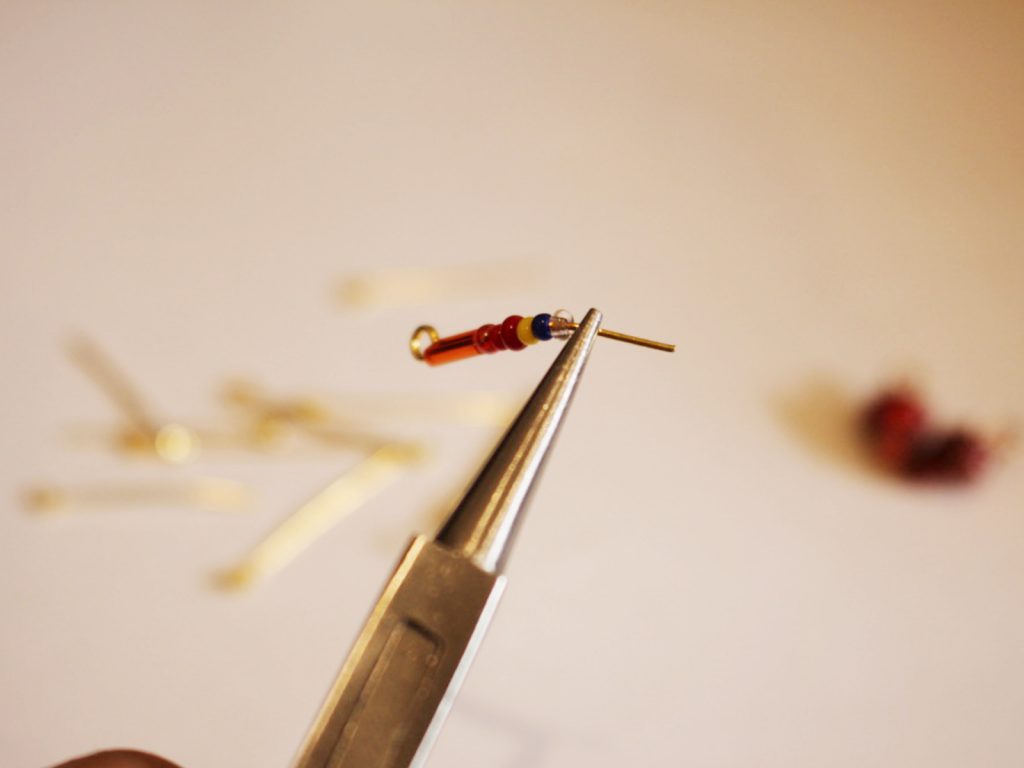
3: Bend the top of the wire around the barrel of the round nose pliers to create a loop. Now the beads are secured onto the pin.
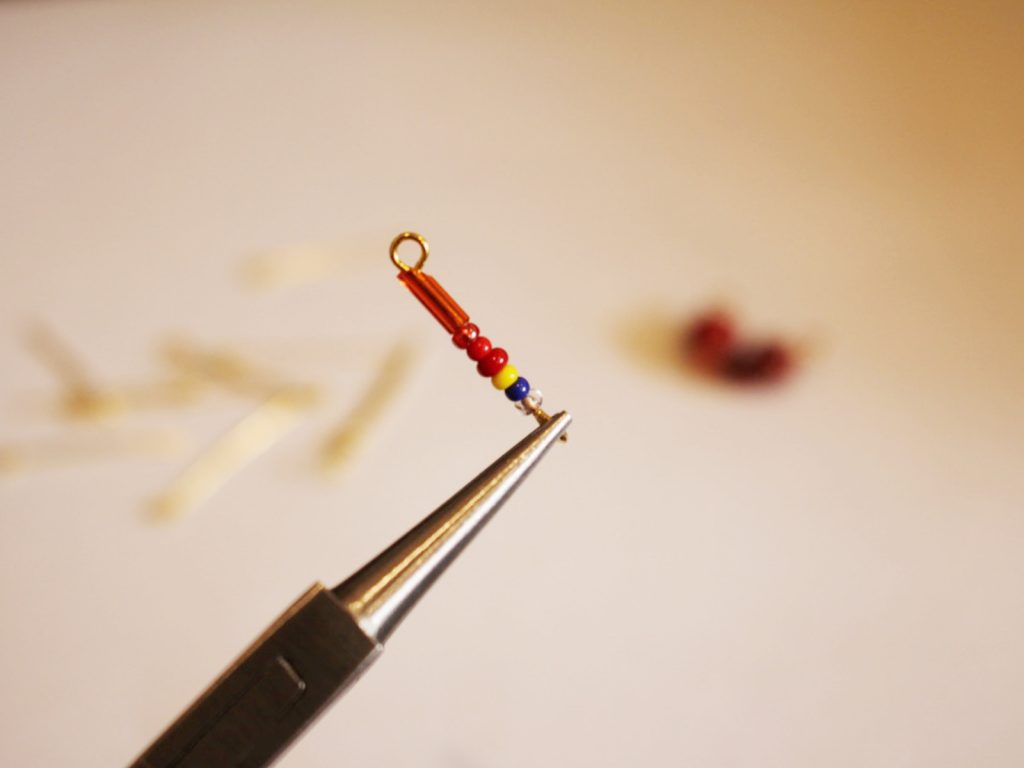

4: Repeat steps 1-3 for the remaining eye pins.
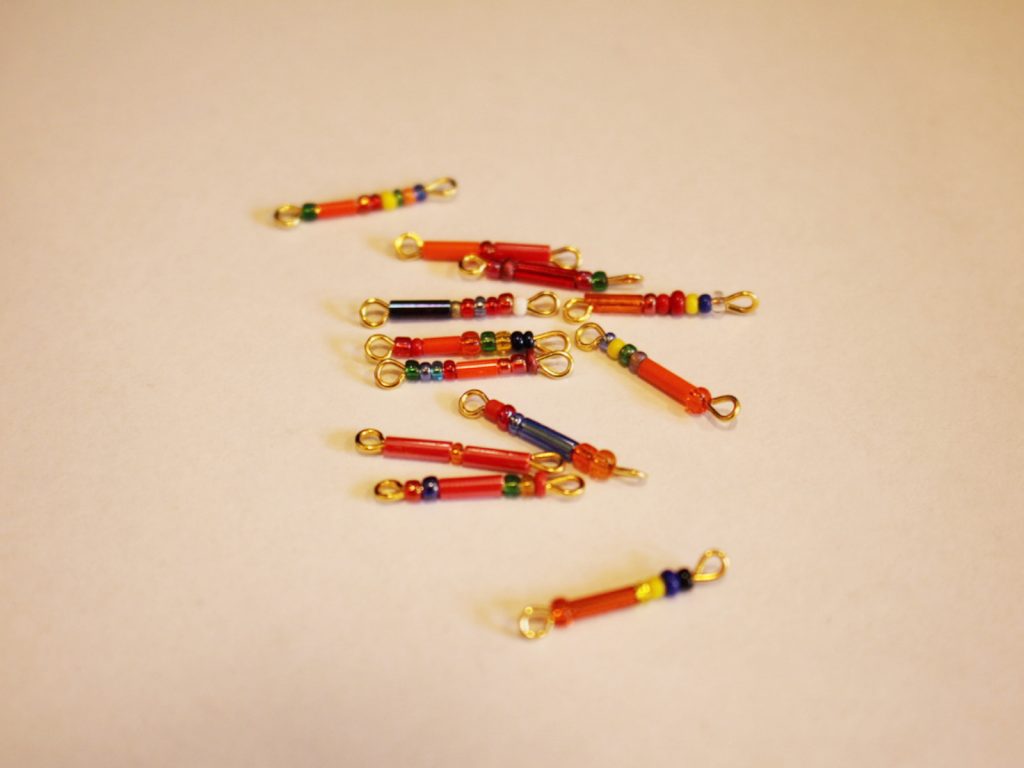
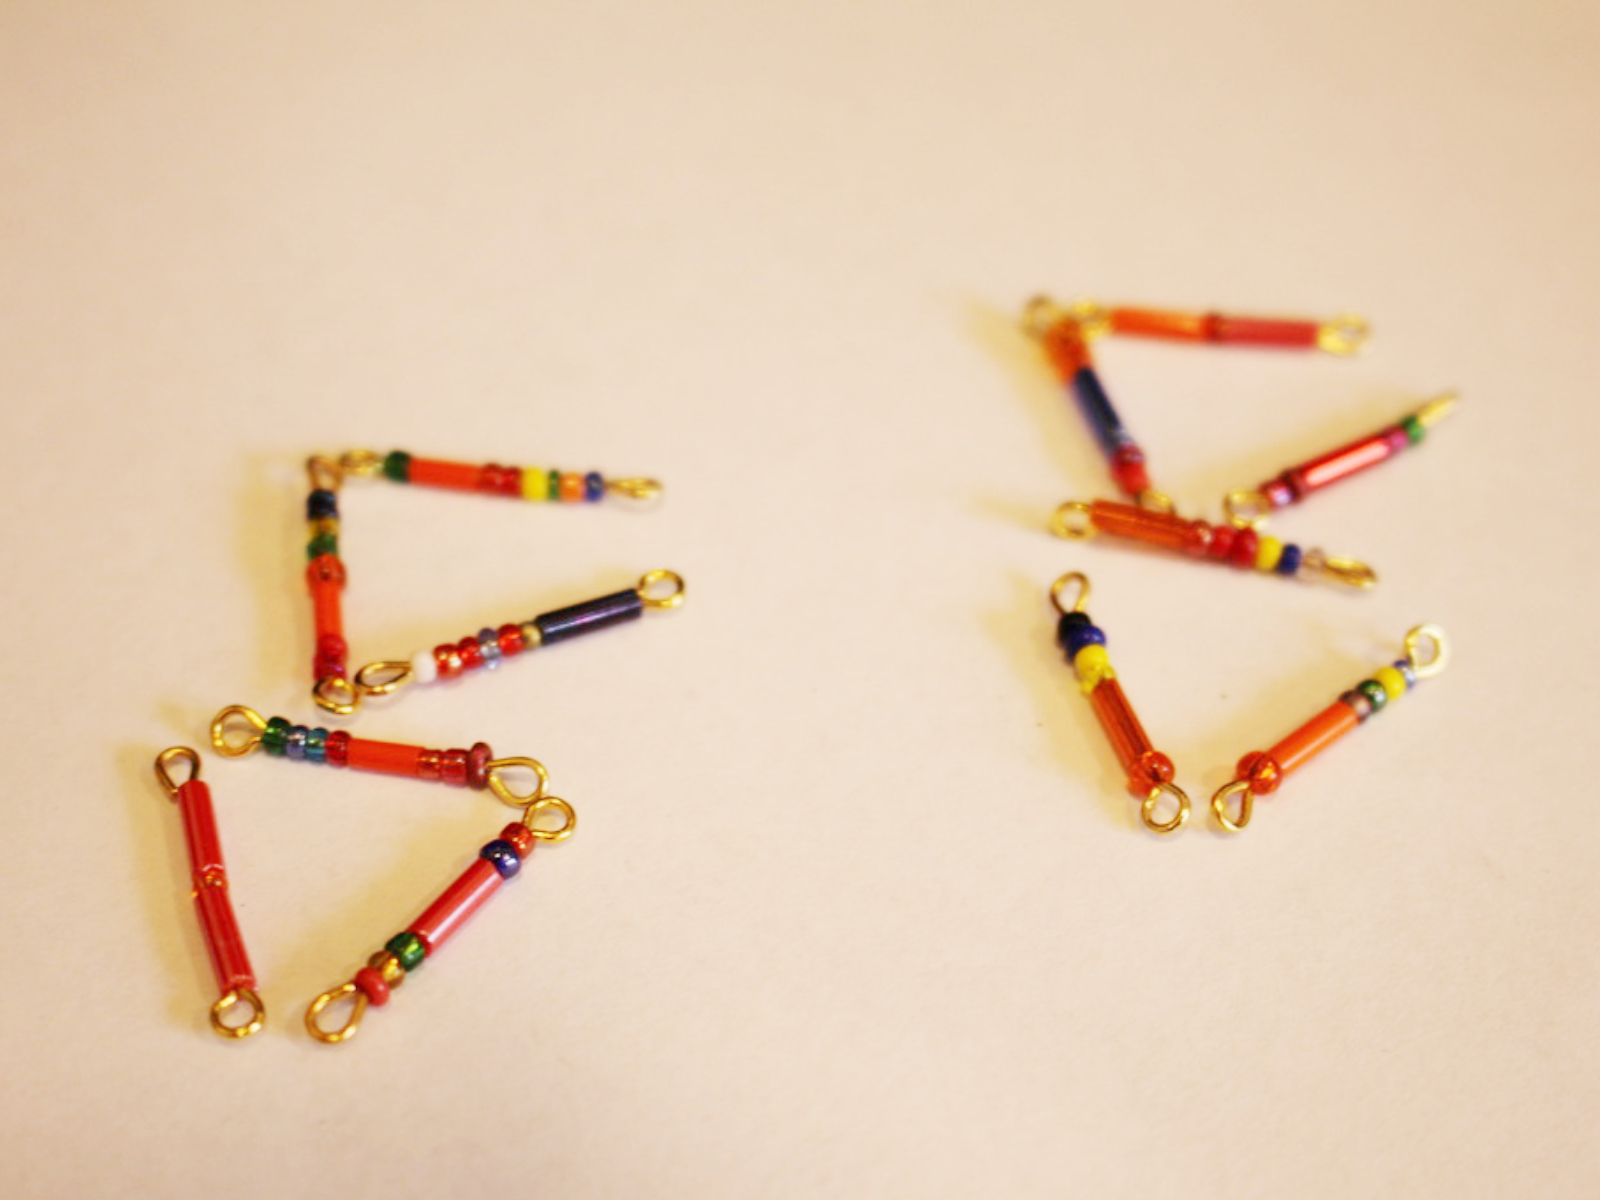
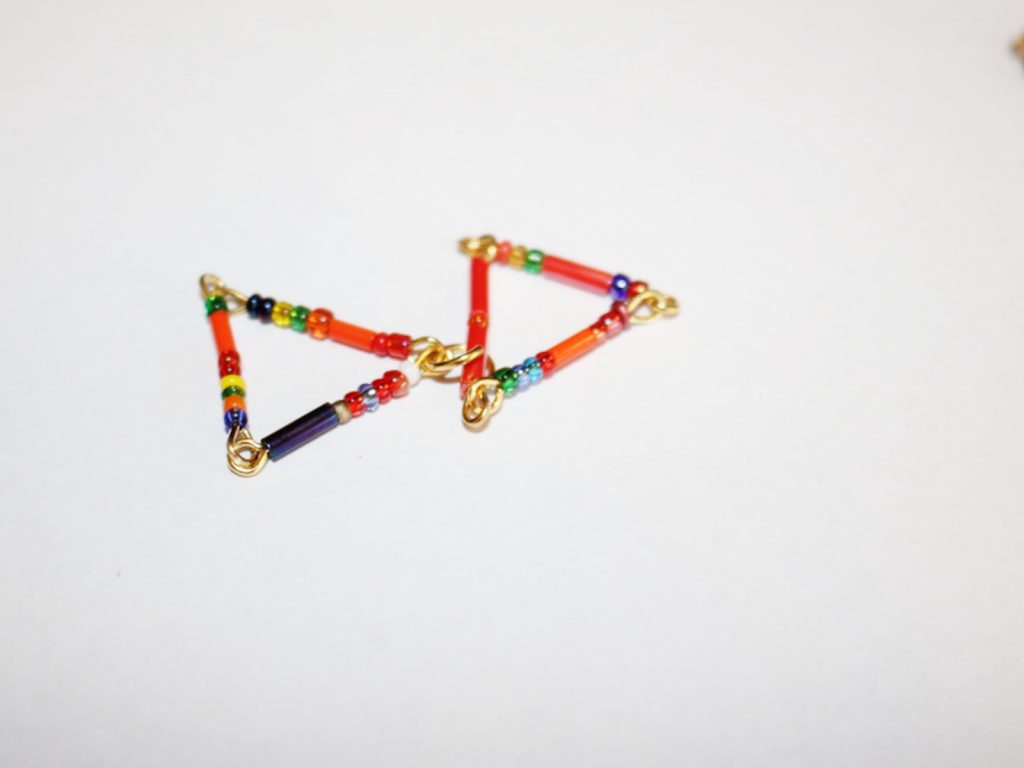
5: Now you have all your eye pins beaded you can begin attaching them together to form your triangles.

6: Attach one eye pin to another to form a mini-chain.

7: Attach another eye pin to the first two.
8: Now attach the loose end of the first eye pin to the end of the last eye pin to form a triangle shape. Close the loops to secure the eye pins together.
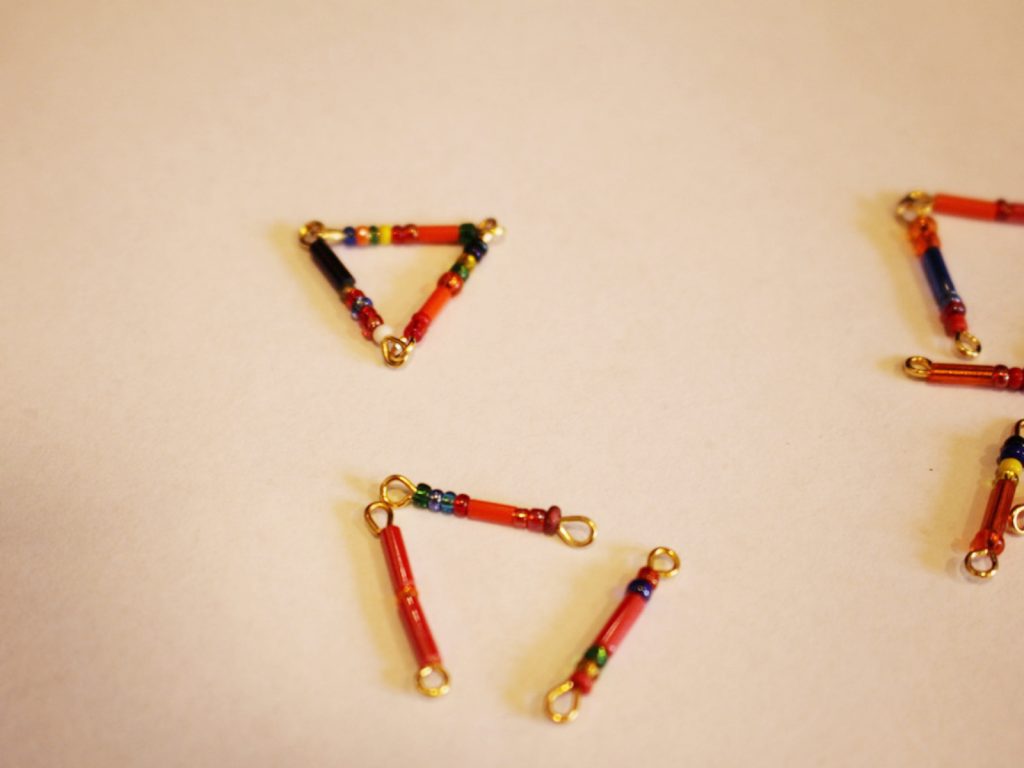
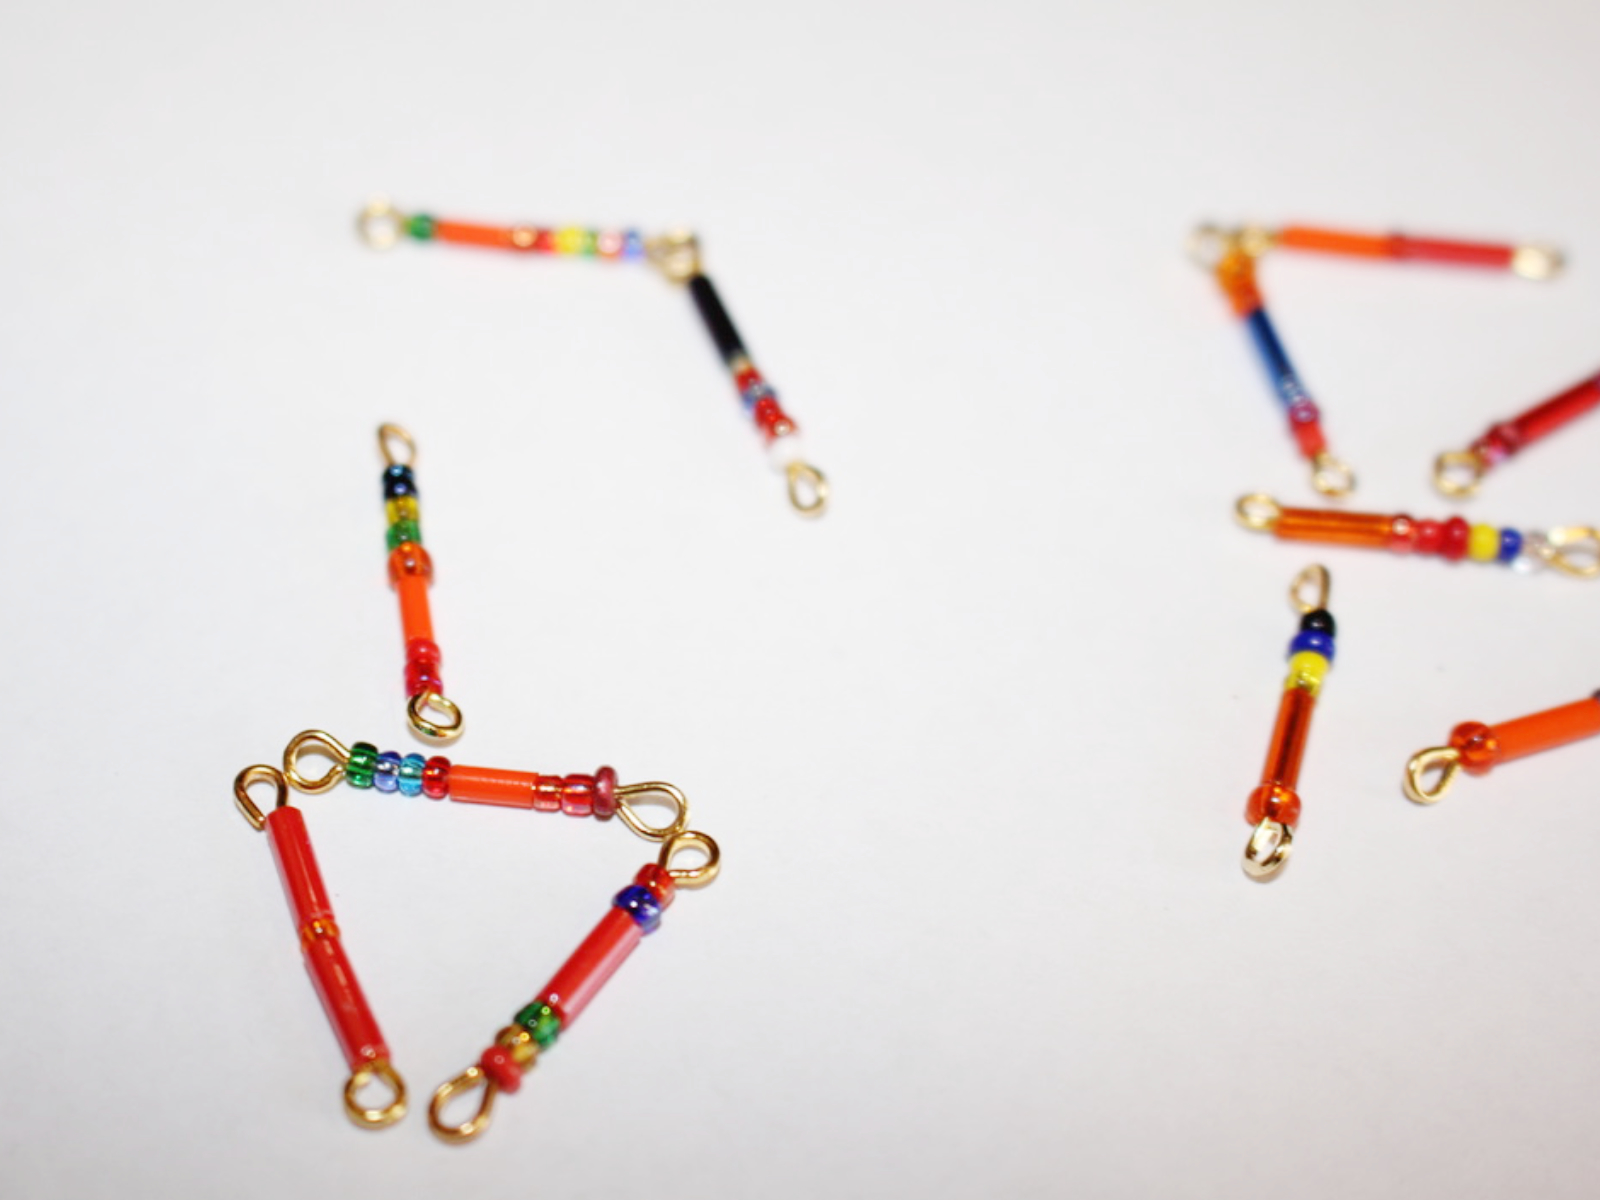
9: Repeat steps 6 to 8 for the other eye pins so that you have four triangles.

10: Use one of the jump rings to attach two of the triangles together.


11: Attach a strawberry charm to the bottom of the pair of triangles using another jump ring.
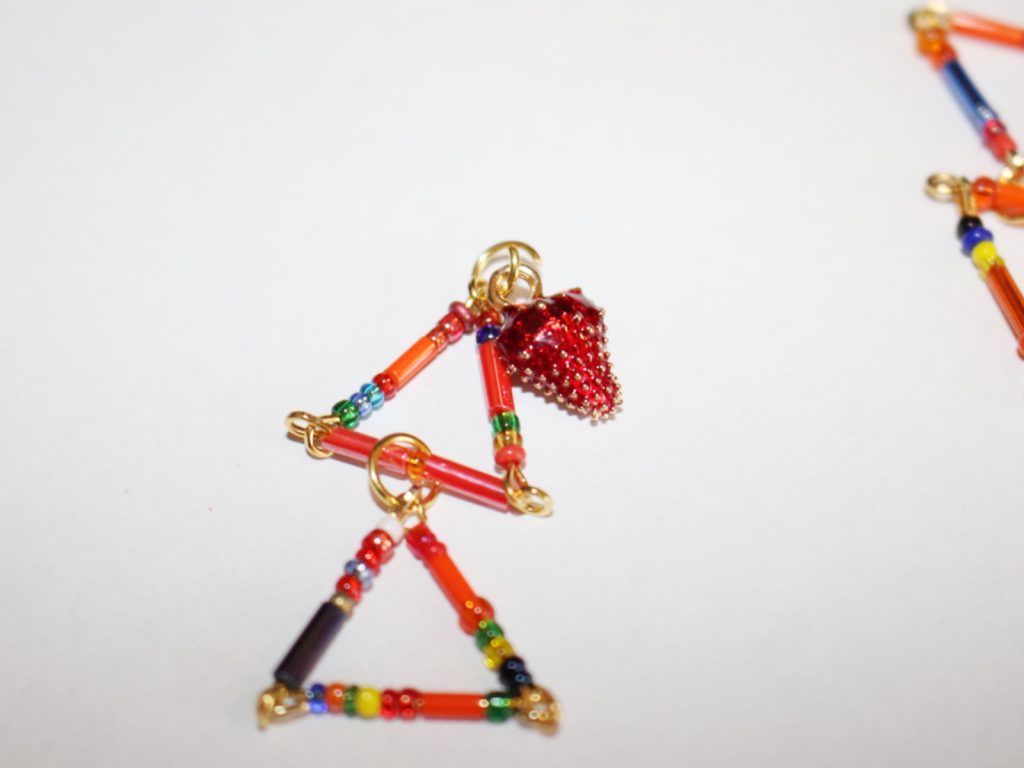
12: Repeat steps 10 and 11 for the other earring.
13: Attach the earring posts to each of the triangle charms using the remaining two jump rings to finish them off.


Now your super cute triangle and strawberry earrings are finished and ready to wear! Pop them on at home to add some glamour and fun to your WFH outfit, or throw them on to head out to work, the shops… anywhere really! I really hope you have fun not just wearing these babies, but also making them too!

Here are some other triangle designs to try if these cuties tickled your fancy!
- Some long triangle ladder earrings.
- Some cute tiny triangle dangles.
- A triangle pendant necklace made with long tube beads.
- Or a fun triangle pendant that uses chain and gravity to its advantage.
- Simple upside-down triangle earrings.
- A pretty lariat with a triangle detail.
- A video tutorial that shows you how to make triangle tassel earrings.
- Beaded chain triangle earrings.
- A bunting inspired triangle bracelet.
- Another video tutorial that shows you how to make a triangle statement pendant.
- Some simple bead and chain gravity triangle earrings.
Or maybe it’s fruit jewelry that has caught your eye… here are some other fruity pieces you can make:
-
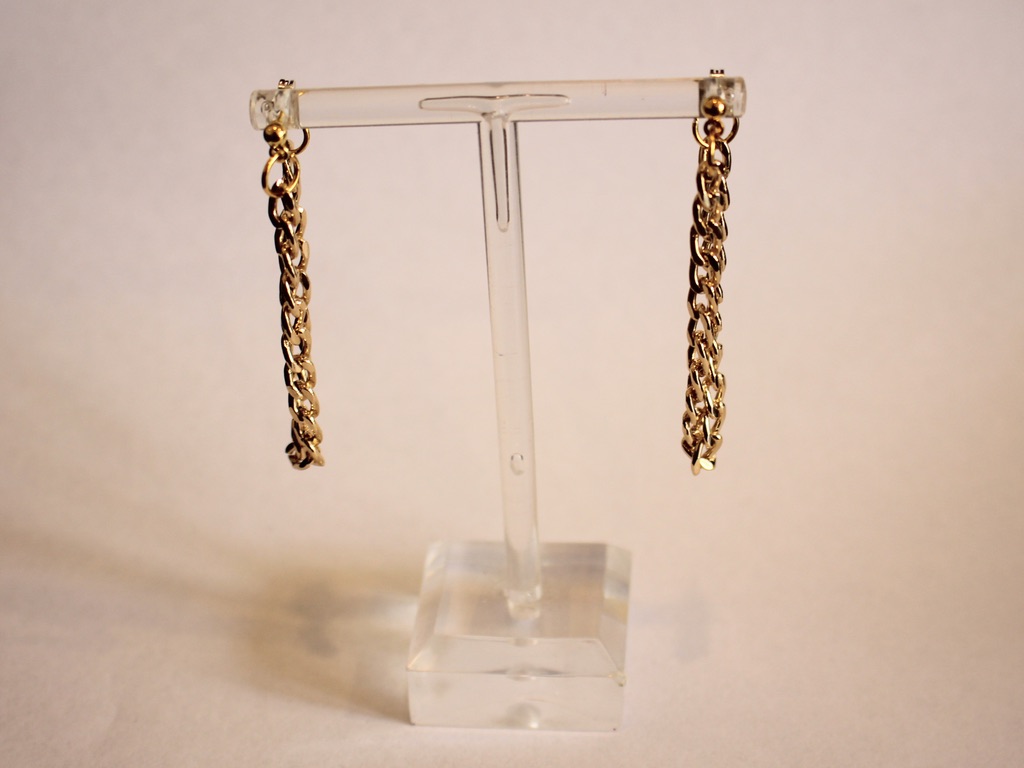
How to make some chunky chain loop earrings!
I think chain loop earrings are really cool! This DIY uses lightweight chunky curb chain to loop from the front to back of your ears. Please note that this tutorial contains affiliate links.
You’ll need the following tools and materials to make this pair of earrings:
1: Pliers. I used my flat nose pliers and round nose pliers.
2: Two charm post earrings with butterfly backs.
3: Two short pieces of chain, approximately 8cm long.
4: Four jump rings.
Follow these steps to make your chain loop earrings
1: Open one of the jump rings and slide it through the charm loop on one of the earrings.

2: Attach one end of a chain to the open jump ring.

3: Close the jump ring to secure the chain onto the earring.

4: Add another jump ring to the other end of the chain.
5: Secure the other end of the chain to the butterfly clasp by sliding the jump ring through and closing it using your pliers.

6: Repeat steps 1-5 for the second earring.


Now you can wear them (or give them to someone special)! 😉

Here are some other chain loop earring tutorials:
-
How to make a three strand chain anklet. Super cute and simple!
This cute anklet is made from three different kinds of chain for a textured look. Combine your fave types of chain to create your own custom look. This tutorial contains affiliate links.
You’ll need the following materials to make your three chain anklet:
1: Pliers. I used my flat nose pliers and round nose pliers.
2: Three lengths of chain that are long enough to fit comfortably around your ankle. I used chunky gold tone curb chain, copper tone rolo chain and antique gold tone curb chain.


3: Two large jump rings.

4: A lobster clasp.
Follow these steps to make your three chain anklet:
1: Open one of the jump rings.
2: Add each of the chains to the open jump ring.

3: Close the jump rings to secure the chains together.


4: Open the other jump ring and put the other end of each chain onto the jump ring in the same order as the other end.
5: add the lobster clasp to the second jump ring before closing it.
Now your anklet is finished and ready to put on! Throw one together before your next social distanced hang.


-
Here’s how to make a fun hand harness with pearl tassel charms, so cool!
Are you bored at home staring at your hands with nothing else to do? Make them more interesting to look at with this fun hand harness! Making this should be fun and and you’ll have a cool accessory at the end. This tutorial contains affiliate links.
You’ll need these tools and materials to make your cool pearl tassel hand harness:
1: Pliers. I used my flat nose pliers and round nose pliers.
2: Chain that is long enough to wrap around your finger, the front of your hand and wrist. I used some gold-tone rolo chain.

3: Two medium jump rings.

4: A lobster clasp.

5: Pearl beads. I used eight pink pearl beads.

6: Eight smaller jump rings.

7: Eight head pins.

Follow these steps to make your pearl tassel hand harness:
1: Add each of the pearl beads to the head pins.

2: Curl the tops of the head pin around the round nose pliers to form loops and secure the beads in place. Once you have beaded and curled all eight pins you can set them aside.


3: Pick up the chain and create a loop that fits loosely around your middle finger.

4: Attach the end of the chain to the point where where it fits so that you have a loose loop of chain secured together. You can do this by opening one of the chain links and then closing it again around one of the links in the chain.

5: Measure a piece of chain so that it falls down the middle of your hand.
6: Then wrap the rest of the chain around your wrist, trim it and secure it into a large loop like you did with the ring part of the chain. Now you should have one small and one large loop with a single chain joining them.

7: Split the large loop so that it is open in the back opposite to the centre chain.

8: Attach the medium sized jump rings to either end of the open loop and attach the lobster clasp to one of them.


9: Now all that is left is to attach the pearl charms! Add the eight pearl charms to the centre chain that runs down the centre of your hand using the smaller jump rings.


Once all your pearls are attached your pearl tassel hand harness is finished and ready to wear!! So cute!


Here are some other hand harness designs that you can make:
This tutorial contains affiliate links.
-
Half and Half for the best of both worlds? Here’s how to make a half bead half chain necklace!
This necklace is really cool! It is made using different materials for a half-half look. One side of the necklace is made with delicate chain while the other half features a rainbow of glass seed beads.
The Materials
You’ll need the following tools and materials to make your half and half necklace:
1: Pliers. I used my cutting pliers, round nose pliers and flat nose pliers.
2: A piece of tiger-tail wire.

3: Four crimp beads.

4: Three jump rings.

5: A lobster clasp.

6: Some chain. I used gold-tone rolo chain.

7: Beads. I used some mixed glass seed beads in different colors.

The steps
Follow these steps to make your half and half necklace:
1: Add two of the crimp beads and a jump ring to one end of the wire.

2: Fold the short end of the wire around it and back through the crimp beads.

3: Squash the crimp beads using the flat nose pliers.

4: Add beads and continue beading until you have a beaded section that is around half the length you want your necklace. I checked my length by measuring it against my neck, holding the secured end at the back of my neck and wrapping it loosely around the font of my neck.


5: Add two more crimp beads to the wire and a second jump ring.

6: Bend the wire around the jump ring and pull it tightly back through the crimps and a few of the beads.

7: Squash the crimp beads using the flat nose pliers again.

8: Trim the excess tiger tail wire using the cutting pliers.

9: Open a jump ring on one side of the beaded strand and attach one end of the chain.

10: Measure the chain so that it is the same length as the beaded strand and trim it.

11. Add the remaining jump ring to the other end of the chain, using it to secure the lobster clasp in place.

Now your half and half necklace is finished!


You can even add a charm to the middle to add some extra interest. I added this yellow clay and resin charm to mine.


This tutorial contains affiliate links.
-
Do you like triangle-shaped jewelry? Here’s a way to make some triangle earrings.
I’m pretty into geometric triangle-shaped jewelry, these earrings use eye pins and chain to form a cool dynamic triangle shaped pair of dangly earrings. This design is pretty much the reverse of these earrings and this pendant that we published previously.
Here are the tools and materials you need to make these earrings:
1: Pliers. I used my round and flat nose pliers for these earrings.
2: Two long eye pins.

3: Two head pins.

4: Two short chains, around 8-10cm long

5: Four jump rings.

6: Earring findings. I used gold-tone post earrings.

7: Beads. I used some rose-quartz chip beads and some purple glass seed beads.


Follow these steps to make your triangle earrings:
1: Add beads to the eye pins in your pattern of choice.


2: Loop the end of the pins using the round nose pliers once you have finished beading them.


3: Add each of the chains to either end of the eye pins to form a loop on earring earring.


4: Add beads to the head pins and curl the tops of the pin to secure the beads in place.


5: Attach the head pin charms to the chains using two of the jump rings.


6: Attach the earring findings to the middle of each beaded eye pin using the last couple of large jump rings.


Now your triangle earrings are finished and ready to wear!
This tutorial contains affiliate links.