Beads and Chains, The Perfect Pair… Here’s How to Make a Beaded Chain Necklace
Here is another way you can add beads to chain to create a stunning beaded necklace. This DIY jewelry design is pretty easy to make, but it does require some patience when it comes to putting your beads and chains together. However, I assure you, the results are well worth the effort!
To make this necklace you will need the following tools and materials:
1: Pliers. To make this necklace you will need your round nose pliers, cutting pliers and your flat nose pliers.

2: Chain.

3: Seven eye pins.

4: Beads of your choice. I used this assortment of glass beads.

5: One lobster clasp.

6: One jump ring.

The Steps:
1: Place all your beads onto the eye pins.

2: Bend each pin at a right angle to the bead using the round nose pliers.

3: If your pin is too long, trim it using your cutting pliers.

4: Once your pins are at the right length, curl them into a loop using the round nose pliers.

5: Repeat steps 2 to 4 for all of your beads.

6: Take the bead that you would like to have at the end of your pattern and open one loop slightly using your pliers. Slide the open loop onto the end of your piece of chain.

7: Close the loop again and secure the bead charm in place.

8: Count your chain links. I decided to leave seven links between each bead.

9: Open the 7th link using the pliers and separate the pieces of chain. Choose your next bead and attach it to the end of the small piece of chain. Secure the bead in place by closing the link with your pliers.

10: You will now have two beads attached by a piece of chain.

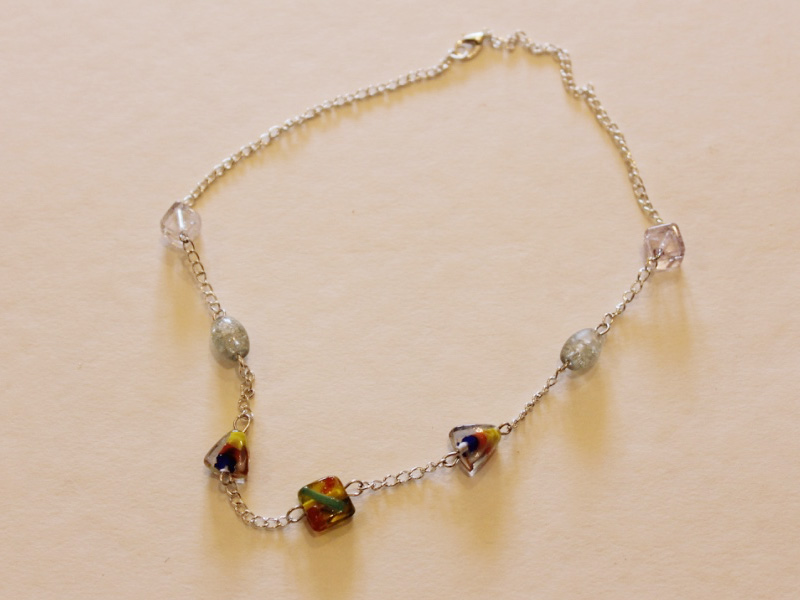
11: Continue steps 8 and 9 until all your beads have been added to the chain. Your piece should look something like this.

12: Open the loop on one of your end beads and attach the remaining length of chain.

13: Attach the other end of the chain to the bead on the other side.

14: Find the middle of the long section of chain and open a link.

15: Slide the lobster clasp onto the open link and secure it in place by closing the link again using pliers.


16: Open a jump ring and attach it to the other end of the chain.

17: Your necklace is complete! You can experiment with this design by choosing different types of beads or by playing with the spacing between the beads. Get creative!
Happy Making!

If you loved this tutorial you might like our other bead chain DIYs:
- Dangly beaded chain earrings
- A cute beaded chain bracelet
- Bead chain glasses holder strap
- A beaded body chain
- Beaded chain choker
- Bead chain and charm pendant necklace
- V-Shaped beaded chain necklace
This tutorial contains affiliate links.
DIY Jewelry Hub
Welcome to DIY Jewelry Hub. If you’ve ever wanted to learn how to make your own jewelry this is the place to start! Jewelry is a great way to show off your individuality and style. You’ll be surprised at how easy it is to create your own unique pieces! DIY Jewelry Hub will equip you with all the knowledge and inspiration you need to make your own jewelry.


You May Also Like

Defy gravity with this floating bead necklace
How to Make a Chain Necklace (With A stunning pendant in the middle)
