
You Need This Little Charmer! Here’s How to Make a Chain Charm Bracelet
The first ever tutorial I made for DIY Jewelry Hub was a step-by-step guide to making a beaded charm bracelet. This time I wanted to show you all how to make a classic charm bracelet, where carefully crafted and chosen charms dangle off a delicate chain. One of the wonderful things about a chain charm bracelet is that they are very easy to personalize and make your own. For this design I chose to combine some handmade beaded charms with some pre-made silver charms, spreading them out across the chain. Get creative with your charm bracelet, you might have some charms left over from a fabulous holiday, or some unique beads that you have been saving for a special piece… combine them all together to create your own special and sentimental charm bracelet!
You will need the following tools and materials to make this charm bracelet:
1: Pliers. For this design you will need your round nose pliers, flat nose pliers and cutting pliers.

2: Chain. You will need a piece of chain enough to fit comfortably around your wrist.

3: Head pins. I used seven pins for this design (including a few that were recycled from an old piece), but you can use as many or as few as you like.

4: Beads of your choice. To make my bead charms I used an assortment of glass and plastic beads.


5: Charms. I used three different charms. I highly recommend using charms that are special to you to create an extra special charm bracelet. You may need some extra jump rings.
6: One lobster clasp.

7: One jump ring.

The Steps:
1: Open a link at one end of your piece of chain using pliers.

2: Slide the lobster clasp onto the open chain link and then secure it into place by closing the link again with the pliers.


3: Open your jump ring using pliers and slide it onto the other end of your chain. Secure it in place by closing it with the pliers.

4: Now your chain bracelet has been completed you can start adding your charms.

5: Begin adding beads to each of your head pins.

6: Once your beads have been added, bend the pin at a right angle to the beads using the round nose pliers.

7: Curl the end of the pin into a loop using the round nose pliers.

8: Once you have made all your charms, take some time to arrange your charms around your bracelet.

9: Once you are happy with your arrangement, begin adding your charms to the chain. You can attach each charm by opening each charm loop or jump ring slightly using the pliers and sliding the charm onto the corresponding chain link.

10: Secure each charm in place by closing the loop again using your pliers.
11: Once all your charms are attached, your bracelet is complete. Now you can wear all your special memories and sentiments on your wrist all the time! I hope you enjoy making this stunning and special do it yourself jewelry design.
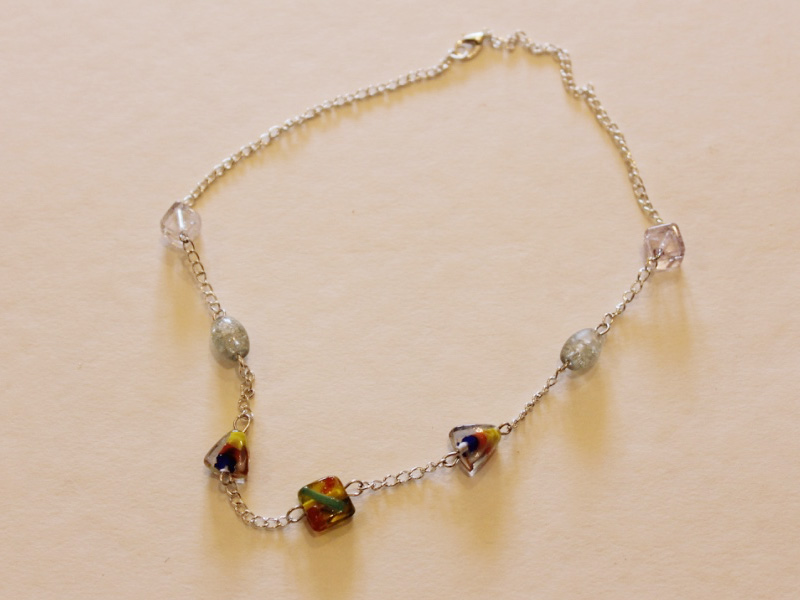
Here are some other examples of chain charm bracelets packed full of bright and beautiful beads.


DIY Jewelry Hub
Welcome to DIY Jewelry Hub. If you’ve ever wanted to learn how to make your own jewelry this is the place to start! Jewelry is a great way to show off your individuality and style. You’ll be surprised at how easy it is to create your own unique pieces! DIY Jewelry Hub will equip you with all the knowledge and inspiration you need to make your own jewelry.

You May Also Like

Here’s how to turn some thick wire into a wiggle bangle!

Add a charm bracelet to your collection with this cute bracelet tutorial!
