-
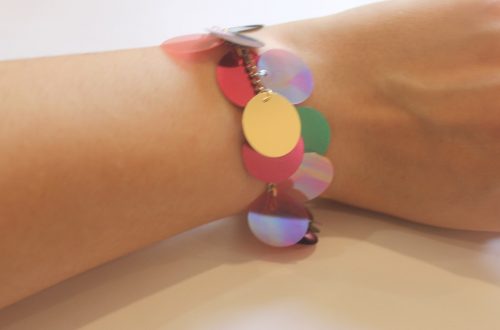
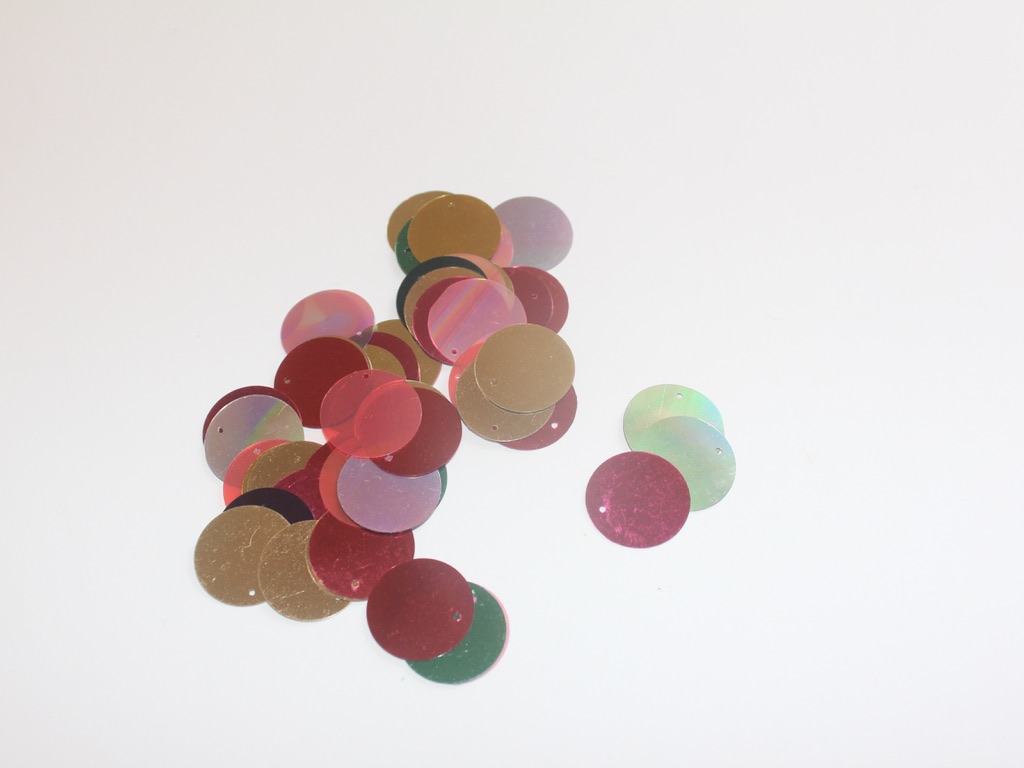
Here’s how to make a sequin charm bracelet. This is such a joyful design!
I really love this design, it is super fun to wear! Transform a piece of chain into a fun and sparkly charm bracelet with some large iridescent sequins. This is the perfect mate for our lightweight sequin earrings tutorial. Pop these guys on at home for the perfect video chat look! This tutorial contains affiliate links.
You’ll need the following tools and materials to make your sequin charm bracelet:
1: Pliers. I used round nose and flat nose pliers.


2: A piece of bracelet length chain with large-ish links.

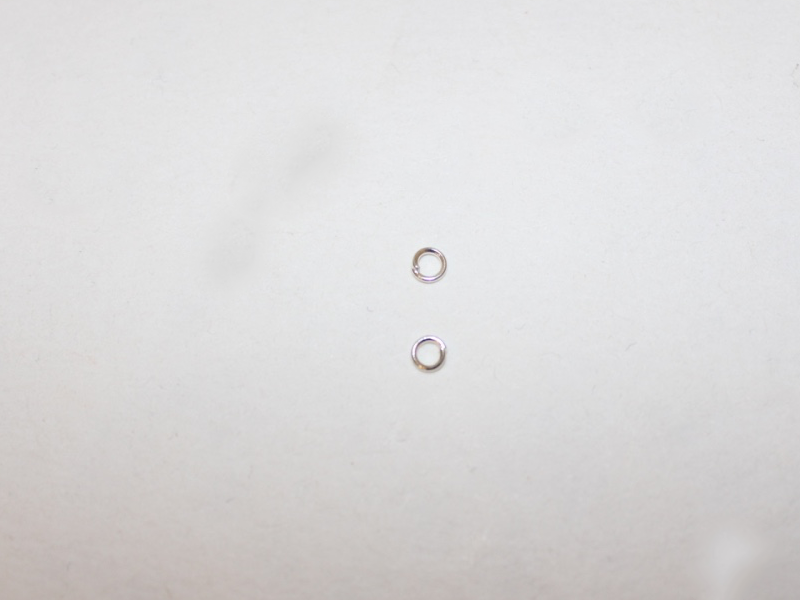
3: Two large jump rings.

4: A lobster clasp.

5: A bunch of smaller jump rings.

6: Sequins with holes at the top.
Follow these steps to make your cute sequin charm bracelet:
1: Attach the large jump rings and clasp to either end of the bracelet chain.


2: Take a sequin and add one of the small jump rings to the top.

3: Keeping the jump ring open, slide it through one of the links of the chain.
4: Close the jump ring to secure the first sequin to the bracelet.

5: Repeat steps 2-4 until the bracelet is fully covered with sequin charms. I added mine approximately 4 links apart. These sequins are large so that they will overlap.


Once all your sequins are attached your sequin charm bracelet is finished and ready to wear!!


This tutorial contains affiliate links.
-
Here’s how to turn those shopping bag cords into cool wrap bracelets!

Do you ever think about what to do with those handles that come on paper shopping bags? Here’s how to turn some trash into treasure…
You will need the following tools and materials to make your wrap bracelet:
1: Pliers. Some flat pliers and round nose pliers.
2: Two flat crimp ends.

3: Two medium sized jump rings.

4: A toggle clasp.

5: A charm. I used this bead charm that I had made earlier.

6: Some cord from a paper shopping bag. The piece I had was long enough to wrap three times around my wrist.

Follow these steps to make your cord wrap bracelet:
1: Squash a crimp end around each end of the cord, secure each in place by squeezing it using the flat nose pliers.


2: Add a jump ring to the end of one crimp and slide on part of the toggle clasp. Close the jump ring to secure the clasp in place.


3: Add the charm to the jump ring.


4: Add the other jump ring and the remaining part of the toggle clasp to the other side of the cord.


Once the remaining toggle component is attached to the cord your bracelet is finished and ready to wear! I think that’s a pretty cool way to save some usable materials from finding their way to the garbage.

-
Need Some Ideas for a Special Valentine’s Day Gift? Why Not Make One of these special pieces?
Nothing’s more romantic than a handmade gift for your loved one on a special occasion! Here are some DIY gift ideas for this Valentine’s Day.
1: Handmade Cufflinks
Use some special charms or some vintage buttons to make some one of a kind cufflinks for that special someone in your life. Click here for the the full tutorial.


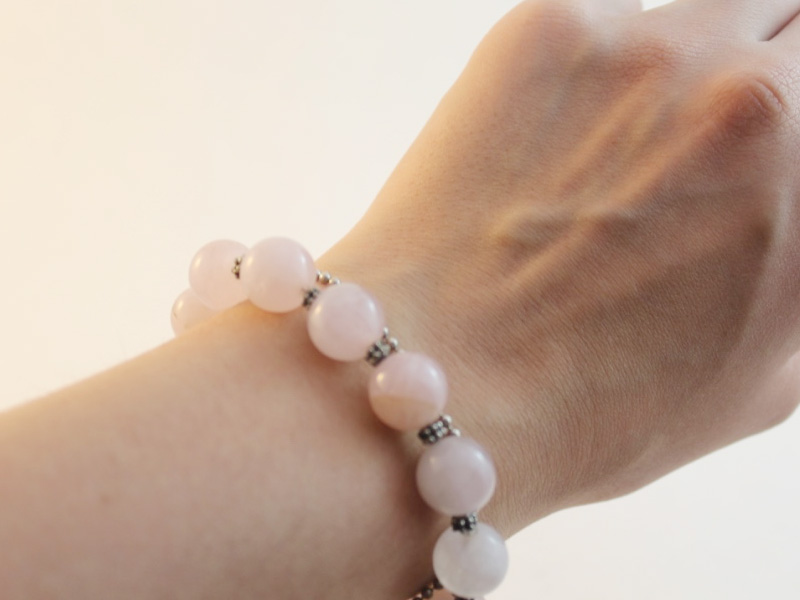
2: A Rose Quartz Bracelet.
Rose Quartz is a crystal synonymous with love, which makes it perfect for a Valentine’s gift! Here’s the full tutorial.
3: A Custom Charm Bracelet.
Is there anything more sentimental and romantic than a charm bracelet full of special and meaningful charms? Here’s how to make an adorable charm bracelet.

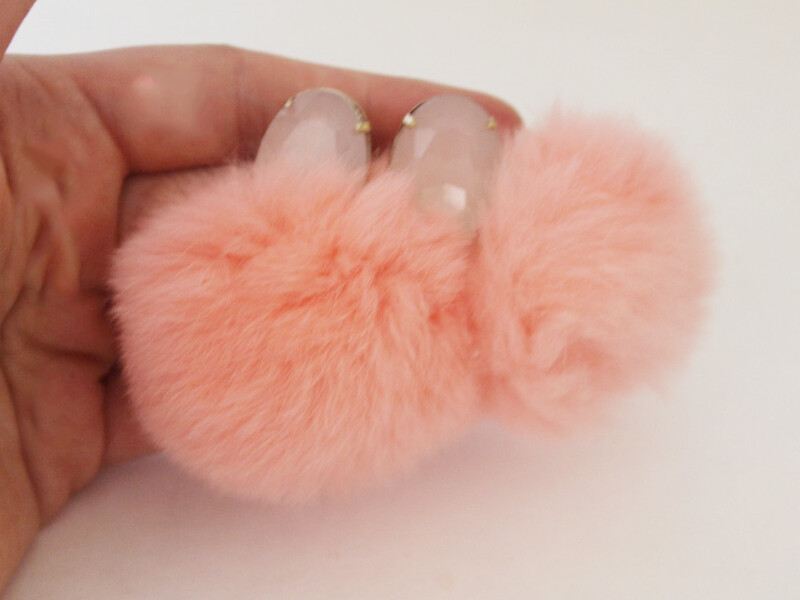
4: Some Pink Pom Pom Earrings.
These earrings are fuzzy, flirty and the perfect Valentine’s gift for a fun loving pal. Here’s the full tutorial.
So there you go! Four ideas for special and sentimental Valentine’s gifts. Which one will you make?
-
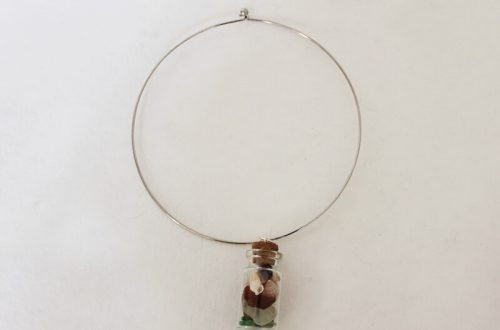
Make your jewellery work for you, this necklace is also a bracelet!

This choker necklace can also be worn as a cool bracelet. It’s super cool and easy to make.
You will need the following tools and materials to make your choker/bracelet:
1: Pliers. You will need your flat nose pliers, round nose pliers and cutting pliers to make this choker/bracelet.

2: A piece of leather or faux leather long enough to fit closely around your neck.

3: Two flat crimp ends.

4: Two jump rings.

5: A toggle clasp.

6: A head pin.

7: A bead or charm of your choice. I used this glass bead.

Follow these steps to make your convertible choker bracelet:
1: Add a crimp to each end of the leather, securing it in place by squeezing it around the leather using the flat nose pliers.


2: Add a jump ring to one end and attach one part of the toggle clasp.


3: Add the other jump ring and the second part of the clasp to the other end of the leather.


4: Put the bead onto the head pin.

5: Bend the head pin so that it is at a right angle to the bead using the round nose pliers.


6: Trim the end of the pin if required (it should extend approximately 1cm from the top of the bead). If no trimming is required, curl the pin into a loop using the round nose pliers.


8: Open the charm loop slightly and attach the charm to one of the jump rings that connects the leather and the clasp.

9: Close the charm loop to secure it in place. Once your charm is secured in place your creation is ready to wear, either as a choker or a bracelet!

Here’s the design worn as a bracelet.


And here it is as a choker necklace.

-
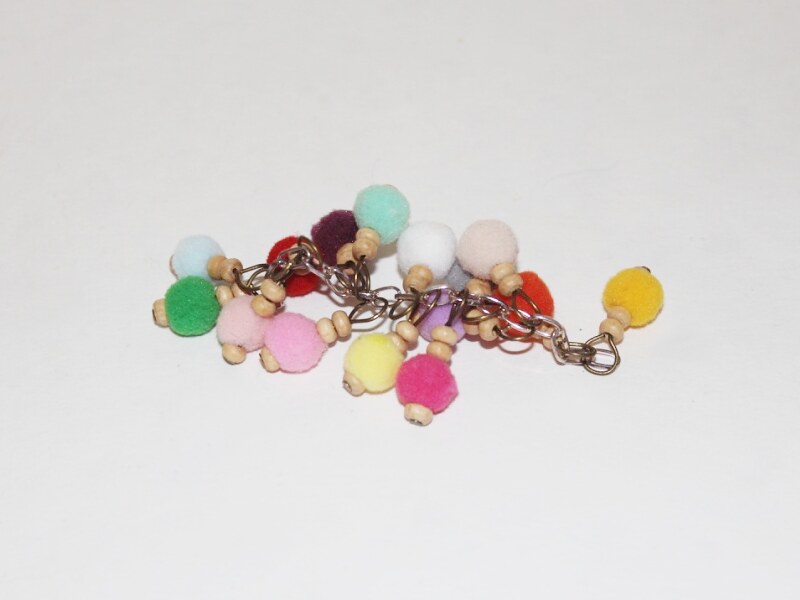
This Pom Pom Charm Bracelet is a Whole Lotta fun!
This pom pom charm bracelet is so much fun to put together and even more exciting to wear! Contains affiliate links.
You will need the following tools and materials to make this bracelet:
1: Pliers. You will need your round nose pliers, flat nose pliers and cutting pliers to make this bracelet.
2: A short piece of chain.

3: Two pieces of string cut to the same length.

4: Two leather crimp ends.

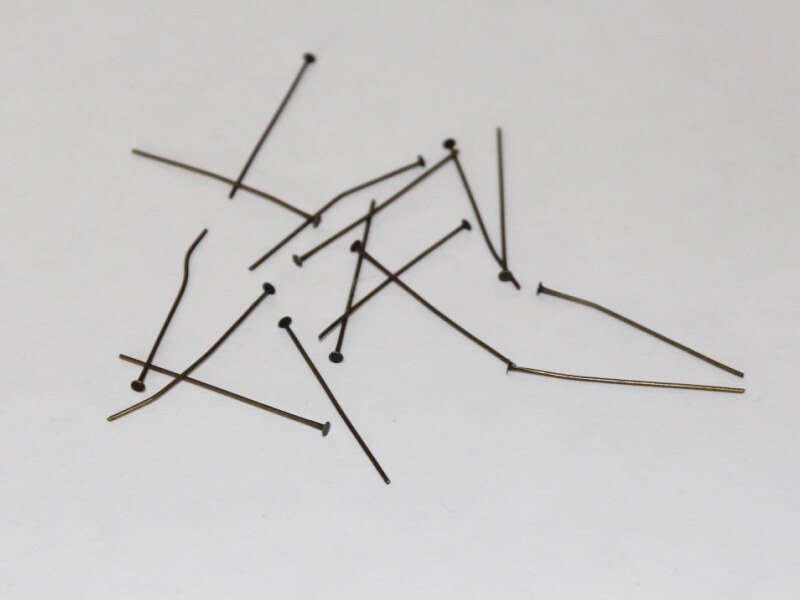
5: Head pins. I used 15 head pins so that I could add one charm to each link of the chain.
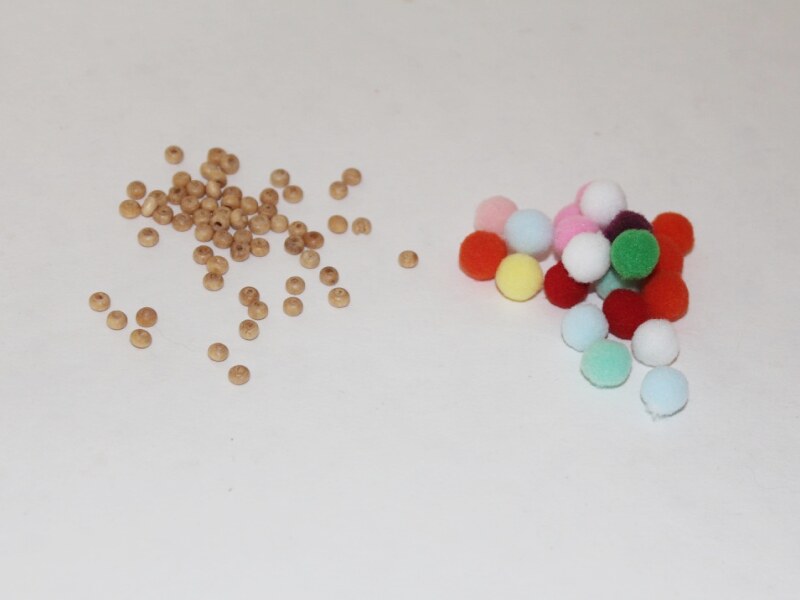
6: Pom Poms and beads of your choice. I used these small multi-colored pom poms and some small timber beads.
Follow these steps to make your pom pom bracelet:
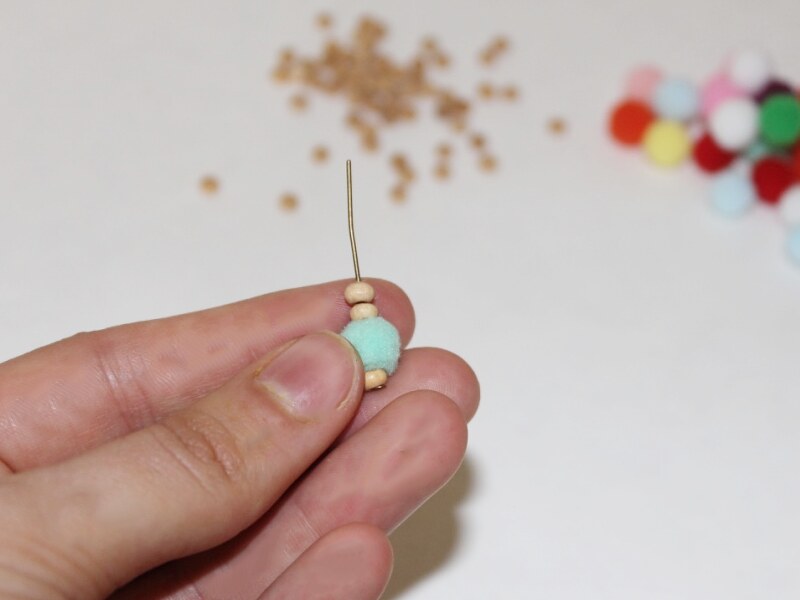
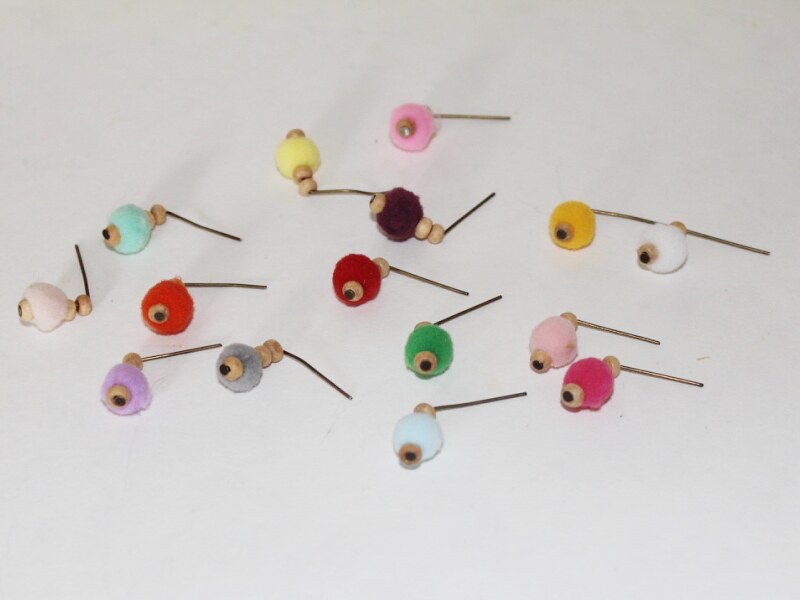
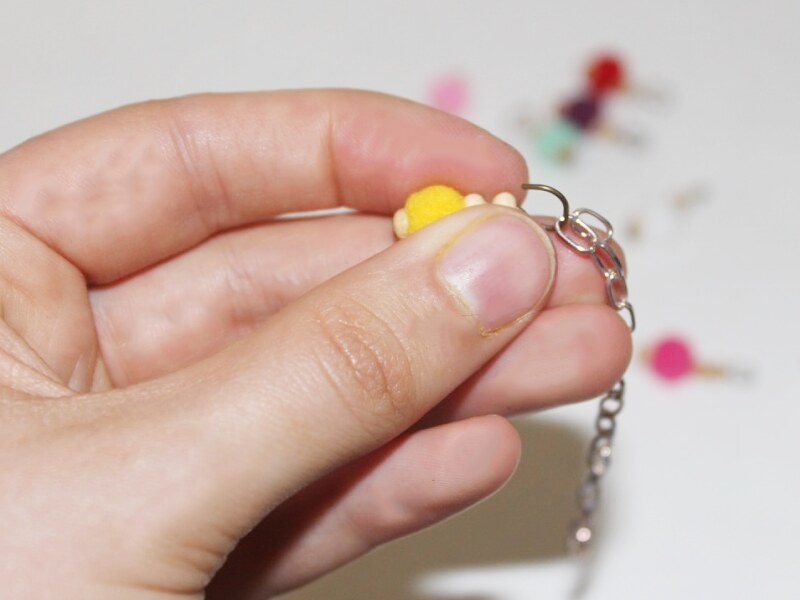
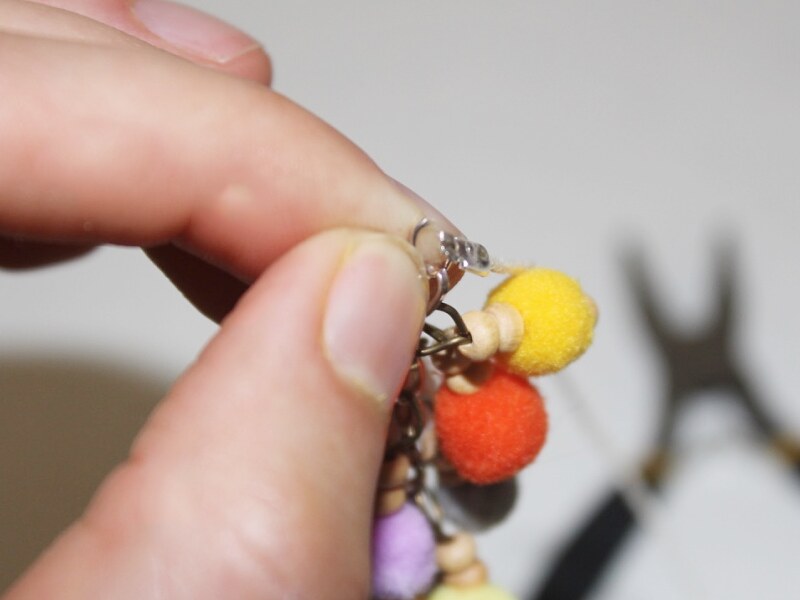
1: Add the beads and pom poms to each of the head pins.

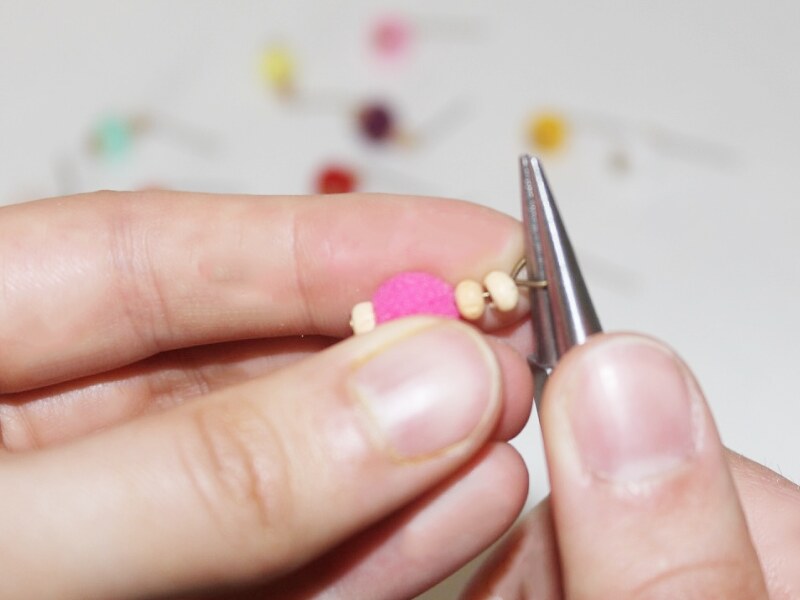
2: Bend each pin to form a right angle using the round nose pliers.
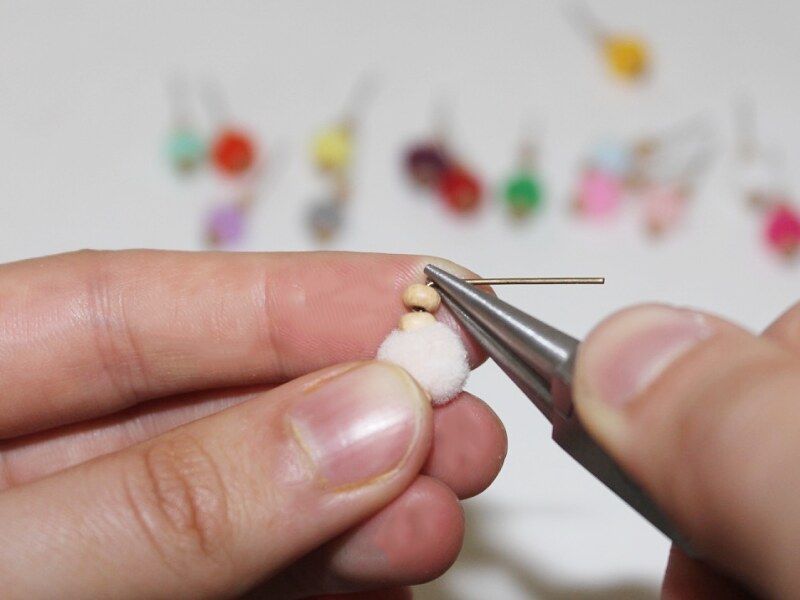
3: Form a loop at the top of each pin using the round nose pliers.
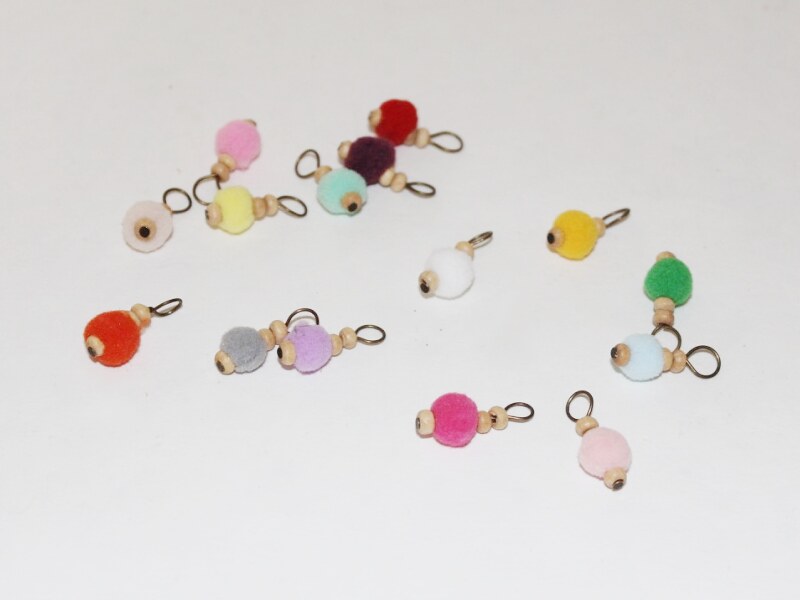
4: Add each of the pom pom charms to a link on your chain. I left the links on each end empty.
5: Add a crimp end to each of the strings, leaving one end open.
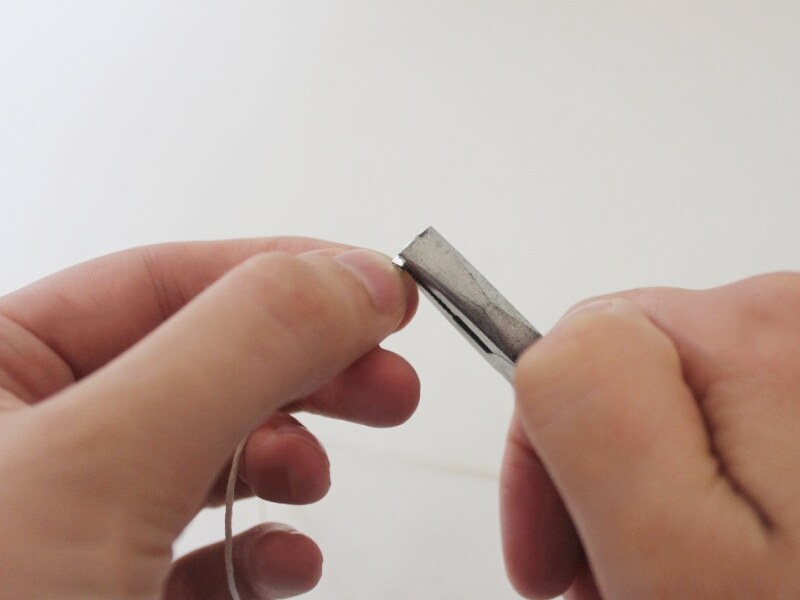
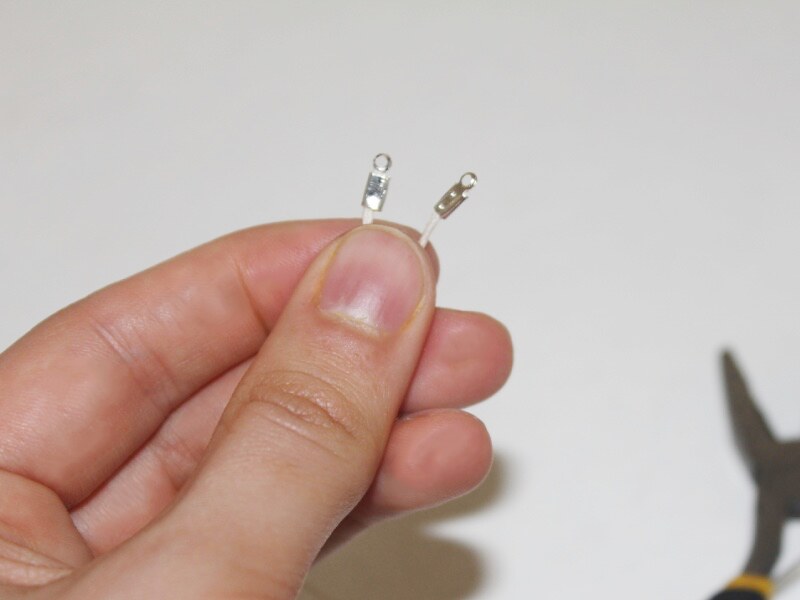
6: Attach the strings to either end of the chain by opening the chain links or using some jump rings.
Once the strings are attached your bracelet is finished and ready to wear!


-
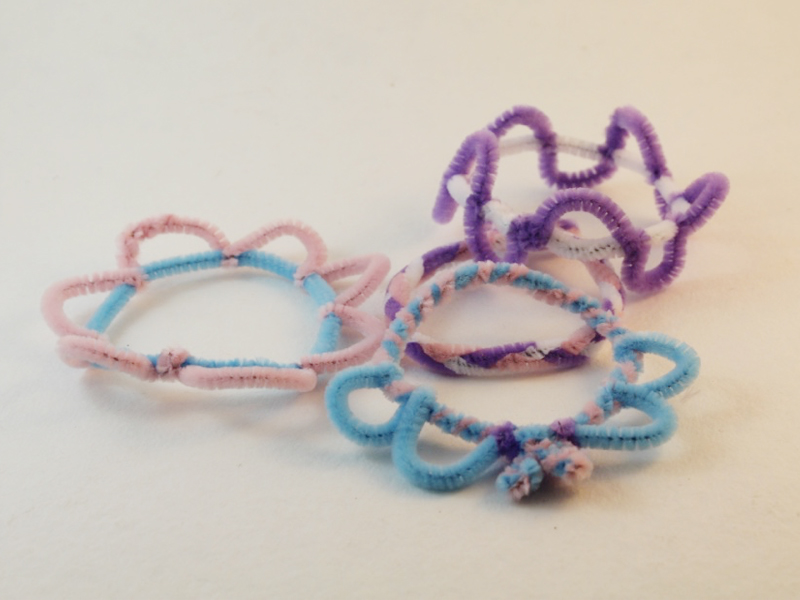
Do you have some string sitting in your kitchen drawers? Why not turn it into a braided charm bracelet?
Here’s how to turn some household string into a cool braided charm bracelet! This bracelet is super easy to make and looks great with a casual summer outfit!
You will need the following tools and materials to make this bracelet:
1: Pliers. You will need your cutting pliers, round nose pliers and flat nose pliers to make this bracelet.
2: Two crimp ends.
3: Three pieces of string. Cut each to approximately 25cm (9.8 inches) long.

4: Two jump rings.
5: One large jump ring.

6: A clasp. I used this screw clasp.

7: Charms of your choice. I used this polymer clay charm and a wire charm that used to be an earring.


Follow these steps to make your bracelet:
1: Hold the ends of the three strings together and add a crimp end to secure them together. Add the crimp by folding it around the strings, squashing the sides down using the flat nose pliers as pictured.


2: Braid the strings until the bracelet reaches comfortably around your wrist.


3: Trim the strings using your cutting pliers or a pair of scissors.


4: Add the other crimp end to the end of the braid.


5: Add a jump ring to either side of the bracelet and attach the screw clasp, closing the jump rings to secure the clasp in place.


6: Add the charms to the large jump ring.

7: Add the large jump ring with the charms attached to one of the jump rings next to the clasp. Close the large jump ring to secure the charms to the bracelet.

Now that your charms are attached your fun summer beaded bracelet is finished!

-
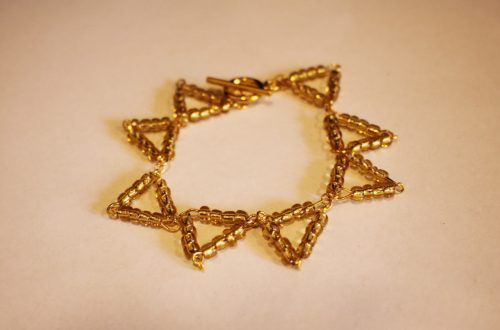
This Cluster Bracelet Design is so Fun and Pretty to Boot!

These cluster bracelets are so fun, to make and to wear! They look great when made with bright and colorful beads.
You will need the following tools and materials to make this bracelet:
1: Pliers. You will need your round nose pliers, flat nose pliers and cutting pliers to make this bracelet.
2: A piece of leather cord long enough to fit closely around your wrist. (Cut it to length using your cutting pliers).

3: Two leather crimp ends.

4: Five large jump rings.

5: Fifteen small head pins.

6: Two small jump rings.

7: A toggle clasp.

8: Beads of your choice. I used small yellow glass e-beads and some small natural colored wooden beads.


Follow these steps to make your beaded cluster bracelet:
1: Add one glass bead and one timber bead to each of the head pins.

3: Create a loop at the top of each pin to secure the beads in place. You can do this by curling the pin slowly around the barrel of the pliers.


4: Add three beaded charms to each of the large jump rings (five in total). Close the jump rings to secure the bead charms in place.


5: Set the cluster charms aside. Add a leather crimp end to one end of the leather. Do so by squashing one side down around the leather using the flat nose pliers, followed by the other side, folding it over the first.


6: Add each of the charms to the leather.

7: Add the other leather crimp end to the other end of the leather cord.

8: Add a jump ring to one side of the bracelet and attach one part of the toggle clasp. Close the jump ring to secure it in place.

9: Repeat this step for the other side of the bracelet, attaching the second part of the clasp using the remaining small jump ring.

Once your clasp is in place your bracelet is finished! What colors will you make yours in?


-
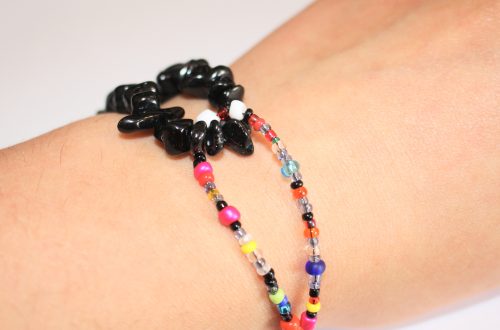
Make this cutie-pie bracelet using a charm connector today!
Have you ever seen a charm that has two loops rather than one? That’s a charm connector! These charms let you join two different strands to create unique pieces of jewelry. I have already shown you how to make a braided friendship bracelet using a charm connector, in this tutorial I will give you all the knowledge you need to make a beaded bracelet that features a pretty silver charm connector.
You will need the following tools and materials to make this charm connector bracelet:
1: Pliers. You will need your cutting pliers and your flat nose pliers to make this bracelet.

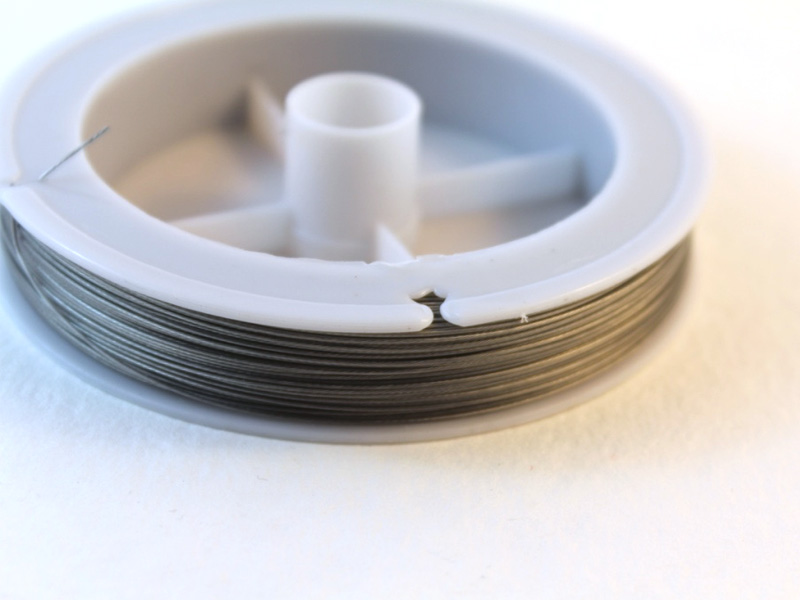
2: Tiger tail wire.
3: Eight crimp beads.

4: A toggle clasp.


6: Beads of your choice. I used some pink glass bugle beads and some blue glass seed beads.


The Steps:
1: Use your cutting pliers to cut two lengths of tiger tail wire long enough to fit halfway around your wrist. I cut mine with a little extra length to ensure that my bracelet would fit.


2: Take one piece of tiger tail wire and add two crimp beads to the end, then fold the end of the wire around one loop on the charm connector.


3: Squash the crimp beads to secure the wire and charm together using the flat nose pliers.
4: Repeat steps 2 and 3 for the second tiger tail strand attaching it to the other side of the charm connector.

5: Begin adding beads to one side of the bracelet. I started with the pink bugle beads.

6: Continue adding beads until the beaded section reaches approximately half way around your wrist.

7: Add two crimp beads to the strand.

8: Add one side of the toggle clasp to the strand as well, fold the wire around the clasp and back through the crimp beads.

9: Squash the crimp beads using the flat nose pliers to secure the strand.

10: Trim the excess wire using the cutting pliers.

11. Repeat steps 5 and 6 for the second strand. Continue beading until the second strand is approximately the same length as the first.


12: Add two more crimp beads and the other end of the toggle clasp to the end of the second strand.

13: Bend the wire around the clasp and back through the crimps as you did the first strand.

14: Secure the strand by squashing the crimp beads using the flat nose pliers.

15: Trim the excess wire close to the crimp beads using the cutting pliers.
16: Once all the extra wire has been trimmed your bracelet is finished and ready to wear! This is such a cute way to make a stunning bracelet. Charm connector bracelets look great stacked with other beaded bracelet designs! Style yours up any way you like.


Here are some other beaded charm connector bracelet designs. You can get really experimental and creative with charm connectors. Happy making!


Here are some other charm connector tutorials on DIY Jewelry Hub
- A delicate charm connector anklet
- A charm connector bangle
- Charm connector statement earrings
- Braided charm connector bracelets
Please note that this tutorial contains affiliate links.
-
In Need of Some Inspiration for the Festive Season? Try Giving These DIY Presents
I’ve already written about why DIY jewelry makes for a great gift option, so as the festive season approaches, I thought it would be fun to share some ideas for DIY jewelry gifts you can make.

You might not be interested in making a kitschy Christmas themed bracelet like I did, but you can adapt some of my DIY jewelry tutorials to fit a specific theme. Perhaps you have a friend who loves science fiction, or a relative who has a passion for sea animals? Why not make them a themed bracelet or necklace that features a dolphin charm or some futuristic looking glass beads?
If keeping to the festive theme tickles your fancy, why not pick up some holiday themed jewelry charms to add to your designs:


Making your own jewelry to give as a gift allows you to make something specifically for that person. Create one of a kind pieces based on what you know your friends and family will love by experimenting with different colors and by using different charms and materials to make something that will be extra special to them. Why not try adapting my beaded necklace tutorial using your friend’s favorite colors, or perhaps you could try making a slinky chain anklet with a cute personal charm. You know all the basics, now take them and make them yours!


I hope you get to give and receive many beautiful and special handmade gifts this festive season! I can’t think of a better way to show someone that you care than to make them something that is specifically for them. So go ahead, get creative and make something sweet for someone sweet! And if all that sentimentality isn’t enough to get you inspired to make your own jewelry gifts this this might… hand making jewelry is also less expensive than buying something pre-made, especially if you make use of recycled beads, charms or other materials in your designs.
-
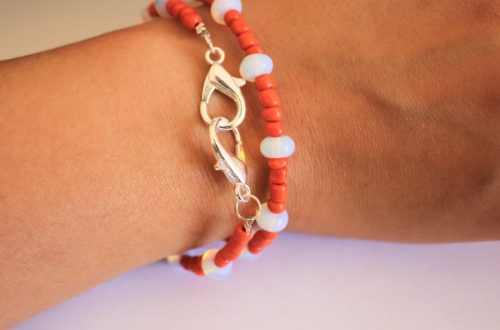
Does Your Wrist Need Something Pretty and New? Here’s How to Make a Beaded Chain Bracelet
If you’ve already tried your hand at the beaded chain necklace tutorial you will notice that the steps for making this pretty beaded chain bracelet are very similar. Using chain allows you to create simple, delicate pieces that you can wear alone or stacked high with your other DIY jewelry creations. Take a few moments out from your day to make this beautiful beaded bracelet, as a present for someone special or maybe as a treat for yourself this festive season.
You will need the following tools and materials to make this beaded chain bracelet:
1: Pliers. To make this bracelet you will need your round nose pliers, flat nose pliers and cutting pliers.
2: Head pins.

3: Chain.

4: Beads of your choice. I used these gold colored enamel beads that feature a floral design.

The Steps:
1: Slide each bead onto a head pin.

2: Take each pin and using the round nose pliers, bend it at a right angle to the bead.


3: Use the round nose pliers again to create a loop and secure the bead onto the pin.


4: Once you have completed steps 1 to 3 for each bead, take your chain and count 5 links.
Open the 6th link and separate the pieces of chain.

5: Open one side of the first bead charm and slide the chain into the loop. Close it again using pliers.

6: Return to the other piece of chain and slide the open link onto the other side of the bead charm. Close the chain using your pliers.

7: Count three chain links and repeat steps 4 to 6. Continue in this pattern until all your beads have been added to the chain.


8: Count another 5 links from the last bead you added. Open the 6th link and remove the excess chain.

9: Take one end of the chain and slide an open jump ring through the end link. Close the jump ring again with your pliers.

10: Open a chain link at the other end of the bracelet, slide the lobster clasp onto the link and secure it in place by closing the link with your pliers.

11: Now your bracelet is finished! Put it on and wear it with pride. I love the sense of satisfaction I get knowing that I have made my own unique accessories.


You can adapt this design by experimenting with different beads. I made this bracelet using orange glass beads.