-
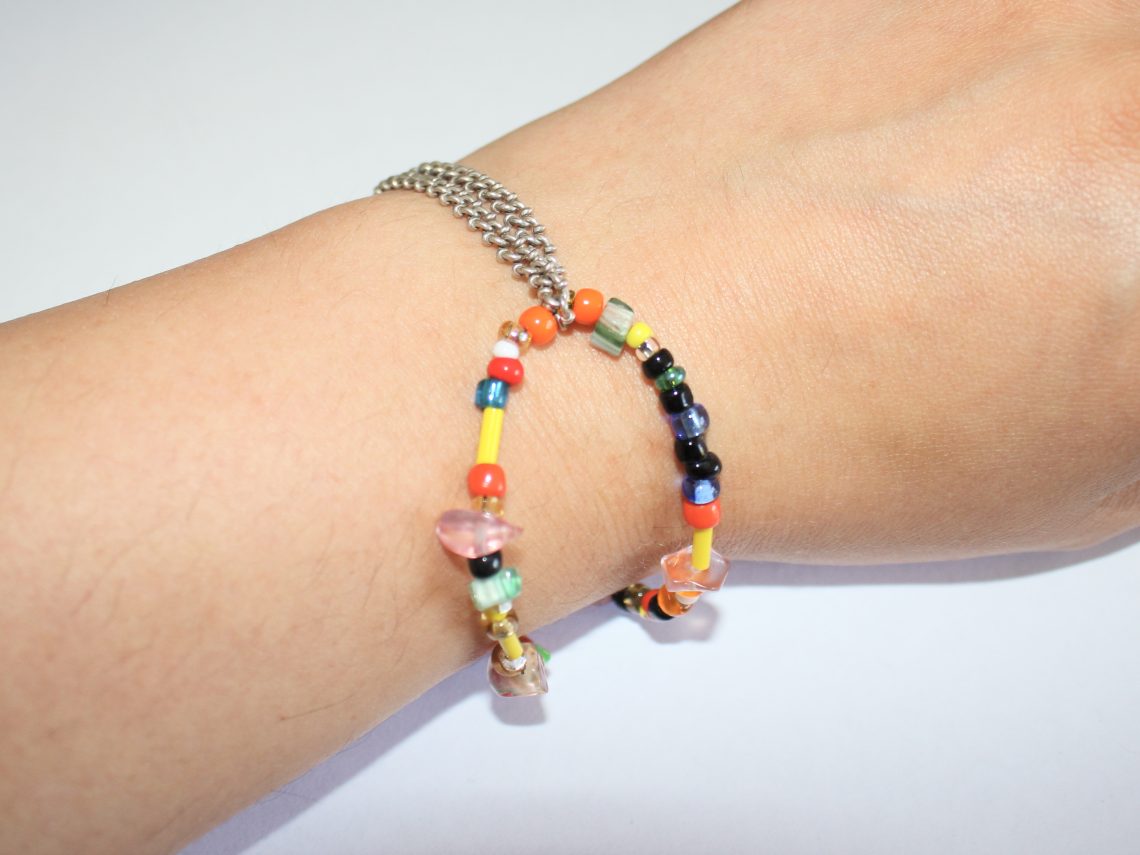
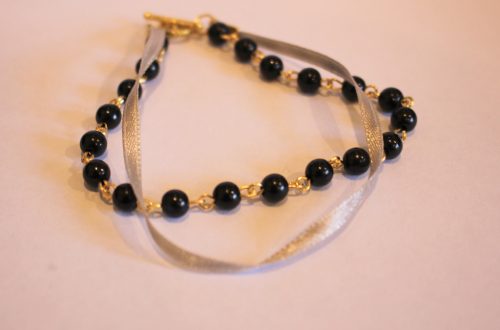
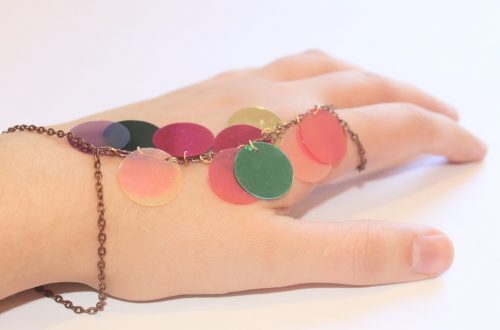
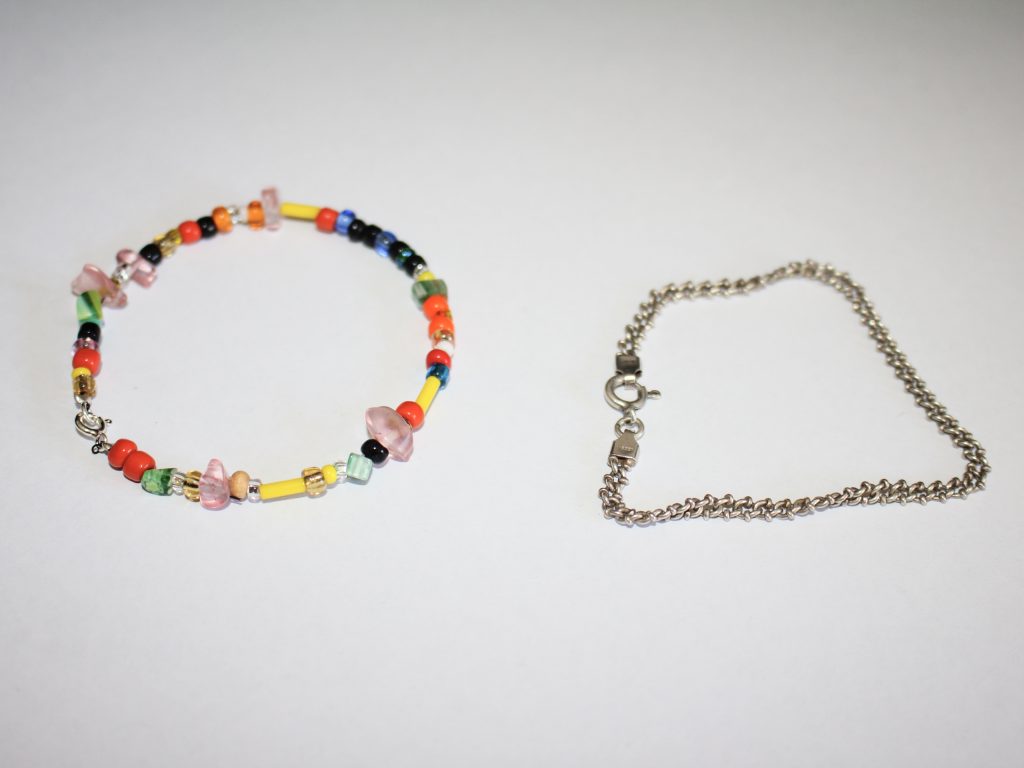
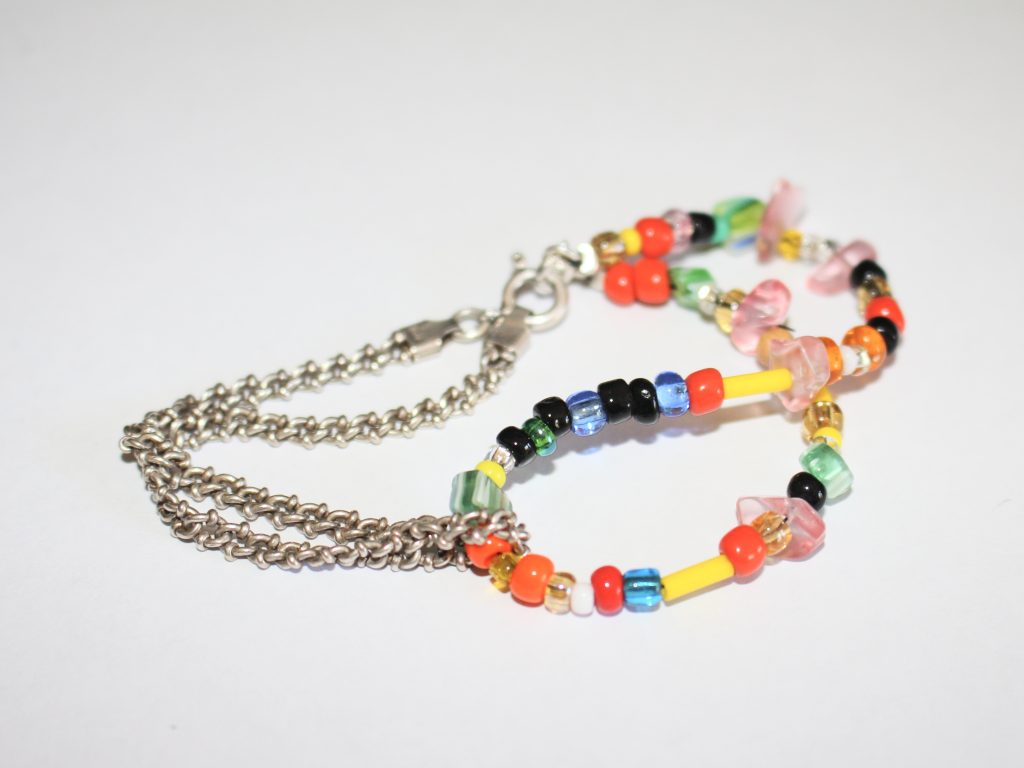
This tutorial shows you how to turn two bracelets into one interlocked statement bracelet!
Do you like it when you’re jewellery shows off different textures and colours? Me too! Sometimes it can be fun to hack you’re existing jewellery collection to make something look cute and new. This tutorial shows you how you can turn two of your favourite bracelets into a new statement bracelet! This tutorial is extra great because you don’t need any tools to make it! Please note that this tutorial contains affiliate links for which this website might receive a commission.
You’ll need the following tools and materials to make your interlocked bracelets:
1: All you need for this tutorial is two bracelets. I used a sterling silver chain bracelet and a rainbow beaded bracelet. It is ideal if they are about the same length and each fit your wrist comfortably.
I made this rainbow beaded bracelet but here are some places you can get something similar:
Here are some sterling silver chain bracelets you can purchase:
Follow these steps to make your interlocked statement bracelet:
1: Undo the clasps on each bracelet.

2: Loop the bracelets around each other, folding them in the middle and clasping them together so they are attached.


3: Put it on your wrist, opening one of the clasps and closing it around its closure and the closure on the other bracelet. It can help to add an extender chain to one of the bracelets to make it easier to put on. You can get one here:

And that’s it! This tutorial is great for adding some spice to your existing jewellery collection. What bracelets will you use to make your own interlocked statement piece?
If you want this look but don’t want to use bracelets you already own, you can follow this tutorial that shows you how to make one from scratch: https://www.diyjewelryhub.com/how-to-make-a-beaded-double-loop-bracelet/
-
Here’s how you can make a fun mixed bead bracelet to show off your personality!
I love the trend towards the craft-core bead explosion designs in jewellery! I’ve shared a few other similar tutorials in the form of mixed bead anklets and necklaces, but this one is a bracelet! This bracelet features a mixture of handmade, recycled and new beads for a unique look! What beads will you use in yours? Please note that this tutorial contains affiliate links.
You’ll need these tools and materials to make your own mixed bead bracelet:
1: Some tiger tail wire cut to a length that will fit your wrist plus a few extra cm.

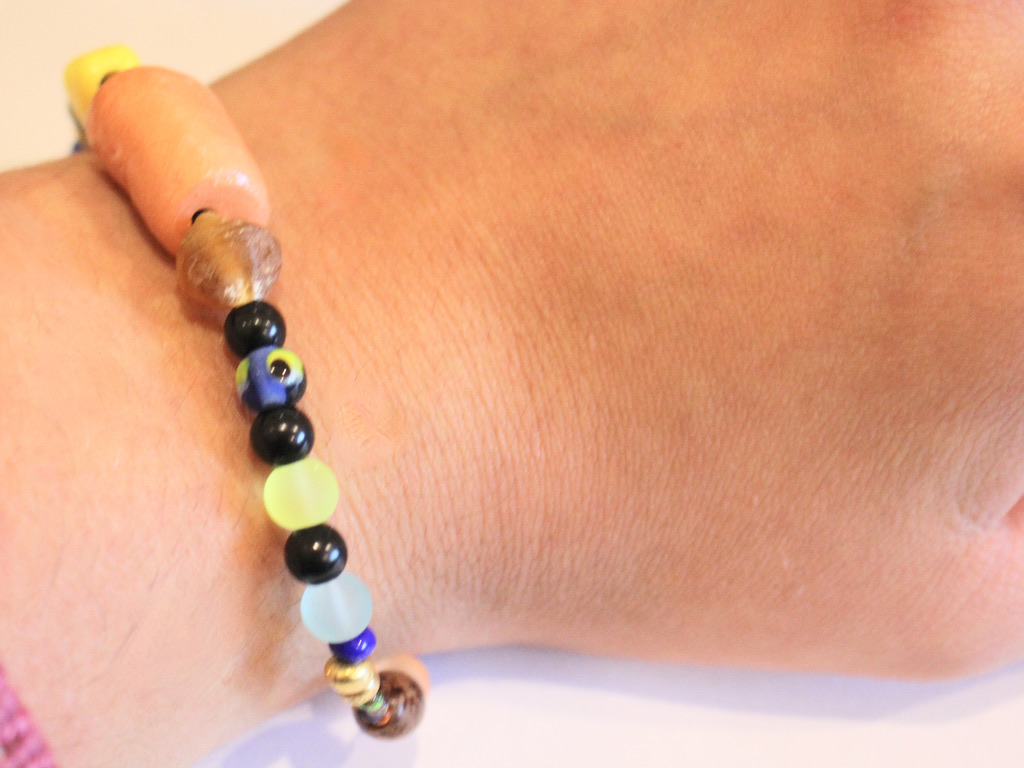
2: A selection of beads. I used a mix of plastic, clay and glass beads from different sources, recycled, new and handmade.

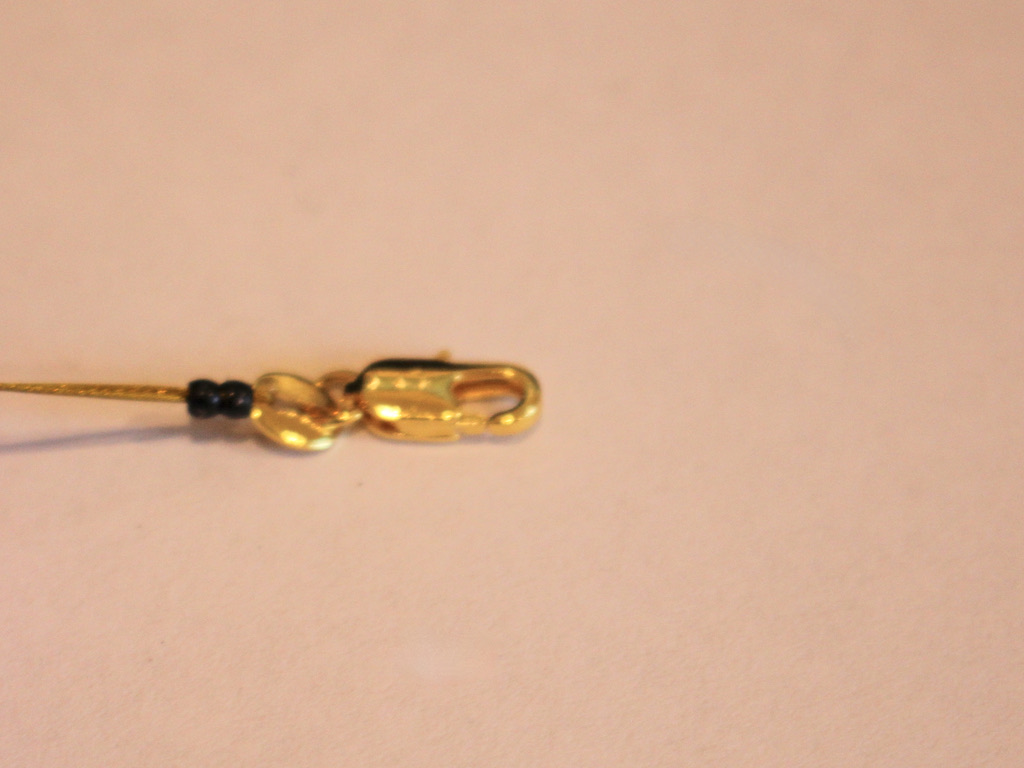
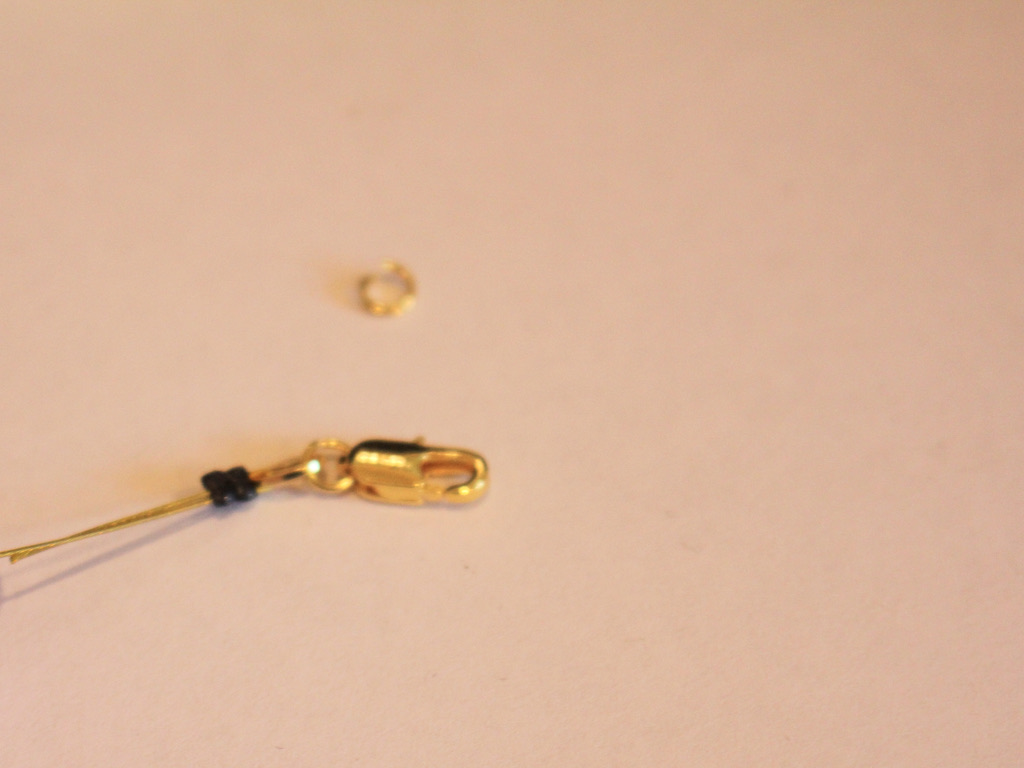
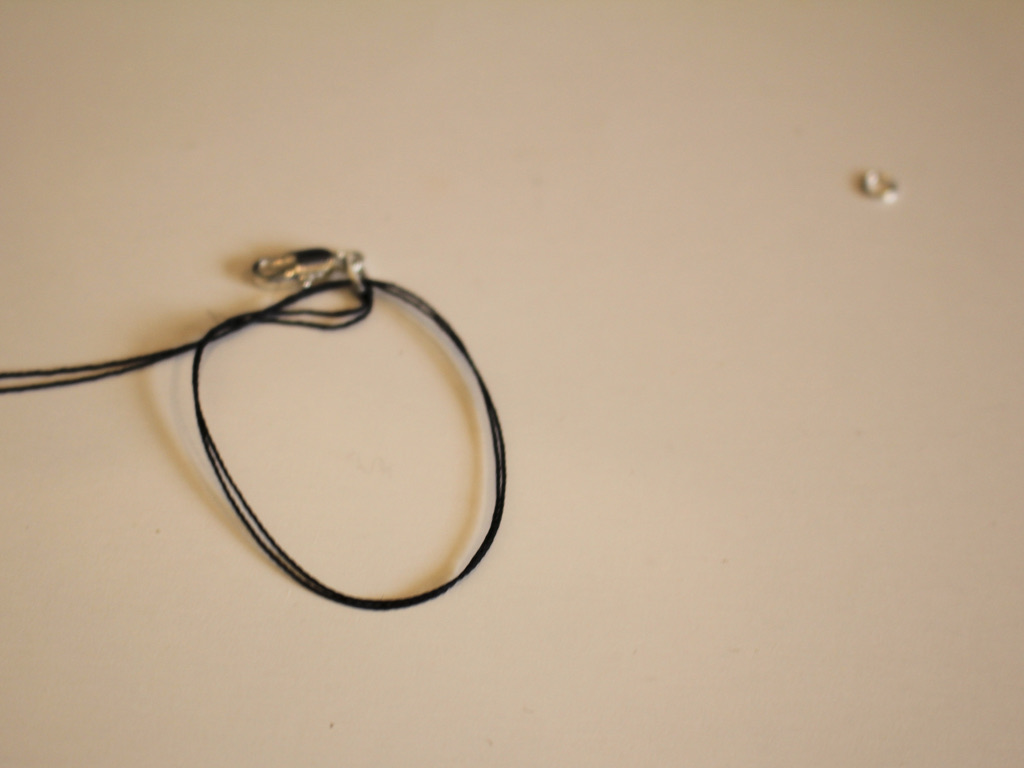
3: A clasp. I used this gold-tone parrot claw clasp.

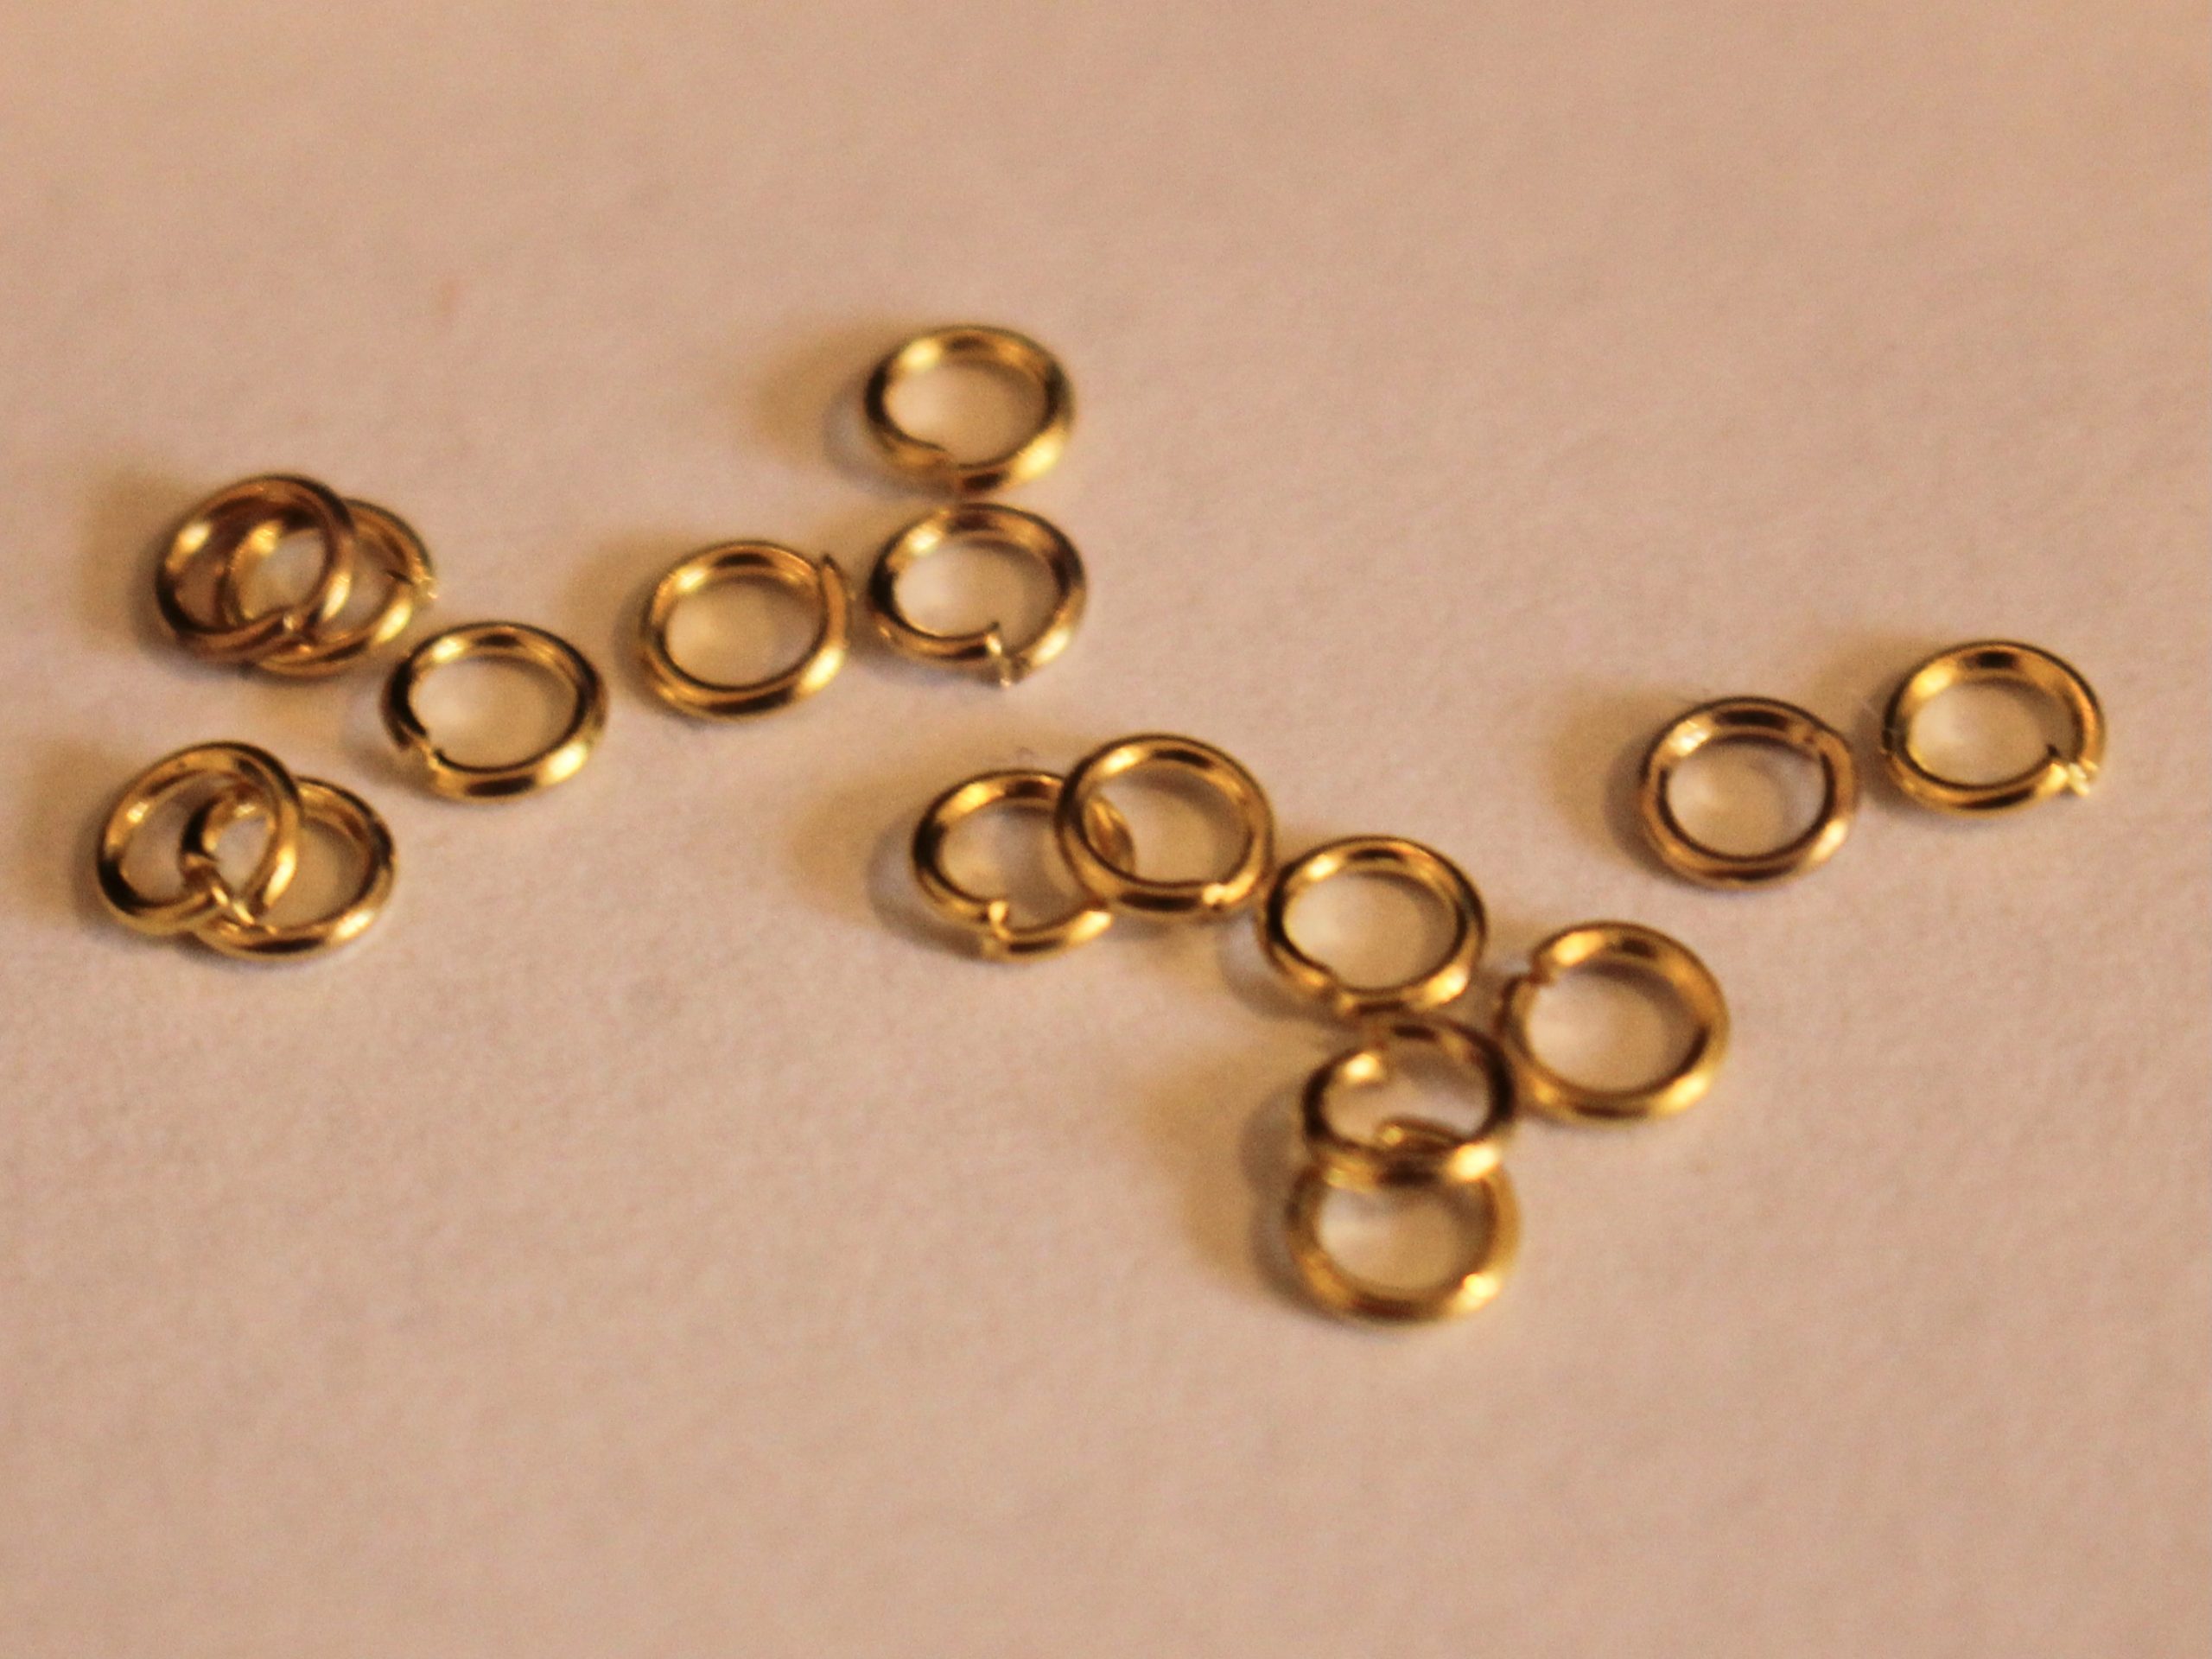
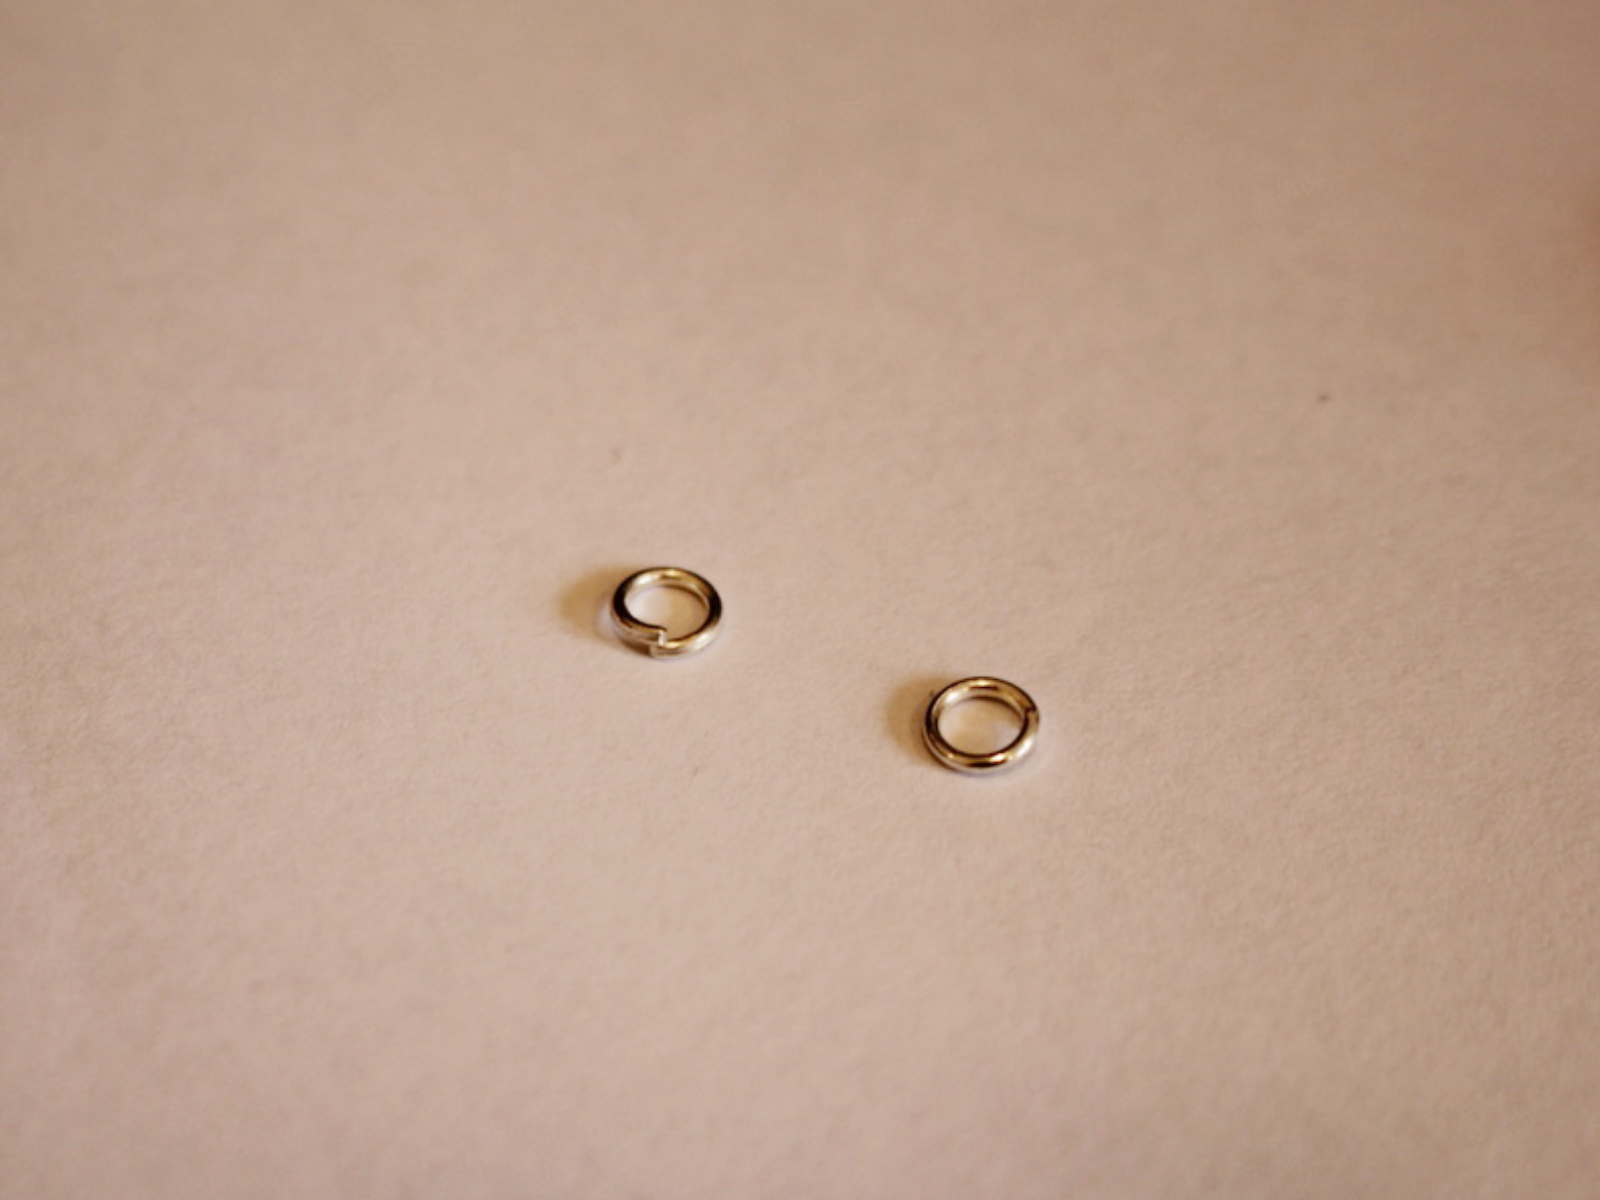
4: A jump ring.

5: Four crimp beads.

6: Pliers. I used cutting pliers to cut the wire, flat nose pliers and round nose pliers.

Cutting pliers, round nose pliers, flat nose pliers. Follow these steps to make your crazy mixed bead bracelet:
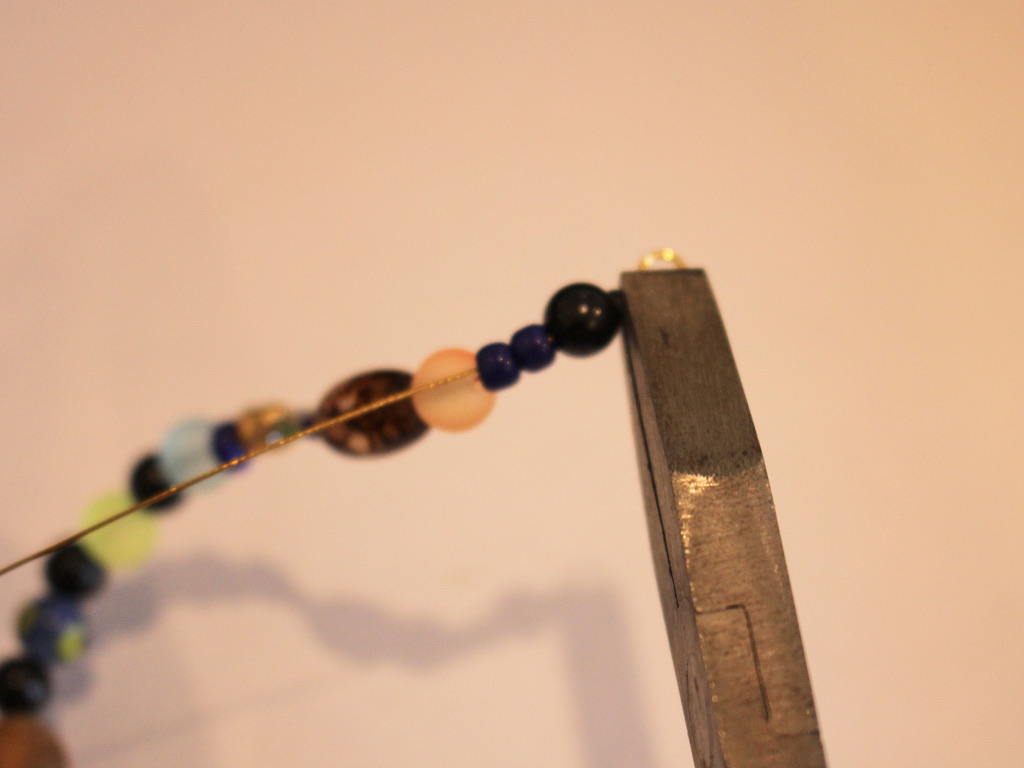
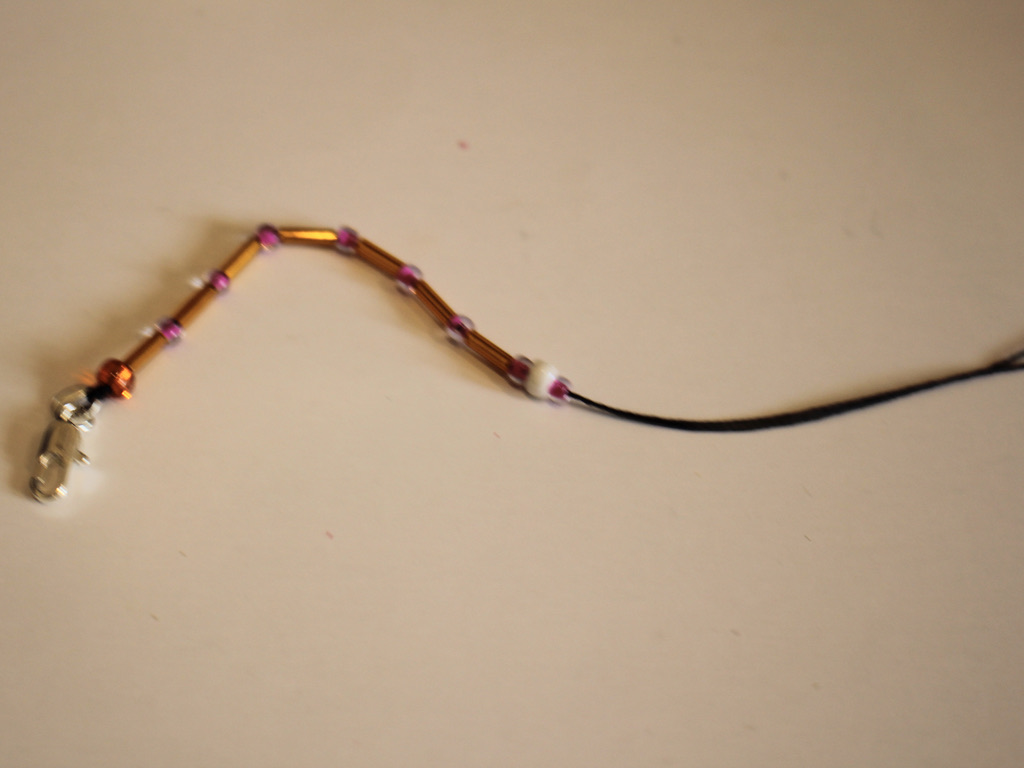
1: Take the tiger tail wire and add two of the crimp beads.

3: Add the clasp to the wire and loop the end of the wire back through the crimp beads.

4: Squash the crimp beads using the flat nose pliers.

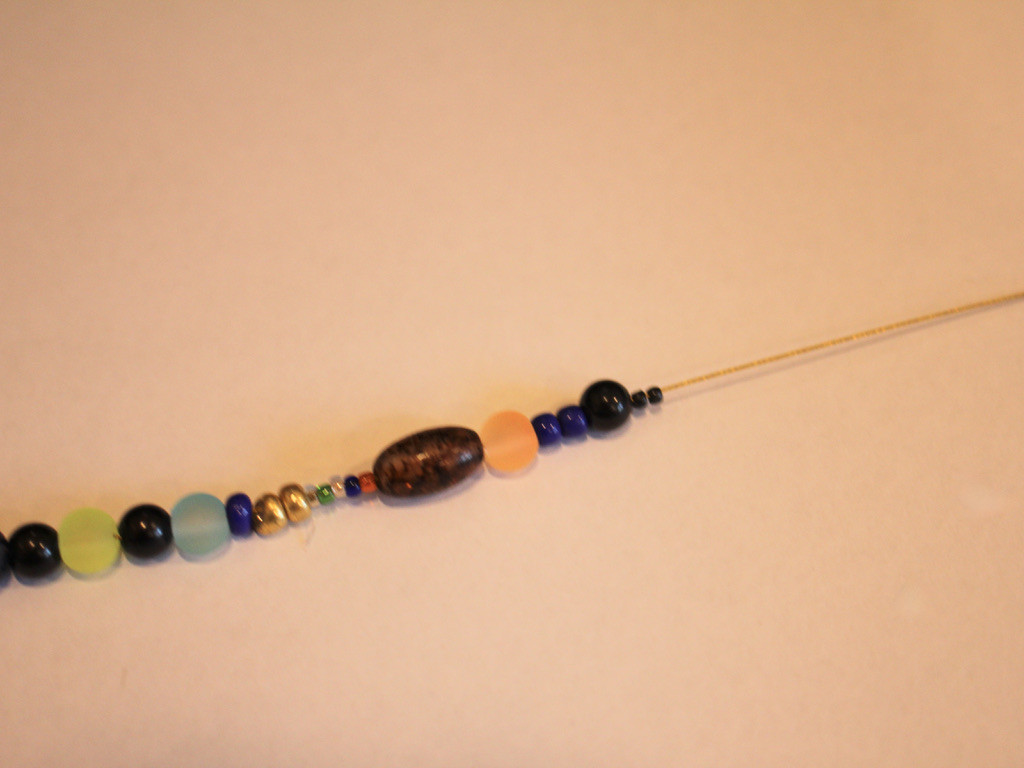
5: Begin adding beads to the wire in random order.
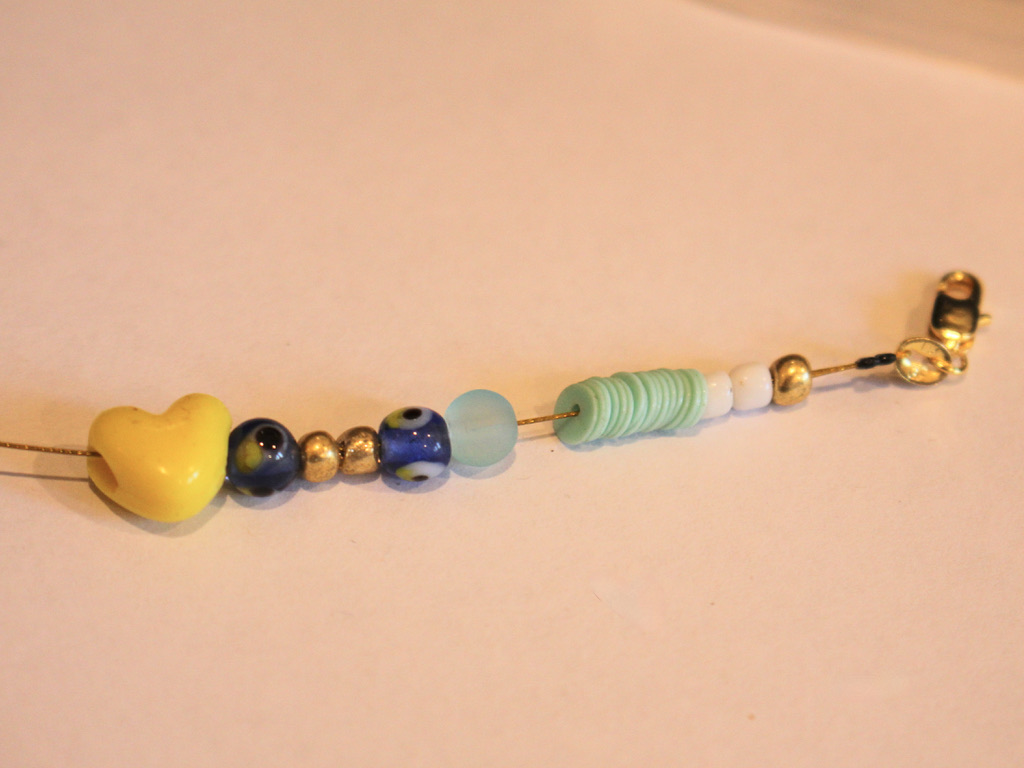
6: Continue adding beads until you get it to the length that feels comfortable around your wrist.
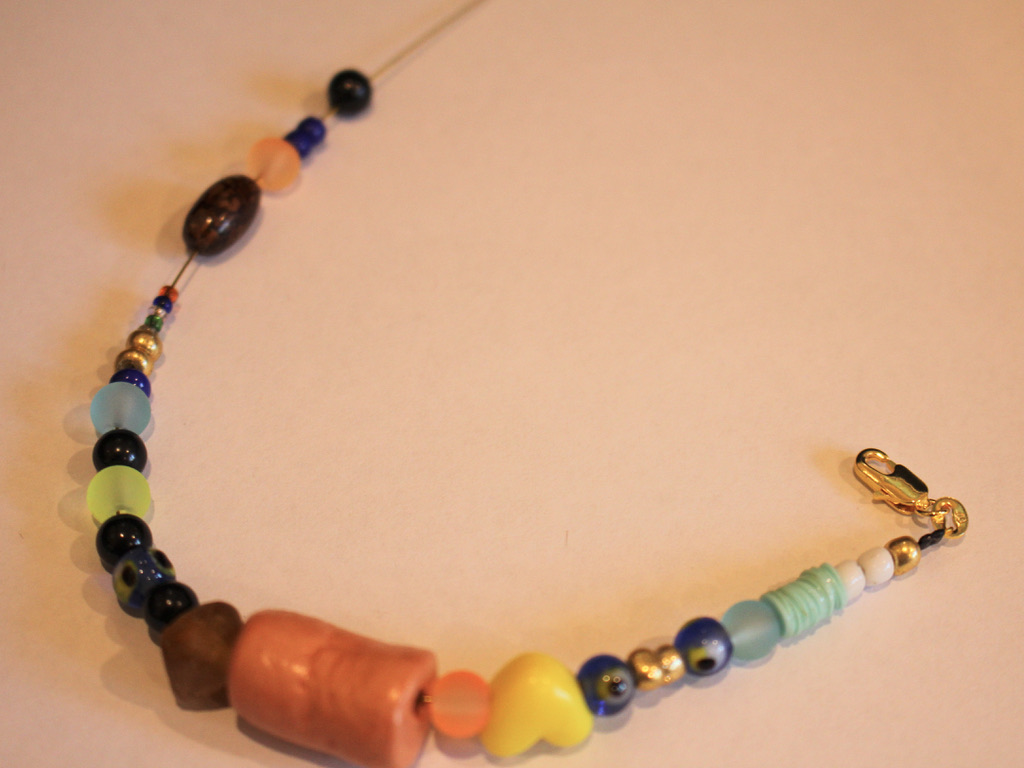
7: Add the second set of crimp beads to the wire.
8: Add the jump ring to the wire.
9: Loop the wire around the jump ring and back through the crimp beads and the first few beads at the end of the bracelet.

10: Pull the wire tight.
11: Squash the crimp beads using the flat nose pliers.
12: Trim the excess wire using the cutting pliers.


13: Now your bracelet is finished and ready to wear!


Here are some other mixed bead, craft-core tutorials for you to follow:
- A crazy mixed bead necklace
- A mixed bead necklace with letter beads
- This special mixed bead shoe chain that can also be worn as an anklet
- A simple mixed bead anklet
If you love the clay bead featured on this bracelet, here’s a tutorial that you can follow to make your own.
-
Flower beading is so fun! Here’s how to put together a flower beaded bracelet.
Flower beading was one of the first beading techniques I learned when I was a crafty kid! I still love beading and it is so fun to see this nostalgic style coming back! This bracelet makes a feature of a beaded flower, surrounded by a variety of glass beads. Please note that this tutorial contains affiliate links.
You’ll need these tools and materials to make your flower beaded bracelet:
1: Scissors.

2: Beading thread.

3: A selection of beads. I used some larger glass beads for the flower and some smaller ones for the base of the bracelet.

4: A parrot clasp and jump ring for the ends of the bracelet.


5: Some superglue.

6: A beading needle with a thin loop of thread tied to it.

Here are the steps to follow to make your flower beaded bracelet:
1: Cut a length of thread, about 50cm and fold it in half.

2: Slip the loop around the clasp end and pull the length of the thread back through that loop. Pull it tight to secure it to the clasp.

3: Tie a knot at the base of the clasp and put the thread back through the clasp end, tying one final knot for extra security.


4: Add the looped needle to the beading thread.
5: Begin adding beads, bead to about half of the preferred length of your bracelet. You can check this roughly by laying the bracelet across your wrist and measuring by eye how far it reaches around the wrist.

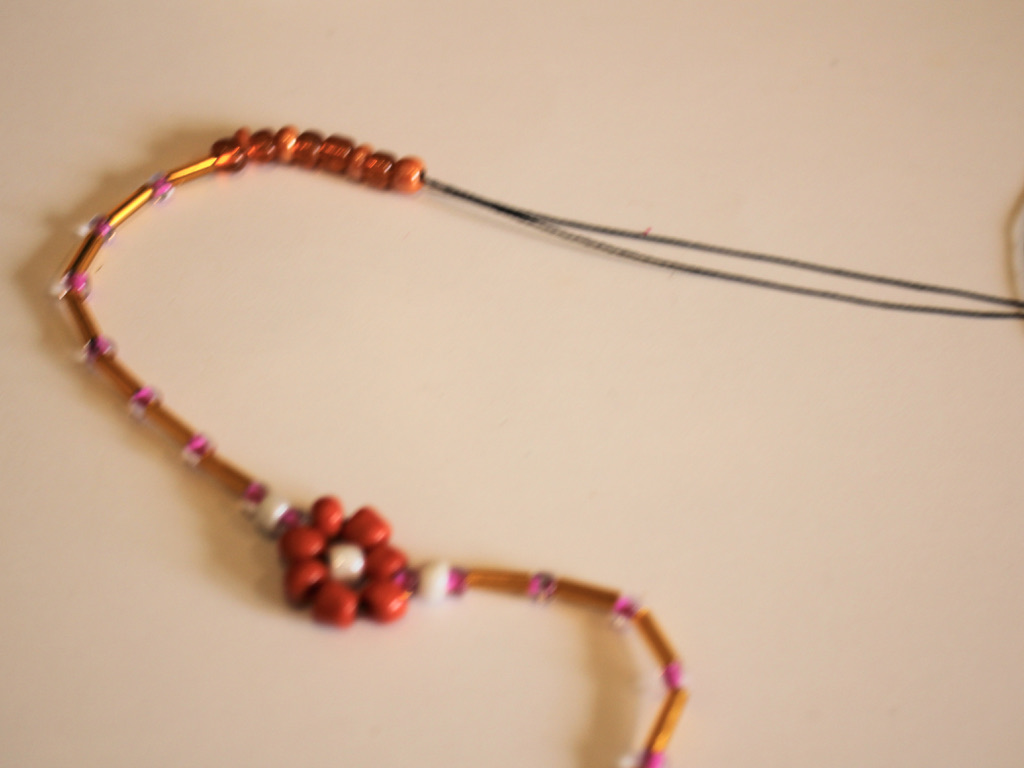
6: Once you have the length you like, add the seven beads for making the flower.
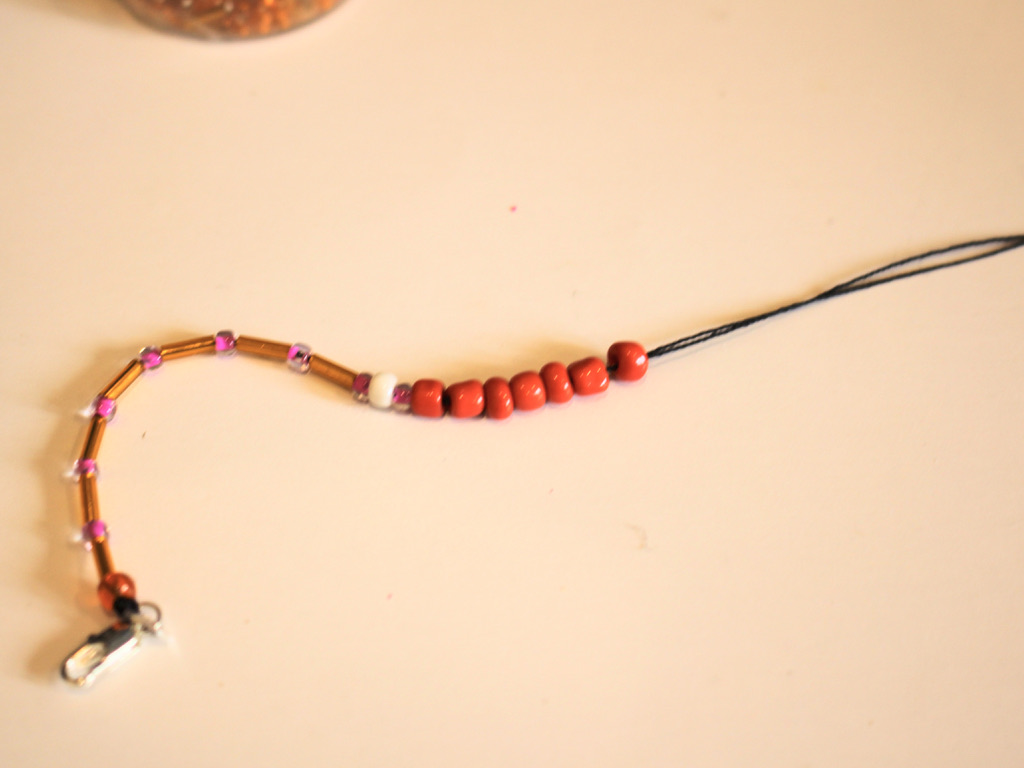
7: Take the needle and put it through the hole of the first of the flower beads. When you pull it tight you will have a circle shape.

8: Add another bead to the thread, this will be the centre of the flower.

9: Place the centre bead into the middle of the circle and then thread the needle through one of the beads opposite the one you used to form the circle.

10: Pull the thread tight, you will now have a flower with a centre.
11: Continue beading until you have the length you like. I didn’t quite make the first part of my bracelet long enough so I decided to add some extra feature beads at the end to make it long enough.


12: Once you have your desired bracelet length, tie a knot at the end of the beads to secure them.
13: Loop the thread around the jump ring and tie a knot. Repeat this to secure the jump ring well.


14: Trim the excess thread from the end of the bracelet, cutting closely. Then add a dab of superglue to the knots on both ends of the bracelet for extra security. Set the bracelet aside and wait for the glue to dry.


Once the glue is dry, your sweet and cheerful floral bracelet is finished and ready to wear!


Here are some more floral bead tutorials you can follow:
-
Here’s how to make a bracelet using beading thread and a needle!
I’m loving using nylon beading thread at the moment, so I thought I’d make a tutorial showing how to use it to make a cute beaded bracelet! Here are all the instructions plus some affiliate links so you can buy the materials to make your own.
You’ll need these tools and materials to make this beaded bracelet:
1: Some nylon beading thread. I used some thread that was cut to about 1m long.

2: A clasp. I used this sterling silver parrot clasp.

3: A jump ring. I used a sterling silver jump ring.
4: Beads. I used these handmade polymer clay beads and some red glass seed beads.

5: Scissors to cut the thread.
6: Super glue.
7: A beading needle with a thin loop of thread tied around the bottom.
Follow these steps to make your beaded bracelet:
1: Fold the piece of thread in half, loop and knot it around the jump ring.

2: Slide the thread through the needle loop and begin adding beads.


3: Add beads in your desired pattern.


4: Once you have your bracelet at a length you like, tie a knot to the end so the beads won’t slide off.
5: Tie the end of the string to the jump ring on the parrot clasp, be sure to do a few knots and loops around the clasp for a strong tie.


6: Trim the excess thread.

7: Add a dab of superglue to each knot and set the bracelet aside to dry.

8: Once the superglue is dry, your bracelet is finished! How sweet is it to learn how to use new beading materials?


If you like using beading thread, here’s a tutorial that shows you how to use it to make a beaded necklace.
-
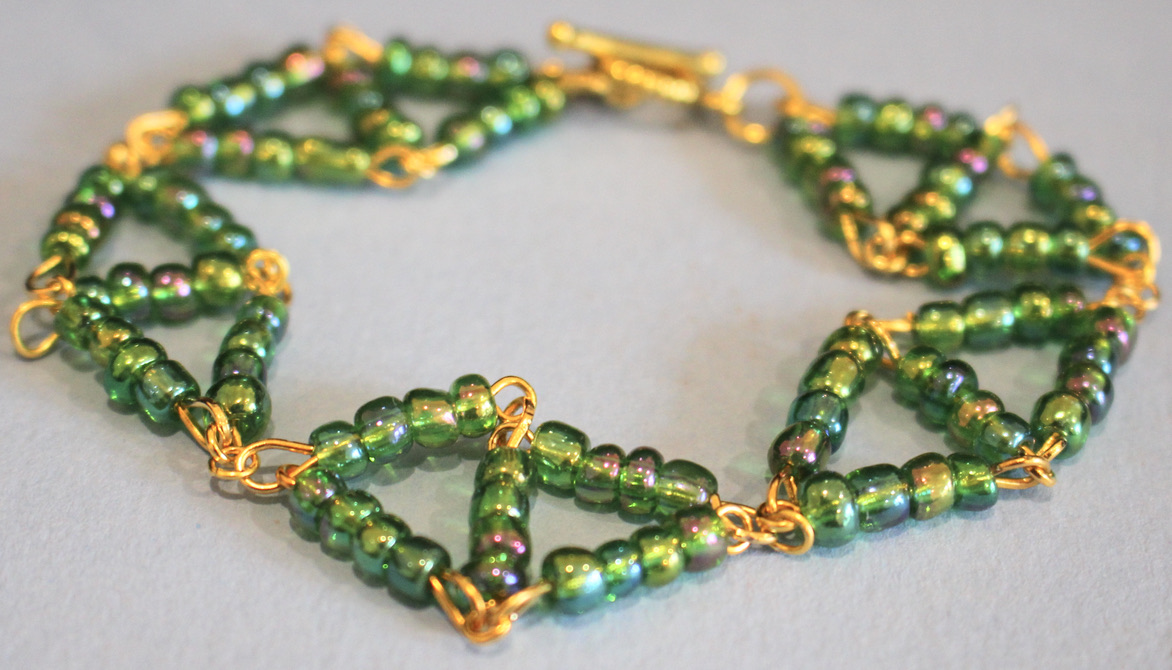
How to make a super cute bracelet with beaded diamond shapes!
This is a cute little bracelet that looks great! the beaded diamond bracelet design uses eye pins and beads to form a series of diamond shapes that link together to create a bracelet. This diamond shaped bracelet is eye-catching and fun to put together, perfect for constructing on a quiet afternoon at home.
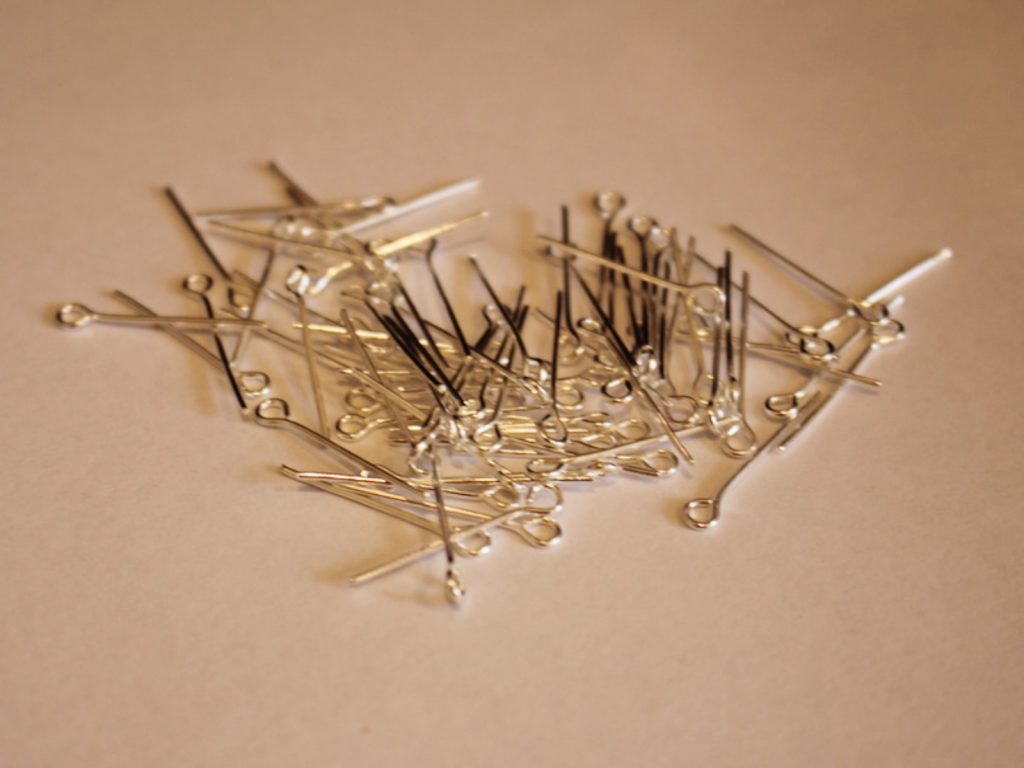
You’ll need these tools and materials to make your beaded diamond bracelet:
1: Pliers. I used my round nose and flat nose pliers.


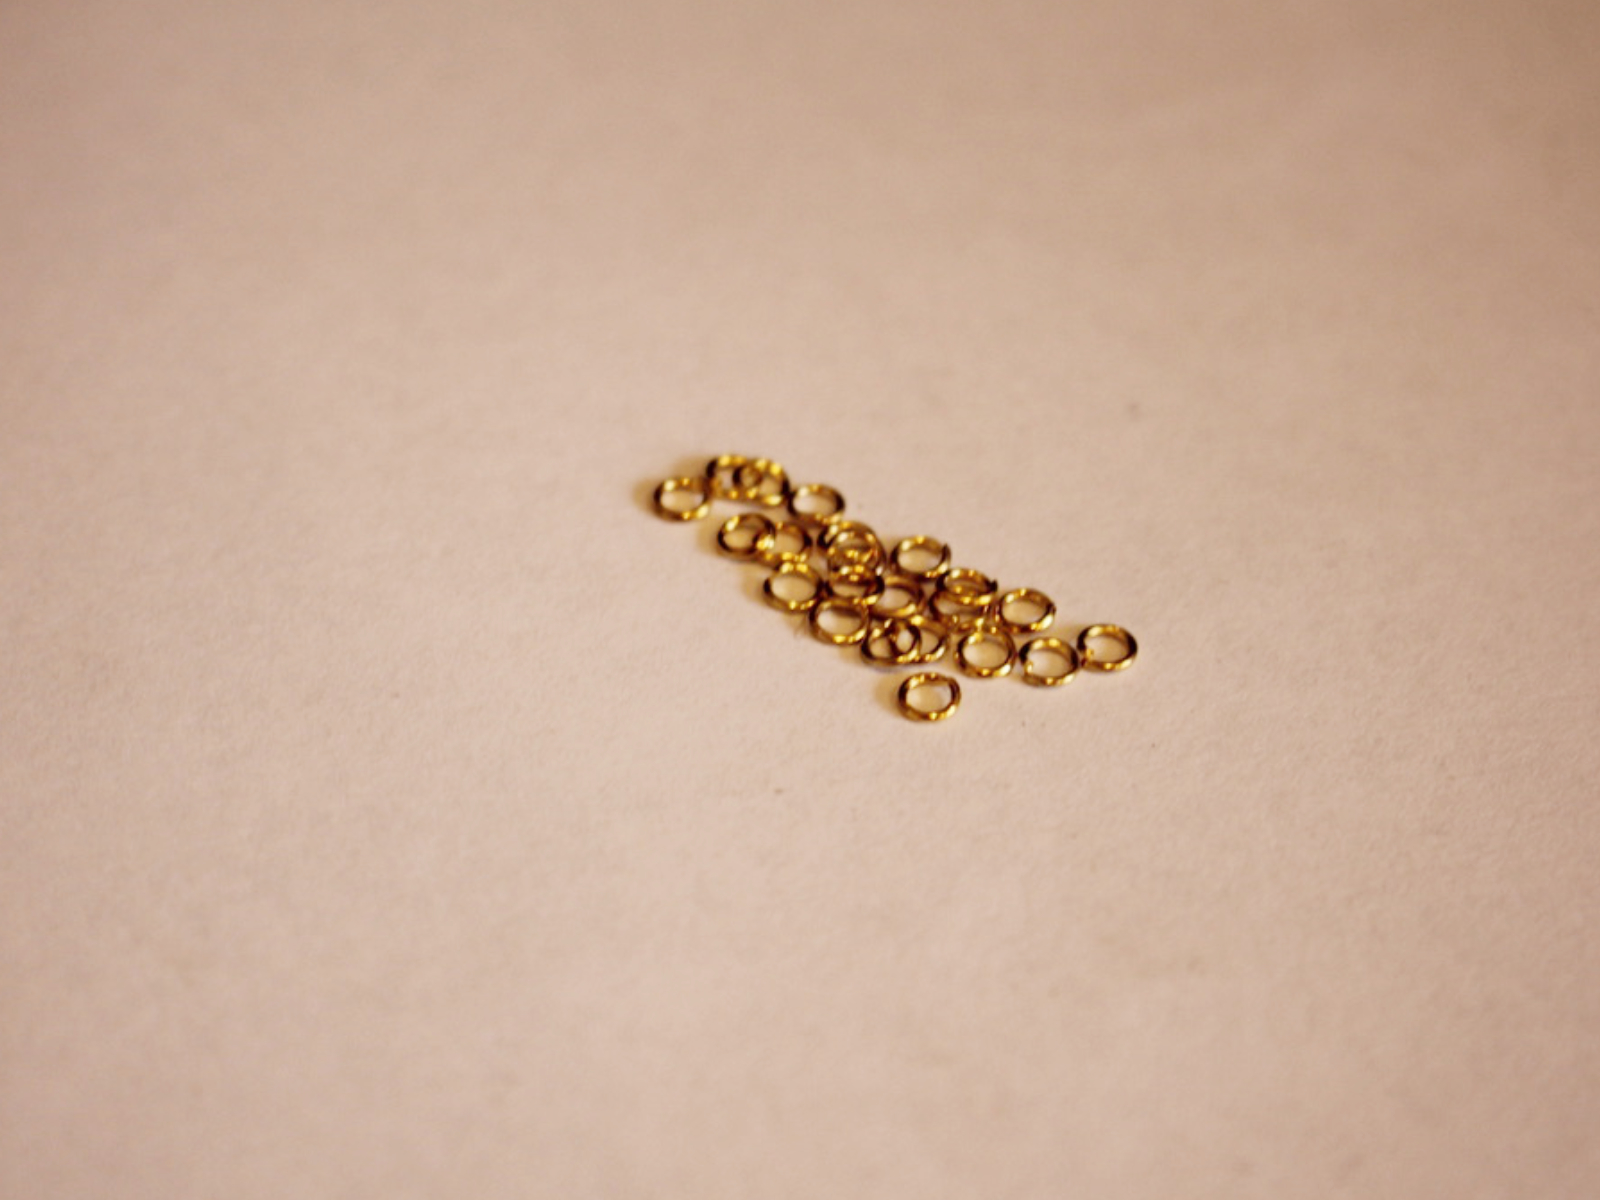
2: A bunch of eye pins. I ended up using about 25 pins. You may need more or less depending on your wrist size.

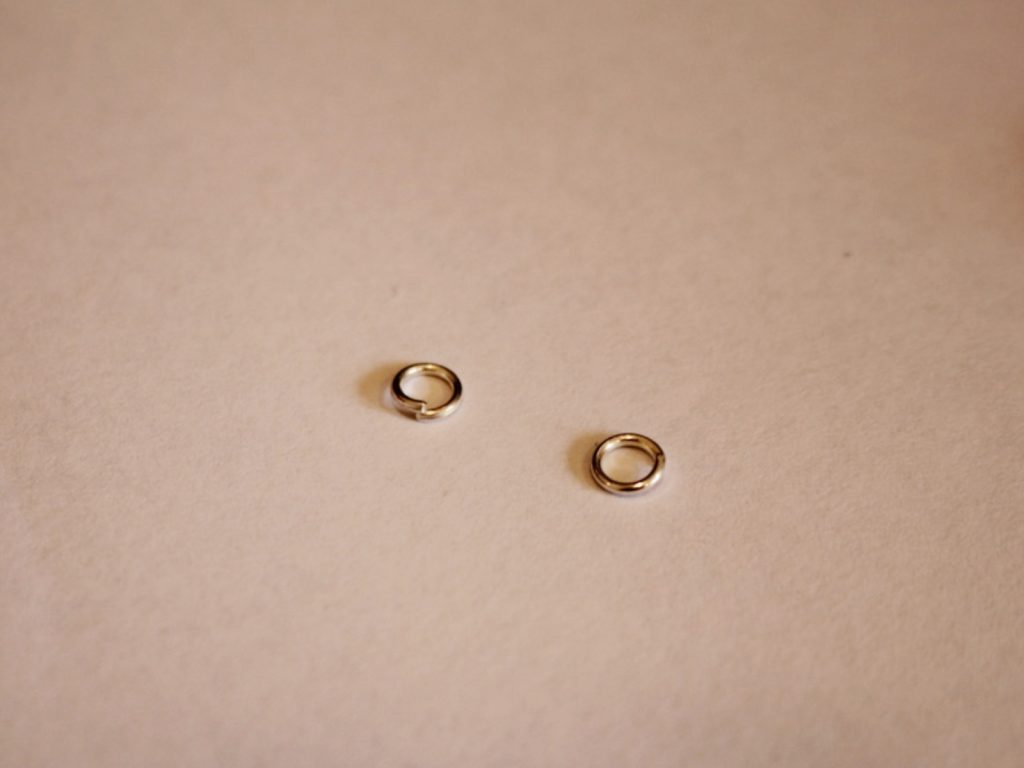
3: Some small jump rings. I used four, you may need more or less depending on the size of the bracelet.

4: Two larger jump rings.

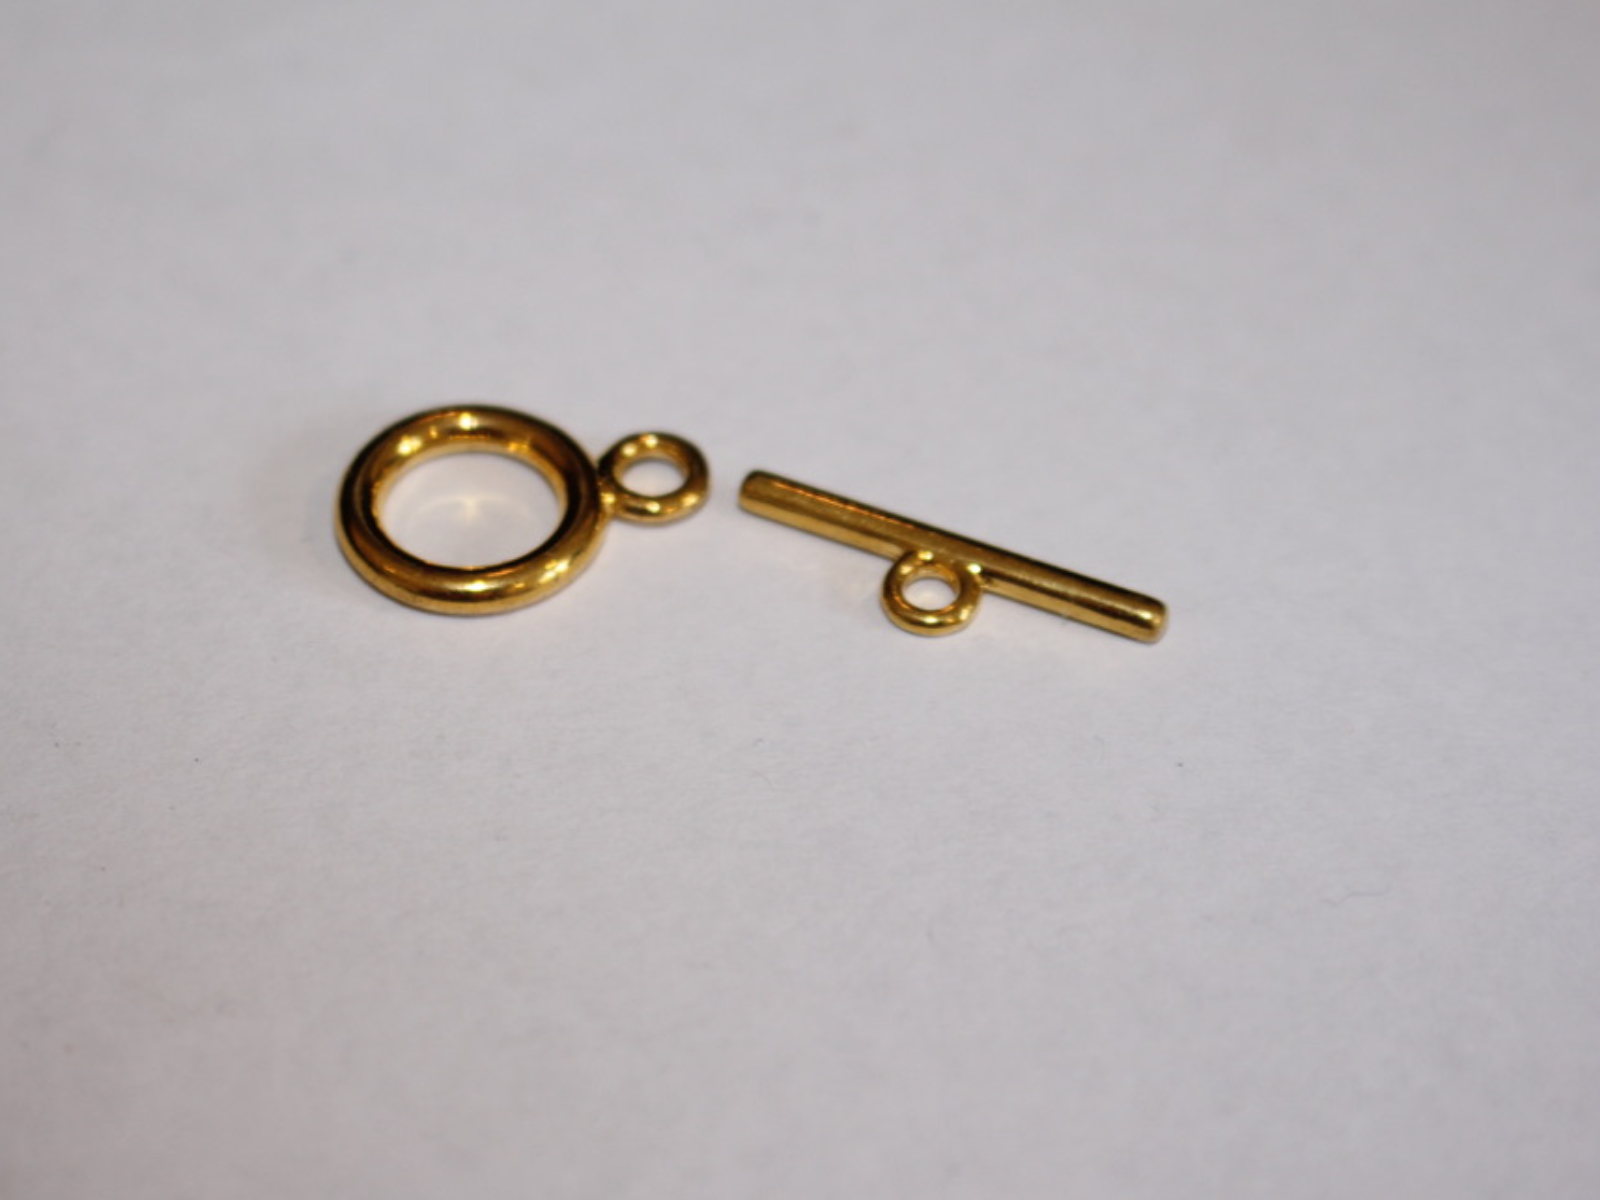
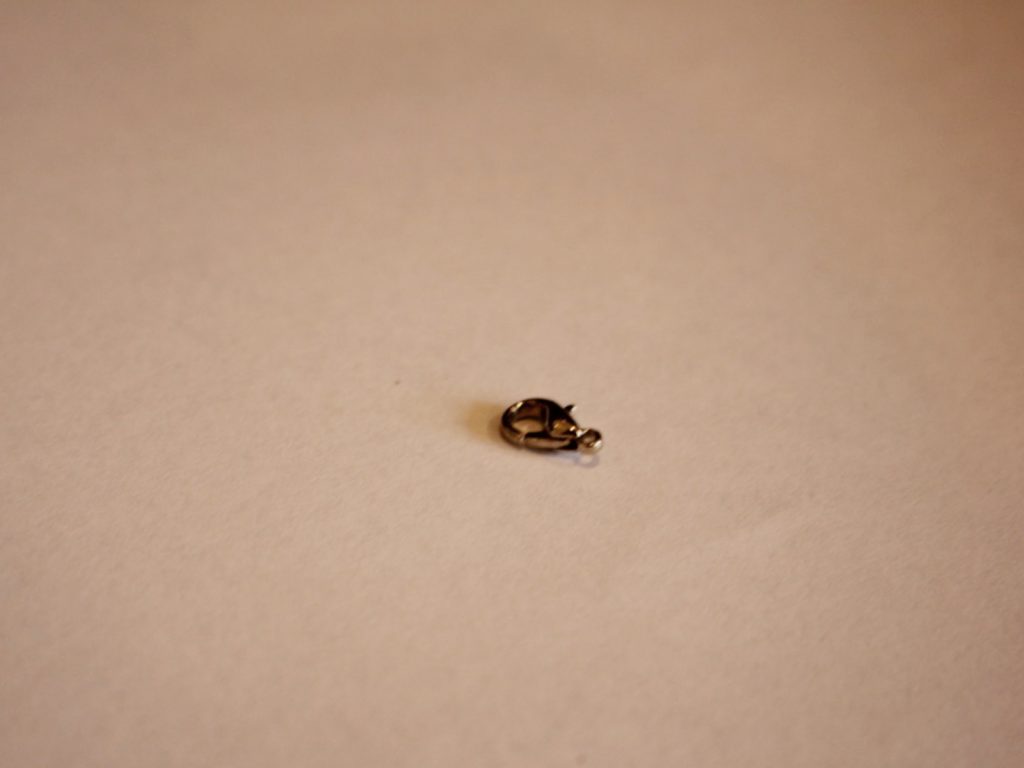
5: A toggle clasp.

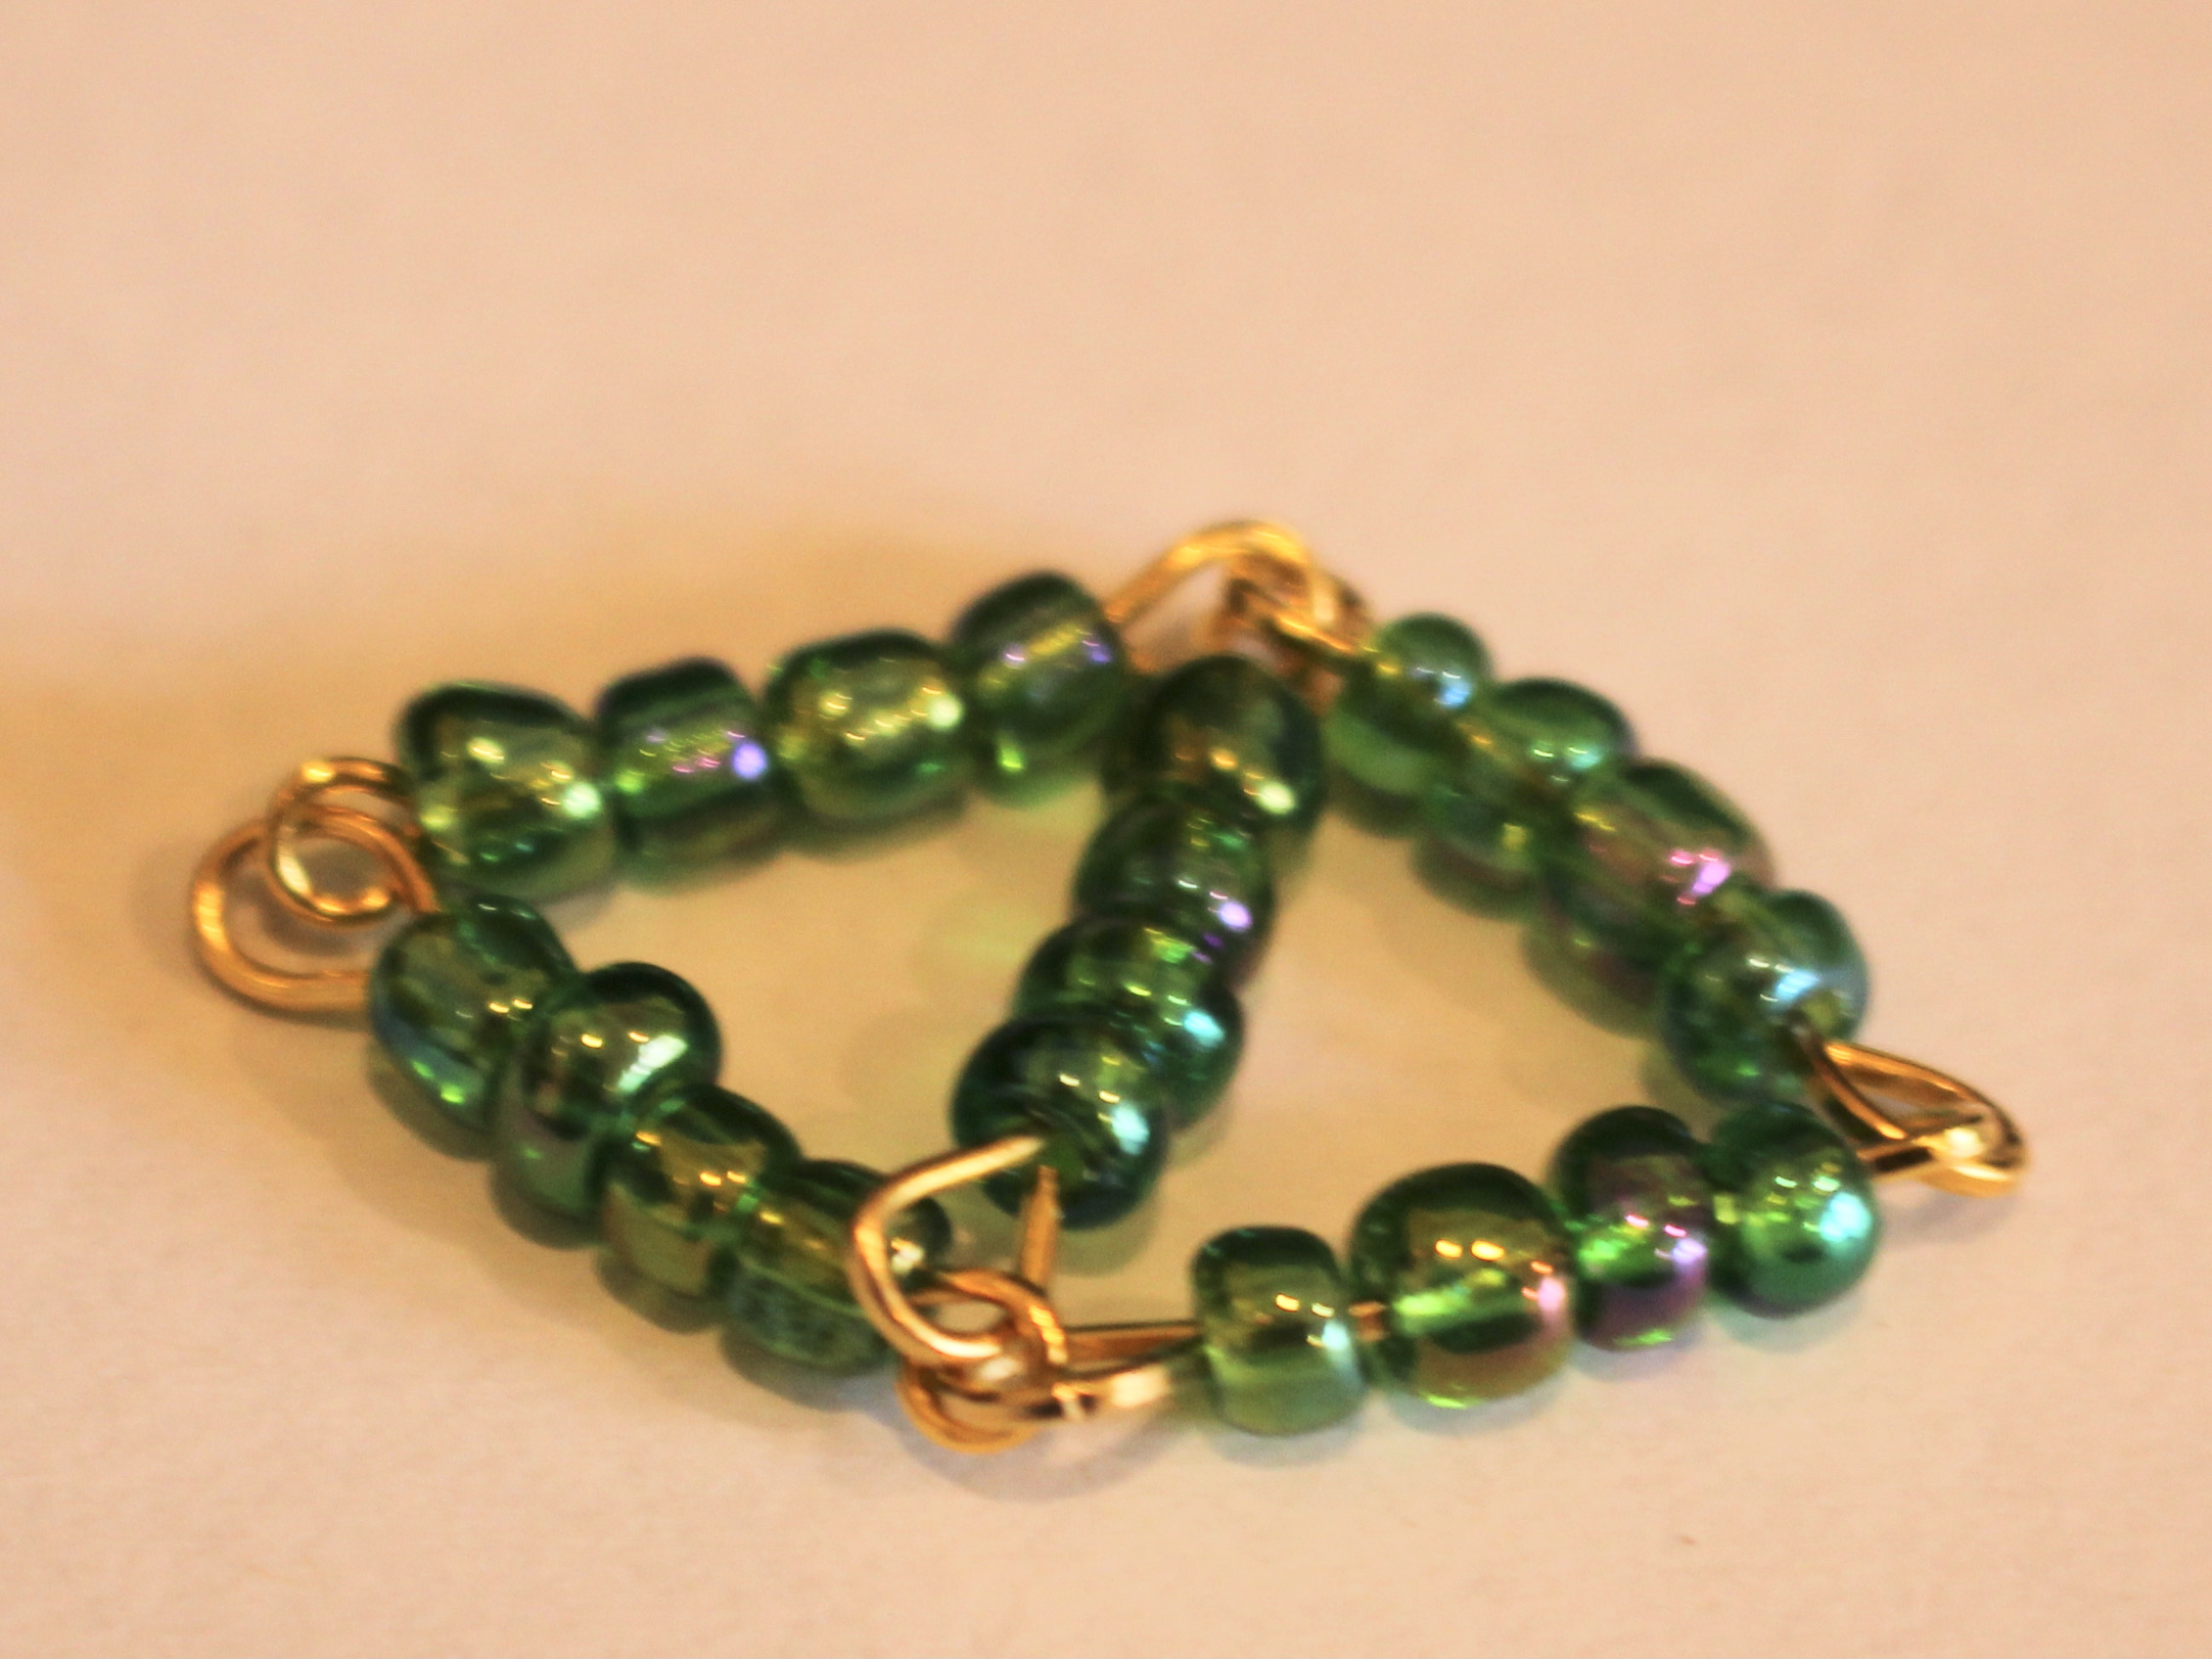
6: Beads of your choice. I used these green glass e-beads.

Follow these steps to make your beaded diamond bracelet:
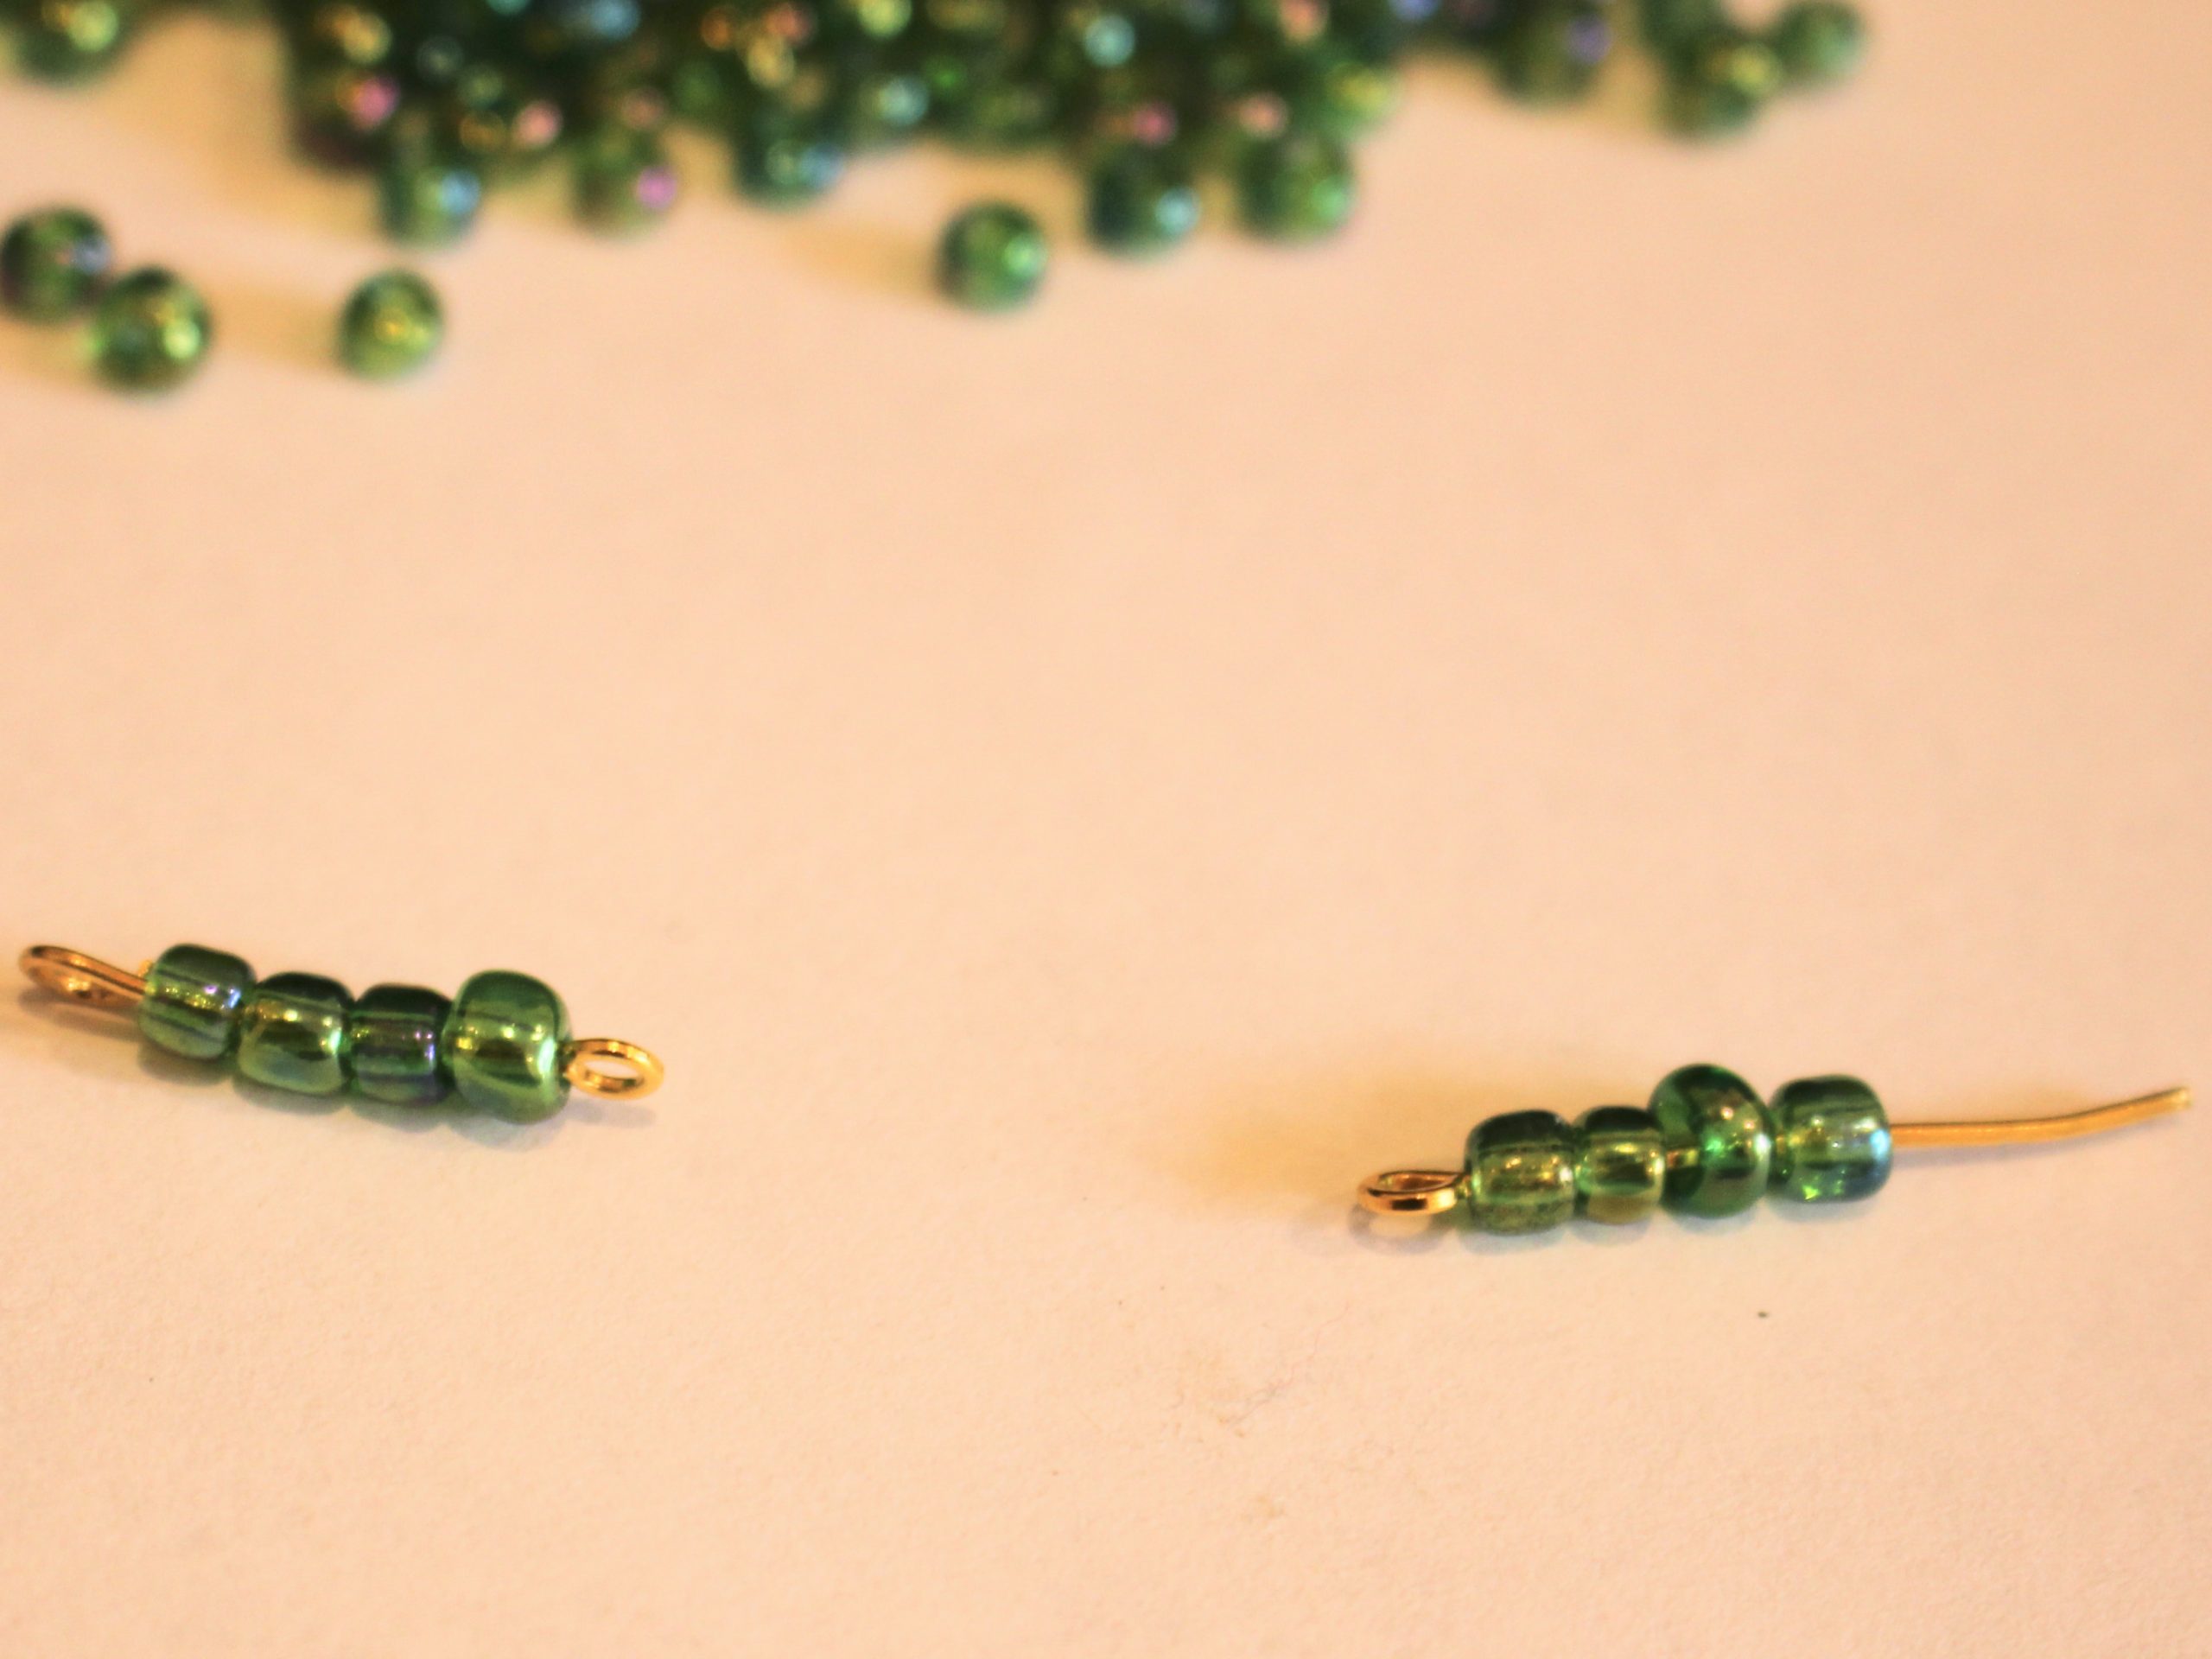
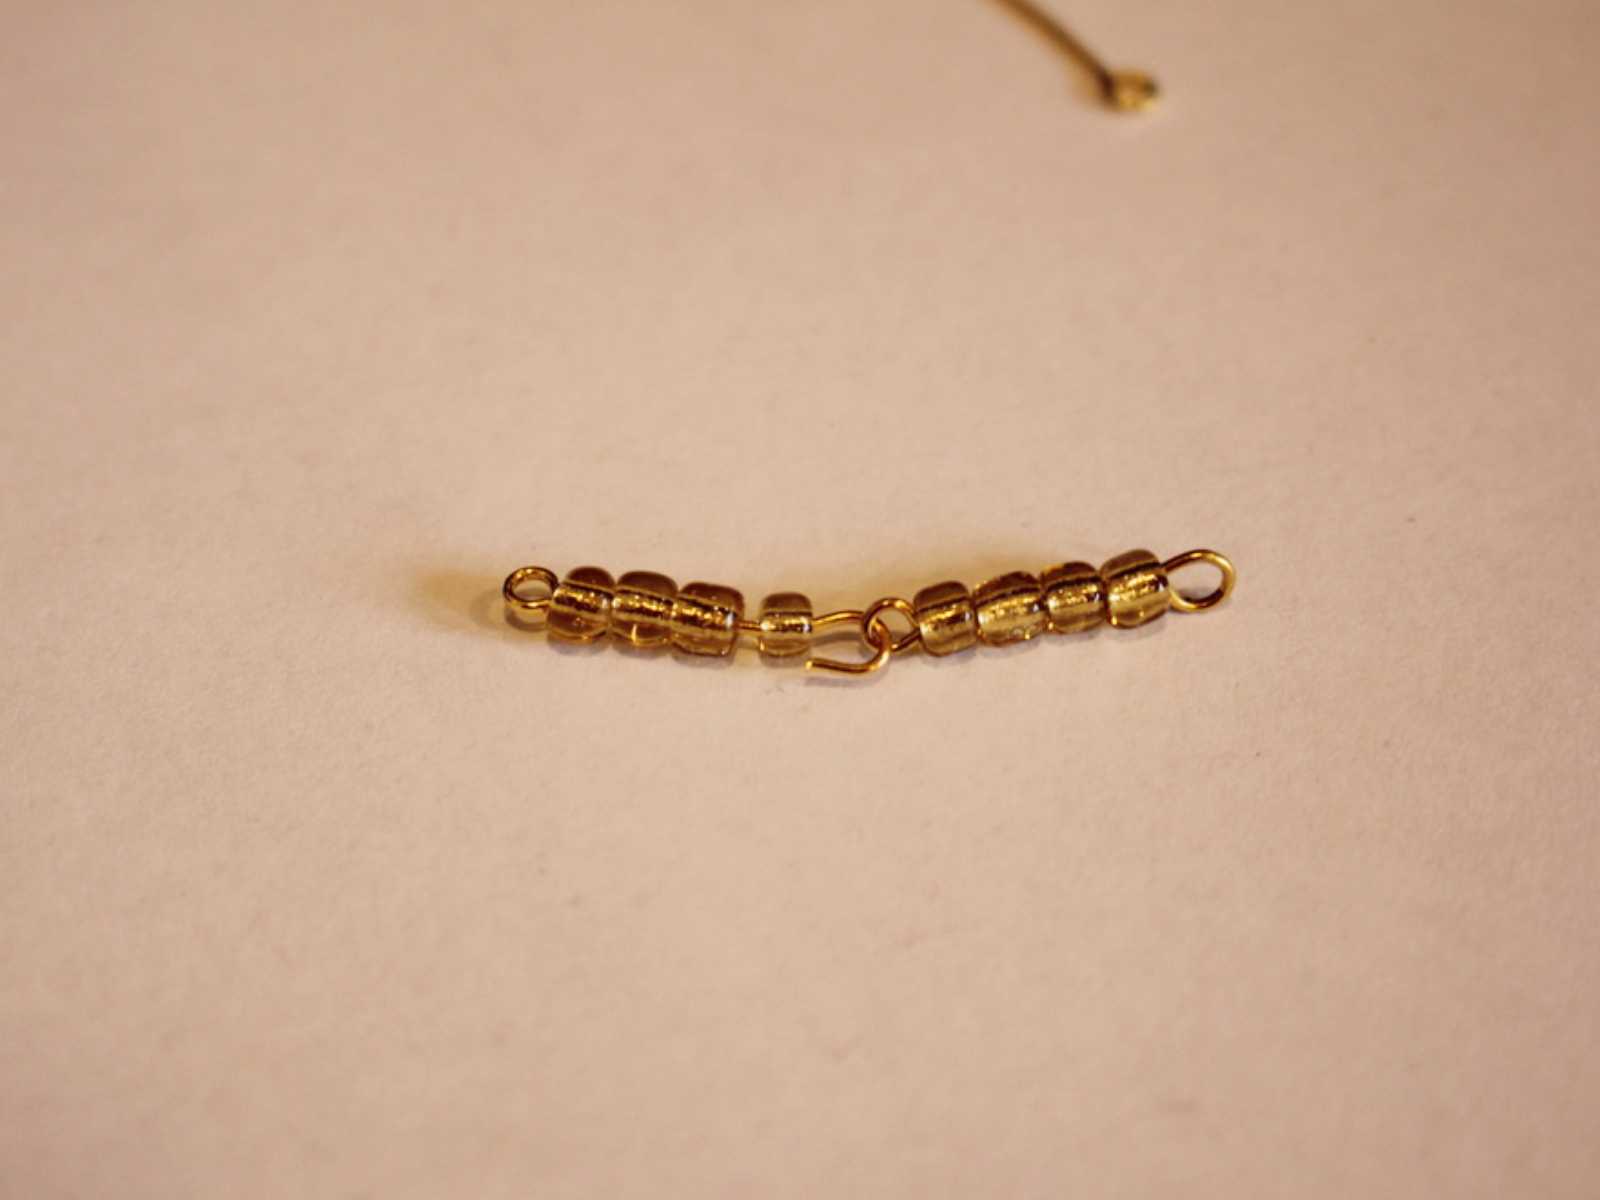
1: Add beads to two of the eye pins.
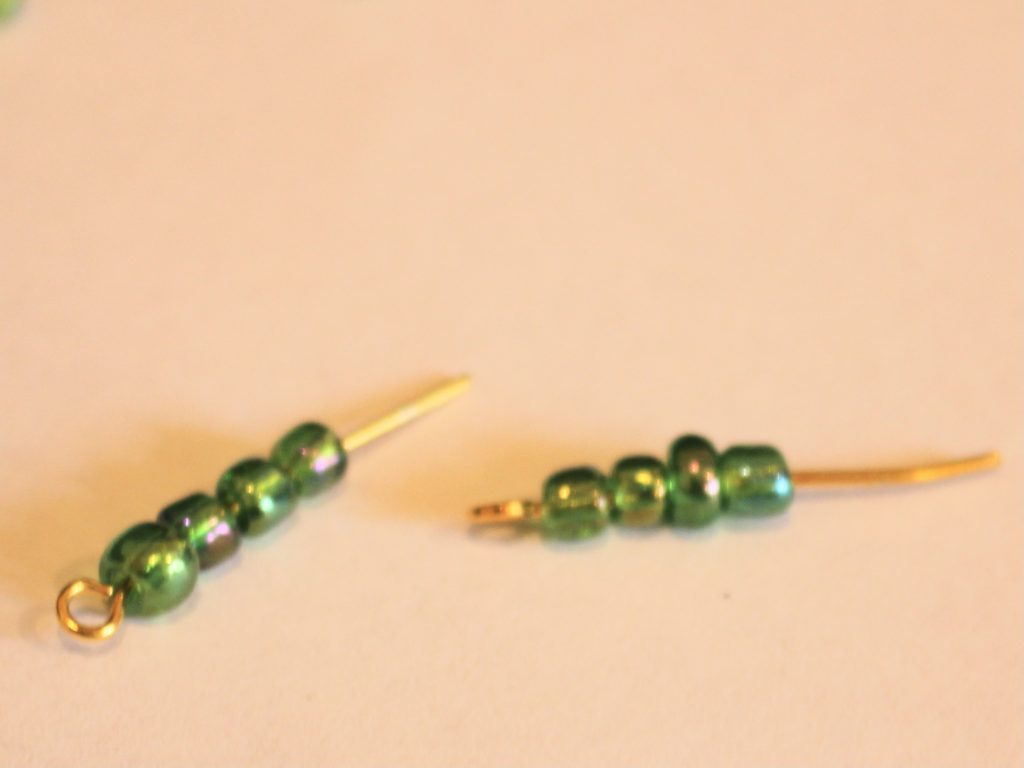
2: Leave about 1cm without beads.
3: Bend the pins to form an angle with the beaded section.

4: Loop the end of the pins around the round nose pliers to create a loop that secures the beads onto the pins.


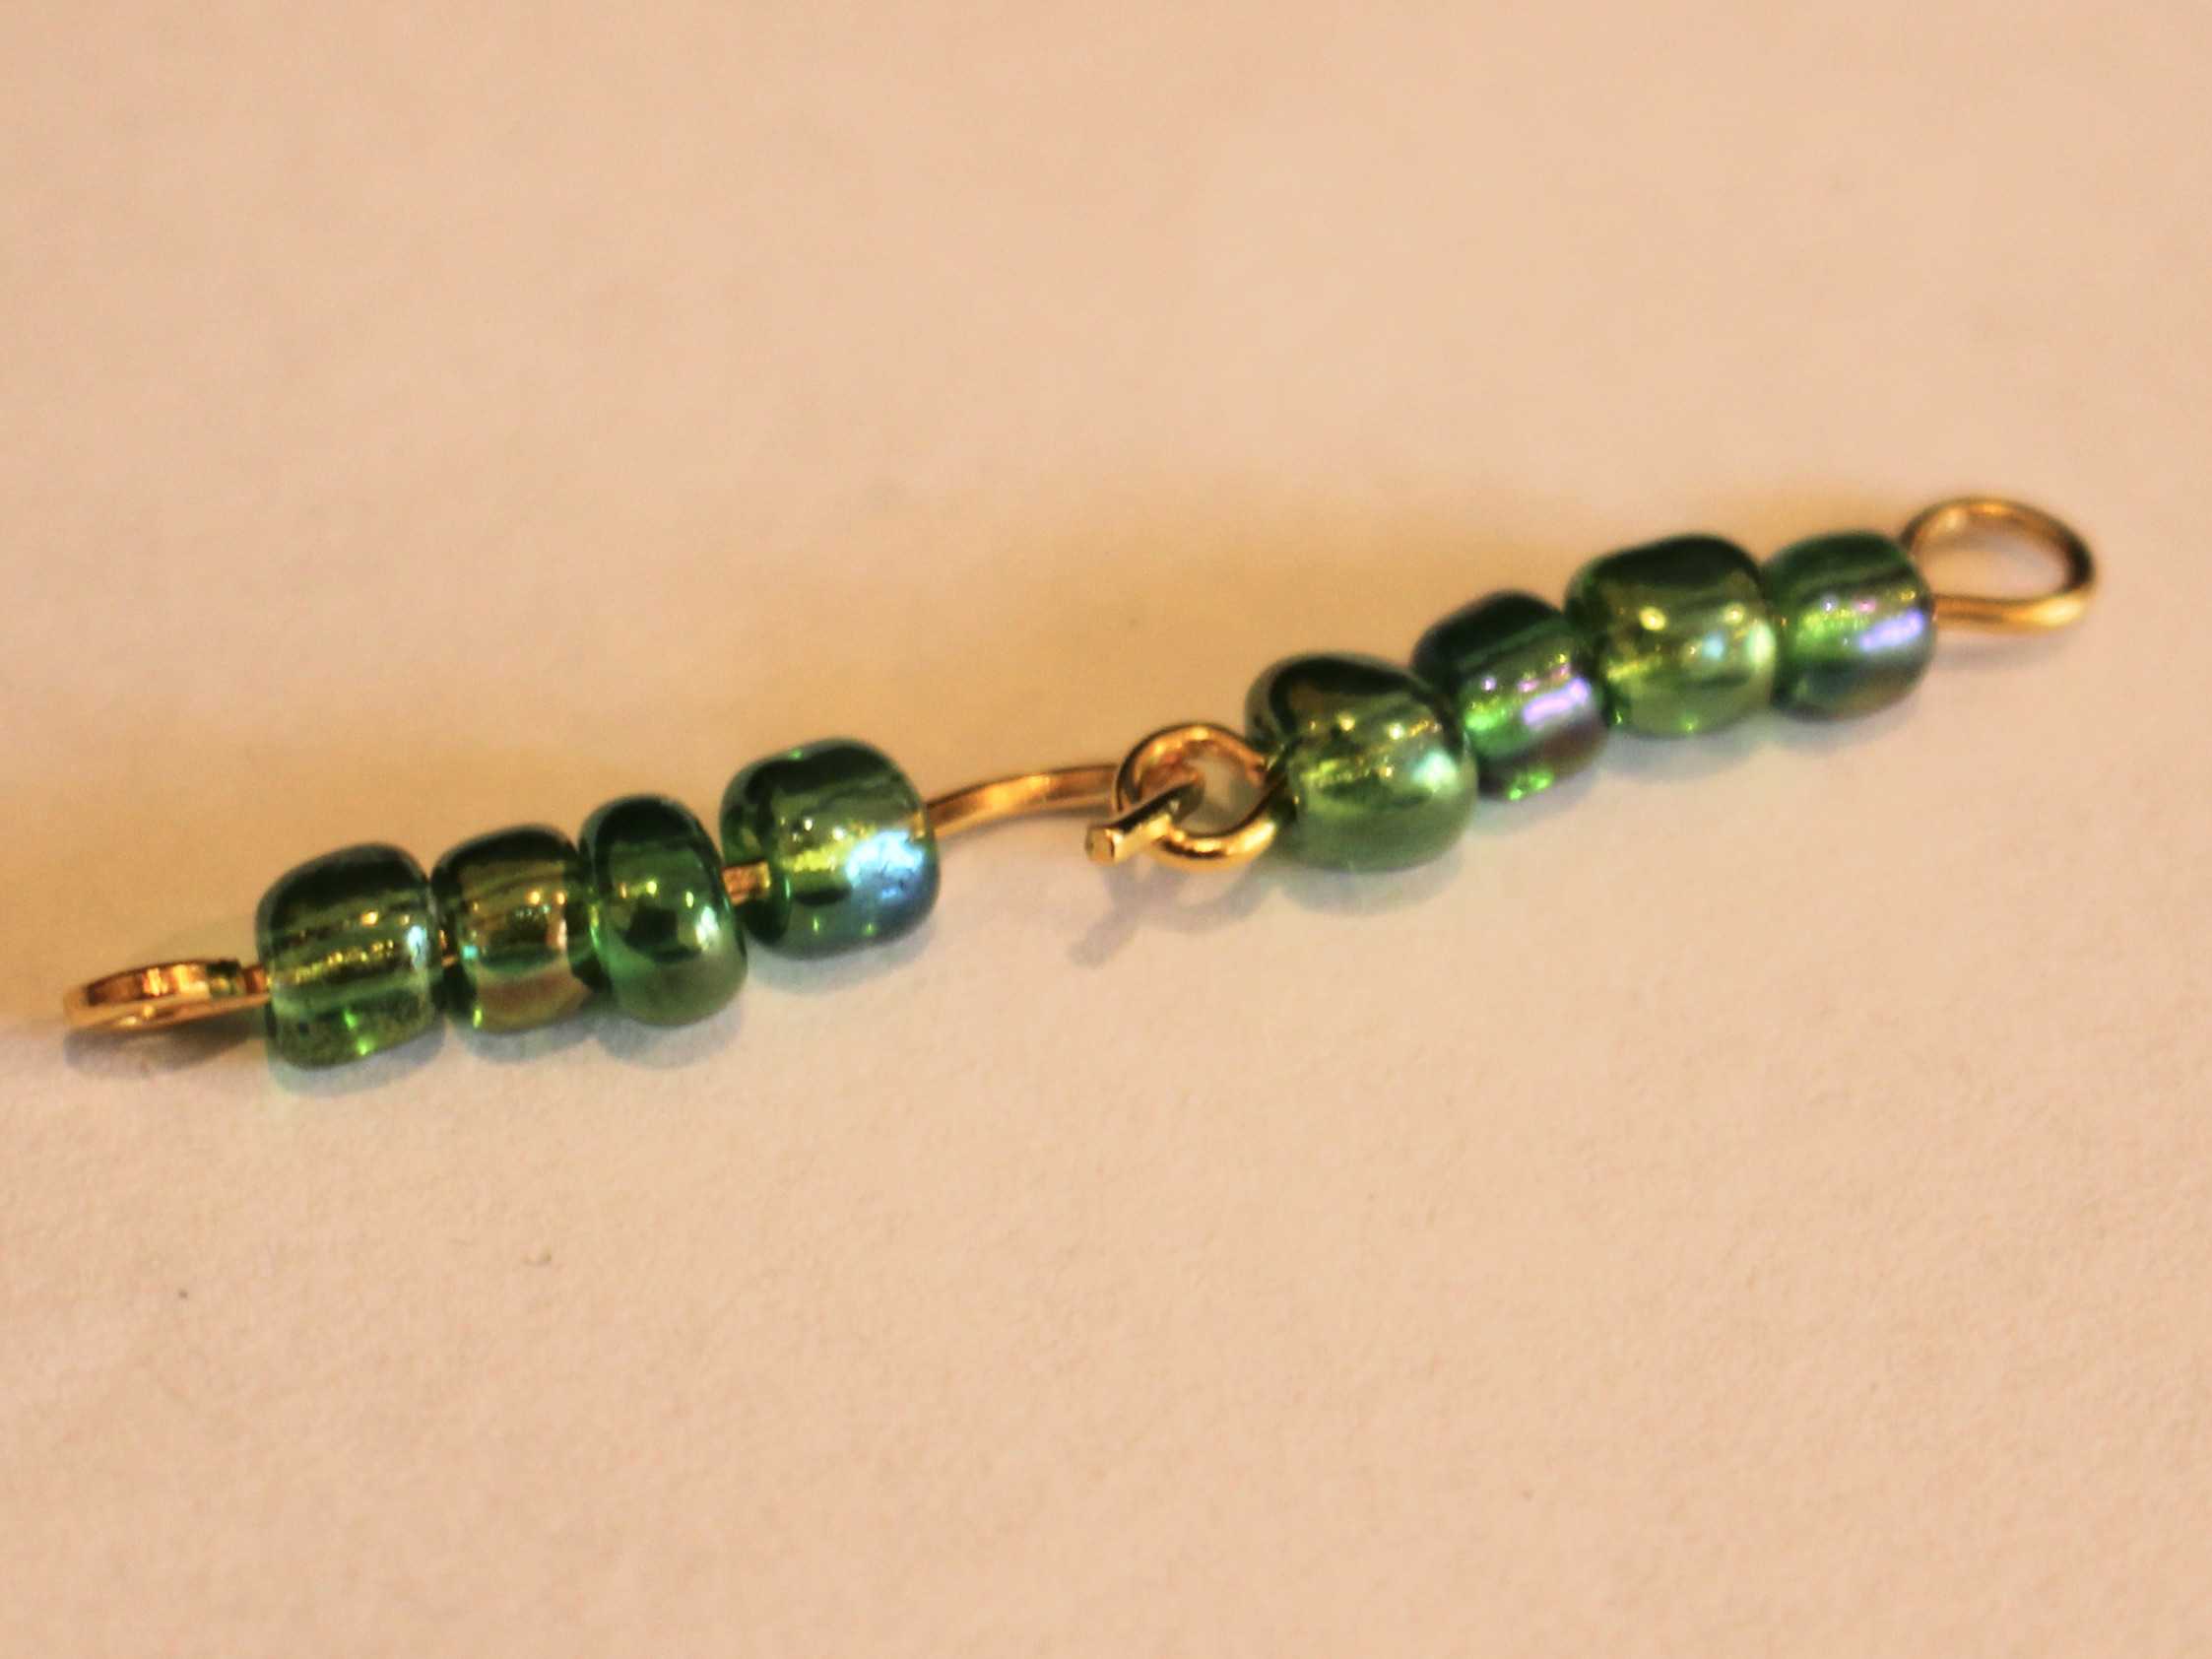
5: Link the two pins together.

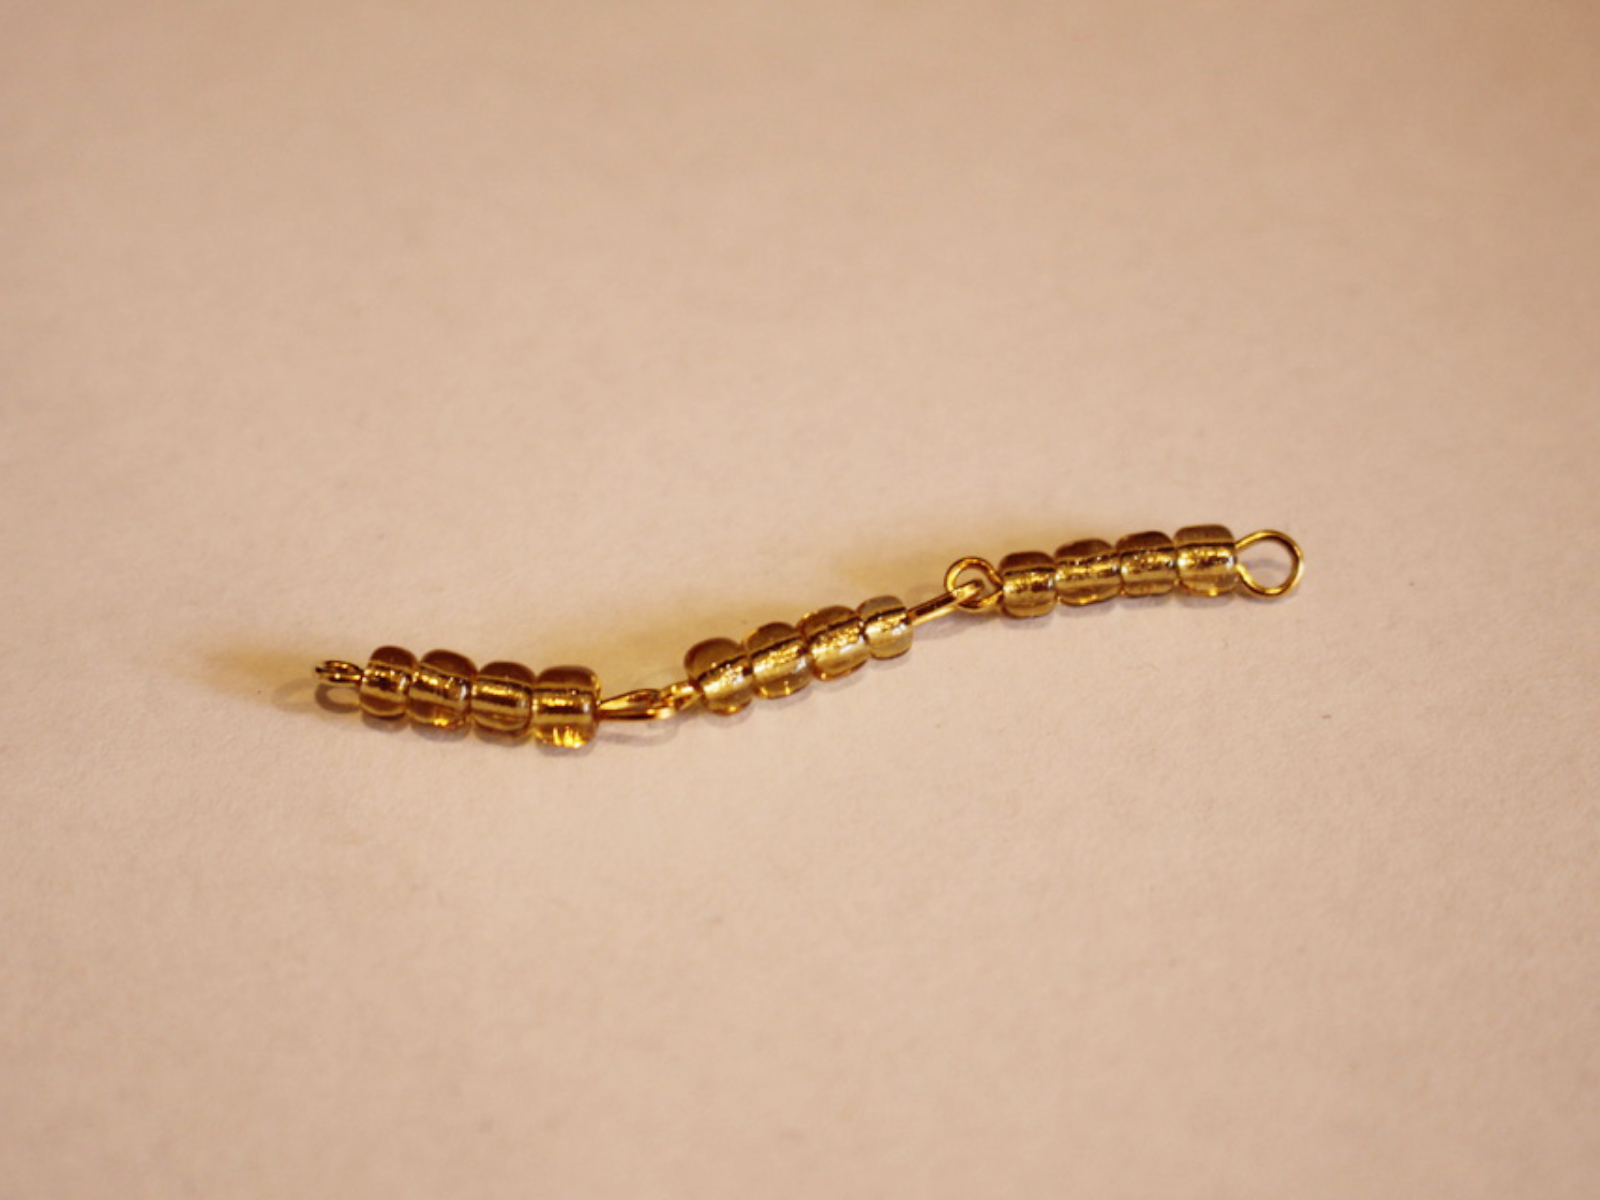
6: Repeat steps 1-5 three more times so that you have 5 beaded pins.
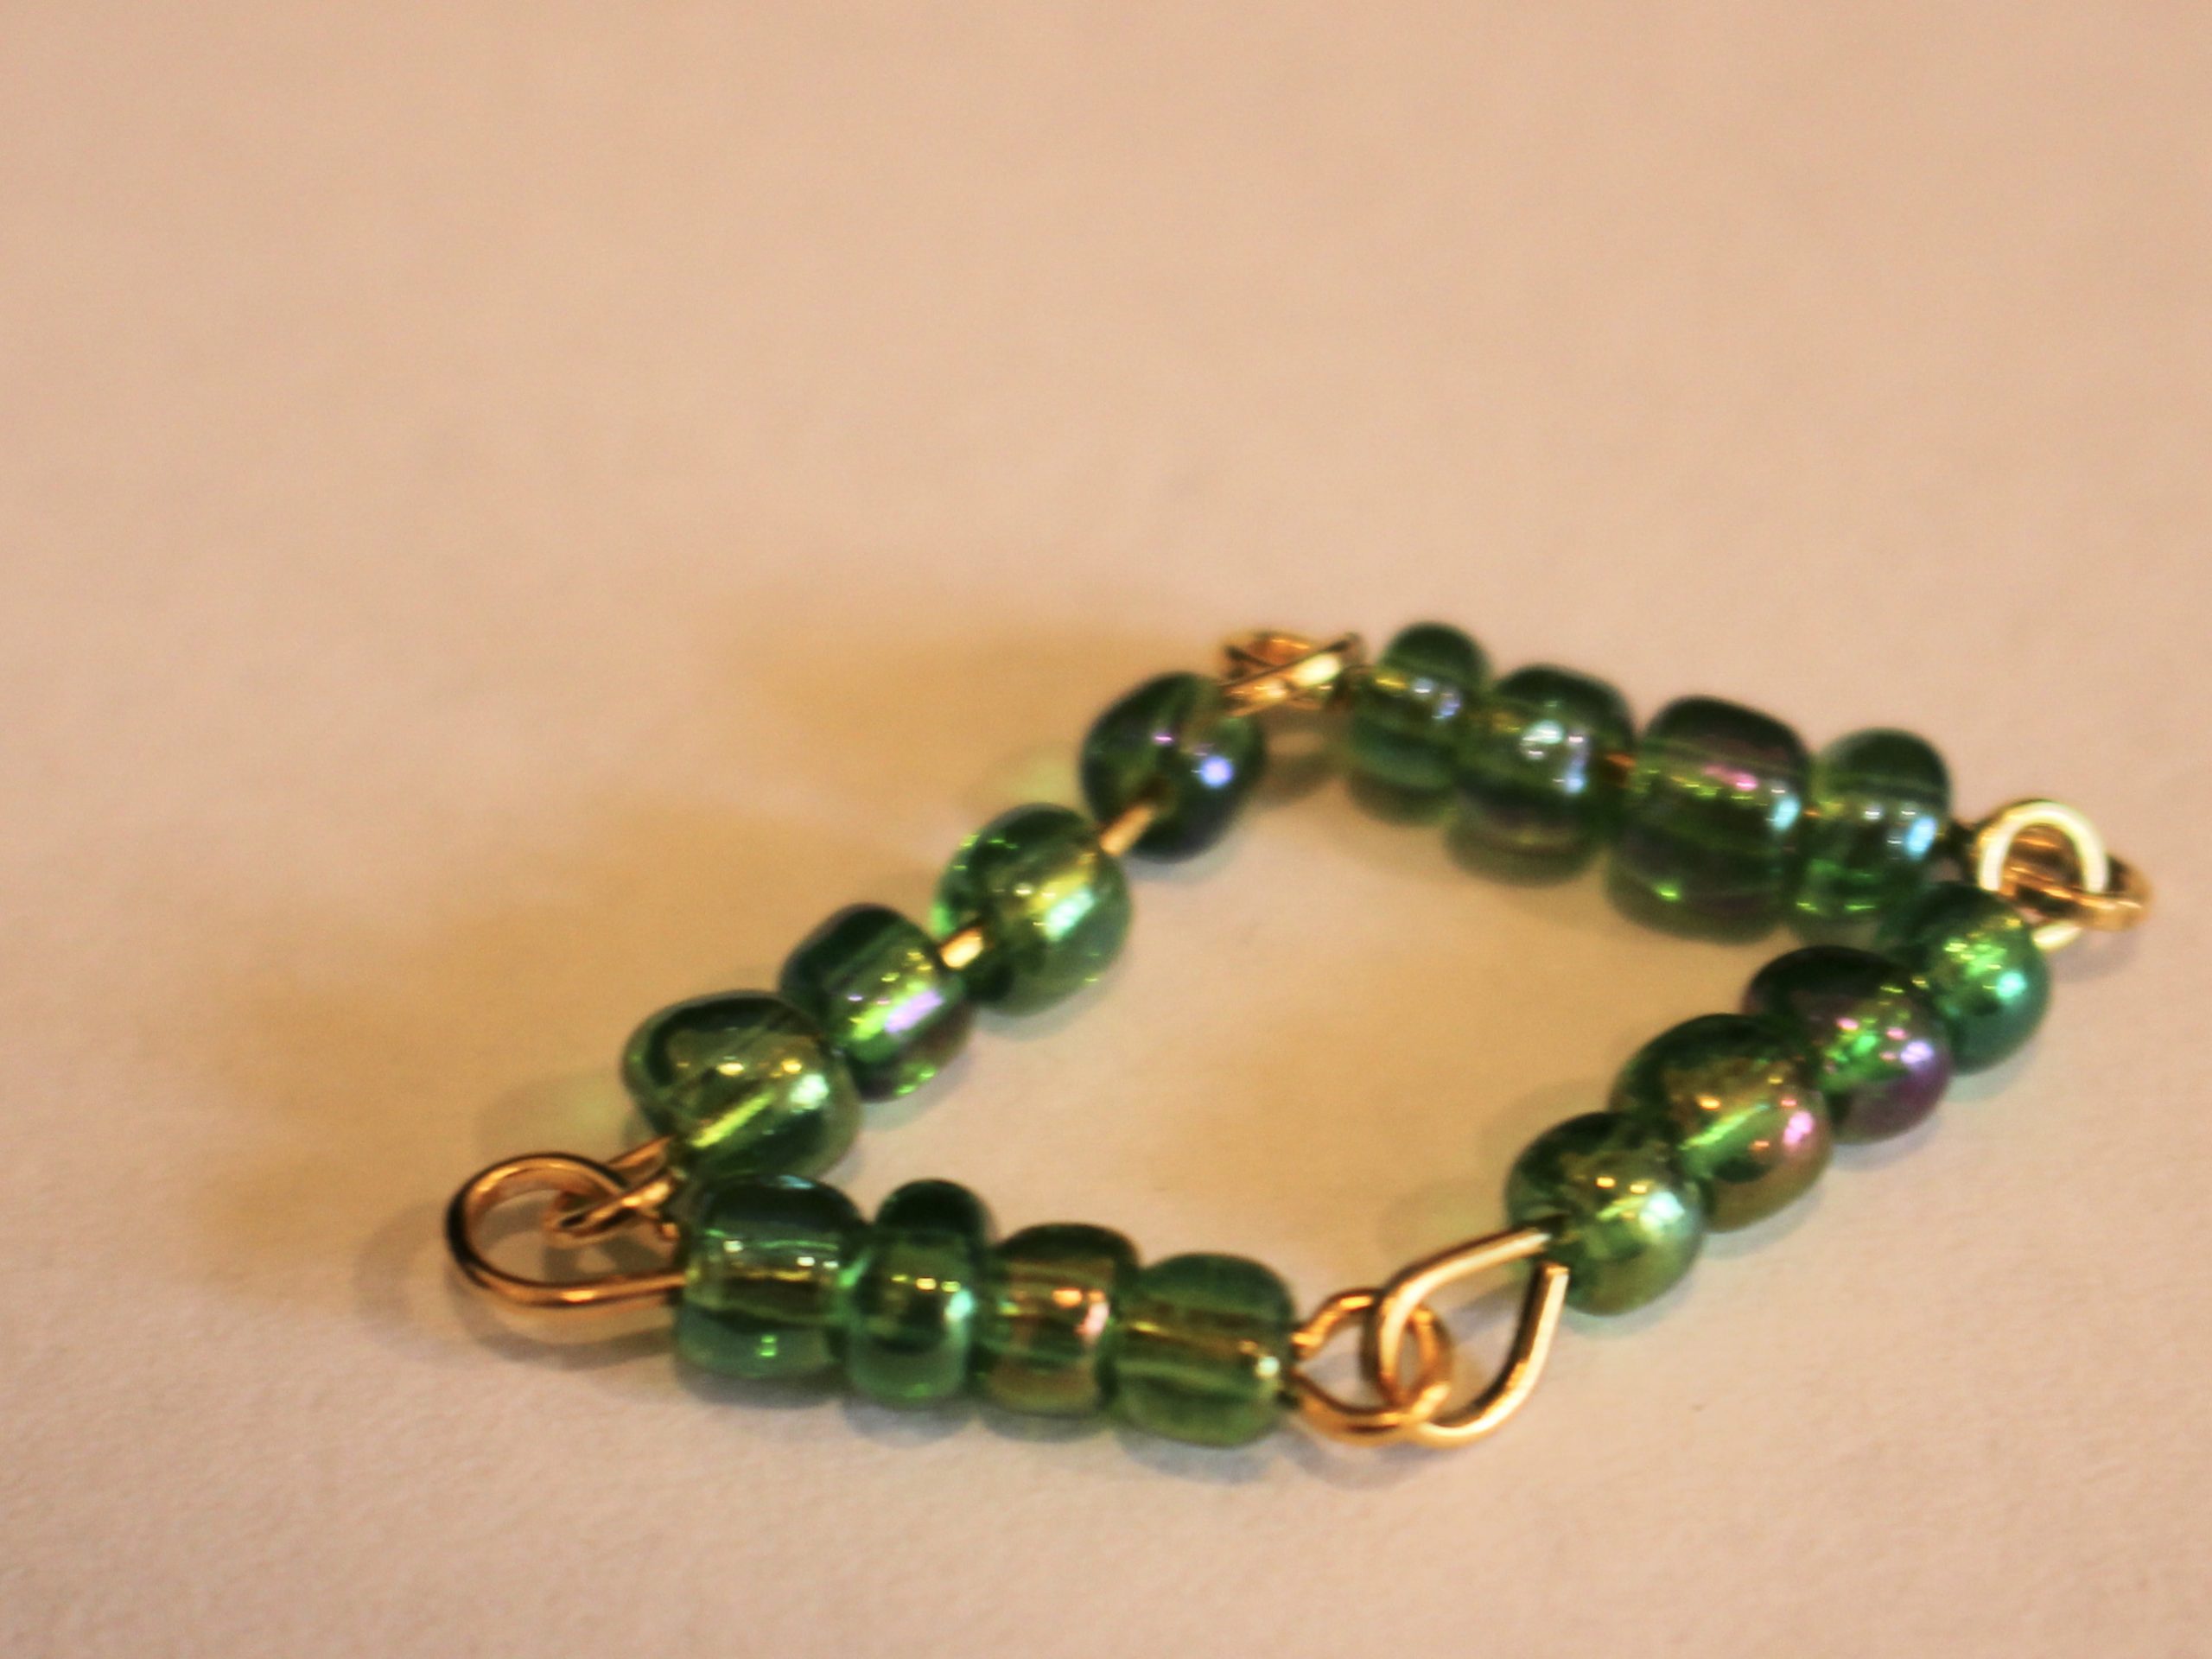
7: Link two more pins to the first two, so you have a square shape.


8: Add the last pin to the middle of the four linked pins so that you have a diamond shape that doesn’t shift around.


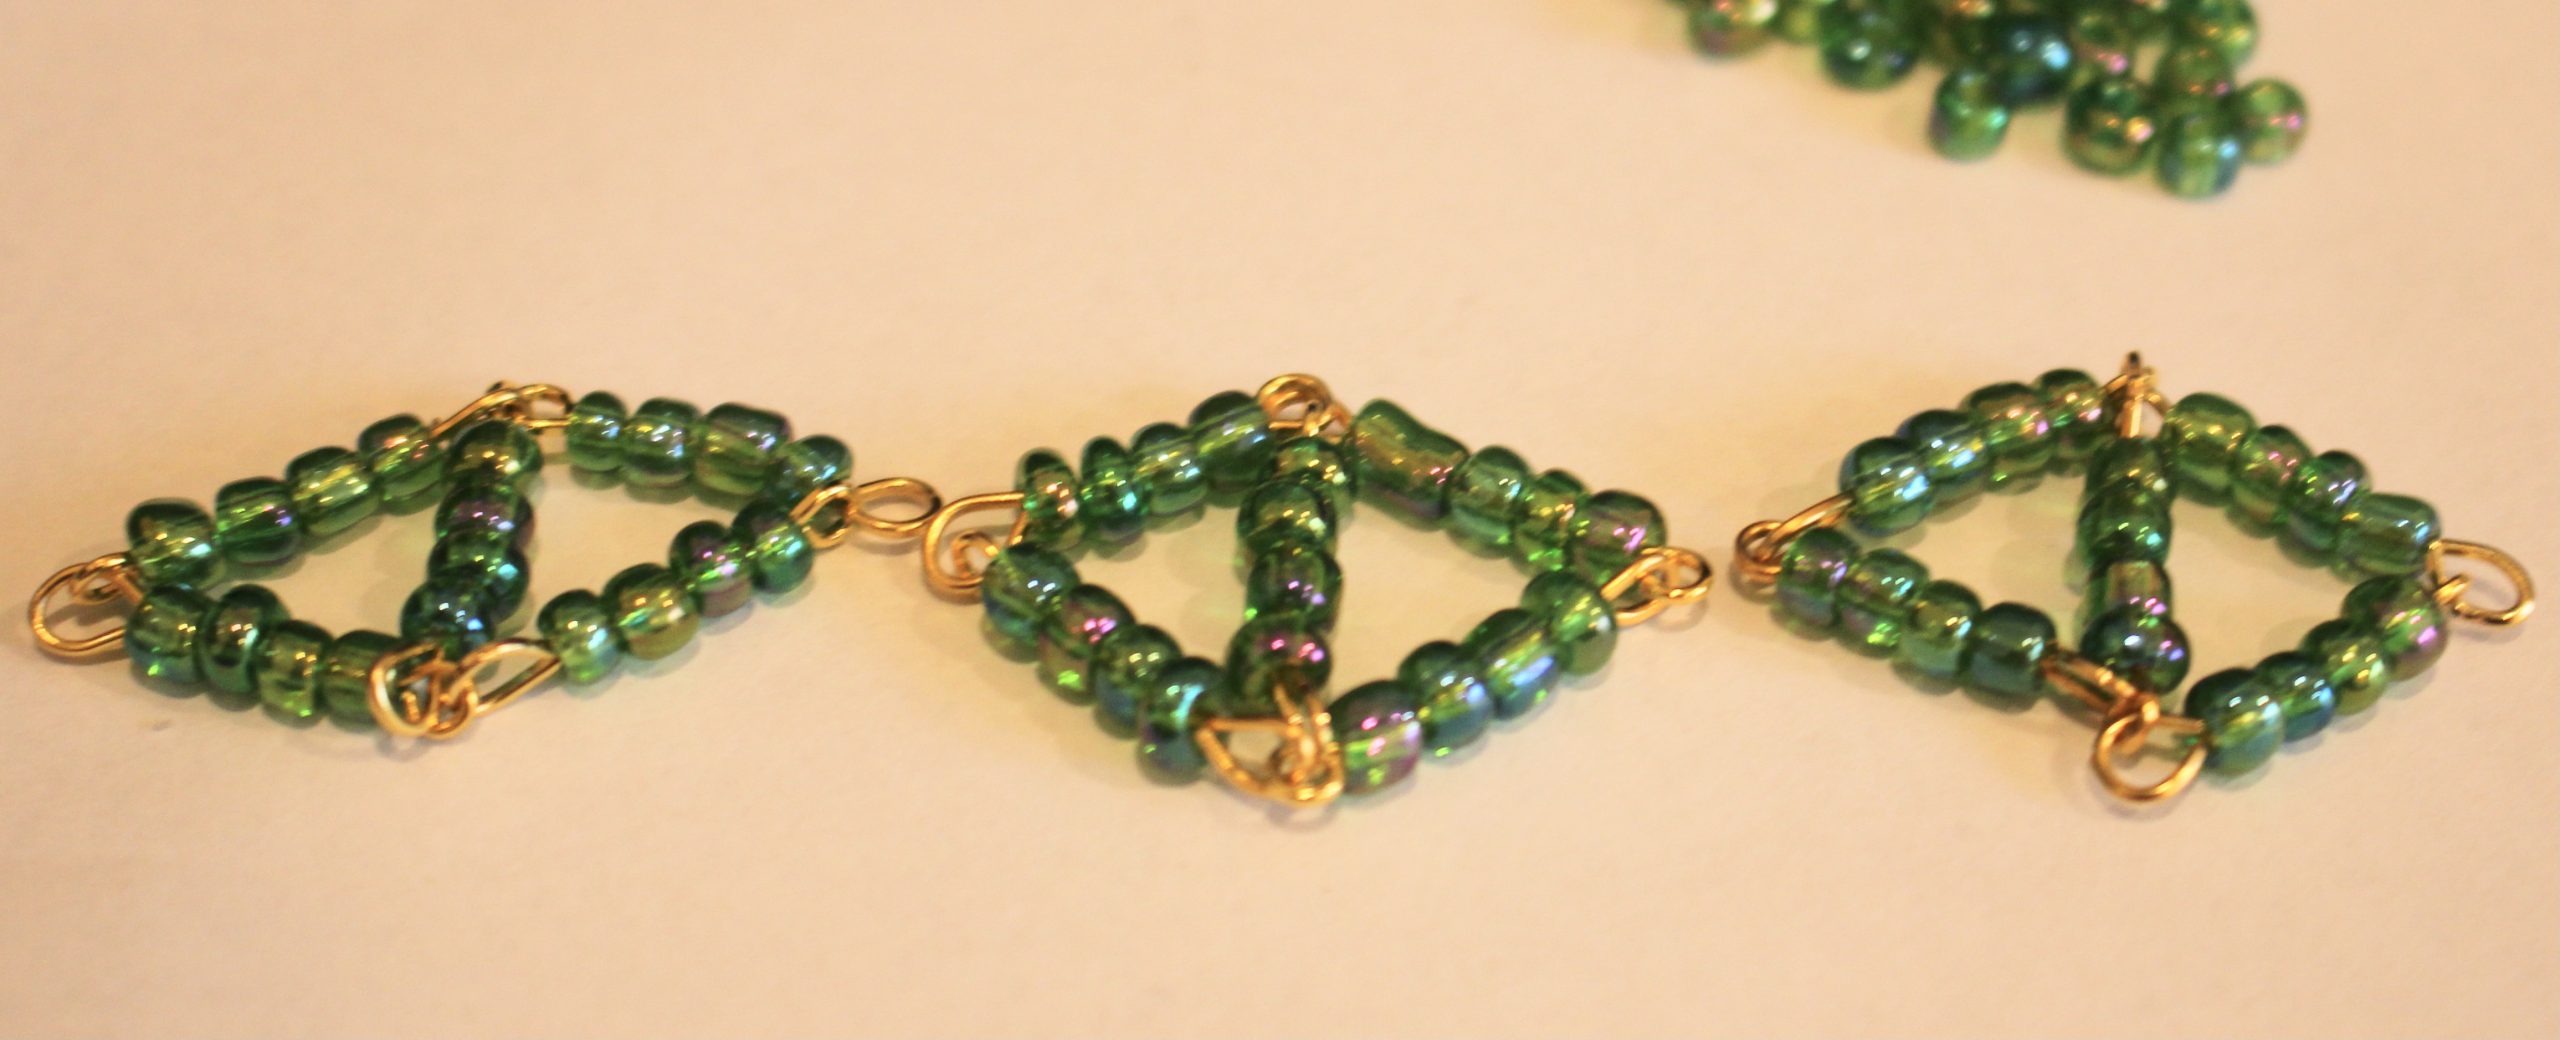
9: Repeat steps 1-8 until you have enough diamond shapes to fit around your wrist. I ended up making 5 diamonds.


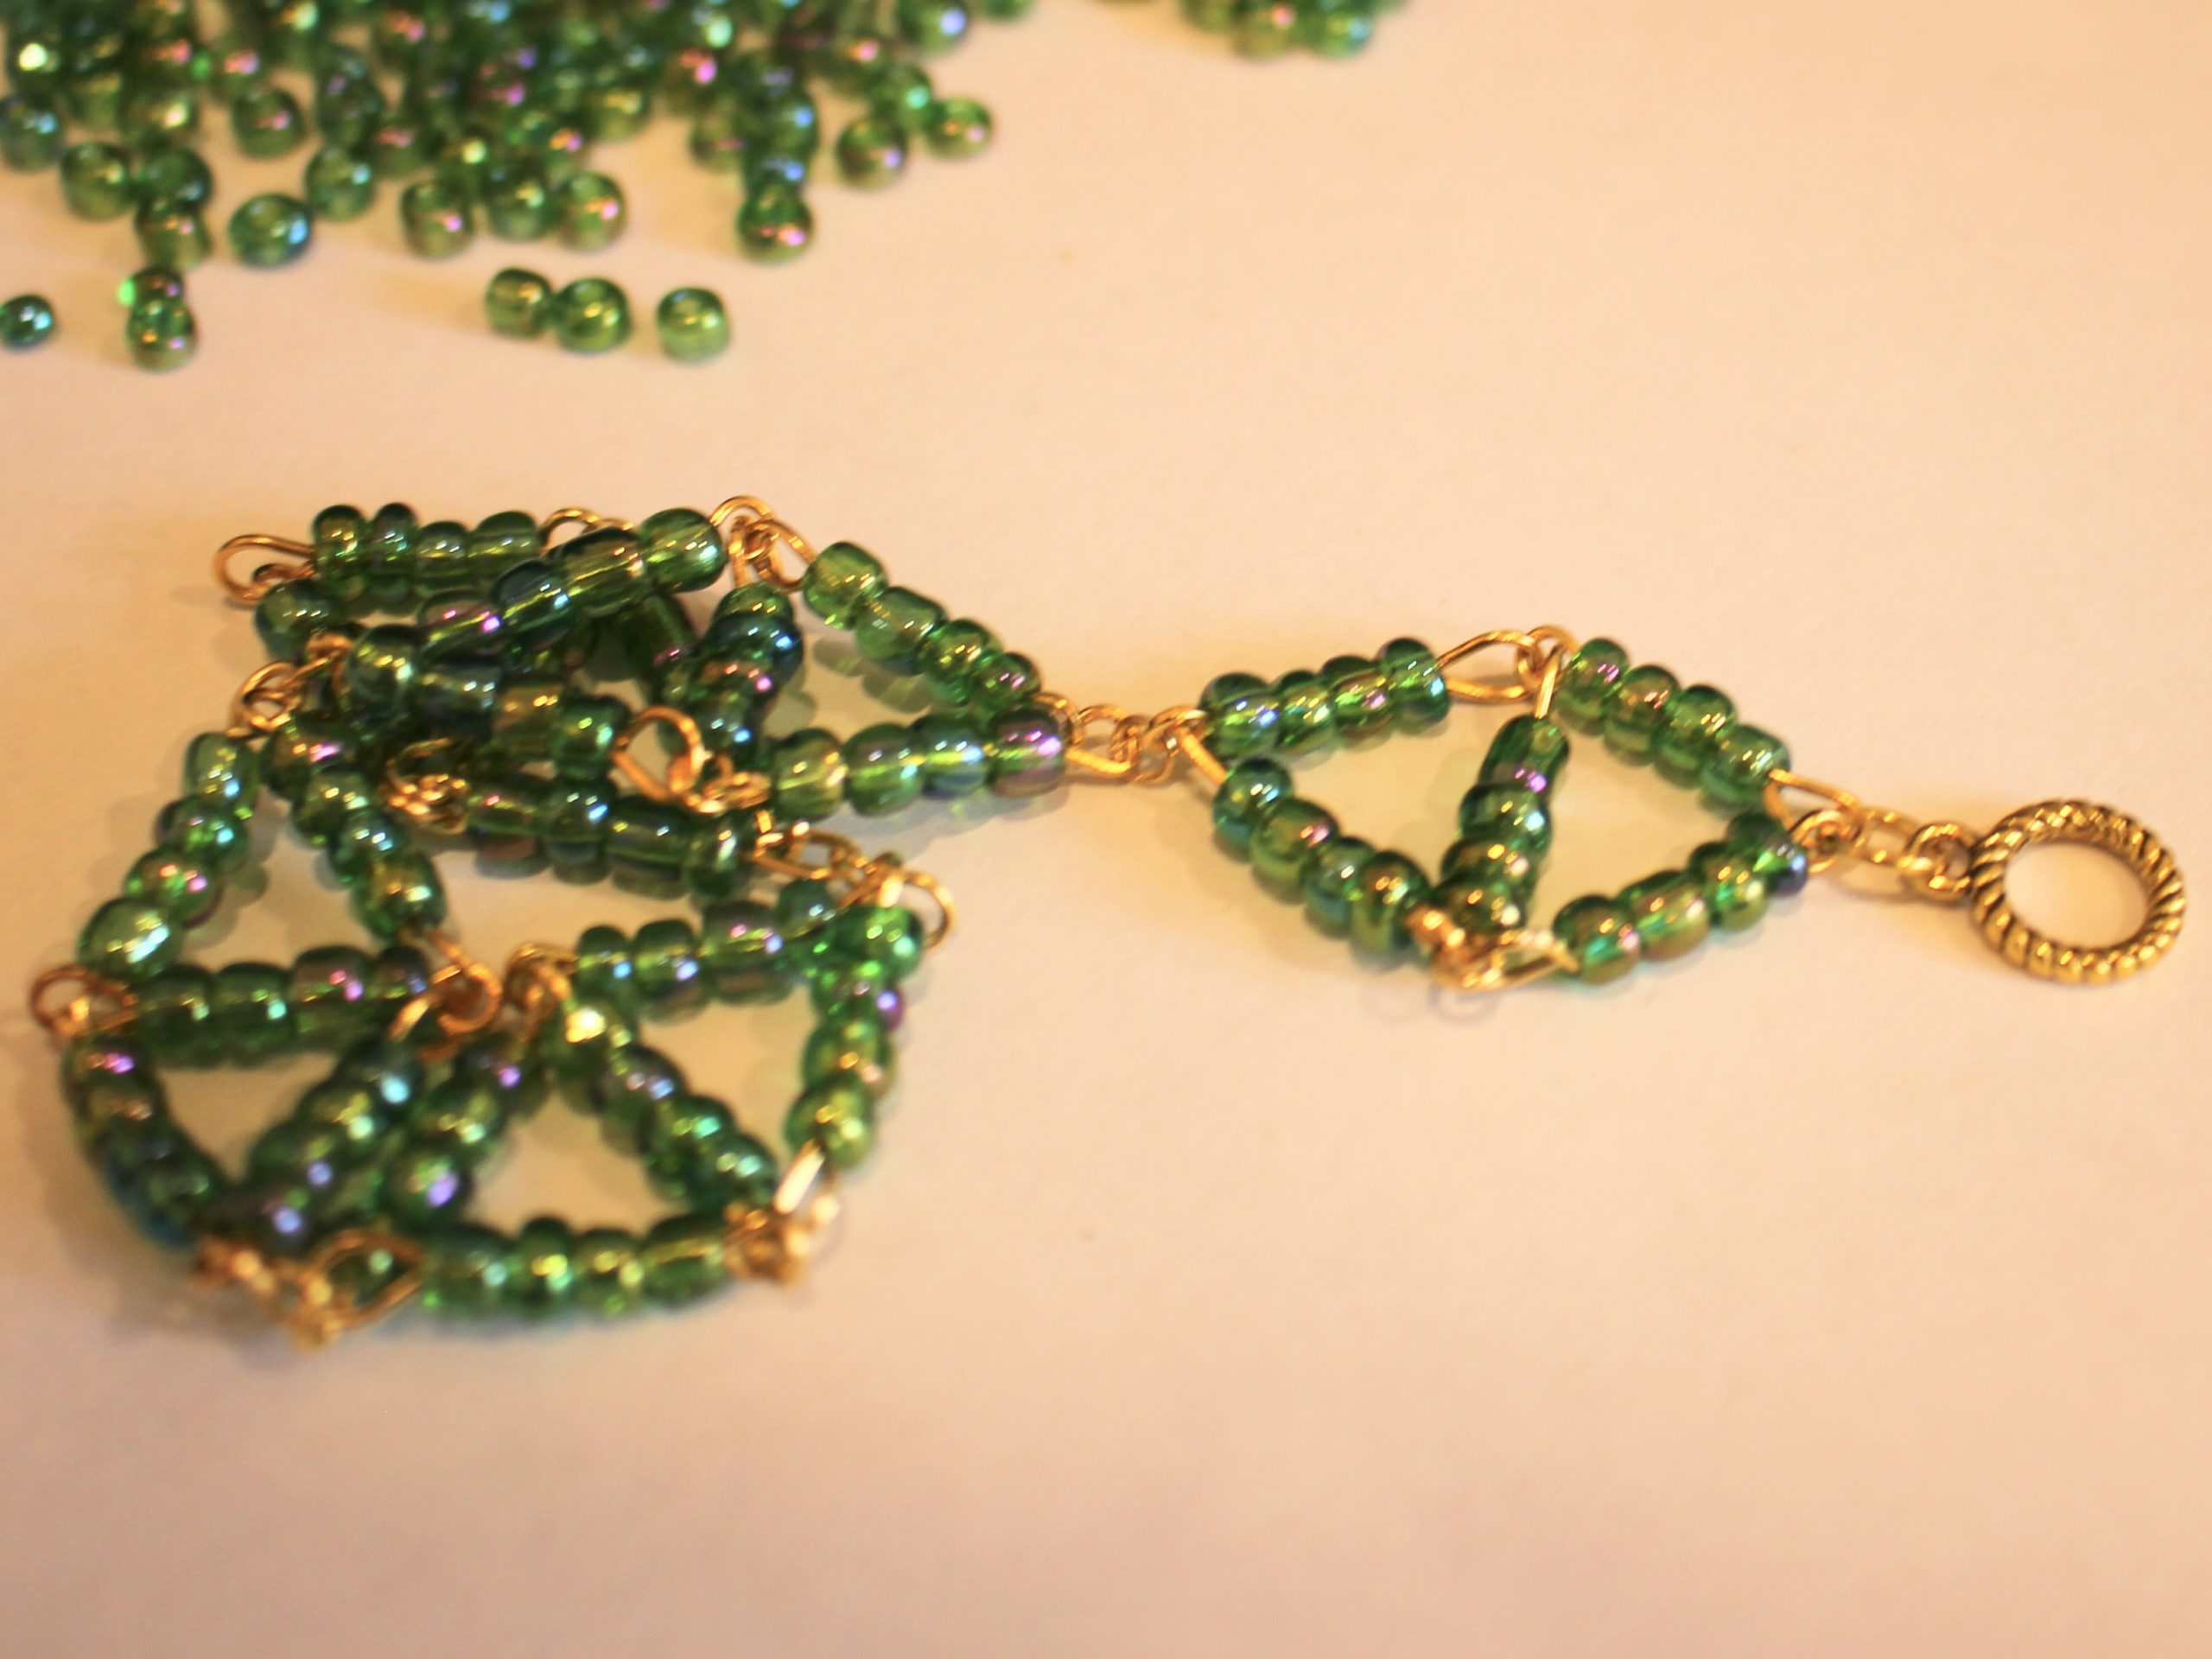
10: Attach each of the diamond shapes together with the small jump rings to form a chain.


11: Attach the clasp components to each end of the chain using the larger jump rings, this will finish the design off!


Now your beaded diamond bracelet is finished and ready to wear!


Here is another design you can make using this beaded diamond shape

-
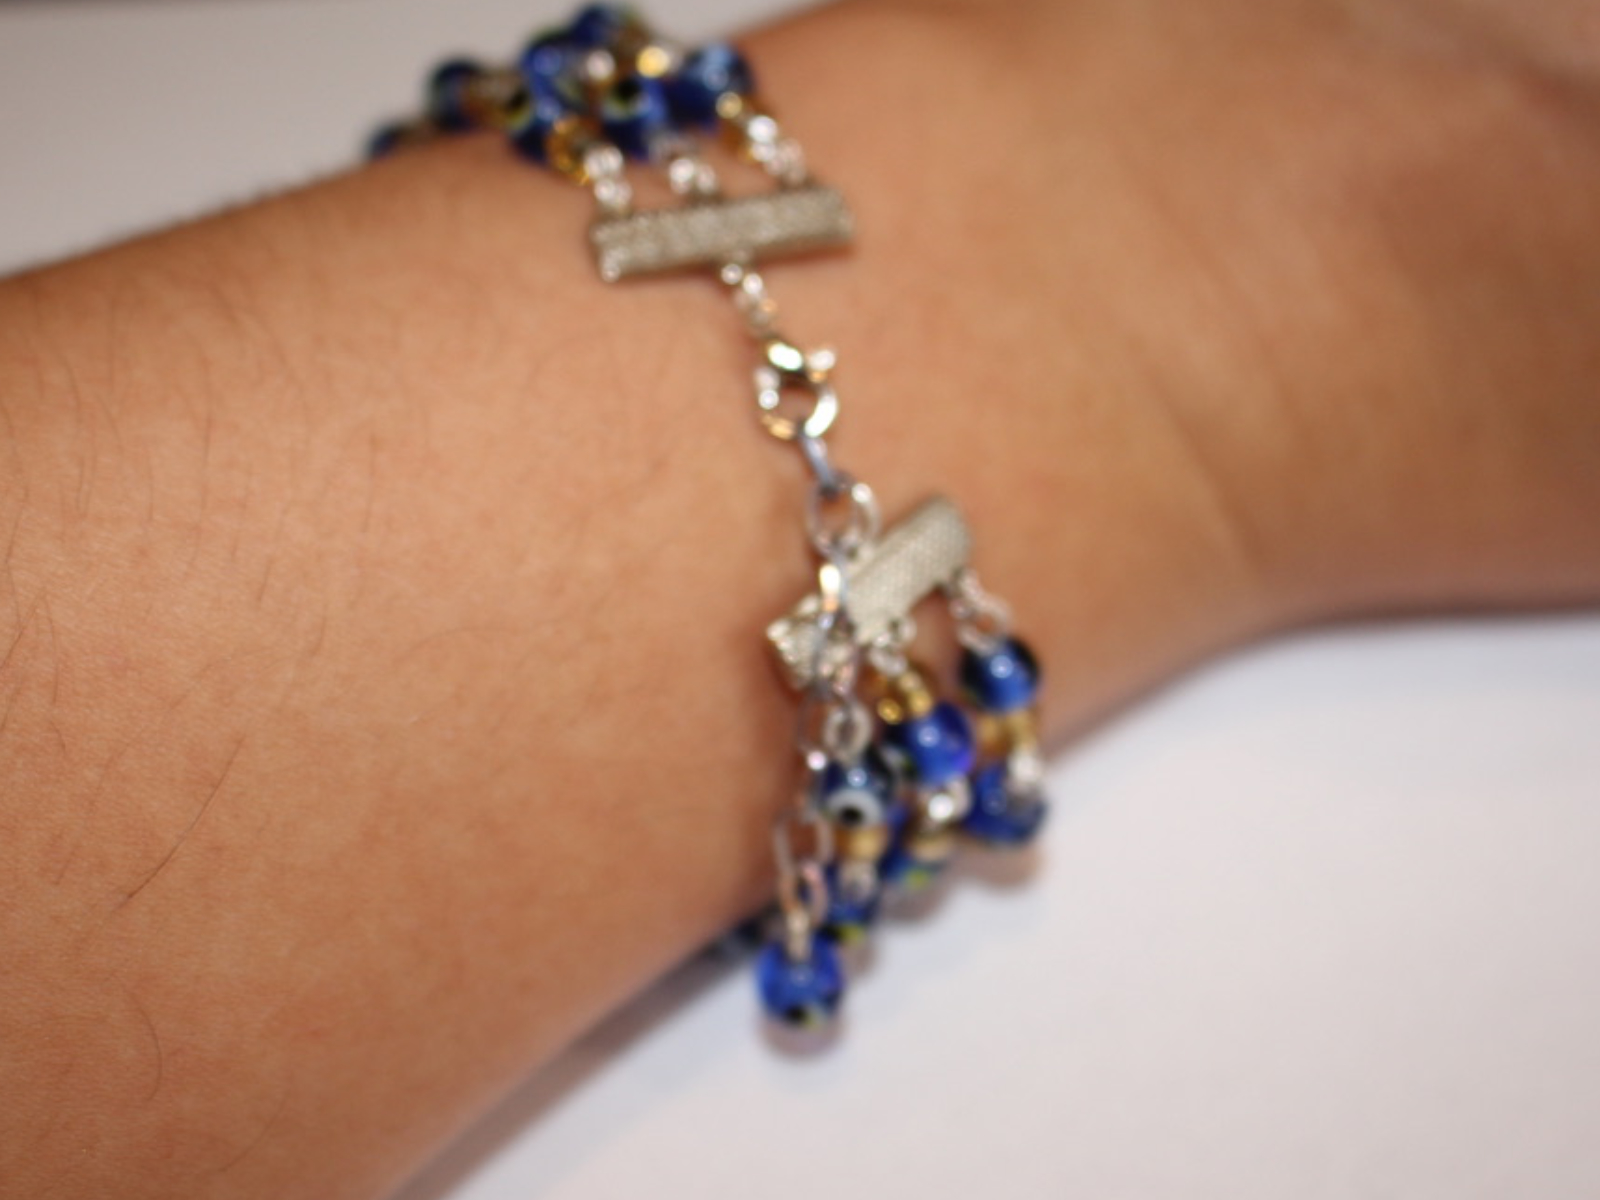
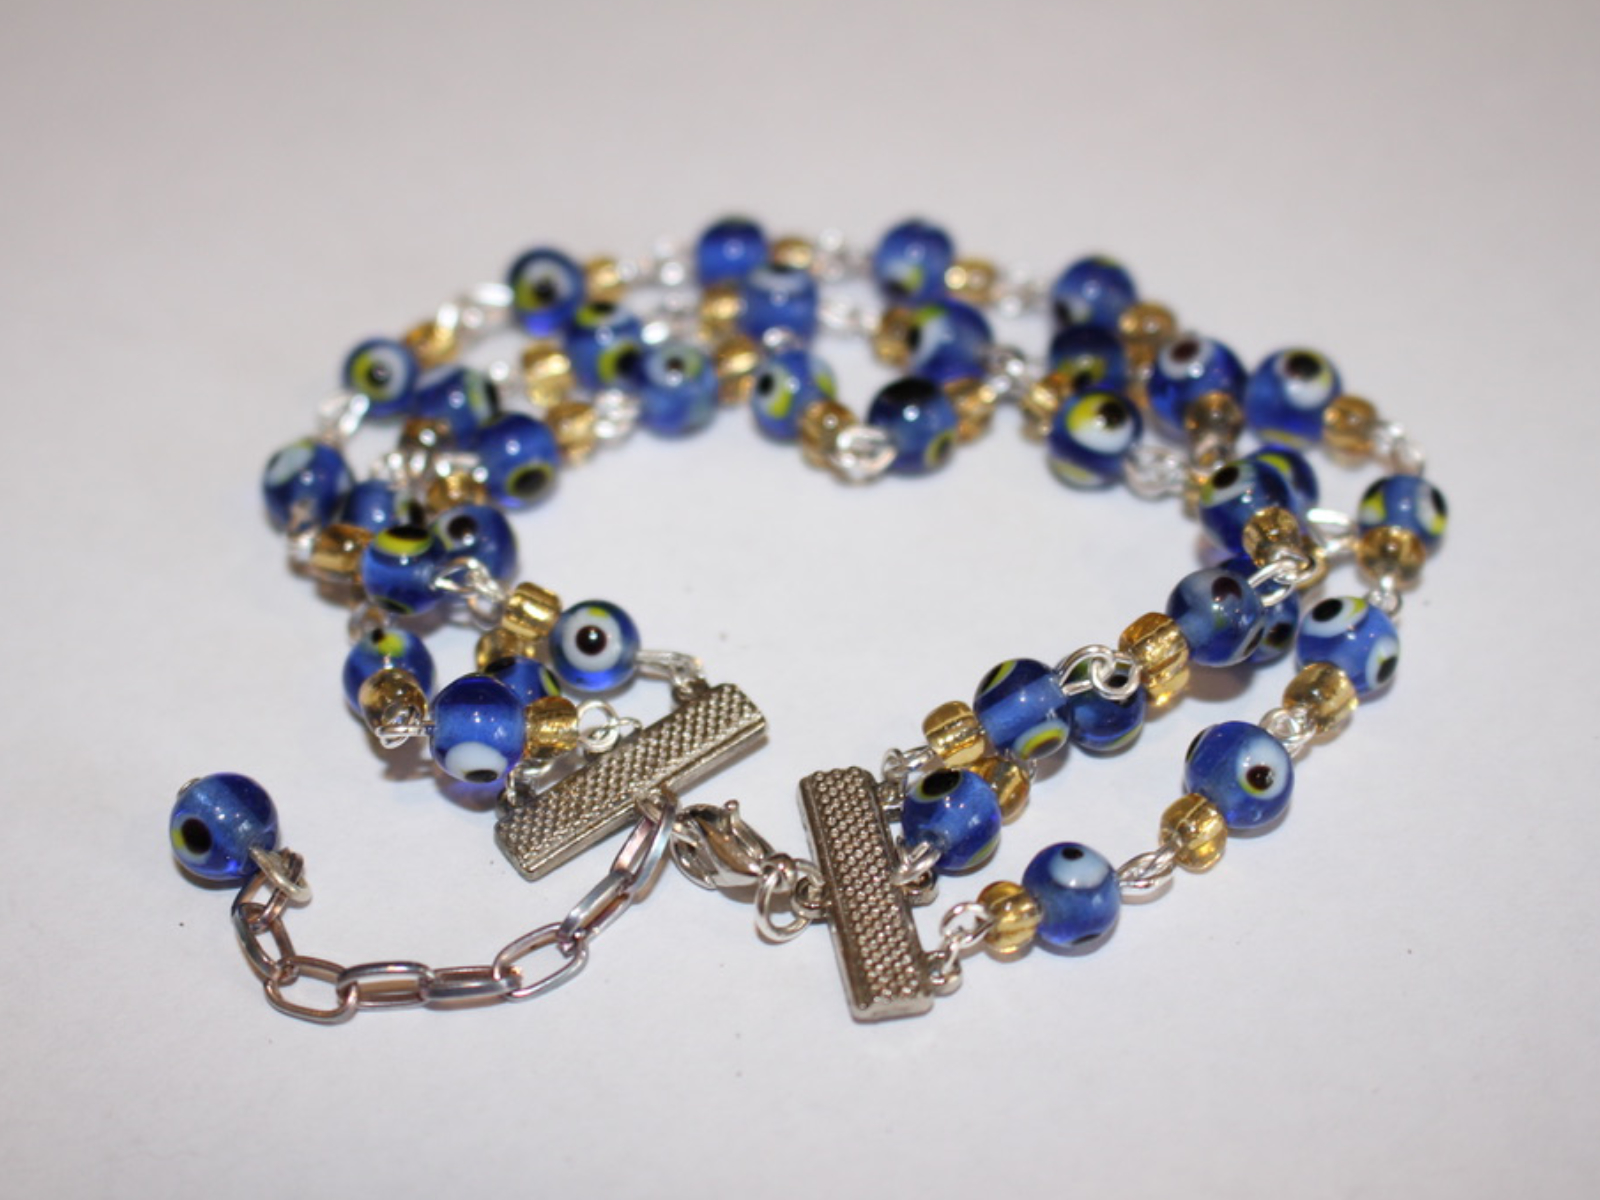
Love a bracelet stack? Here’s how to get the look with one bracelet!
For this bracelet design you need to construct three different beaded chains and attach them together using charm connectors for a stacked bracelet look. This design is really cute and the chain extender means that putting it on by yourself is easier! Please note that this tutorial contains affiliate links.
You’ll need these tools and materials to make your triple strand stack bracelet:
1: Pliers. I used my round nose and flat nose pliers. You might also need your cutting pliers depending on the length of your eye pins.
Here’s where you can buy some jewellery pliers to add to your tool kit:
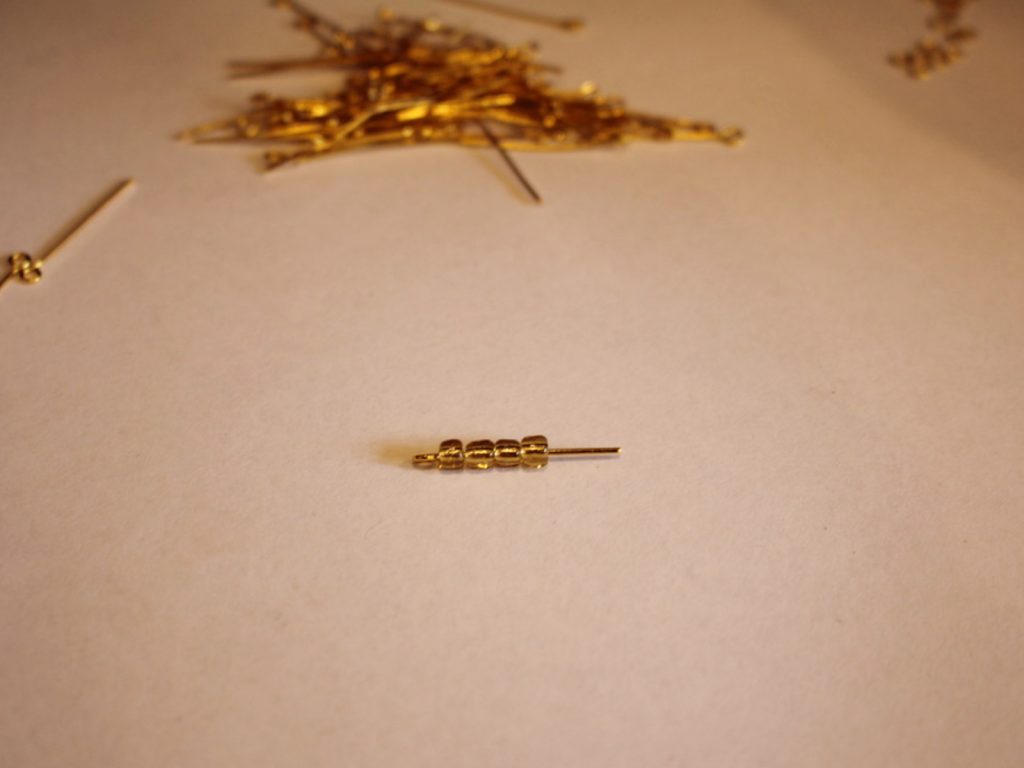
2: Eye pins. You’ll need a bunch of small eye pins to make your beaded chain.
Here are eye pins in different lengths:
3: Charm connectors. I used these charm connectors that have three loops on one side and one on the other.

you can buy some charm connectors here:
4: Six small jump rings.

5: Two larger jump rings.
and here’s a link to differently sized jump rings to buy:
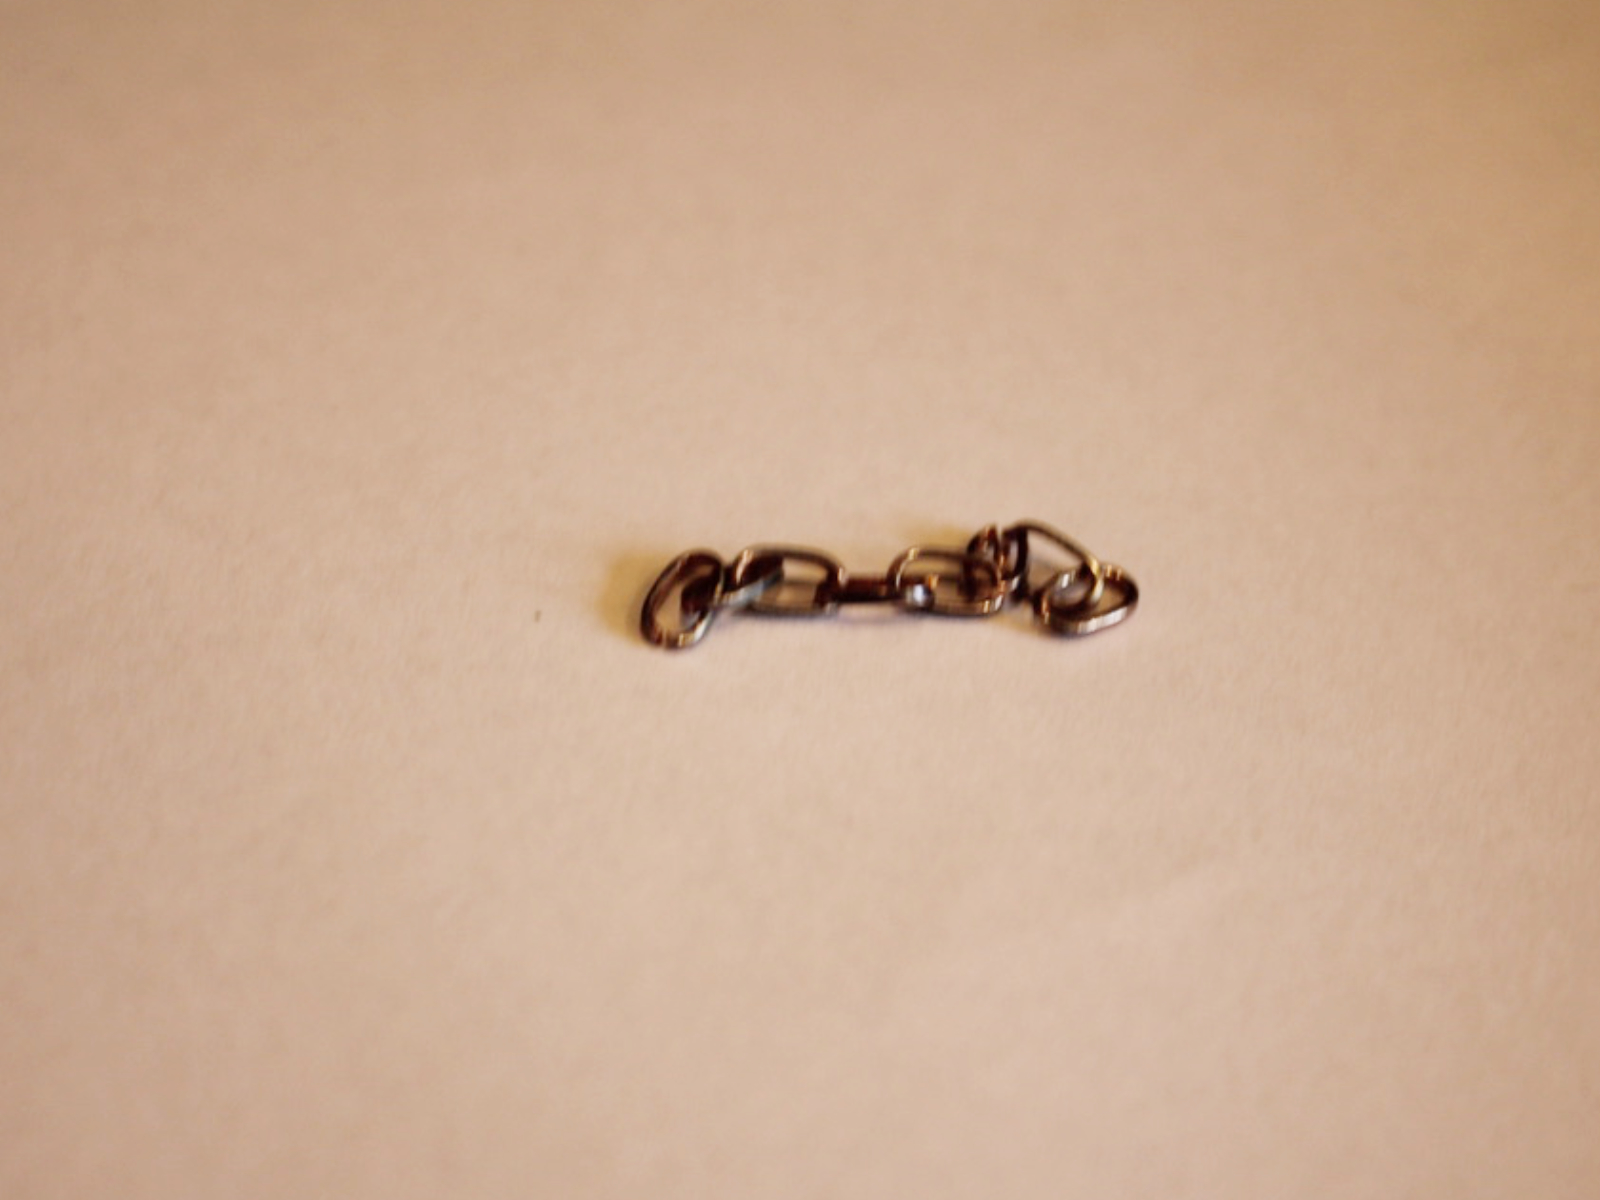
6: A small piece of chain. I used this spare piece of chain I had.

Get some here:
7: A small head pin.

A link to some small head pins:
8: A lobster clasp.
Here’s a link:
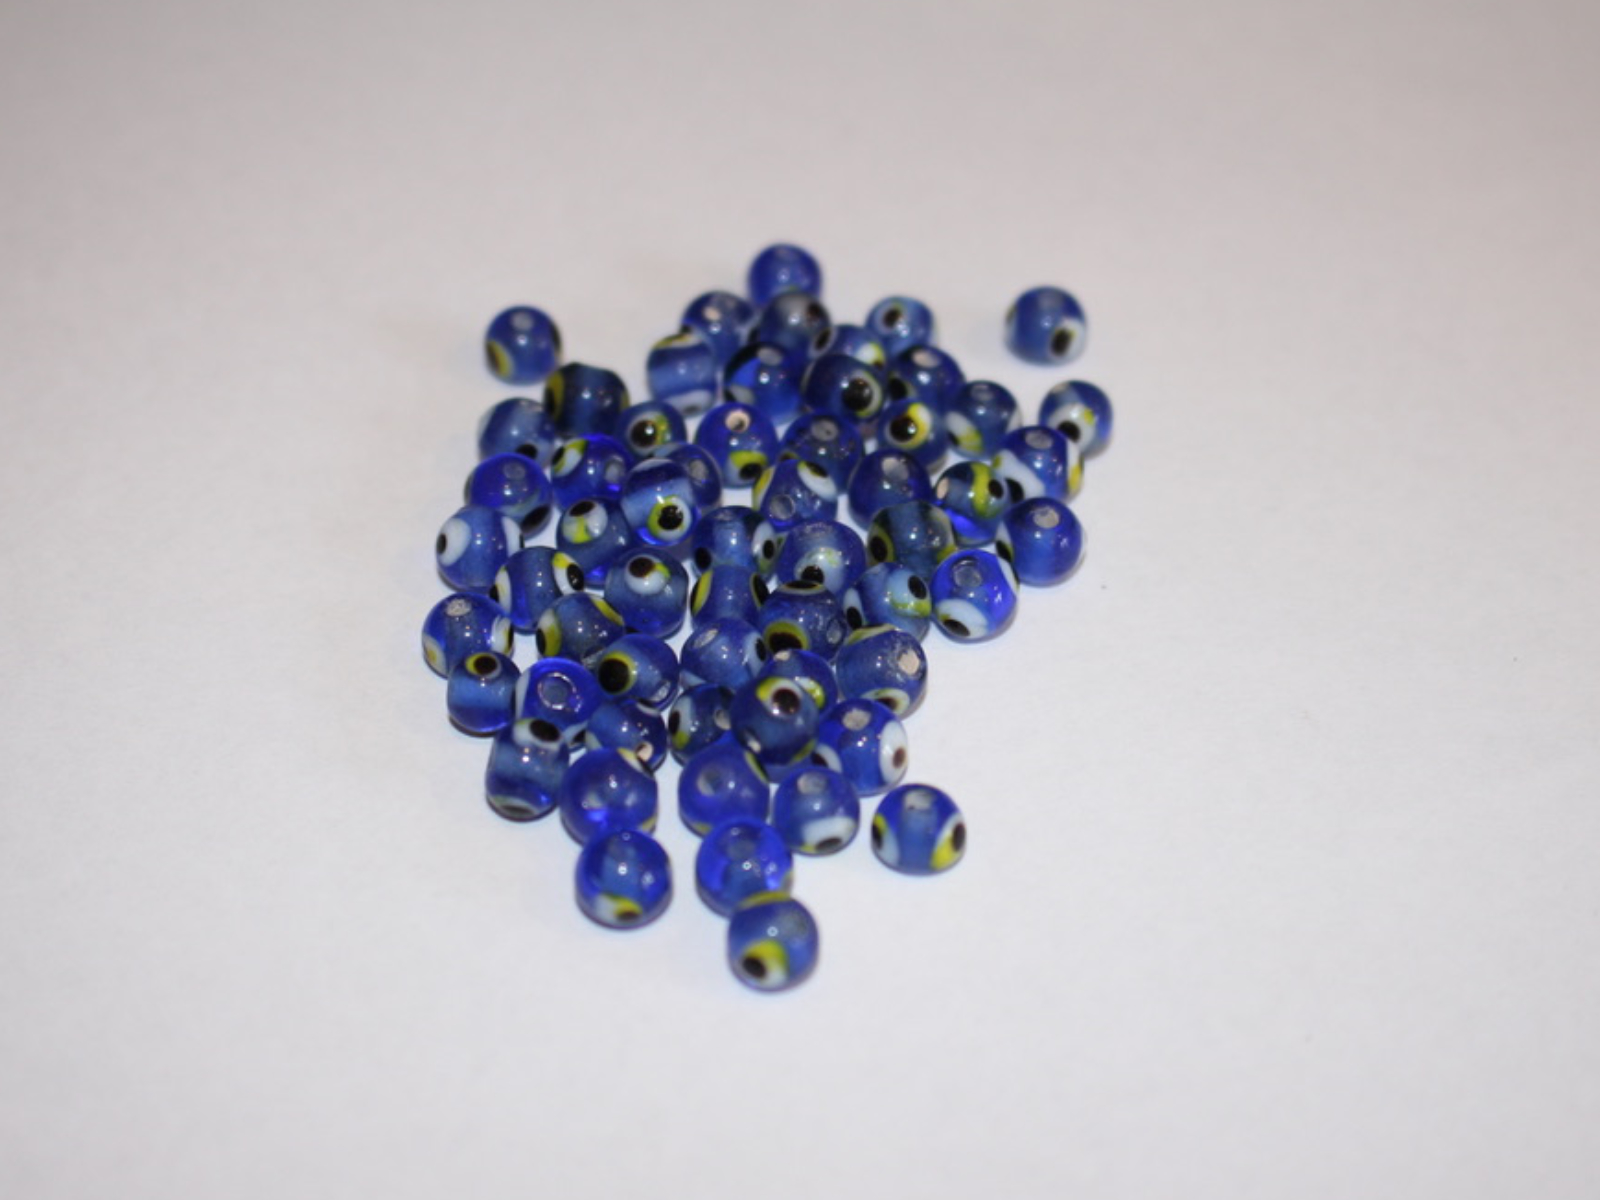
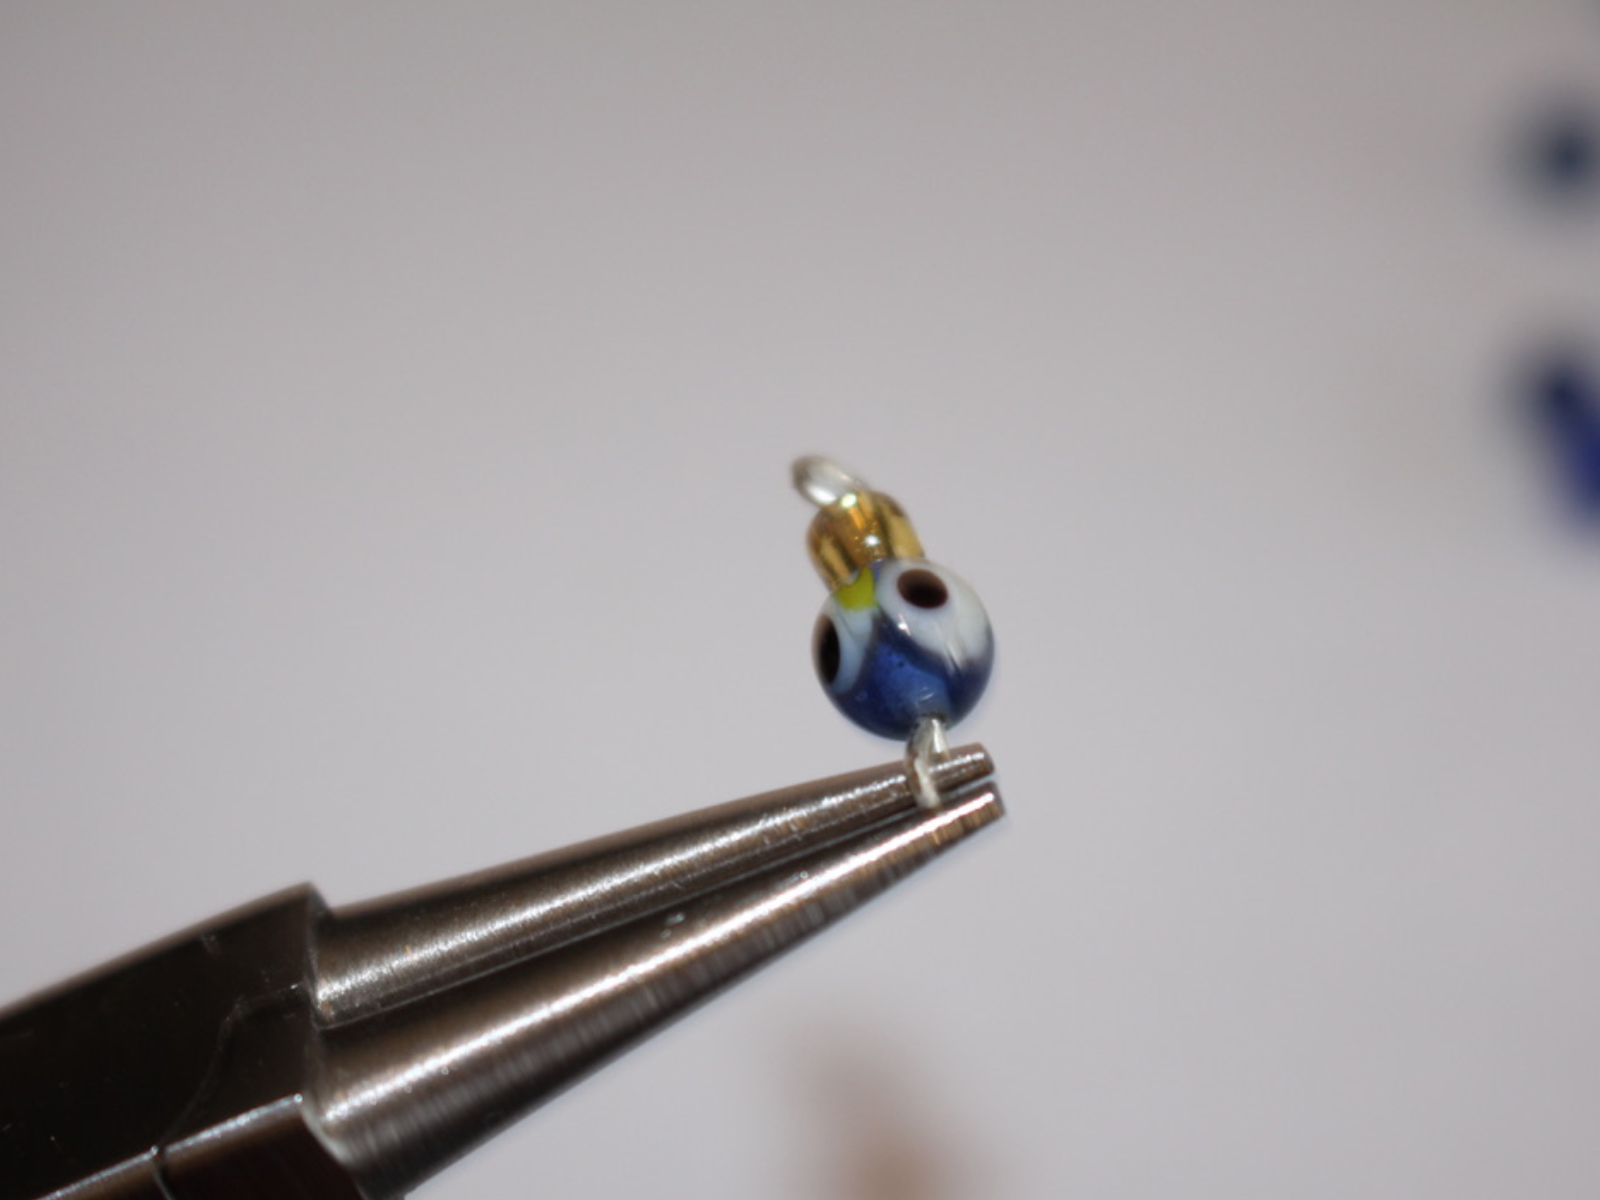
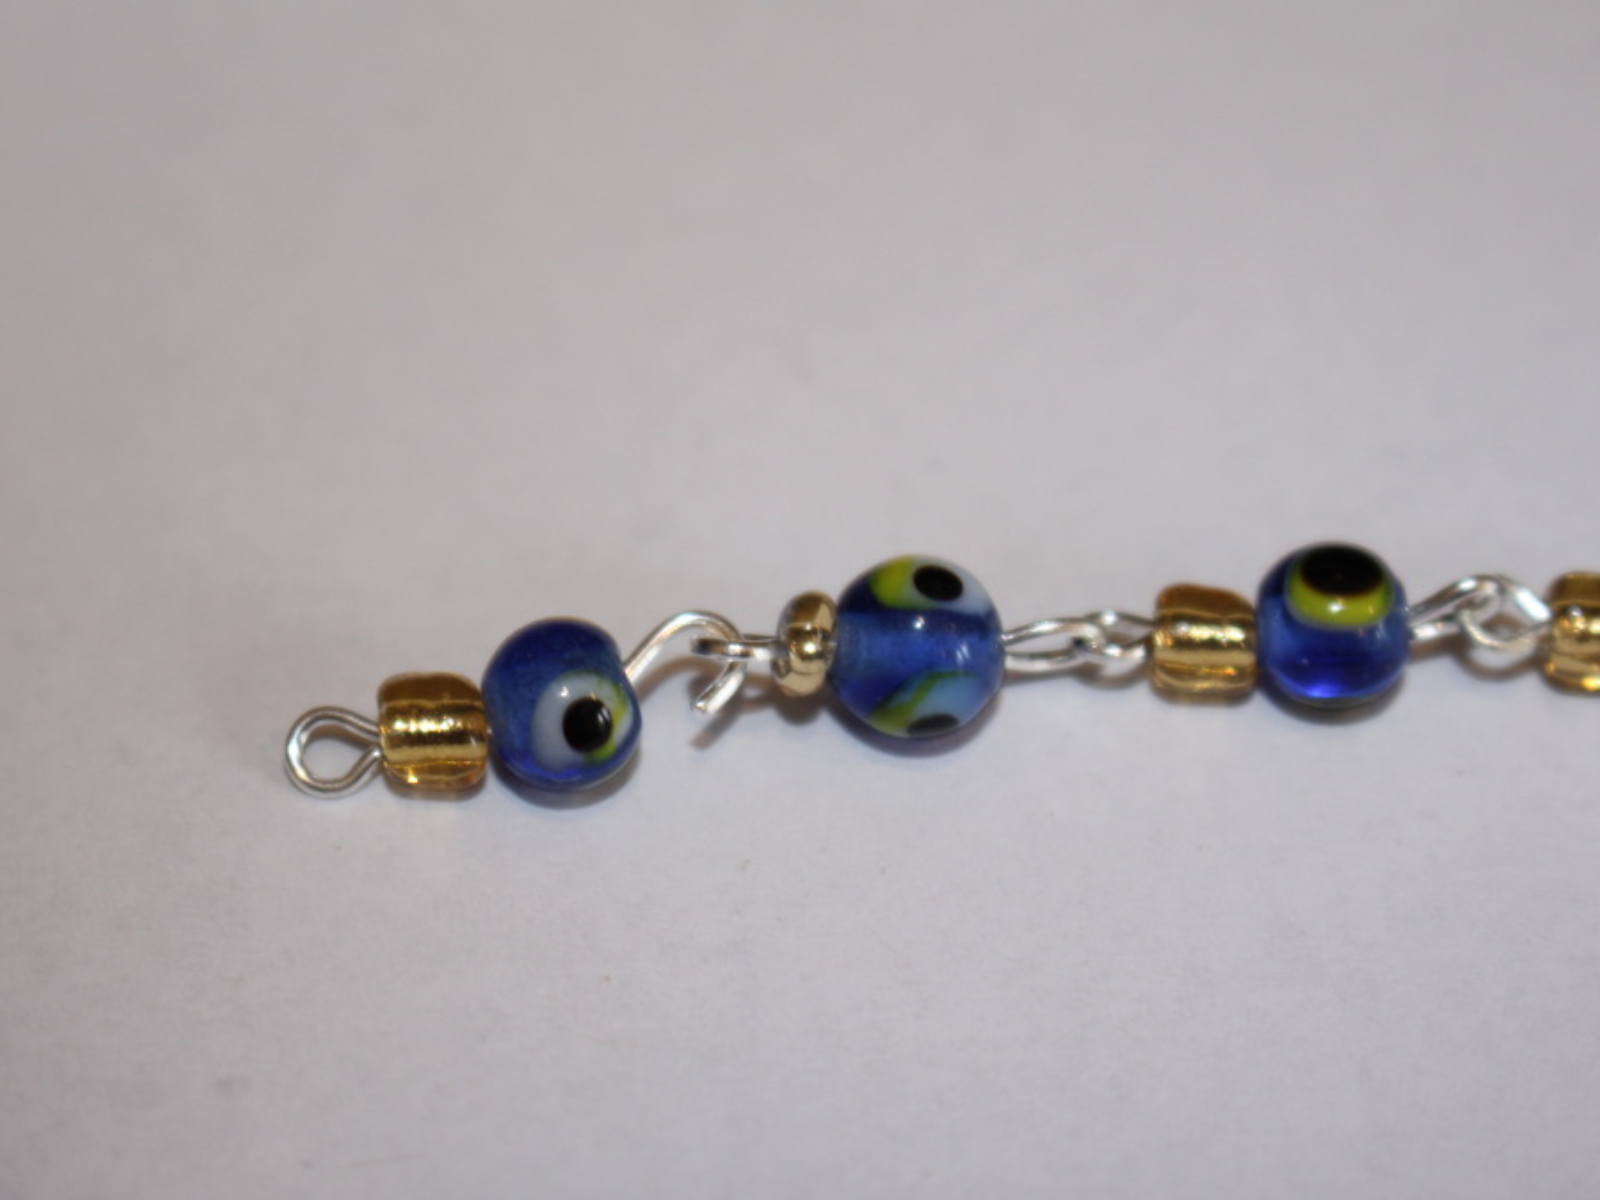
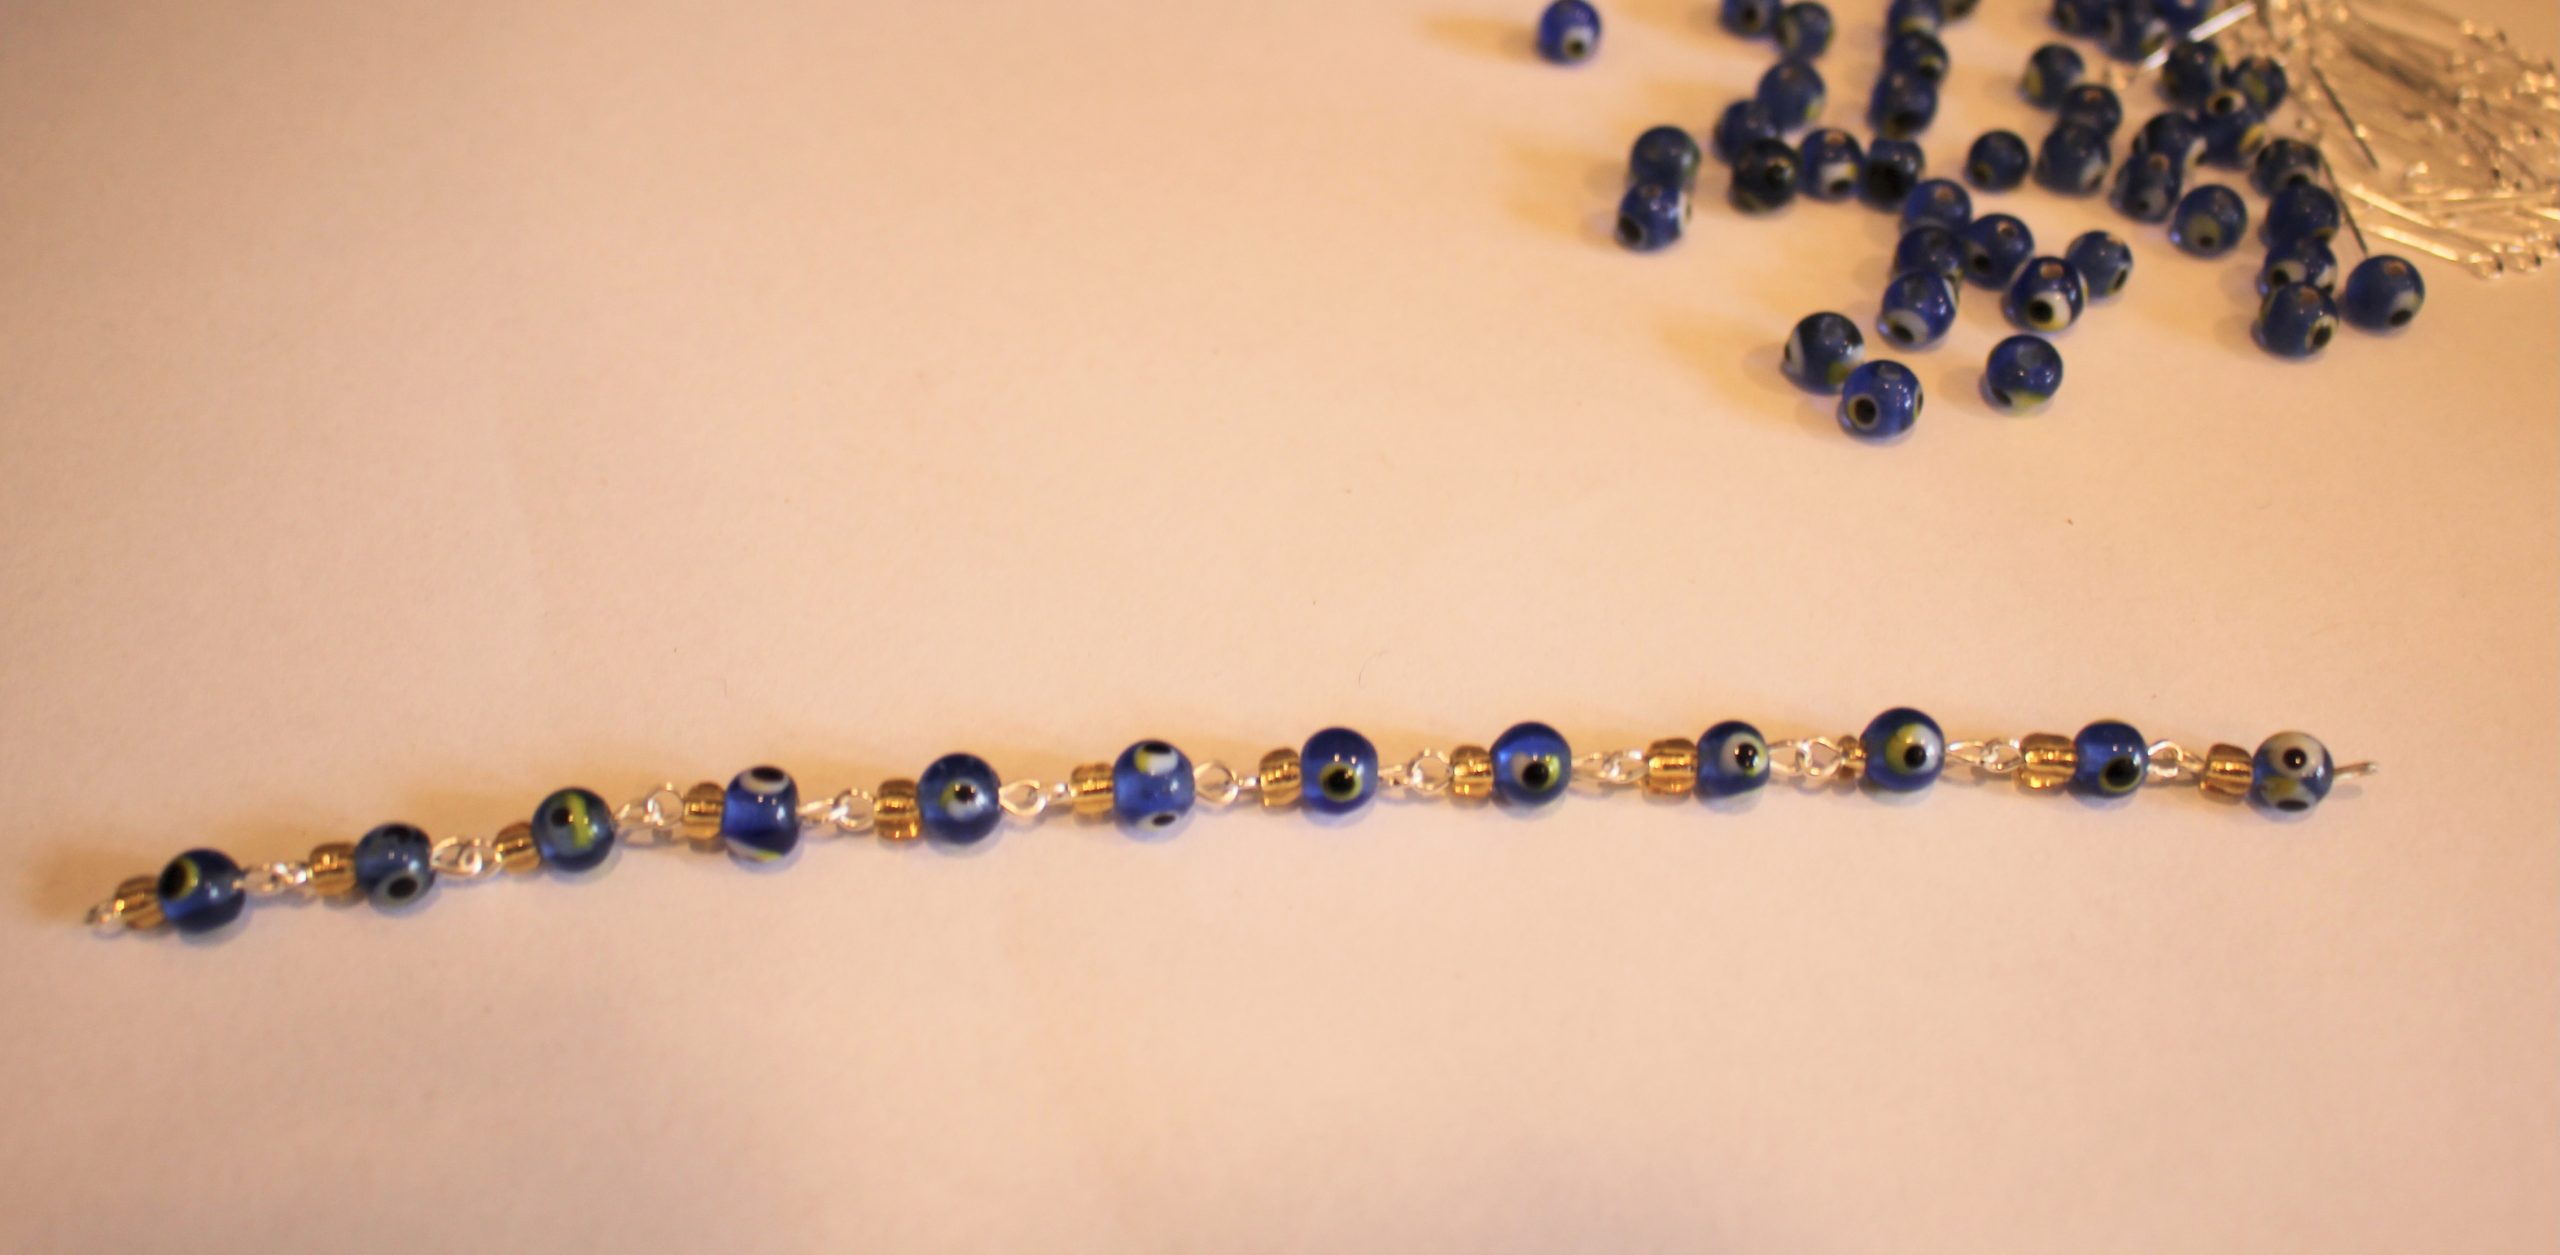
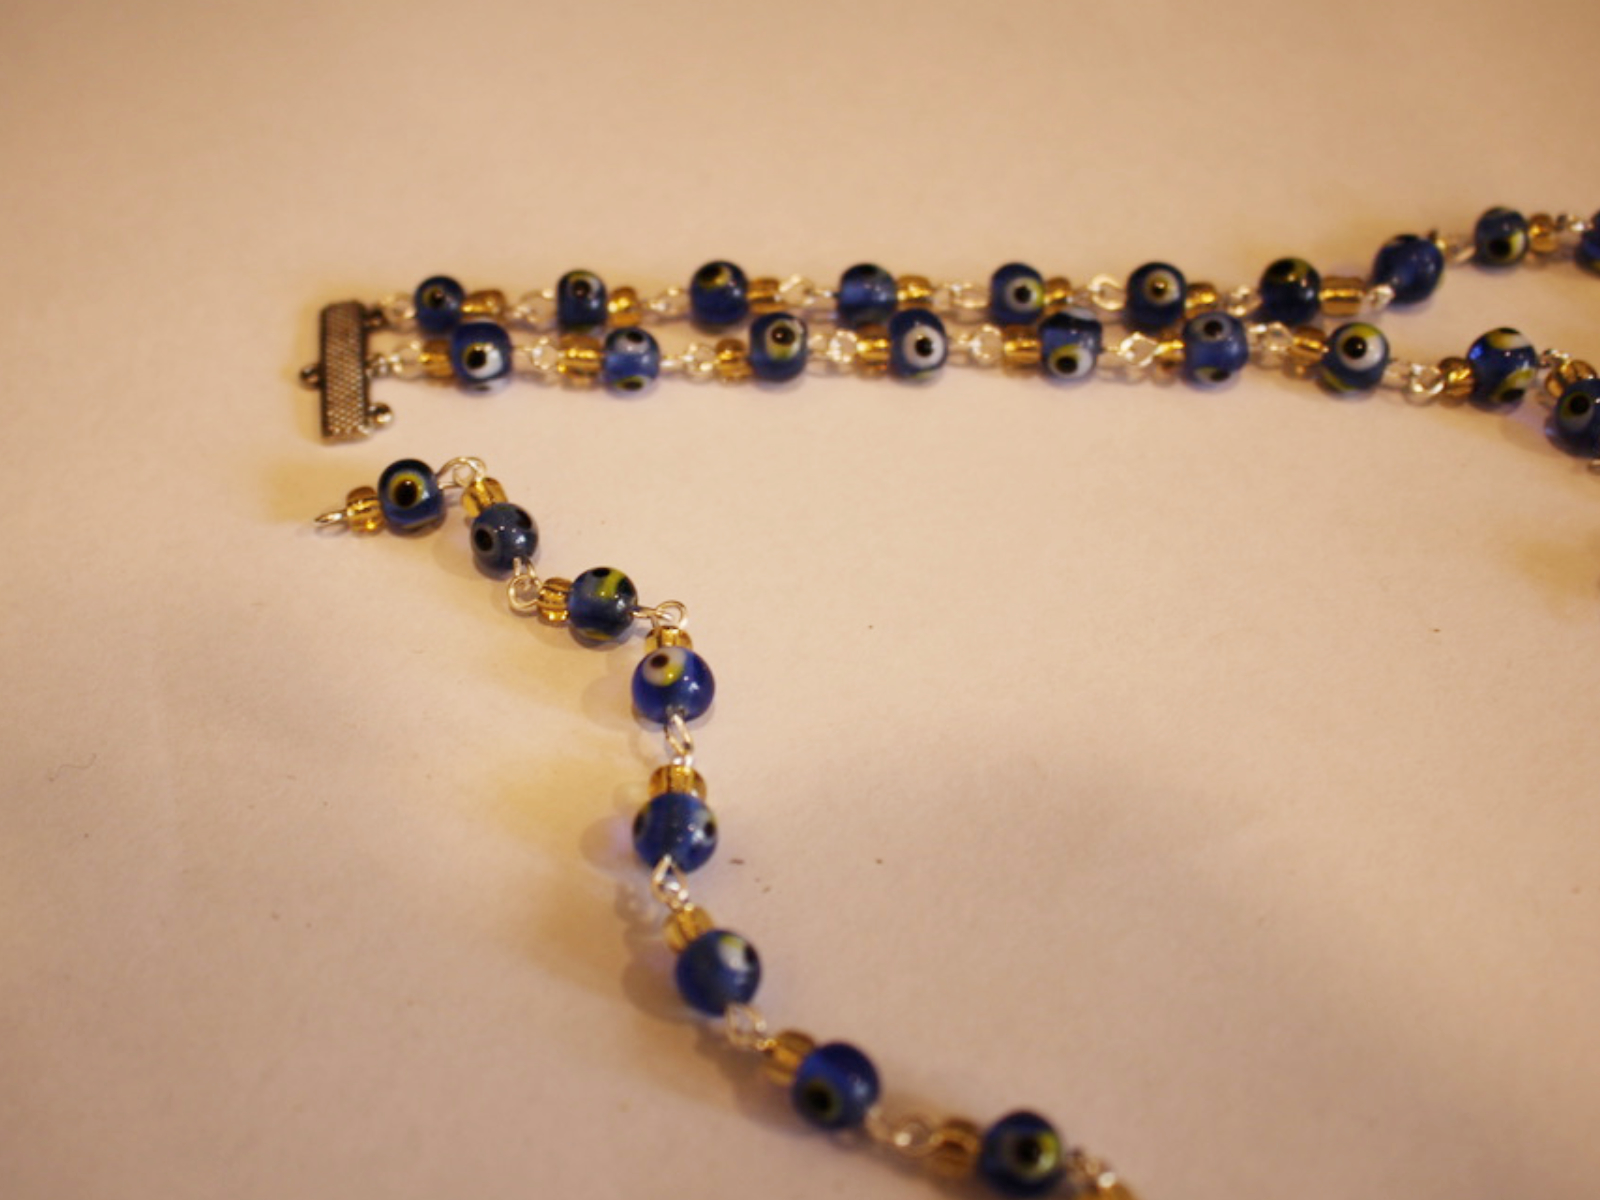
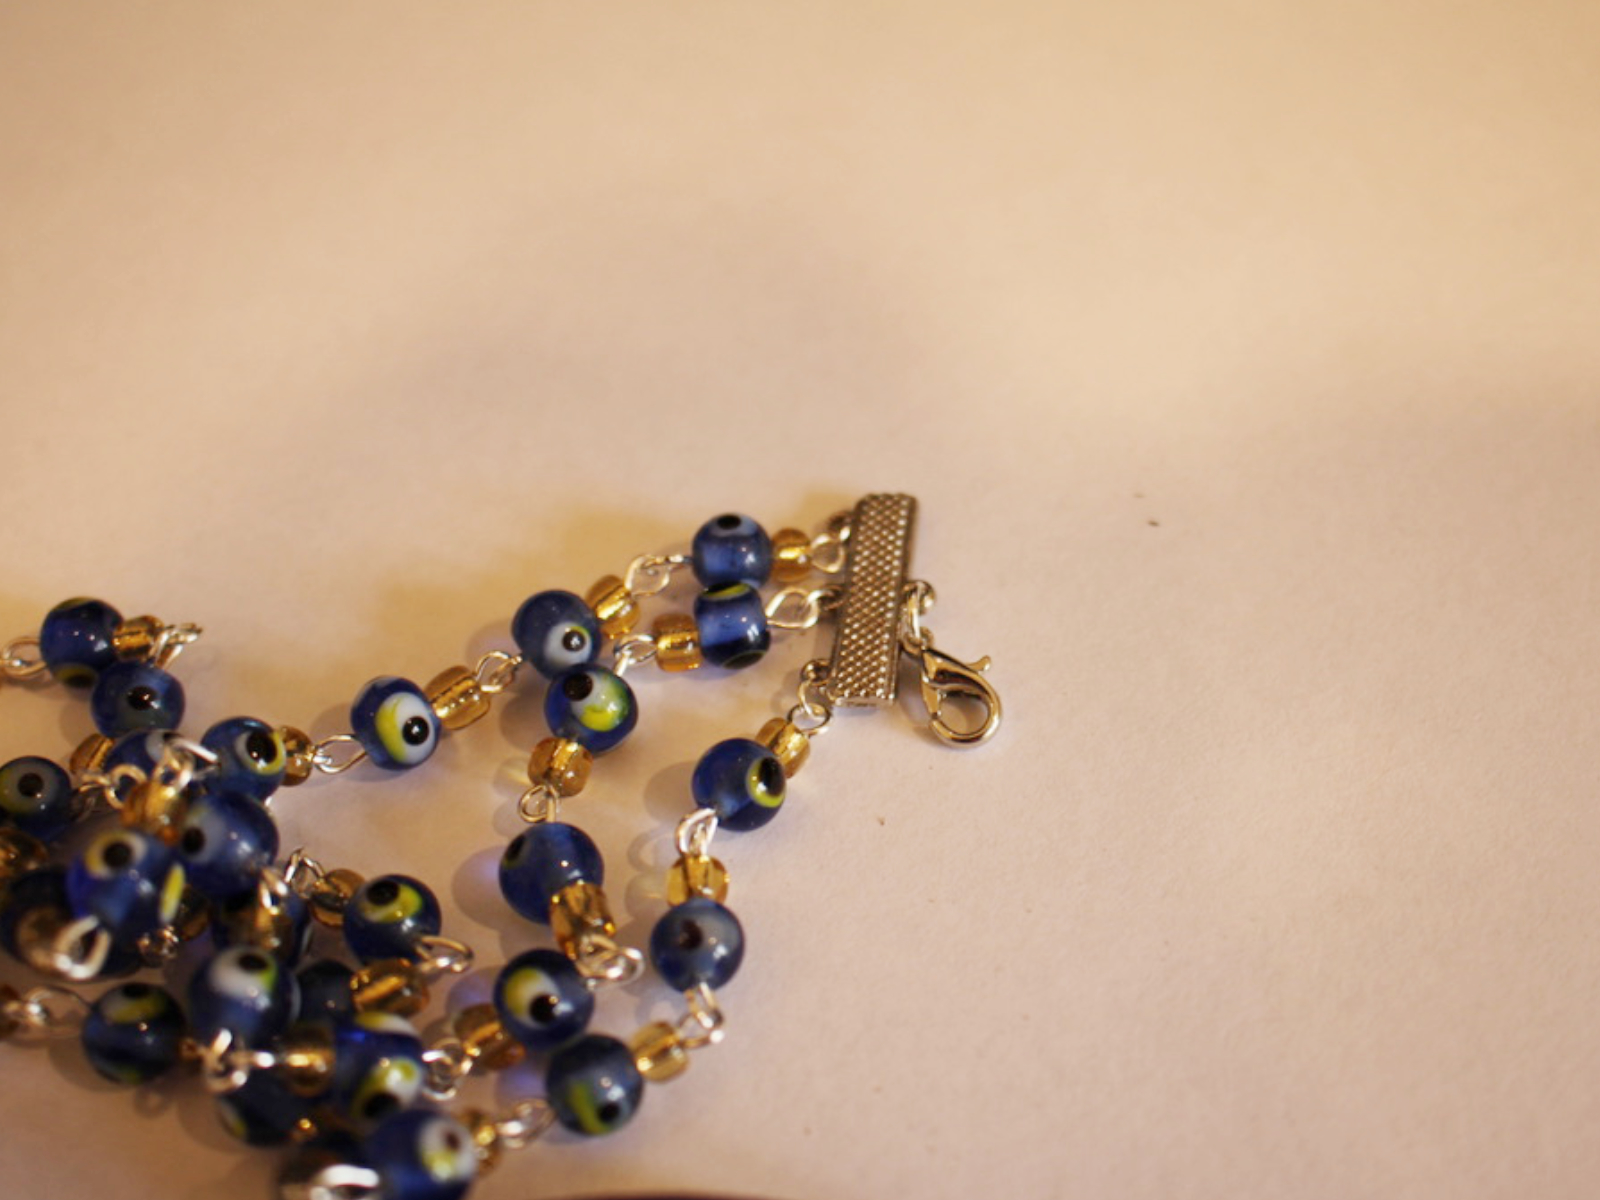
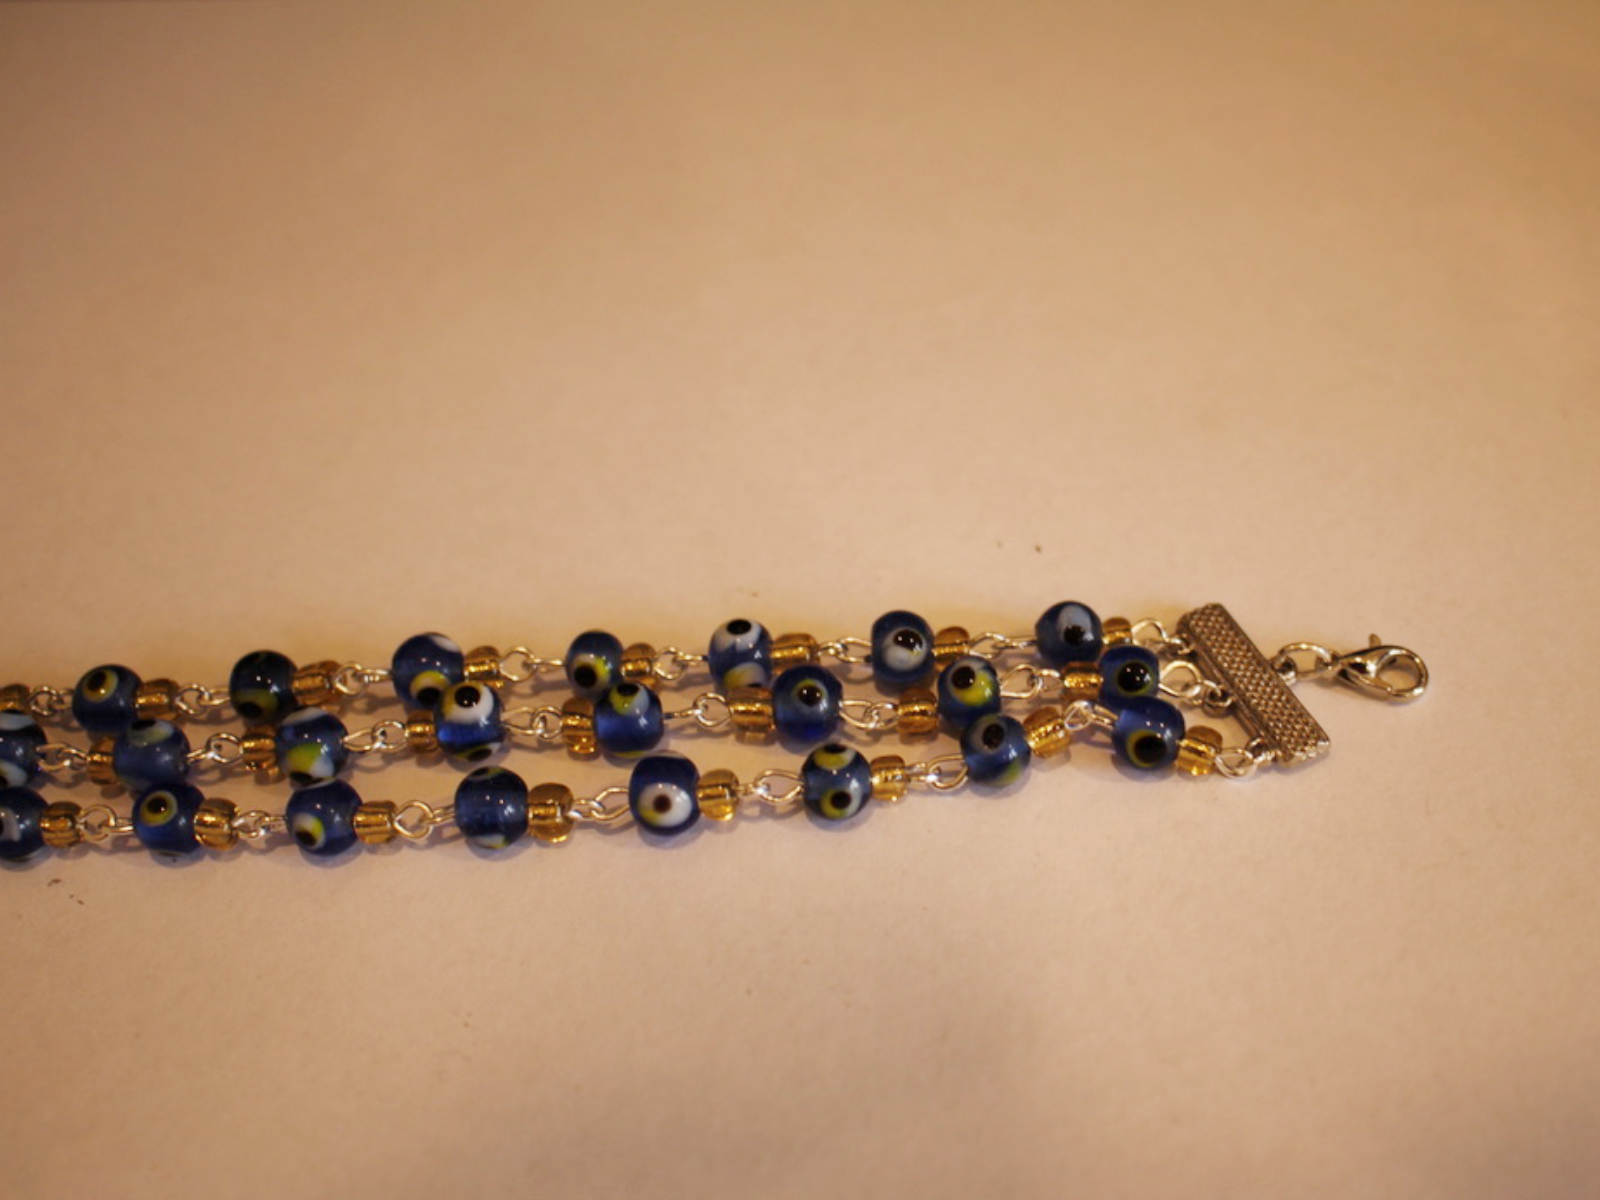
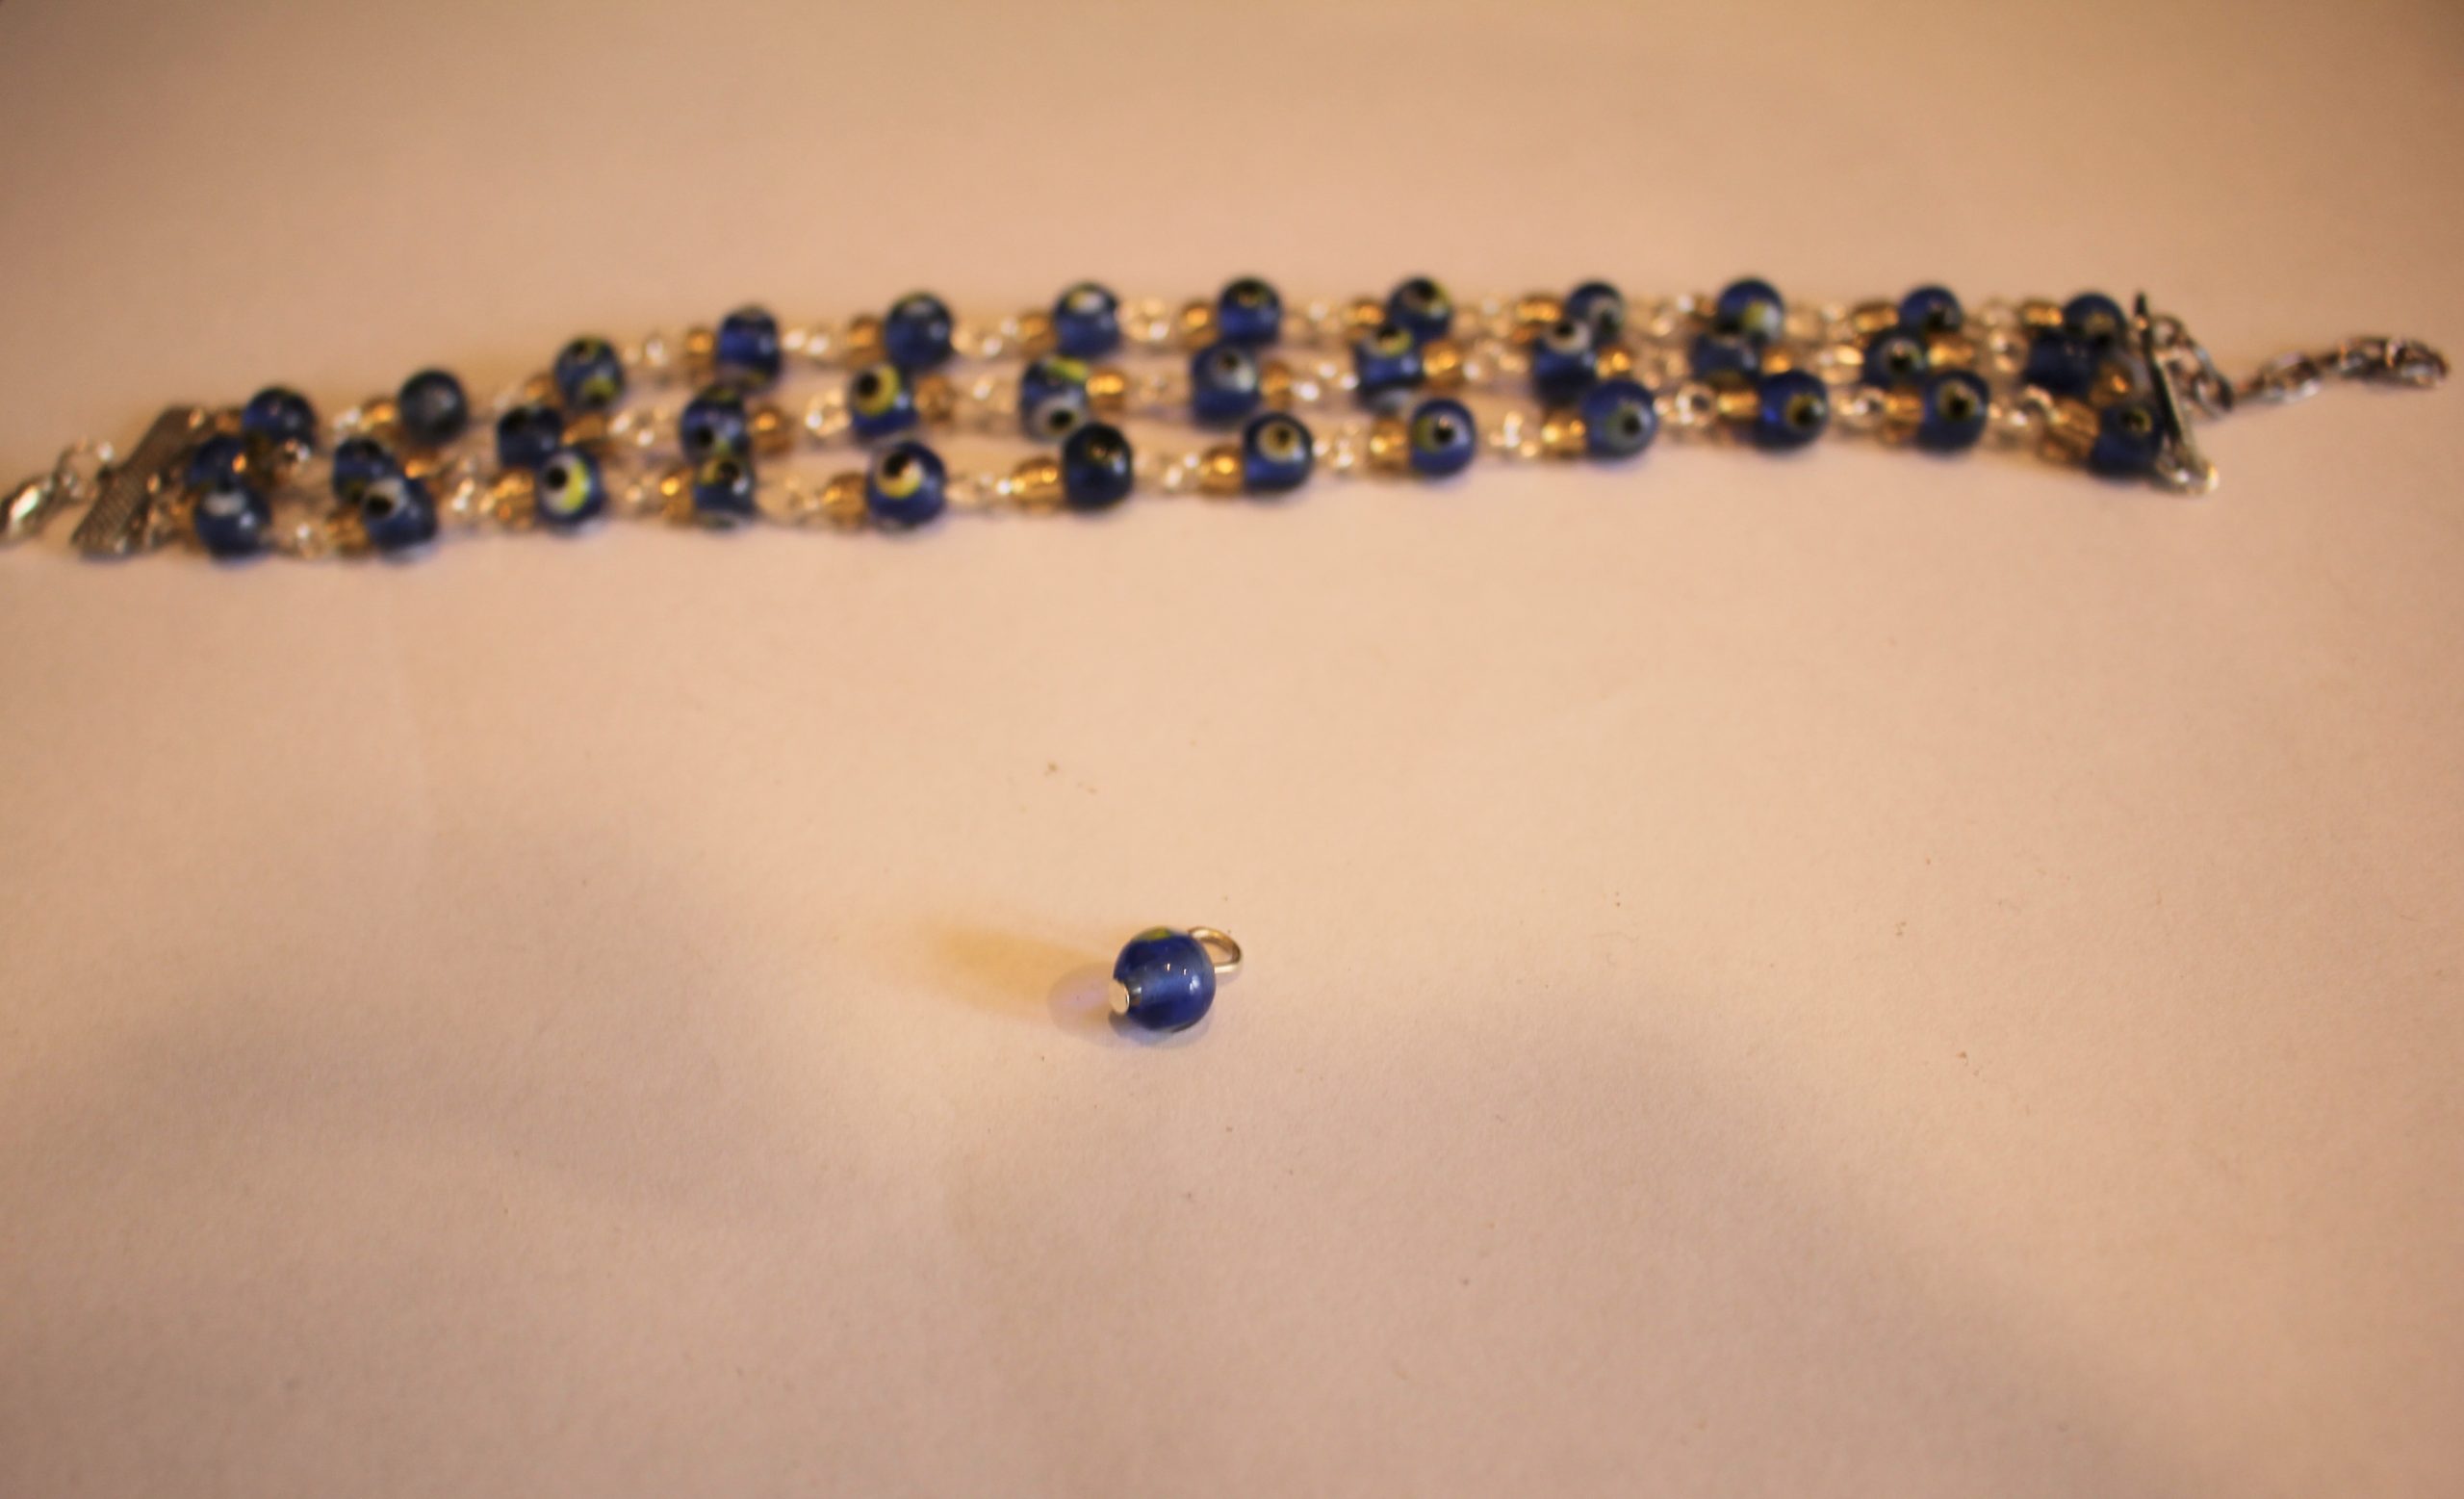
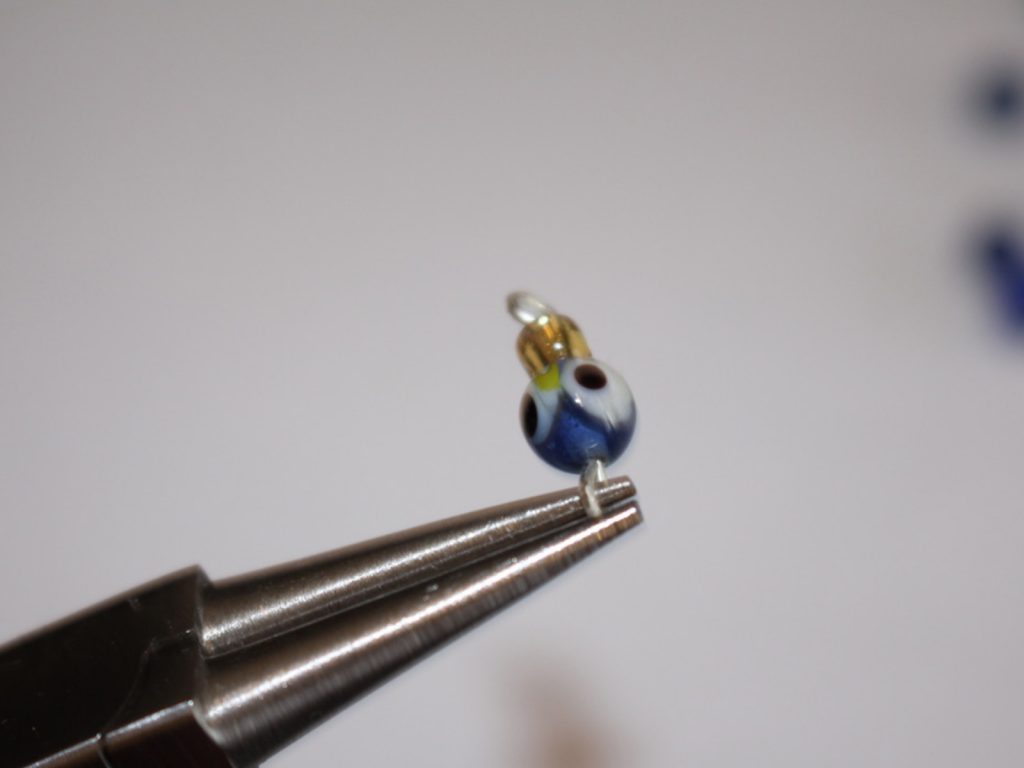
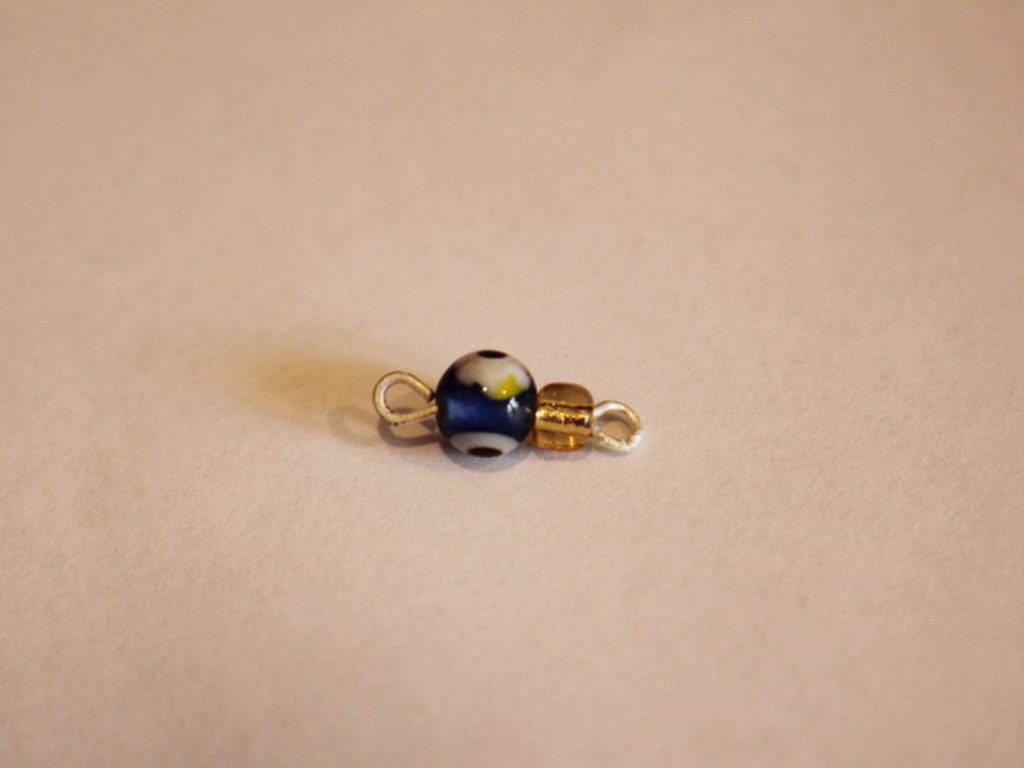
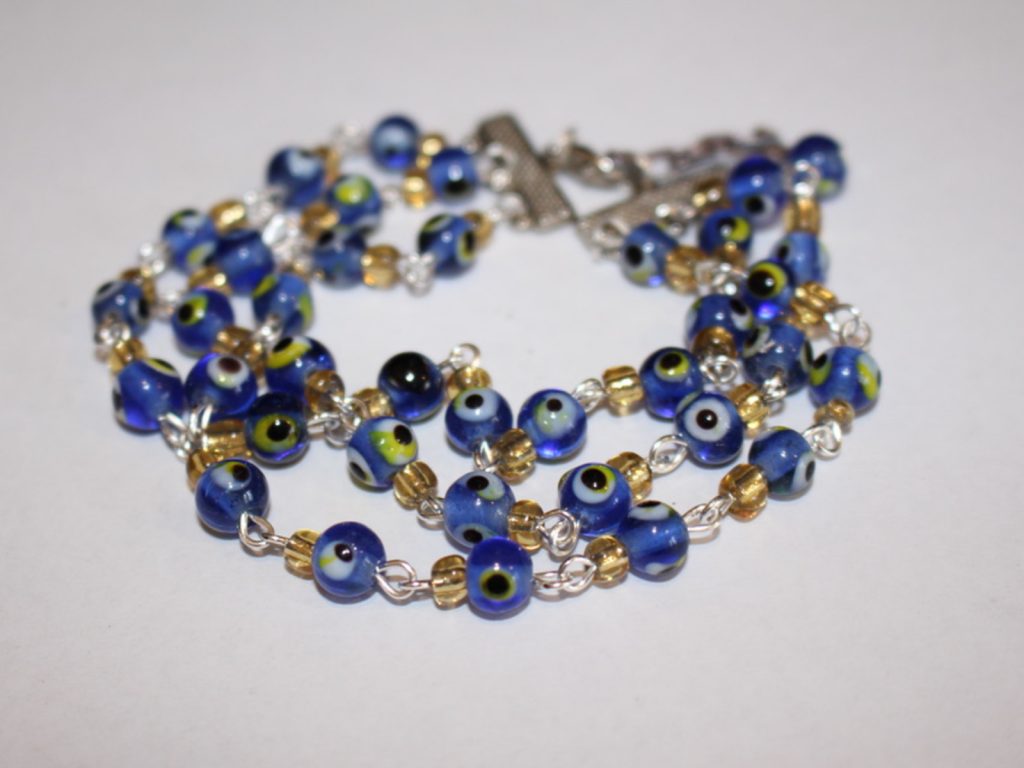
9: Beads. I used a mix of glass evil eye beads and yellow e-beads.


Find some beads for crafting here:
Follow these steps to make your three-in-one stacked chain bracelet:
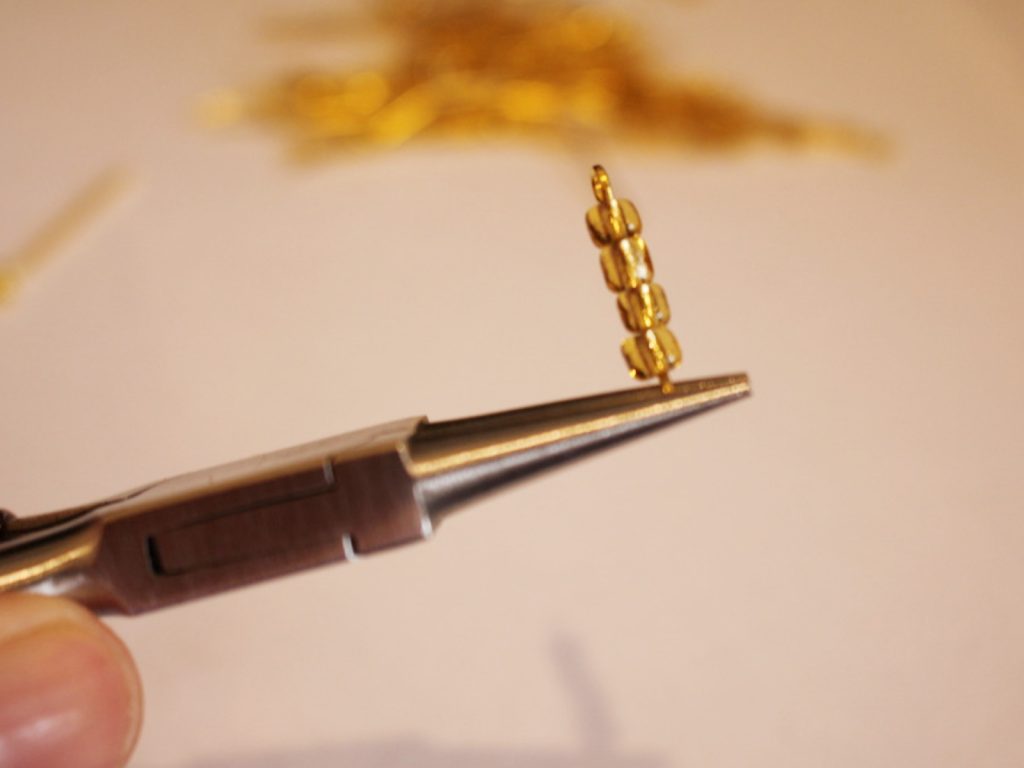
1: Take one of the eye pins and add beads.
2: Bend the end of the pin to form an angle with the beaded section.

3: Create a loop at the top of the pin using your round nose pliers to secure the beads in place.
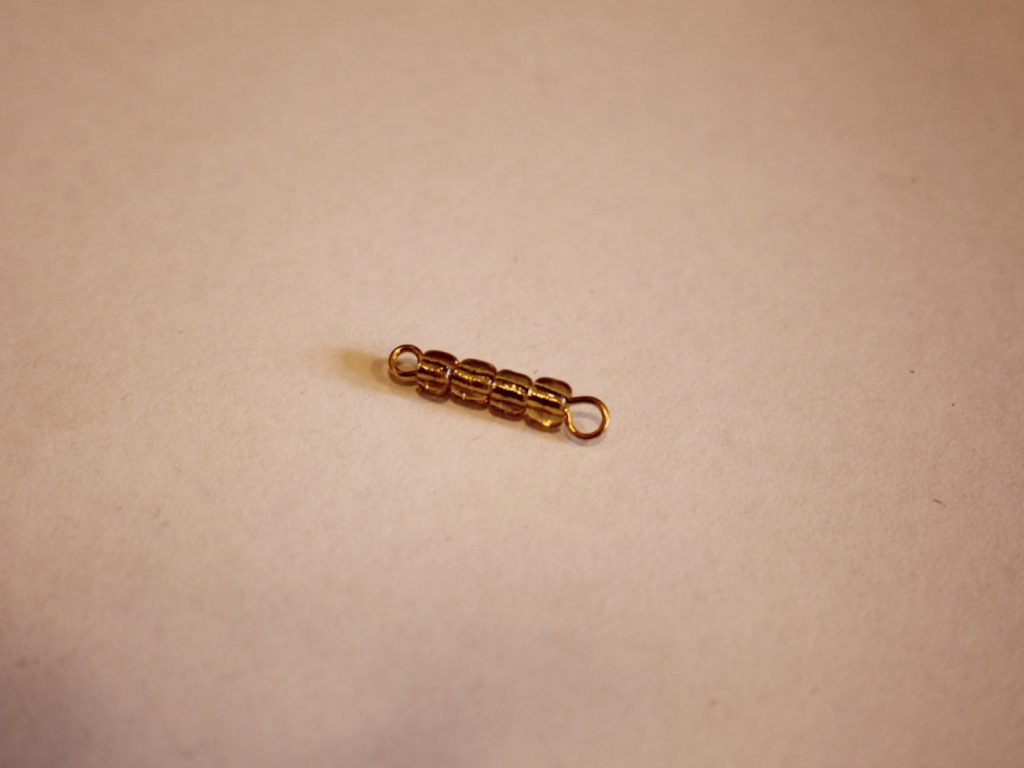
4: Repeat steps 1-3 to create another beaded chain link.
5: Attach the two beaded links together.
6: Repeat steps 1-5 until you have a chain long enough to fit your wrist, make it one link shorter than you think you’ll need, the charm connectors will add extra length to your finished bracelet.


7: Make another two chains in the same way.

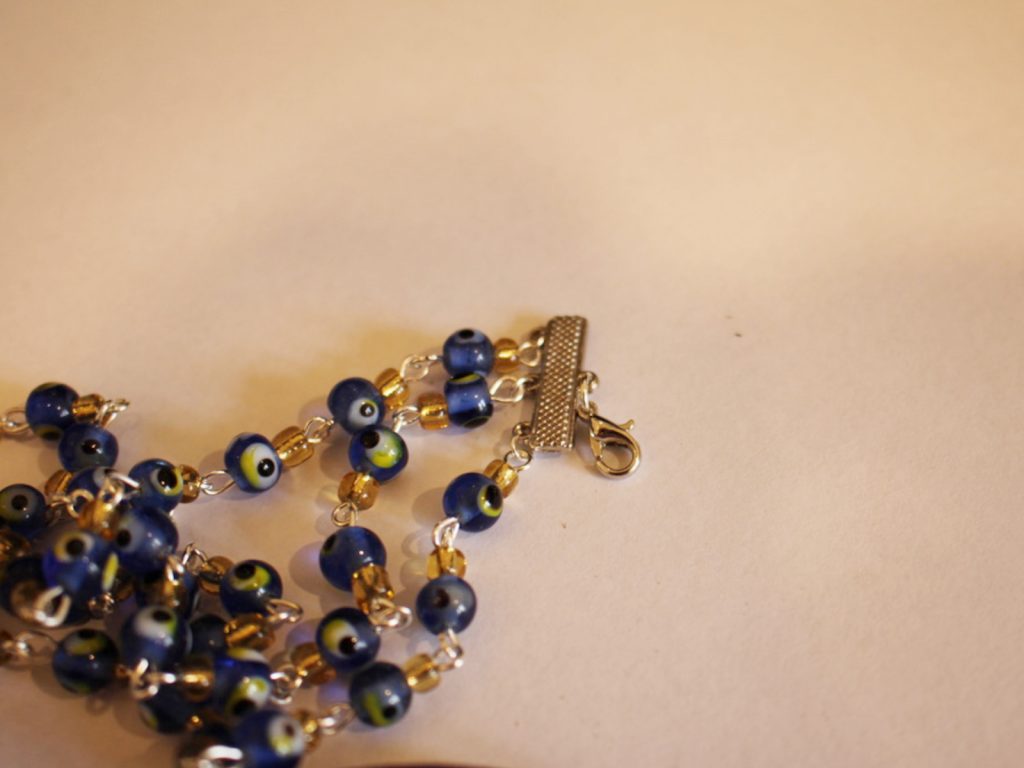
8: Attach each of the chains to one of the charm connectors using three of the small jump rings.


9: Attach the other end of the chains to the other charm connector using the remaining three small jump rings.

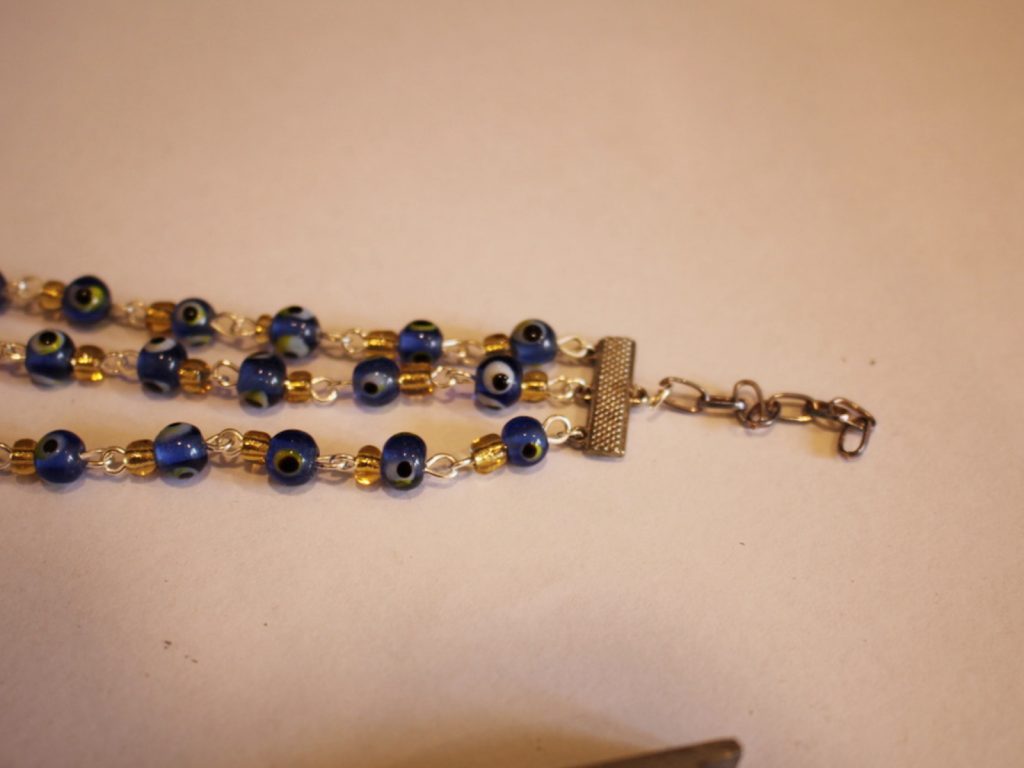
10: Add A jump ring to one side of the bracelet and attach the lobster clasp.

11: Add another jump ring to the other side and attach the small piece of chain.
12: Add one more bead to the head pin and create a loop at the top as you did in step 3.

13: Attach the charm you just made to the end of the small chain to finish your bracelet off!


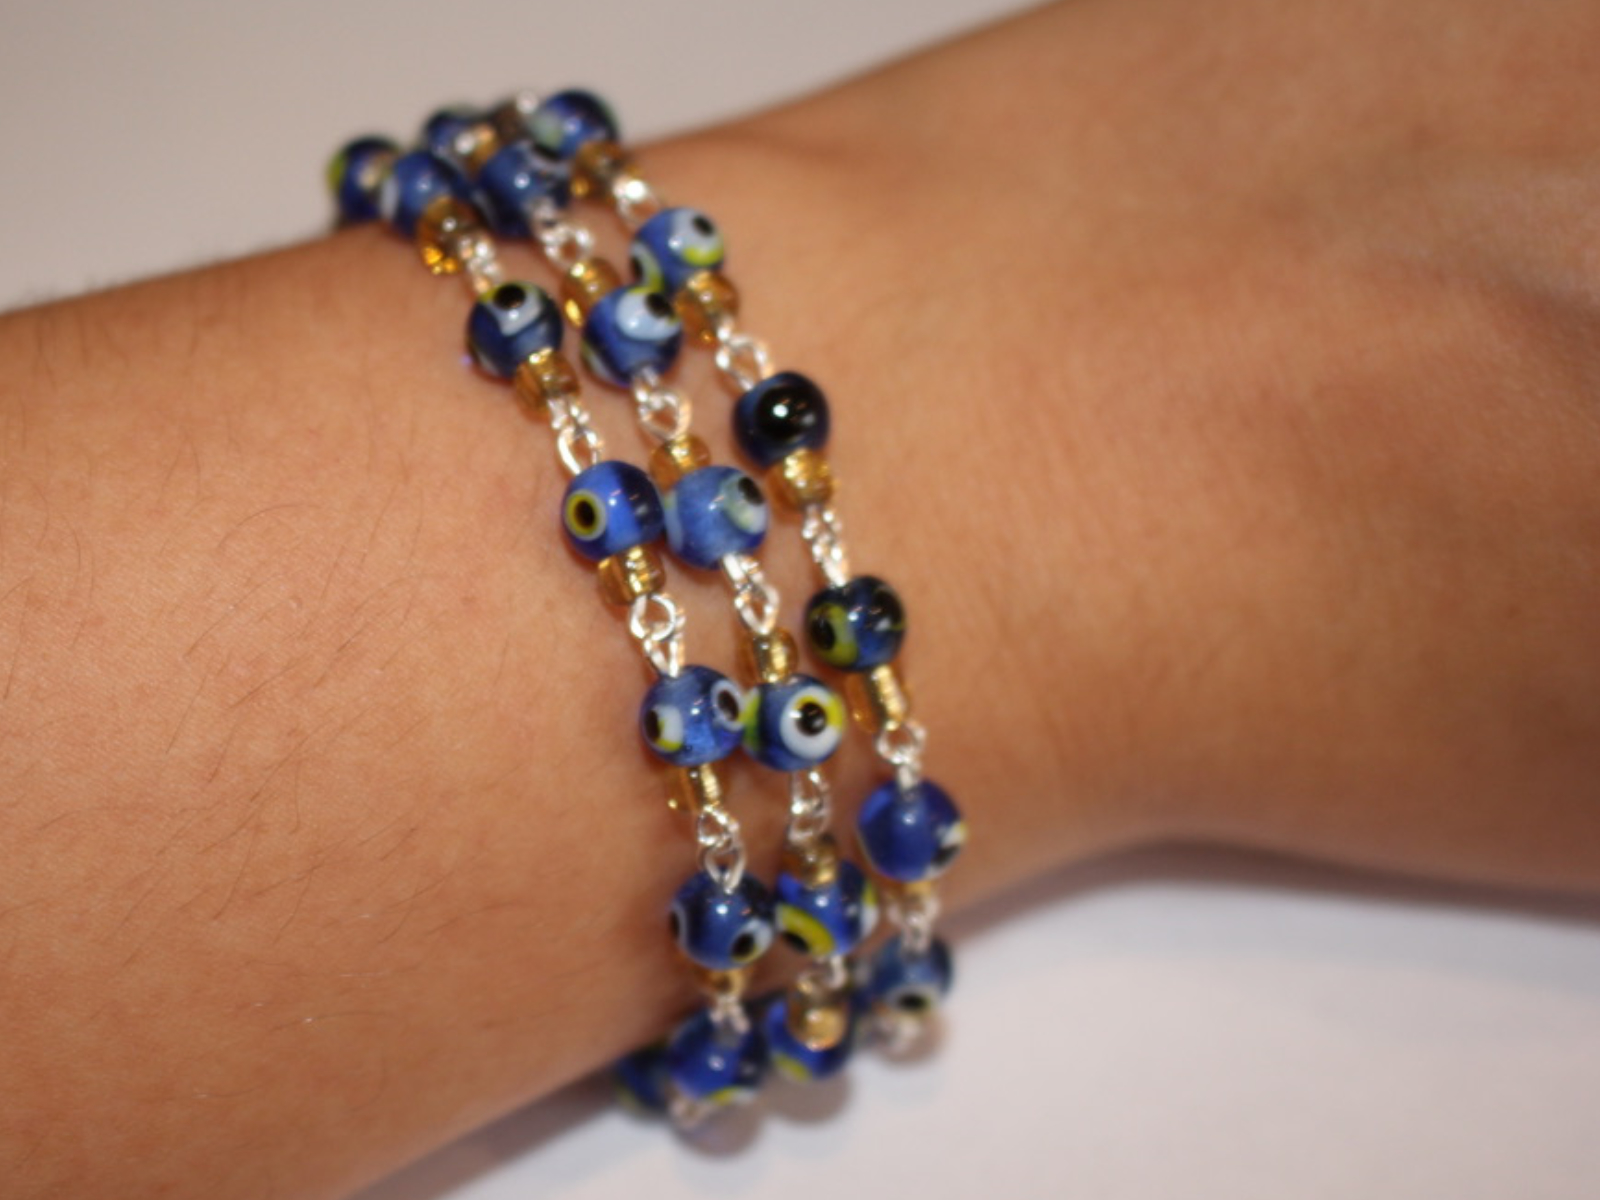
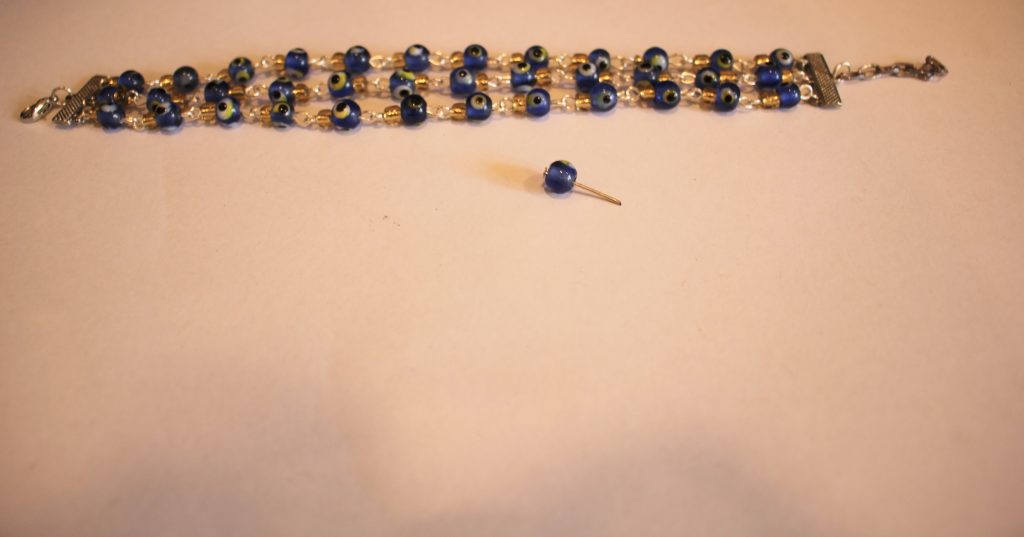
So, now your triple chain bracelet stack is finished and ready to wear! What kind of beads will you use in your design? I think that this bracelet would look great with three different types of gemstone beads layered on top of each other. Gemstone chip beads would be perfect for this DIY. You can buy some


And here are some other multi-strand bracelet tutorials you can follow:
-
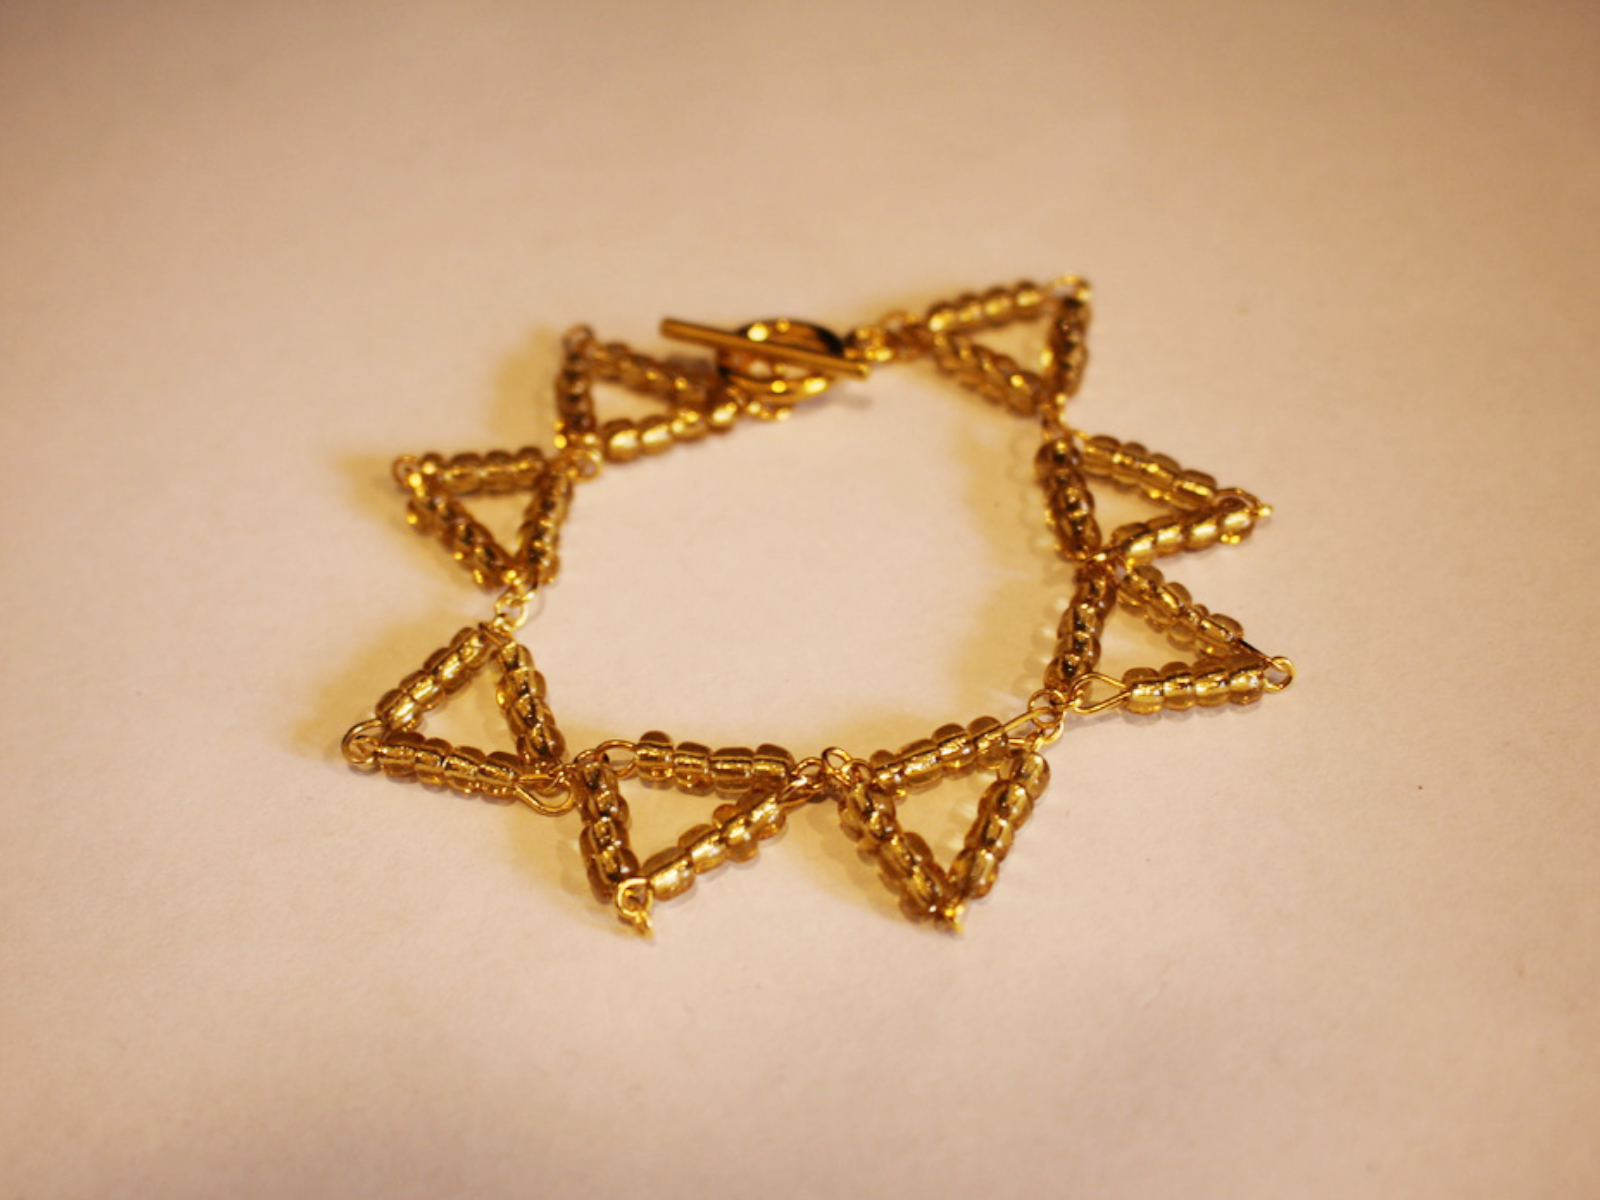
How to make a bunting inspired bracelet by making triangle shapes, so cute!
I was really excited when I came up with this bracelet design! It uses eye pins to make a series of triangles that are linked together to make wrist bunting! I love how there are lots of different ways you can use findings to make unique and sculptural pieces of jewelry. Please note that this tutorial contains affiliate links. This design might look complicated but its actually pretty easy bracelet making!
You’ll need these tools and materials to make this cute triangle bracelet:
1: Pliers. I used round nose pliers and flat nose pliers.
Here are some you can add to your jewelers tool kit:
2: Eye pins. I used a bunch of eye pins all the same length, 24 in total but you may need more or less depending on the size of your bracelet. I used gold tone for this design.
Here are some for your bracelet DIY:
3: Jump rings. I used 7 small jump rings in a gold tone. These were used to attach the triangles together.

4: Two larger jump rings to put the clasp onto the triangle chain.

Here’s a link to some different sized jump rings that you can add to your jewelry kit:
5: A toggle clasp. Mine was gold to match the rest of the hardware I used.

Check out this toggle clasp:
6: Beads. I used some yellow glass e-beads but you could use any colour.
Here are some links to beads you can use in crafting your bracelet:
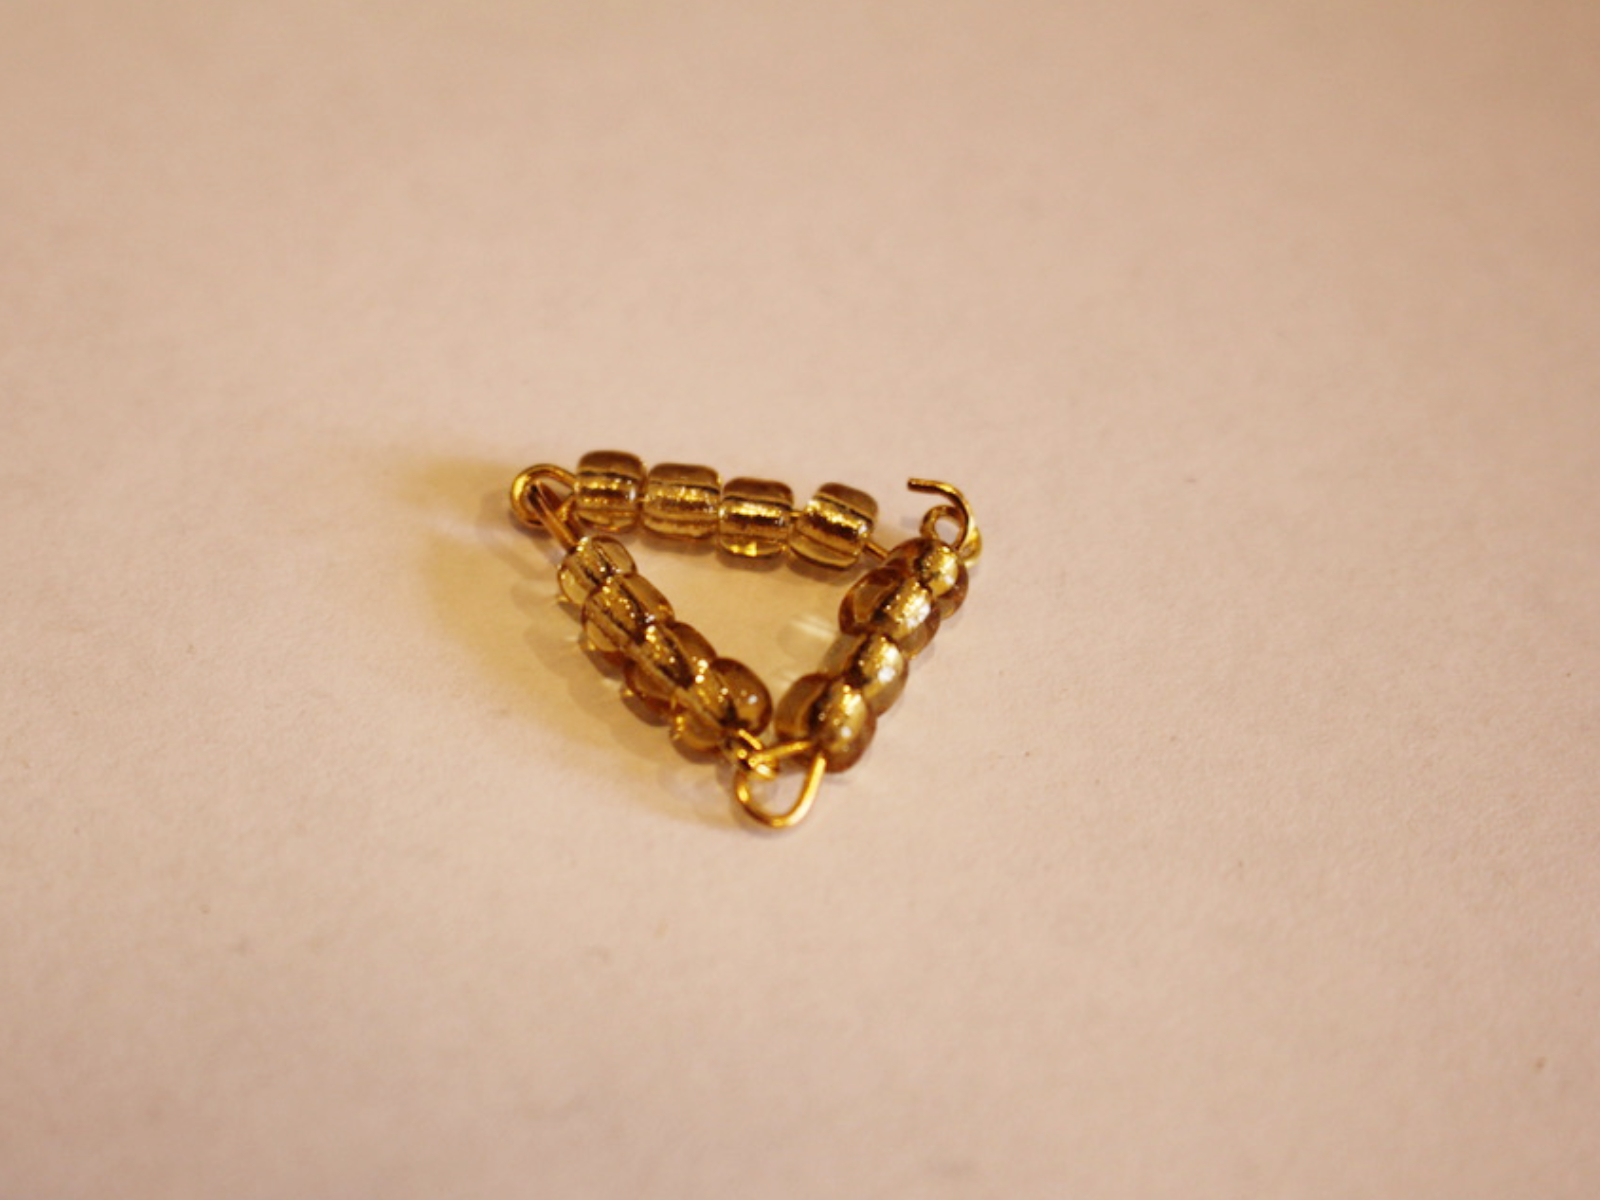
Follow these steps to make your bunting inspired triangle bracelet:
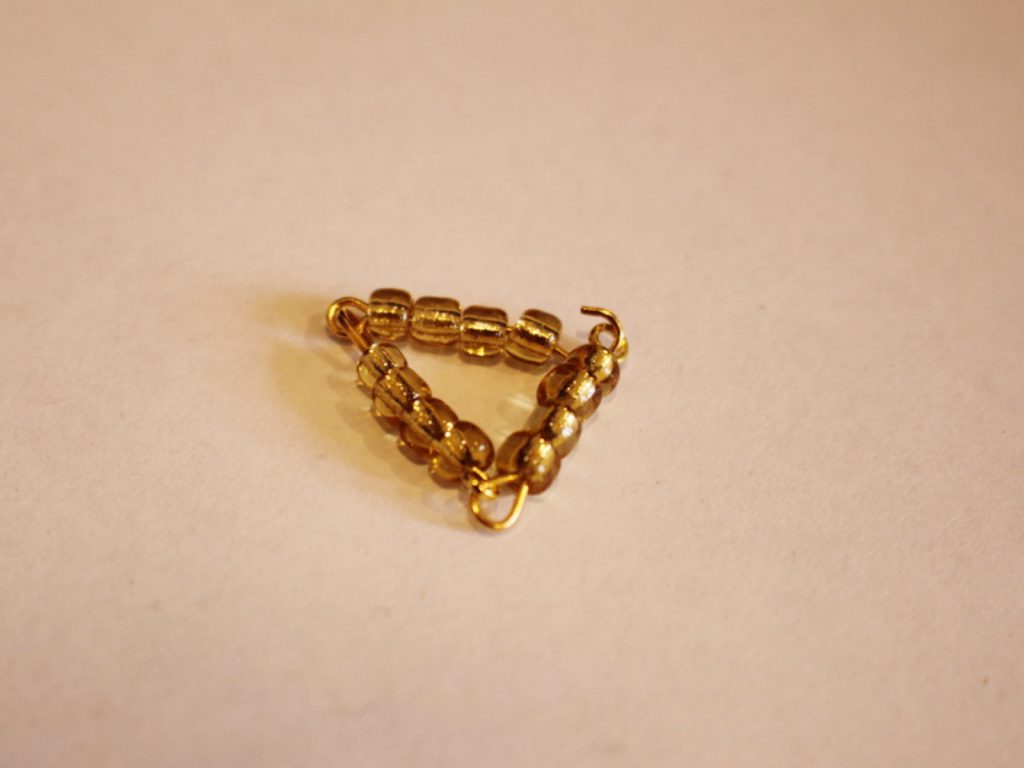
1: Take one of the eye pins and add beads until there is approximately 1cm left without beads.
2: Bend the unbeaded section so that it forms an angle to the beaded section. You can do this with your fingers if your pin is soft enough or use your pliers.

3: Bend the top of the pin around the barrel of your round nose pliers to form a loop.
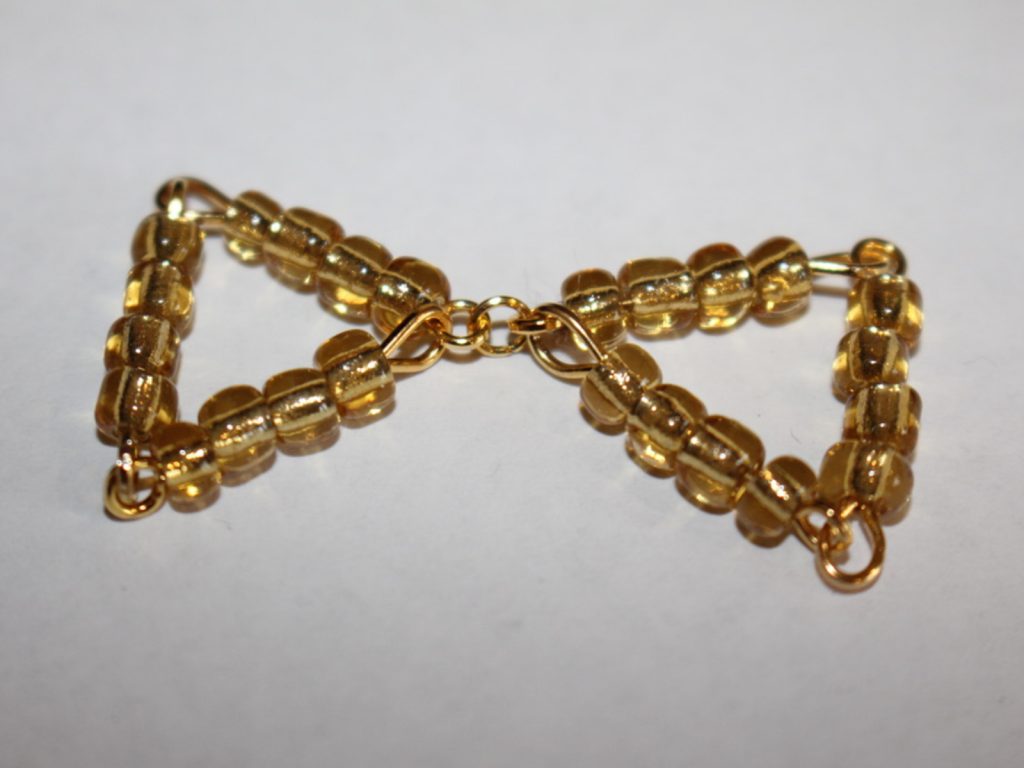
4: Repeat steps 1 to 3 for a second pin. Open one of the loops at the end of a pin and attach it to the first pin you completed. Close the loop to secure the pins together.


5: Repeat steps 1-4 for another pin.

6: Take the chain you just made and open a loop at the end of one of the end pins.
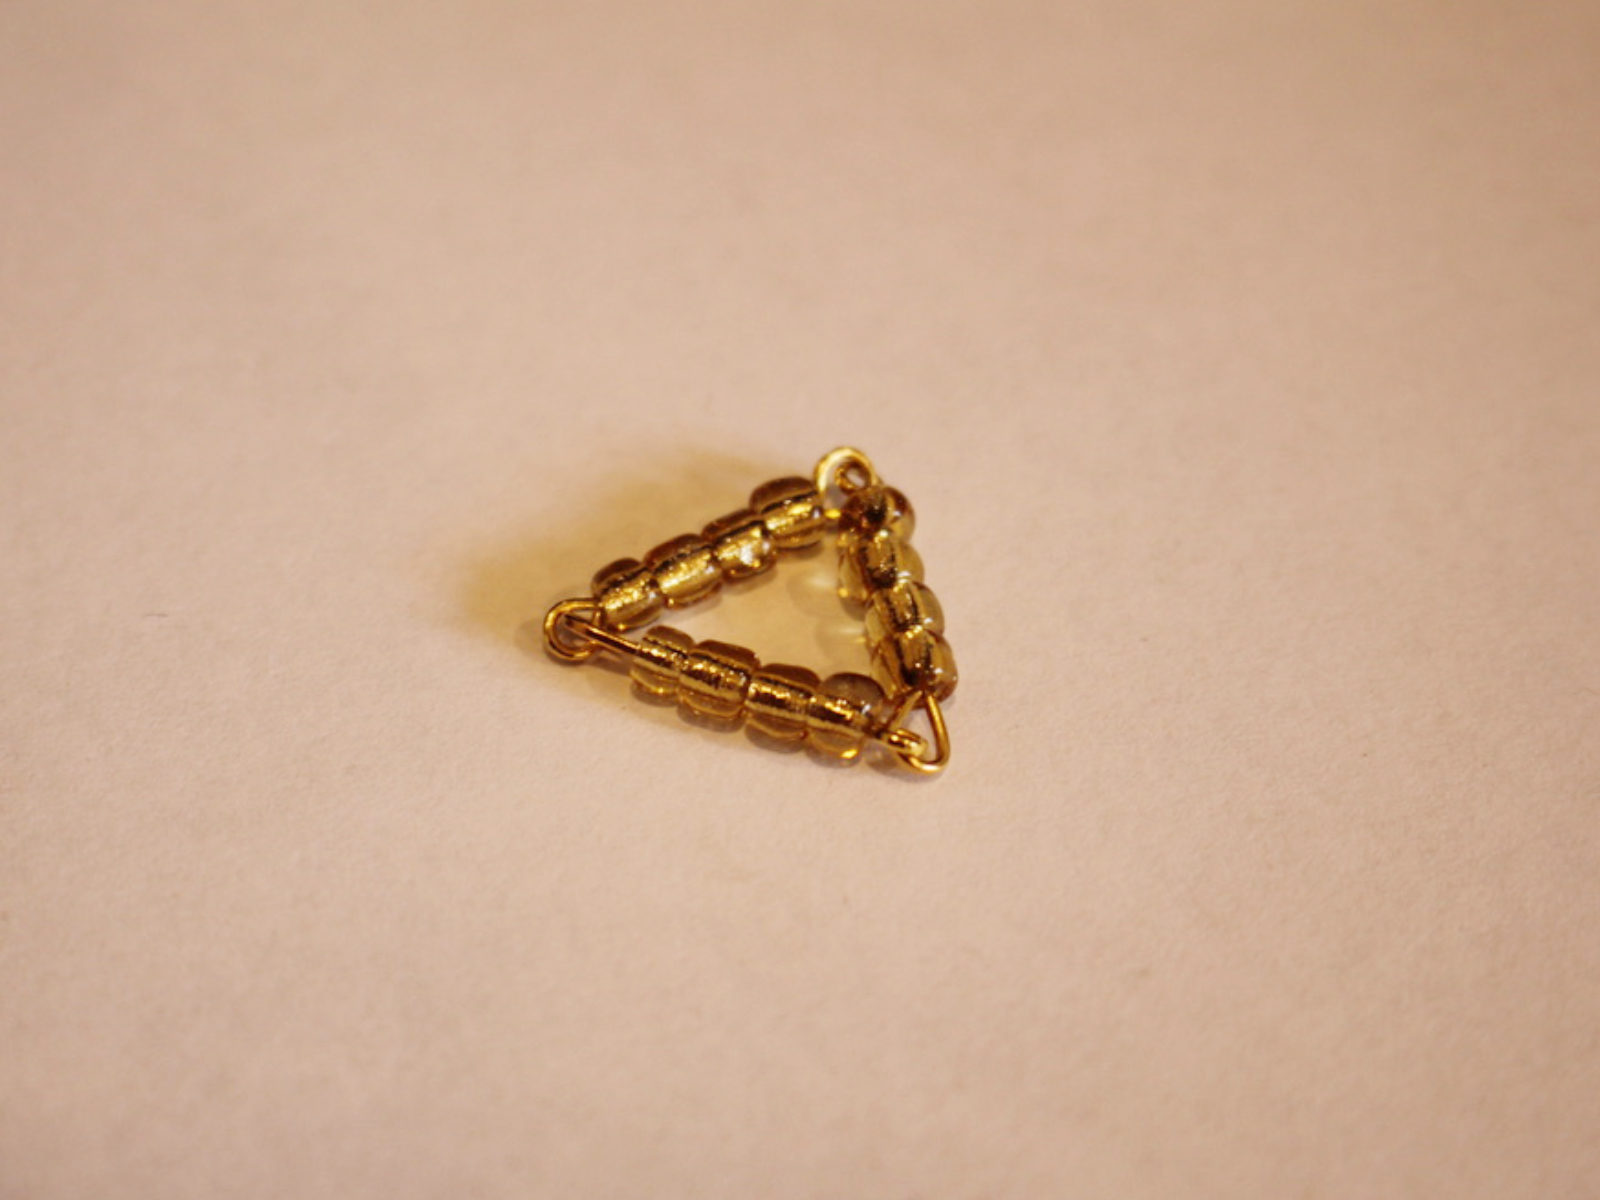
7: Link the two end pins and close the loop to form a triangle shape.

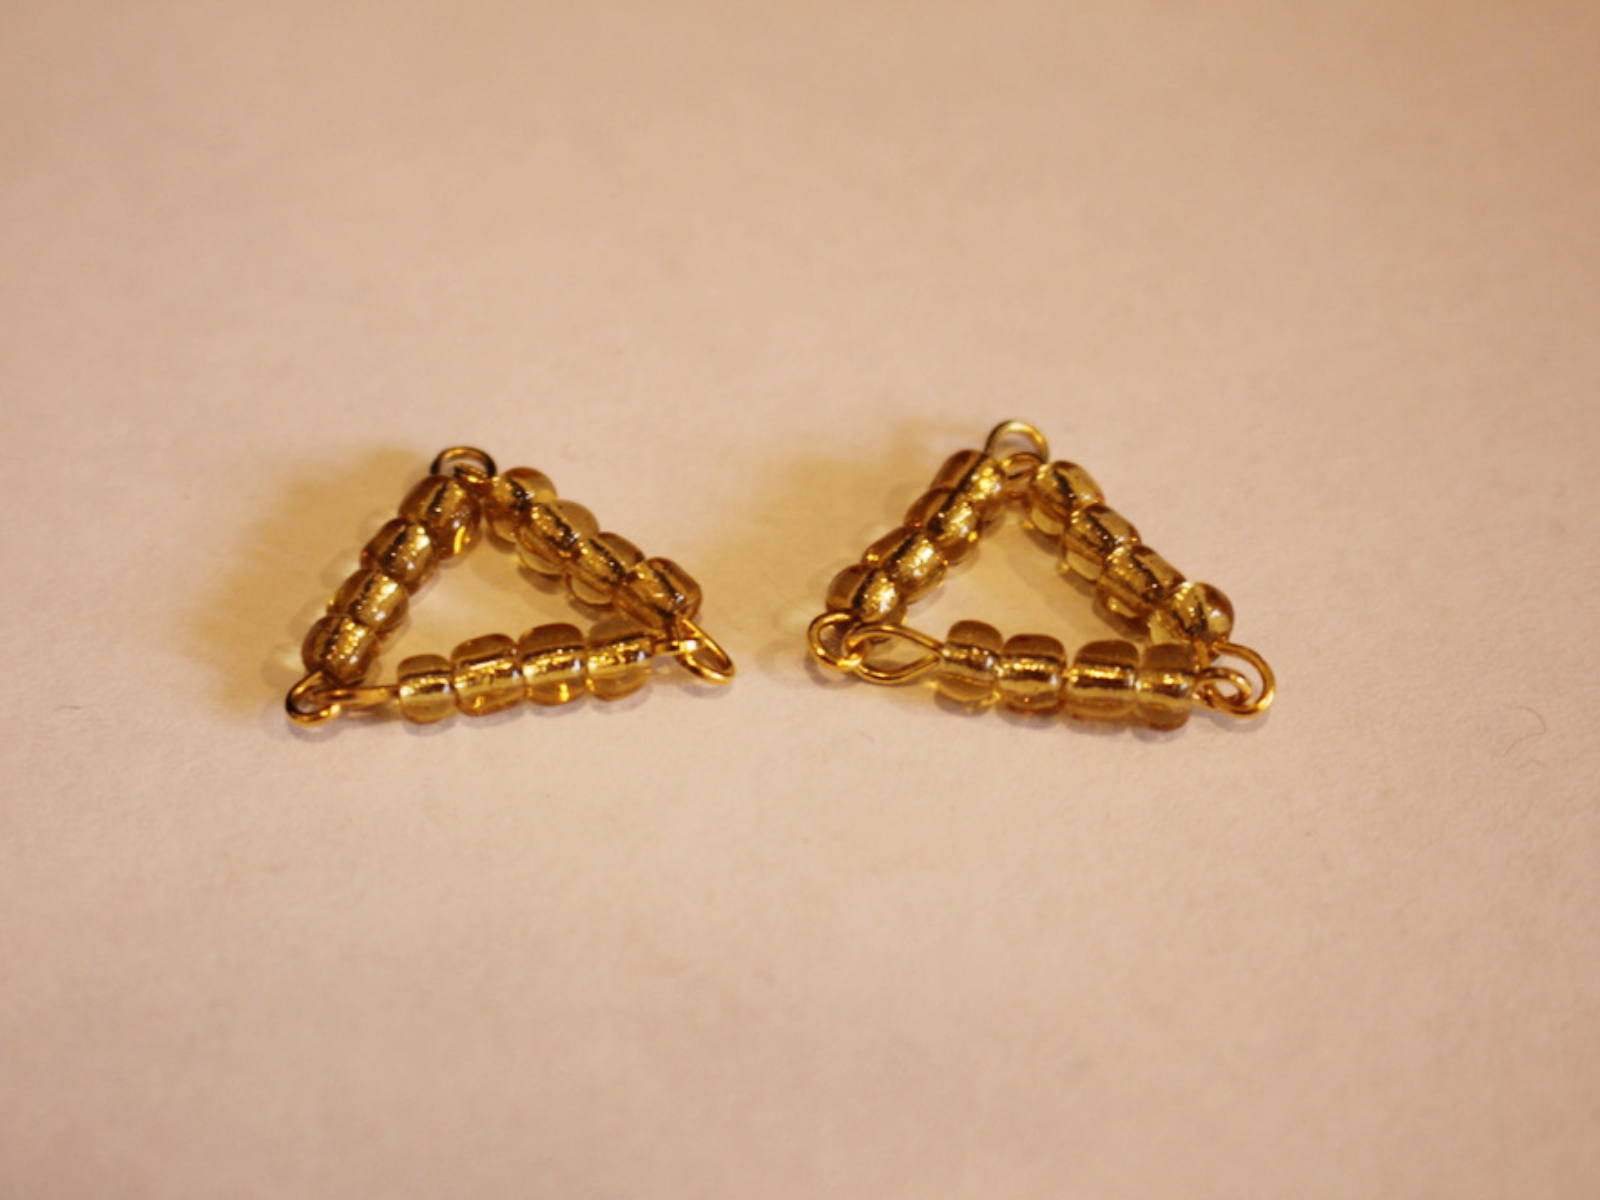
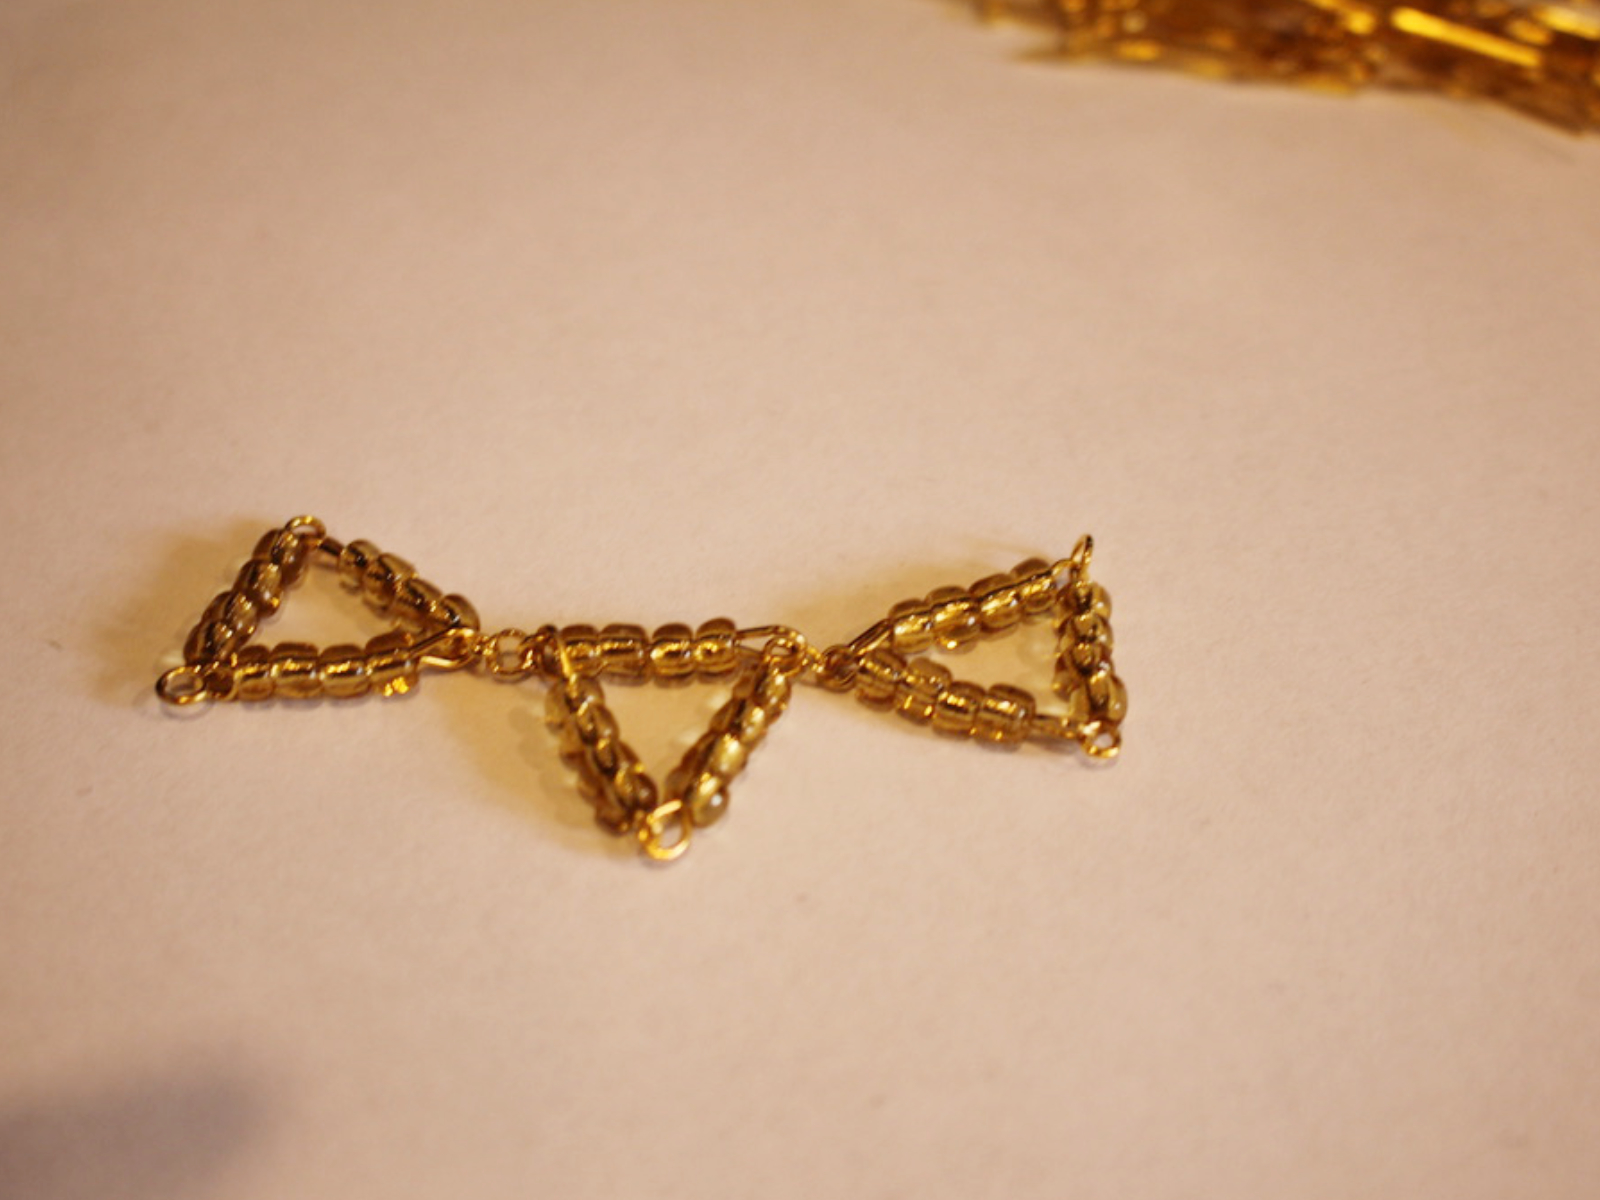
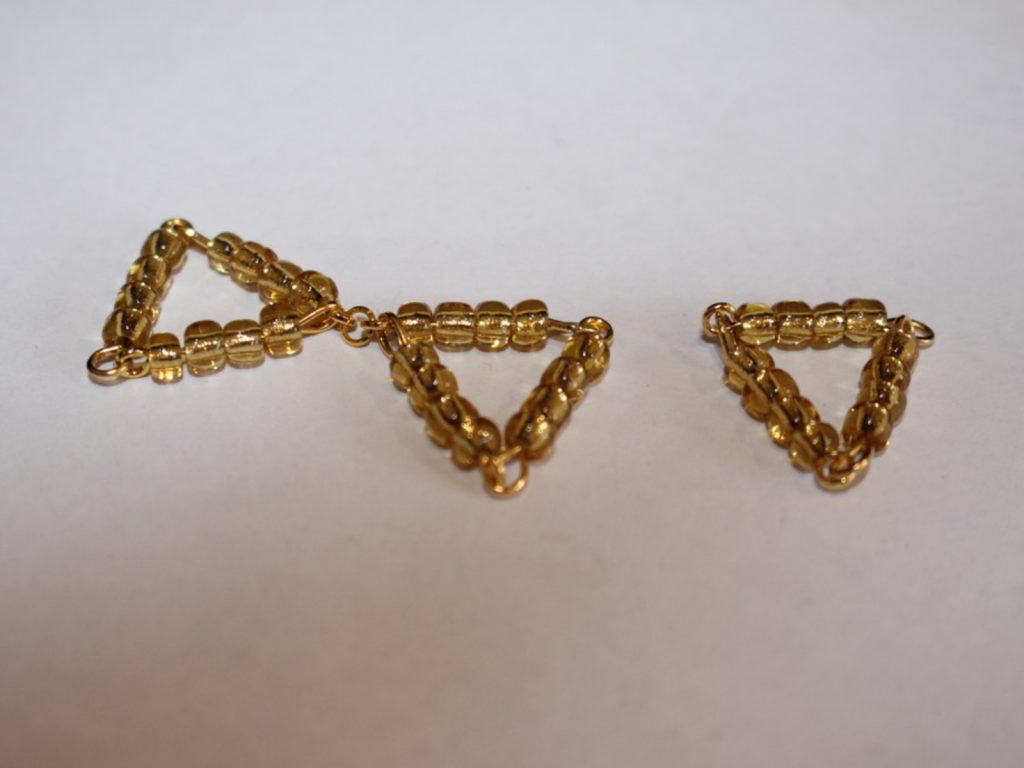
8: Make another triangle as you did in steps 1-7 and attach the two triangles together using one of the small jump rings, this is the start of your triangle chain.

9: Repeat steps 1-8 until you have a triangle chain long enough to fit your wrist. Make it a tiny bit smaller than you need to account for the length of the jump rings and toggle clasp.

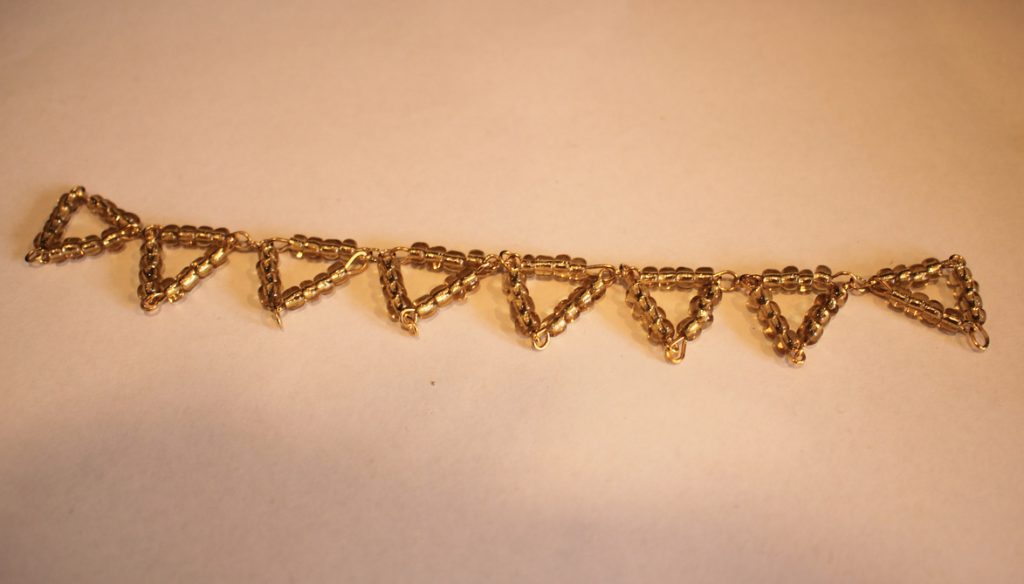
10: Attach the toggle clasp components to each end using the two larger jump rings.


Now your cute triangle bracelet is finished and ready to wear! This bracelet is so fun to fidget with and will look great layered with other gold and silver tone jewellery. What colours will you make yours in?


I think if I make this design again I will bead it with a variety of pastel coloured beads for a cute vapor-wave look. How cute would that look when paired with a fun floral dress in summer?
I hope you have fun making your own adorable triangle bead bracelet! I sure had fun making mine <3
If you liked this tutorial, here are some other’s I have created that use eye pins and beads to form triangle shapes:
- This one uses gravity to form a triangle shaped pair of earrings!
- Follow this video tutorial to make some triangle tassel earrings.
- Here’s a triangle charm lariat.
- A pair of basic triangle earrings made with beaded eye pins.
- A chain and eye pin beaded triangle pendant.
- A triangle necklace made from long metal beads and string.
- Some cute beaded mini triangle earrings.
- A triangle statement pendant.
- Some chain and pin triangle drop earrings.
- Use triangles to make this 3D diamond pendant.
- Triangles form this flat diamond shaped bracelet charm.
I hope you enjoyed this tutorial and have fun finding some other pieces to make at home! Have fun!
-
Want versatile jewellery? This bracelet can also be part of a necklace!
Remember this tutorial? Well here’s how you can make this design work even harder for you. Make a necklace strand that will also fit around your wrist as a bracelet. (Please note that this tutorial contains affiliate links).
You’ll need these tools and materials to make this necklace:
1: Pliers. I used my round nose (middle), flat nose (right) and cutting pliers (left).
2: Tiger tail wire, long enough to wrap around your wrist twice plus a little bit extra.

3: Four crimp beads.

4: Two jump rings.

5: Two large lobster clasps.

6: Beads. I used opalite beads and some recycled orange glass beads.


Follow these steps to make your wrap bracelet that can also be used as a component in the customisable necklace design.
1: Add two of the crimp beads and a jump ring to one end of the tiger tail wire.


2: Loop the wire back through the jump ring and through the crimps.

3: Squash the crimp beads using the flat nose pliers.


4: Add beads to the wire in your pattern of choice.

5: Once you have the length you want, add the remaining crimp beads to the end of the wire and the other jump ring.


6: Loop the wire around the jump ring and back through the crimps and the first few beads. Pull the wire tight.

7: Squash the crimp beads using the flat nose pliers.

8: Trim the excess wire.

9: Attach a lobster clasp to either end of the beaded strand by opening each jump ring and sliding them on. Make sure you close the jump ring again to secure the clasps in place.


Now your convertible bracelet/customisable necklace strand is finished. How will you wear yours?