-
This Circle Pendant Is Simple and Beautiful, Load Yours up With Your Favorite Beads!

The highlight of this necklace is a lovely beaded circle pendant! You can use all kinds of lovely beads to make this design your own. note: contains affiliate links.
You will need the following tools and materials to make your necklace:
1: Pliers. You will need your cutting pliers, round nose pliers and flat nose pliers to make your necklace.

2: Wire. I used some copper wire to make my circle pendant. I cut mine to approximately 12cm in length.

3: Three jump rings.

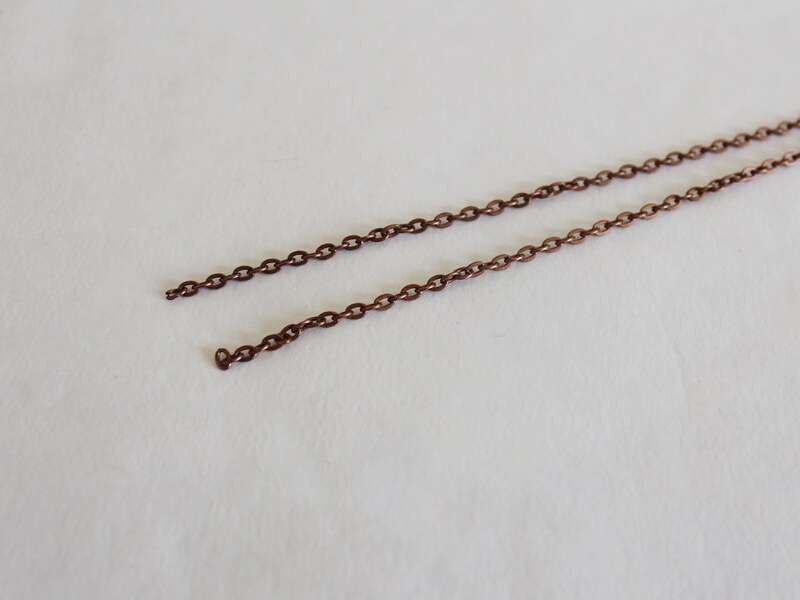
4: A piece of chain at the length you want your necklace. I used copper chain to match the wire.

5: A lobster clasp. I used this copper colored one.
6: Beads of your choice. I used some red glass seed beads and some small timber beads.


Follow these steps to make your circle pendant necklace:
1: Create a loop at one end of the wire using the round nose pliers.


2: Add the beads to the wire in your choice of pattern.

3: Continue beading until there is approximately 1cm of wire remains unbeaded.

4: Bend the end of the wire so that it is at a right angle to the beaded section.

5: Create a loop at the end of the wire using the round nose pliers.
6: Attach the two loops together and close them to create a circle shape. You might need to gently reshape the loop to make it more of a circle shape.


7: Attach a jump ring to one of the loops at the top of the circle pendant.
8: Slide the ends of both chains onto the open jump ring.


9: Close the jump ring to secure the chain in place.

10: Split the chain in the middle opposite the place where the pendant is attached.
11: Add a jump ring to one side of the chain and add the lobster clasp. Close the jump ring to secure the lobster clasp in place.

12: Add the remaining jump ring to the other side of the chain to finish the necklace!

-
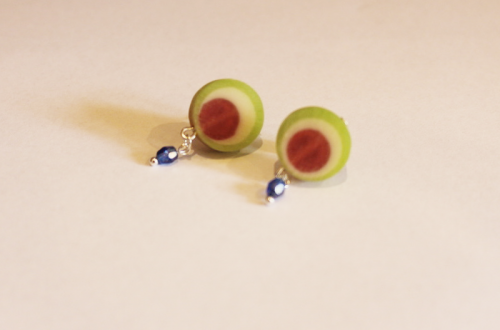
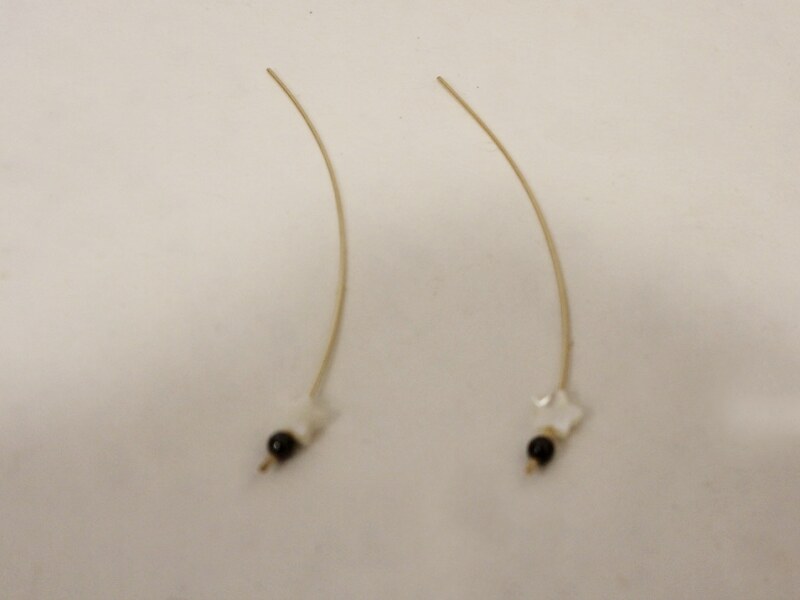
Here’s how to make some beaded wire threader earrings!
These wire threader earrings feature delicate beads, kept in place by hammering some wire flat. Contains affiliate links.
You will need the following tools and materials to make these earrings:
1: Pliers. You will need wires with a square bending nose without ridges so that you don’t mark the wire. You will also need your cutting pliers to cut the pieces of wire.

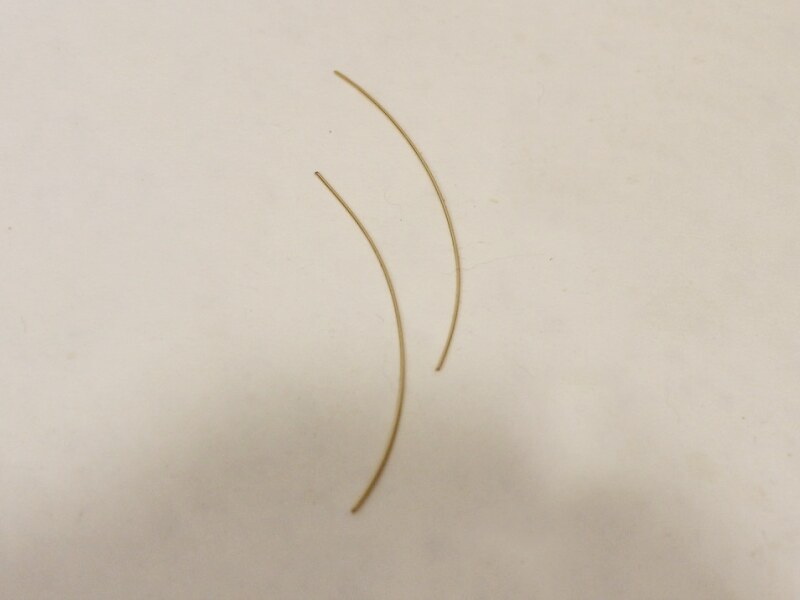
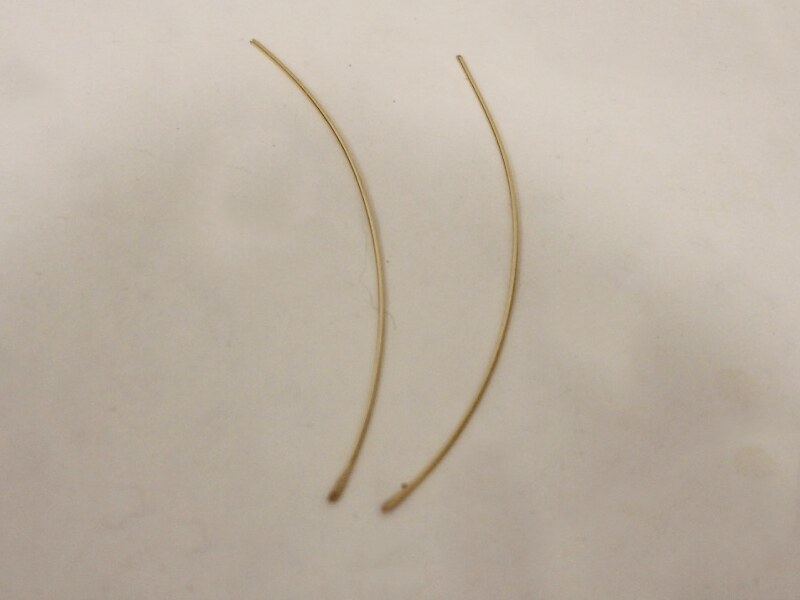
2: Two pieces of wire. Approximately 8cm long. I used some gold-fill wire.
3: A file.

4: A steel block.

5: A hammer.

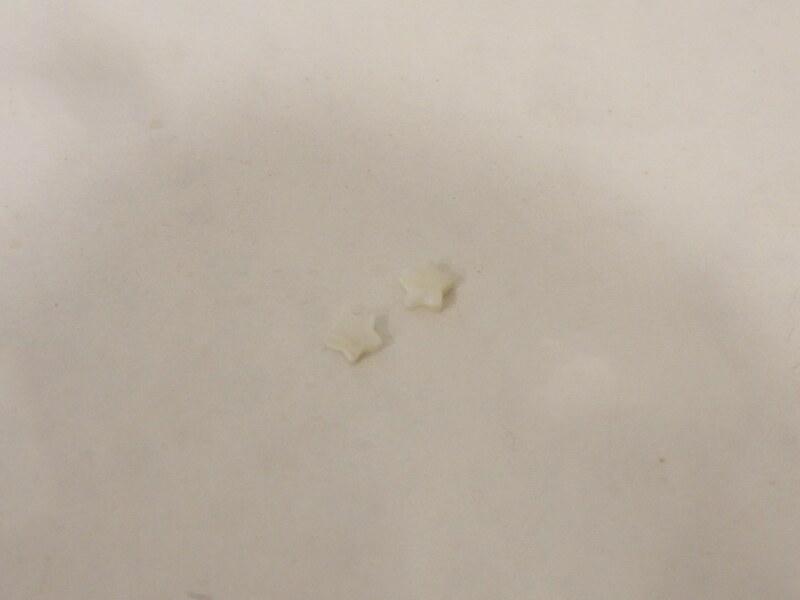
6: Beads of your choice. I used these star shaped shell beads and these round hematite beads.

Follow these steps to make your earrings:
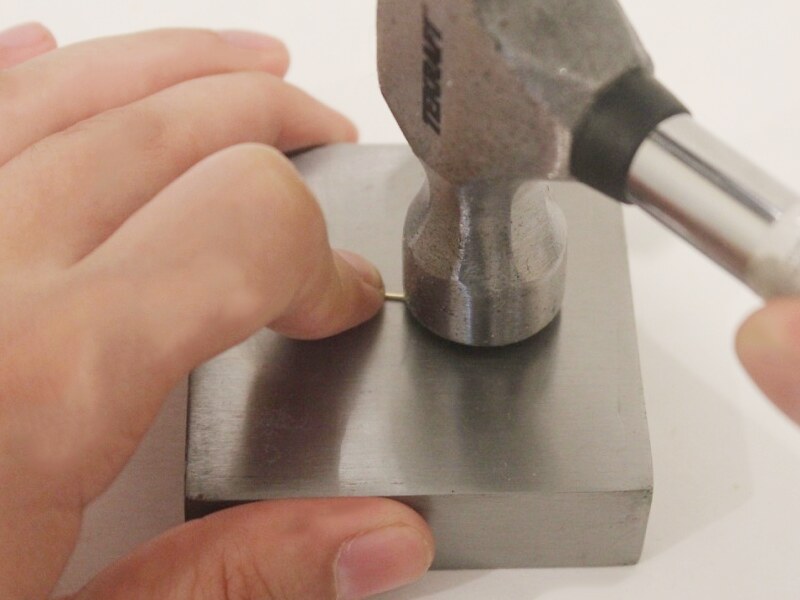
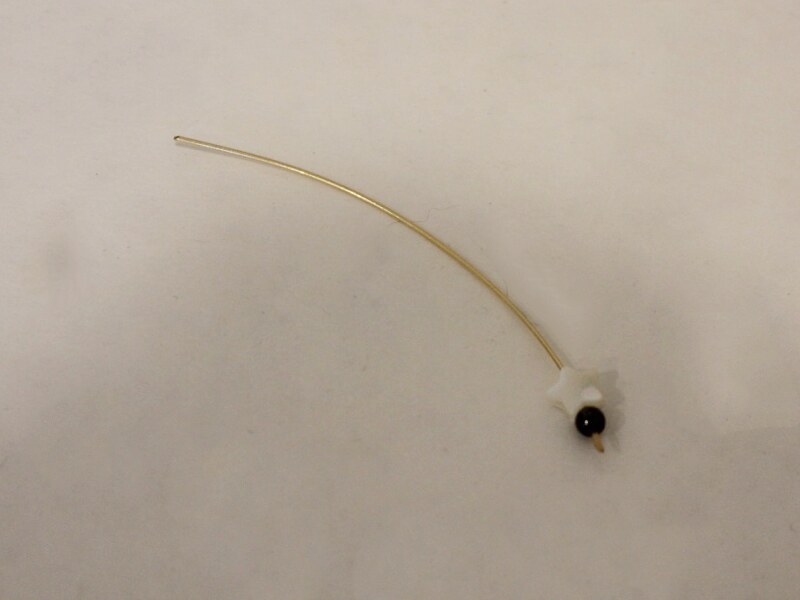
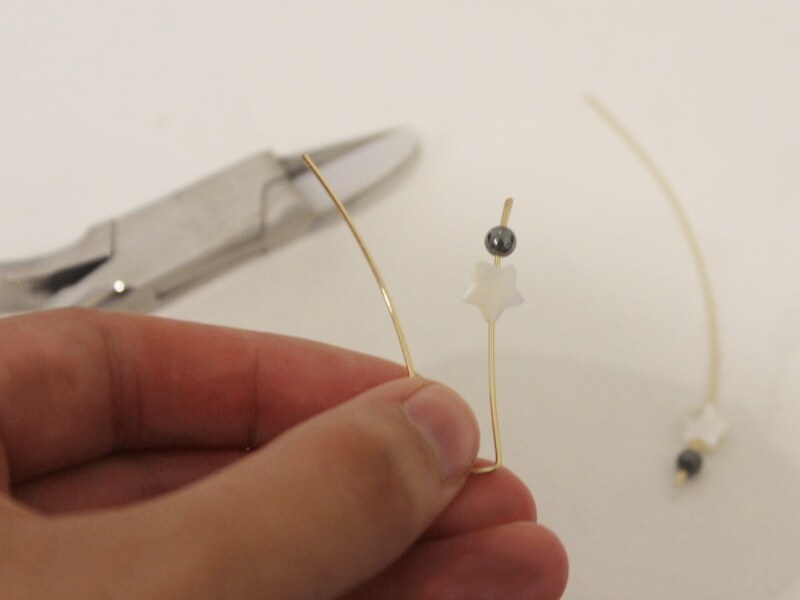
1: Hammer one end of each piece of wire. Hammer on the steel block and continue to flatten the wire until it is wide enough to stop your beads from sliding off. Repeat this step for the second piece of wire so that both pieces have one flattened end.
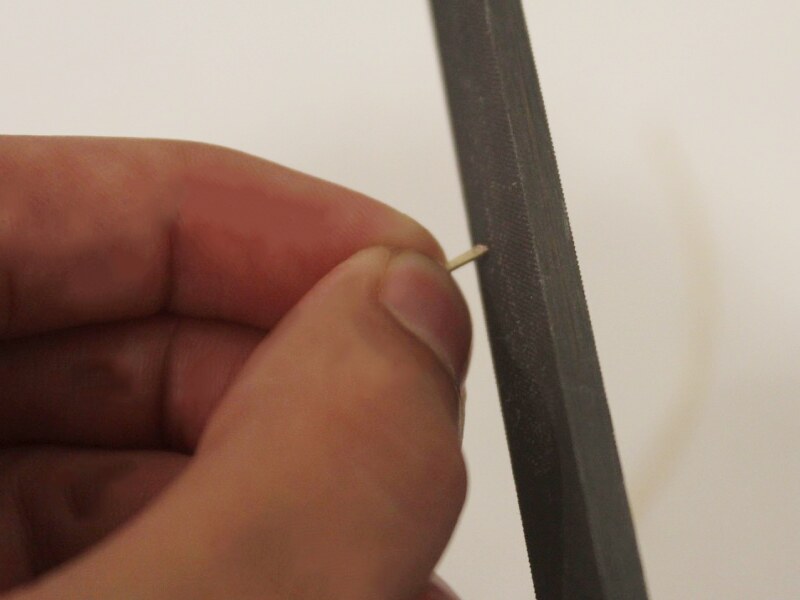
2: File each of the wire ends so that none are sharp or rough.
3: Add the beads to each of the wires.
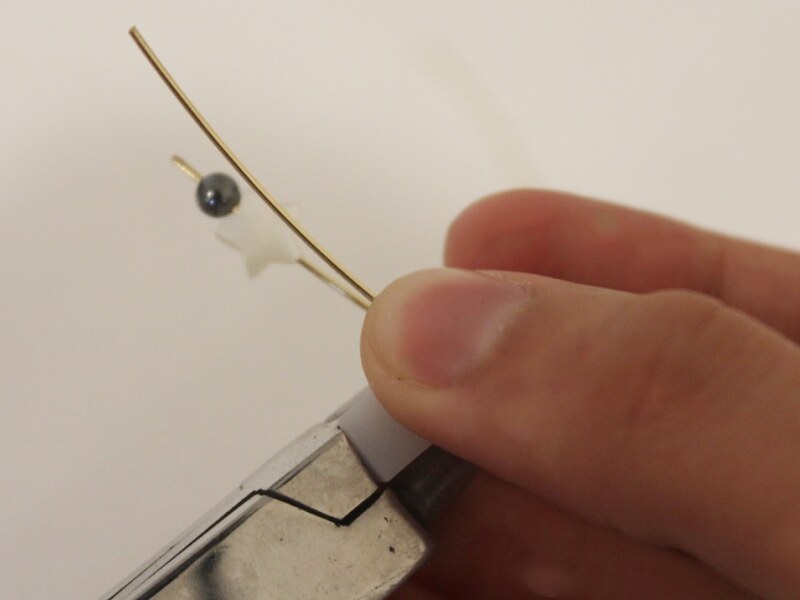
4: Hold one of the wires with the plastic nose pliers.
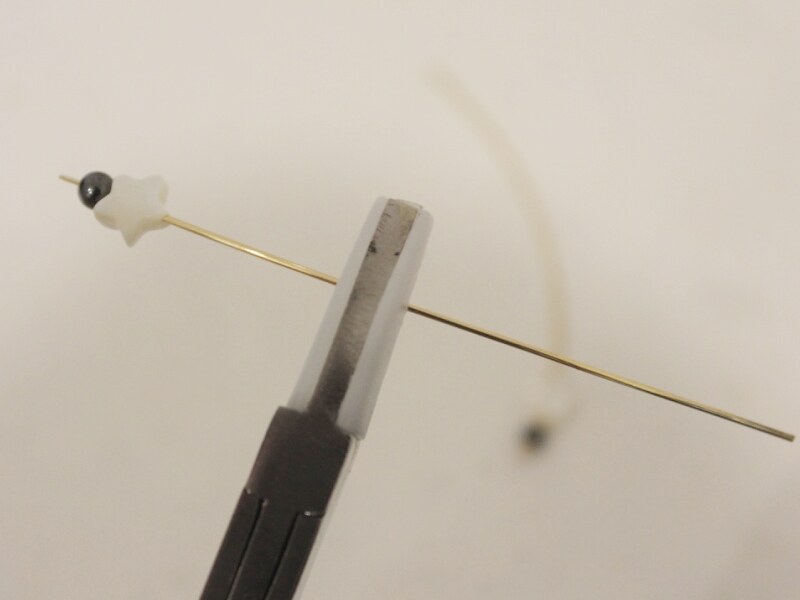
5: Bend one side of the wire around the angle of the pliers to form a right angle.
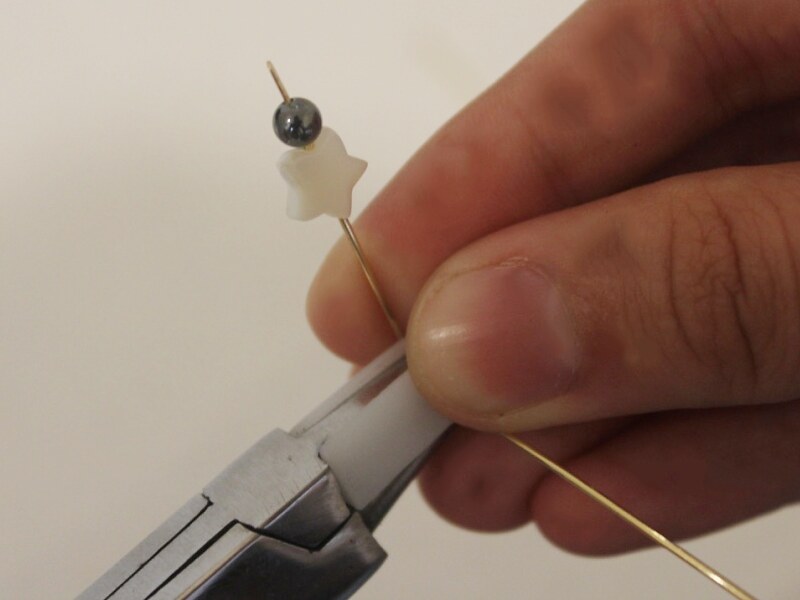
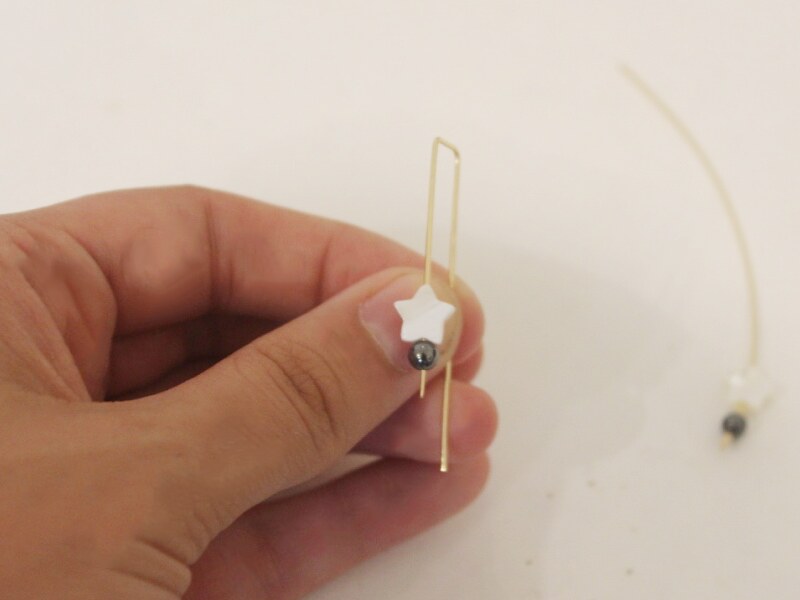
6: Bend the other side around the pliers to form another right angle. This will form a square shape that makes the top of your earring.
7: Repeat steps 4-6 for the second earring.
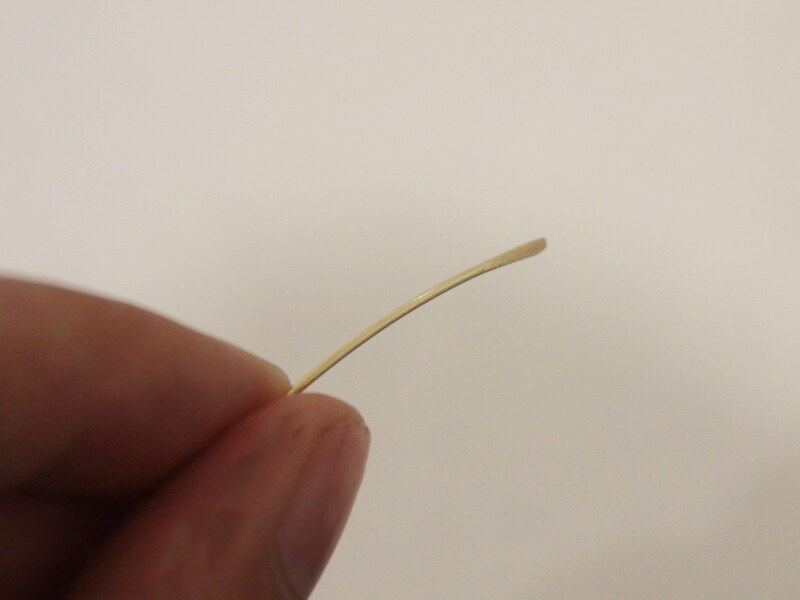
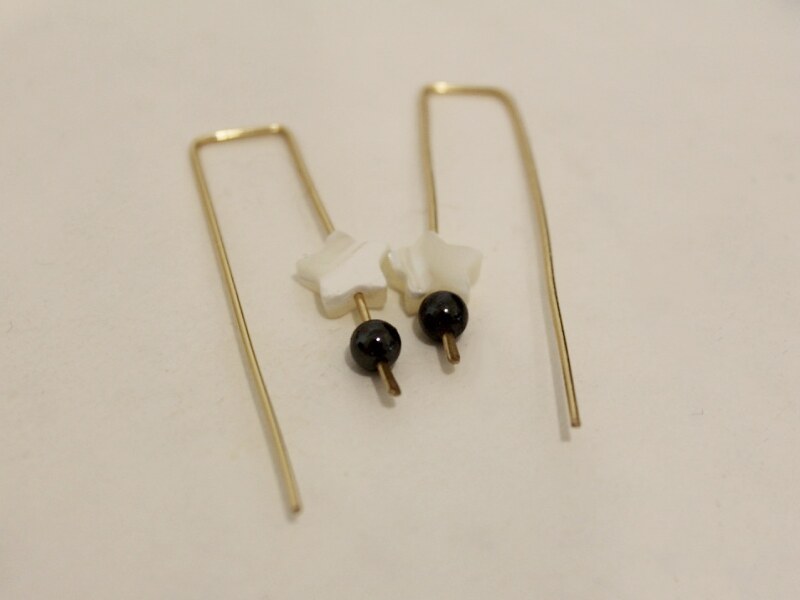
8: If your wire had some curve to it like mine did you can straighten it out gently using your pliers and fingers.
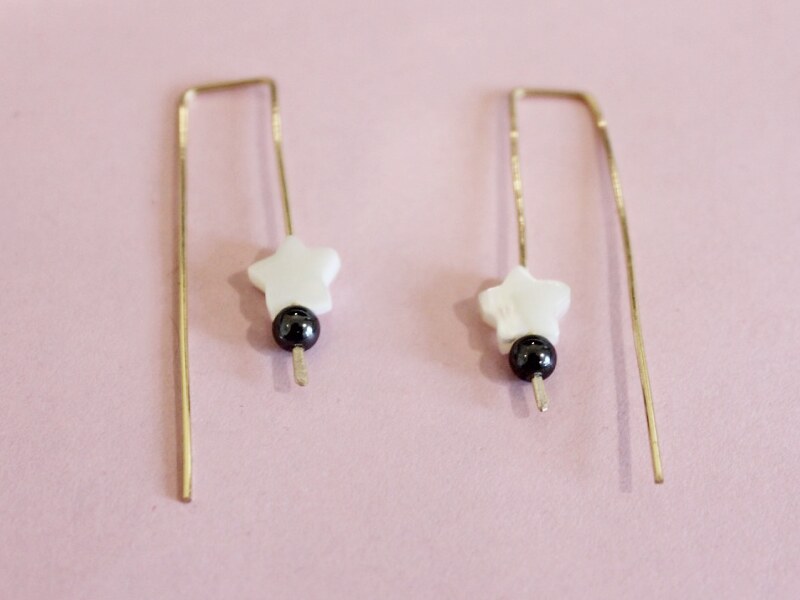
Once your earrings are straight then they are finished and ready to wear! How amazing are they? So delicate and simple.
-
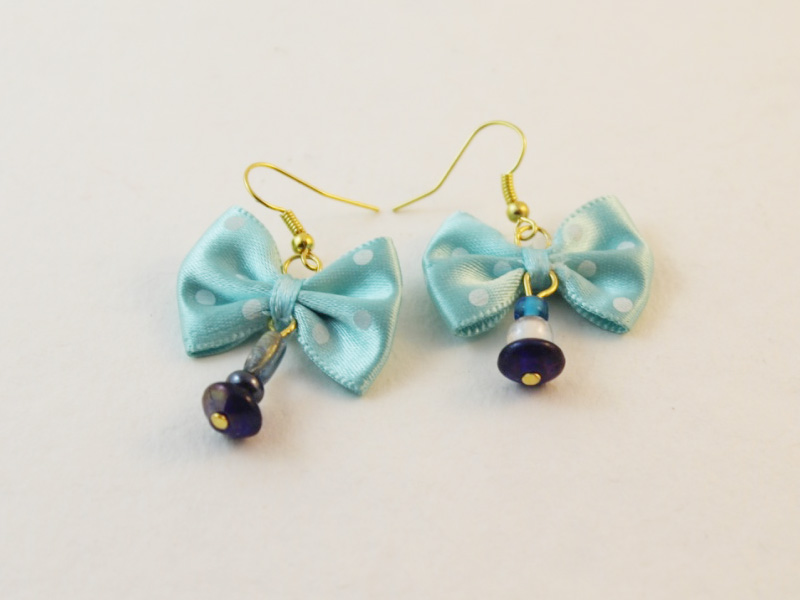
These loopy earrings are great!
These loopy beaded earrings look so lovely! Make some using your favorite colors today! contains affiliate links.
You will need the following tools and materials to make these loop earrings:
1: Pliers. You will need your cutting pliers, flat nose pliers and round nose pliers to make these earrings.
2: Two pieces of tiger tail wire.

3: Eight crimp beads.
4: Two charm connector earrings.
5: Two large jump rings.
6: Two small jump rings.

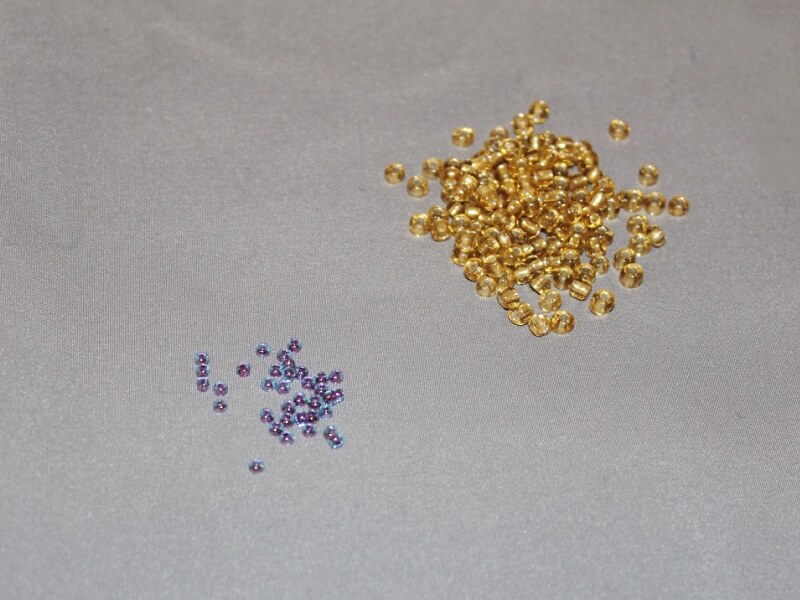
7: Beads of your choice. I used these yellow glass e-beads and purple glass seed beads.
Follow these steps to make your loop earrings:
1: Add two crimp beads to the end of one of the pieces of tiger tail wire.
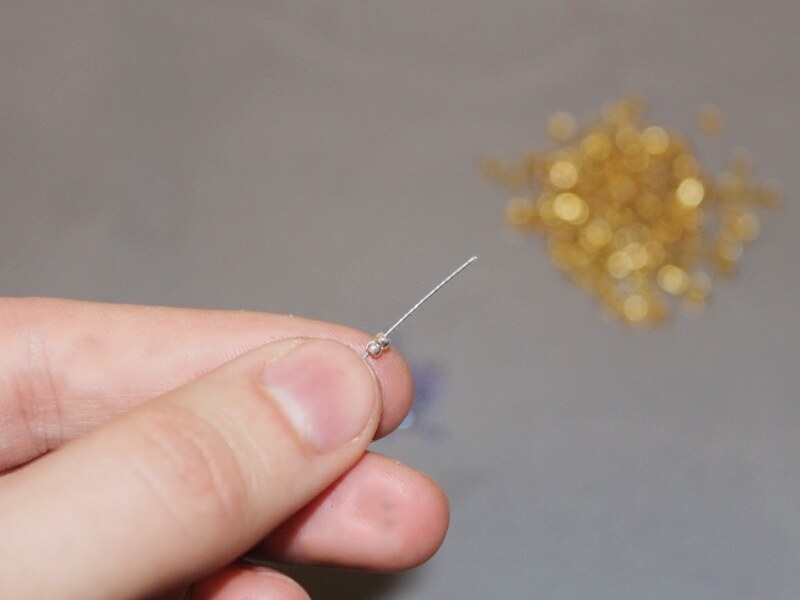
2: loop the end of the wire around one of the large jump rings and back through the crimp beads.
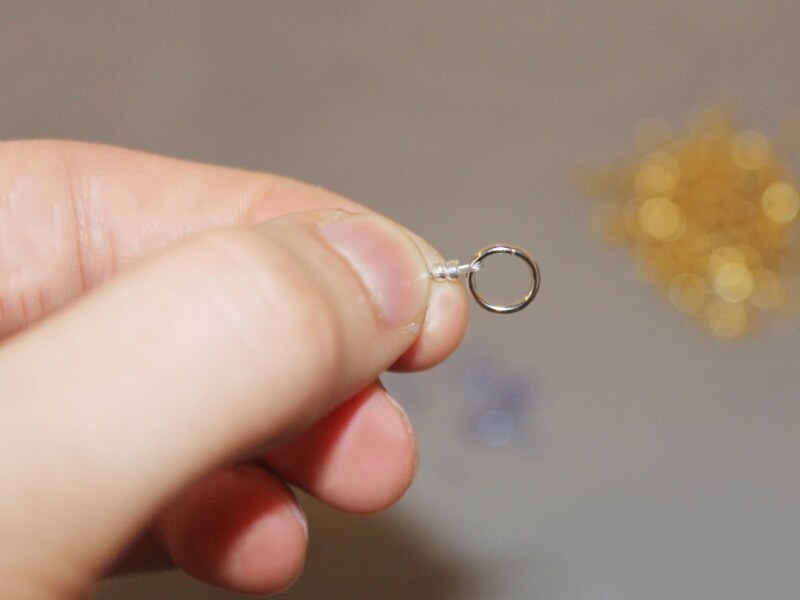
3: Squash the crimp beads using the flat nose pliers.


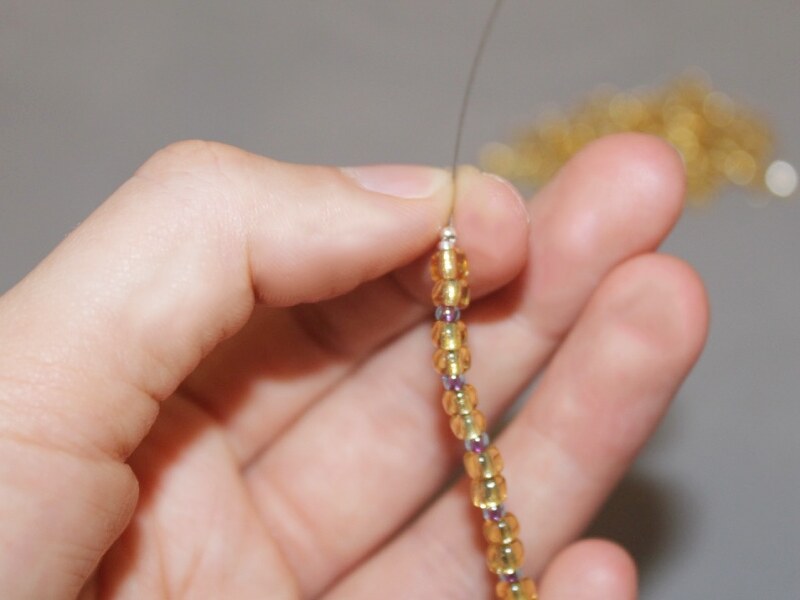
4: Begin adding beads in your pattern of choice.

5: Continue beading until you’ve reached your desired length, leaving approximately 5cm of wire exposed.

6: Add another two crimp beads and loop the end of the wire around the other side of the jump ring and back through the crimps.

7: Squash the crimp beads using the flat nose pliers.

8: Trim the remaining wire using the cutting pliers.

9: Repeat steps 1 to 8 for the second earring making sure that the beaded sections follow the same pattern and are the same length.

10: Add a smaller jump ring to the top of each beaded loop.

11: Attach each beaded loop to each of the charm connector earrings and close the small jump rings to secure the earrings to the loops.
Once both earrings are secured to your beaded loops they are ready to wear!
-
The necklace you’ve always needed, here’s how to make a beaded curve necklace

This necklace is made using some memory wire and colorful beads added in a cool pattern.
You will need the following tools and materials to make this necklace:
1: Pliers. You will need your cutting pliers, flat nose pliers and round nose pliers to make this necklace.
2: Two pieces of cord.

3: Four crimp ends.

4: Four jump rings.

5: A piece of necklace length memory wire cut into a half circle.

6: A lobster clasp.

7: Beads of your choice. I used these different colored seed beads.

Follow these steps to make your beaded curve necklace:
1: Create a loop at one end of the memory wire using the round nose pliers.


2: Begin adding seed beads in your pattern of choice.

3: Continue adding beads until there is approximately 1cm (o.4 inches) of un-beaded wire.

4: Create a loop at the other end using the round nose pliers, this will secure the beads on the wire.


5: Add a crimp end to each end of the two pieces of cord. Do this by folding each side of the crimp around the cord using the flat nose pliers.


6: Attach each of the cords to either side of the beaded wire using two of the jump rings.


7: Add one of the jump rings to the other end of one of the cords and attach the lobster clasp. Secure the clasp in place by closing the jump ring.

8: Add the remaining jump ring to the other side of the necklace on the end of the second cord. Once you’ve attached this jump ring, the necklace is finished and ready to wear!


Here’s another version I made using leather cord and smoky quartz feature beads.

-
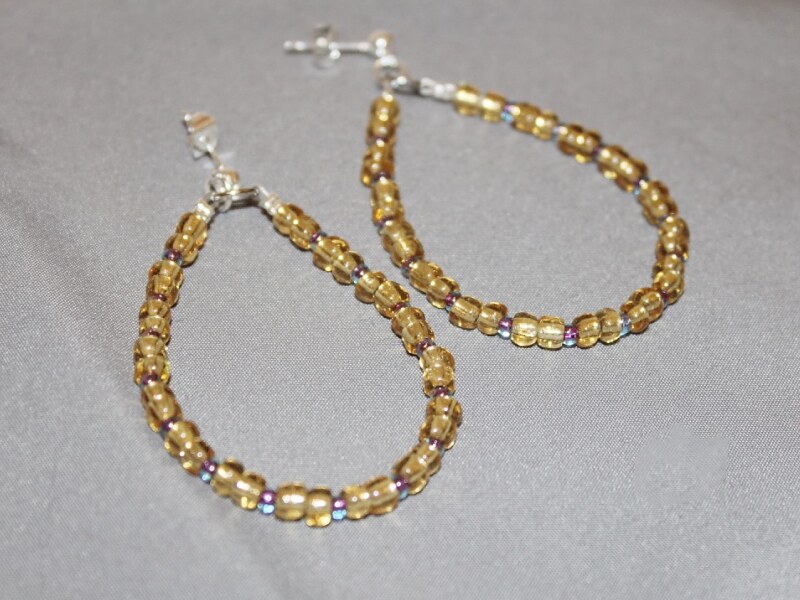
Hoops are in! Here’s how to make some beaded hoop earrings.
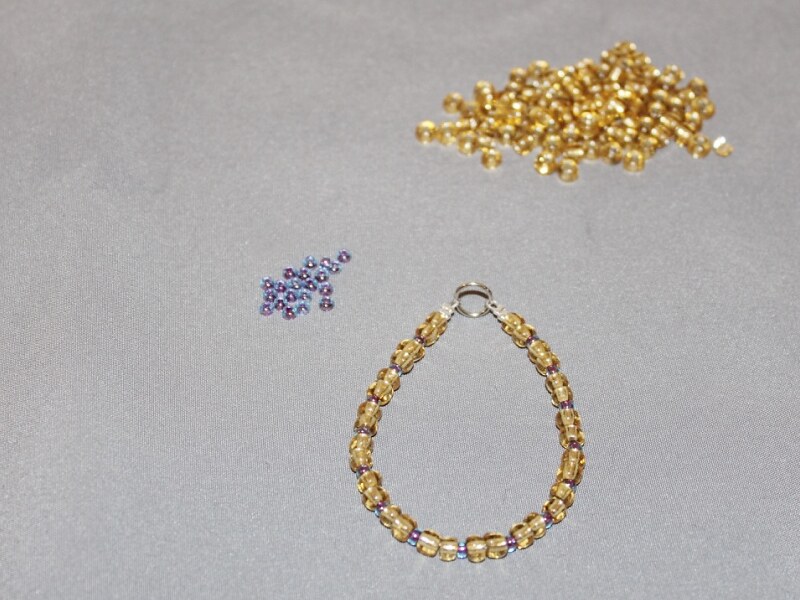
These hoop earrings are as easy to make as they are stunning to wear! I made mine using some pretty yellow glass beads and some bracelet-sized memory wire. contains affiliate links
You will need the following tools and materials to make these earrings:
1: Pliers. You will need your cutting pliers, flat nose pliers and round nose pliers to make these earrings.
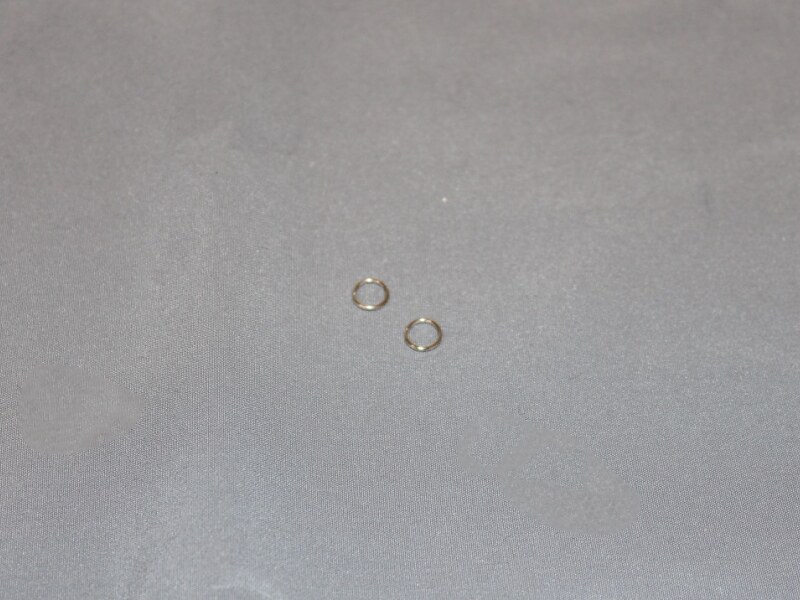
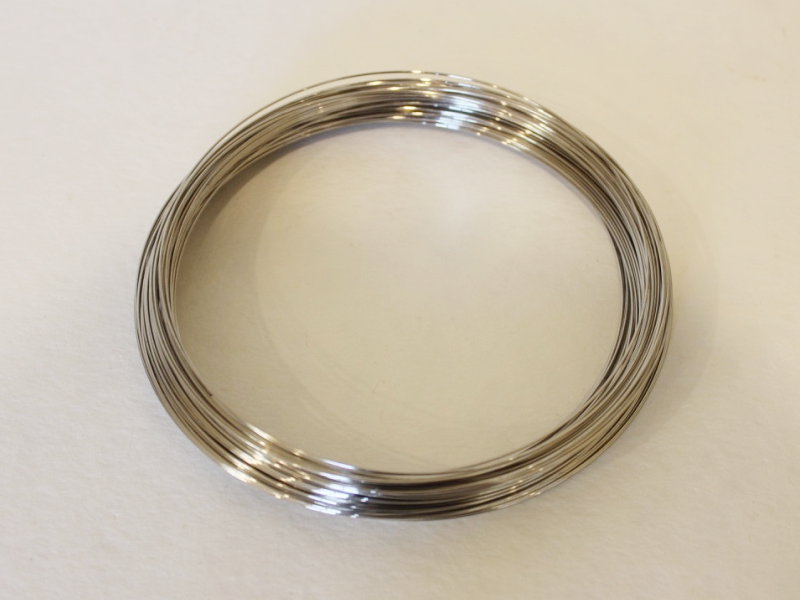
2: Two pieces of memory wire cut to the length of a single circle.
https://flic.kr/p/TEfEdz
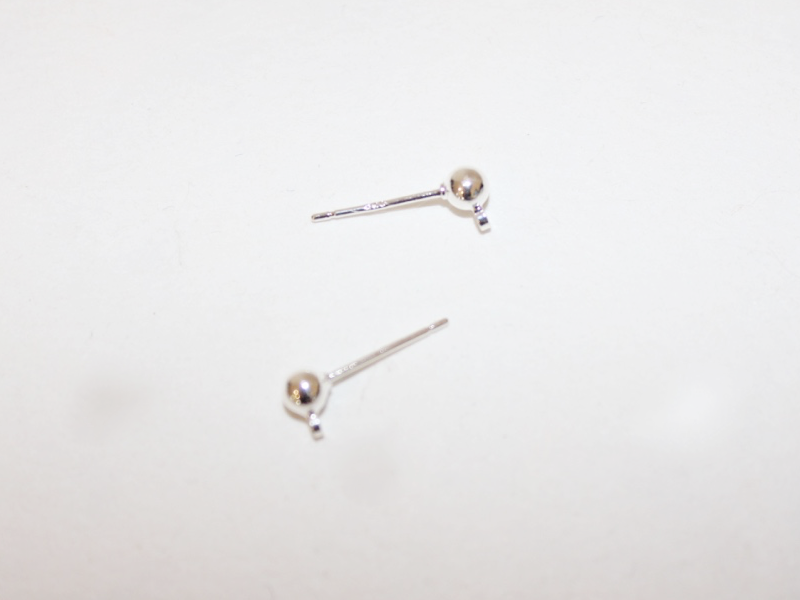
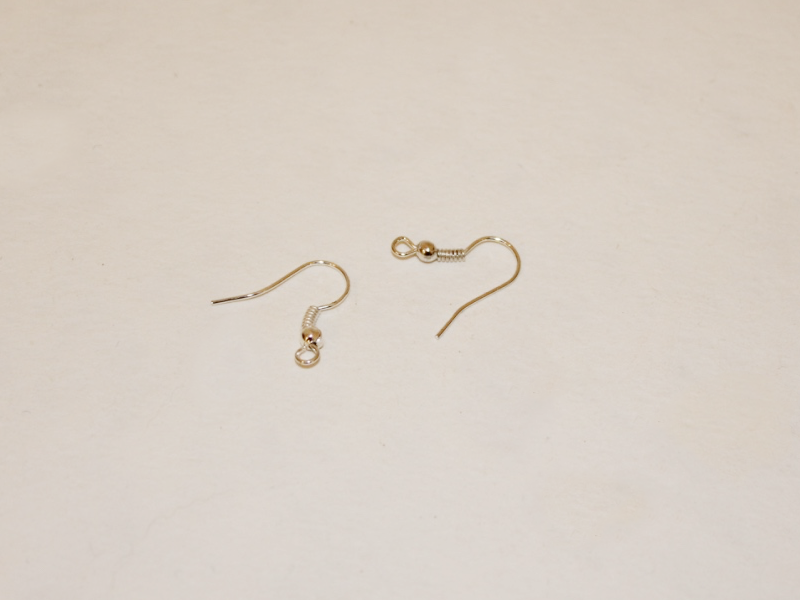
3: Two earring hooks.
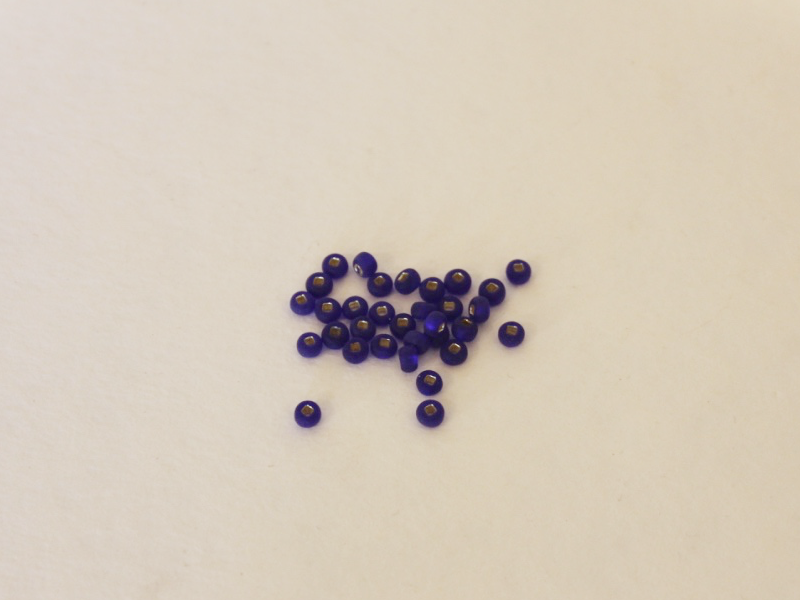
4: Beads of your choice. I used these yellow glass e-beads.
Follow these steps to make your beaded hoop earrings:
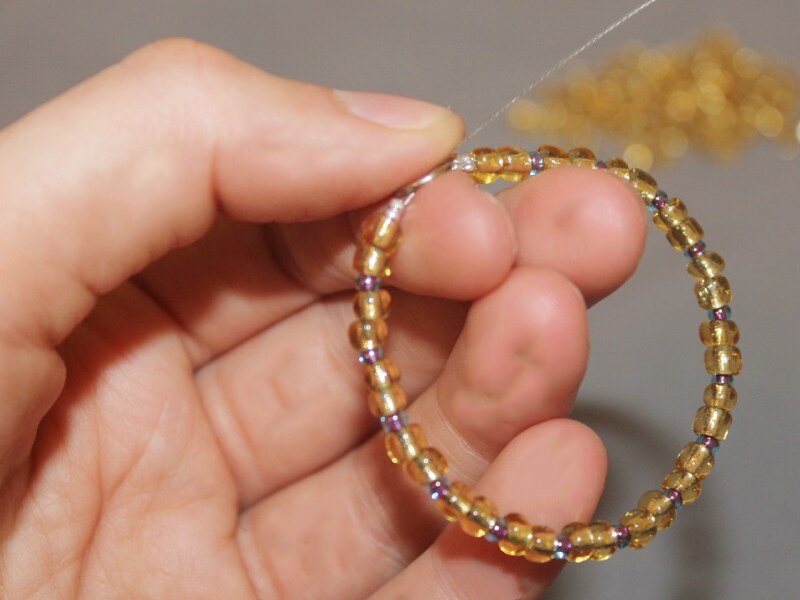
1: Create a loop at one end of the memory wire circle using the round nose pliers.


2: Add beads to the memory wire.

3: Continue adding beads until there is approximately 1cm (0.4 inches) left without beads.

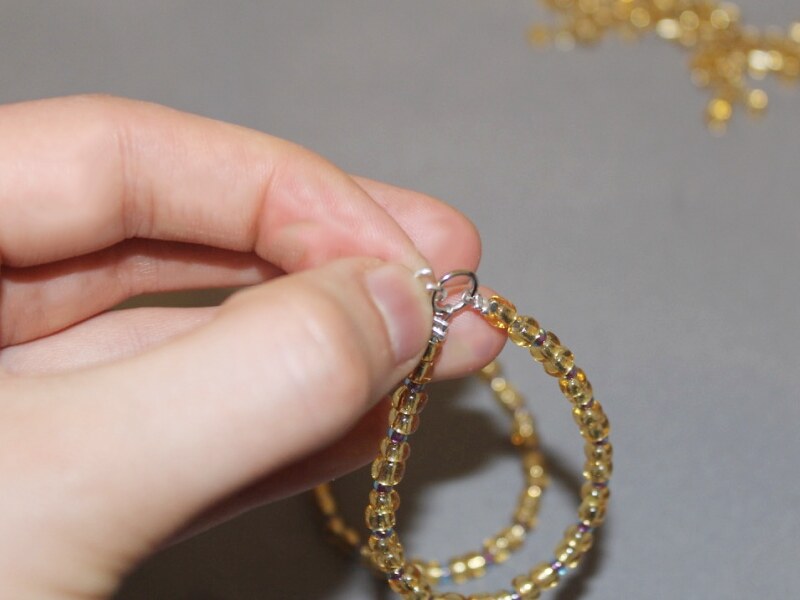
4: Create half a loop using the round nose pliers. Hook it around the first loop.


5: Close the second loop using the round nose pliers to secure the ends of the hoop together.

6: Add an earring hook to the top of the hoop and close it to secure it in place.

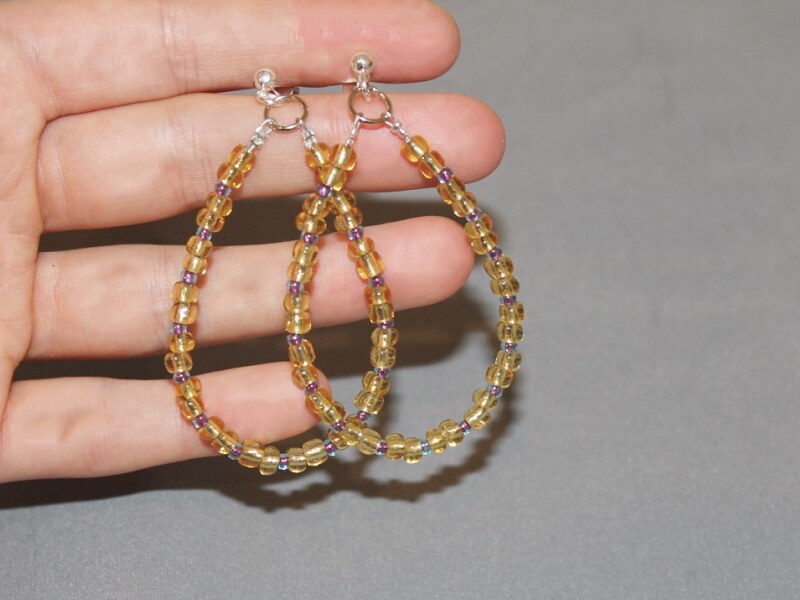
7: Repeat steps 1 to 6 for the second earring.

How cute are these? What colors will you make your hoops in?
-
Use Memory Wire To Construct A Cool Beaded Collar
Memory wire is a great material. It comes in different sizes so you can make beautiful jewelry without having to fiddle with extra findings.
You will need the following tools and materials to make your memory wire collar necklace.
1: Pliers. You will need your cutting pliers and round nose pliers.


You can get jewelry pliers here:
2: Necklace length memory wire.
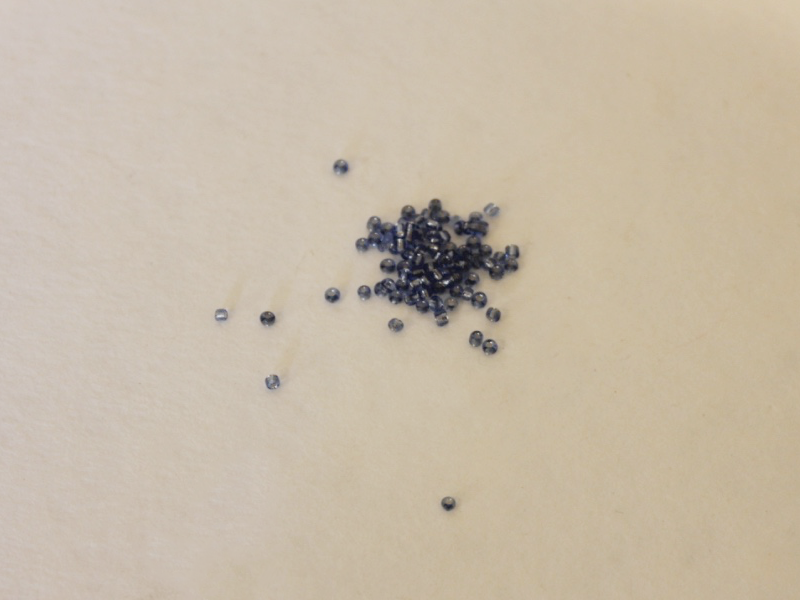
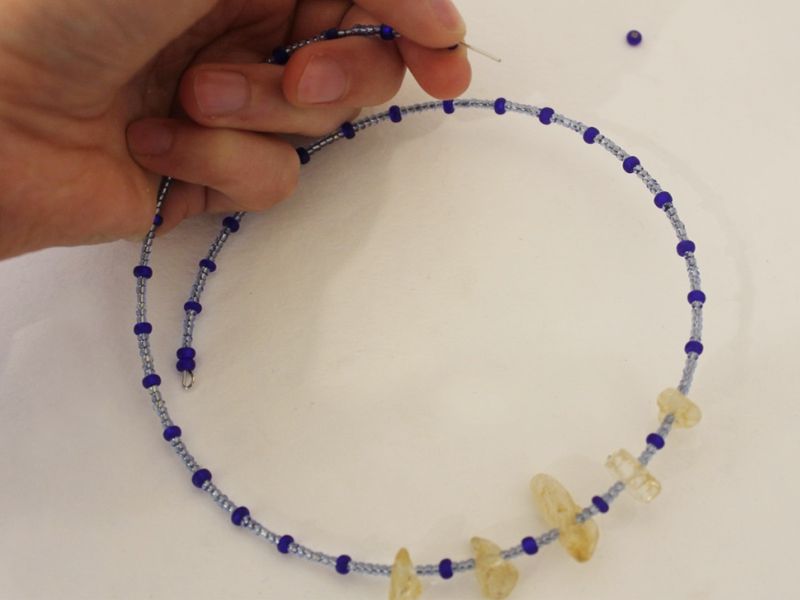
3: Beads of your choice. I used these citrine gemstone beads, frosted blue e-beads and blue glass seed beads.

Follow these steps to make your own memory wire necklace:
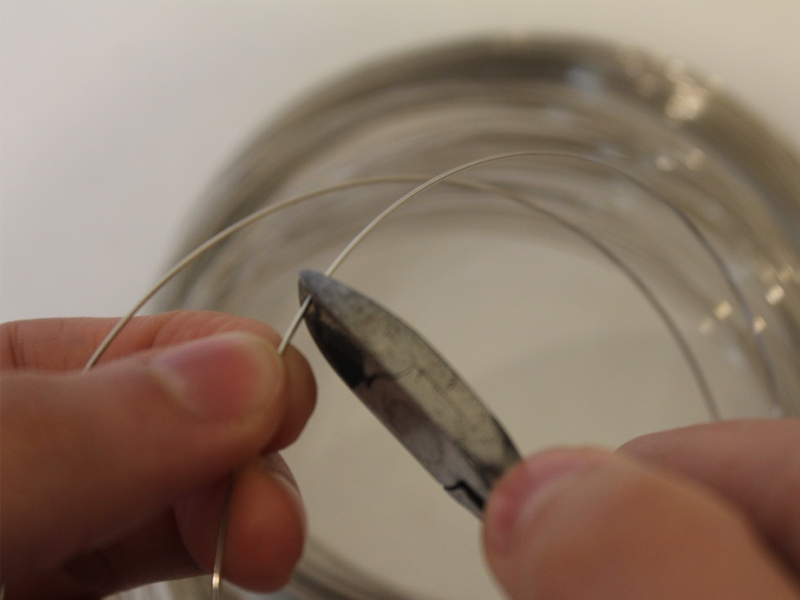
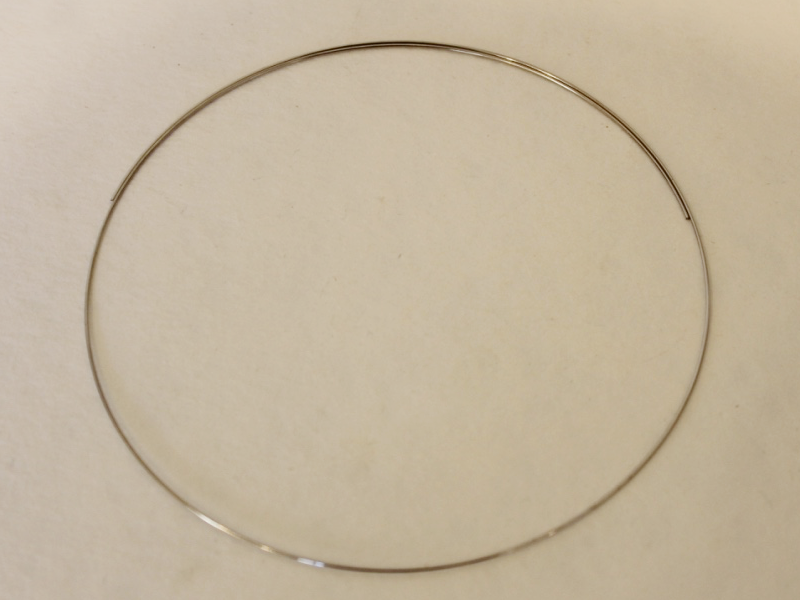
1: Cut the memory wire to length, make sure there is a bit of overlap on either side so that the necklace will stay on your neck when worn.
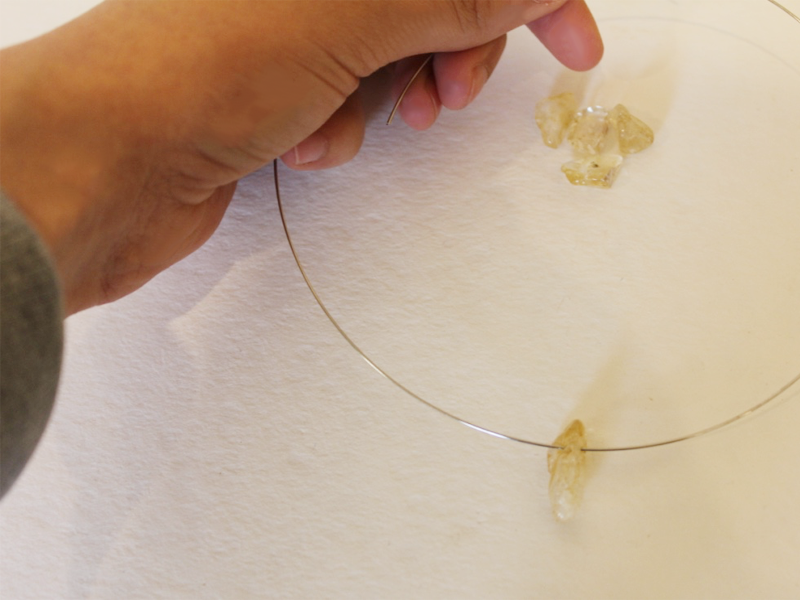
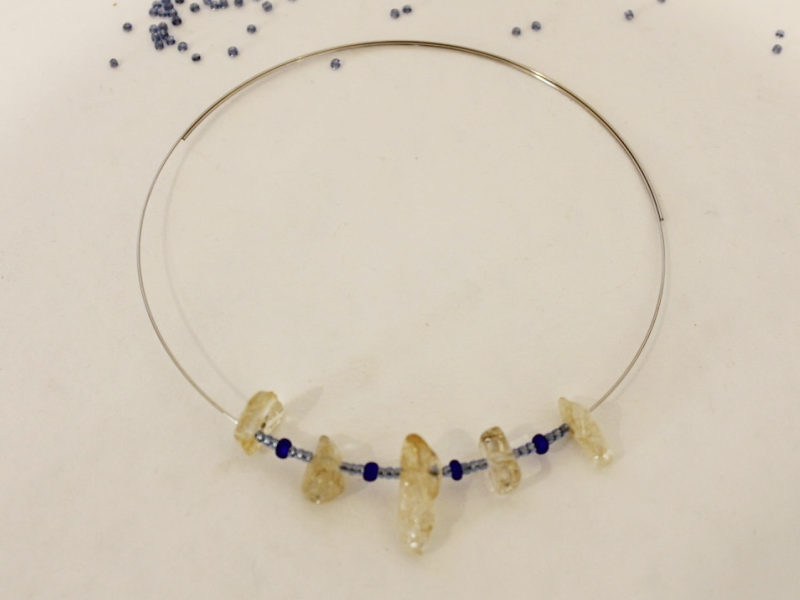
2: Begin adding beads. Add the feature beads first so that you can position them in the center of the necklace.
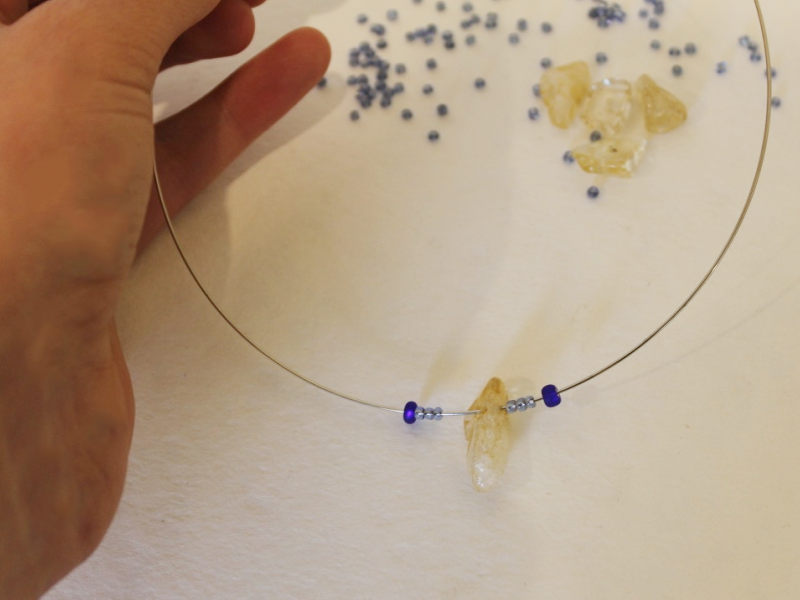
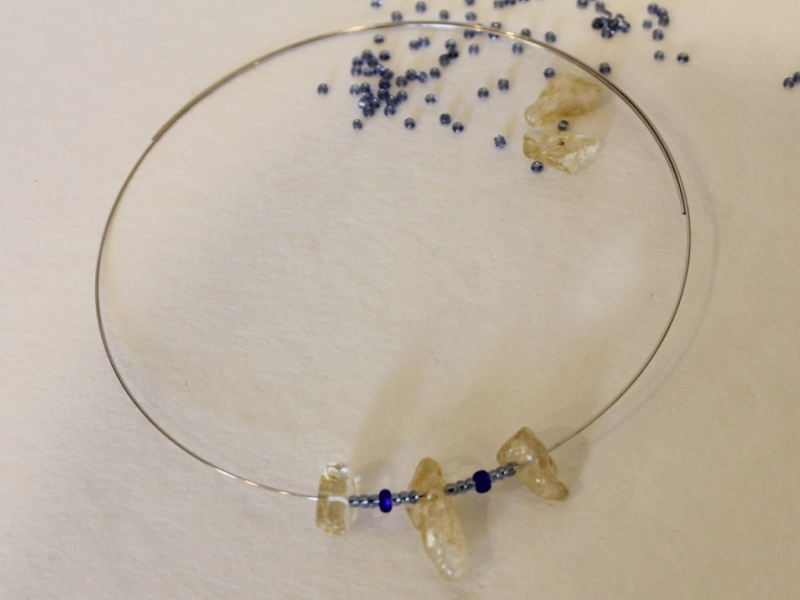
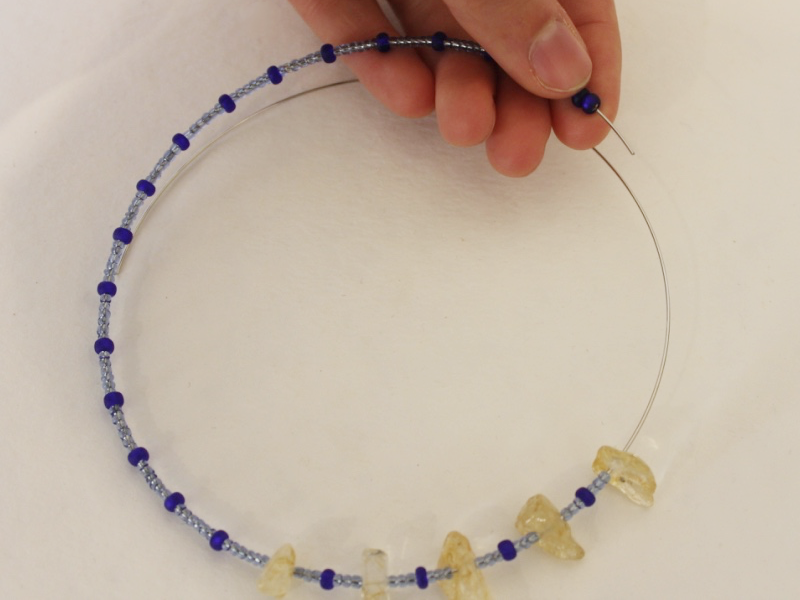
3: Once all the feature beads have been added, continue beading in your desired pattern on one side of the necklace, finishing close to the end of the wire.
4: Use the round nose pliers to bend the wire at a right angle to the beads.
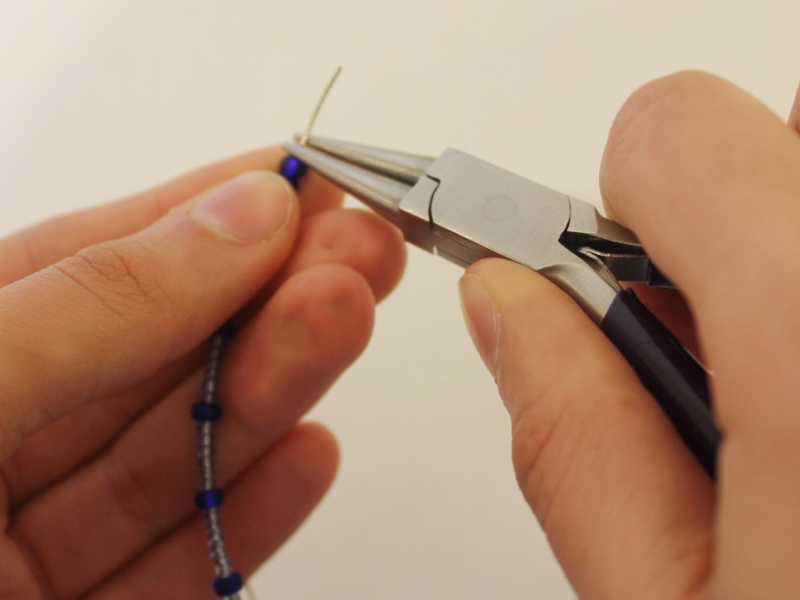
5: Then use the round nose pliers again to create a loop at the end of the necklace and secure the beads in place.

6: repeat steps 3 to 5 on the other side of the necklace.
Once the other end of the necklace is secured your collar is complete! Wear it with pride.

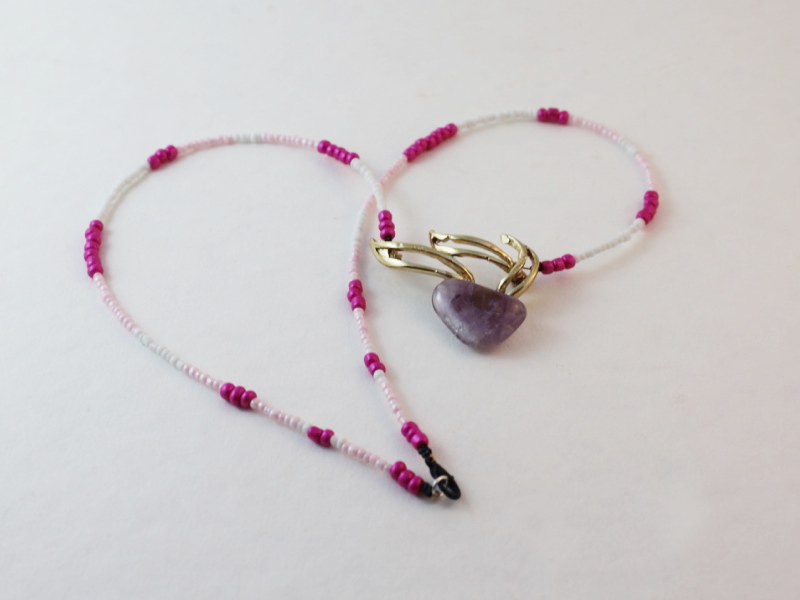
Here is another memory wire collar made with amethyst chip beads and yellow e-beads.

-
Can’t Get Enough of the Choker Trend? Here’s Another Cool Choker Design to Add to Your Collection!

Everyone knows that chokers are the IT accessory right now. If you can’t get enough of the choker trend and want to make sure that you stand out from the crowd this chain and suede choker design is for you. This choker might be simple to make but it sure does have a big impact!
You will need the following tools and materials to make this suede and chain choker:
1: Pliers. You will need your cutting pliers (or scissors), flat nose pliers and round nose pliers to make this choker.

2: Suede cord. I already cut mine to length. Make each piece a tiny bit shorter than you think you need so that the choker will fit snugly on your neck once the charm connector and clasp have been added.

3: Two pieces of chain trimmed to the same length as the suede.

4: Four leather crimp ends.

5: Eight small jump rings.

6: Two charm connectors.

7: Two large jump rings.

8: One Lobster Clasp.
Follow these steps to make your own stunning suede and chain choker necklace:
1: Attach a crimp end to either end of both pieces of suede cord. Do this by using the flat nose pliers to fold both sides of the crimp end in place around the end of the suede cord.


2: Open a jump ring and attach one end of a suede cord to one of the loops of the charm connectors.

3: Close the jump ring to secure the strand in place.

4: Add a piece of chain using another jump ring. This will be the second strand.
5: Repeat steps 2 and 3, adding the second suede strand.
6: Repeat step 4, adding the last piece of chain to the first charm connector. Now all four strands will be secured together at one end.

7: Repeat steps 2 to 6 for the other side of the necklace, attaching all strands to the second charm connector.

8: Add one of the large jump rings to one end of the choker and attach the lobster clasp. Secure the clasp in place by closing the jump ring.

9: Add another jump ring to the other side of the choker to finish it off.

Once the last jump ring is secured in place your multi-strand suede and chain choker is complete!

Here’s another multi-strand choker made using beaded strands.


-
Want create a beaded necklace that drapes beautifully? This one is for you!
Sometimes head pins don’t give you the look you want for your DIY necklace designs. When you want to add a beaded section to your jewelry chain tiger tail wire can be the perfect material to give you the finish you want. Here are the instructions for making a flexible beaded charm for your pretty chain necklaces!

You will need the following tools and materials to make this beaded tiger tail charm necklace:
1: Pliers. To make this necklace you will need your flat nose pliers and cutting pliers.
2: Tiger tail wire. I used this bronze colored tiger tail wire.

3: Four gold colored crimp beads.

4: A length of chain. I used this gold plated chain.

5: Two gold colored jump rings.

6: One gold colored toggle clasp.

7: Beads of your choice. I used these turquoise tear drop beads with some purple glass seed beads and blue metallic glass seed beads.


Follow these steps to make the necklace:
1: Cut a length of tiger tail wire using the cutting pliers. This length of wire will add to the overall length of the necklace.


2: Bend the tiger tail wire around the first loop of the piece of chain.

3: Add two crimp beads to the wire.

4: Use the flat nose pliers to squash the crimp beads and secure the tiger tail wire in place so that it is ready for you to add the beads.

5: Once the crimp beads have been squashed begin adding the beads onto the piece of wire.

7: Continue adding beads in your desired pattern.

8: Once all the beads are in place add another two crimp beads to the end of the tiger tail wire.

9: Loop the end of the wire through the other end of the necklace chain and back through the crimp beads.

10: Use the pliers to pull the wire tight and then squash the crimp beads in place.
11: Trim the excess wire using the cutting pliers.


12: Split the center of the necklace chain at the top of the necklace.

13: Add a jump ring and one side of the toggle clasp to one end of the split chain. Secure the clasp in place by closing the jump ring.


14: Add the other side of the toggle clasp as you did in step 13.

15: Once your clasp has been secured in place your necklace is finished. Pop it on and have some fun!


Here’s another tiger tail chain necklace made with rutilated quartz and gold chain!


-
Add some fun to your wrist, make this fun pom pom bracelet

Sometimes you need a bit of fun and vibrancy in your life. Sometimes it can be hard to find but making this sweet pom pom bracelet might just do the trick! This bracelet is made using memory wire and some brightly colored pom poms.
You will need the following tools and materials to make this special pom pom bracelet:
1: Pliers. You will need your round nose pliers, cutting pliers, and flat nose pliers to make this bracelet.
2: Memory wire.

3: Pom Poms. I used five pom poms in pink and yellow.

4: Beads of your choice. I used some green glass e-beads and some purple glass seed beads.


Follow these steps to make your pom pom bracelet:
1: Cut some memory wire. The amount you cut depends on how many times you want the bracelet to wrap around your wrist.

2: Use the round nose pliers to curl one end of the memory wire into a loop. You might need to use your flat nose pliers to properly close the wire loop.


3: Begin adding beads to the memory wire in your desired pattern.

4: When you are ready, add your first pom pom.

5: Continue beading and adding pom poms until you are satisfied with the pattern you have created.

6: If you are like me you might have some excess wire to trim away before you can complete your bracelet.

7: Bend the wire at a right angle to the beaded section of the bangle using the round nose pliers.

8: Trim the wire approximately 1cm (0.4 inches) from the beaded part of your bracelet using the cutting pliers.

9: Create a loop at the other end of the bracelet using the round nose pliers again.

10: Once the final loop has been completed your bracelet is done! I hope making and wearing this bracelet design will give you a little happiness.

-
Add to your wrist stack, construct some charm connector bangles today!
Are your daily bangles feeling boring? Do you need something fresh to add to your accessories collection? Well then have I got the tutorial for you! This bangle featuring a chunky charm connector gives a stunning effect and looks incredible when layered with other different bracelets.
You will need the following tools and materials to make this charm connector bangle:
1: Pliers. You will need your cutting pliers and round nose pliers to make this bangle.
2: Wire. I used some thick malleable wire in a silver color.

3: A charm connector. I used this simple silver colored charm connector. Style your bangle with these pretty connector charms:
4: Beads of your choice. I used a selection of wooden beads in different shapes and colors.


Follow these steps to make your charm connector bangle:
1: Measure out a length of wire that will fit comfortably around your wrist. Cut it to length using the cutting pliers.


2: Bend a small section of the end of the wire into a loop. This will prevent your beads from falling off the wire.

3: Begin adding beads to the wire in the pattern of your choice.

4: Once your beading has been completed, use the round nose pliers to bend the end of the wire at a right angle to the beaded section.

5: Trim the excess wire using the cutting pliers and then use the round nose pliers to create another loop at the end of the wire to secure the beads in place.


6: Open one loop slightly using the pliers and place the charm connector onto one side of the bangle. Secure the charm connector in place by closing the loop again.


7: Repeat step 6 for the other side of the bangle, securing the charm connector in place.

8: Now your bangle is finished and ready to pop on your wrist. Will you stack your bangles high or let it shine on its own? Style it your way and make this design your own!