-
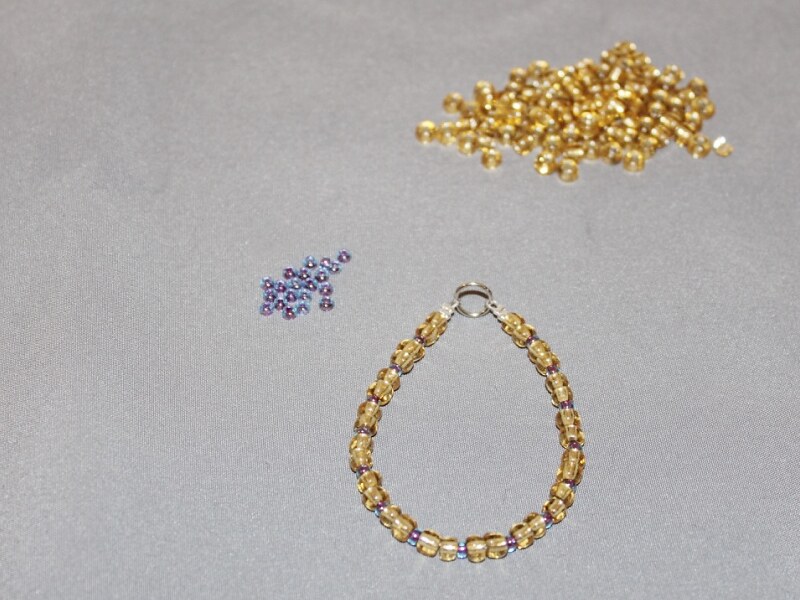
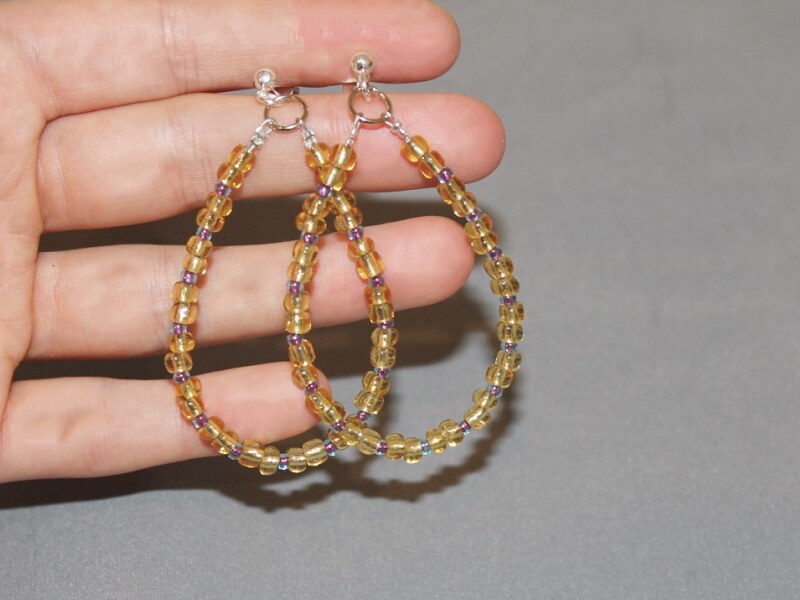
These loopy earrings are great!

These loopy beaded earrings look so lovely! Make some using your favorite colors today! contains affiliate links.
You will need the following tools and materials to make these loop earrings:
1: Pliers. You will need your cutting pliers, flat nose pliers and round nose pliers to make these earrings.

2: Two pieces of tiger tail wire.

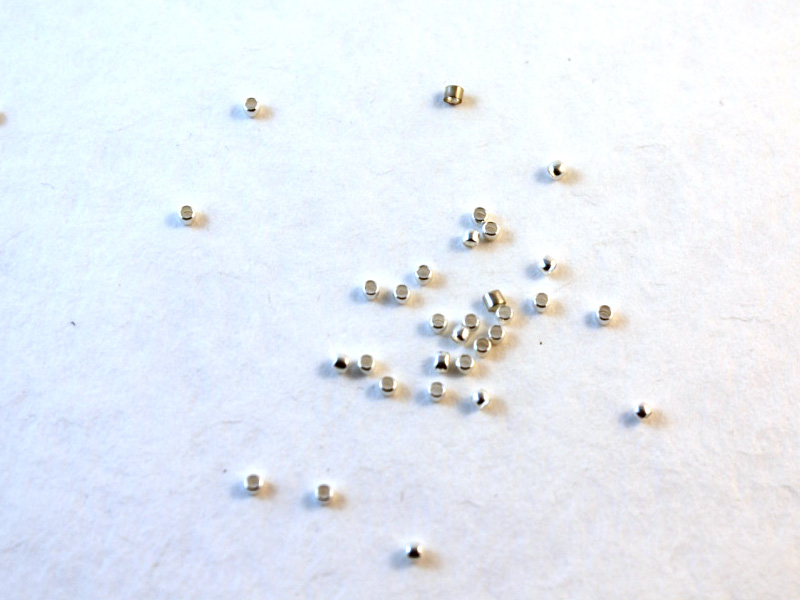
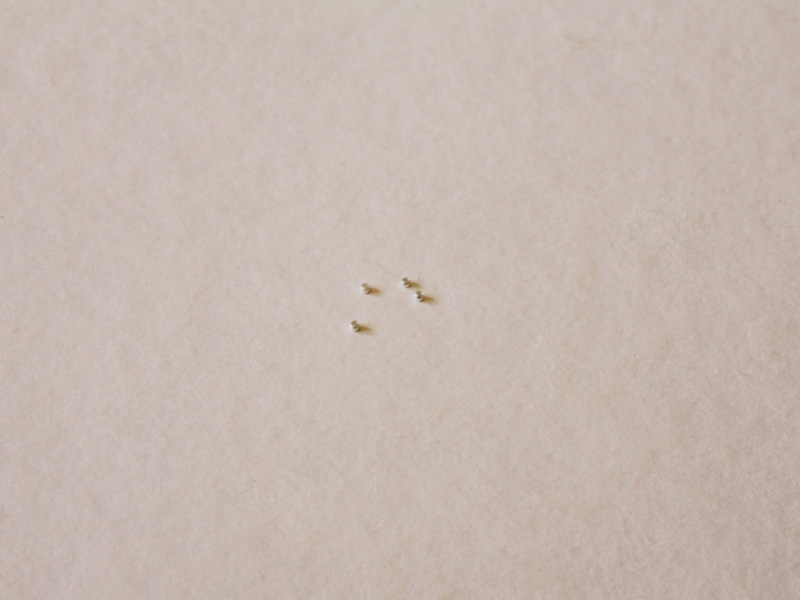
3: Eight crimp beads.
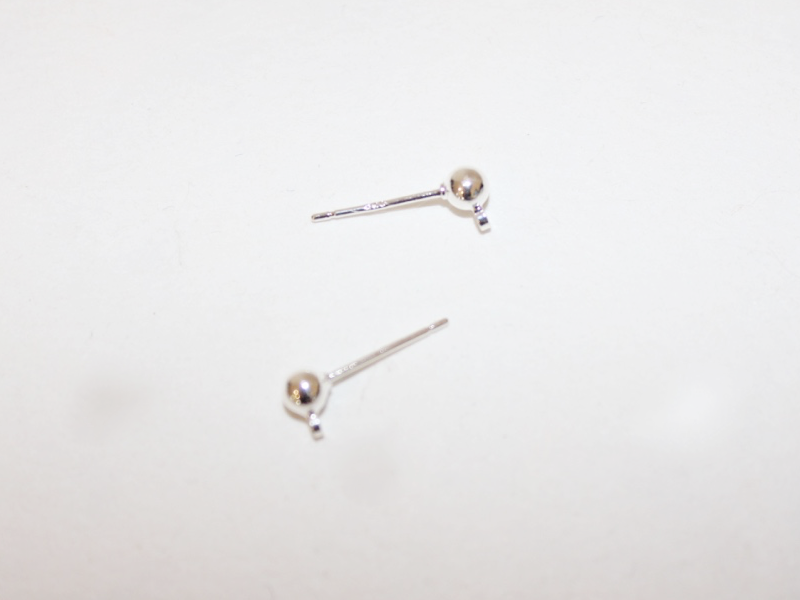
4: Two charm connector earrings.
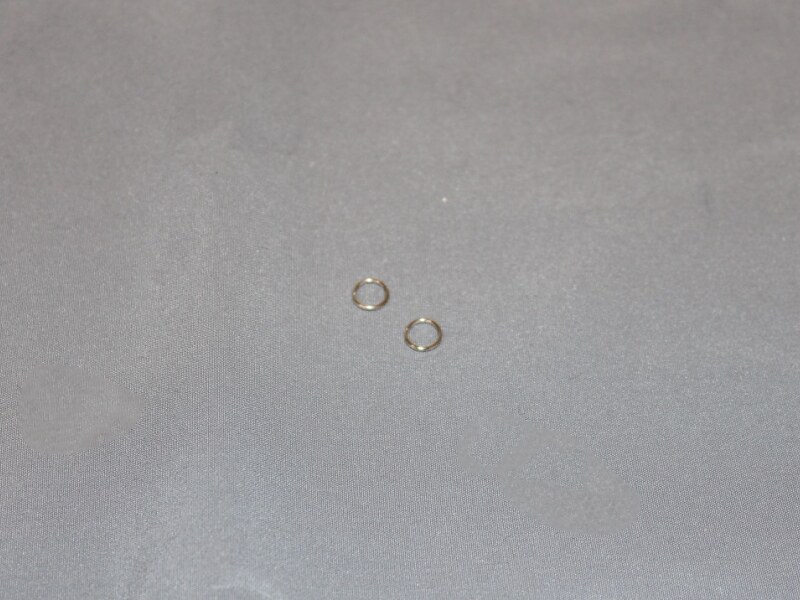
5: Two large jump rings.
6: Two small jump rings.

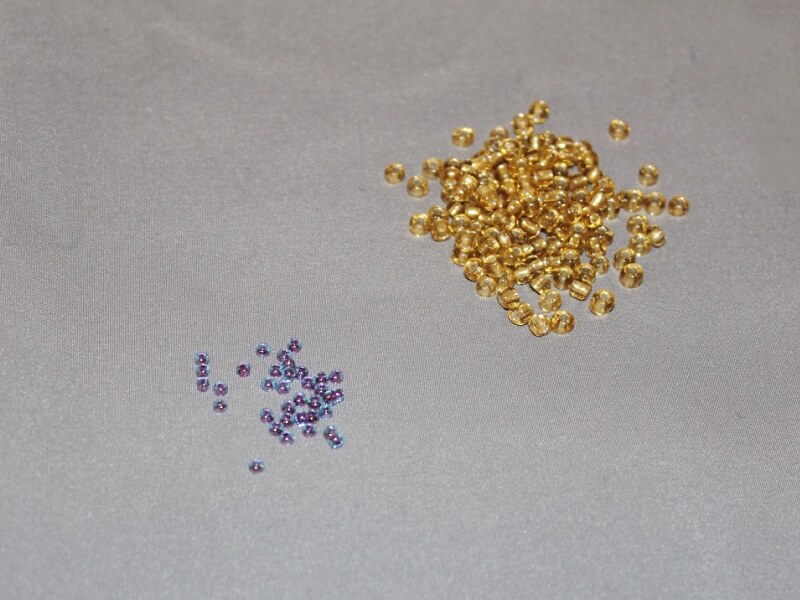
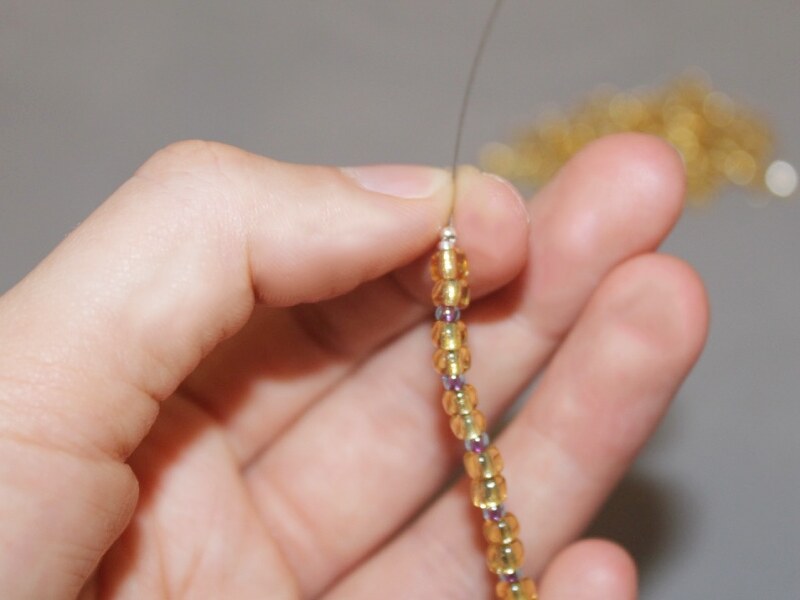
7: Beads of your choice. I used these yellow glass e-beads and purple glass seed beads.
Follow these steps to make your loop earrings:
1: Add two crimp beads to the end of one of the pieces of tiger tail wire.
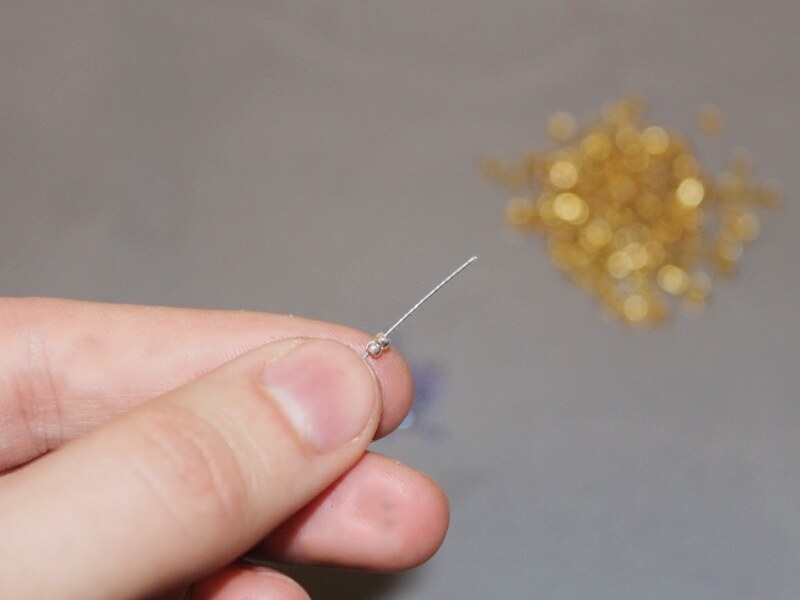
2: loop the end of the wire around one of the large jump rings and back through the crimp beads.
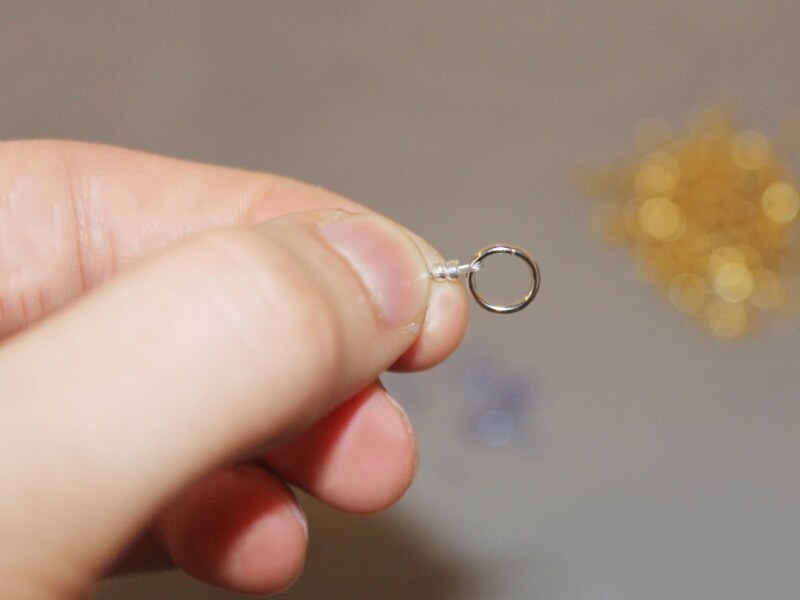
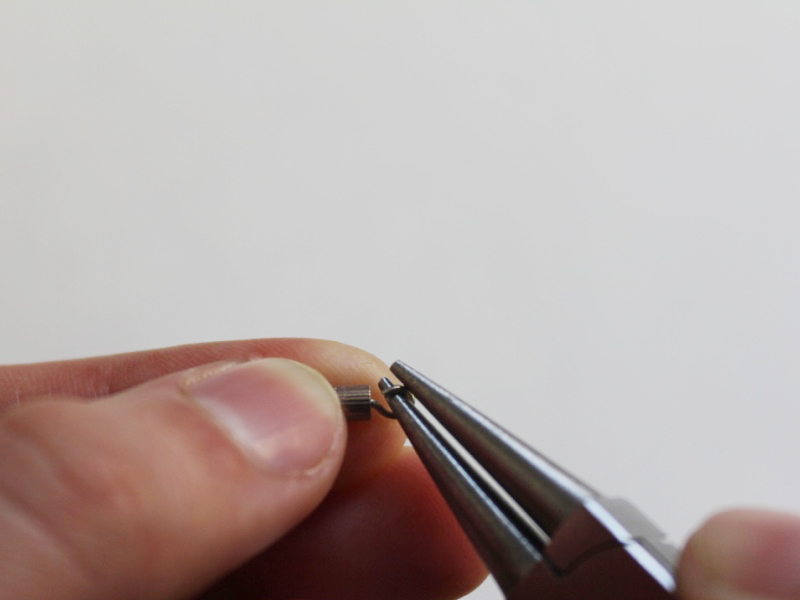
3: Squash the crimp beads using the flat nose pliers.


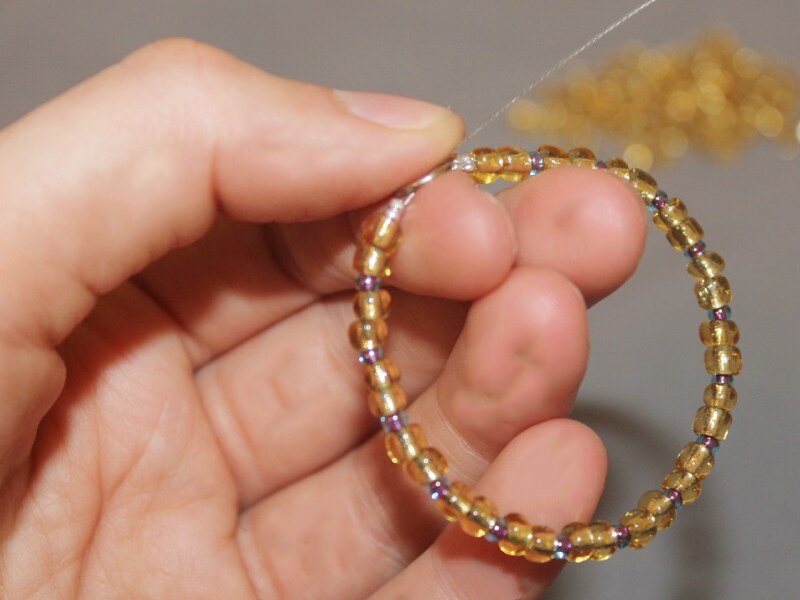
4: Begin adding beads in your pattern of choice.

5: Continue beading until you’ve reached your desired length, leaving approximately 5cm of wire exposed.

6: Add another two crimp beads and loop the end of the wire around the other side of the jump ring and back through the crimps.

7: Squash the crimp beads using the flat nose pliers.

8: Trim the remaining wire using the cutting pliers.

9: Repeat steps 1 to 8 for the second earring making sure that the beaded sections follow the same pattern and are the same length.

10: Add a smaller jump ring to the top of each beaded loop.

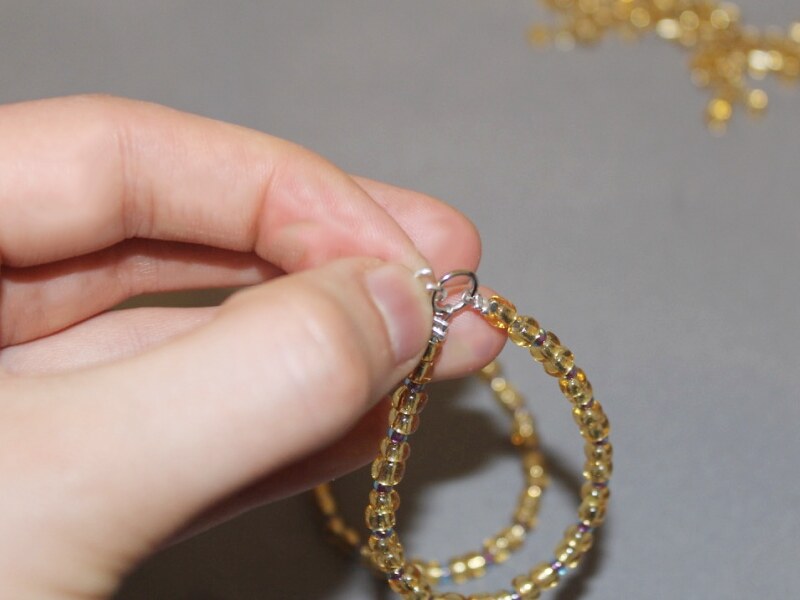
11: Attach each beaded loop to each of the charm connector earrings and close the small jump rings to secure the earrings to the loops.
Once both earrings are secured to your beaded loops they are ready to wear!
-
Want create a beaded necklace that drapes beautifully? This one is for you!
Sometimes head pins don’t give you the look you want for your DIY necklace designs. When you want to add a beaded section to your jewelry chain tiger tail wire can be the perfect material to give you the finish you want. Here are the instructions for making a flexible beaded charm for your pretty chain necklaces!

You will need the following tools and materials to make this beaded tiger tail charm necklace:
1: Pliers. To make this necklace you will need your flat nose pliers and cutting pliers.


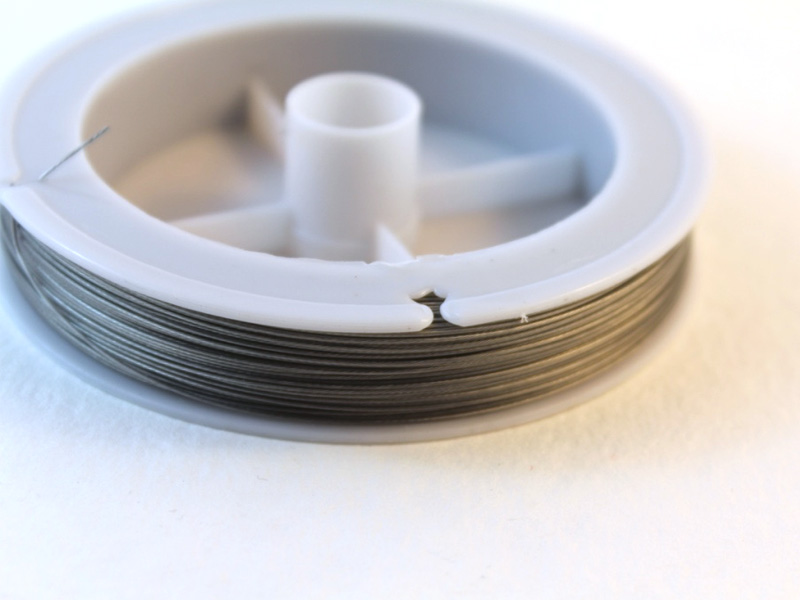
2: Tiger tail wire. I used this bronze colored tiger tail wire.

3: Four gold colored crimp beads.

4: A length of chain. I used this gold plated chain.

5: Two gold colored jump rings.

6: One gold colored toggle clasp.

7: Beads of your choice. I used these turquoise tear drop beads with some purple glass seed beads and blue metallic glass seed beads.


Follow these steps to make the necklace:
1: Cut a length of tiger tail wire using the cutting pliers. This length of wire will add to the overall length of the necklace.


2: Bend the tiger tail wire around the first loop of the piece of chain.

3: Add two crimp beads to the wire.

4: Use the flat nose pliers to squash the crimp beads and secure the tiger tail wire in place so that it is ready for you to add the beads.

5: Once the crimp beads have been squashed begin adding the beads onto the piece of wire.

7: Continue adding beads in your desired pattern.

8: Once all the beads are in place add another two crimp beads to the end of the tiger tail wire.

9: Loop the end of the wire through the other end of the necklace chain and back through the crimp beads.

10: Use the pliers to pull the wire tight and then squash the crimp beads in place.
11: Trim the excess wire using the cutting pliers.


12: Split the center of the necklace chain at the top of the necklace.

13: Add a jump ring and one side of the toggle clasp to one end of the split chain. Secure the clasp in place by closing the jump ring.


14: Add the other side of the toggle clasp as you did in step 13.

15: Once your clasp has been secured in place your necklace is finished. Pop it on and have some fun!


Here’s another tiger tail chain necklace made with rutilated quartz and gold chain!


-
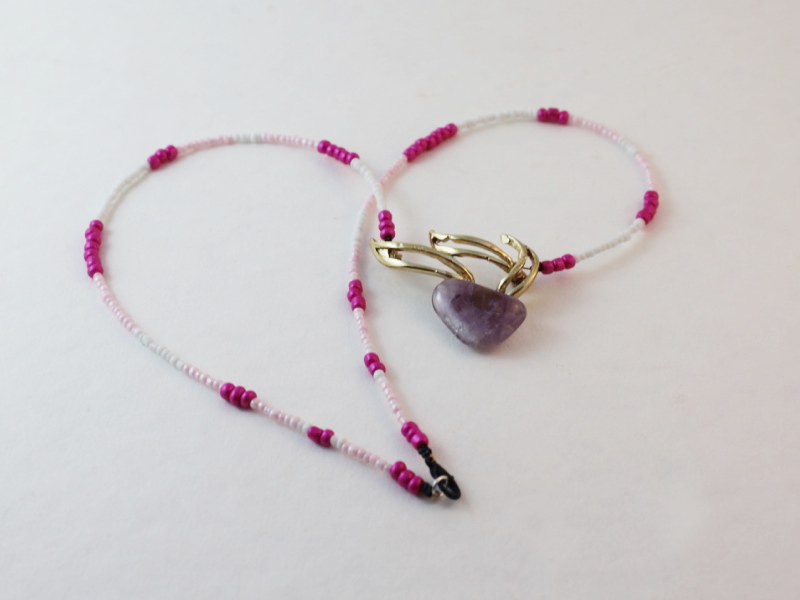
Got Some Old Brooches Hanging Around? Here’s How to Turn them into a necklace Pendant!
I recently acquired some of my grandmother’s old costume jewelry, and among all the beads and clip on earrings I found some wonderful brooches. I am not really a brooch wearer myself so I decided to turn them into something that I would wear, a necklace. Attaching the tiger tail wire to the necklace wire can be a bit tricky, but once you have it in place the rest is smooth sailing. This tutorial is a really fun way to re-purpose and recycle old pieces that you have stashed away in your jewelry box!
You will need the following tools and materials to make a brooch pendant necklace:
1:Pliers. To make this necklace I used the round nose pliers, flat nose pliers and cutting pliers.
2: A brooch. I used this gold colored amethyst broach that was handed down from my grandmother.

3: Tiger tail wire. I used this bronze colored tiger tail wire.

4: Eight crimp beads. I used these black colored crimp beads.

5: One lobster clasp. I used this black colored lobster clasp.

6: One jump ring.

7: Beads of your choice. I used a selection of pink and white glass beads.


The steps for making this broach necklace:
1: The first step is to remove the pin from the back of the brooch. If you want to be able to use it again as a brooch i recommend skipping this step and leaving the pin where it is. To remove the pin you can either try to pull it off using your flat nose pliers or cut it off using the cutting pliers.

2: Cut a length of tiger tail wire long enough to fit comfortably around your neck.

3: Using the cutting pliers, cut the length of tiger tail wire in half. These pieces will be used to make either side of the necklace.


4: Take one piece of tiger tail wire and add two crimp beads to the end. Then wrap the end around the back pin prong on the brooch. Make sure you pull the wire tight around the pin and through the crimps to ensure that it stays in place.

5: Once the loop has been formed, squash the crimp beads using your pliers to secure the strand in place. Because of the way this brooch was formed I needed to use my round nose pliers to squash the crimps but you can also use flat nose pliers to secure the crimps in place.


6: Repeat steps 4 and 5 for the second strand, attaching it to the other pin prong on the back of the brooch.

7: Begin adding beads to one side of the necklace in your chosen pattern.


8: When you reach the end of the first strand, add two crimp beads and the lobster clasp.

9: Loop the tiger tail around the clasp and back through the crimp beads. Make sure you pull it tight before squashing the crimp beads.

10: Once your tiger tail wire has been pulled tight, use the flat nose pliers to squash the crimps and secure the end of the strand.

11: Trim any excess wire using the cutting pliers.


12: Repeat steps 7 to 11 for the second strand, this time adding the jump ring to the end rather than a clasp.


13: Once you have completed the second strand of the necklace your new piece of jewelry is complete! Using a vintage brooch is a great way to make sure that you will have a special design that no one else has. How’s that for exclusive?!
This tutorial contains affiliate links
-
Defy gravity with this floating bead necklace
Do you have a craving for light and delicate jewelry? Do you wish you could be wearing jewelry that feels dainty and special? Well have I got the DIY solution for you! This necklace is as delicate and dainty as it comes, but don’t worry, it’s not going to break on you either. Using some tiger tail wire and some crimp beads, this exquisite necklace comes together in no time. Go ahead, make yourself this lovely necklace today.
You will need the following tools and materials to make this floating bead necklace:
1: Pliers. To make this necklace you will need your cutting pliers and your flat nose pliers.
2: Tiger tail wire.
3: Crimp beads.
4: One lobster clasp.

5: One jump ring.
7: A ruler. You will need this to measure the distance between your beads.

8: Beads of your choice. I used some pearls as the centerpiece of this floating bead necklace and two hematite beads to finish off the ends of the necklace.


Pearls are the epitome of elegance, grab some pearls of your own right here:
The Steps:
1: Measure out a length of tiger tail wire to your desired necklace length. The effect of the floating beads will have a greater impact if you keep your necklace to a collar length.
2: Cut the length of tiger tail wire using the cutting pliers.

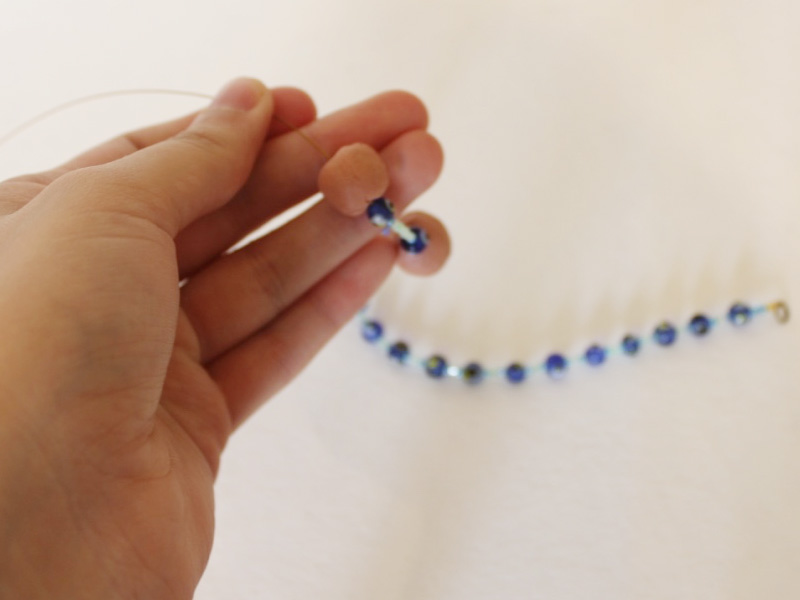
3: Take one bead and thread it onto the tiger tail strand. Pull it through until it is at the center of the piece of tiger tail wire.

4: Add a crimp bead to either side of the center bead.

5: Use the flat nose pliers to carefully squash the crimp beads either side of the center bead to secure it in place in the middle of the tiger tail wire.


6: Add another crimp bead and use the ruler to work out where to place your next bead. I placed my beads roughly 3cm (approx 1.4 inches) apart.

7: Carefully squash the next crimp place before adding the second bead and crimp bead.

8: Squash the crimp on the other side of the second bead to secure it in place. If you are using pearls like I did be careful not to damage the surface with the pliers.

9: Repeat steps 6 to 8 for the remaining beads, placing them either side of the first center bead that you added to the strand.


10: Once all your beads have been secured in place, add two crimp beads followed by a hematite bead and a final crimp as well as the lobster clasp to the end of the wire. Fold the end of the wire around the lobster clasp and through the crimps and bead.

11: Carefully squash the crimps on either side of the hematite bead to secure the clasp in place.


12: Once the crimps have been secured, use the cutting pliers to trim the excess tiger tail wire.

13: Repeat steps 10 to 12 to secure the jump ring to the other side of the necklace.

14: Once the clasp and jump ring has been secured in place your delicate floating bead necklace is complete. Pop it on for an elegant addition to your daily style.

How will you style this sweet and dainty necklace? Get creative with your style and have fun making!


If you are a lover of modern pearl jewelry, we have a load of amazing tutorials for you:
- Dangly pearl and shell earrings
- Pink pearl and rainbow bead anklet
- Rainbow pearl beaded necklace
- Multi-color beaded pearl hoops
- Pearl tassel hoop earrings
- Plastic and pearl stud earrings
- Chilli and pearl single statement earring
- Brightly colored pearl drop earrings
- Faux pearl bobby pin
- Simple silver pearl threader earrings
- A delicate pearl earring for double pierced earrings
- Faux pearl charm necklace
- Pearl lariat necklace
- Faux pearl and rhinestone statement ring
-
How to Make a Double Strand Necklace, For When One Strand Just Isn’t Enough
This necklace doesn’t have just one beautiful beaded strand, it has two! But don’t let the extra strand fool you, this stunning accessory is super easy to put together. And if you need some inspiration for where to use the beads you made by following my handmade bead tutorial this incredible necklace is a great place to start.
You will need the following tools and materials to make this lovely double strand necklace:
1: Pliers. You will need your round nose pliers, flat nose pliers and cutting pliers to make this necklace.
2: Two jump rings.

If you find yourself fancying the antique brass finish make it a feature of your own designs:
3: One lobster clasp.
4: Tiger tail wire. I used this bronze colored tiger tail wire to make this double strand necklace.

5: Eight crimp beads.

4: Beads of your choice. I used a selection of glass beads in different sizes as well as five handmade clay beads as a feature beads on this necklace.


I love these evil eye beads, you can use them in your own jewelry designs too! Click the link to get your own:

If you are feeling particularly inspired to make your own beads you can order some air dry clay in white or terracotta… too easy!
The Steps:
1: Cut two pieces of tiger tail wire to your desired length. Make sure that one of the pieces is slightly longer than the other to ensure that each strand sits comfortably around your neck when you are wearing your necklace.


2: Add two crimp beads and a jump ring to one end of the first piece of tiger tail wire. (I started with the longest piece of tiger tail wire).

3: Bend the end of the tiger tail wire around the jump ring and through both crimp beads. Pull the wire tight and ensure that the crimp beads are sitting closely to the jump ring.


4: Use the flat nose pliers to squash the crimp beads and secure the jump ring and wire in place.


5: Once the crimp beads have been secured, begin adding beads to the strand of tiger tail wire.

6: Continue beading in your desired pattern. I added 5 large handmade clay beads towards the center of the longer beaded strand.

7: Once the beading has been completed, add two more crimp beads and loop the wire around the second jump ring back through the crimp beads.


8: Pull the wire tight and squash the crimp beads in place using the flat nose pliers.

9: Once the crimp beads have been squashed, use the cutting pliers to trim the excess wire.
10: Once the first strand has been secured, add the second strand to a jump ring at one end of the necklace. Add two crimp beads and loop the tiger tail wire around the jump ring.

11: Squash the crimp beads to secure the tiger tail wire in place using the flat nose pliers.


12: Begin adding beads to the second strand. Continue adding them in your desired pattern until you reach the end of the strand. This strand will be shorter than the first one.
13: Once the beading on the second strand has been completed, add two more crimp beads and loop the end of the tiger tail wire through the jump ring at the other end of the necklace.
14: Pull the wire tight and squash the crimps using the flat nose pliers.


15: Trim the excess tiger tail wire using the cutting pliers.


16: To complete the necklace, open one jump ring and slide on the lobster clasp. Secure the clasp in place by closing the jump ring again.

17: Now your necklace is finished. I bet that making this beauty was far more simple that you thought! How will you style your double stand necklace? You can make this design using lots of different materials and special gemstones, so get creative and make something unique and and special for you!

If you love double strand necklaces we have some more tutorials for you…
- How to make a double chain necklace with bead charms
- How to make a two-tone chain choker
- How to make a double strand necklace from broken headphones
- How to make a double strand string necklace
- How to make a mixed media double strand necklace
This tutorial contains affiliate links.
-
Need Some Valentine’s Day Inspiration? Make Your Honey This Sweet Bracelet
Valentine’s Day is fast approaching and if you are stuck for ideas as to what to get your someone special you might want to give this tutorial a go. This bracelet is super special and easy to make, I made mine using some beautiful rose quartz (the gemstone that is meant to represent unconditional love) but you can use any bead or stone that is special to you and your loved one. Cue the love heart eyes and adorable smiles, this is bracelet a beauty.
You will need the following tools and materials to make this stunning Valentine’s bracelet:
1: Pliers. You will need your round nose, flat nose and cutting pliers to make this bracelet.
Don’t have any pliers yet? Get some here.2: A piece of chain long enough to fit comfortably around your wrist.

3: One lobster clasp.

4: Tiger tail wire.
5: Four crimp beads.
6: Beads of your choice. I used these round rose quartz beads and some silver colored spacer beads.


Want to use Rose Quartz too? Get some pretty pink beads here:
The Steps:
1: Attach the lobster clasp to the piece of chain.


2: Measure out a length of tiger tail wire slightly longer than the length of your chain. (This will ensure that your bracelet fits comfortably).

3: Cut the tiger tail wire to length using the cutting pliers.

4: Add two crimp beads to the wire and thread the wire through the end of the bracelet chain.

5: bend the wire and thread the end through the crimp beads.


6: Use the flat nose pliers to squash the crimp beads and secure the wire in place.

7: Begin adding beads to the wire.


8: Continue adding beads until you reach your desired length, then add two more crimp beads.

9: Thread the end of the wire through the end of the bracelet chain and back through the crimp beads.

10: Use the pliers to squash the crimp beads and secure the strand in place.


11: Trim the excess wire using the cutting pliers.

12: Once you have trimmed the excess wire your sweet Valentine’s day bracelet is complete! Make this adorable bracelet and you will be sure to impress, what could be sweeter than a handmade Valentine’s day gift for that special person in your life?


-
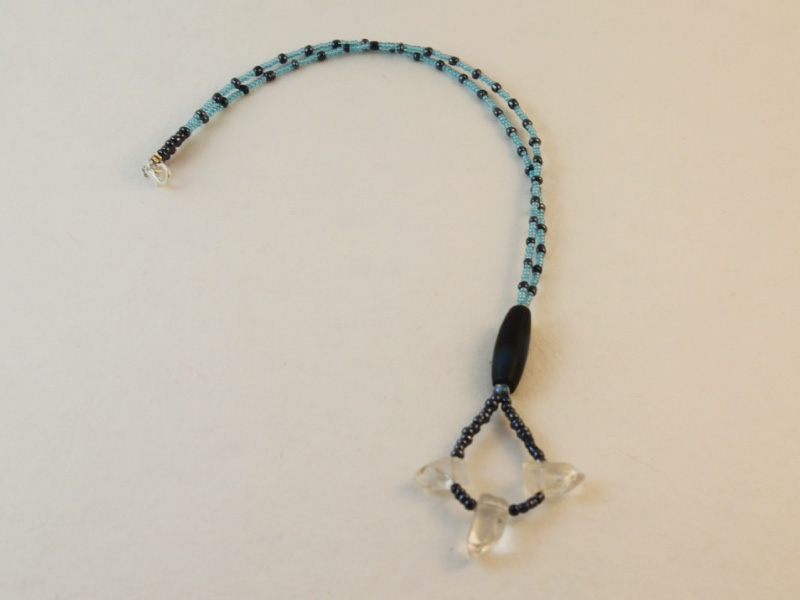
Get loopy! Make this beaded loop necklace
This necklace gives you the effect of a charm without actually adding one. By using some cleverly placed beads this necklace looks fancier than the effort it takes to make it! This technique allows you to experiment with, and show off your exotic and unique beads in a creative manner.
You will need the following tools and materials to make this beaded loop necklace:
1: Pliers. You will need your round nose pliers, flat nose pliers and cutting pliers to make this necklace.
2: Tiger tail wire.
3: One lobster clasp and one jump ring.

4: Four crimp beads.

5: Beads of your choice. Make sure you pick one large bead to hold the loop in place. I used a long blue timber bead as my central bead. You might also want to choose some beads to feature on your loop pendant, I used three quartz beads.


The Steps:
1: Cut a length of tiger tail wire. Make sure it is long enough to fit around with the pendant loop.


2: Begin adding beads to the middle of the necklace. Add enough to form a small loop at the center of the necklace.


3: Once you have enough beads to form your loop, secure it in place by adding a glass e-bead.

4: After adding the e-bead, add your larger centerpiece bead.

5: Add another e-bead after the centerpiece bead.

6: After adding the second e-bead, begin beading one side of the necklace. I used some blue seed beads for the rest of the necklace.


7: Once your beading is complete, add two crimp beads and the lobster clasp.


8: Loop the wire back through the crimp and beads, pulling it tight using the pliers.


9: Squash the crimps using the flat nose pliers. After the crimps have been secured, trim the excess wire using the cutting pliers.


11: Repeat steps 6 to 10, adding a jump ring to the end of the strand instead of a clasp.

12: With both sides finished your necklace is ready to wear. I love this design and I hope that you do too.

-
Twice as Nice: How to Make a Double Strand Bracelet
Do you remember the multi-strand bracelet tutorial where I showed you how to make a bracelet using some charm connectors? Well here is another way that you can make a beaded bracelet with more than one strand. This tutorial shows you how to make a pretty double strand bracelet without the use of any charm connectors at all!
You will need the following tools and materials to make this double strand bracelet:
1: Pliers. To make this bracelet you will need your cutting pliers, round nose pliers and flat nose pliers.
2: Tiger tail wire.
3: Eight crimp beads.

4: One toggle clasp.

5: Beads of your choice. I used some white frosted seed beads with some small garnet beads and some green square gemstone beads.


The Steps:
1: Cut two pieces of tiger tail wire. Make sure that you cut your pieces long enough to fit around your wrist. I recommend adding a little extra length to ensure a comfortable fit.


2: Take one piece of tiger tail wire and add two crimp beads to one end.

3: Once your crimp beads have been added you can add one part of your toggle clasp.

4: Once the toggle clasp and crimp beads have been added, take the short end of the wire and bend it. Thread the end around the toggle loop and back through the crimp beads. You might need to use your pliers to help you pull the wire through.


5: Once you’ve got your wire in place, use the flat nose pliers to squash the crimp beads.

6: Begin adding your beads in the pattern you have chosen. I decided to create two centerpiece features so I added my gemstone beads to the bracelet so that they were slightly off center.


7: Continue adding beads until the beaded section is long enough to fit around your wrist.

8: Once you are finished with your beading, add two more crimp beads and the other part of the toggle clasp.


9: Feed the end of the tiger tail wire around the toggle clasp loop and back through the crimp beads. You might need to use your pliers to pull the wire nice and tight.


10: Once your tiger tail wire has been pulled through, use the flat nose pliers to squash the crimp beads and secure the wire in place.

11: Trim any extra tiger tail wire using the cutting pliers. Once this wire has been trimmed you will be at the halfway point!


11: Add the second piece of tiger tail wire following the steps 2 – 5 that you followed for the first strand.

12: Bead the second strand as you did the first. I added my centerpiece beads off to the side so that my feature beads didn’t overlap.

13: When your beading is complete and both strands have reached the same length, secure the second bead strand in place following steps 8 – 10.

14: Trim any excess tiger tail wire after you have squashed the last of the crimp beads. Once you have your wire trimmed you will find that your bracelet is now ready to wear!


Here are a few other double strand bracelets I have made. I hope you decide to have fun and get experimental with your own double strand bracelet designs!


Here are some other ways to make multi-strand bracelets:
- A double strand bracelet made from recycled headphone cords
- 2 strand bracelet with a double hole statement bead
- Velvet and chain two strand bracelet
- Double chain charm bracelet
- Two color Christmas velvet bracelet
- Two chain beaded ladder bracelet
- Romantic double strand rose quartz bracelet
- Triple strand bead bracelet
This tutorial contains affiliate links.
-
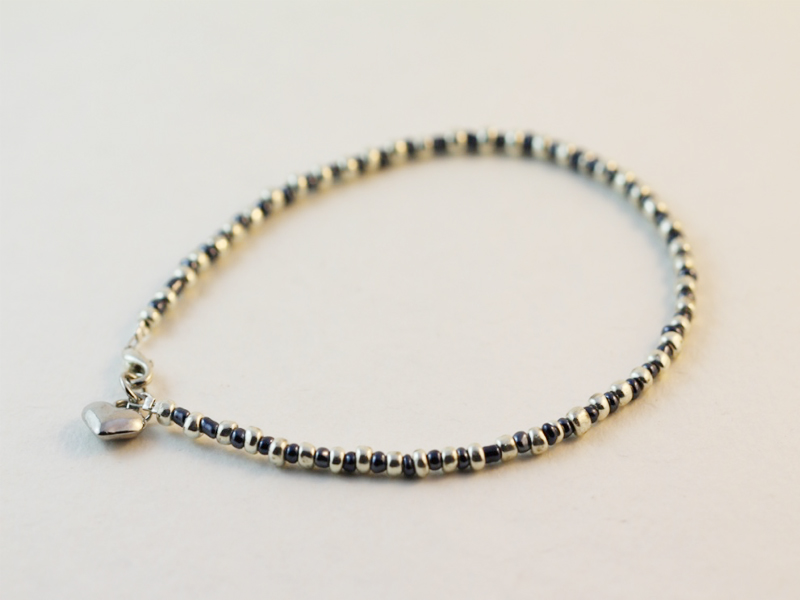
How to Make An Adorable Anklet
Here it is… DIY Jewelry Hub’s first video tutorial! I decided that an anklet would be the perfect piece to make for my first video, and as you will soon see, making one is pretty easy!
The process for making this anklet is very similar to that of my beaded charm bracelet design, complete with a cute little charm at the end. And just in case you missed it, here are a few extra tips and tidbits to help you make your very own beaded anklet.
You will need the following tools and materials to make this anklet:
- Pliers (Round nose, cutting and flat)
- Beads
- Two jump rings
- One lobster clasp
- Four crimp beads
- Tiger tail wire (to measure the amount of wire you need, wrap it loosely around your ankle. remember to add a little extra so that you can secure your beads on each end.)
- One charm of your choice
And that’s it… there isn’t anything too complicated about making this anklet. I hope you enjoy watching this tutorial and making this design as much as I did!

Happy making!
-
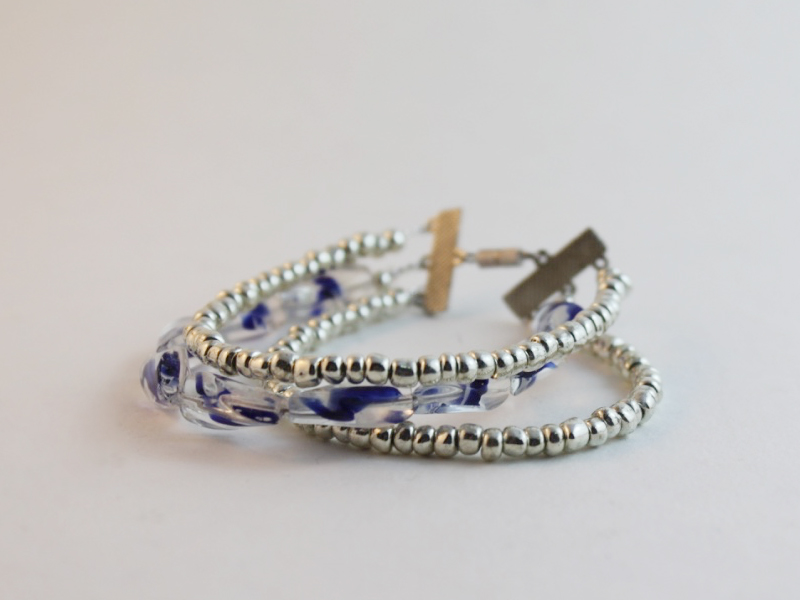
Because More Is Always Better, You Need to Know How to Make a Multi-Strand Bracelet
Multi strand bracelets are great for giving the illusion of a wrist that is stacked full of bracelets without having the hassle of putting them all on! The three-strand bracelet featured in this tutorial is so easy to make thanks to the use of some handy charm connectors. Follow these DIY jewelry instructions and you’ll be sporting an arm full of beads in no time.
You will need the following tools and materials to make this bracelet:
1. Pliers.
For this DIY jewelry project you will need your round nose pliers, flat nose pliers and cutting pliers.
2. Tiger tail wire.
3. 12 crimp beads.

3. 2 charm connectors.

4. A clasp. For this bracelet I used a screw clasp but I usually use a toggle clasp when I am making bracelets as they are easier to operate with one hand.

5. Beads of your choice. In this design I used some silver e beads for the two outer strands and some twisted glass beads for the center strand.


The Steps:
1. Cut three strands of tiger tail wire so that they are slightly longer than the length you would like your bracelet to be. You can measure your tiger tail by wrapping the wire loosely around your wrist.

2. Once all the wire has been cut to size, start to attach the ends to one of the charm connectors. Do this by poking one of the wire through the hole and then bending it around the connector.


3. Add two crimp beads so that they sit close to the charm connector.

4. Once the crimps are in place use the flat nose pliers or round nose pliers to squash them and secure them in place. Repeat steps 2 to 4 for the two remaining strands so that all the wire pieces are secured to the charm connector.

5. Start adding beads to the first strand and continue beading until you have reached your desired length.


6. Once you’ve completed the beading add another two crimp beads to the strand.

7. After you have added the crimps, thread the end of the tiger tail wire through the second charm connector and pull the end back through the crimp beads.


8. Once the wire has been fully pulled through, use the round nose pliers to squash the crimp beads and secure the strand in place.

9. Use the cutting pliers to trim the excess wire.

10. Repeat steps 5 to 9 for the remaining strands.


10. Once the strands are secured to the charm connectors on both ends it is time to add the clasp. Open one end of the clasp using the round nose pliers.
11. Slide the open loop onto the end of the bracelet and then close the clasp loop again using the round nose pliers.

12. Repeat steps 10 and 11 for the other end of the clasp to complete the bracelet.

13. Now you are done, wear and enjoy!