Step-By-Step Tutorials
-
Beads and Chains, The Perfect Pair… Here’s How to Make a Beaded Chain Necklace
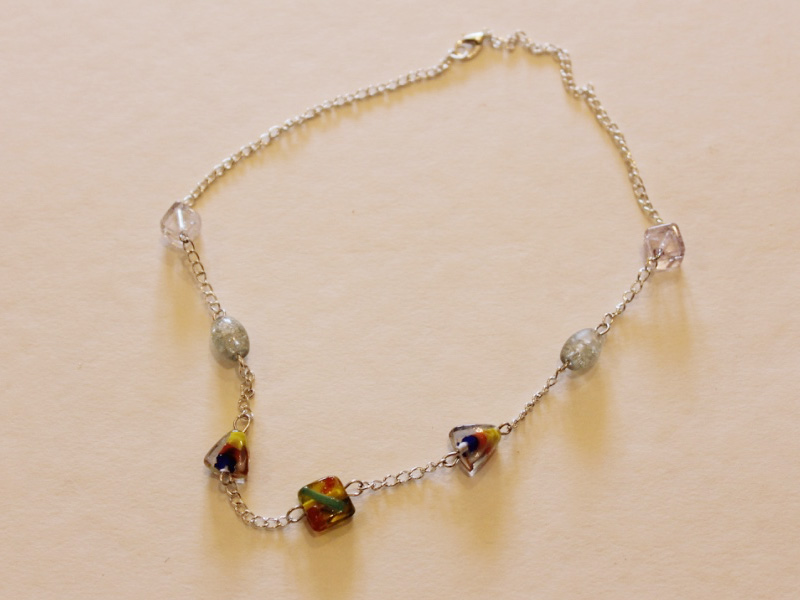
Here is another way you can add beads to chain to create a stunning beaded necklace. This DIY jewelry design is pretty easy to make, but it does require some patience when it comes to putting your beads and chains together. However, I assure you, the results are well worth the effort!
To make this necklace you will need the following tools and materials:
1: Pliers. To make this necklace you will need your round nose pliers, cutting pliers and your flat nose pliers.

2: Chain.

3: Seven eye pins.

4: Beads of your choice. I used this assortment of glass beads.

5: One lobster clasp.

6: One jump ring.

The Steps:
1: Place all your beads onto the eye pins.

2: Bend each pin at a right angle to the bead using the round nose pliers.

3: If your pin is too long, trim it using your cutting pliers.

4: Once your pins are at the right length, curl them into a loop using the round nose pliers.

5: Repeat steps 2 to 4 for all of your beads.

6: Take the bead that you would like to have at the end of your pattern and open one loop slightly using your pliers. Slide the open loop onto the end of your piece of chain.

7: Close the loop again and secure the bead charm in place.

8: Count your chain links. I decided to leave seven links between each bead.

9: Open the 7th link using the pliers and separate the pieces of chain. Choose your next bead and attach it to the end of the small piece of chain. Secure the bead in place by closing the link with your pliers.

10: You will now have two beads attached by a piece of chain.

11: Continue steps 8 and 9 until all your beads have been added to the chain. Your piece should look something like this.

12: Open the loop on one of your end beads and attach the remaining length of chain.

13: Attach the other end of the chain to the bead on the other side.

14: Find the middle of the long section of chain and open a link.

15: Slide the lobster clasp onto the open link and secure it in place by closing the link again using pliers.


16: Open a jump ring and attach it to the other end of the chain.

17: Your necklace is complete! You can experiment with this design by choosing different types of beads or by playing with the spacing between the beads. Get creative!
Happy Making!

If you loved this tutorial you might like our other bead chain DIYs:
- Dangly beaded chain earrings
- A cute beaded chain bracelet
- Bead chain glasses holder strap
- A beaded body chain
- Beaded chain choker
- Bead chain and charm pendant necklace
- V-Shaped beaded chain necklace
This tutorial contains affiliate links.
-
You Need This Little Charmer! Here’s How to Make a Chain Charm Bracelet
The first ever tutorial I made for DIY Jewelry Hub was a step-by-step guide to making a beaded charm bracelet. This time I wanted to show you all how to make a classic charm bracelet, where carefully crafted and chosen charms dangle off a delicate chain. One of the wonderful things about a chain charm bracelet is that they are very easy to personalize and make your own. For this design I chose to combine some handmade beaded charms with some pre-made silver charms, spreading them out across the chain. Get creative with your charm bracelet, you might have some charms left over from a fabulous holiday, or some unique beads that you have been saving for a special piece… combine them all together to create your own special and sentimental charm bracelet!
You will need the following tools and materials to make this charm bracelet:
1: Pliers. For this design you will need your round nose pliers, flat nose pliers and cutting pliers.
2: Chain. You will need a piece of chain enough to fit comfortably around your wrist.

3: Head pins. I used seven pins for this design (including a few that were recycled from an old piece), but you can use as many or as few as you like.

4: Beads of your choice. To make my bead charms I used an assortment of glass and plastic beads.


5: Charms. I used three different charms. I highly recommend using charms that are special to you to create an extra special charm bracelet. You may need some extra jump rings.

6: One lobster clasp.
7: One jump ring.
The Steps:
1: Open a link at one end of your piece of chain using pliers.

2: Slide the lobster clasp onto the open chain link and then secure it into place by closing the link again with the pliers.


3: Open your jump ring using pliers and slide it onto the other end of your chain. Secure it in place by closing it with the pliers.

4: Now your chain bracelet has been completed you can start adding your charms.

5: Begin adding beads to each of your head pins.

6: Once your beads have been added, bend the pin at a right angle to the beads using the round nose pliers.

7: Curl the end of the pin into a loop using the round nose pliers.

8: Once you have made all your charms, take some time to arrange your charms around your bracelet.

9: Once you are happy with your arrangement, begin adding your charms to the chain. You can attach each charm by opening each charm loop or jump ring slightly using the pliers and sliding the charm onto the corresponding chain link.

10: Secure each charm in place by closing the loop again using your pliers.
11: Once all your charms are attached, your bracelet is complete. Now you can wear all your special memories and sentiments on your wrist all the time! I hope you enjoy making this stunning and special do it yourself jewelry design.

Here are some other examples of chain charm bracelets packed full of bright and beautiful beads.


-
Cover Yourself In Chains… With This Sweet Body Chain
Do you remember my tutorial on how to create your own ring bracelet? Well this body chain design is a scaled up version that drapes beautifully across your body, adding some glimmer and shine to your outfit. This body chain is super easy to make, all you need is a few meters of chain, a clasp and some pliers.
You will need the following tools and materials to make this body chain:
1: Pliers. You will need your round nose pliers and flat nose pliers.


2: Chain. I started with 2 meters of chain but you may need a little more or less depending on how you want your body chain to fit.

3: One lobster clasp.

4: One jump ring.
The Steps:
1: Create a loop with a chain that is large enough to slip over your head.

2: Attach the end of the chain to the point you measured out. Do this by opening the chain link on the end using the pliers, slip it over a link at the appropriate point and then close it again using your pliers. Once the link has been secured you will have the top of your body chain completed.


3: Slide the necklace loop over your head and begin measuring the length you will need for the waist of your body chain. Leave approximately 8 cm (3.1 inches) of chain before you begin measuring the waist loop. Wrap the remaining chain around your waist, keeping it fairly snug.

Once you have measured your required chain, trim the excess.

4: Keeping note of where the middle piece of your body chain ends (the part that will measure approximately 8cm), open the link at the end of the chain, sliding it over the point you have measured to be the center of the chain and close it again using your pliers.


5: Find the center of the large loop, opposite to the the join you just made and open a link using your pliers.

6: Leaving the chain link open, slide the lobster clasp on. Once your clasp is in place, close it again using your pliers.

7: Add a jump ring to the other end of the open loop.

8: Close the clasp and step back to admire your handiwork! This body chain looks great on top of all sorts of outfits. Use it to add some pizzazz to a casual outfit, or slip it over your evening attire for an extra glam look.


Here are some other body chain tutorials:
This tutorial contains affiliate links.
-
How to Make a Beaded Chain Anklet, Because Ankles Need Some Bling Too!
I didn’t think that I would be making another anklet tutorial… but then inspiration struck and here we are. This anklet is super easy to make with minimal materials required. I used a piece of silver chain, a small eye pin, a clasp and some lovely fluorite beads. You can make this design your own by using a different assortment of beads or maybe even by adding an extra piece of chain to create a layered look… the options are only limited by your creativity! All that aside, here are the instructions for making your own beaded chain anklet.
You will need the following tools and materials to make this anklet:
1: Pliers. You will need to use your round nose pliers, flat nose pliers and cutting pliers to make this anklet.
2: Chain. Make sure it is long enough to fit comfortably around your ankle.

3: One eye pin.

4: One lobster clasp.
5: One jump ring.
6: Beads of your choice. I used these fluorite chip beads.

The Steps:
1: Start by adding your beads to the eye pin.

2: Once all your beads are in place, use the round nose pliers to bend the pin at a right angle to the beaded section.


3: Depending on the length of your pin, you may need to trim it a little before forming your loop. I used a short head pin for this anklet so no trimming was required.
4: Use the round nose pliers to curl the pin into a loop, securing the beads into place.


5: Once your charm has been completed, open one end slightly and slide the end of the chain onto the loop. You can then close it again using your pliers.

6: Once your charm has been securely attached to the chain, open the loop on the other end and slide on the lobster clasp. Be sure to close the loop again using the pliers once your clasp is in place.


7: Open the jump ring using your pliers and slide it onto the other end of the chain. Close the ring again once it is in place using the pliers.

8: Once the jump ring has been secured your anklet is complete! Pop it on and show it off!


And that is how you make a beaded chain anklet. I hope you have lots of fun making your own!
-
How to Make Chain Back Earrings AKA The Prettiest Earrings Out
These earrings didn’t turn out quite how I had hoped but I’m still pretty excited about these asymmetrical chain-back drop earrings. These simple earrings are made using charm connector earrings and a simple piece of chain that is attached to the butterfly back of the earrings. Add your choice of beads to make these special earrings your own. I used a pair of stunning green fire agate beads.
You will need the following tools and materials to make these chain back earrings:
1: Pliers. You will need round nose pliers, flat nose pliers and round nose pliers to make these earrings.
2: Two charm connector stud earrings.

3: One head pin.

4: One eye pin.
5: Two jump rings.

6: Two pieces of chain. The pieces I used already had jump rings attached, however, depending on the chain you use you might need some extra jump rings.

7: Two feature beads. I used these green fire agate beads.

The Steps:
1: Add one bead to the eye pin.

2: Use the round nose pliers to make a loop at the other end of the pin, securing the bead in place.


3: Add the other bead to the head pin.

4: Bend the pin at a right angle to the bead using the round nose pliers.

5: Trim the pin using the cutting pliers.

6: Create a loop with the end of the pin using the round nose pliers.

7: Now you both of your bead charms are complete.

8: Take the double looped charm and attach it to one of the earring studs. Make sure you close the loop again to secure the earring in place.

9: Add a piece of chain to the other end of the charm.

10: Slide an open jump ring into a loop of a butterfly earring back.

11: Slide the end of the chain into the same jump ring. Close the jump ring using pliers.

12: Now one of your earrings is complete.

13: Take the other bead and attach it to the end of the second chain. Close the bead charm loop using your pliers.

14: Attach a jump ring to the middle of the chain.

15: Slide the earring charm onto the open jump ring and then close it using pliers.

16: Now your second earring is complete!

17: Now your earring set is complete. Head out and wear your new earrings with flair!

-
How to Make a Friendship Bracelet to Celebrate Your Wonderful Pals
These bracelets are a classic. I used to make tonnes of these sweet friendship bracelets when I was a kid, and I think they still look cute and stylish now! All you need to make these cute and simple beaded friendship bracelets is some string and some colorful glass e-beads.
You will need the following tools and materials to make this friendship bracelet:
1: Scissors

2: String. I used some natural colored twine.

3: Glass e-beads in your choice of colors. I used some bronze colored beads for this design.

The Steps:
1: Cut three pieces of string. I cut my pieces to be approximately 40cm (15.5 inches) long but you might want to make your pieces a little longer.


2: Tie the three strands together at one end.


3: Once your strands are secure you can begin braiding.

4: Continue braiding until the braid reaches approximately a third of the way around your wrist.

5: Once you have reached this point it is time to begin adding beads. Slide one bead onto the strand that is currently in the center of the braid.

6: Push the bead up close to the braid, holding it tight, and then continue braiding around the bead to hold it in place.


7: Continue adding beads in the same manner, adding as many as you would like. For this design I used 5 beads.

8: Once you’ve added all your beads you can continue braiding normally.


9: Once your bracelet has reached your desired length, secure the braid with another knot.


10: Once your you have secured the end of your bracelet, use your scissors to trim the ends of the string so that they are all the same length.

11: Now your friendship bracelet is complete! Make them for yourself and for your friends, better yet… make them with your friends! These stunning bracelets make for great gifts for all occasions.


You can experiment with the style of this bracelet by adding beads at different places throughout the braid.

-
Tap into that Inner Child and Remember How to Make a Finger Knit Bracelet
I decided to look back to childhood crafts for inspiration for this video… and I came up with a super easy design that utilizes finger knitting, how fun! This bracelet couldn’t be easier to make, it’s the perfect piece to create during a lazy night in front of a movie. I hope you enjoy watching this tutorial as much as I liked making it. Happy creating!
-
Knit Yourself A Bracelet… Because Knitting is Cool!
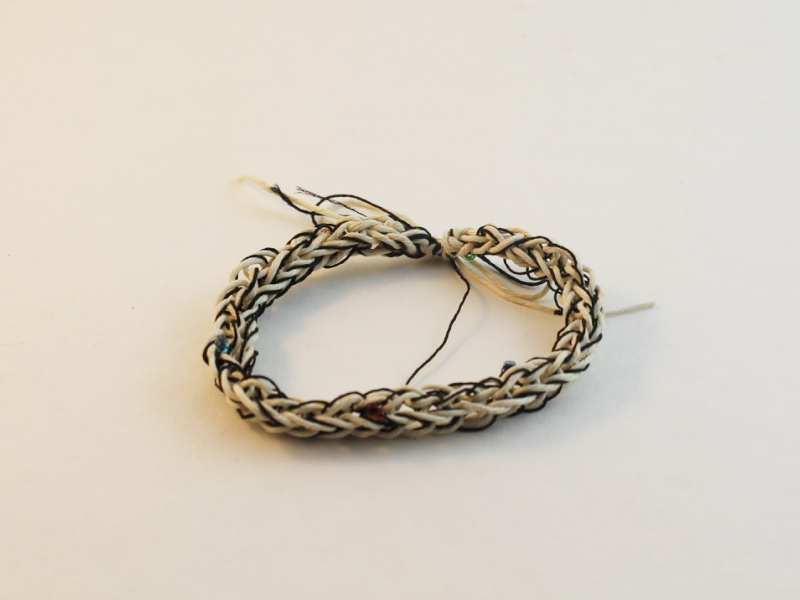
This one is for all the knitters out there (or those who are willing to learn). This bracelet is a knitted I-cord, made using a pair of double pointed needles and some yarn or thread of your choice.
You will need the following tools and materials:
1: Scissors
2: Two double pointed needles.

3: yarn of your choice. I used some natural colored twine and some beaded thread.

The Steps:
1: Hold both strands together and knot the end to create a loop.


2: Slide the loop over the end of one needle and pull it tight by pulling on the short end.

3: Slide the other needle into the back of the loop.

4: Loop the long end of the thread around the back needle, placing it between each needle.

5: Pull the back needle to the front, keeping the thread looped around it. Then move this loop back onto the first needle. Repeat this until you have three stitches on the first needle.

6: To start the next row, slide the stitches to the other end of the needle and flip it around. Start knitting all stitches, flipping the needle at the end of each row.


7: Continue knitting until the cord is long enough to fit around your wrist.

8: Once you have reached your desired length, cast off your stitches as follows.

9: Cut your thread and then loop that short end back through the final loop. Secure with a final knot at each end.

-
How to Make an Elastic Bracelet… Seriously, It’s so Easy!
Beading elastic is great for putting together quick, cheerful stacking bracelets. No extra findings are required for this design, all you need are some beads and your elastic and you are good to go! These elastic bracelets are so easy to make you’ll be churning them out. This design is pretty kid friendly too, they’ll have fun threading all sorts of beads together.
You will need the following tools and materials to make this elastic bracelet:
1: Scissors. You will need scissors to cut your elastic to length and again to trim the ends.
2: Beading elastic.

3: Beads of your choice. I used a selection of blue glass beads.


The Steps:
1: Cut a piece of elastic. Wrap it around your wrist to check the length and make sure to cut it a little longer than you need so that you can tie the ends together.

2: Begin adding beads. I started by threading my feature bead and then adding the rest either side.


3: Continue beading until your bracelet is at your desired length.

4: Tie the ends of a bracelet into a knot. You can do a double knot here if you like.


5: Trim the excess elastic using the scissors.

6: Now your bracelet is complete! How easy was that? Make a stack and pile them on both arms.

-
Rock Those Curves with a Curved Bar Charm Necklace
I’ve already shown you how to make a simple bar charm necklace, so here are the instructions for a curved bar charm necklace. Using memory wire allows you to create a charm that holds a curve. You can experiment with the shape by using different lengths, creating a charm that has a subtle curve or one that is almost a complete circle.
To make this necklace you will need the following tools and materials:
1: Pliers. You will need to use round nose pliers, flat nose pliers and cutting pliers.
2: Memory wire.

3: Two pieces of chain.

4: One lobster clasp.

5: One jump ring.
6: Beads of your choice. I used three enameled beads and some multi-colored seed beads.


The Steps:
1: Cut a piece of memory wire. I cut my piece so that it formed a complete half circle from end to end.


2: Using the round nose pliers, create a loop at one end of the memory wire.

3: Once the loop has been formed you can begin adding your beads.


4: Once the beading is complete, use the round nose pliers again to create a loop at the other end of the wire, securing the beads in place.


5: Open a chain link on the end of one of your pieces of chain using your pliers. Repeat this for the other piece of chain.

6: Slide one end of the charm onto the chain link and close it again using your pliers. Repeat this for the other side of the charm so that both pieces of chain are attached to the charm.


7: Open a chain link at the other end 0f the chain and slide on the lobster clasp. Close the link again using pliers.

8: Add a jump ring to the other end of the chain.

9: Once your clasp has been attached your necklace is complete! Now all you have left to do is wear it and enjoy!

Here is an example of a similar design made using a longer piece of memory wire to form a more circular charm.