Step-By-Step Tutorials
-
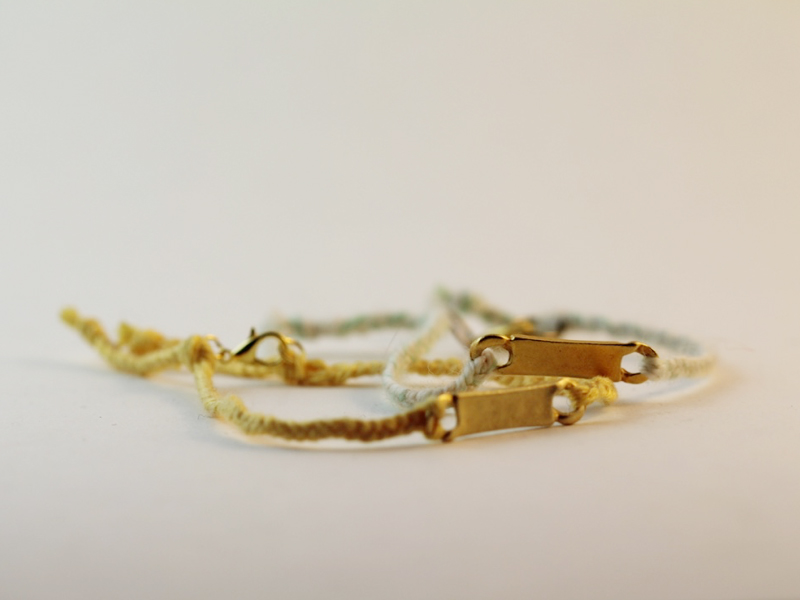
Braiding the Night Away… How to Make A Braided Charm Bracelet
This braided charm bracelet is really simple to make. I think that mixing cotton thread with metal findings makes for some sweet and wearable accessories. You could use a pre-fabricated charm connector, or maybe try making your own beaded charm bar to wear across your wrist! Get experimental and make lots to stack up your arms.
You will need the following tools and materials to make this bracelet:
1: Scissors.

2: Flat nose pliers.

2: Colorful cotton thread cut to length. I used three long pieces of yellow cotton so that I could create a double thickness braid. Make sure you add a little extra length before you cut your thread to make sure that your bracelet fits.

3: One charm connector.

4: One Lobster Clasp.

5: Two Jump Rings.

The Steps:
1: Thread the cotton yarn through each end of the charm connector.


2: Separate the thread into three sections and begin braiding. Try to keep the braiding tight at the start to make sure that the braid is consistent. Continue braiding until the braid is long enough to wrap halfway around your wrist.

3: Once the braid is long enough, secure the end with a knot.


4: Repeat steps 2 and 3 for the other side of the bracelet.

5: Open each jump ring and carefully slide it into the knot at each end of the bracelet.


6: Slide the lobster clasp onto one jump ring and secure them both closed using your flat nose pliers.

7: Once the clasp has been secured, begin braiding again starting from the end knot. Braid for approximately 1.5cm (0.6 inches) and then secure again with a knot.

8: Trim the excess cotton thread using the scissors.

9: Once the ends have been trimmed your bracelet is complete!
Click here to buy this yellow braided beauty!

-
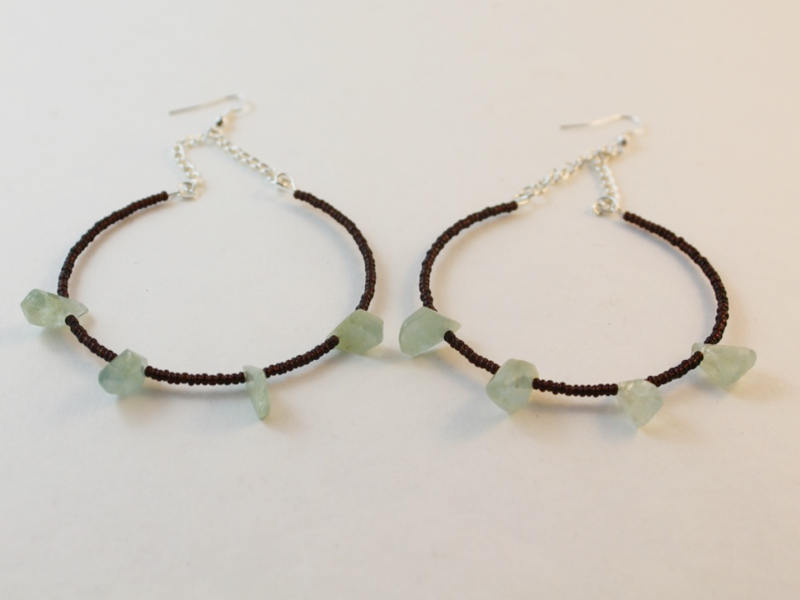
Hoops, Loops and a Whole Lotta Wow! How to Make Statement Hoop Earrings
I’ve already shown you how to make hoop earrings using some pre-made findings, so now it’s time to show you how to make some dangly hoop earrings that really make an impact! Using some memory wire and some chain you’ll be able to create your very own stunning statement hoop earrings.
You will need the following tools and materials to make these earrings:
1: Pliers. To make these earrings you will need to use some round nose pliers, flat nose pliers and cutting pliers.

2: Memory wire.

3: Four Jump Rings.

4: Two short pieces of chain to connect the hoops to the earring findings.

5: Two earring hooks.

6: Beads of your choice. For this design I used some green dyed quartz and some dark glass seed beads.


The Steps:
1: Cut two pieces of memory wire using the cutting pliers so that the ends touch with no overlap.


2: Use the round nose pliers to create a loop at one end of the wire. Repeat for both pieces.


3: Once each loop has been formed, begin adding beads in your desired pattern.

4: Once beading has been completed, create a loop at the other end of the wire to secure the beads in place. Repeat this step for both pieces.


5: Attach a piece of chain to both sides of the hoop using the jump rings.


6: Find the center of the chain and attached an earring hook to complete each earring. Secure the earring hook in place by closing it with some pliers.

7: Now your earrings are complete! Take them out for a spin and show off your DIY creations.

-
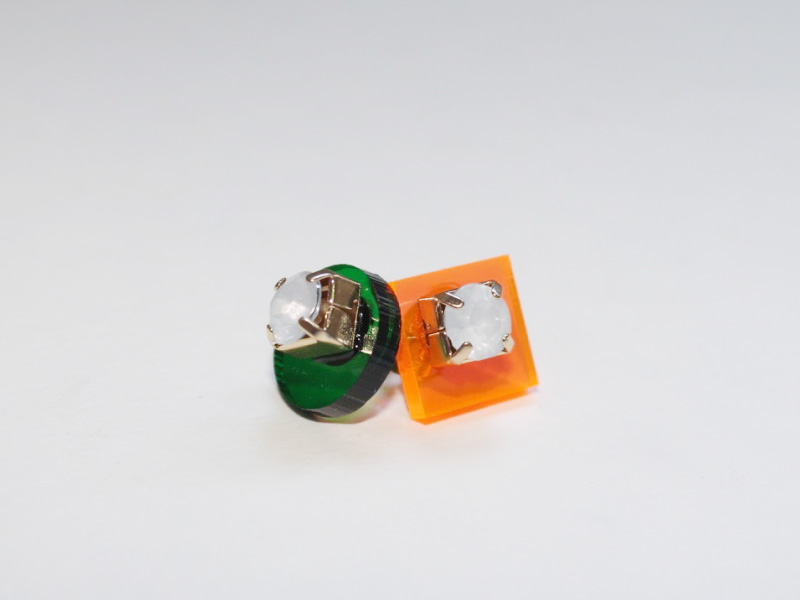
How to Make Stud Earrings. You’ll Wanna Get These Stunners on Your Ear Lobes!
These earrings are easy to make and make a great impact. This design is made using your choice of components, some stud earring posts and some Araldite glue. If you’ve tried out the statement ring tutorial then you’ll already have an idea of how easy this design is to make, all you need to do is to mix up the glue and piece together your components.
You will need the following tools and materials to make these earrings:
1: Glue. I used Araldite two part glue to make these earrings. Make sure you use this glue in a well ventilated area.

2: A skewer for mixing glue with.

3: A piece of scrap paper to mix the glue on.

4: Post earrings and earring backs.

5: Two base pieces to attach the earrings to. In this design I used two pieces of laser cut acrylic in different shapes.

6: Two decorations to attach to the front of your chosen base pieces. In this design I chose to use two rhinestones.

The Steps:
1: Squeeze a little bit of glue out of the tube, keeping it in equal parts. This glue sets quickly so you might need to make a few batches to finish off your earrings.


2: Mix the glue carefully using the skewer.

3: Collect some glue on the end of the skewer and apply it carefully to the back of the rhinestones.

4: Carefully place each rhinestone onto each of the acrylic pieces. Once they are in place, leave the pieces to dry.

5: Once the rhinestones have dried, begin applying glue to the bed of each earring post.

6: Carefully place each post on the back of each acrylic piece. Once they are in place you will need to prop up the earrings to be level to prevent the earring backs from moving out of place before they dry.

9. Once the glue has dried your earrings are complete and ready to wear.
Stud earrings are a wardrobe staple and we’ve got many different styles for you to DIY, check out these other stud earring tutorials:
- Beaded flower stud earrings
- Shell stud earrings
- Adorable pompom stud earrings
- Cute bow studs
- How to turn old clip on earrings into studs for pierced ears
- Tiny hammered wire studs
- Crystal statement studs
- Sweet ladybug studs
- How to transform buttons into stud earrings
- DIY Design Inspiration: Asymmetrical stud earrings
This tutorial contains affiliate links.
-
How to Make Beaded Tassel Earrings, Because This Tassel Is Worth the Hassel
In this video I go though all the steps you need to take to make your own beaded earrings that feature a cute tassel detail. This design is simple, but you can change it up easily with your choice of beads! For these earrings I used an assortment of gemstones and glass seed beads. This design is perfect for exploring your creative side, choose different beads and make it your own.
I hope you enjoy my latest video tutorial. Happy making!
-
Bling Up Your Look With This Epic Statement Ring
This DIY jewelry tutorial is a little different, instead of relying on beads, pins and wire to create a ring, this design uses a flat bed ring finding and an assortment of bright and shiny materials to make a statement. All you need to construct a ring like this are your materials and some strong glue.
To make this design you will need to use the following tools and materials:
1: Glue. When I am working with translucent materials I prefer to use Araldite glue. Using super glue or hot glue from a glue gun can affect the appearance of your materials and the finish of your overall design.
2: A skewer or stick for mixing and applying the glue.
3: A piece of paper or plastic to mix your glue on.
4: A flat bed ring finding.

5: A base piece to build your decoration on. In this design I used a piece of green laser cut acrylic.

6: Decorations. For this design I used two faux pearls and a large pink rhinestone.


The Steps:
1: Squeeze some glue out of the tube, Araldite is a two part glue that requires mixing to make it set. You might need to mix a few batches as the glue can harden while you are waiting for your components to dry. I recommend using this glue in a well ventilated area.
2: Mix the glue carefully using the skewer.
3: Add some glue to the end of the skewer and carefully apply it to the pink rhinestone centerpiece.

4: Carefully place the rhinestone onto the green backing piece. Once the piece is in place, begin adding glue in the same manner to the pearl decorations, placing them either side of the pink rhinestone centerpiece.

5: Once all your decorations are in place, let the piece sit for a few minutes to dry. Try to keep the piece flat to prevent the decorations from sliding around on the base piece.

6: Once the ring decoration is dry, turn it over to prepare for the attachment of the ring finding.

7: Add some glue to the flat part of the ring finding. You might have to mix up some more glue at this stage as your initial batch may have hardened.

8: Carefully place the ring finding onto the backside of the base piece so that it sits directly behind the pink rhinestone centerpiece.


9: You might need to hold the piece still until it begins to dry. Alternatively, you can prop it up, being careful to keep the piece straight so that the ring finding doesn’t move and set in the wrong spot.
Once all the components are dry and set in place your stunning statement ring is ready to wear!


-
When A Ring and A Bracelet Unite What Do you Get? A Ring Bracelet
Ring bracelets are such cool accessories. They adorn the whole hand and seem to add a certain special flair to your jewelry repertoire. You don’t need any special materials to make this ring bracelet design, just some chain, an eye pin and some beads. I used some stunning peridot beads for my design. What will you use to make your own, unique ring bracelet?
You will need the following tools and materials to make this ring bracelet:
1: Pliers
For this design you will need to use the round nose and flat nose pliers. I didn’t use my cutting pliers this time but keep them on hand just in case!
2: Chain

3: One eye pin

4: One lobster clasp

5: One jump ring
4: Beads
In this design I used some Peridot chip beads.

The Steps:
1: Add your beads to the eye pin.

2: Using the round nose pliers, bend the top of the pin at a right angle to the beaded section.

3: Now use the round nose pliers again to create a loop at the end of the pin to secure the beads.

4: Take the chain and create a small loop that is large enough to slip over your finger. Try not to make it too tight. Secure this small loop by opening a link using the pliers closing it again so that it is attached to the point you would like your loop to end.

5: Once the small ring loop has been formed, trim the chain so that the piece reaches the bottom of your middle knuckle, you can do this by carefully opening a chain link using the pliers and sliding the other link out.

6: Now it is time to attach the bead charm you made earlier. Slide one of the looped ends into the chain link you opened in step 5. Once the charm is in place you can use your pliers to close the chain link again.


7: Add the remaining chain to the other end of the charm in the same manner.

8: Your chain might be a little long at this stage. To form the bracelet you will need to let the chain fall to the base of your hand and then wrap it loosely around your wrist. Once you’ve got this measurement, open the link as you did earlier to trim the chain.
9: Attach the end of the chain to the point where the chain meets the base of your hand. At this point the bracelet section will be an unbroken loop.

10: Open the bracelet loop at the halfway point. You can do this by carefully opening a link using your pliers. Once the bracelet has been split, you can start attaching the clasp.
11: On one side of the bracelet, carefully open a chain link (if not already open) and slide on the lobster clasp. Close the link again to secure the clasp in place.


12: Take the jump ring, opening it using your pliers, and attach it to the other side of the bracelet by sliding on the chain link loop. Close the jump ring again using your pliers.

13: Now your ring bracelet is complete! Wear it anytime you want to add a little ‘something special’ to your outfit.

-
You can never have enough rings, so here’s How to Make cute a Wire Ring
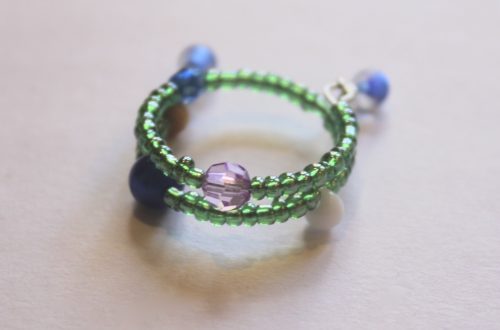
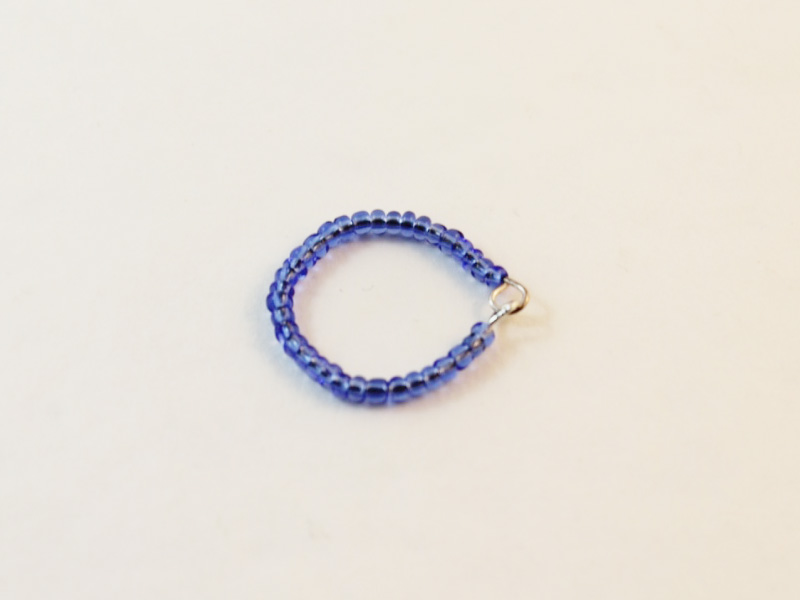
This ring design is just a scaled down version of my super simple beaded bangle design. With a handful of beads and some 18 gauge wire, you’ll be stacking these cute little rings on all your fingers in no time! These wire rings would also make great charms for necklaces and earrings. Get creative and see how you can use them in your own DIY jewelry designs.
You will need the following tools and materials to make this ring:
1: Pliers.
To make this ring you will need to use your round nose pliers and cutting pliers.


2: A piece of 18 gauge wire.
I cut my piece a little longer than I needed to. You can check the length of wire you will need by wrapping a piece of paper around your finger. Mark the point where the paper overlaps for a comfortable fit. You can then use this measurement to cut your wire to size.

3: Beads
I used these bright blue seed beads to make my ring.

The Steps:
1: Take your piece of wire and form a loop at one end using the round nose pliers.

2: Once the loop has been formed, begin adding beads to the wire.


3: Continue beading until there is approximately 1cm (0.4 inches) of wire remaining.

4: Use the round nose pliers to bend the end of the wire at a right angle to the beads. If your wire is a little long, you might also want to trim it at this point.

5: Now you can create a loop at the other end of the wire, leaving a small opening. Do this using the round nose pliers.


6: Gently bend the wire into a ring shape.

7: Once you have your ring shape formed, slide the open loop into the other end of the wire. Then use the round nose pliers to secure the loop closed.


8: Now your ring is finished! I’d love to see how you decide to use your ring, will you stack them on your fingers or dangle them from your ear lobes? Share your wire ring designs with me on instagram by tagging @diyjewelryhub.

-
How to Make An Adorable Anklet
Here it is… DIY Jewelry Hub’s first video tutorial! I decided that an anklet would be the perfect piece to make for my first video, and as you will soon see, making one is pretty easy!
The process for making this anklet is very similar to that of my beaded charm bracelet design, complete with a cute little charm at the end. And just in case you missed it, here are a few extra tips and tidbits to help you make your very own beaded anklet.
You will need the following tools and materials to make this anklet:
- Pliers (Round nose, cutting and flat)
- Beads
- Two jump rings
- One lobster clasp
- Four crimp beads
- Tiger tail wire (to measure the amount of wire you need, wrap it loosely around your ankle. remember to add a little extra so that you can secure your beads on each end.)
- One charm of your choice
And that’s it… there isn’t anything too complicated about making this anklet. I hope you enjoy watching this tutorial and making this design as much as I did!

Happy making!
-
How to Make a Bar Charm Necklace… You know you want to try it!
I’ve seen a lot bar charm necklaces around on Instagram, so I thought I would show you how to make one. The steps for to make this necklace are very similar to the bar charm bracelet tutorial, the only difference here is that the pieces of chains are longer! Making this necklace is really easy, add your own personal touch by using some funky beads or semi precious gemstones to jazz up your charm.
You will need the following tools and materials to make this necklace:
1: Pliers.
To make this necklace you will need to use the round nose pliers and flat nose pliers.
2: One eye pin.

3: Two pieces of chain.
I reused some chain from a previous project so my chain already had the jump rings attached. These pieces were approximately 21cm long (8.5 inches).

4: Two jump rings.

5: One clasp.

6: Beads of your choice.
For this design I used these peridot chip beads.

The Steps:
1: Add the beads to the eye pin. Keep adding beads until the there is approximately 1cm (0.4 inches) of the pin left uncovered.


2: Once you have finished beading, use the round nose pliers to bend the pin at a right angle to the beaded section.

3: Now use the round nose pliers again to create an open loop. Leaving the loop slightly open allows you room to slide on the chain.

4. Slide on the chain and close the loop again using the round nose pliers.

5. Now you should have one side of the charm attached to one chain.

6. Repeat Step 4 for the other side of the charm. Opening the loop slightly using round nose pliers, attaching the chain and then closing the loop again.

7. If you don’t have your jump rings already attached to the ends of the chain, use the pliers to open them and slide them onto the last chain loop. If they are already attached like mine are, open one jump ring using your pliers and slide the clasp on.


8. Close the jump ring again using the round nose pliers.

9. Once the clasp has been attached your necklace is complete!


-
Jingle Jangle How to Make A Bangle!
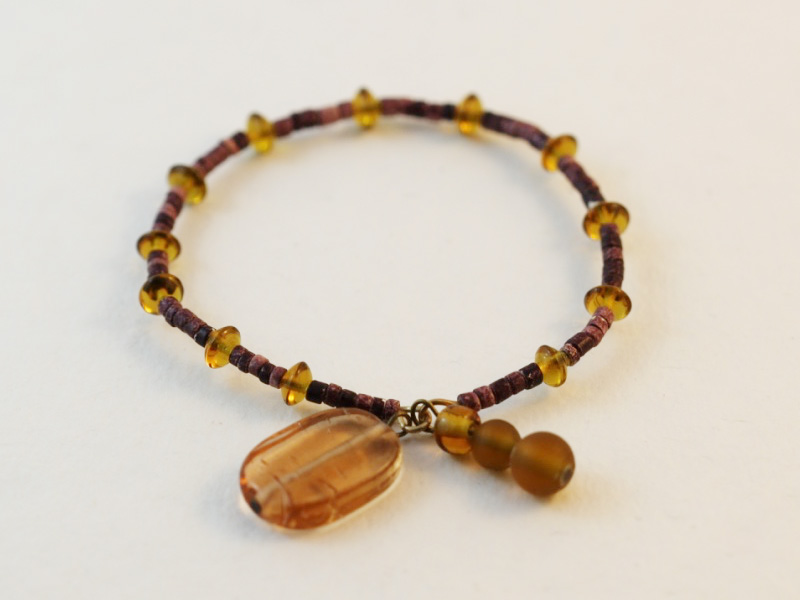
In this tutorial you can learn how to make your own beaded bangle. This design is pretty easy to put together. All you need is some 18 gauge jewelry wire, your pliers and some beads. This pattern is a bit of a blank canvas… once you’ve made one you won’t be able to stop! Try making this bangle design with different beads and charms to make it your own. I’d also love to see your creations!
You will need the following tools and materials to make this bangle:
1: Pliers
You won’t need the flat nose pliers to make this bangle but do make sure you have your cutting pliers and round nose pliers handy!
2: Wire.
I used some 18 gauge gold colored wire for this bangle.
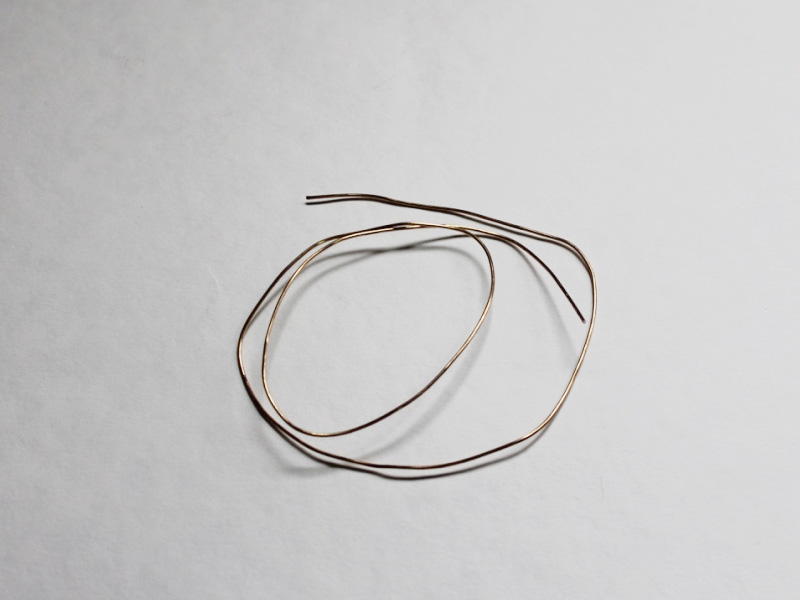
3: Two head pins.
I used some antique brass colored head pins for this design.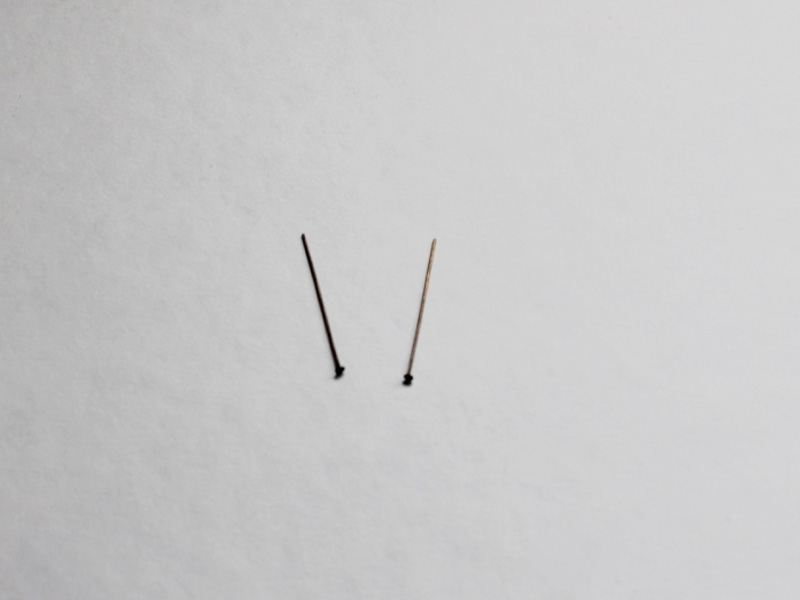
4: Beads for the bangle.
I used these yellow glass beads with some purple ceramic beads.


5: Beads for the charms.
I used this large pink(ish) glass bead and three yellow glass beads to create my charms.


The Steps:
1: Measure the wire before you trim it. I measured how much I need by wrapping my wire loosely around my wrist. Make sure your wire is long enough to allow your hand to fit over your hand. I cut my wire to approximately 24cm (9.5 inches)
2: Cut the wire to your desired length using the cutting pliers.


3: Once you have cut your wire, use the round nose pliers to make a loop at one end of the wire.


4: After the loop has been formed you can start adding your beads.
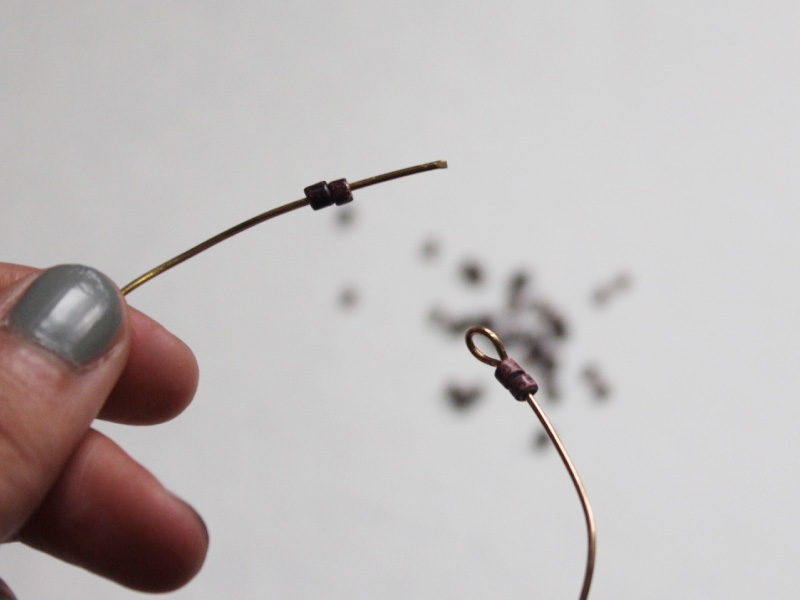
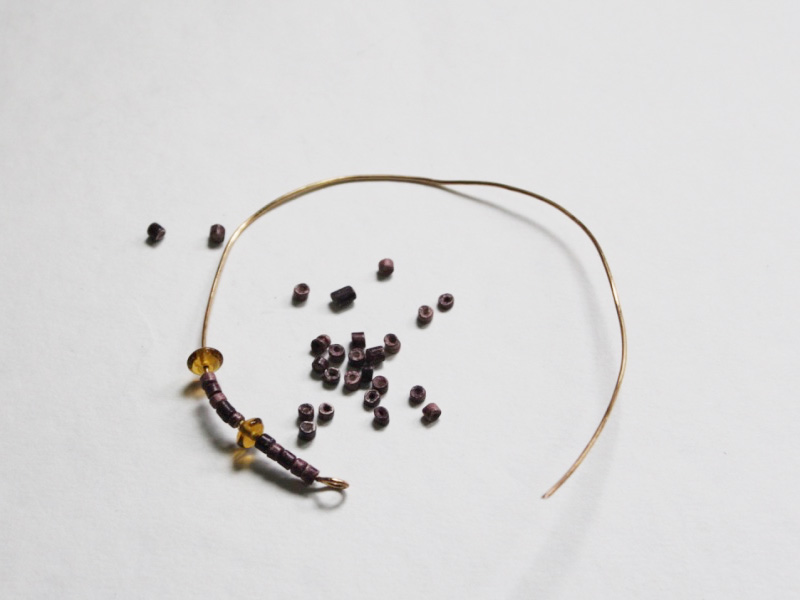
5: Once the beading is complete, use the round nose pliers and bend the end of the wire at a right angle to the beads.
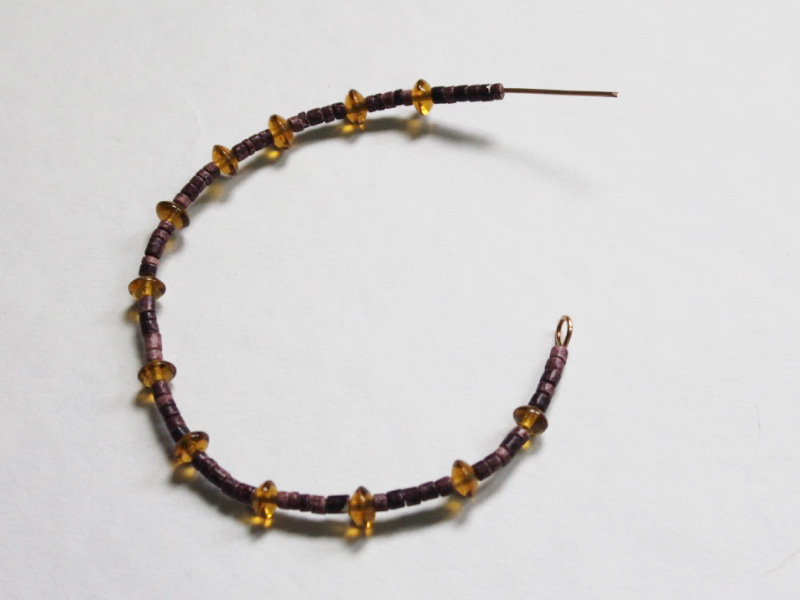
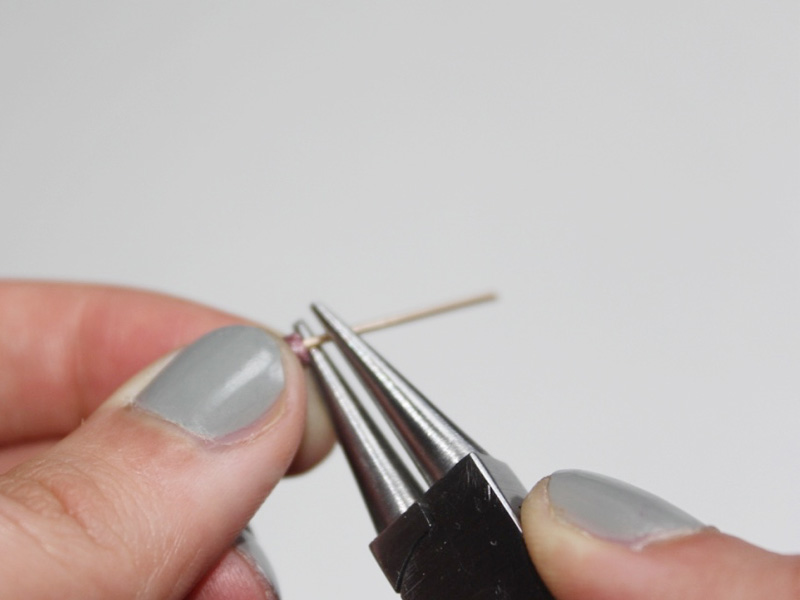
6: After you have bent the wire, use the cutting pliers to trim the end so that it is approximately 1cm (0.4 inches) long.

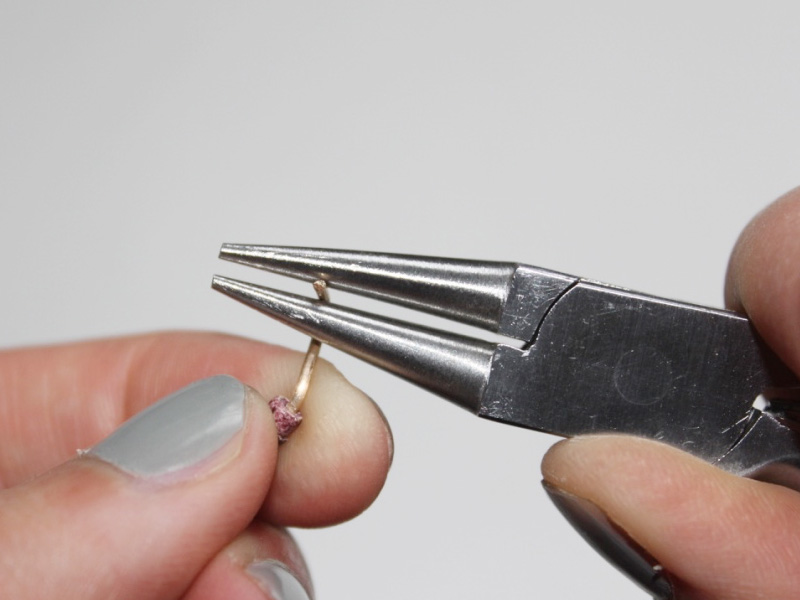
7: Once the end of the wire has been trimmed, use the round nose pliers to form a loop, leaving it slightly open.
8: Slide the open end into the loop at the other end of the wire. Once the open loop is in place, close it using the round nose pliers.
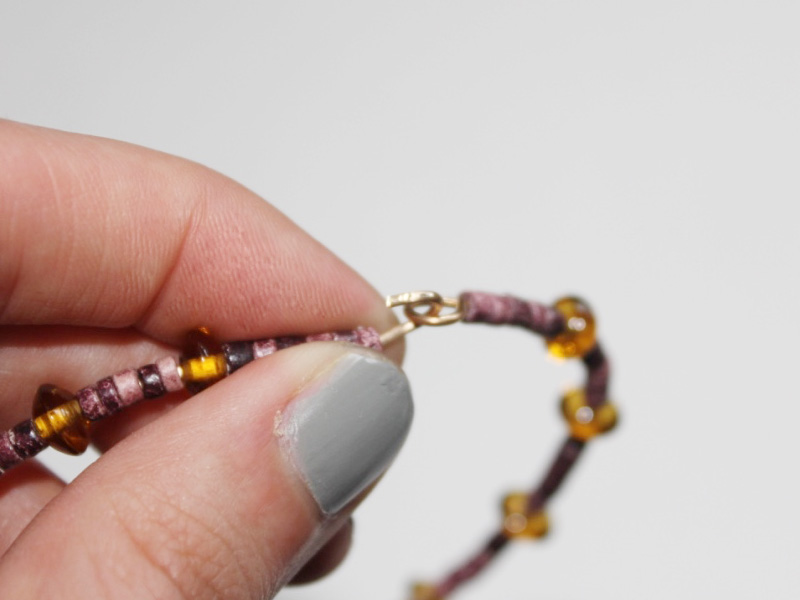

9: Now you’ve got a fully formed bangle! You can leave it here, but for this design I decided to add a couple of extra bead charms as well.

10: Add your chosen charm beads to the two head pins.

11. I used some shorter head pins in this design so there was no need to trim them before forming the loop. Bend the pin at a right angle to the beads using the round nose pliers. Make sure you repeat this for both charms.

12: Use the round nose pliers again to form a loop on the end of each pin.


13: Open each loop slightly and then slide both charms onto one of the looped ends of the bangle.
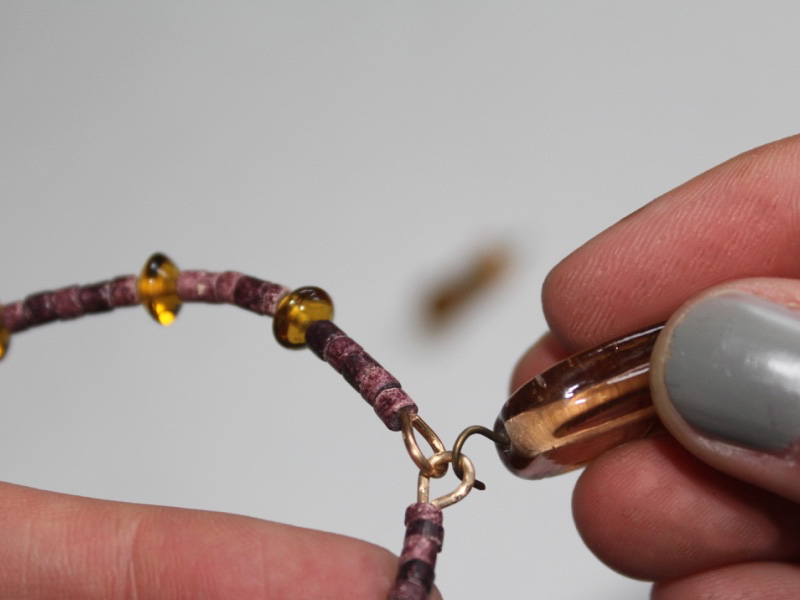
14: Use the pliers to close the charm loops again and secure them into place.

15: Once the charms are in place you’re finished! Pop it on and head out on your way. Imagine a stack of these beauties on your wrists… I think it would look pretty spectacular!