-
The double hole bead is back! This bracelet is delicate and adorable.

The double hole bead strikes again! Make a bracelet to match your necklace using a double hole bead and some delicate chain.
You will need the following tools and materials to make your bracelet:
1: Pliers. You will need your round nose pliers, flat nose pliers and cutting pliers to make this bracelet.

2: Two small eye pins.

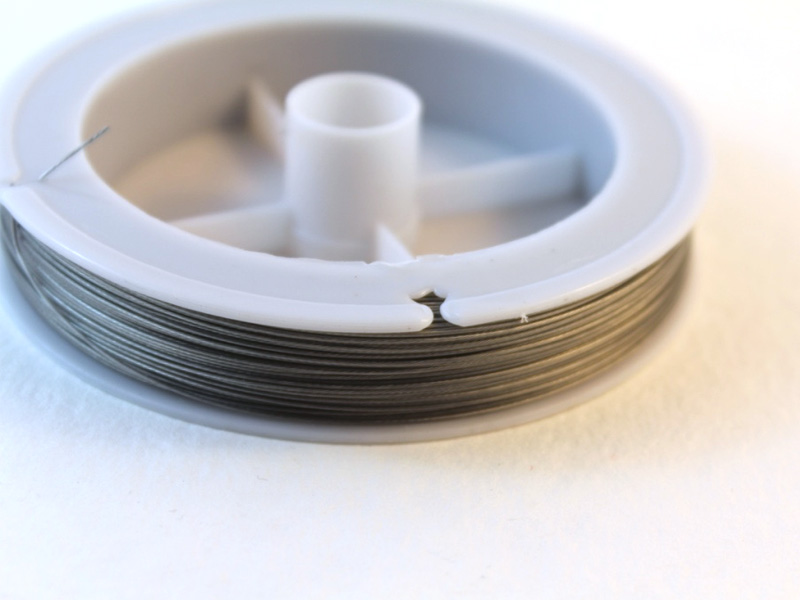
3: Two pieces of chain that fit comfortably around your wrist (maybe a bit on the tight side).

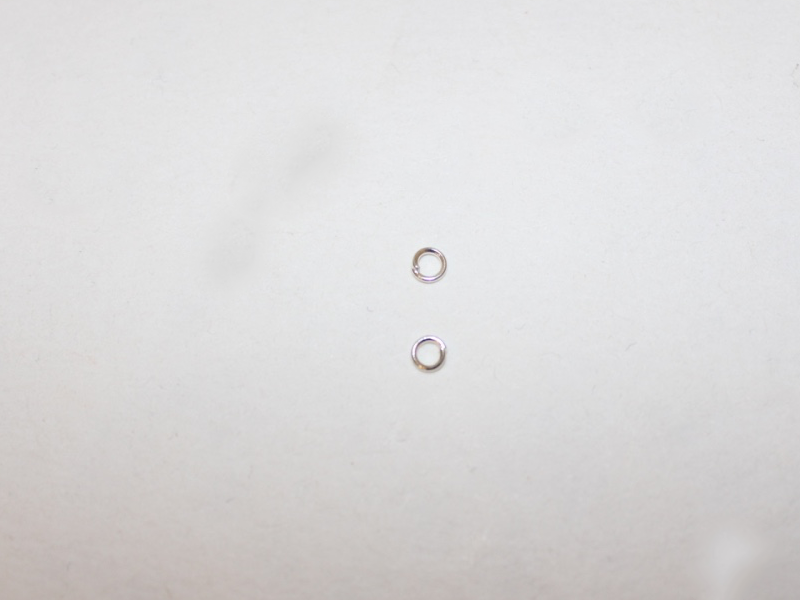
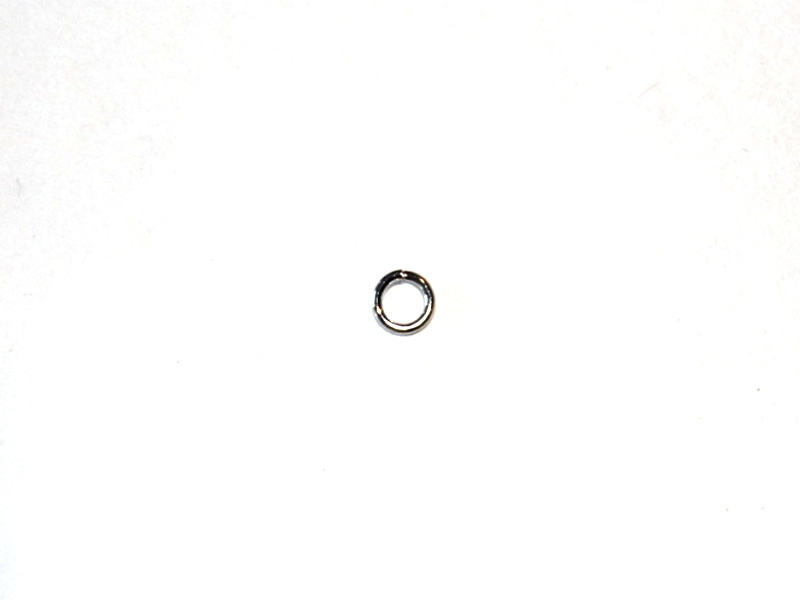
4: Two jump rings.

5: A toggle clasp.

6: A bead of your choice that has two holes. I used this blue glass bead.

Follow these steps to make your bracelet:
1: Add one of the pins to one of the holes in the bead.

2: Bend the pin at a right angle to the bead using the round nose pliers.

3: Loop the pin to secure it on the bead using the round nose pliers.

4: Repeat steps 1-3 for the second pin.

5: Add a piece of chain onto one of the pin loops.


6: Add the other side of the chain to the corresponding pin end on the other side of the bead.

7: Repeat steps 5-6 for the second piece of chain.

8: Split both chains in the middle opposite the bead charm.

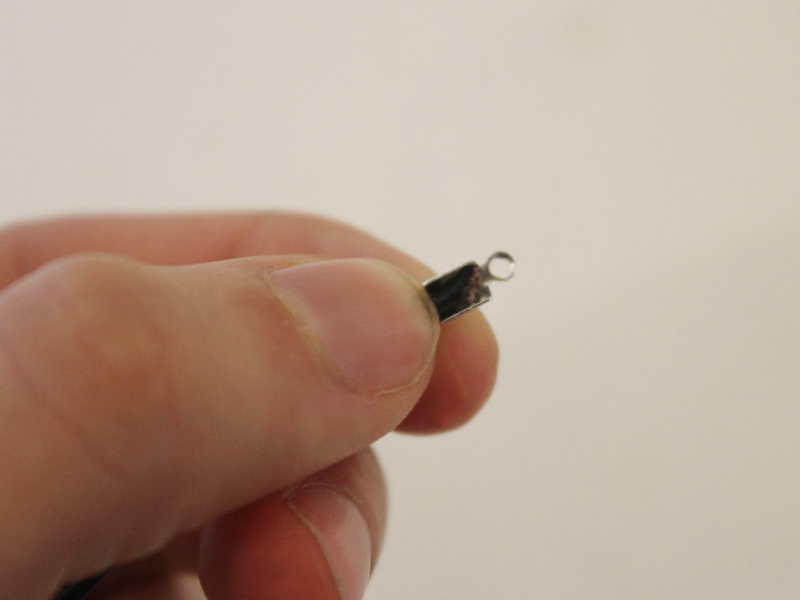
9: Use a jump ring to attach two parallel chains together and add one part of the toggle clasp. Close the jump ring to secure the clasp component in place.


10: Repeat step 9 for the other side of the bracelet, securing the remaining clasp component in place.


Now your bracelet is finished! How cute is it?!

-
Want Some Geometric Jewelry in Your Life? Make this Triangle Necklace!

Do you have a hankering for some new accessories in your life? You should make yourself this super cool triangle necklace!
You will need the following tools and materials to make this triangle necklace:
1: Pliers. You will need your round nose pliers, flat nose pliers and cutting pliers (or scissors, to cut your string) to make this necklace.
2: A piece of string about 50-60 cm long (approx 19.7-23.6 inches).

3: Two leather crimp ends.

4: A lobster clasp.

5: Three tube beads. I used these gold-colored tube beads.

Follow these steps to make your triangle necklace:
1: Add the three beads to the center of the string.

2: Loop the end of the string into the bead opposite it.

3: Pull the strings tight trying to keep the lengths of string even, forming a triangle shape with the beads.

4: Tie a knot at the top of the triangle.


5: Add another knot above the first one to secure the triangle in place.


6: Trim the strings so that they the same length.

7: Add a leather crimp end to one end of the necklace string. Secure the crimp by squashing one side with the flat nose pliers, then squash the other side, folding it over the top.


8: Repeat this step for the other crimp end, securing it to the other side of the necklace.

9: Add a jump ring to one side and slide on the lobster clasp. Close the jump ring to secure it in place.


10: Add the remaining jump ring to the other side of the necklace to finish it off.
Now your necklace is done! So cool and simple.
-
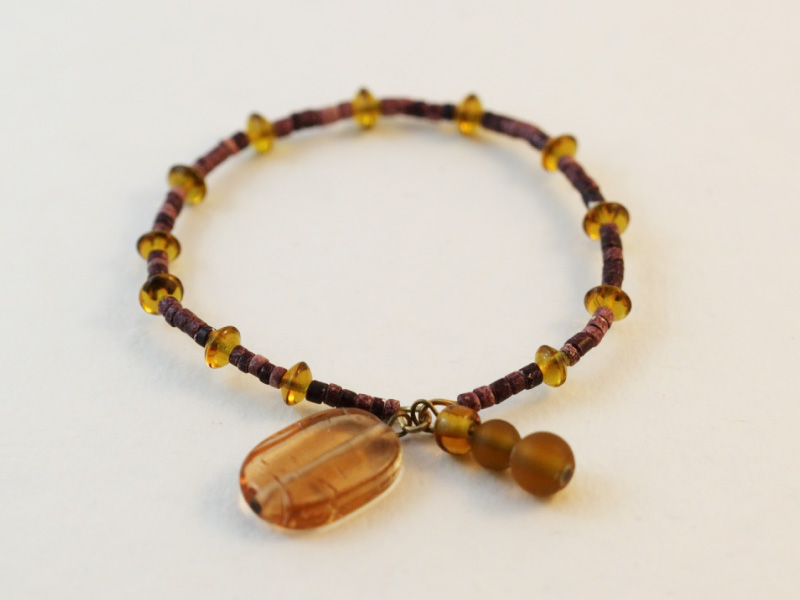
Fling this stunner around your wrist. Here’s how to make a ladder bracelet!

Remember our beaded ladder necklace tutorial? Here the ladder technique gets used to make a stunning gemstone bracelet. Using some delicate chain, some eye pins and the gemstones of your choice you’ll be sporting a bracelet that everyone will envy.
You will need the following tools and materials to make this bracelet:
1: Pliers. You will need all your pliers on hand to make this bracelet. The round nose pliers, flat nose pliers and cutting pliers.
2: Two pieces of chain that fit comfortably around your wrist.

3: Three eye pins.
https://flic.kr/p/NYhza3
4: Two jump rings.

5: A toggle clasp.
6: Three gemstone beads. I used these Dalmatian jasper beads.

Follow these steps to make your own incredible ladder bracelet:
1: Attach the end of both chains to one of the jump rings and add one side of the toggle clasp. Close the jump ring to secure the ends in place.

2: Repeat step one for the other side of the bracelet adding the other part of the toggle clasp.


3: Once both ends are secure you can move on to the eye pins. Add a bead to each of the eye pins.

4: Bend each of the pins at a right angle to the bead using the round nose pliers.

5: Create a loop using the round nose pliers to secure the beads in place.


6: Find the middle of both the chains. This is where your first pin will be added. Open one of the pin loops and attach the pin to the middle of one of the chains.

7: Close the loop to secure the pin in place.

8: Repeat steps 6 and 7 for the other side of the pin, making sure you line up the middle of the chain again.

9: Count chain links to determine how far away you want to place your next pin from the one in the middle. Add the second pin in the same way as the first one.


10: Add the remaining pin to the other side of the center pin, counting out the same number of links as you did in step 9. Add the final pin using the same method as the first two.


Once all your beads are in place your bracelet is finished! Wear it out and watch the compliments fly in!

-
Add This Velvet Number to Your Wrist Stack

This velvet bracelet is super easy to make, make a million and then stack them on your wrist with all your other handmade beauties!
You will need the following tools and materials to make this bracelet:
1: Pliers. You will need your flat nose pliers for this bracelet.

2: Two metal crimp ends.

3: Two jump rings.
4: One toggle clasp.

5: A piece of velvet ribbon that fits around your wrist.

Follow these instructions to make your velvet ribbon bracelet:
1: Place one crimp end at the end of the ribbon.

2: Secure the crimp end in place by squashing it with the flat nose pliers.


3: Repeat steps 1 and 2 for the other end of the ribbon.

4: Add a jump ring to one of the crimp ends. Slide one part of the toggle clasp onto the open jump ring and secure it in place by closing the jump ring.


5: Repeat step 4 for the other side of the bracelet, securing the other side of the toggle clasp in place.


Once the toggle clasp has been secured in place your velvet ribbon bracelet is finished and ready to wear! What will you stack yours on with?

-
Want to give some edge to your wrist-wear? Make this leather beaded bracelet
This bracelet is simple to make but it has a brilliant impact! Made with some black leather cord and some beautiful beads of your choice this bracelet makes a statement. This tutorial is similar to the suede bracelet, but makes use of round leather cord for a cool look.

You will need the following tools and materials to make this leather beaded bracelet:
1: Pliers. You will need your flat nose pliers and cutting pliers (to cut your leather to length).

2: A piece of leather cord long enough to fit around your wrist. The crimp ends and clasp will add some extra length.

3: Two leather crimp ends.

4: Two jump rings.
5: A toggle clasp.
6: Beads of your choice. I used these jade beads. Make sure the beads you choose have a hole large enough to fit on the leather cord.

Follow these steps to make your leather bracelet:
1: Add the beads to the piece of leather.

2: Place a crimp end on one end of the piece of leather.
4: Squash the first side of the crimp using the flat nose pliers.


5: Squash the other side of the crimp end using the flat nose pliers.

6: Repeat steps 4 and 5 for the other side of bracelet.

7: Add a jump ring to one end of the bracelet.

8: Slide one part of the toggle clasp onto the jump ring and secure the clasp in place by closing it using your pliers.

9: Repeat step 8 for the other side of the bracelet.

10: Once the clasp is in place your bracelet is finished! Wear and enjoy.

-
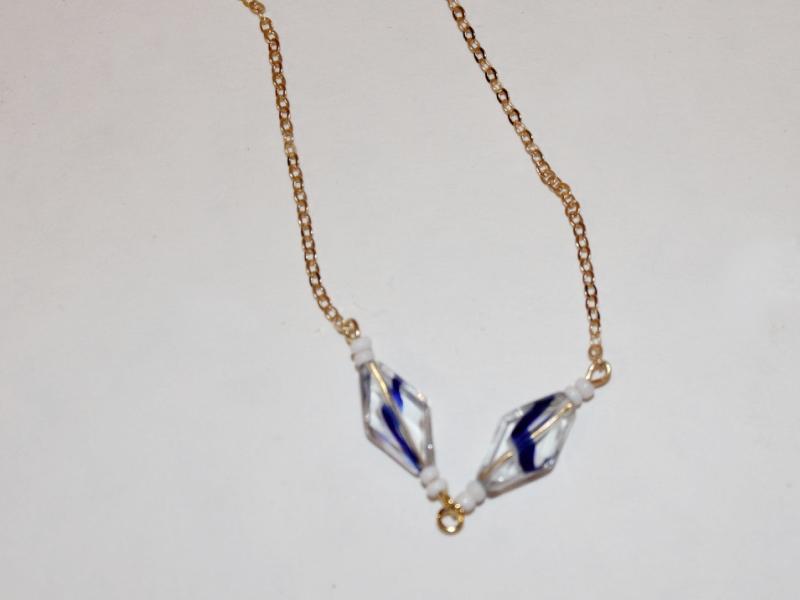
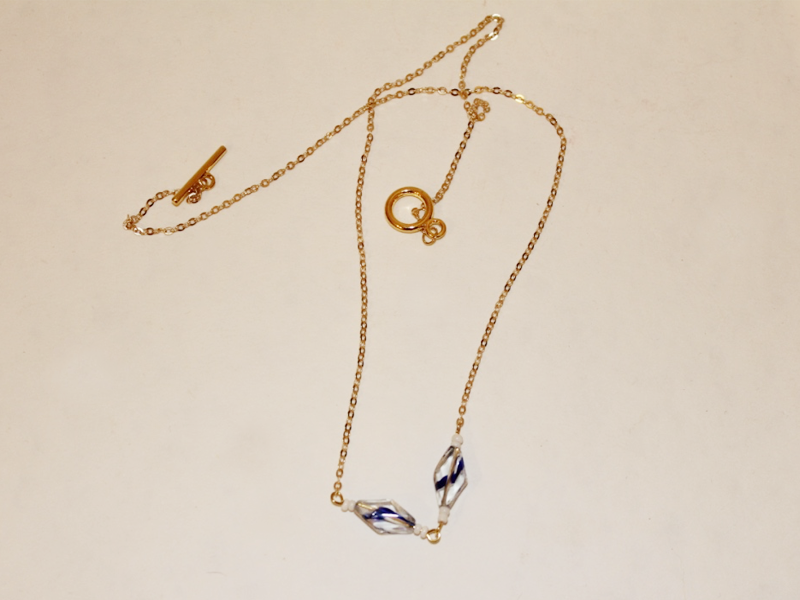
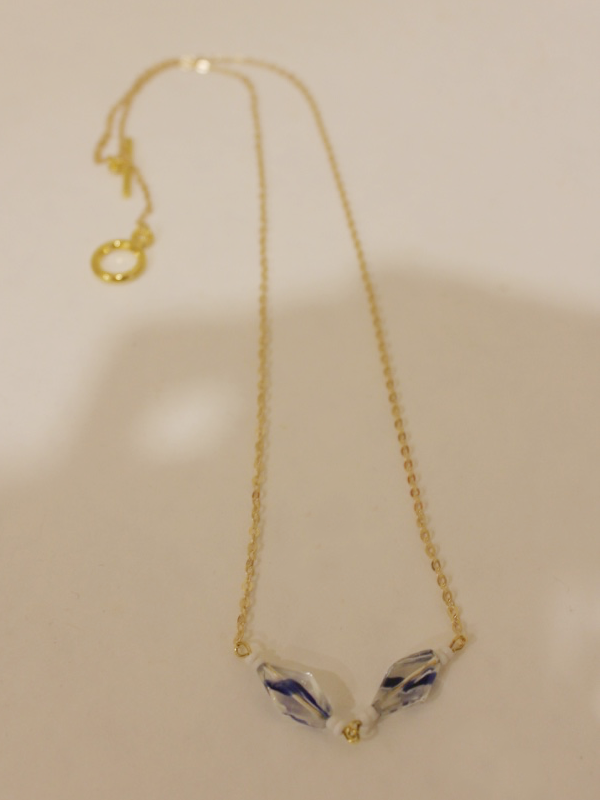
Make this cute beaded arrow necklace for some pretty stunning results
This necklace is made using a couple of eye pins, some pretty chain and any beads you choose. It’s a simple but stunning design that will compliment any number of styles. This arrow necklace is also super easy to make, it shouldn’t take you more than 30 minutes to put together, so you can have a nice new necklace for your next celebration.
You will need the following tools and materials to make this arrow necklace:
1: Pliers. You will need your round nose pliers and flat nose pliers to make this necklace.

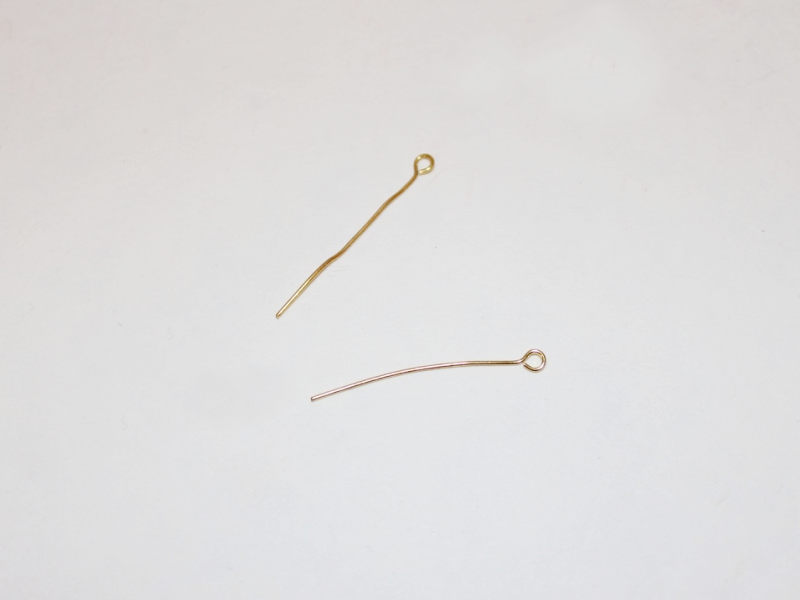
2: Two eye pins.
3: A piece of chain.
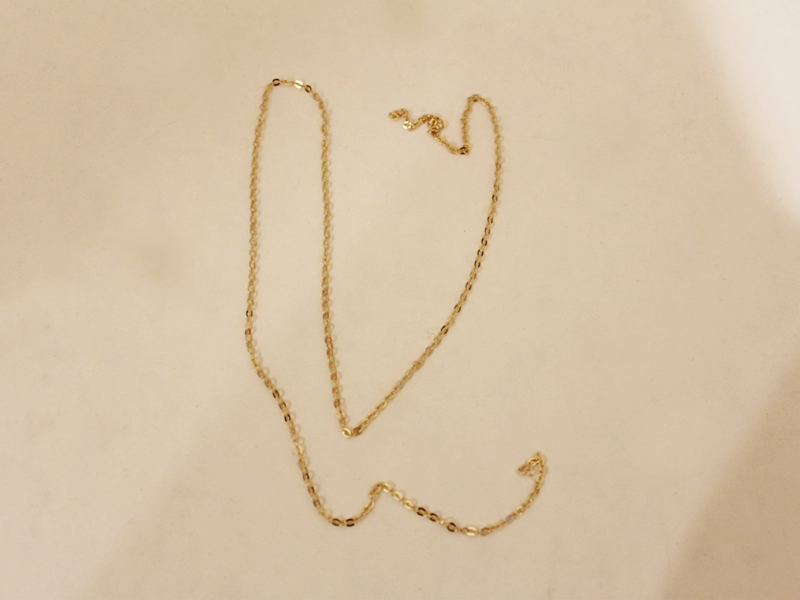
4: One toggle clasp.
5: Two jump rings.

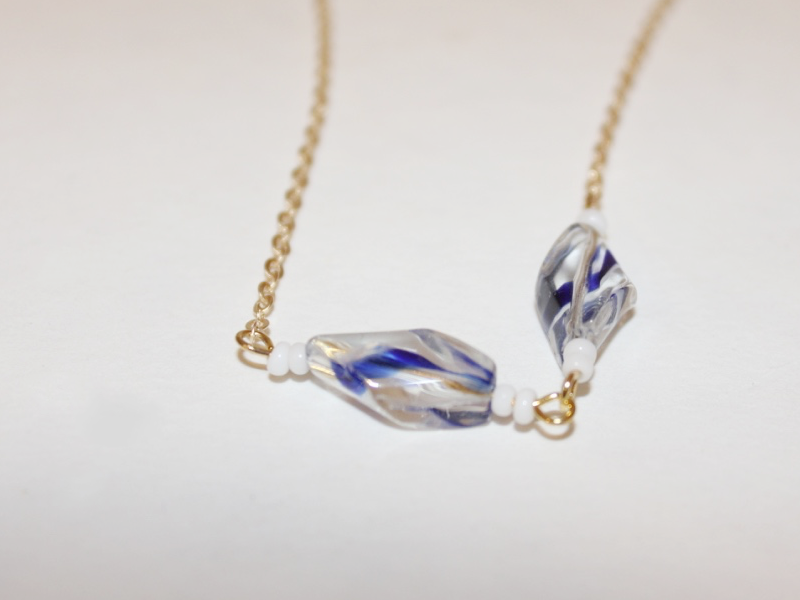
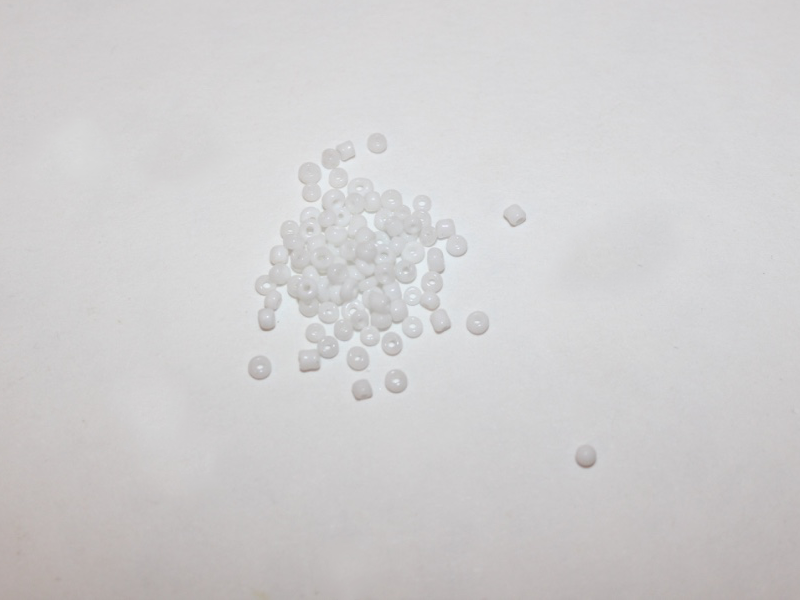
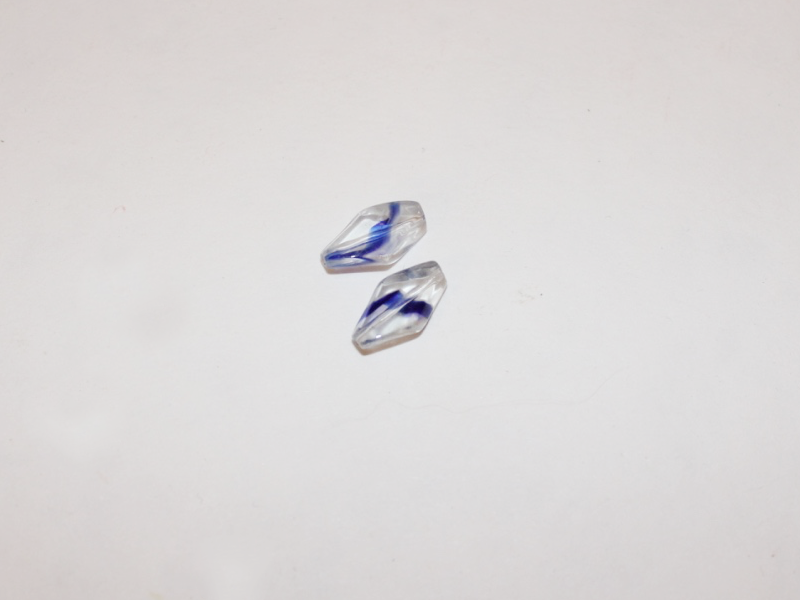
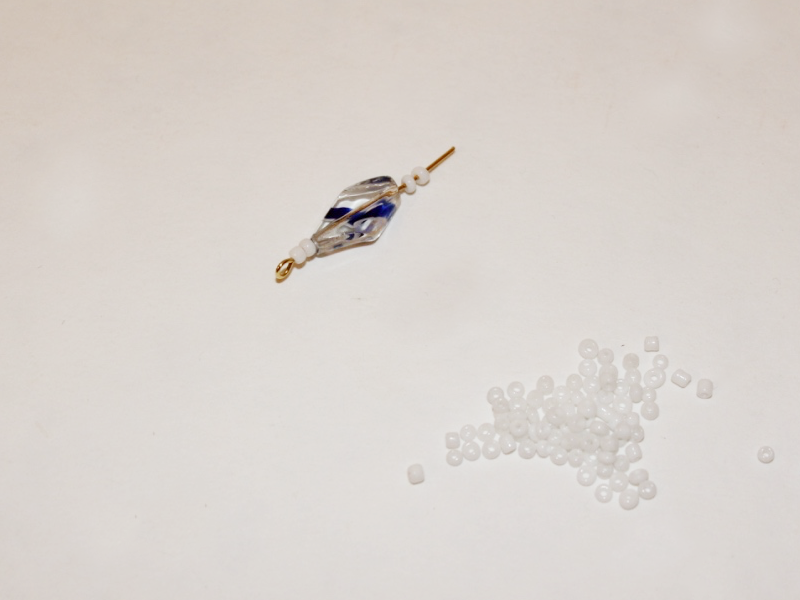
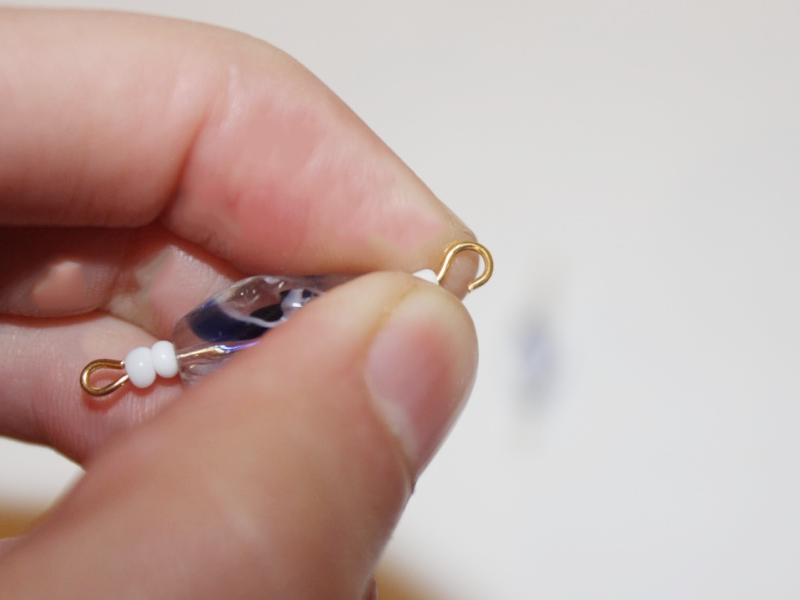
6: Beads of your choice. I used some white seed beads and two blue twisted glass beads.
Follow these steps to make your arrow necklace:
1: Add the beads to each of the head pins in your desired pattern. I used the blue twist beads as feature beads.
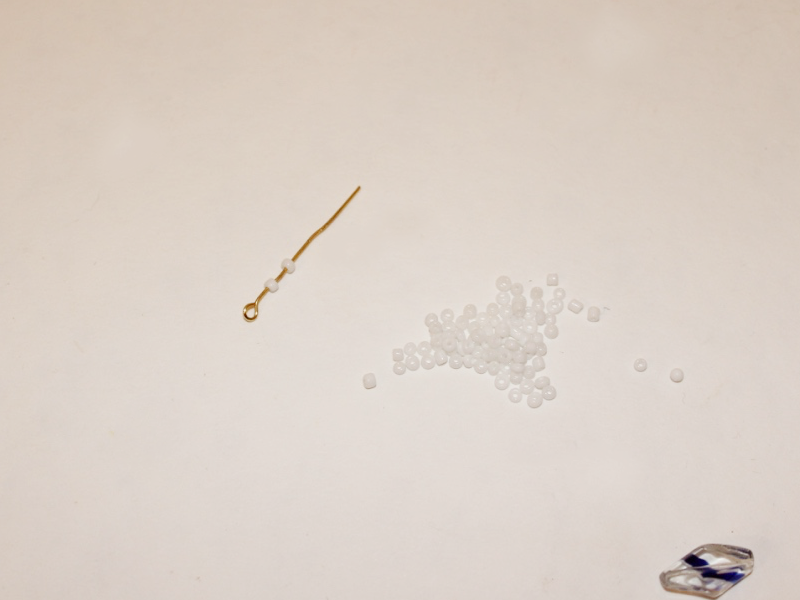
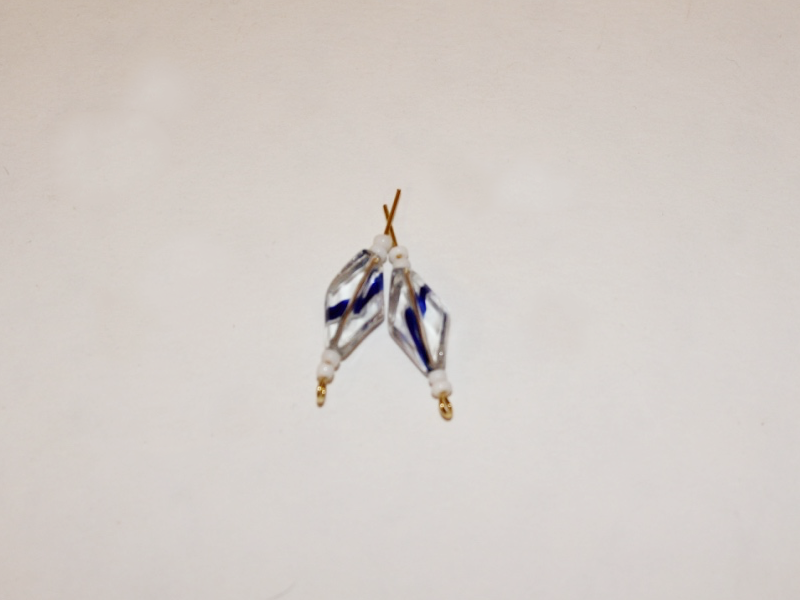
2: Once all the beads have been added, use the round nose pliers to bend each pin at a right angle to the beaded section.
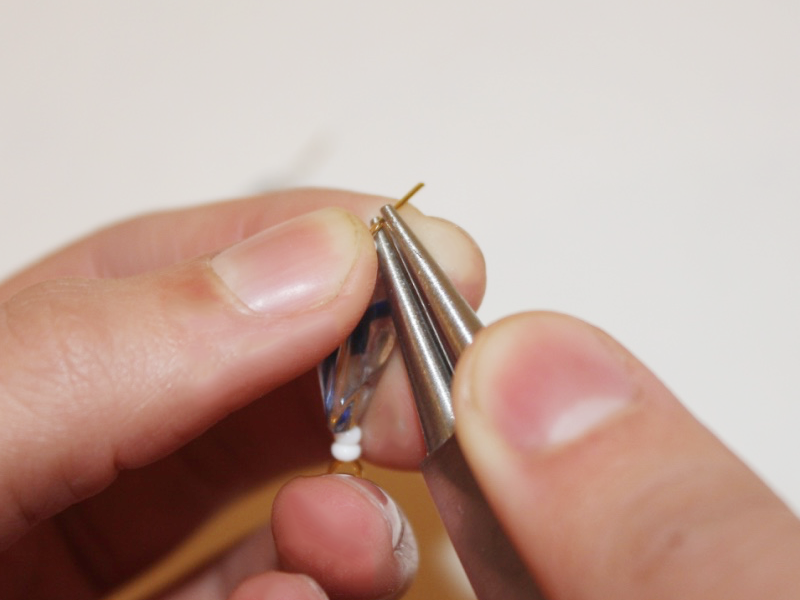

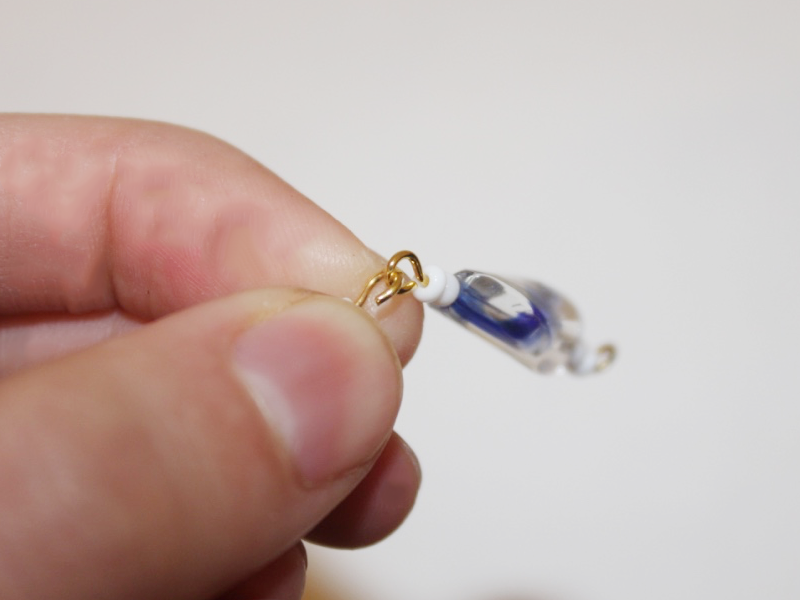
3: Once both pins have been bent, use the round nose pliers again to create a loop at the end of the pin, securing the beads in place.

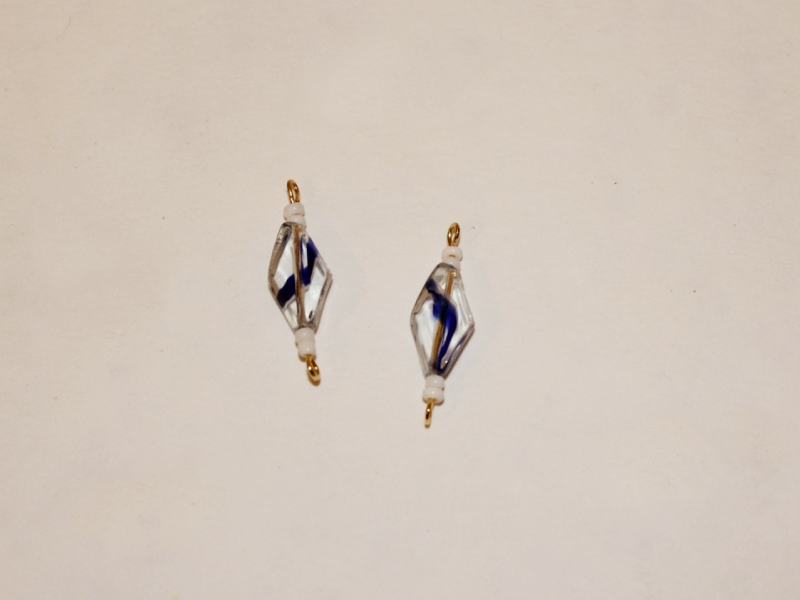
4: Open one of the loops again slightly and attach the two bead charms together. Close the loop again to secure the charms to each other.
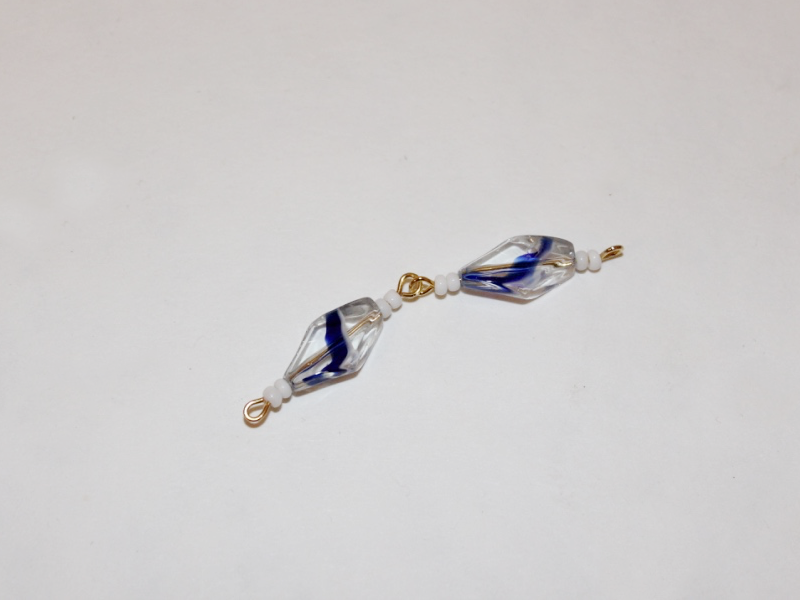
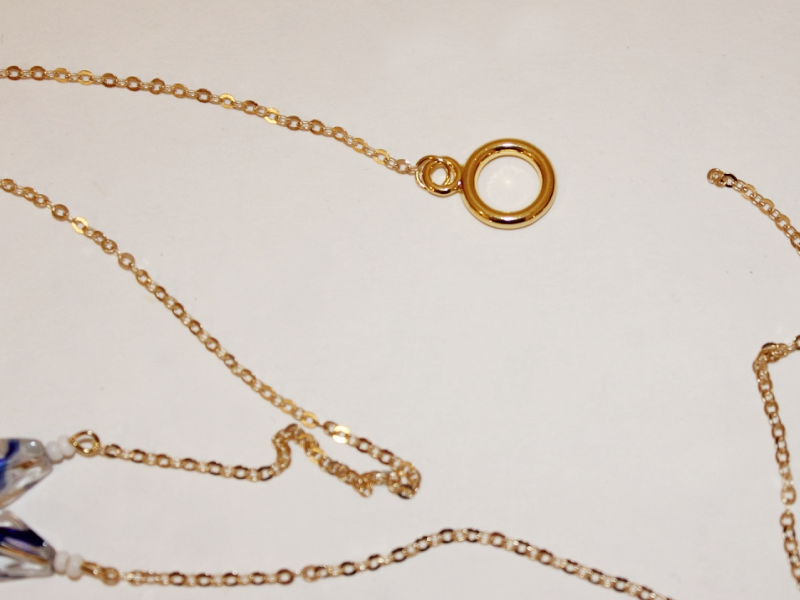
5: Open the end of the charm on one side and slide the open end into the end loop of the necklace chain. Close the loop again to secure the charm to the chain.
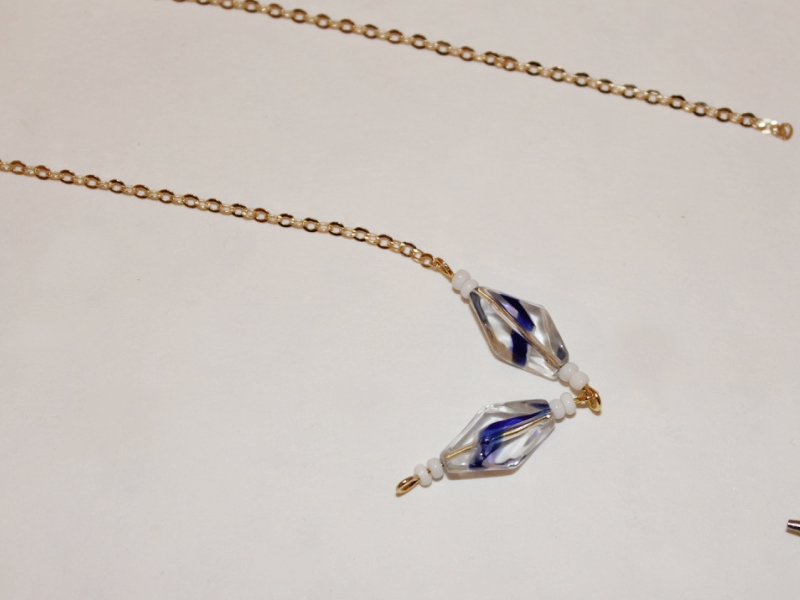
6: Repeat step 5 for the other side of the bead charm.
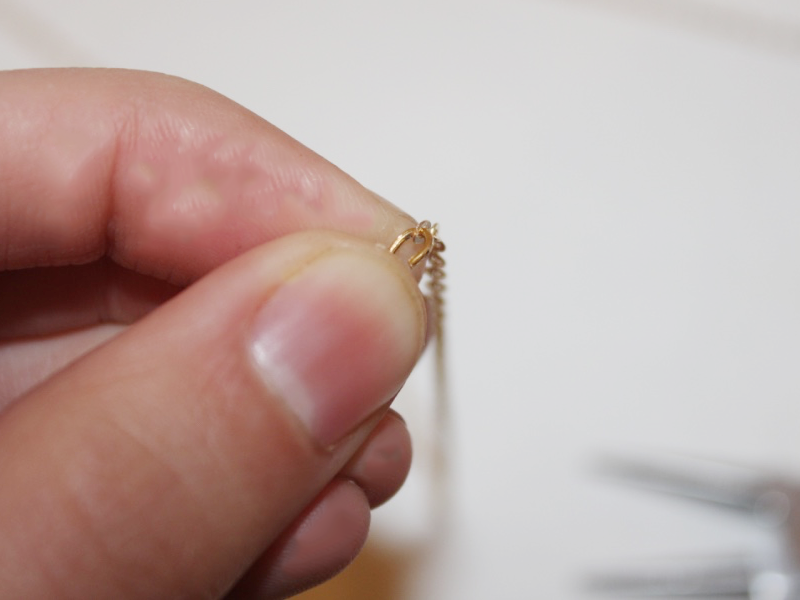
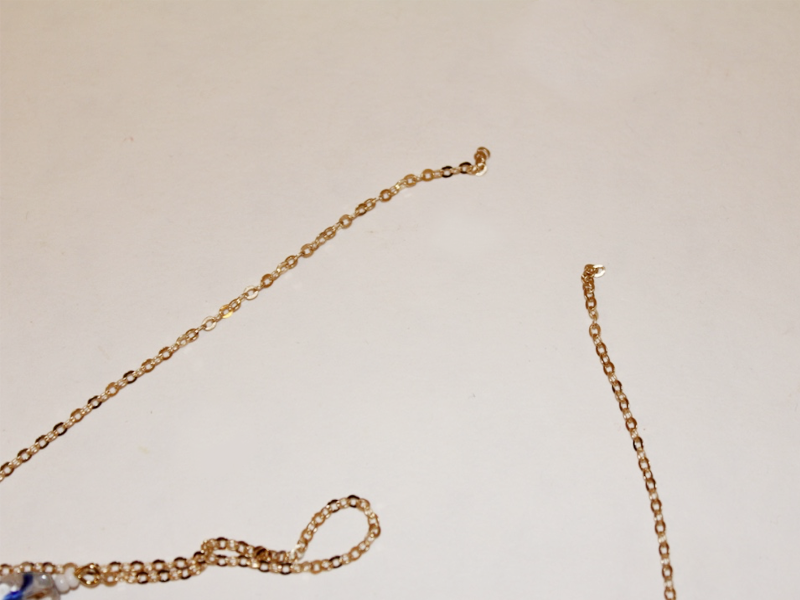
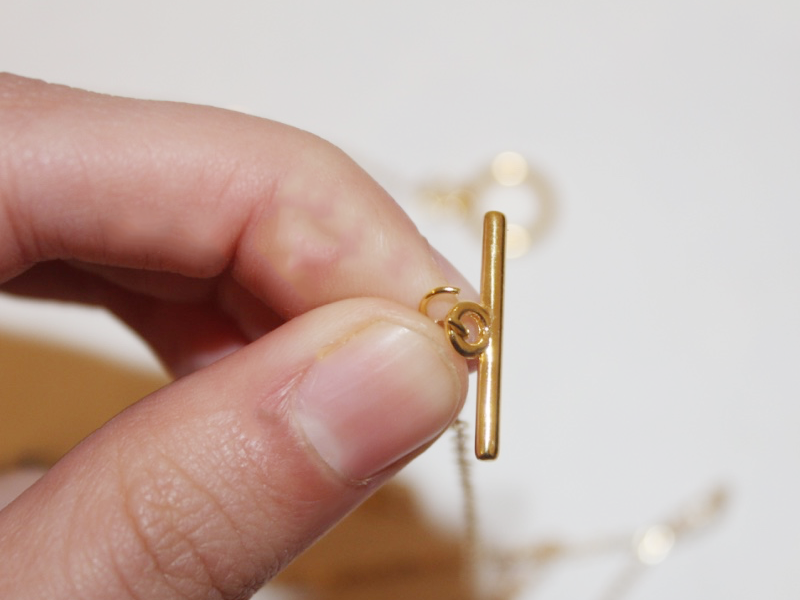
7: Split the chain in the middle to prepare for the attachment of the toggle clasp.
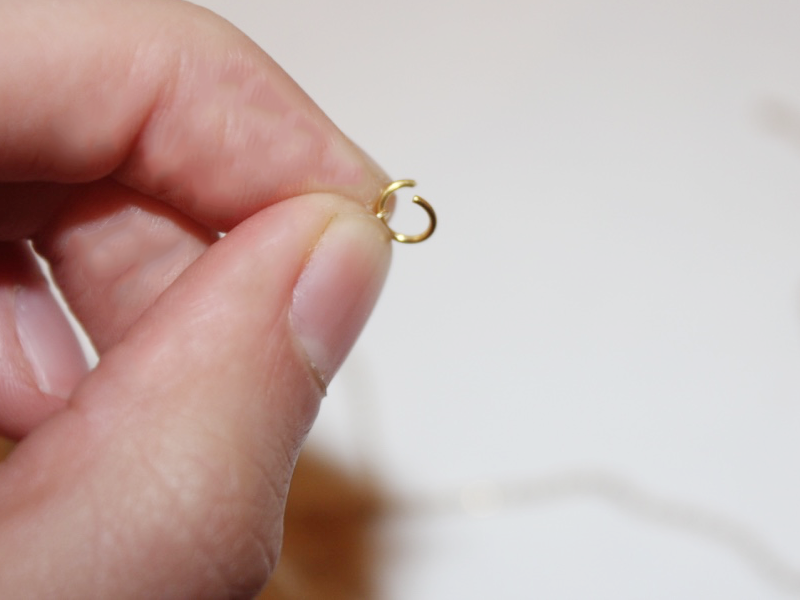
8: Add one of the jump rings to one end of the chain, slide on one side of the toggle clasp and secure it in place by closing the jump ring again.
9: Repeat step 8 for the other side of the chain adding the other side of the toggle clasp.
10: Once the toggle clasp is in place your necklace is finished and ready to wear! Where will you wear your new arrow necklace for the first time?
-
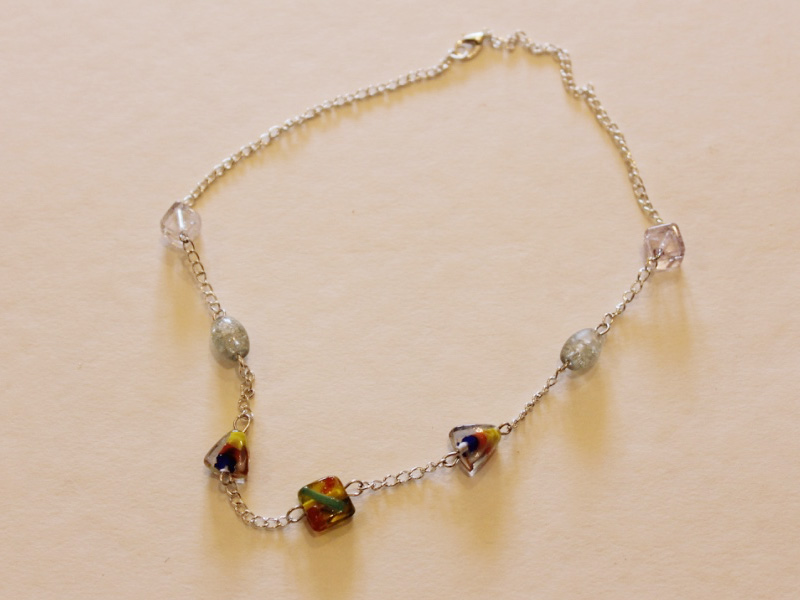
Want create a beaded necklace that drapes beautifully? This one is for you!
Sometimes head pins don’t give you the look you want for your DIY necklace designs. When you want to add a beaded section to your jewelry chain tiger tail wire can be the perfect material to give you the finish you want. Here are the instructions for making a flexible beaded charm for your pretty chain necklaces!

You will need the following tools and materials to make this beaded tiger tail charm necklace:
1: Pliers. To make this necklace you will need your flat nose pliers and cutting pliers.
2: Tiger tail wire. I used this bronze colored tiger tail wire.

3: Four gold colored crimp beads.

4: A length of chain. I used this gold plated chain.

5: Two gold colored jump rings.
6: One gold colored toggle clasp.
7: Beads of your choice. I used these turquoise tear drop beads with some purple glass seed beads and blue metallic glass seed beads.


Follow these steps to make the necklace:
1: Cut a length of tiger tail wire using the cutting pliers. This length of wire will add to the overall length of the necklace.


2: Bend the tiger tail wire around the first loop of the piece of chain.

3: Add two crimp beads to the wire.

4: Use the flat nose pliers to squash the crimp beads and secure the tiger tail wire in place so that it is ready for you to add the beads.

5: Once the crimp beads have been squashed begin adding the beads onto the piece of wire.

7: Continue adding beads in your desired pattern.

8: Once all the beads are in place add another two crimp beads to the end of the tiger tail wire.

9: Loop the end of the wire through the other end of the necklace chain and back through the crimp beads.

10: Use the pliers to pull the wire tight and then squash the crimp beads in place.
11: Trim the excess wire using the cutting pliers.


12: Split the center of the necklace chain at the top of the necklace.

13: Add a jump ring and one side of the toggle clasp to one end of the split chain. Secure the clasp in place by closing the jump ring.


14: Add the other side of the toggle clasp as you did in step 13.

15: Once your clasp has been secured in place your necklace is finished. Pop it on and have some fun!


Here’s another tiger tail chain necklace made with rutilated quartz and gold chain!


-
Make this cutie-pie bracelet using a charm connector today!
Have you ever seen a charm that has two loops rather than one? That’s a charm connector! These charms let you join two different strands to create unique pieces of jewelry. I have already shown you how to make a braided friendship bracelet using a charm connector, in this tutorial I will give you all the knowledge you need to make a beaded bracelet that features a pretty silver charm connector.
You will need the following tools and materials to make this charm connector bracelet:
1: Pliers. You will need your cutting pliers and your flat nose pliers to make this bracelet.
2: Tiger tail wire.
3: Eight crimp beads.

4: A toggle clasp.


6: Beads of your choice. I used some pink glass bugle beads and some blue glass seed beads.


The Steps:
1: Use your cutting pliers to cut two lengths of tiger tail wire long enough to fit halfway around your wrist. I cut mine with a little extra length to ensure that my bracelet would fit.


2: Take one piece of tiger tail wire and add two crimp beads to the end, then fold the end of the wire around one loop on the charm connector.


3: Squash the crimp beads to secure the wire and charm together using the flat nose pliers.
4: Repeat steps 2 and 3 for the second tiger tail strand attaching it to the other side of the charm connector.

5: Begin adding beads to one side of the bracelet. I started with the pink bugle beads.

6: Continue adding beads until the beaded section reaches approximately half way around your wrist.

7: Add two crimp beads to the strand.

8: Add one side of the toggle clasp to the strand as well, fold the wire around the clasp and back through the crimp beads.

9: Squash the crimp beads using the flat nose pliers to secure the strand.

10: Trim the excess wire using the cutting pliers.

11. Repeat steps 5 and 6 for the second strand. Continue beading until the second strand is approximately the same length as the first.


12: Add two more crimp beads and the other end of the toggle clasp to the end of the second strand.

13: Bend the wire around the clasp and back through the crimps as you did the first strand.

14: Secure the strand by squashing the crimp beads using the flat nose pliers.

15: Trim the excess wire close to the crimp beads using the cutting pliers.
16: Once all the extra wire has been trimmed your bracelet is finished and ready to wear! This is such a cute way to make a stunning bracelet. Charm connector bracelets look great stacked with other beaded bracelet designs! Style yours up any way you like.


Here are some other beaded charm connector bracelet designs. You can get really experimental and creative with charm connectors. Happy making!


Here are some other charm connector tutorials on DIY Jewelry Hub
- A delicate charm connector anklet
- A charm connector bangle
- Charm connector statement earrings
- Braided charm connector bracelets
Please note that this tutorial contains affiliate links.
-
Twice as Nice: How to Make a Double Strand Bracelet
Do you remember the multi-strand bracelet tutorial where I showed you how to make a bracelet using some charm connectors? Well here is another way that you can make a beaded bracelet with more than one strand. This tutorial shows you how to make a pretty double strand bracelet without the use of any charm connectors at all!
You will need the following tools and materials to make this double strand bracelet:
1: Pliers. To make this bracelet you will need your cutting pliers, round nose pliers and flat nose pliers.
2: Tiger tail wire.
3: Eight crimp beads.

4: One toggle clasp.

5: Beads of your choice. I used some white frosted seed beads with some small garnet beads and some green square gemstone beads.


The Steps:
1: Cut two pieces of tiger tail wire. Make sure that you cut your pieces long enough to fit around your wrist. I recommend adding a little extra length to ensure a comfortable fit.


2: Take one piece of tiger tail wire and add two crimp beads to one end.

3: Once your crimp beads have been added you can add one part of your toggle clasp.

4: Once the toggle clasp and crimp beads have been added, take the short end of the wire and bend it. Thread the end around the toggle loop and back through the crimp beads. You might need to use your pliers to help you pull the wire through.


5: Once you’ve got your wire in place, use the flat nose pliers to squash the crimp beads.

6: Begin adding your beads in the pattern you have chosen. I decided to create two centerpiece features so I added my gemstone beads to the bracelet so that they were slightly off center.


7: Continue adding beads until the beaded section is long enough to fit around your wrist.

8: Once you are finished with your beading, add two more crimp beads and the other part of the toggle clasp.


9: Feed the end of the tiger tail wire around the toggle clasp loop and back through the crimp beads. You might need to use your pliers to pull the wire nice and tight.


10: Once your tiger tail wire has been pulled through, use the flat nose pliers to squash the crimp beads and secure the wire in place.

11: Trim any extra tiger tail wire using the cutting pliers. Once this wire has been trimmed you will be at the halfway point!


11: Add the second piece of tiger tail wire following the steps 2 – 5 that you followed for the first strand.

12: Bead the second strand as you did the first. I added my centerpiece beads off to the side so that my feature beads didn’t overlap.

13: When your beading is complete and both strands have reached the same length, secure the second bead strand in place following steps 8 – 10.

14: Trim any excess tiger tail wire after you have squashed the last of the crimp beads. Once you have your wire trimmed you will find that your bracelet is now ready to wear!


Here are a few other double strand bracelets I have made. I hope you decide to have fun and get experimental with your own double strand bracelet designs!


Here are some other ways to make multi-strand bracelets:
- A double strand bracelet made from recycled headphone cords
- 2 strand bracelet with a double hole statement bead
- Velvet and chain two strand bracelet
- Double chain charm bracelet
- Two color Christmas velvet bracelet
- Two chain beaded ladder bracelet
- Romantic double strand rose quartz bracelet
- Triple strand bead bracelet
This tutorial contains affiliate links.
-
How to Make (my favorite) Beaded Charm Bracelet
Do you want to learn how to make a bracelet? Look no further, DIY Jewelry Hub has got all the details on how to make a stunning beaded charm bracelet.
This charm bracelet design is easy to make, but it sure doesn’t scrimp on style! Using glass e beads and your choice of charm, you’ll want to make one in every color. This charm bracelet can be worn on its own, it’s also a great piece for layering with your other favorite pieces.
You will need the following tools and materials to make this bracelet:
1. Pliers
To make this bracelet you will need your flat nose pliers, round nose pliers and cutting pliers.
2. Tiger tail wire.
3. Two head pins.

4. One jump ring.
5. A selection of e beads.
For this bracelet I used a range of green beads, but the choice is yours… go nuts! Just remember that you will need enough beads to make up the length of your bracelet).

6. Ten extra e beads
I have used two different colors as these beads will be used to make your charms.

7. A charm of your choice.

8. Four crimp beads.

9. A toggle clasp.

The Steps
1. Cut your tiger tail wire to length using your cutting pliers.
You can measure how much you need by wrapping a length loosely around your wrist (make sure you cut it a little bit longer than you think you need, you don’t want your bracelet to be too small). I cut my wire to 22cm (8.5 inches).


This is the tiger wire, cut to length. 2. bend the end of your tiger tail wire around one end of your toggle clasp (it will stay folded).

3. Add two crimp beads to the tiger tail, make sure the crimp beads are covering both the long and short ends of the bent wire.

4. Crimp the beads using the round nose pliers.


5. Once the crimp beads have been secured you can start stringing your beads!

6. Once you’ve strung the beads to reach your desired length, add another two crimp beads and the jump ring.

7. Fold the other end of your tiger tail around the jump ring and pull it through the crimp beads and through three of the glass beads using your round nose pliers.


8. Once the tiger tail has been pulled through the beads as far as possible, use the round nose pliers to squash the crimp beads.

9. Once the crimp beads have been secured you can then trim the excess tiger tail, being sure to trim it close enough so that it sits under the beads (This will ensure that it doesn’t scratch you while you are wearing your bracelet).

10. Use your pliers to open the jump ring. This will allow you to attach the other end of the toggle clasp. Once the clasp has been placed on the jump ring it can then be closed using the pliers.


Your bracelet will look like this before you put on your charms. 11. Now it’s time to make your charms! Take your extra e beads and add them to the head pins.


12. Once the beads have been placed on the pin it needs to be bent using the round nose pliers at a right angle to your beaded section.

13. Once your pins are bent you can trim them using the cutting pliers. Trim the pins so that they are approximately 1cm (0.4 inches) from the beads. Repeat this step for both bead charms. Be careful when trimming your pins, it helps to hold the pin either side of the pliers to prevent the end from flying away.

14. Now your charms are ready for bending! Use your round nose pliers to bend the end of each pin into a circular shape, to do this you need to bend the pin around one of the round nose barrels in the opposite direction to the previous bend you made.


the pin on the left has been trimmed and bent. 15. Once the loops have been formed you can attach your bead charms to the bracelet. Open the loop slightly so that it can be hooked around the jump ring on the bracelet. Repeat for both bead charms and again for your chosen charm. My charm had a jump ring on it that I simply opened and closed carefully using pliers to attach to my bracelet.


16. Once your charms have been attached your bracelet is finished and ready to pop on show off!